
Simple Recipes for Iconic European Dinner Rolls

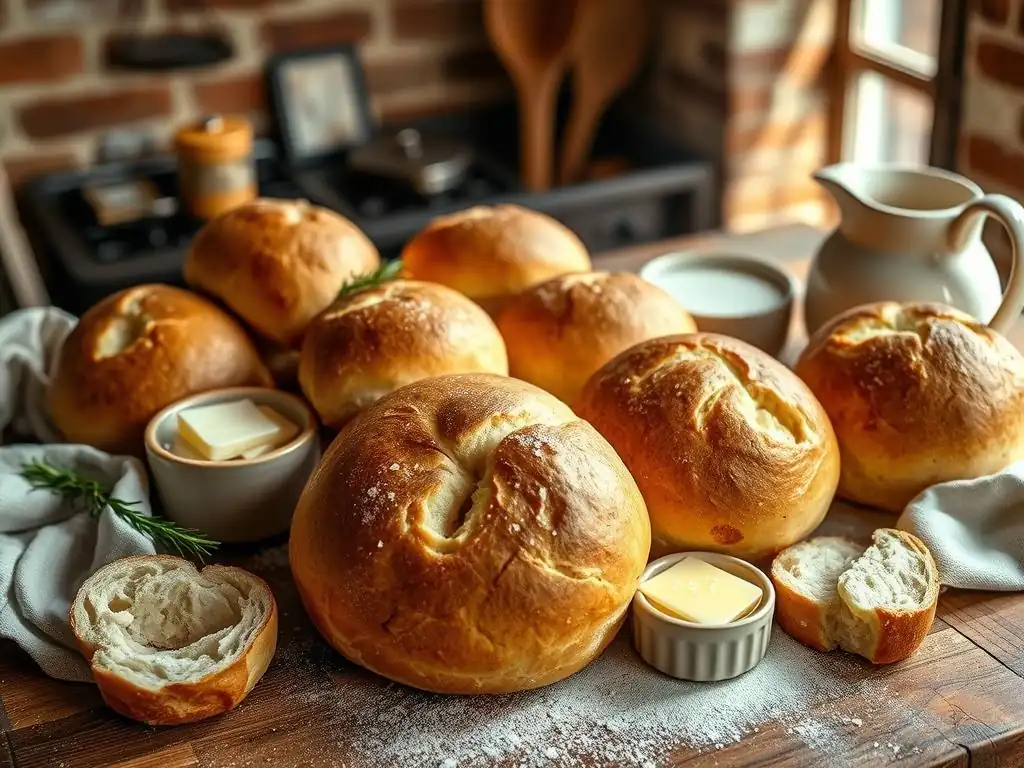
Welcome to BakeWithEase, your haven for all things baking! Ever dreamt of effortlessly crafting those perfectly crusty, yet soft, European-style dinner rolls? Imagine the aroma filling your kitchen, the satisfied smiles around your table. Our guide, "Simple Recipes for Iconic European Dinner Rolls," unveils the secrets to achieving just that. Intrigued? Let's unlock the secrets to effortlessly baking these iconic rolls, and transform your next meal into a truly special occasion.
- Simple Recipes for Iconic European Dinner Rolls: Bake With Ease
- Introduction to Baking European Dinner Rolls at Home
- Easy European Dinner Roll Recipe: A Baker's Guide
- Recipe 1: Classic French Brioche Rolls
- Recipe 2: Rustic Italian Ciabatta Rolls
- Recipe 3: German Pretzel Rolls (Laugenbrötchen)
- Recipe 4: Soft and Fluffy Irish Potato Rolls
- Tips and Tricks for Perfect European Dinner Rolls
- Serving and Storing Your Homemade Dinner Rolls
- Conclusion: Enjoy the Taste of Europe, Baked With Ease
- Frequently Asked Questions
- Final Reflection: The Enduring Power of Simple Bread
- Unleash Your Inner Baker: Master European Dinner Rolls!
Simple Recipes for Iconic European Dinner Rolls: Bake With Ease
Introduction to Baking European Dinner Rolls at Home
Discover the Delight of Homemade European Dinner Rolls
There's a unique satisfaction that comes from pulling a batch of warm, golden-brown dinner rolls from your own oven. When those rolls are classic European varieties, the experience is elevated, bringing a taste of traditional bakeries right into your home kitchen. Imagine the aroma of freshly baked brioche filling your house, or the satisfying crackle of a ciabatta crust.
These aren't just simple bread rolls; they are edible pieces of European culinary heritage, each with its own story, texture, and flavor profile. Learning an easy european dinner roll recipe allows you to explore this rich diversity without needing a passport. From the buttery richness of France to the rustic charm of Italy, and the unique twists of Germany and Ireland, baking these rolls is an accessible and rewarding journey for any home baker.
Embarking on this baking adventure opens up a world beyond the basic white roll. You'll learn how different ingredients and techniques shape the final product, transforming simple flour, water, and yeast into something truly special. Whether you're looking for a light and airy accompaniment to a meal or a hearty roll perfect for sandwiches, there's a European dinner roll that fits the bill.
Mastering an easy european dinner roll recipe means you're always just a few steps away from serving warm, delicious bread that will impress family and friends. It's about bringing a touch of old-world charm and incredible flavor to your table, all baked with ease.
Why Bake Your Own Dinner Rolls? [Cost Savings & Freshness]
Baking your own dinner rolls offers significant advantages over purchasing them from a store. One of the most compelling reasons is cost savings. The core ingredients for most bread recipes – flour, yeast, water, and salt – are relatively inexpensive, especially when bought in standard quantities.
For example, a 5-pound bag of all-purpose flour, which might cost between $3 and $6, can yield dozens of dinner rolls across multiple baking sessions. Compare this to the price of a small package of 8-12 rolls from the grocery store, which can range from $3 to $5 or more, depending on the type and brand. By baking at home, your cost per roll is often just pennies, resulting in substantial savings over time, particularly if your family enjoys bread regularly.
Beyond the economic benefits, the freshness of homemade rolls is unparalleled. Store-bought rolls, while convenient, often contain preservatives to extend their shelf life, which can sometimes affect texture and flavor. Homemade rolls, on the other hand, are typically made with minimal, natural ingredients and are enjoyed shortly after baking.
This means you get to experience the rolls at their peak – warm, soft (or crusty, depending on the style), and fragrant. The difference in taste and texture is often remarkable, offering a superior eating experience that simply can't be matched by pre-packaged alternatives. Plus, you have complete control over the ingredients, which is great for managing dietary needs or preferences.
Easy European Dinner Roll Recipe: A Baker's Guide
Understanding the Basics of Dinner Roll Dough
At its heart, most dinner roll dough is a simple combination of flour, liquid (usually water or milk), yeast, and salt. Flour provides the structure, primarily through gluten development. Different flours, like all-purpose, bread flour, or specialty flours such as rye or spelt, will impact the texture and flavor of the final roll. Liquid hydrates the flour, allowing gluten to form and activating the yeast.
Yeast is the leavening agent; it consumes sugars and produces carbon dioxide gas, which causes the dough to rise and gives the rolls their light texture. Salt is crucial for flavor, controlling yeast activity, and strengthening the gluten structure. These basic components form a "lean" dough.
Many European dinner rolls, however, use "enriched" doughs. This means they include ingredients like eggs, butter, milk, or sugar, in addition to the basic four. These additions contribute richness, tenderness, and flavor. Eggs add richness and help create a finer crumb structure.
Butter or other fats tenderize the dough by coating gluten strands and also add flavor. Milk, instead of water, adds richness and helps the crust brown nicely due to its sugar and fat content. Sugar can be added to feed the yeast initially and contributes to browning and a slightly sweeter taste. Understanding how these basic and enriching ingredients interact is key to mastering any easy european dinner roll recipe.
Essential Ingredients for Authentic European Flavors
To truly capture the authentic flavors of European dinner rolls, paying attention to specific ingredients is important. While standard all-purpose flour works for many recipes, some traditional rolls benefit from different flour types. For example, German rolls might incorporate rye flour for a more robust, earthy flavor, while certain rustic Italian breads use a mix of semolina and wheat flour.
Using good quality dairy, like whole milk or unsalted butter, is essential for enriched doughs like brioche, contributing significantly to their luxurious texture and taste. European-style butter, with its higher fat content (often 82% compared to 80% in American butter), can make a noticeable difference in richness.
Beyond the staples, unique ingredients define specific European rolls. Mashed potatoes are the secret to the incredibly soft crumb of Irish potato rolls. For German pretzel rolls, the distinctive dark crust and chewy interior come from a brief dip in an alkaline solution before baking – traditionally lye, but a baking soda solution is a safer and easier home alternative.
These specific additions are what give each type of roll its iconic character. Sourcing these ingredients, or understanding their role so you can make informed substitutions if necessary, is part of the journey in creating an authentic and easy european dinner roll recipe at home.
Recipe 1: Classic French Brioche Rolls
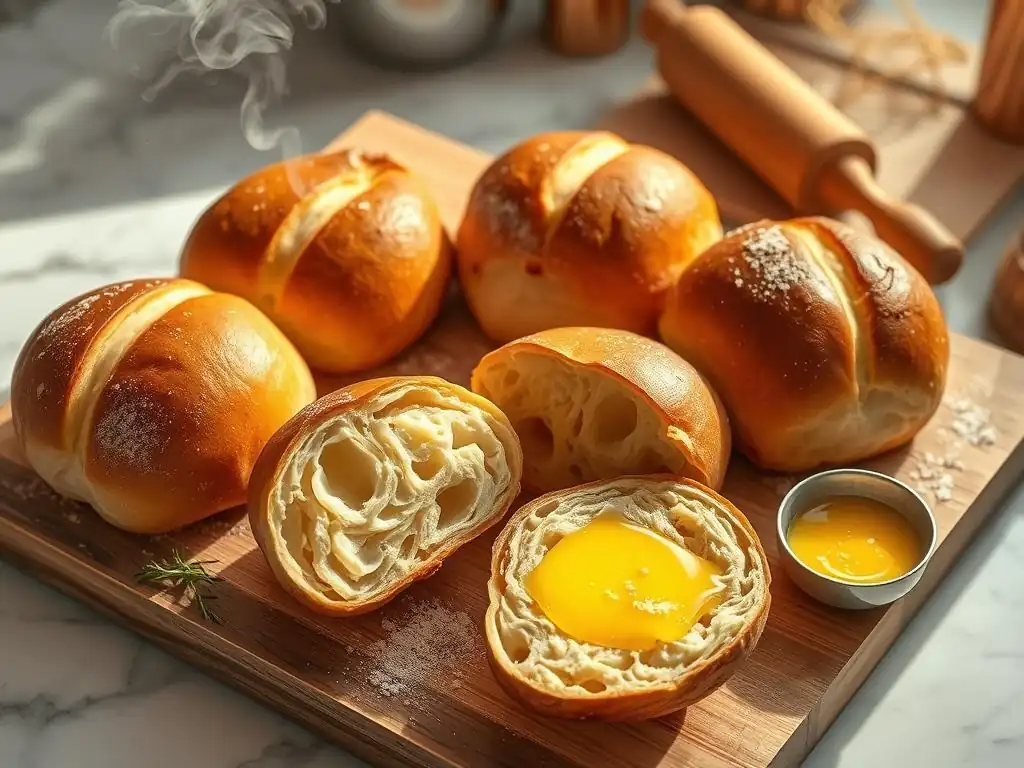
The Secret to Light and Fluffy Brioche Dough
The hallmark of classic French brioche is its incredibly light, tender, and fluffy texture, achieved through a very rich dough. The secret lies in the high proportion of butter and eggs relative to the flour. A typical brioche dough can contain anywhere from 40% to 80% butter relative to the weight of the flour, along with a generous amount of eggs.
This high fat content inhibits gluten development compared to leaner doughs, resulting in a soft, cake-like crumb rather than a chewy one. However, sufficient kneading is still crucial to build some structure to support the richness and allow the dough to rise.
Another key technique is incorporating the butter gradually, often after the initial dough has come together and developed some gluten. Cold, cubed butter is typically added piece by piece while kneading continues. This process can be lengthy, often taking 10-20 minutes in a stand mixer, until the dough is smooth, elastic, and pulls away from the sides of the bowl.
The dough will be soft and sticky, which is normal due to the high hydration and fat. After kneading, brioche dough benefits greatly from a long, slow fermentation, often including an overnight rest in the refrigerator. This chilling firms up the butter, making the dough easier to handle for shaping, and develops deeper flavors.
Step-by-Step Brioche Roll Baking Instructions
Making classic brioche rolls involves a few key steps. First, activate your yeast in warm liquid (often milk) with a pinch of sugar; it should become foamy in 5-10 minutes. Combine flour, sugar, and salt in a large bowl or stand mixer. Add the yeast mixture and eggs, mixing until a shaggy dough forms.
Knead the dough until it's relatively smooth, about 5-8 minutes by hand or mixer. Now, gradually add the cold, cubed butter, a few pieces at a time, allowing each addition to be incorporated before adding more. Continue kneading for another 10-15 minutes until the dough is very smooth, elastic, and glossy. It will be soft and may still be slightly sticky.
Place the dough in a lightly greased bowl, cover, and let it rise in a warm place until doubled in size, typically 1.5 to 2 hours. Punch down the dough gently, then transfer it to the refrigerator for at least 4 hours, or preferably overnight. Chilling makes shaping much easier. Once chilled, divide the dough into equal portions (e.g., 50-70 grams each for a standard roll).
Shape each portion into a ball or your desired roll shape. Place the shaped rolls on a baking sheet lined with parchment paper, leaving some space between them. Cover and let them proof at room temperature until visibly puffy, about 1-1.5 hours.
Preheat your oven to 375°F (190°C). Just before baking, brush the tops of the rolls with an egg wash (beaten egg mixed with a little water or milk) for a golden, shiny crust. Bake for 15-20 minutes, or until deeply golden brown and cooked through.
Brioche Roll Variations: [Chocolate Chip Brioche Rolls]
Once you've mastered the basic easy european dinner roll recipe for brioche, experimenting with variations is simple and fun. One popular variation is adding chocolate chips. For Chocolate Chip Brioche Rolls, after the initial bulk fermentation (the first rise), gently knead about 1 cup (approximately 175 grams) of chocolate chips into the dough before chilling. Alternatively, you can fold the chocolate chips into the dough during the shaping process. Dark chocolate chips work wonderfully, but milk or white chocolate can also be used depending on preference.
Other delicious variations include incorporating dried fruits like raisins or cranberries, or adding spices like cinnamon or cardamom for a fragrant roll. Savory variations are also possible; omit the sugar in the dough and add herbs like rosemary or thyme, or mix in grated cheese like Gruyère or Parmesan after the first rise. These simple additions transform the classic brioche dough into a versatile base for both sweet and savory treats, proving just how adaptable an easy european dinner roll recipe can be.
Recipe 2: Rustic Italian Ciabatta Rolls
Achieving the Perfect Ciabatta Texture
Ciabatta, meaning "slipper" in Italian, is characterized by its irregular shape, airy, open crumb, and wonderfully crisp crust. Achieving this texture relies on two main factors: high hydration and long fermentation with gentle handling. Ciabatta dough is typically very wet, often having a hydration level of 75% to over 85% (meaning the weight of the water is 75-85% of the weight of the flour).
This high water content is essential for creating the large, irregular holes (alveoli) in the crumb structure. Working with such a wet dough requires different techniques than working with a firmer dough, often involving stretching and folding rather than traditional kneading.
The second crucial element is a long fermentation period, which develops flavor and strengthens the dough structure without aggressive kneading. This often involves using a preferment, such as a poolish (equal parts flour and water plus a tiny amount of yeast, fermented for several hours or overnight) or a biga (a drier preferment). The main dough is then mixed with the preferment, and the bulk fermentation can last for several hours, during which the dough is gently stretched and folded every 30-60 minutes.
This process builds strength while preserving the gas bubbles needed for the open crumb. Minimal handling during shaping is also key to avoid deflating the precious air pockets.
Ciabatta Roll Recipe: A Simple Approach
While traditional ciabatta can be complex, an easy european dinner roll recipe for ciabatta can simplify the process for home bakers. Start by making a simple poolish the night before: mix 1 cup (about 120g) of all-purpose or bread flour with 1 cup (240g) of lukewarm water and 1/4 teaspoon of instant yeast. Cover and let it ferment at room temperature for 12-18 hours, until bubbly and slightly collapsed in the center.
The next day, combine the poolish with 1.5 cups (about 180g) more flour, 1/2 cup (120g) lukewarm water, 1 teaspoon salt, and another 1/4 teaspoon instant yeast. Mix until just combined – the dough will be very wet and shaggy.
Let the dough rest for 20-30 minutes (autolyse). Then, perform a series of stretch and folds over the next 2-3 hours. Every 30-45 minutes, wet your hands, grab one side of the dough, stretch it upwards, and fold it over the center. Repeat this with the other three sides. After 4-6 folds, the dough will be smoother and more elastic. Lightly oil a large, flat container or baking sheet.
Gently pour the dough onto the oiled surface, trying not to deflate it. Let it rest for another 30-60 minutes. Preheat your oven to 450°F (230°C) with a baking stone or steel inside, if you have one. Gently divide the dough into roll-sized pieces using a bench scraper, disturbing the air bubbles as little as possible. Carefully transfer the rolls to the hot baking surface using parchment paper or a peel.
Tips for Baking Crispy Crust Ciabatta Rolls
Achieving that signature crispy ciabatta crust requires high heat and steam in the oven. Baking ciabatta at a high temperature, typically 450°F (230°C), helps the crust set quickly and develop a deep golden color. The high heat also encourages a good oven spring, where the rolls rapidly expand in the initial stages of baking.
Introducing steam into the oven is perhaps the most critical factor for a crispy crust. Steam keeps the surface of the dough moist longer, allowing it to expand fully before the crust hardens. This results in a thinner, crispier crust and better oven spring. There are several ways to create steam at home:
- Water pan: Place a metal pan on the bottom rack of your oven while preheating. Carefully pour hot water into the pan just as you put the rolls in the oven.
- Ice cubes: Place a metal pan on the bottom rack and add a handful of ice cubes when you load the rolls.
- Spraying: Use a clean spray bottle to mist the walls of the oven with water immediately after placing the rolls inside (avoid spraying the light or glass). Repeat once or twice in the first 5-10 minutes of baking.
Bake the ciabatta rolls for 20-25 minutes, or until they are a deep golden brown and sound hollow when tapped on the bottom.
Recipe 3: German Pretzel Rolls (Laugenbrötchen)
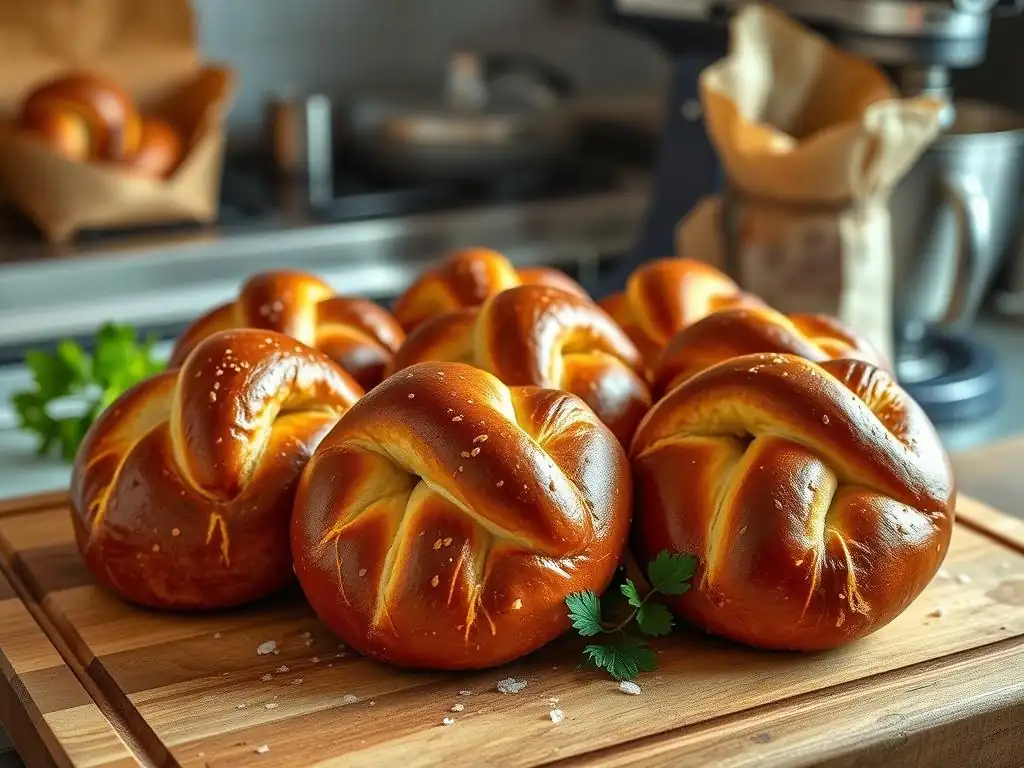
The Authentic Pretzel Roll Flavor: Lye Solution Safety
German pretzel rolls, or Laugenbrötchen, are famous for their deep brown, slightly chewy crust and distinct flavor. This unique character comes from a brief dip in an alkaline solution before baking. Traditionally, this solution is made with food-grade sodium hydroxide, also known as lye.
Lye is a strong base that rapidly changes the pH of the dough's surface. When exposed to the high heat of the oven, this alkaline environment accelerates the Maillard reaction, the complex chemical process responsible for browning and flavor development, at a much lower temperature than it would normally occur. This is why pretzels achieve their deep color and unique 'pretzel' flavor and aroma.
However, lye is a caustic substance and requires careful handling with gloves and eye protection in a well-ventilated area. For home bakers, a much safer and still effective alternative is a baking soda solution. While it won't produce exactly the same intensity of color or flavor as a true lye bath, boiling baking soda in water creates a more alkaline solution than plain water, providing a very good approximation for an easy european dinner roll recipe at home.
To make a strong baking soda solution, dissolve 1/2 cup (about 85g) of baking soda in 4-6 cups of boiling water. Simmer the dough pieces in this solution for 30-60 seconds per side.
Easy Pretzel Roll Recipe for Home Bakers
An easy european dinner roll recipe for German pretzel rolls using the baking soda bath is quite accessible. Begin by making a standard bread dough: combine 2.5 cups (about 300g) bread flour, 1 tsp salt, 1 tsp sugar, 1 tsp instant yeast, and 1 cup (240g) warm water (around 110°F or 43°C). Mix and knead until a smooth, elastic dough forms, about 6-8 minutes by hand or mixer. Place the dough in a lightly oiled bowl, cover, and let rise until doubled, about 1-1.5 hours.
Punch down the dough and divide it into 8-10 equal pieces. Shape each piece into a tight ball or an oval roll. Place the shaped rolls on a parchment-lined baking sheet, cover, and refrigerate for at least 30 minutes (or up to a few hours). Chilling the dough makes it easier to handle and helps the crust set properly after the bath. While the rolls chill, prepare the baking soda bath: bring 4-6 cups of water to a boil in a wide pot and carefully stir in 1/2 cup baking soda. Reduce heat to a simmer.
Baking and Salting Your German Pretzel Rolls
Once the baking soda bath is ready and the rolls are chilled, it's time for the crucial dipping step. Gently place 1-2 rolls at a time into the simmering baking soda solution using a slotted spoon or spider. Simmer for 30-60 seconds per side. Carefully remove the rolls, letting excess liquid drip off, and place them back onto the parchment-lined baking sheet. The surface will look slightly slick and might change color slightly.
Immediately after the bath, use a sharp knife or razor blade to make a shallow cut or score across the top of each roll. This helps them expand evenly in the oven. Generously sprinkle coarse pretzel salt or sea salt over the wet surface of the rolls. Preheat your oven to 400°F (200°C). Bake the pretzel rolls for 15-20 minutes, or until they are a deep, glossy brown. The baking soda bath ensures a beautiful color even without high heat, making this an easy european dinner roll recipe that delivers on visual appeal and unique flavor.
Recipe 4: Soft and Fluffy Irish Potato Rolls
The Secret Ingredient: Mashed Potatoes
Irish Potato Rolls are renowned for their exceptionally soft and tender crumb, and the secret to this delightful texture is the inclusion of mashed potatoes in the dough. Cooked and mashed potatoes, particularly those that are fluffy and not too starchy, add moisture and richness to the bread dough in a way that water or milk alone cannot. The starches in the potatoes contribute to a finer, softer crumb structure that stays moist longer. This makes potato rolls a fantastic way to use up leftover mashed potatoes, transforming them into something entirely new and delicious.
Using plain mashed potatoes is best – avoid those with added butter, milk, or seasonings if possible, or adjust the recipe's liquid and fat accordingly. The potatoes should be cooled to lukewarm or room temperature before being added to the dough mixture. They integrate surprisingly well into a standard yeast dough, creating a slightly sticky but manageable consistency that bakes up into wonderfully soft rolls. The potato flavor is subtle, primarily enhancing the texture rather than dominating the taste.
Irish Potato Roll Recipe: A Unique Twist
Creating an easy european dinner roll recipe for Irish potato rolls involves adding mashed potatoes to a basic enriched dough. Start by activating your yeast: dissolve 2.25 teaspoons of active dry yeast (or 1.75 tsp instant yeast) in 1/2 cup (120g) warm milk (around 105-115°F or 40-46°C for active dry). In a large bowl, combine 2.5 cups (about 300g) all-purpose flour, 2 tablespoons sugar, and 1 teaspoon salt. Add the yeast mixture, 1/4 cup (55g) melted butter, and 1 cup (about 200g) of cooled mashed potatoes.
Mix everything together until a shaggy dough forms. Knead the dough on a lightly floured surface or in a stand mixer for 6-8 minutes, or until it's relatively smooth and elastic. The dough will be soft due to the potatoes. Place the dough in a lightly oiled bowl, cover, and let it rise in a warm place until doubled in size, about 1.5 to 2 hours. Punch down the dough gently and divide it into 10-12 equal portions.
Achieving the Right Texture for Irish Potato Rolls
To ensure your Irish potato rolls are soft and fluffy, proper handling and proofing are key. After dividing the dough, shape each portion into a smooth ball. Place the shaped rolls on a baking sheet lined with parchment paper, leaving about 2 inches between them. Cover the rolls loosely and let them proof (second rise) in a warm, draft-free place until they are noticeably puffy and nearly doubled in size, about 45-60 minutes. Don't rush this step; sufficient proofing allows the rolls to develop their light texture.
Preheat your oven to 375°F (190°C). For a slightly richer color, you can brush the tops of the rolls with melted butter or an egg wash before baking, though this is optional. Bake for 15-20 minutes, or until the rolls are golden brown on top and cooked through. The potatoes help keep the interior incredibly moist, so they won't dry out easily during baking. Allow them to cool slightly on a wire rack before serving warm. This easy european dinner roll recipe yields rolls perfect for accompanying stews, soups, or simply slathered with butter.
Tips and Tricks for Perfect European Dinner Rolls
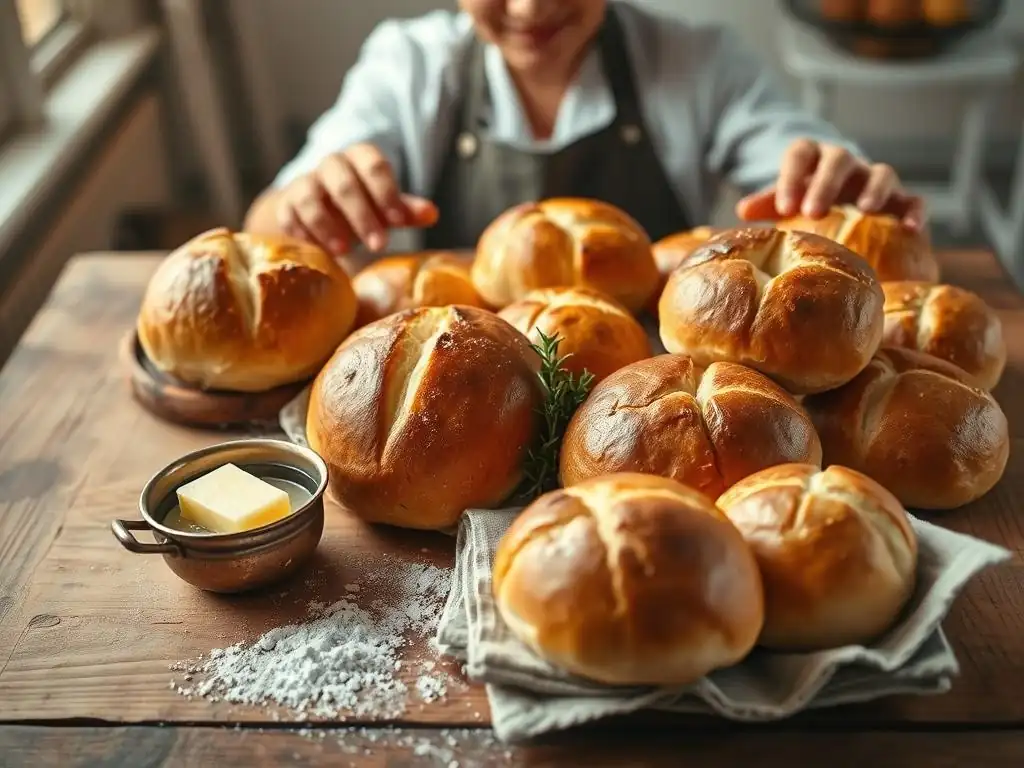
Mastering Dough Handling Techniques
Working with different types of dough is fundamental to successful bread baking. For leaner doughs or slightly enriched doughs like those used for simpler rolls or the base of potato rolls, traditional kneading is effective. Kneading develops gluten, the protein network that gives bread structure and elasticity. You can knead by hand, pushing and pulling the dough, or using a stand mixer with a dough hook. You'll know the dough is sufficiently kneaded when it is smooth, elastic, and passes the "windowpane test" – you can stretch a small piece thin enough to see light through it without tearing.
For high-hydration doughs like ciabatta, aggressive kneading isn't suitable. Instead, techniques like stretching and folding are used. This involves gently stretching the dough and folding it over itself in the bowl or on a wet surface at intervals during the bulk fermentation. This builds strength more gently, preserving the airy structure. Shaping rolls also requires different techniques depending on the type: rounding dough pieces creates a tight ball suitable for many rolls, while minimal handling is needed for rustic shapes like ciabatta. Practicing these techniques will improve the outcome of any easy european dinner roll recipe.
Understanding Yeast Activation for Optimal Rise
Yeast is a living organism, and understanding how to activate it is crucial for ensuring your rolls rise properly. Most recipes call for either active dry yeast or instant yeast. Active dry yeast typically needs to be "proofed" or activated in a warm liquid (usually water or milk) with a pinch of sugar before being added to the dry ingredients.
The ideal temperature for this is between 105°F and 115°F (40°C and 46°C). If the liquid is too cold, the yeast won't activate; if it's too hot, it can kill the yeast. After 5-10 minutes, the mixture should be foamy, indicating the yeast is alive and active.
Instant yeast, on the other hand, can usually be mixed directly with the dry ingredients, as it has a finer granule size and a protective coating. The liquid added to the dough should still be warm, around 120-130°F (49-54°C) for instant yeast when mixing directly. Regardless of the type, providing a warm, draft-free environment for the dough during its rise (fermentation) is essential for optimal activity.
A warm oven (turned off, with the light on), a microwave (turned off), or simply covering the bowl with plastic wrap and placing it in a warm spot works well. The dough should typically double in size during the first rise, which can take anywhere from 1 to 2 hours depending on the recipe, room temperature, and yeast activity.
Baking Time and Temperature Guide for Different Roll Types
The ideal baking time and temperature vary depending on the type and size of the European dinner roll, as well as your specific oven. As a general guide:
- Enriched rolls like Brioche and Irish Potato Rolls often bake at moderate temperatures, around 350°F to 375°F (175°C to 190°C), for 15-25 minutes. The lower temperature helps prevent the rich dough from browning too quickly before the inside is cooked through. They should be golden brown on top and sound slightly hollow when tapped on the bottom.
- Leaner or rustic rolls like Ciabatta and Pretzel Rolls typically require higher temperatures, often 400°F to 450°F (200°C to 230°C). Ciabatta benefits from very high heat and steam for a crispy crust, baking for 20-25 minutes. Pretzel rolls, with their alkaline bath, achieve their color at a slightly lower high temperature, around 400°F (200°C), and bake for 15-20 minutes.
To check for doneness, besides visual cues like golden color, you can tap the bottom of a roll – it should sound hollow. For absolute certainty, especially with larger rolls, an internal thermometer should read between 190°F and 200°F (88°C and 93°C). Always remember that oven temperatures can vary, so it's wise to use an oven thermometer and start checking for doneness at the lower end of the recommended time range. Adjusting baking time and temperature is part of mastering any easy european dinner roll recipe.
Serving and Storing Your Homemade Dinner Rolls
Creative Ways to Serve European Dinner Rolls
Homemade European dinner rolls offer a delightful addition to countless meals. Their unique characteristics make them versatile for various pairings. Classic French Brioche rolls, with their rich, slightly sweet flavor and tender crumb, are perfect for breakfast or brunch, served simply with butter and jam, or used for sweet sandwiches. They also make luxurious dinner accompaniments. Rustic Italian Ciabatta rolls, with their open texture and crispy crust, are ideal for dipping in olive oil and balsamic vinegar, serving with pasta dishes, or splitting horizontally for hearty sandwiches filled with cured meats and cheeses.
German Pretzel rolls, with their distinctive chewy crust and salty exterior, are fantastic served alongside German sausages, cheese platters, or with a variety of mustards. They also make unique and flavorful sandwich rolls. Soft and fluffy Irish Potato rolls are wonderful served warm with butter alongside stews, soups, or roasted meats. Their tender texture also makes them excellent for sliders or small sandwiches. Offering a variety of these rolls allows guests to choose their favorite, enhancing any meal. An easy european dinner roll recipe can elevate even a simple weeknight dinner.
Properly Storing Dinner Rolls for Freshness
To keep your homemade European dinner rolls as fresh as possible, proper storage is essential. First and foremost, allow the rolls to cool completely on a wire rack before storing them. Storing warm rolls will trap steam, leading to a soggy crust and promoting mold growth. Once cooled, the best way to store rolls depends on how quickly you plan to eat them and the type of roll.
Most rolls will stay fresh at room temperature for 1-2 days when stored in an airtight container or a sealed plastic bag. This prevents them from drying out. For rolls with a crispy crust like ciabatta, storing them in a paper bag allows the crust to remain crispier initially, though they will inevitably soften over time. Avoid refrigerating bread unless it's an enriched dough meant for longer storage, as refrigeration can actually make many types of bread stale faster. For longer storage, freezing is an excellent option.
Reheating Techniques to Maintain Softness and Flavor
Reheating homemade dinner rolls can bring them back to their freshly baked glory. The best method depends on the type of roll and how it was stored. For rolls stored at room temperature that have lost some softness, a quick warm-up in the oven or microwave works well. To reheat in the oven, preheat to 300-325°F (150-160°C). Place the rolls directly on the rack or wrapped loosely in foil (wrapping helps retain moisture, useful for softer rolls) and heat for 5-10 minutes until warm.
For frozen rolls, it's best to thaw them first at room temperature or overnight in the refrigerator. Then, reheat as you would fresh rolls. Alternatively, you can sometimes bake frozen rolls directly from the freezer, adding a few minutes to the baking time.
Rolls with a crispy crust, like ciabatta, benefit from a quick reheat at a higher temperature (around 375-400°F or 190-200°C) for just a few minutes to crisp up the crust again. While the microwave is the fastest option (30-60 seconds per roll), it can sometimes make rolls chewy, especially if overheated. A little moisture, like wrapping in a damp paper towel, can help mitigate this.
Conclusion: Enjoy the Taste of Europe, Baked With Ease
Your Journey to Baking Delicious European Dinner Rolls
Exploring the world of European dinner rolls through simple, achievable recipes is a deeply rewarding endeavor for any home baker. We've journeyed from the luxurious, buttery layers of French brioche to the rustic, airy structure of Italian ciabatta, experienced the unique chew of German pretzel rolls, and discovered the comforting tenderness of Irish potato rolls.
Each easy european dinner roll recipe offers a distinct taste and texture, showcasing the incredible diversity of bread traditions across the continent. You've learned about the key ingredients that define these rolls, the essential techniques for handling different doughs, and the importance of proper baking conditions.
Armed with this knowledge and these simple guidelines, you are well-equipped to bring the authentic flavors of Europe into your own kitchen. Baking these rolls from scratch not only provides superior freshness and flavor compared to store-bought options but also offers significant cost savings. Whether you're preparing a special holiday meal, hosting a dinner party, or simply want warm, delicious bread for your family, mastering an easy european dinner roll recipe is a valuable skill. So, gather your ingredients, tie on your apron, and embark on this delicious baking adventure. The taste of Europe, baked with ease, awaits you.
Frequently Asked Questions
What makes this dinner roll recipe considered "easy"?
This recipe focuses on simplified techniques and uses readily available ingredients, making it accessible for bakers of all skill levels. We've streamlined the process for a quicker and easier bake.
Can I substitute any ingredients in the recipe?
While we recommend following the recipe for optimal results, you can often substitute different types of flour or plant-based milk options. However, be aware that these changes might affect the final texture and flavor.
How do I ensure my dinner rolls are soft and fluffy?
Achieving soft rolls relies on proper proofing and not over-baking. Also, using a high-quality flour and the correct amount of liquid is crucial.
What are some variations I can try with this recipe?
You can add herbs, cheeses, or seeds to the dough for added flavor and texture. Consider experimenting with different toppings or even using the dough for small sandwiches.
How long will these dinner rolls stay fresh?
When stored properly in an airtight container, these dinner rolls will stay fresh for 2-3 days at room temperature. For longer storage, you can freeze them after they have cooled completely.
Final Reflection: The Enduring Power of Simple Bread
The humble dinner roll, a seemingly insignificant element of a meal, holds a surprising power to evoke memories, connect cultures, and bring people together. From rustic Italian loaves to delicate French croissants, these simple recipes are far more than just food; they are vessels of tradition, comfort, and shared experience. The ease with which these iconic European rolls can be made, as detailed in this article, makes their impact even more profound.
The enduring appeal of these recipes lies in their ability to transcend generations and geographical boundaries. They are a testament to the simple pleasures in life, a reminder that sometimes the most satisfying experiences come from the most straightforward methods. Bread is the staff of life,
a proverb often repeated, speaks to the fundamental role bread plays in our sustenance and culture. This article has hopefully provided you with the tools to not only bake delicious bread but also to appreciate the rich history and cultural significance woven into each bite.
Now, I invite you to roll up your sleeves, gather your ingredients, and embark on your own baking journey. Don't be intimidated by the seemingly complex techniques; embrace the simplicity and allow yourself to be transported to the heart of Europe, one perfectly risen roll at a time. The warmth of the oven, the aroma of freshly baked bread, and the satisfaction of creating something delicious with your own hands – these are the rewards that await you. Share your creations, share your experiences, and continue the legacy of these timeless recipes.
Unleash Your Inner Baker: Master European Dinner Rolls!
Thanks for joining us on this delicious journey through the heart of European baking! You've now unlocked the secrets to creating truly iconic dinner rolls. Ready to put your new skills to the test?
- Bake your own masterpiece today! Choose your favorite recipe from the article and get baking. The aroma alone will be worth it!
- Share your baking journey! Snap a photo of your finished rolls and post it on social media – tag us @BakeWithEase so we can see your creations.
- Explore other European baking delights! Dive into our recipe archive for more inspiration – you might just discover your next favorite treat.
What European-inspired treat will you bake next? Let us know in the comments below!