
The Secret to Perfect Sourdough Rye Bread

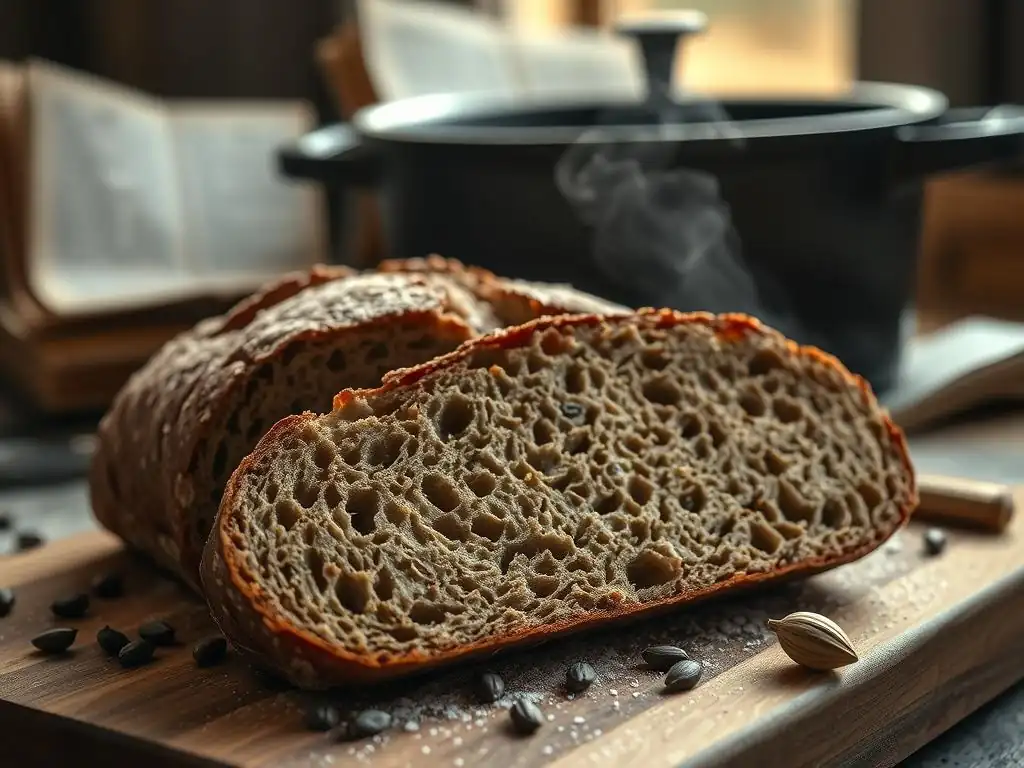
Welcome to BakeWithEase, your trusted guide to the delightful world of baking! Ever wondered how to achieve that perfectly tangy, deeply flavorful sourdough rye bread? You're in the right place. Discover the secrets behind our perfect sourdough rye bread recipe and unlock the artisan baker within you. Intrigued? Let's get started and explore the simple steps that lead to baking brilliance.
- Mastering Sourdough Rye: A Comprehensive Guide
- Introduction to Sourdough Rye Baking
-
Crafting the Ideal Sourdough Rye Recipe: A Step-by-Step Guide
- Assembling Ingredients for Authentic Sourdough Rye
- Preparing the Sourdough Rye Bread Dough
- Bulk Fermentation: Cultivating Flavor and Structure
- Shaping the Sourdough Rye Loaf
- Proofing the Sourdough Rye Bread
- Baking the Sourdough Rye Bread to Perfection
- Cooling and Enjoying Homemade Sourdough Rye Bread
- Troubleshooting Common Sourdough Rye Bread Challenges
- Advanced Sourdough Rye Bread Techniques
- Conclusion: Elevating Your Sourdough Rye Baking Skills
- Frequently Asked Questions
- Final Reflection: The Enduring Allure of Perfect Sourdough Rye
- Unlock Your Inner Baker: Craft the Perfect Rye Loaf!
Mastering Sourdough Rye: A Comprehensive Guide
Introduction to Sourdough Rye Baking
Why Bake Sourdough Rye at Home? Flavor, Satisfaction, and Tradition
Baking sourdough rye bread at home is a deeply rewarding experience that goes far beyond simply producing a loaf. It's an opportunity to connect with age-old baking traditions and create something truly unique in your own kitchen. The process itself, from nurturing a lively starter to witnessing the transformation of simple ingredients into a fragrant, rustic loaf, offers immense satisfaction. It's a tangible skill that yields delicious results, making the effort worthwhile.
Beyond the satisfaction of creation, the flavor of homemade sourdough rye is unparalleled. Unlike commercially produced loaves that might rely on commercial yeast and additives, a perfect sourdough rye bread recipe crafted at home develops complex, nuanced flavors through the natural fermentation process. The characteristic tang of sourdough pairs beautifully with the earthy, slightly sweet notes of rye flour, creating a depth of flavor that simply cannot be replicated quickly. This slow fermentation also contributes to better digestibility and a longer shelf life, adding practical benefits to the exceptional taste.
Understanding the Characteristics of Homemade Rye Bread
Homemade sourdough rye bread possesses distinct characteristics that set it apart. Visually, it often has a dense, close-knit crumb compared to wheat loaves, and a thick, often dark crust. The color of the crumb can range from light brown to deep mahogany, depending on the type of rye flour used and the length of fermentation. The aroma is rich and earthy, with a noticeable sour note from the sourdough.
Texturally, rye bread can be quite different from wheat bread. Rye flour is lower in gluten-forming proteins than wheat, meaning the dough behaves differently – it's often stickier and less elastic. This results in a loaf that is typically more compact and moist. Achieving the perfect sourdough rye bread involves understanding these characteristics and adjusting techniques accordingly, such as handling the dough more gently and recognizing that a towering rise isn't the goal as it might be with a purely wheat loaf. The unique qualities of rye contribute to a bread that is hearty, flavorful, and incredibly satisfying.
Crafting the Ideal Sourdough Rye Recipe: A Step-by-Step Guide
Assembling Ingredients for Authentic Sourdough Rye
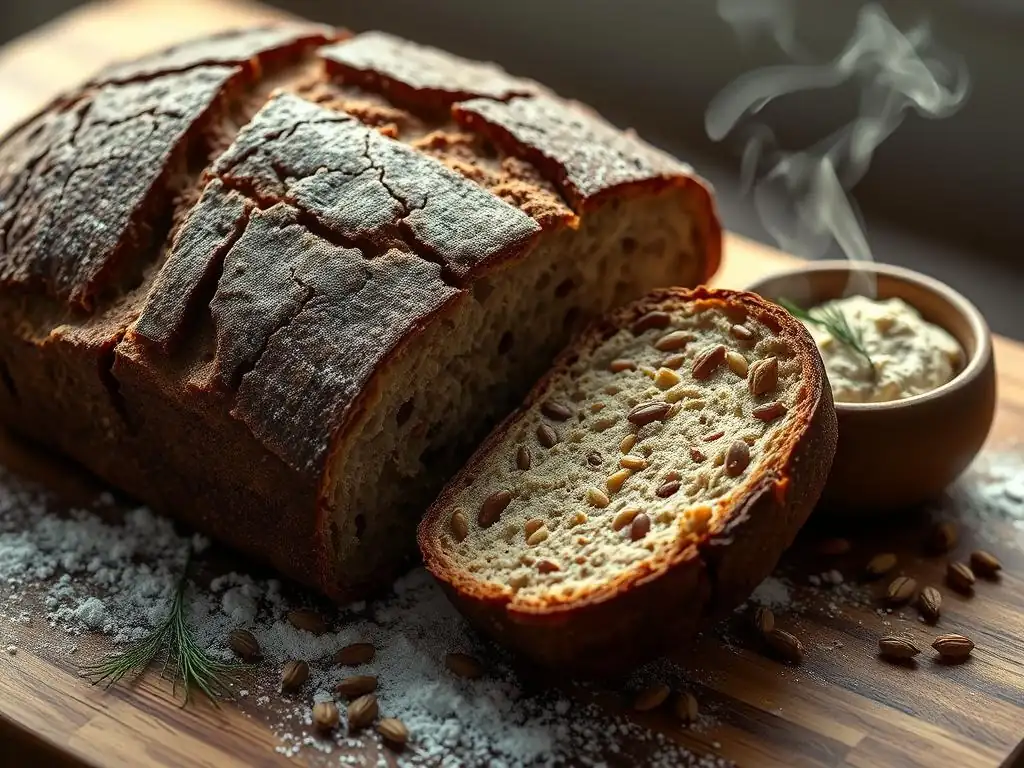
Crafting a truly authentic and perfect sourdough rye bread recipe begins with selecting the right ingredients. While the list is relatively short – flour, water, salt, and a sourdough starter – the quality and type of each component play a crucial role in the final outcome. Using high-quality rye flour is paramount, as it forms the backbone of the loaf's flavor and texture. Clean, filtered water is also recommended, as chlorine can inhibit starter activity.
Optional additions like caraway seeds are traditional in many rye bread recipes and add a warm, aromatic note that complements the rye flavor beautifully. Approximately 1-2 tablespoons of whole or crushed caraway seeds per standard loaf are common. High-quality salt, such as fine sea salt or kosher salt, is essential not only for flavor but also for controlling fermentation speed and strengthening the dough structure. Avoid iodized table salt, as it can sometimes impart an off-flavor or affect fermentation.
Rye Flour Selection: Understanding Type Numbers
Rye flour comes in various types, often indicated by numbers, particularly in European milling classifications (like German or Austrian). These numbers relate to the ash content remaining after milling, which indicates how much of the outer layers of the grain are included. Lower numbers (like Type 815) signify lighter flours with less bran and germ, resulting in a lighter-colored crumb.
Higher numbers (like Type 1150 or Type 1370) indicate darker, wholemeal flours containing more of the grain's components, leading to a denser, darker, and more flavorful loaf. Pumpernickel flour is the darkest and coarsest type, often made from the whole rye kernel, sometimes even before the bran is removed, and can include cracked rye kernels.
For a classic, rustic sourdough rye bread, a medium rye flour (like Type 1150) or a blend of light and dark rye flours is often used. Using 100% whole rye flour (Type 1370 or Pumpernickel) will result in a very dense loaf, which requires different hydration levels and fermentation times compared to recipes using a mix of rye and wheat. Understanding these differences helps you select the best flour combination to achieve your desired perfect sourdough rye bread texture and flavor profile.
Maintaining a Vigorous Sourdough Starter for Rye
A healthy, active sourdough starter is the heart of any perfect sourdough rye bread recipe. For rye bread, you can use a starter fed with either wheat or rye flour, but a starter fed primarily with rye flour can sometimes offer a more harmonious flavor profile with the rye loaf. Regardless of the flour used to feed it, your starter should be vigorous, meaning it consistently doubles or triples in volume within 4-6 hours after feeding at room temperature (around 21-24°C or 70-75°F).
Signs of a vigorous starter include numerous bubbles throughout, a pleasant tangy aroma (not overly acetic or nail-polish-like), and passing the "float test" – a small dollop placed in water should float. If your starter is sluggish, give it a few days of consistent feeding (at least once every 12-24 hours, discarding a portion each time) to build up its strength before attempting to bake. A weak starter is one of the most common reasons for a dense loaf with poor rise.
Essential Ingredients: Water, Salt, and Optional Caraway Seeds
Water quality significantly impacts your sourdough rye. Highly chlorinated water can stress or kill the beneficial bacteria and yeasts in your starter and dough. If your tap water is heavily chlorinated, letting it sit out in an open container for 24 hours or using filtered water is a simple solution. The temperature of the water also matters; lukewarm water (around 25-30°C or 78-86°F) can help kickstart fermentation, especially in a cooler kitchen.
Salt is not just for flavor; it plays a critical role in controlling the rate of fermentation and strengthening the gluten structure (even in lower-gluten rye dough). Too little salt can lead to overly fast fermentation and a bland loaf, while too much can inhibit yeast activity. Typically, salt is added at 1.8% to 2.2% of the total flour weight. Caraway seeds, while optional, are a traditional addition that provides a warm, slightly peppery note. They can be added whole or lightly crushed, usually incorporated during the initial mixing phase.
Preparing the Sourdough Rye Bread Dough
Once you have your ingredients ready, preparing the dough is the next crucial step towards a perfect sourdough rye bread. Unlike wheat dough, rye dough can be quite sticky and less amenable to traditional kneading. The process often involves mixing to combine, followed by a series of gentle folds during bulk fermentation to build structure.
Starting with an active starter is key. You'll typically mix the starter with water first, then add the flours and salt (and any seeds). Mixing can be done by hand with a sturdy spoon or spatula, or in a stand mixer with a dough hook. The goal is to hydrate all the flour and bring the ingredients together into a cohesive, albeit sticky, mass.
Evaluating Starter Activity for Optimal Dough Development
Before you even mix your dough, visually and aromatically check your sourdough starter. It should have doubled or tripled in size since its last feeding, showing a domed top that might be starting to recede slightly if it's peaked. The surface should be bubbly. A small test dollop should float on water, indicating it's light and full of carbon dioxide produced by the yeast and bacteria. Using a starter that is past its peak or hasn't reached peak activity will result in a sluggish dough that doesn't rise well.
Using a starter that is at or just slightly past its peak ensures you're introducing a lively culture into your dough, providing the necessary leavening power for your perfect sourdough rye bread. This is particularly important for rye dough, which relies more heavily on the starter's leavening ability due to its lower gluten content compared to wheat dough. A robust starter helps lift the denser rye flour structure.
Mixing the Dough: Achieving a Tacky Consistency
Mixing sourdough rye dough is generally a less intensive process than mixing wheat dough. Since rye flour forms less gluten, aggressive kneading isn't necessary and can sometimes even break down the limited structure that does form. The goal is simply to combine the ingredients thoroughly until no dry flour remains and the dough forms a shaggy mass.
The consistency you're aiming for is typically quite tacky or sticky, more so than a standard wheat dough. Hydration levels for rye bread can vary, but often range from 65% to 75% hydration relative to the flour weight. Resist the urge to add too much extra flour during mixing, even if it feels very sticky; this tackiness is normal for rye dough and contributes to a moist crumb in the finished perfect sourdough rye bread.
Autolyse: Hydrating the Flour for Improved Texture
An autolyse step, where flour and water are mixed and left to rest before adding the starter and salt, can also be beneficial for rye dough, although it's often shorter than for wheat. This resting period allows the flour to fully hydrate, which helps the proteins start to develop and makes the dough easier to handle later. For rye dough, an autolyse of 20-30 minutes is usually sufficient.
During the autolyse, the dough will become slightly smoother and more pliable. After the rest period, the starter and salt are added, and the dough is mixed again to incorporate them evenly. While rye doesn't develop gluten like wheat, the autolyse still aids in hydration and makes the subsequent mixing and folding steps more effective, contributing to a better structure in your perfect sourdough rye bread.
Bulk Fermentation: Cultivating Flavor and Structure
Bulk fermentation, also known as the first rise, is a critical phase where the sourdough starter works its magic, leavening the dough and developing complex flavors. This stage typically takes place at room temperature and involves periodic folding to build strength. The duration of bulk fermentation is highly variable, depending on the ambient temperature, the activity of your starter, and the proportion of starter used in the recipe.
For a standard loaf with 20-30% starter (relative to flour weight) at room temperature (around 21-24°C or 70-75°F), bulk fermentation might last anywhere from 3 to 6 hours. During this time, the dough will increase in volume, though perhaps not double as dramatically as a pure wheat dough. You'll also notice bubbles forming on the surface and throughout the dough.
Monitoring the Bulk Fermentation Process
Monitoring the dough rather than strictly adhering to a time schedule is key to successful bulk fermentation. Look for visual cues: the dough should appear noticeably puffier, feel lighter, and have rounded edges when resting in its container. If using a clear container, you can often see gas bubbles forming along the sides and bottom. The dough may increase in volume by 30-50% for a typical rye loaf, less than the 50-100% often targeted for wheat.
Another indicator is the "poke test" during the later stages: gently poke the dough with a wet finger; if the indentation slowly springs back only partially, the dough is likely ready for shaping. If it springs back immediately, it needs more time. If it doesn't spring back at all and leaves a deep indentation, it might be slightly over-fermented. Getting this timing right is crucial for achieving the desired rise and structure in your perfect sourdough rye bread.
Coil Folds for Dough Strength and Even Fermentation
While rye dough is less elastic than wheat, performing a few sets of gentle coil folds during bulk fermentation can still help build some structure and ensure even temperature and fermentation throughout the dough. Coil folds involve gently lifting the dough from the center and letting the edges fold underneath itself, effectively tucking the dough. This is repeated from all four sides of the container.
Typically, 2-3 sets of coil folds are performed during the first 1.5 to 2 hours of bulk fermentation, with about 30-45 minutes rest in between sets. Because rye dough is sticky, wetting your hands slightly before performing the folds can prevent sticking. These gentle manipulations help develop the limited protein structure in rye, providing support for the gas produced during fermentation and contributing to a better crumb structure in your perfect sourdough rye bread.
Assessing Dough Readiness for Shaping
Knowing when your bulk fermentation is complete is arguably the most challenging part of sourdough baking. For rye, the signs are subtle. The dough should feel noticeably lighter and airy compared to when you started. There should be visible signs of fermentation, like bubbles on the surface and potentially increased volume (30-50% is a good estimate for many rye recipes).
The dough shouldn't be overly sticky or completely collapsed. If it's spreading rapidly and feels very slack, it might be over-fermented. If it still feels dense and heavy with few bubbles, it needs more time. Trusting your intuition and observing the dough's behavior are key skills developed over time, helping you know precisely when it's ready to be gently shaped into your perfect sourdough rye bread.
Shaping the Sourdough Rye Loaf
Shaping sourdough rye dough requires a different approach than shaping wheat dough due to its lower gluten content and stickier nature. Aggressive handling or trying to create significant surface tension like you would with a wheat boule can often tear the delicate structure. The goal is to gently consolidate the dough into a desired shape while creating just enough surface tension to hold its form during proofing and baking.
Lightly flouring your work surface and hands is helpful, but avoid using excessive flour, which can create dry pockets in the dough. Common shapes for rye bread include a boule (round) or a batard (oval). The technique typically involves folding the edges into the center and then gently rounding or elongating the dough using a bench scraper or the sides of your hands.
Gentle Handling for a Tight Crumb
Because rye dough has less gluten development, it's prone to tearing if handled too roughly. Gentle handling during shaping helps preserve the gas bubbles created during fermentation, which is essential for achieving a relatively open (for rye) and even crumb structure. Instead of stretching and pulling, focus on folding and tucking the dough.
Think of it more as coaxing the dough into shape rather than forcing it. Minimizing the time the dough is handled on the work surface also helps prevent it from sticking and becoming unmanageable. This gentle approach is vital for maintaining the integrity of the dough structure and contributing to a perfect sourdough rye bread with a pleasant texture.
Utilizing a Banneton for Shape and Support
A banneton (proofing basket) is highly recommended for proofing sourdough rye bread. Its purpose is twofold: it helps the dough hold its shape during the final proof, preventing it from spreading outwards, and if lined with linen or well-floured, it prevents the sticky rye dough from sticking to the basket itself.
Dusting the banneton generously with rye flour (or a mix of rice flour and rye flour, as rice flour is less likely to stick) is crucial. After gently shaping the dough, place it seam-side up into the prepared banneton. The basket provides the necessary support for the relatively soft rye dough, allowing it to maintain its form as it proofs and contributing to a nicely shaped perfect sourdough rye bread with an attractive pattern from the basket imprint (if desired).
Proofing the Sourdough Rye Bread
Proofing, the final rise before baking, is where the shaped loaf gains its final volume and structure. For sourdough rye, proofing can be done at room temperature for a shorter period or, more commonly and often preferably, in the refrigerator (cold retardation) for a longer duration. The proofing temperature and time significantly impact the flavor and texture of the final loaf.
Room temperature proofing might take 1-3 hours depending on the temperature. The dough should feel light and airy, and the poke test should indicate it's ready (slow partial spring back). However, cold proofing offers several advantages, making it a popular choice for aspiring bakers of perfect sourdough rye bread.
Cold Retardation for Enhanced Flavor
Cold proofing involves placing the shaped loaf in its banneton into the refrigerator (typically around 4°C or 39°F) for an extended period, usually 8 to 24 hours, or even longer. The cold temperature significantly slows down the yeast activity, but the lactic acid bacteria continue to work, producing more organic acids. This process develops a deeper, more complex, and characteristic tangy flavor profile in the sourdough rye.
Furthermore, cold proofing makes the sticky rye dough much easier to handle and score before baking, as it firms up in the cold. The longer fermentation also contributes to a slightly better rise and crumb structure by giving the enzymes more time to break down starches. This technique is a secret weapon for achieving a truly flavorful and perfect sourdough rye bread.
Determining Proofing Completion
Determining when a sourdough rye loaf is perfectly proofed is tricky, especially with cold proofing. For a cold-proofed loaf, the visual cues are less pronounced than for a room-temperature proofed wheat loaf. The dough might increase slightly in volume in the fridge, but the primary indicator is often the time spent in the cold and the dough's behavior when gently prodded.
Using the poke test is still the most reliable method. A loaf that is ready for baking should spring back slowly and incompletely when gently poked. If it springs back quickly, it needs more time. If it leaves a deep indentation that doesn't spring back at all, it's likely over-proofed, which can lead to a lack of oven spring and a dense crumb. Learning to read the dough's readiness is a skill honed with practice, essential for your perfect sourdough rye bread.
Baking the Sourdough Rye Bread to Perfection
Baking is the final transformation, turning the proofed dough into a fragrant loaf with a beautiful crust and moist interior. Achieving a perfect sourdough rye bread involves high initial heat, steam to encourage oven spring and crust development, and then a slightly lower temperature to finish baking the interior. Baking in a Dutch oven or a baking stone with steam is highly recommended.
Preheating your oven and baking vessel (like a Dutch oven) to a high temperature is crucial. This initial blast of heat provides the necessary "oven spring" – the rapid expansion of the dough as the trapped gases expand before the crust sets.
Preheating the Oven and Baking Vessel
A very hot oven is essential for a good sourdough crust and oven spring. Preheat your oven, along with your Dutch oven or baking stone and steam setup, to a high temperature, typically between 230°C and 250°C (450°F and 480°F). Allow ample time for everything to heat soak thoroughly, usually at least 30-60 minutes after the oven signals it's reached temperature.
Baking rye bread in a preheated Dutch oven is particularly effective. The lid traps the moisture released from the dough, creating a steamy environment that keeps the crust pliable during the initial rise, allowing for maximum expansion. After the initial baking phase, the lid is removed to allow the crust to brown and crisp up, resulting in a perfect sourdough rye bread crust.
Scoring Techniques for Controlled Expansion
Scoring, or slashing, the surface of the dough just before baking serves several purposes: it provides weak points for the dough to expand predictably during oven spring, prevents uncontrolled cracking, and adds an aesthetic element. For rye dough, which has less dramatic oven spring than wheat, simpler scores are often effective.
A single, deep slash down the center is common. For a round loaf, a cross shape or a simple geometric pattern works well. Use a very sharp blade (like a razor blade or lame) and make swift, confident cuts about 1-2 cm (½ inch) deep. The scoring helps direct the expansion, ensuring a more uniform shape and contributing to the final structure of your perfect sourdough rye bread.
Baking Time and Temperature: Achieving a Dark, Aromatic Crust
Baking sourdough rye bread typically involves two phases. The first phase is covered (if using a Dutch oven) or with steam, at a high temperature (230-250°C or 450-480°F) for about 20-30 minutes. This is where the oven spring occurs. The steam keeps the crust soft, allowing the loaf to expand.
After this initial period, remove the lid (if using a Dutch oven) or the steam source and reduce the oven temperature slightly (to 200-220°C or 400-430°F) for another 20-30 minutes, or until the crust is deeply browned and the internal temperature reaches 93-98°C (200-208°F). Rye bread benefits from a longer, darker bake than wheat bread; a darker crust contributes significantly to the rich, aromatic flavor and texture of a perfect sourdough rye bread.
Cooling and Enjoying Homemade Sourdough Rye Bread
The moment your perfect sourdough rye bread emerges from the oven is exciting, but the process isn't quite finished. Proper cooling is absolutely essential for developing the final flavor and texture of the loaf. Cutting into a hot rye loaf can result in a gummy, unpleasant texture, as the internal structure is still setting and moisture is redistributing.
Resist the urge to slice immediately! Place the baked loaf on a wire rack and allow it to cool completely to room temperature. This can take anywhere from 2 to 4 hours, depending on the size of the loaf. During this time, the internal steam dissipates, the crumb structure stabilizes, and the flavors continue to meld and deepen.
Cooling to Enhance Flavor and Texture
Cooling is a non-negotiable step for achieving the desired texture and flavor of sourdough rye bread. As the loaf cools, moisture migrates from the interior to the crust, helping to create that signature thick, chewy rye crust. Simultaneously, the starches in the crumb undergo retrogradation, firming up the structure and preventing gumminess.
Flavors also continue to develop as the loaf cools. The complex acids and compounds created during the long fermentation process become more pronounced and balanced. Cutting too early traps moisture and disrupts this process, leading to a potentially disappointing result even after successful baking. Patience during cooling is key to your perfect sourdough rye bread.
Serving Suggestions and Storage Guidelines
Once fully cooled, your homemade sourdough rye bread is ready to be enjoyed. It's wonderfully versatile. Serve thick slices simply with butter, or pair it with strong cheeses, smoked fish, cured meats, or pickles. It makes an exceptional base for open-faced sandwiches. Consider toasting slices to bring out even more depth of flavor.
To store your perfect sourdough rye bread, allow it to cool completely, then store it at room temperature. Avoid refrigeration, as this can actually stale bread faster. A linen bread bag or wrapped in a clean tea towel works well for the first day or two, allowing the crust to breathe. For longer storage (up to a week), a sealed plastic bag or bread bin will help retain moisture. For extended storage, slice the cooled loaf and freeze the slices in an airtight bag; they can be toasted directly from frozen.
Troubleshooting Common Sourdough Rye Bread Challenges
Even with a great recipe, sourdough rye baking can present challenges. Understanding common issues and their causes is key to improving your results and consistently baking a perfect sourdough rye bread. Patience and observation are your best tools.
Dense or Gummy Texture: Addressing Insufficient Baking or Over-Proofing
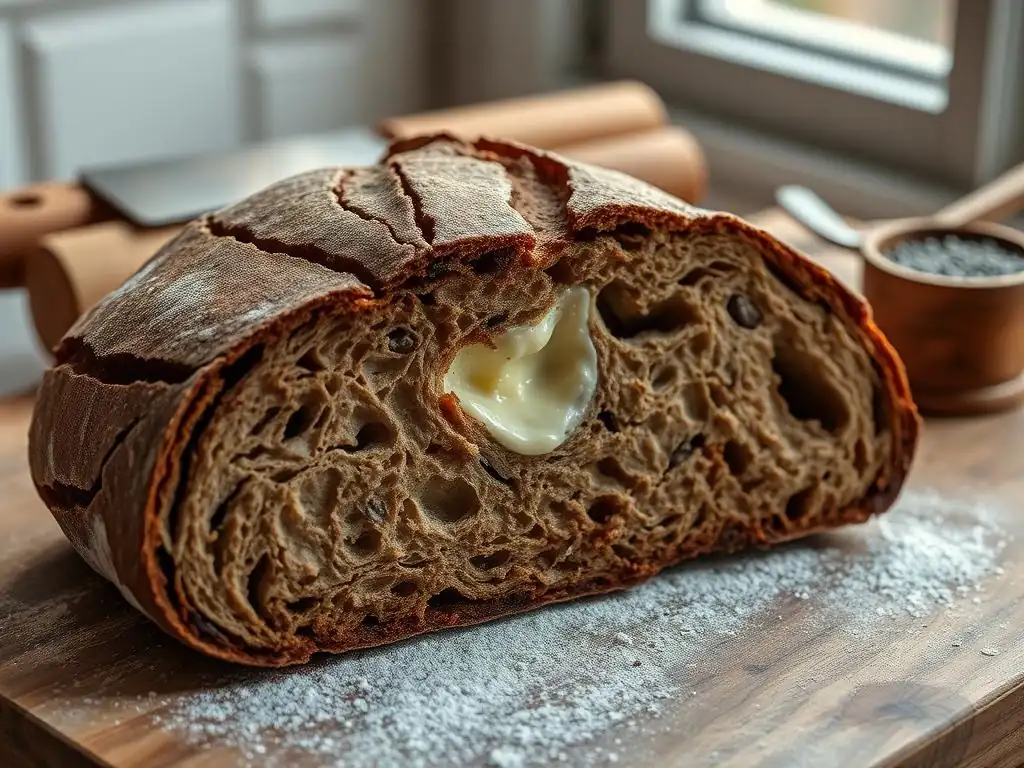
A dense or gummy crumb is one of the most frequent complaints with sourdough rye. This can stem from several issues. Insufficient baking is a primary culprit; if the internal temperature didn't reach 93-98°C (200-208°F), the starches didn't fully set, leading to a wet, sticky interior. Ensure you bake until the internal temperature is correct, even if the crust looks done. A darker crust is desirable for rye.
Over-proofing can also cause a dense crumb. If the dough proofs too long, the structure breaks down, and it won't have the strength to hold its shape or achieve good oven spring. The dough might collapse slightly before or during baking. Using the poke test and observing the dough's behavior during fermentation and proofing helps prevent this. Baking slightly under-proofed is often better than baking over-proofed for rye.
Lack of Rise: Optimizing Starter Activity and Gluten Development
If your sourdough rye loaf doesn't rise much (either during fermentation or in the oven), several factors could be at play. A weak or inactive starter is a common reason; ensure your starter is vigorous and at its peak activity when you mix the dough. Using too little starter for the amount of flour can also result in a slow or insufficient rise.
While rye is low in gluten, some level of structure is needed. Insufficient mixing or folding during bulk fermentation means the limited protein structure hasn't developed enough to support the gas. Conversely, over-mixing can damage the delicate structure. Ensure you are performing gentle folds and assessing the dough's readiness for shaping. Dough hydration also plays a role; too low hydration can result in a tight, dense loaf, while too high can make the dough too weak to hold its shape and rise. Finding the right balance is part of perfecting your perfect sourdough rye bread recipe.
Sourness Imbalance: Adjusting Fermentation Parameters
The level of sourness in sourdough rye is a matter of personal preference, but sometimes it can be overwhelmingly sour or not sour enough. The sourness is primarily controlled by the fermentation temperature and duration. Warmer temperatures (above 24°C or 75°F) and shorter fermentation times tend to favor yeast activity, resulting in a milder tang. Colder temperatures (below 20°C or 68°F) and longer fermentation times, especially cold retardation in the fridge, favor the production of lactic acid by bacteria, leading to a more pronounced sourness.
If your bread is too sour, try using a slightly warmer room temperature for bulk fermentation or reducing the cold proofing time. You can also try using a starter fed with a higher ratio of flour to water (e.g., 1:2:2 starter, 1 part starter, 2 parts water, 2 parts flour by weight), which tends to be less acidic. If your bread isn't sour enough, try a longer bulk fermentation at a slightly cooler room temperature or extend the cold proofing time in the refrigerator. Adjusting these parameters allows you to fine-tune the flavor of your perfect sourdough rye bread.
Advanced Sourdough Rye Bread Techniques
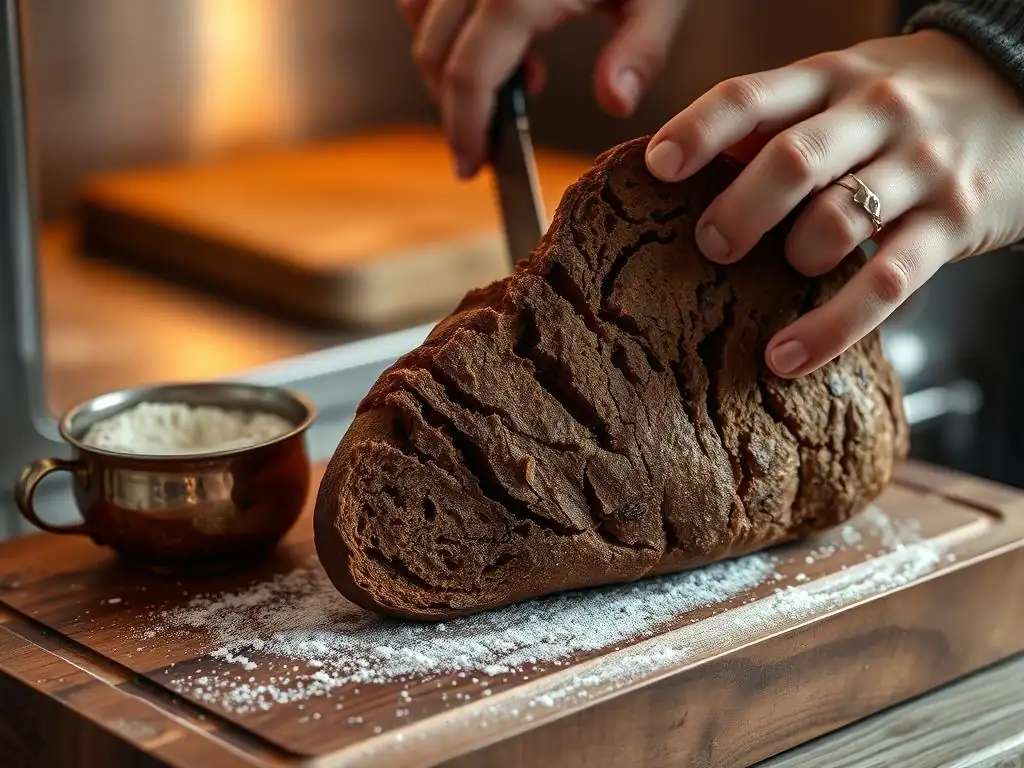
Once you've mastered the basics of a perfect sourdough rye bread recipe, you might want to explore more advanced techniques to further customize your loaves and expand your baking repertoire. These techniques can add complexity, flavor, and visual appeal.
Exploring Different Rye Flour Blends
Varying the type and proportion of rye flour used is a simple yet impactful way to change the character of your sourdough rye bread. Blending light rye flour with darker rye flour (like Type 1150 or Pumpernickel) allows you to control the density, color, and intensity of the rye flavor. For instance, using 50% light rye and 50% dark rye will yield a different result than using 100% medium rye.
You can also experiment with incorporating a percentage of strong wheat flour (like bread flour) into your rye dough. A blend of 20-30% strong wheat flour with rye can make the dough easier to handle and result in a slightly lighter, more open crumb while still retaining the characteristic rye flavor. This is a good approach when aiming for a less dense perfect sourdough rye bread.
Incorporating Seeds and Spices for Enhanced Flavor Profiles
Beyond traditional caraway seeds, numerous additions can elevate the flavor of sourdough rye. Toasted seeds like sunflower, pumpkin, flax, or sesame can be incorporated into the dough during mixing or used to coat the exterior before proofing. Seeds add texture, nutty flavor, and nutritional value. A seed soak (hydrating seeds in water before adding to the dough) can prevent them from absorbing moisture from the dough and drying out the crumb.
Spices like fennel seeds, coriander seeds, or even a pinch of ground cloves or allspice can add layers of complexity. Toasted and ground spices release more aroma and flavor. Consider adding dried fruits like raisins or currants for a touch of sweetness that pairs well with the tang of the sourdough and the earthiness of the rye. These additions allow you to personalize your perfect sourdough rye bread recipe.
Creating Variations: Marbled Rye and Pumpernickel
Advanced techniques include creating classic variations like marbled rye or traditional pumpernickel. Marbled rye is achieved by making two separate doughs – one plain rye and one colored with ingredients like cocoa powder, instant coffee, or dark molasses and sometimes caraway seeds – then swirling them together before shaping. This creates a visually striking loaf with a blend of flavors.
Traditional pumpernickel is a dense, dark, and slightly sweet rye bread often made with coarse rye meal or pumpernickel flour and baked for a very long time at a lower temperature (sometimes even steamed) to caramelize the sugars and develop its characteristic deep color and flavor. Mastering these variations requires understanding how different ingredients and baking methods interact with rye flour to create distinct types of perfect sourdough rye bread.
Conclusion: Elevating Your Sourdough Rye Baking Skills
Baking perfect sourdough rye bread is a journey of skill and patience, offering deep satisfaction and incredibly flavorful results. From understanding the unique properties of rye flour and nurturing an active starter to mastering fermentation, shaping, and baking techniques, each step contributes to the final loaf.
Troubleshooting common issues like dense texture or lack of rise helps refine your process, while exploring advanced techniques like flour blends and flavorful additions allows for endless creativity. With practice and attention to detail, you can consistently bake beautiful, delicious sourdough rye loaves that are a testament to traditional baking and a highlight of your kitchen creations. Continue experimenting, learning from each bake, and enjoy the rewarding process of crafting your own perfect sourdough rye bread.
Frequently Asked Questions
What makes this sourdough rye bread recipe "perfect"?
This recipe focuses on achieving a balance of rye flavor, sourdough tang, and a perfect crumb. It uses specific techniques to ensure optimal rise and texture.
What kind of rye flour is best for this recipe?
We recommend using a medium rye flour for this recipe, as it provides a good balance of flavor and structure. Dark rye flour can be used, but adjust hydration accordingly.
How long does it take to make this sourdough rye bread from start to finish?
The entire process, including starter preparation, mixing, proofing, and baking, can take around 24-36 hours. This allows for proper fermentation and flavor development.
Can I substitute the sourdough starter with commercial yeast?
While possible, it's not recommended for this recipe. Sourdough starter provides the unique flavor profile and texture characteristic of sourdough rye bread. Using commercial yeast will result in a different product.
What's the best way to store leftover sourdough rye bread?
Wrap the bread tightly in plastic wrap or store it in an airtight container at room temperature. For longer storage, slice and freeze the bread, then toast it when ready to eat.
Final Reflection: The Enduring Allure of Perfect Sourdough Rye
The pursuit of the perfect sourdough rye loaf is not merely a culinary quest; it's a journey of patience, precision, and profound connection to the ancient art of bread making. This article has explored the intricacies of achieving that perfect crumb, that tangy yet subtly sweet flavor, that satisfying chew – a testament to the power of simple ingredients transformed by time and care. The demand for authentic, handcrafted food continues to grow, and mastering sourdough rye, with its complex fermentation process, places you squarely within this movement.
The journey to perfect sourdough rye is a microcosm of life itself – requiring dedication, attention to detail, and the acceptance that not every loaf will be a masterpiece. The process, with its unpredictable variables and the need for constant adaptation, mirrors the challenges and rewards of life's endeavors. The best bread is made with love,
a baker once told me, and I believe it to be true. This isn't just about a recipe; it's about the mindful engagement with the process, the satisfaction of creating something beautiful and nourishing from scratch, and the sharing of that creation with others.
Now, I invite you to take what you've learned and embark on your own sourdough rye adventure. Don't be afraid to experiment, to adjust the recipe to your own preferences, and to embrace the inevitable imperfections along the way. Each loaf, whether a triumph or a learning experience, will bring you closer to understanding the magic of sourdough and the profound satisfaction of creating something truly special. The perfect loaf awaits – but more importantly, the journey itself is a reward.
Unlock Your Inner Baker: Craft the Perfect Rye Loaf!
Thanks for taking the time to explore the world of sourdough rye bread with us! We hope you’ve gained valuable insights and inspiration to elevate your baking skills. Now it’s time to put your knowledge into practice.
- Bake your own sourdough rye today! Use the recipe and techniques you learned here to create a delicious, artisanal loaf. Don't be afraid to experiment – that's where the true magic happens!
- Share your baking journey! Post a picture of your masterpiece on social media and tag us – we'd love to see your results.
- Challenge a friend to bake along with you. It's even more fun (and delicious) to share the experience.
What unique twist will you add to your perfect sourdough rye bread?