
Transitioning Flour: Switching Your Starter's Diet Successfully


Welcome to BakeWithEase, your companion in the delightful world of baking! Ever wondered if changing your sourdough starter's flour is more alchemy than science? We're diving deep into the art of transitioning your starter's diet successfully. Unlock the secrets to a thriving, flavorful starter and discover how to feed sourdough starter the right way for optimal results. Get ready to explore the nuances of flour types and techniques, and let's elevate your sourdough game together!
- Introduction to Flour Transitioning for Sourdough Starters
- Step-by-Step Guide to Changing Your Sourdough Starter's Flour
- Feeding Sourdough Starter with New Flour: Best Practices
- The Benefits of Experimenting with Different Flours in Your Sourdough Starter
- Maintaining Your Sourdough Starter After a Successful Flour Transition
- Advanced Techniques for Flour Transitioning
- Frequently Asked Questions About Changing Sourdough Starter's Flour
- Conclusion: Mastering the Art of Flour Transitioning for Sourdough
-
Frequently Asked Questions
- How often should I feed my sourdough starter when transitioning flour?
- What ratio of starter, flour, and water should I use when transitioning flour?
- How long does it typically take to fully transition a sourdough starter to a new flour?
- What are some signs that my sourdough starter is not adjusting well to the new flour?
- Can I mix the old flour and the new flour during the transition period?
- Final Reflection: The Ever-Evolving Dance of Flour and Starter
- Unleash Your Starter's Potential: A New Floury Adventure!
Introduction to Flour Transitioning for Sourdough Starters
Embarking on the sourdough journey is exciting, and learning how to feed sourdough starter correctly is fundamental. As you become more comfortable, you might wonder about changing the type of flour you use to nourish your starter. This process, known as flour transitioning, can significantly impact your starter's characteristics and, consequently, your bread. It's a step that allows for greater control and experimentation in your baking.
Switching your starter's flour isn't just about changing its food source; it's about influencing its microbial community and enzymatic activity. Different flours provide varying levels of nutrients (like complex carbohydrates and proteins) that the wild yeasts and lactic acid bacteria in your starter thrive on. Understanding this relationship is key to successfully managing your starter's health and performance during and after a transition.
Why Change Your Sourdough Starter's Flour?
There are several compelling reasons why a baker might choose to transition their sourdough starter to a new flour type. One of the primary motivations is to influence the flavor profile of the resulting bread. For instance, feeding your starter with rye flour can impart a distinct tanginess and depth of flavor that is difficult to achieve with plain all-purpose flour. Whole wheat flour, on the other hand, often contributes a nuttier, more complex taste.
Beyond flavor, changing flour can also affect your starter's activity and strength. Some flours, particularly whole grains like rye and whole wheat, are incredibly rich in nutrients and enzymes, which can lead to a very vigorous and active starter. This increased activity can translate into a more reliable rise in your loaves. Additionally, practical reasons like availability or cost might prompt a switch; perhaps a local mill offers high-quality flour at a better price, or your usual flour is temporarily out of stock. Learning how to feed sourdough starter adaptable to different flours adds flexibility to your baking.
Understanding Different Flour Types and Their Impact on Your Starter
Different flours offer unique nutritional profiles that influence the microbial balance and activity within your sourdough starter. All-purpose flour, a common choice for initial starter creation and maintenance, provides a balanced diet that supports a stable microbial community. It's relatively consistent in its composition, making it predictable for regular feeding. However, its lower nutrient density compared to whole grains might result in a less vigorous starter over time for some bakers.
Whole grain flours, such as whole wheat and rye, contain the bran and germ in addition to the endosperm, making them exceptionally rich in nutrients, enzymes, and beneficial microorganisms naturally present on the grain. Rye flour, in particular, is known for its high enzymatic activity and fermentable sugars, often leading to extremely fast and vigorous starter growth. Whole wheat flour also promotes strong activity due to its nutrient density. Using these flours when feeding sourdough starter can significantly boost its health and leavening power, though they may require slight adjustments in hydration due to their absorption properties.
Step-by-Step Guide to Changing Your Sourdough Starter's Flour
Transitioning your sourdough starter to a new flour type requires a careful, gradual approach to avoid shocking the microbial ecosystem. Rushing the process can lead to a sluggish or inactive starter. This step-by-step guide outlines a common method for successfully making the switch.
Step 1: Assessing Your Current Starter's Health
Before you begin transitioning flours, it's crucial to ensure your current starter is healthy and active. A healthy starter should consistently double (or even triple) in volume within 4-8 hours after being fed at a warm room temperature (around 75-80°F or 24-27°C). It should also have a pleasant, slightly tangy aroma, not sharp or overly acidic. Visual cues include numerous bubbles throughout, especially near the surface and sides of the jar.
If your starter is sluggish, inconsistent, or has an off smell (like acetone), it's best to revitalize it using its current flour for a week or two before attempting a transition. A strong, healthy starter is much more resilient and better equipped to handle the change in diet. Regularly observing these signs is part of mastering how to feed sourdough starter effectively.
Step 2: Choosing the Right Flour for Your Transition
Selecting the new flour is a key decision based on your baking goals and what you hope to achieve with your starter. Consider the characteristics each flour type brings to the table, both in terms of starter activity and the eventual bread flavor.
Considerations for Whole Wheat Flour
Transitioning to whole wheat flour is popular because it often results in a very active starter. Whole wheat contains more nutrients and enzymes than refined flour, which can provide a significant boost to microbial activity. When considering whole wheat, be prepared for a potentially faster fermentation cycle and a starter that might require slightly more water due to the bran's absorption. A starter fed with whole wheat flour can contribute a deeper, nuttier flavor to your bread.
Using whole wheat requires attention to hydration; you might find you need to add an extra tablespoon or two of water per 100g of flour compared to all-purpose. This helps ensure the starter isn't too stiff, which can hinder microbial movement. When learning how to feed sourdough starter with whole wheat, start with a familiar ratio like 1:1:1 (starter:flour:water) and adjust hydration as needed based on consistency.
Considerations for Rye Flour
Rye flour is perhaps the most potent flour for boosting starter activity. It's incredibly rich in enzymes and fermentable sugars, often leading to explosive growth. Starters fed with rye tend to be very robust and resilient. The downside is that rye starters can ferment very quickly, sometimes peaking in just 3-4 hours at warm temperatures. They also have a stickier, more paste-like consistency compared to wheat-based starters.
Opting for rye will significantly influence the flavor of your bread, adding a pronounced tang and earthy notes. Hydration is also critical with rye; it absorbs water differently than wheat. Many bakers use a higher hydration ratio, like 1:1:1.2 (starter:flour:water) or even more, to achieve a workable consistency. Understanding these properties is vital when deciding how to feed sourdough starter with rye.
Considerations for All-Purpose Flour
Switching to or back to all-purpose flour is common for bakers seeking consistency and a milder flavor profile. All-purpose flour is widely available and provides a reliable food source for maintaining a stable starter. While it may not provide the same level of vigorous activity as whole grains, a well-maintained all-purpose starter is perfectly capable of leavening bread.
When transitioning to all-purpose, you might notice slightly slower activity compared to whole grain feeds. It absorbs less water than whole wheat or rye, so your usual hydration ratio (like 1:1:1) should work well, resulting in a thick, bubbly consistency. This makes it a straightforward option for regular feeding sourdough starter.
Step 3: The Gradual Flour Transition Process
A gradual transition is key to allowing your starter's microbial population to adapt to the new food source without stress. Abruptly switching 100% of the flour can lead to a significant slowdown or even collapse in activity as the microbes struggle to adjust.
Day 1-3: Initial Flour Incorporation (Small Percentage)
Begin the transition by replacing only a small portion of your usual flour with the new flour. A good starting point is around 20-25% new flour and 75-80% old flour. For example, if you typically feed your starter with 100g of flour, use 20-25g of the new flour and 75-80g of the old flour, maintaining your usual water ratio.
Continue with your regular feeding schedule (e.g., every 12 or 24 hours). Observe your starter's activity closely during these first few days; it might show a slight change in behavior, but it should still be rising and showing signs of life. This gentle introduction helps the microbes begin to familiarize themselves with the new substrate.
Feeding Example (assuming a 1:1:1 ratio and 100g total flour):
Day 1: 50g starter + 75g Old Flour + 25g New Flour + 100g Water
Day 4-7: Increasing the New Flour Ratio
If your starter appears stable and active after the first few days, gradually increase the percentage of the new flour. You could move to a 50/50 split (50% old flour, 50% new flour) for the next 3-4 days. Again, maintain your standard hydration ratio unless the consistency seems significantly off (too stiff or too liquid).
Continue feeding on your regular schedule. At this stage, you should start to see the characteristics of the new flour influencing the starter's behavior, such as changes in rise time or bubble structure. This phase is crucial for the microbes to really start adapting to their new primary food source.
Feeding Example (assuming a 1:1:1 ratio and 100g total flour):
Day 4: 50g starter + 50g Old Flour + 50g New Flour + 100g Water
Day 8-14: Monitoring Starter Activity and Adjusting
By this point, you can transition to feeding with 100% of the new flour. Continue feeding daily or every 12 hours, depending on your starter's speed and your schedule. Pay close attention to how quickly your starter rises and falls, its peak activity time, and its consistency.
You may need to slightly adjust your hydration ratio now that you are using 100% of the new flour, especially if switching to or from a whole grain flour. A starter fed with rye, for instance, might require more water to achieve a pourable consistency than one fed with all-purpose. This period allows the starter to stabilize on its new diet.
- [ ] Feed with 100% new flour
- [ ] Observe rise time and peak
- [ ] Check consistency and adjust water if needed
- [ ] Smell for desirable aromas
- [ ] Note peak time for future feeding schedule adjustments
Step 4: Recognizing Signs of a Successful Flour Transition
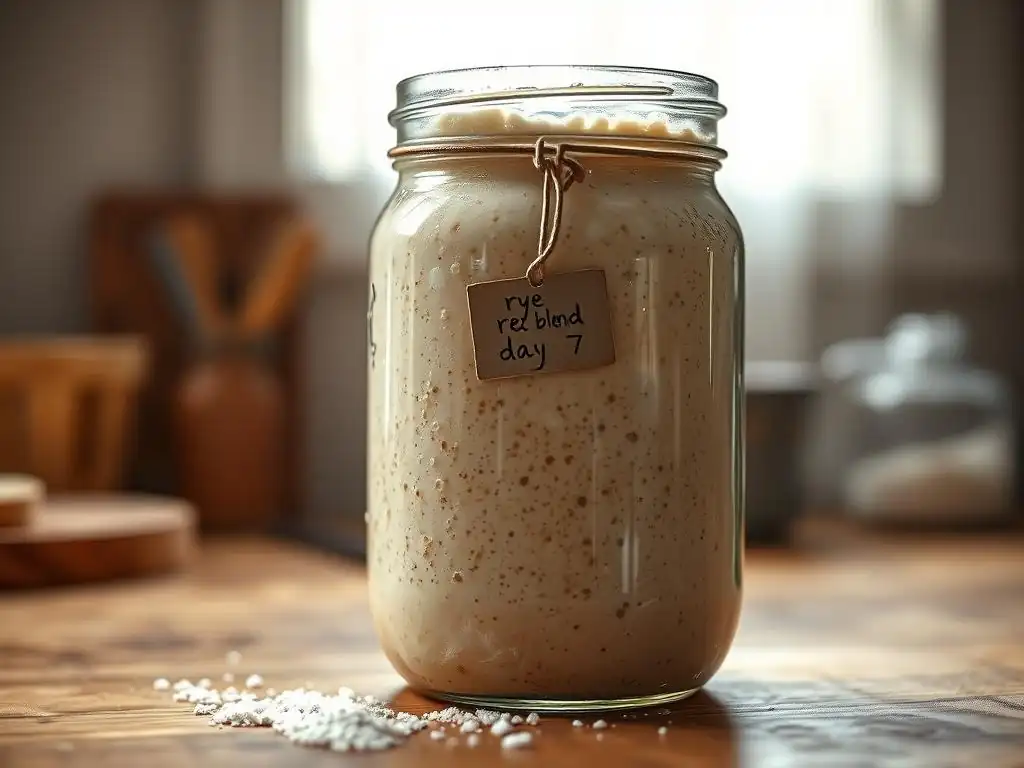
Knowing when your starter has successfully transitioned is key to moving forward with baking. Several indicators can help you assess its readiness.
Visual Cues: Bubbles, Texture, and Rise
A successfully transitioned starter will display robust activity consistent with its new flour type. You should see abundant bubbles throughout the culture, indicating active gas production by the yeasts and bacteria. The texture should be airy and spongy at its peak. Most importantly, the starter should consistently double in volume within a predictable timeframe after feeding (e.g., 4-8 hours for a healthy starter at room temp, though this varies by flour and temperature). The dome shape it forms at its peak before slowly deflating is another positive sign.
Smell Test: Identifying Desirable Aromas
The aroma of your starter is a strong indicator of its health and the balance of its microbial community. A successfully transitioned starter should smell pleasant, typically yeasty with a clean, slightly tangy or yogurt-like note. The specific aroma might change slightly depending on the new flour – rye starters can have a more pronounced, earthy tang, while all-purpose starters might be milder. Avoid smells like strong acetone (nail polish remover), rotten fruit, or moldy odors, which suggest an imbalance or contamination. A healthy, happy starter smells like potential delicious bread!
Step 5: Troubleshooting Common Issues During Flour Transition
It's not uncommon to encounter minor setbacks when changing your starter's diet. Patience and observation are your best tools for overcoming these challenges.
Dealing with Inactivity or Slow Rise
If your starter becomes sluggish or fails to double consistently during or after the transition, several factors could be at play. The most common issue is that the microbial community needs more time to adapt to the new flour; simply continuing with the gradual feeding schedule for a few more days might be enough. Ensure your feeding ratio is appropriate (a higher ratio of flour to starter, like 1:3:3 or 1:4:4, can sometimes help revitalize a slow starter by providing more food).
Also, check your ambient temperature; a cooler environment will slow down fermentation significantly. Increasing the room temperature or using a proofing box can help.
Addressing Mold or Unpleasant Odors
Mold is typically visible as fuzzy patches (often green, black, or pink) on the surface. If you see mold, unfortunately, it's best to discard the starter and begin anew, as the mold spores can permeate the culture. Unpleasant odors, like strong acetone or rotten smells, usually indicate an imbalance.
A strong acetone smell often means the starter is hungry and producing alcohol; try feeding it more frequently or with a higher ratio of flour (e.g., 1:2:2 or 1:3:3). Foul or rotten smells can suggest undesirable bacteria are present; try discarding a larger portion of the starter before feeding (e.g., keeping only 10g and feeding it with 50g flour and 50g water) for a few cycles. Ensure your jars are clean.
Adjusting Hydration Levels for Different Flours
As mentioned earlier, different flours absorb water differently. Whole grain flours (like whole wheat and rye) generally require more water than refined flours (like all-purpose) to achieve the same consistency. If your starter seems too stiff after feeding with a whole grain, add a little extra water (a teaspoon or two at a time) until it reaches a consistency you're familiar with.
Conversely, if your starter becomes too liquid after switching to a refined flour, slightly decrease the water in your feeding ratio. The ideal consistency is often like thick pancake batter or a loose dough, depending on your preference and the flour type.
Feeding Sourdough Starter with New Flour: Best Practices
Once your starter is happily established on its new flour diet, maintaining its health and activity requires consistent care and observation.
Maintaining a Consistent Feeding Schedule
Regularly feeding your starter is paramount, regardless of the flour type. Whether you feed it every 12 hours, 24 hours, or even less frequently when stored in the refrigerator, consistency helps maintain a stable microbial population and predictable activity. Choose a schedule that fits your baking habits and stick to it. This is the core practice of how to feed sourdough starter successfully long-term.
Observing and Adjusting Based on Environmental Factors
Your starter's activity is highly sensitive to temperature. Warmer temperatures (75-80°F) accelerate fermentation, while cooler temperatures slow it down. Humidity can also play a minor role. Pay attention to how your starter behaves in your specific environment after feeding. Does it peak faster on warm days? Is it sluggish when the house is cool? Adjust your feeding frequency or location (e.g., moving it to a warmer spot in winter) based on these observations to keep it consistently active and ready for baking.
Optimizing Hydration Ratios for Your Chosen Flour
While a 1:1:1 ratio (starter:flour:water by weight) is a common starting point, the optimal hydration might vary slightly depending on the flour you've transitioned to. Whole wheat and rye often perform well at 100-110% hydration (meaning the water weight is equal to or slightly more than the flour weight), while all-purpose might be perfect at 100%. Experiment slightly with the water amount during regular feedings to find the consistency where your starter is most active and easiest to work with. This fine-tuning is part of mastering how to feed sourdough starter for peak performance.
The Benefits of Experimenting with Different Flours in Your Sourdough Starter

Exploring different flours for feeding your sourdough starter offers exciting opportunities to enhance your baking results in multiple ways.
Enhancing Flavor Profiles in Your Sourdough Bread
Perhaps the most enjoyable benefit is the impact on your bread's flavor. A starter fed with rye flour will contribute a deeper, more complex tang and earthy notes to a loaf. Using whole wheat flour can impart a nuttier, more robust flavor compared to a starter maintained solely on white flour. Even subtle changes, like using a blend of bread flour and whole wheat, can add nuance. This experimentation allows you to tailor your starter to the specific type of bread you want to bake, opening up a world of flavor possibilities beyond the standard sourdough taste.
Improving Starter Strength and Activity
Switching to flours richer in nutrients and enzymes, like whole wheat or rye, can significantly boost your starter's overall strength and activity. These flours provide more fuel for the yeasts and bacteria, leading to more vigorous fermentation and a starter that rises reliably and quickly. A stronger starter translates directly to better oven spring and a more open crumb structure in your bread. If you've struggled with a sluggish starter, a transition to a more active flour might be the solution.
Exploring Unique Baking Characteristics
Different flours don't just change flavor and activity; they can also influence the handling properties of your dough and the final characteristics of the baked loaf. A starter maintained on rye, for instance, can contribute to a stickier dough but also potentially a moister crumb in the finished bread.
A starter fed with high-protein bread flour might contribute to a stronger gluten network. By experimenting with what you use for feeding sourdough starter, you gain a deeper understanding of how different flours behave and can use this knowledge to achieve specific results in your baking, from crust crispness to crumb texture.
Maintaining Your Sourdough Starter After a Successful Flour Transition
Once your starter has happily settled into its new flour diet, ongoing care is essential for its long-term health and reliability.
Long-Term Care and Feeding Tips
Continue feeding your starter regularly with its new preferred flour, following the schedule and hydration ratio you've found works best. Observe its activity over time; even after transitioning, factors like seasonal temperature changes can affect its behavior. If you notice a dip in activity, try a few consecutive feedings at a higher ratio (e.g., 1:3:3) to give it a boost. Always use clean jars and utensils to prevent contamination. Maintaining a consistent routine for feeding sourdough starter with its chosen flour is the foundation of a healthy culture.
Storing Your Starter for Optimal Health
How you store your starter depends on how often you bake. If you bake frequently (multiple times a week), keeping your starter at room temperature with daily or twice-daily feedings is ideal. If you bake less often, storing your starter in the refrigerator is a convenient option. When refrigerating, feed your starter until it's active, then place it in the fridge. You'll typically need to feed it just once a week. Remember to take it out and feed it at room temperature for one or two cycles before you plan to bake to ensure it's active and ready.
Advanced Techniques for Flour Transitioning
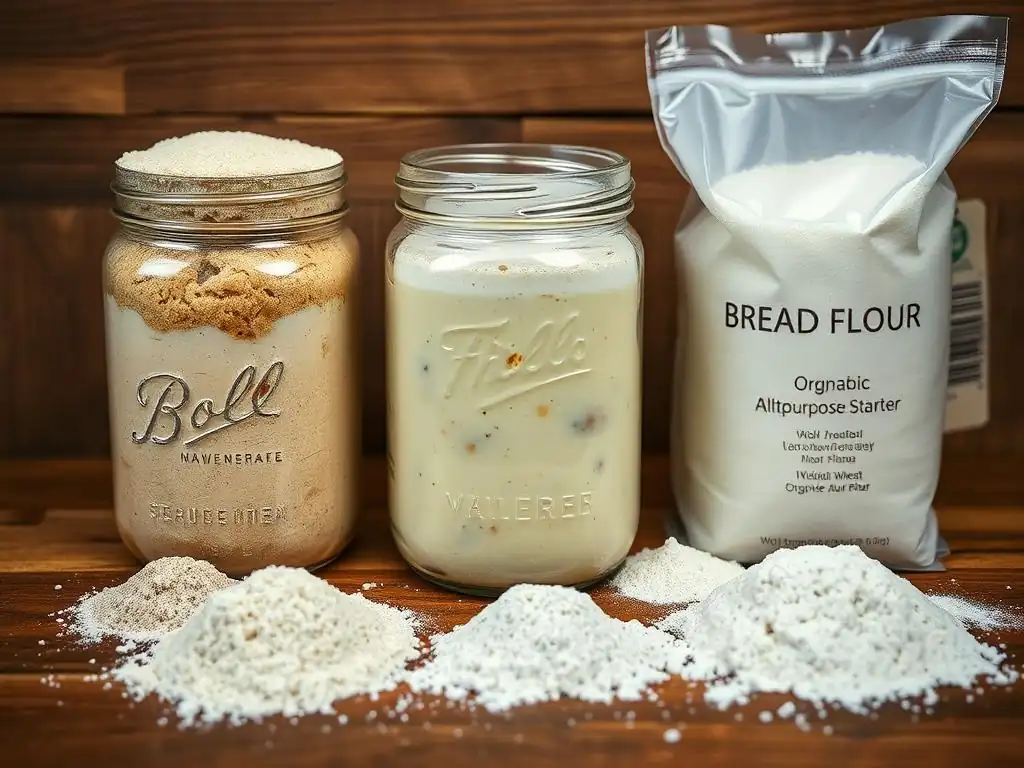
For those looking to dive deeper, there are more nuanced ways to approach flour transitions or incorporate different flours into your starter maintenance.
Creating a Hybrid Flour Blend for Your Starter
Instead of switching to a single new flour, you can create a custom blend for feeding your sourdough starter. For example, a common blend is 50% all-purpose and 50% whole wheat, or perhaps 80% bread flour and 20% rye. This allows you to combine the benefits of different flours – getting some of the vigor from whole grains while maintaining easier handling properties or a milder flavor from refined flour. Experiment with different ratios to see how they affect your starter's activity and the flavor it imparts to your bread.
Using Autolyse with Different Flours
While not strictly a starter feeding technique, understanding autolyse (mixing flour and water and letting it rest before adding starter and salt) is relevant when working with different flours in your dough, which your newly transitioned starter will interact with. Different flours benefit from different autolyse times. Whole grains, for instance, often benefit from a longer autolyse (30-60 minutes or more) to allow the bran to soften and the flour to fully hydrate.
Refined flours may need less time (20-30 minutes). While you don't autolyse your starter itself, being aware of how your new flour behaves in dough is important for successful baking after the transition.
Frequently Asked Questions About Changing Sourdough Starter's Flour
Transitioning flour can bring up questions. Here are some common ones.
Can I switch back to my original flour?
Yes, absolutely! You can switch your starter back to its original flour or transition it to yet another type using the same gradual process outlined above. Just reverse the steps, slowly incorporating the old flour back into the feeding ratio over several days until it's 100%.
How often should I change my starter's flour?
There's no set rule for how often you should change your starter's flour. Many bakers maintain their starter on the same flour for years. You should only change it if you have a specific goal in mind, such as altering flavor, boosting activity, or due to flour availability. Frequent, unnecessary changes might stress the starter.
What if my starter doesn't double after the transition?
If your starter is consistently failing to double after transitioning, revisit the troubleshooting steps. Ensure your room temperature is warm enough (ideally 75-80°F), try adjusting the hydration slightly, and consider increasing the feeding ratio (e.g., feeding 10g starter with 50g flour and 50g water for a few cycles) to give the microbes a better chance to multiply. Patience is key; sometimes, they just need a little more time to fully adapt.
Conclusion: Mastering the Art of Flour Transitioning for Sourdough
Successfully transitioning your sourdough starter to a new flour is a rewarding step in your baking journey. It allows you to influence the flavor, strength, and characteristics of your starter and, ultimately, your bread. By understanding why you might change flours, choosing the right one for your goals, and following a gradual transition process while paying close attention to your starter's health cues, you can navigate this process with confidence.
Embrace Experimentation and Enjoy the Baking Journey
Don't be afraid to experiment with different flours for feeding sourdough starter. Each type offers unique possibilities. Whether you settle on a single flour, a regular rotation, or a custom blend, the process of learning how your starter responds is invaluable. Enjoy the journey of discovery, the enhanced flavors in your bread, and the deeper connection you build with your living culture. Happy baking!
Frequently Asked Questions
How often should I feed my sourdough starter when transitioning flour?
When transitioning flour, you should feed your starter every 12-24 hours, observing its rise and fall to determine the best timing. This helps the starter adjust to the new flour and build strength.
What ratio of starter, flour, and water should I use when transitioning flour?
A common ratio is 1:1:1 (starter:flour:water) by weight. This allows for consistent hydration and helps the starter effectively utilize the new flour.
How long does it typically take to fully transition a sourdough starter to a new flour?
The transition process usually takes between 5-7 days, or about 3-5 feedings, but it can vary depending on the starter's vigor and the type of flour being used.
What are some signs that my sourdough starter is not adjusting well to the new flour?
Signs include lack of rise, a sour or unpleasant odor, and a thin, watery consistency even after feeding. These indicate the starter might need more time or a different approach.
Can I mix the old flour and the new flour during the transition period?
Yes, gradually mixing the old and new flours can help the starter adjust more smoothly. Start with a small percentage of the new flour and slowly increase it with each feeding.
Final Reflection: The Ever-Evolving Dance of Flour and Starter
The seemingly simple act of feeding a sourdough starter is, in reality, a dynamic interplay of biology, patience, and culinary artistry. Understanding this dance, as explored throughout this article, is crucial not just for maintaining a healthy starter, but for unlocking its full potential in creating truly exceptional bread. The subtle shifts in flavor profiles, the responsiveness to different flours, and the overall health of your starter are all directly tied to the choices you make in its feeding regimen.
The journey of nurturing a sourdough starter is a deeply personal one. It's a testament to the interconnectedness of nature and human endeavor, a slow-cooked alchemy that yields incredible rewards. Patience is a virtue, and in baking, it is paramount.
This quote, though not specifically about sourdough, perfectly encapsulates the essence of the process. The subtle changes in your starter's activity, its response to different flours, and the eventual transformation into a magnificent loaf are all a reflection of the care and attention you've invested. It's a humbling experience, reminding us of the power of consistent effort and the beauty of natural processes.
Now, consider your own starter. What have you learned about its unique personality? What flour combinations excite you most? Don't be afraid to experiment, to push the boundaries of your knowledge, and to embrace the occasional setback as a learning opportunity. The world of sourdough is vast and ever-evolving; your journey is just beginning. Continue to observe, adapt, and most importantly, enjoy the process of creating something truly special, one feeding at a time.
Unleash Your Starter's Potential: A New Floury Adventure!
Thanks for joining us on this journey into the fascinating world of sourdough starter transitions! We hope you gained valuable insights into smoothly changing your starter's diet and unlocking even more delicious baking possibilities. Ready to put your new knowledge into practice?
- Try a new flour today! Gradually introduce a small amount of your chosen flour to your starter's usual feedings, carefully observing its reaction. This is your chance to experiment and discover the perfect flour for your next loaf.
- Share your transition experience! Tell us about the flours you're trying and how your starter responds in the comments below – let's build a supportive baking community!
- Explore alternative grains: Consider experimenting with rye, spelt, or other whole grains to add complexity and nutrition to your sourdough creations.
What exciting floury adventures await you and your starter? Let's hear your plans!