
Is Your Starter Dead? How to Tell and Attempt Revival


Welcome to BakeWithEase, where we believe everyone can bake with confidence! Ever stared into your jar of sourdough starter and wondered if it's truly lifeless? This week, we're tackling a common baking woe: reviving a sourdough starter that seems to have failed. Discover the telltale signs of a dormant (or deceased!) starter and explore proven techniques to bring it back from the brink. Don't throw it out just yet – your baking adventure might just be getting started!
- Reviving a Neglected Sourdough Starter
- Assessing Sourdough Starter Health
- Identifying a Potentially Dead Starter
- Revival Steps
- Troubleshooting Revival
- Preventing Future Problems
- When Revival Fails
- Conclusion
-
Frequently Asked Questions
- How can I tell if my sourdough starter is truly dead?
- What are the most common reasons a sourdough starter fails?
- Can a sourdough starter be revived after a long period of inactivity?
- What kind of flour is best for reviving a sourdough starter?
- How long should I attempt to revive a sourdough starter before giving up?
- Final Reflection: The Enduring Life of a Sourdough Starter
- Rediscover Your Baking Confidence: Get That Starter Going!
Reviving a Neglected Sourdough Starter
Sourdough starters are wonderfully resilient, living cultures that can bring incredible flavor and texture to your baking. However, life happens, and sometimes our starters get neglected. Maybe it's been sitting in the back of the fridge for months, or perhaps you forgot a feeding. Whatever the reason, you might be wondering if your starter is still alive and if reviving your sourdough starter is possible. Let's explore how to assess its health and what steps you can take to bring it back to its former glory.
Assessing Sourdough Starter Health
Understanding what a healthy sourdough starter looks, smells, and acts like is the first step in determining if yours is in trouble or just needs a little care. A thriving starter is key to successful sourdough baking, providing the leavening power and characteristic tang.
Signs of a Healthy Starter
A healthy, active sourdough starter typically exhibits several key characteristics. Visually, it should have a bubbly, aerated texture throughout, especially after a feeding. The surface might show numerous small bubbles, and you might see larger bubbles forming and breaking. Growth is a significant indicator; a healthy starter fed regularly at room temperature should reliably double or even triple in volume within 4 to 12 hours, depending on the temperature and feeding ratio.
A healthy starter also possesses a distinct aroma. It should smell pleasantly tangy, slightly yeasty, perhaps a bit like ripe fruit or yogurt. It should not smell strongly alcoholic (like nail polish remover) or putrid. Consistency-wise, a healthy starter fed at a 100% hydration level (equal weight of flour and water) will have a thick, yet spoonable, consistency, similar to a thick batter or pancake mix. It should hold its shape somewhat but still flow easily.
Common Issues and Solutions
Even healthy starters can sometimes show minor issues, often related to feeding frequency or temperature. A common problem is hooch, a layer of liquid that separates on the surface. This is typically a sign that your starter is hungry and has consumed all available food (flour). While it looks unappealing, hooch is usually just alcohol and indicates the starter is still alive. To address hooch, you can simply pour it off before feeding, or stir it back in for a stronger, tangier flavor.
Another frequent issue is a starter that isn't rising much or seems sluggish. This could be due to inconsistent feeding schedules, using chlorinated water, or keeping the starter in a cool environment. Ensuring a consistent feeding routine, using filtered or dechlorinated water, and finding a warmer spot (ideally between 70-80°F or 21-27°C) can often revitalize a slow starter. Sometimes, simply switching to a different type of flour, like a mix of all-purpose and whole wheat or rye, can provide the nutrients needed for a boost.
Identifying a Potentially Dead Starter
While sourdough starters are tough, there are circumstances where they might be beyond simple revival. Recognizing these critical warning signs is important before investing time and effort into a starter that won't bounce back. If you find that reviving sourdough starter failed after several attempts, it's often because these underlying issues were present.
Critical Warning Signs
Beyond sluggishness or hooch, certain signs strongly suggest your starter may be compromised. If your starter consistently shows no signs of activity whatsoever – no bubbles, no rise, even after several days of regular feeding in a warm environment – it's a major red flag. While dormancy is possible (discussed below), a complete lack of response to optimal conditions after neglect is concerning.
Another critical sign is an extremely unpleasant, rotten, or sulfurous smell that persists even after feeding and discarding. This kind of odor is different from the normal tangy or alcoholic smell and indicates the presence of undesirable bacteria that may have taken over the culture. If your starter smells truly foul, it's highly probable that the beneficial yeast and bacteria have been outcompeted or died off.
Recognizing Mold and Off-Odors
Mold is perhaps the most definitive sign that your sourdough starter is dead and cannot be revived. Mold typically appears as fuzzy or powdery patches on the surface or sides of the starter. It can be various colors, including white, green, black, blue, or pink. Unlike hooch or harmless surface crusts, mold is filamentous and often spreads. Never attempt to scrape mold off and use the rest of the starter; mold spores can permeate the entire culture invisibly. If you see any sign of mold, the starter must be discarded completely.
As mentioned, off-odors are also a major warning sign. While a strong alcoholic smell is okay (indicating hunger), smells that are truly foul, rotten, cheesy, or chemical (like acetone that doesn't dissipate) suggest that the balance of microorganisms is severely wrong. These smells indicate that harmful bacteria or molds are likely present, making the starter unsafe and ineffective for baking.
Dormancy vs. Inactivity
It's crucial to distinguish between a starter that is merely dormant (often from cold storage) and one that is truly inactive or dead. A starter kept in the refrigerator slows down significantly; its metabolism drops, and it produces very few bubbles or rise. This is a state of dormancy, not death. When brought back to room temperature and fed, a dormant starter should eventually wake up and resume activity, though this might take several feedings over a day or two.
Inactivity, on the other hand, refers to a starter that shows no signs of life even when given optimal conditions for activity (warm temperature, regular feeding with good flour and water) after a period of neglect. If you've tried feeding a neglected starter for 3-5 days in a warm spot, discarding most of it each time and feeding it fresh flour and water, and it still shows no bubbles or rise, it is likely truly inactive or dead. Understanding this difference prevents discarding a perfectly good, albeit sleepy, starter.
Revival Steps
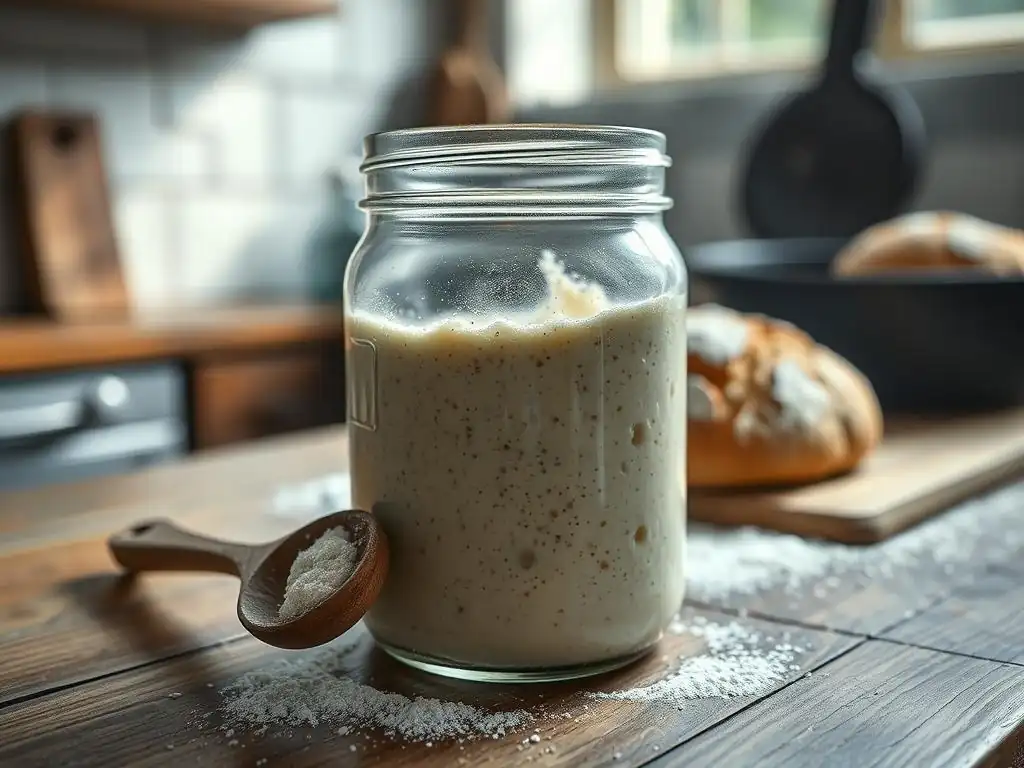
If your neglected starter shows no signs of mold or truly foul odors, there's a good chance you can revive it. The process requires patience and consistent care, similar to starting a new starter, but often with a head start from the surviving culture. Many bakers have successfully brought back starters that looked hopeless.
Evaluating Revival Potential
Before you begin the revival process, take a good look and smell test. Is there any visible mold? Does it smell putrid?
If the answer is yes to either of these, unfortunately, the potential for safe revival is zero, and you should discard it. If it just looks separated, has a thick layer of hooch, smells strongly alcoholic, or looks dried out on top but okay underneath, its potential is likely good. Consider how long it was neglected; starters left for years without feeding are less likely to recover than those neglected for weeks or a few months in the fridge.
Another factor to consider is the age of the starter before neglect. A well-established, mature starter (several months or years old) tends to be more robust and resilient than a young starter (only a few weeks old) that was neglected early in its development. A mature starter has a stronger, more stable microbial community better equipped to survive adverse conditions and compete against undesirable microbes during revival.
The Float Test
While not a perfect indicator for a neglected starter, the float test is a classic way to check if an active starter is ready for baking. A small spoonful of active starter dropped into a glass of water should float if it's sufficiently aerated and active. For a neglected starter, this test is less about readiness for baking and more about confirming any level of significant gas production. If after a couple of days of revival feedings, a small amount floats, it's a very positive sign that the yeast are reproducing and producing CO2, indicating successful revival is underway.
If the starter sinks immediately, it doesn't necessarily mean revival has failed, especially early in the process. It simply means there isn't enough trapped gas to make it buoyant. Continue with the feeding schedule. The float test becomes more relevant as an indicator of progress after a few days of consistent care. If after several days of visible bubbling and rising, it still sinks, it might suggest the yeast activity isn't quite strong enough yet, or the starter's structure isn't holding gas effectively, potentially requiring more time or a slight adjustment in consistency.
Discarding and Feeding
The core of reviving a neglected starter is consistent discarding and feeding to dilute any undesirable byproducts and introduce fresh food. Start by discarding a significant portion of the neglected starter. If there's a thick layer of hooch or a dried crust, discard that entirely. Aim to keep only a small amount, perhaps just 1-2 tablespoons (around 20-30g), of the most promising-looking part of the starter (often found underneath the hooch or crust).
Feed this small amount with fresh, unbleached flour and non-chlorinated water. A common and effective ratio for revival is 1 part starter to 1 part water to 1 part flour by weight (e.g., 20g starter, 20g water, 20g flour). Mix thoroughly in a clean jar. Repeat this feeding process every 12-24 hours, depending on the temperature and how quickly you see any signs of activity. Consistency is key; try to feed it around the same time each day.
Temperature Control
Temperature plays a critical role in microbial activity. Yeast and bacteria in sourdough starters are most active in warmer temperatures, typically between 70°F and 80°F (21°C - 27°C). Keeping your neglected starter in this temperature range during the revival process will significantly speed up the metabolic activity of any surviving organisms, encouraging them to reproduce and become active again.
Avoid placing the starter in cold drafts or direct sunlight, which can cause temperature fluctuations. Finding a consistently warm spot, like near a reliable appliance (not on top, as it might get too hot), inside a microwave or oven (turned off with the light on), or on a seedling mat can provide the stable warmth needed. Cooler temperatures will slow down or halt activity, making it difficult to gauge if the starter is reviving or if reviving sourdough starter failed due to inadequate warmth.
Observation and Patience
Reviving a neglected starter is a process that requires careful observation and, most importantly, patience. Don't expect dramatic results after the first feeding. It might take several days, sometimes up to a week or more, of consistent feeding before you see reliable signs of life like bubbles, a change in smell (moving towards tangy), and eventual rising.
Keep a close eye on the starter's texture, smell, and any visible signs of bubbles or expansion after each feeding. Note the temperature of your environment. If after 5-7 days of diligent daily or twice-daily feeding in a warm spot you still see absolutely no change – no bubbles, no rise, same smell – it might be time to consider that reviving sourdough starter failed for this particular culture. However, don't give up too soon; some starters take longer to wake up than others.
Troubleshooting Revival
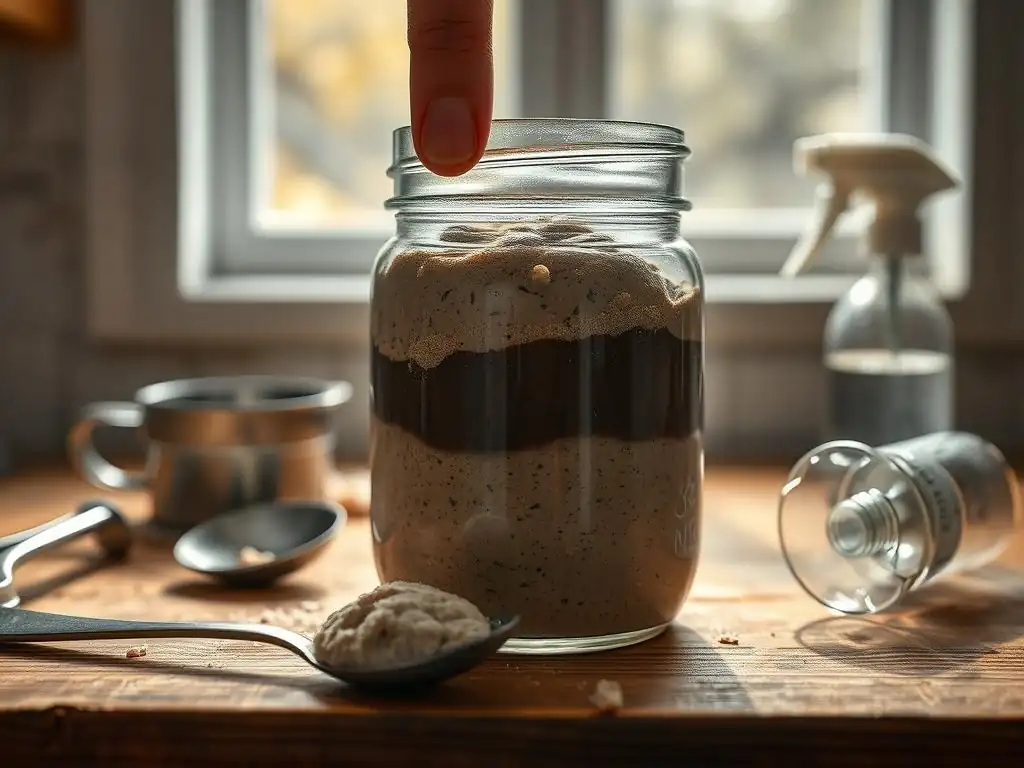
Even when following the steps correctly, you might encounter hurdles during the revival process. These issues don't necessarily mean reviving sourdough starter failed completely, but they require specific adjustments.
Starter Not Doubling
One of the most common issues when trying to revive a neglected starter is that it fails to double in size, even after showing some initial signs of bubbling. This often indicates that the microbial population, particularly the yeast responsible for leavening, isn't strong enough yet. They might be producing some gas (hence the bubbles), but not enough to create significant lift.
To encourage more vigorous activity and doubling, try adjusting your feeding ratio or frequency. You might increase the ratio of fresh flour and water relative to the starter (e.g., feeding 1:2:2 or even 1:3:3). This provides more food per unit of starter, allowing the population to grow larger. Feeding more frequently (every 12 hours instead of 24 hours) in a warm environment also gives the microbes a constant supply of food, accelerating their growth cycle and potentially leading to stronger rise over time.
Watery Consistency
If your starter becomes consistently watery after feeding, several factors could be at play. It might indicate that the starter is extremely hungry and quickly consuming the flour, breaking down the gluten structure and releasing water. This is often accompanied by a strong, alcoholic smell and possibly a layer of hooch.
Addressing a watery consistency involves ensuring the starter is fed sufficiently and possibly adjusting the hydration level slightly. If you are feeding 1:1:1 and it's becoming watery quickly, increase the amount of flour and water relative to the starter (e.g., feed 1:2:2). Alternatively, slightly decrease the water ratio in your feeding (e.g., feed 1:1:0.9 flour:water by weight) to create a slightly thicker initial consistency that might hold up better. Using a stronger flour, like bread flour, which has higher protein content, can also help build a more robust structure that holds onto water and gas better.
Sticky or Gummy Texture
A sticky or gummy texture can be frustrating and suggests issues with either the flour type, hydration level, or potentially enzymatic activity breaking down the starches too quickly. If the starter feels like paste or glue and doesn't develop a smooth, extensible texture when mixed, it can impede its ability to rise.
Experimenting with your flour is often the solution here. Some flours, particularly certain whole wheat or rye flours, can contribute to a gummy texture. Try switching to a good quality unbleached all-purpose flour or bread flour for a few feedings to see if the texture improves. Ensure you are measuring ingredients accurately by weight, as volume measurements can lead to inconsistent hydration. Sometimes, a slightly lower hydration (thicker starter) can help manage stickiness, or conversely, ensuring it's not too thick can prevent it from becoming a dense, gummy mass.
Preventing Future Problems
The best way to avoid the stress of reviving sourdough starter failed attempts is to prevent your starter from getting into a state of severe neglect in the first place. Establishing a consistent routine and understanding proper storage methods are key to maintaining a healthy, active culture.
Consistent Feeding
Regular feeding is the most critical aspect of maintaining a healthy sourdough starter. The frequency depends on how you store it. A starter kept at room temperature (around 70-75°F / 21-24°C) needs to be fed daily, or even twice daily if your environment is warmer, using a ratio that prevents it from becoming overly hungry (like 1:1:1 or 1:2:2). This consistent feeding schedule ensures the yeast and bacteria always have enough food to remain active and healthy.
If you don't plan to bake frequently, storing your starter in the refrigerator significantly slows down its activity, allowing you to feed it less often. For refrigerated starters, feeding once a week is typically sufficient. Before refrigerating, feed your starter and let it sit at room temperature for an hour or two until it shows initial signs of activity, then place it in the fridge. Remember to take it out and feed it at room temperature for a day or two before you plan to bake to wake it up.
Proper Storage
Where and how you store your starter makes a big difference. Use a clean, non-reactive container, such as a glass jar or food-grade plastic tub. The container should be large enough to accommodate the starter doubling or tripling in size. Avoid airtight lids, especially when storing at room temperature, as the starter produces gas. A loosely fitted lid, plastic wrap secured with a rubber band, or a cloth cover allows gases to escape while preventing the starter from drying out or attracting pests.
When refrigerating, a slightly tighter lid is acceptable as gas production is minimal, but it's still wise to leave a little vent or burp the container occasionally if storing long-term. Ensure the container is clean before adding the starter, as residual food or soap can negatively impact the culture. Storing in a consistent temperature zone (room temp or fridge) prevents stress on the microbes.
Flour Selection
The type and quality of flour you use to feed your starter have a direct impact on its health and activity. Unbleached all-purpose flour or bread flour are excellent choices as they provide good nutrition and gluten structure. Whole wheat and rye flours are also very nutritious for starters and can boost activity, but they absorb water differently and can sometimes lead to a stickier texture.
Consistency in flour type is helpful, but it's also fine to switch it up occasionally. Avoid bleached flours, which can contain chemicals that inhibit microbial growth. Organic flours are preferred by many as they are free from pesticides and herbicides that could potentially harm the starter. Using a blend of flours, like 50% bread flour and 50% whole wheat, can offer a good balance of structure and nutrients for a robust starter.
When Revival Fails

Despite your best efforts, sometimes reviving sourdough starter failed. It's disheartening, especially if you've had the starter for a long time, but it's not the end of your sourdough journey. Understanding when to let go and what to do next is part of the process.
Accepting Failure
You've followed the steps: discarded, fed consistently for a week in a warm place, observed closely, and still, there are no signs of life – no bubbles, no rise, possibly persistent off-odors (though mold means immediate failure). If you've truly given it your best shot with proper technique and environment, it's okay to accept that this particular starter culture didn't survive. Prolonging the process with a dead starter is unproductive and prevents you from moving forward with baking.
Think of it as a learning experience. You've learned the signs of a healthy starter, how to attempt revival, and the importance of consistent care. While it's disappointing if reviving sourdough starter failed, it doesn't reflect poorly on your baking skills. Sometimes, the microbial community was simply too weakened by the neglect or compromised by undesirable microbes.
Obtaining a Healthy Starter
If your revival attempts were unsuccessful, the quickest way to get back to baking sourdough is to obtain a healthy, active starter from another source. Many baker friends are often happy to share a bit of their thriving starter. This gives you an established culture that is already active and proven.
Alternatively, you can purchase dehydrated or active sourdough starters online or from specialty baking stores. Dehydrated starters are dormant and require rehydration and feeding to become active, which is a simpler process than reviving a truly neglected one. Active starters purchased online or locally can often be used for baking almost immediately after receiving them and giving them a quick feed.
Starting a New Starter
Another excellent option if reviving sourdough starter failed is to simply start a new one from scratch. All you need is flour, water, and patience. This process takes about 7-14 days to develop a robust, active starter ready for baking, but it's a rewarding experience.
To start a new starter, mix equal weights of flour and non-chlorinated water in a clean jar. For example, combine 50g flour and 50g water. Cover loosely and let it sit at room temperature (70-80°F is ideal).
Discard half of the starter each day and feed the remainder with fresh flour and water (e.g., discard down to 50g, then feed with 50g flour and 50g water). You'll likely see initial bubble activity within a few days (often driven by leuconostoc bacteria), followed by a lull, and then increasing, reliable rising and bubbling as the desired yeast and lactobacilli take over. This ensures you build a strong, stable culture from the ground up.
Conclusion
Reviving a neglected sourdough starter is often possible with patience, consistent feeding, and the right conditions. By understanding the signs of a healthy starter, recognizing critical warning signs like mold or foul odors, and following structured revival steps, you give your culture the best chance to bounce back. While reviving sourdough starter failed for some, many others have brought their sleepy starters back to life.
Tips for a Thriving Starter
- Feed consistently: Daily at room temperature, weekly in the fridge.
- Use quality ingredients: Unbleached flour and non-chlorinated water.
- Maintain optimal temperature: Aim for 70-80°F (21-27°C) for active starters or during revival.
- Use a suitable container: Large enough with a loose cover.
- Observe regularly: Pay attention to smell, texture, and activity.
- Don't be afraid to discard: Regular discarding is essential for a healthy culture.
- Know when to quit: If mold is present or revival truly fails after diligent effort, start fresh.
Frequently Asked Questions
How can I tell if my sourdough starter is truly dead?
A dead starter will show no signs of activity after feeding, such as no bubbles, no rise, and no sour smell. Mold growth is also a sign something is wrong, though not necessarily death.
What are the most common reasons a sourdough starter fails?
Common failures include improper feeding ratios, inconsistent temperatures, and contamination from unclean equipment. Using the wrong type of flour can also hinder development.
Can a sourdough starter be revived after a long period of inactivity?
Yes, in many cases! Even a seemingly dead starter can often be revived by consistently feeding it small amounts of flour and water over several days, discarding the majority each time.
What kind of flour is best for reviving a sourdough starter?
Whole wheat flour or rye flour are generally recommended for reviving a starter, as they contain more nutrients and wild yeasts that can help kickstart activity.
How long should I attempt to revive a sourdough starter before giving up?
Give it at least one week of consistent feeding before assuming it's unrevivable. If you see no signs of life (bubbles, rise, sour smell) after a week, it may be time to start fresh.
Final Reflection: The Enduring Life of a Sourdough Starter
The humble sourdough starter, a living testament to patience and perseverance, holds a mirror to our own resilience in the face of setbacks. Its seemingly simple existence—a mixture of flour and water—belies the complex ecosystem thriving within, a microcosm of life's delicate balance. The ability to revive a seemingly "dead" starter is not just about baking bread; it's about understanding the power of nurturing and the possibility of renewal.
The journey of a sourdough starter, from its initial bubbly life to periods of dormancy and potential revival, mirrors our own personal journeys. We all face moments where our passions seem to wane, our projects falter, and our spirits flag. Yet, just as a seemingly lifeless starter can be coaxed back to life with careful attention, so too can we rediscover our own inner strength and reignite our passions. The oak sleeps in the acorn; the bird waits in the egg; and in the highest vision of the soul a waking angel stirs. Dreams are the seedlings of realities.
This quote speaks to the latent potential within everything, including our own selves and our sourdough starters.
Consider the lessons learned from your starter's journey, whether successful or not. Did you learn patience? Did you discover the importance of consistent care? Now, apply this knowledge to other aspects of your life. What seemingly "dead" projects or dreams are waiting for your nurturing touch? What small, consistent actions can you take to revive them? Embrace the process, celebrate the small victories, and remember that even the smallest spark of life can ignite a powerful flame.
Rediscover Your Baking Confidence: Get That Starter Going!
Thanks for taking the time to learn about reviving your sourdough starter! We hope you now feel more confident tackling this essential baking component. Ready to put your newfound knowledge into action?
- Prioritize your starter: Dedicate just 10 minutes each day to feeding and monitoring it. This consistent care is key to success.
- Share your starter journey: Let us know (and other bakers!) how your revival is going in the comments below – we love hearing your stories!
- Experiment with different flours: Try using different types of flour to see how it affects your starter's activity and flavor profile.
Have you noticed any surprising changes in your starter's behavior since attempting a revival? Let's discuss!