
Secrets to a Crispy Crust on Your Whole Wheat Loaf

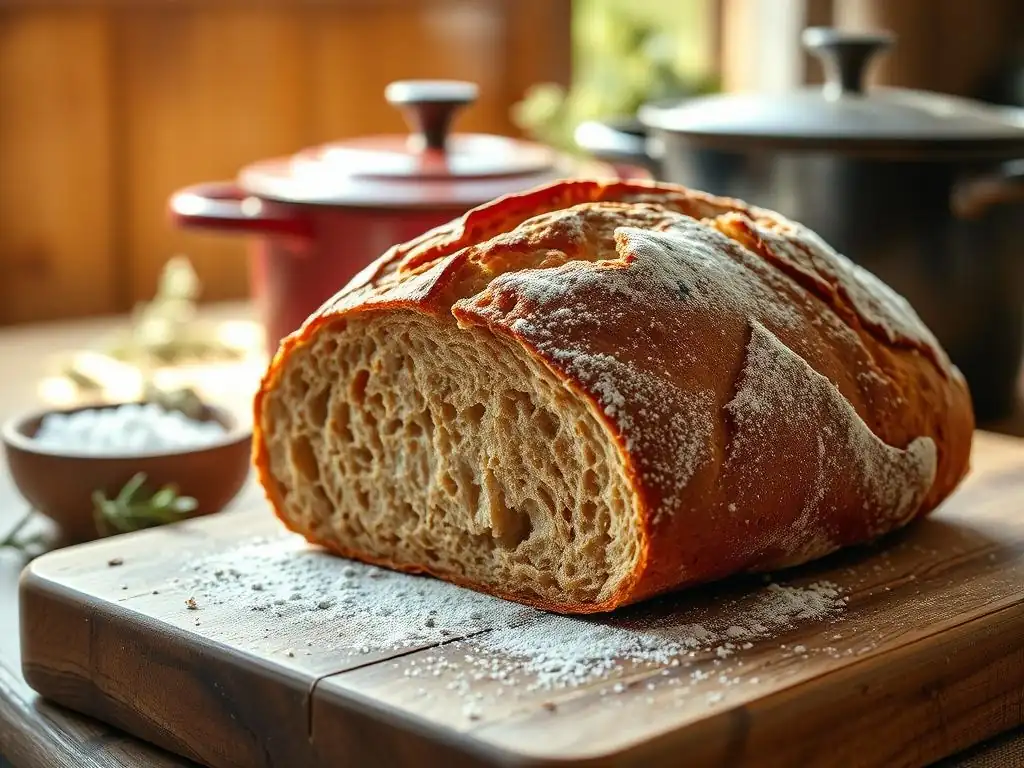
Welcome to BakeWithEase, your guide to confident baking! Ever wondered how to achieve that perfectly crispy whole wheat loaf crust you see in artisan bakeries? Unlock the secrets to a crackling, golden exterior and a soft, chewy interior with our expert tips and tricks. Dive in to discover the techniques that will transform your whole wheat bread baking from good to unforgettable.
- Secrets to a Crispy Crust on Your Whole Wheat Loaf - BakeWithEase
- Introduction: Achieving the Perfect Crispy Crust on Whole Wheat Bread
- Understanding the Science Behind a Crispy Crust
- Key Ingredients for a Superior Crispy Whole Wheat Crust
- Essential Techniques for Baking a Crispy Whole Wheat Loaf
- Troubleshooting Common Crust Problems in Whole Wheat Baking
- Advanced Tips for Enhancing Your Whole Wheat Bread Crust
- Recipe: BakeWithEase's Guaranteed Crispy Crust Whole Wheat Loaf
- Conclusion: Enjoying Your Perfectly Crispy Whole Wheat Loaf
-
Frequently Asked Questions
- What are the main challenges in achieving a crispy crust on a whole wheat loaf?
- What role does hydration play in achieving a crispy whole wheat loaf crust?
- How can I create steam in my oven to enhance crust crispiness?
- What baking temperature is ideal for a crispy whole wheat loaf crust?
- Besides temperature and steam, what other techniques can contribute to a crispy whole wheat loaf crust?
- Final Reflection: The Unexpected Joys of a Perfectly Crispy Crust
- Unlock Your Crusty Whole Wheat Potential!
Secrets to a Crispy Crust on Your Whole Wheat Loaf - BakeWithEase
Introduction: Achieving the Perfect Crispy Crust on Whole Wheat Bread
Welcome to BakeWithEase! There's nothing quite like the aroma of a freshly baked whole wheat loaf cooling on the counter. But beyond the smell and the soft, wholesome crumb, there's another element that elevates a good loaf to a great one: a perfectly crispy crust. That satisfying crunch when you slice into it is the hallmark of artisan-quality bread. Achieving this elusive crispy whole wheat loaf crust can sometimes feel like magic, but it's rooted in understanding a few fundamental baking principles.
Whole wheat bread presents unique challenges and opportunities when it comes to crust development compared to white bread. The presence of bran and germ affects gluten structure and moisture distribution. However, with the right knowledge and techniques, you can consistently bake loaves with that coveted texture. This guide will walk you through the science, the ingredients, and the techniques needed to unlock the secrets to a stunningly crispy crust on your next whole wheat masterpiece. Get ready to transform your home baking!
Understanding the Science Behind a Crispy Crust
The journey to a perfect crispy whole wheat loaf crust begins with understanding what happens inside and outside the dough during baking. Several key scientific processes work together to create that desirable texture and color. From the intricate dance of gluten development to the critical phase of starch gelatinization and the delicate balance of moisture, each step plays a vital role. By grasping these principles, you gain greater control over the final outcome of your bake.
Understanding the "why" behind baking techniques allows for better adjustments when things don't go exactly as planned. It turns baking from following instructions blindly into a controlled experiment where you can predict and influence the results. Let's delve into the core scientific concepts that contribute to a beautiful, crispy whole wheat loaf crust.
The Role of Gluten in Whole Wheat Bread Crust Formation
Gluten, formed when water interacts with proteins in flour (glutenin and gliadin), creates a network that traps gases produced by yeast, allowing the dough to rise. In whole wheat flour, the sharp edges of the bran particles can interfere with this gluten network, potentially tearing it and inhibiting full development. This is why whole wheat doughs often require slightly higher hydration levels, sometimes 75-85% of the flour weight, compared to 60-70% for white bread, to help soften the bran and allow gluten to form more effectively.
A well-developed gluten network provides the structure needed for the loaf to hold its shape and expand during oven spring. This expansion stretches the outer layer of dough thinly. If the gluten is weak or underdeveloped, the loaf won't expand fully, and the crust might be thick and less likely to become truly crispy. Conversely, overworking the dough can make the gluten too tight, also hindering expansion and potentially leading to a tough crust. Finding the right balance through proper kneading or folding techniques is essential for laying the foundation for a crispy whole wheat loaf crust.
The Importance of Starch Gelatinization for Crust Crispness
Starch gelatinization is a critical phase that occurs early in the baking process. As the internal temperature of the dough reaches approximately 140-180°F (60-82°C), the starch granules in the flour absorb moisture and swell, eventually bursting and forming a gel-like structure. This gelatinized starch contributes significantly to the structure of the crumb and the initial setting of the crust. It essentially creates a rigid framework just beneath the surface.
Following gelatinization, as the crust temperature continues to rise above 300°F (150°C), the surface moisture evaporates, and the crust begins to dry out and brown. The gelatinized starch matrix becomes brittle as it dries, which is a key factor in achieving crispness. Without sufficient gelatinization, the crust wouldn't have the necessary structure to become properly crispy upon cooling; it might remain soft or chewy instead of developing that desirable snap. The subsequent browning reactions (Maillard reaction and caramelization) further contribute to the color and flavor of the crispy whole wheat loaf crust.
How Moisture Affects the Crust of Whole Wheat Loaves
Moisture plays a dual role in developing a crispy crust. Initially, high internal moisture content is crucial. As the loaf bakes, this moisture turns to steam within the dough, contributing to oven spring as the steam expands. This internal steam also helps keep the crust surface moist for a longer period in the early stages of baking, preventing it from setting too quickly. A crust that sets prematurely restricts the loaf's expansion, resulting in a smaller loaf and often a thicker, less crispy crust.
Crucially, the presence of steam in the oven environment during the first 10-15 minutes of baking is paramount for achieving a crispy whole wheat loaf crust. This external steam condenses on the cooler surface of the dough, keeping it pliable. This allows the loaf to achieve maximum oven spring before the crust hardens.
Once the crust temperature rises above the boiling point of water (212°F / 100°C), the surface dries rapidly, and the browning reactions kick in, leading to a thin, crisp layer. Without sufficient moisture (both internal and external steam), the crust will set too soon, leading to a tougher, less crispy result.
Key Ingredients for a Superior Crispy Whole Wheat Crust
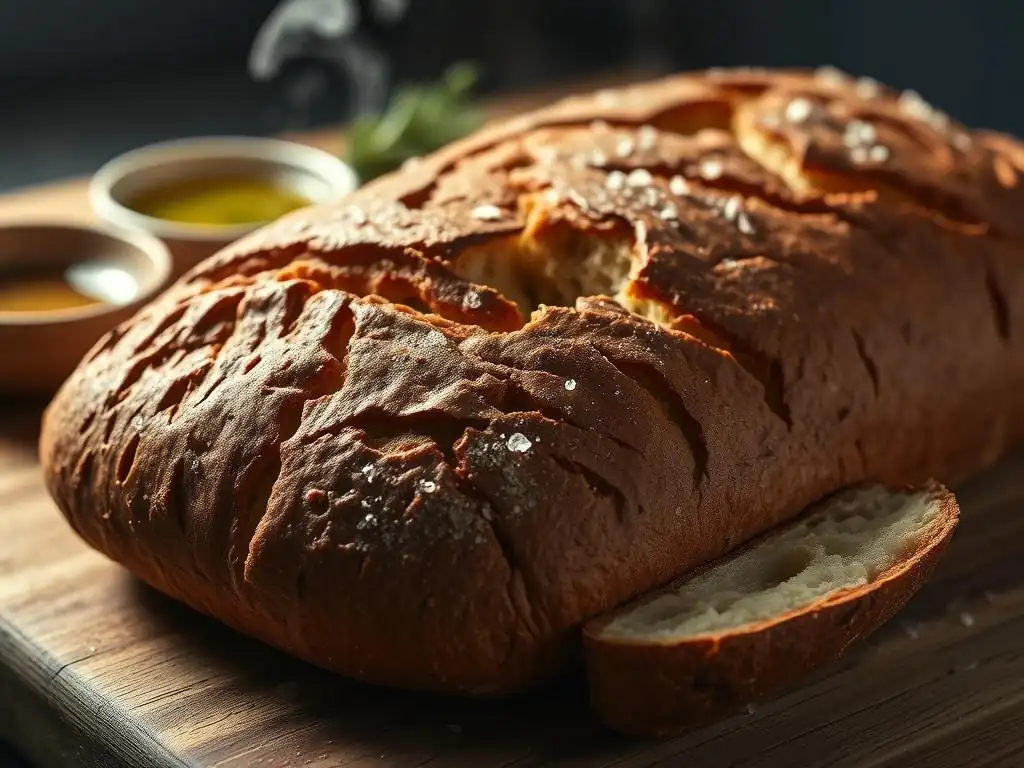
While technique is vital, the ingredients you choose also lay the groundwork for a great crispy whole wheat loaf crust. Each component plays a specific role, and understanding how they interact can help you optimize your recipe for maximum crispness. From the type of flour used to the temperature of your water and even the addition of a secret ingredient, paying attention to these details makes a significant difference.
Selecting high-quality ingredients tailored for bread baking is always a good starting point. However, for whole wheat bread aimed at a crispy crust, there are particular considerations that can enhance the texture and appearance of the final product. Let's explore how specific ingredients contribute to achieving that desirable crispy whole wheat loaf crust.
Choosing the Right Whole Wheat Flour for Optimal Crust Development
Not all whole wheat flours are created equal when it comes to baking bread with a crispy crust. The type of wheat (hard vs. soft) and how finely it's milled significantly impact hydration needs and gluten development. Hard red wheat varieties typically have higher protein content (often 13-14%), which is excellent for building a strong gluten network necessary for structure and oven spring.
Look for "hard" whole wheat flour if possible. The milling process also matters; a finer grind can make the bran less disruptive to gluten, allowing for better development and potentially higher hydration, which aids in crust development.
Using a blend of whole wheat and bread flour (high-protein white flour) is also a common technique to achieve a more open crumb and often a crispier crust. For example, a blend might be 70% whole wheat and 30% bread flour. The added gluten from the white flour helps build a stronger structure, while the whole wheat provides flavor and nutrition. Experimenting with different brands and types of whole wheat flour will help you discover which ones yield the best crispy whole wheat loaf crust in your specific baking environment.
The Impact of Water Temperature on Crust Texture
While water temperature primarily affects yeast activity and fermentation speed, it indirectly influences crust texture by impacting the dough structure and proofing. Using water that is too cold (below 70°F / 21°C) can slow yeast activity significantly, leading to a very long proofing time, which can potentially weaken the gluten structure if not managed carefully. Water that is too hot (above 120°F / 49°C) can kill the yeast outright, resulting in a flat, dense loaf with no oven spring and thus no chance of a crispy crust.
For most recipes, lukewarm water around 95-105°F (35-40°C) is ideal for activating dry yeast quickly and ensuring a consistent fermentation rate. A steady, controlled fermentation allows the gluten network to develop properly and the dough to gain strength. A well-developed, properly proofed dough expands predictably in the oven, leading to good oven spring and a thinner, crispier crust. Consistency in water temperature helps ensure consistent results every time you bake a crispy whole wheat loaf crust.
Adding Fat for a Tender Crumb and Crispy Exterior
Adding a small amount of fat, such as butter or oil, to whole wheat bread dough might seem counterintuitive for a crispy crust, as fat can tenderize. However, in small percentages (typically 1-3% of the flour weight), fat can contribute positively. Fat coats the gluten strands, which helps to create a more tender and soft crumb texture. This contrast between a soft interior and a hard, crispy exterior is part of what makes a great crust so appealing.
Furthermore, fat can sometimes improve the browning of the crust, leading to a richer color and potentially enhancing crispness. However, using too much fat (say, above 5-10%) will significantly inhibit gluten development, resulting in a dense loaf that doesn't achieve good oven spring. Excessive fat also makes the crust softer and more cake-like rather than crispy. A little fat can be a helpful tool in achieving a balanced texture with a delightful crispy whole wheat loaf crust, but moderation is key.
The Secret Ingredient: Diastatic Malt Powder
Diastatic malt powder is a baker's secret weapon for improving crust color and crispness, especially in whole wheat bread. This powder contains enzymes (primarily amylase) that break down complex starches in the flour into simple sugars. These sugars serve as additional food for the yeast, boosting fermentation, but more importantly, they provide readily available sugars on the crust surface for the Maillard reaction and caramelization during baking.
Adding just a small amount, typically 0.5% to 1% of the flour weight (e.g., 5-10 grams per kilogram of flour), can dramatically improve the browning of the crust, leading to a deeper, more appealing color and enhanced flavor. This increased browning also contributes to a thinner, crispier texture. Non-diastatic malt powder, which has had the enzymes deactivated, provides flavor and color but won't aid in breaking down starches for extra browning. Ensure you are using diastatic malt powder for its enzymatic benefits towards achieving a beautiful, crispy whole wheat loaf crust.
Essential Techniques for Baking a Crispy Whole Wheat Loaf
Mastering the right techniques is arguably the most critical factor in achieving that perfect crispy whole wheat loaf crust. From how you handle the dough to the conditions inside your oven, every step in the baking process plays a vital role. These techniques build upon the science and ingredients, bringing everything together to create a stunning result.
Applying these methods with care and precision will significantly increase your chances of success. They are the bridge between having good ingredients and a truly excellent, crispy whole wheat loaf crust. Let's explore the essential steps you need to follow.
Mastering the Art of Shaping Your Whole Wheat Dough
Proper shaping is fundamental for developing good structure and surface tension in your dough. When you shape a loaf, you are creating a taut "skin" on the exterior. This surface tension helps the loaf hold its shape during proofing and provides the necessary structure to support the rapid expansion (oven spring) in the hot oven. A well-shaped loaf will expand upwards and outwards in a controlled manner.
If the dough is poorly shaped, it can spread out excessively during proofing or baking, resulting in a flatter loaf with a thicker, less uniformly crispy crust. Techniques like folding the dough onto itself multiple times or using bench scrapers to build tension can help create this taut surface. For a boule (round loaf), aim for a smooth, tight ball. For a batard (oval loaf), ensure the seams are sealed tightly underneath. A good shape sets the stage for optimal oven spring and a thin, crispy whole wheat loaf crust.
The Significance of Proofing for a Well-Developed Crust
Proofing, the final rise of the dough before baking, is crucial for both crumb structure and crust development. The dough needs to be adequately proofed – not under-proofed and not over-proofed. An under-proofed loaf hasn't developed enough gas; it will experience explosive oven spring, potentially tearing the crust unevenly and resulting in a dense crumb and a thick, tough crust.
An over-proofed loaf, on the other hand, has exhausted most of its fermentable sugars and the gluten structure is weakened. It will likely collapse slightly when handled and will have very little oven spring, leading to a flat loaf with a dense, gummy crumb and a soft, pale crust.
The ideal proofing stage, often called "just-right" or "almost-there," allows for significant oven spring without uncontrolled tearing, ensuring a thin, even surface that can crisp up beautifully. You can often tell a loaf is properly proofed by gently poking it; if the indentation slowly springs back halfway, it's likely ready for baking and on its way to a crispy whole wheat loaf crust.
Baking Temperature and Time: The Key to Crust Perfection
High initial baking temperatures are essential for achieving a crispy whole wheat loaf crust. When the dough hits a very hot environment, the rapid transfer of heat causes the gases inside to expand dramatically (oven spring) and the moisture on the surface to turn into steam. A common starting temperature is 450-500°F (230-260°C). This intense heat quickly sets the outer layer while the interior continues to expand, stretching the crust thin.
After the initial burst of oven spring (typically the first 10-15 minutes), many bakers reduce the oven temperature to around 400-425°F (200-220°C) to ensure the interior cooks through without burning the crust. The total baking time for a standard 1-2 pound loaf is usually 30-45 minutes, or until the internal temperature reaches 200-210°F (93-99°C).
Baking for the correct duration at these high temperatures ensures the crust dries out completely and the browning reactions occur, locking in that desirable crispy texture. Baking too cool or too short will result in a pale, soft crust instead of a crispy whole wheat loaf crust.
Steam Injection: Creating the Ideal Environment for a Crispy Crust
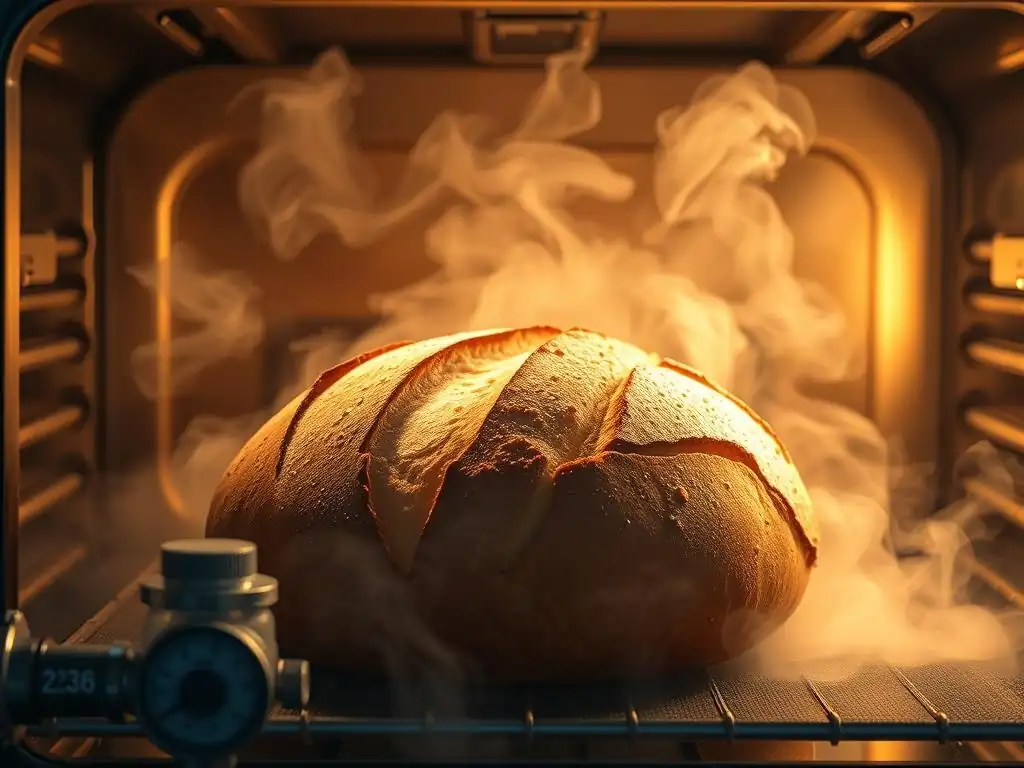
As mentioned earlier, steam is perhaps the single most important factor for achieving a thin, crispy crust. Steam in the oven environment prevents the surface of the dough from drying out and setting too early. This allows the loaf maximum time to expand during oven spring. Only after the loaf has achieved its full size and the steam dissipates does the crust begin to dry and harden, leading to a much thinner and crispier result than if it had set prematurely.
The first 10-15 minutes of baking are when steam is most critical. After this point, the crust has typically set, and steam is no longer needed; in fact, dry heat is required for browning and crisping. Providing sufficient steam during this initial phase is non-negotiable for a truly professional-quality crispy whole wheat loaf crust.
Methods for Generating Steam in Your Home Oven
Generating sufficient steam in a standard home oven can be a bit tricky, as they are designed to be vented. However, several effective methods can be employed. One common technique is to place a metal tray (like a broiler pan or cast iron skillet) on the bottom rack of the oven while it preheats. Just before loading the bread, carefully pour a cup or two of boiling water into the hot tray. This creates a burst of steam. Be cautious of the hot steam produced.
Another popular method is using lava rocks or a metal chain in a tray; these materials have high surface area and retain heat well, producing steam for a longer period when water is added. Some bakers also spray the oven walls with water, though this produces less sustained steam. Regardless of the method, the goal is to create a humid environment for the first part of the bake to ensure a beautiful crispy whole wheat loaf crust develops.
The Benefits of Using a Dutch Oven for Crusty Bread
Using a Dutch oven is widely considered one of the easiest and most effective ways for home bakers to achieve a consistently crispy whole wheat loaf crust. When the dough is baked inside a preheated, lidded Dutch oven, the moisture evaporating from the dough itself is trapped inside the pot, creating a perfect steamy environment around the loaf. This internal steam allows the dough to expand fully without the crust hardening prematurely.
After the initial baking phase (typically 20-30 minutes with the lid on), removing the lid allows the trapped steam to escape. The dry heat of the oven then hits the now-expanded loaf, causing the crust to dry out, brown beautifully, and become incredibly crispy. Baking in a Dutch oven mimics the environment of professional deck ovens with steam injection systems, making it an excellent tool for anyone serious about getting a top-notch crispy whole wheat loaf crust.
The Importance of Oven Spring for a Crispy Whole Wheat Loaf
Oven spring refers to the rapid increase in volume that occurs in the first 10-15 minutes of baking. It's driven by the expansion of gases (carbon dioxide produced by yeast and air trapped during kneading) as they are heated, and the conversion of water within the dough to steam. A well-proofed dough with a strong gluten network and sufficient internal moisture is primed for excellent oven spring.
When the loaf experiences significant oven spring, the outer layer of dough is stretched tautly and thinly. This thin layer is much more likely to bake up into a light, shatteringly crispy crust than a thick, undeveloped one. Steam in the oven environment is crucial for maximizing oven spring by keeping the crust pliable. Without good oven spring, the crust will be thicker and potentially tougher. Therefore, maximizing oven spring through proper dough handling, proofing, and steam is vital for achieving a truly crispy whole wheat loaf crust.
Troubleshooting Common Crust Problems in Whole Wheat Baking
Even with the best intentions and techniques, sometimes your crispy whole wheat loaf crust doesn't turn out exactly as planned. Baking involves many variables, and identifying the cause of a problem is the first step to fixing it. Don't get discouraged by imperfections; they are learning opportunities!
Let's look at some common issues home bakers face with whole wheat crusts and how to diagnose and correct them. Understanding these potential pitfalls will help you refine your process and consistently bake loaves with that desirable crispy whole wheat loaf crust.
Avoiding a Pale and Soft Crust
A pale and soft crust is often a sign that the crust surface didn't reach a high enough temperature or wasn't exposed to dry heat long enough for the Maillard reaction and caramelization to occur and for the moisture to evaporate completely. This can happen if the oven temperature is too low, the baking time is too short, or there is too much steam present for too long.
To fix this, ensure your oven is accurately calibrated (an oven thermometer is a good investment). Preheat your oven thoroughly, often for 30-60 minutes, especially if using a baking stone or Dutch oven. Increase the baking time if the internal temperature hasn't reached 200-210°F (93-99°C). If using steam, ensure it dissipates or is removed after the first 10-15 minutes of baking. Baking directly on a preheated surface like a baking stone or in a Dutch oven can also help transfer heat efficiently to the bottom crust, improving overall crispness.
Preventing a Thick and Tough Crust
A thick and tough crust can be caused by several factors, including under-proofing, inadequate hydration, or insufficient steam during the initial bake. Under-proofed dough results in explosive, uncontrolled oven spring that can tear the crust and make it thick. Dough that is too dry (low hydration) will also tend to form a thick, hard crust quickly in the oven. Lack of steam causes the crust to set too early, preventing it from stretching thinly during oven spring.
Ensure your whole wheat dough is adequately hydrated – aim for at least 75% hydration for many whole wheat recipes. Learn to recognize the signs of a properly proofed dough. Most importantly, ensure you are generating sufficient steam in your oven during the first 10-15 minutes of baking. This allows the crust to remain pliable and stretch thin, resulting in a lighter, crispier texture. Gentle handling during shaping also helps maintain a delicate outer layer.
Addressing a Burnt or Overly Dark Crust
A crust that is too dark or burnt, while potentially crispy, often indicates excessive heat or too much sugar on the surface. This can happen if the oven temperature is too high for the entire bake, the loaf is baked too close to a heating element, or the baking time is too long after the crust has already browned. Excessive sugar on the surface (from washes or recipes with high sugar content) will caramelize and burn quickly.
If your crust is consistently too dark, try reducing the oven temperature slightly after the initial 10-15 minutes of high-heat baking. If baking on a stone or in a Dutch oven, ensure the temperature is appropriate for the full bake. Tent the loaf loosely with aluminum foil once it reaches your desired color to prevent further darkening while the interior finishes baking. If using an egg or milk wash, consider diluting it or skipping it if browning is too rapid.
Fixing a Soggy Bottom Crust
A soggy bottom crust is usually the result of poor heat transfer from the bottom of the oven to the base of the loaf. This is common when baking directly on a cold baking sheet or in an oven that doesn't heat evenly from the bottom. The bottom crust doesn't dry out and crisp up properly due to lack of direct, intense heat.
The most effective solution for a soggy bottom is to bake on a preheated surface that retains and radiates heat well, such as a baking stone, steel, or a preheated Dutch oven. Ensure your stone or Dutch oven is preheated for at least 30-60 minutes at your target baking temperature. This provides a burst of intense heat to the base of the loaf, ensuring the bottom crust bakes and crisps simultaneously with the top. Placing a baking steel on a lower rack than a stone can sometimes provide even more intense bottom heat.
Advanced Tips for Enhancing Your Whole Wheat Bread Crust
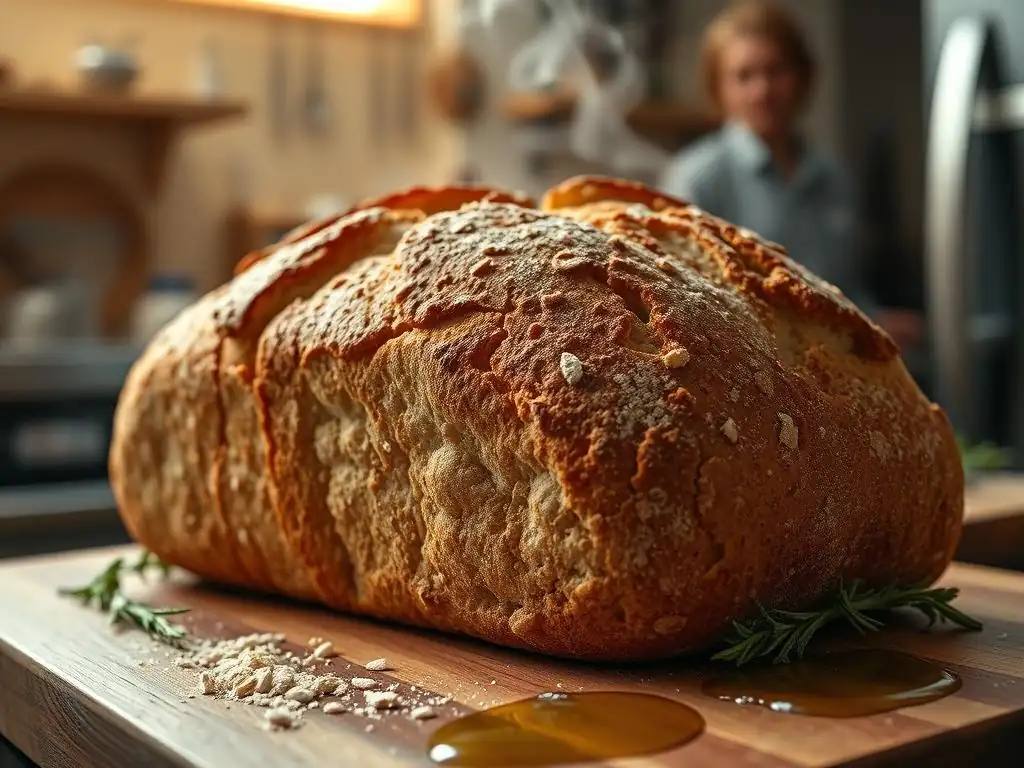
Once you've mastered the basics, you can explore more advanced techniques to further enhance the crispiness, appearance, and overall quality of your crispy whole wheat loaf crust. These methods build upon the foundational principles and can take your bread from good to truly spectacular.
These tips involve tweaking your setup or adding specific steps that contribute to a more professional-looking and feeling loaf. They are refinements that can make a noticeable difference in your pursuit of the ultimate crispy whole wheat loaf crust.
Using a Baking Stone for Even Heat Distribution
A baking stone or steel is an invaluable tool for achieving a superior crispy whole wheat loaf crust, particularly the bottom crust. When preheated thoroughly in the oven (ideally for 60 minutes at the highest temperature), the stone or steel absorbs and retains a significant amount of heat. Placing the dough directly onto this hot surface provides a powerful, even heat transfer to the base of the loaf.
This intense bottom heat is crucial for several reasons: it contributes to better oven spring by quickly heating the base, and it ensures the bottom crust dries out and crisps up effectively, preventing a soggy bottom. It provides a much more consistent and intense heat source than a thin metal baking sheet. Using a baking stone or steel is a simple upgrade that can dramatically improve the crispness of your crispy whole wheat loaf crust.
Experimenting with Different Scoring Patterns for Enhanced Crust
Scoring the loaf involves making intentional cuts on the surface of the dough just before it goes into the oven. These cuts serve a vital purpose: they provide weak points that allow the dough to expand in a controlled manner during oven spring. Without scoring, the expanding dough would burst randomly wherever the crust is weakest, often resulting in an uneven shape and potentially a thicker, less uniformly crispy crust.
Different scoring patterns can influence the final shape and appearance of the loaf. A single long slash down the middle of a batard encourages it to open up along that line, creating a prominent "ear" which can become incredibly crispy. Multiple parallel slashes or a geometric pattern on a boule also direct expansion and create visually appealing breaks in the crust.
The edges created by scoring tend to crisp up more intensely, adding to the overall crispy texture of the whole wheat loaf crust. Using a sharp blade (like a lame or razor blade) is key to getting clean cuts that open up nicely.
Achieving a Shiny Crust: Egg Wash vs. Milk Wash
While the natural baking process can yield a lovely crispy whole wheat loaf crust, applying a wash to the surface before baking can enhance both color and shine. Common washes include egg wash (whole egg, yolk, or white mixed with a little water or milk) and milk wash. An egg wash, particularly one using the yolk, provides proteins and fats that contribute to a deep golden-brown color and a noticeable sheen. It can also help seeds or grains adhere to the crust.
A milk wash offers a slightly less intense browning and shine than egg wash but still contributes to color through lactose (milk sugar) and proteins. Some bakers prefer a simple water spray just before baking, especially when using steam, as it helps keep the surface moist and can result in a delicate crispness without added color from sugars or proteins. The choice of wash depends on the desired final appearance, but any wash will add a very thin layer that bakes quickly and contributes to the crispy texture of the crispy whole wheat loaf crust.
Post-Bake Cooling Techniques for Maintaining Crispness
The process isn't over once the loaf comes out of the oven! How you cool your bread significantly impacts the final texture of the crispy whole wheat loaf crust. Immediately upon removing the loaf from the oven (or Dutch oven), transfer it to a wire cooling rack.
Cooling on a wire rack allows air to circulate freely around the entire loaf, preventing steam from condensing on the bottom crust. If you cool the loaf on a solid surface, the trapped steam will make the bottom crust soggy. Allow the loaf to cool completely, ideally for at least 1-2 hours for a standard-sized loaf, before slicing. As the loaf cools, moisture from the interior migrates towards the crust and then evaporates.
This continued drying process is essential for the crust to set and maintain its crispiness. Slicing too early traps this moisture inside, leading to a softer crust and potentially a gummy crumb. Patience during cooling is key to enjoying that perfect crispy whole wheat loaf crust.
Recipe: BakeWithEase's Guaranteed Crispy Crust Whole Wheat Loaf
Ready to put these secrets into practice? This recipe is designed to incorporate the techniques and ingredient considerations discussed to help you achieve a consistently wonderful crispy whole wheat loaf crust. It uses a relatively high hydration and leverages steam and high heat for optimal results.
- This recipe yields one standard loaf (approx. 900-1000g).
- Preparation time: Approx. 30 mins (active) + 3-4 hours (fermentation/proofing)
- Baking time: Approx. 40 minutes
Ingredients List
- 400g Strong Whole Wheat Flour (approx. 4 cups)
- 100g Strong White Bread Flour (approx. 1 cup)
- 375g Lukewarm Water (approx. 1 2/3 cups, 95-105°F / 35-40°C) - This is 75% hydration relative to total flour weight
- 10g Fine Sea Salt (approx. 1.5 tsp)
- 7g Instant Dry Yeast (approx. 2 tsp)
- 5g Diastatic Malt Powder (optional, approx. 1 tsp)
- Optional: Small amount of oil for greasing bowl (e.g., 1 tsp)
Step-by-Step Instructions
- Combine flours, salt, and diastatic malt powder (if using) in a large mixing bowl.
- In a separate bowl, whisk together the lukewarm water and instant yeast. Let stand for 5 minutes until slightly foamy.
- Pour the wet ingredients into the dry ingredients. Mix with a spoon or spatula until a shaggy dough forms and no dry flour remains.
- Cover the bowl and let rest for 20-30 minutes (autolyse). This helps the flour absorb water and gluten development begin.
- Turn the dough out onto a lightly floured surface. Knead for 8-10 minutes until the dough is smooth and elastic. Alternatively, perform 4-5 sets of stretch and folds in the bowl over 2-3 hours, resting 30 minutes between sets. The dough should be smooth and pass the windowpane test.
- Lightly grease a clean bowl with oil. Place the dough in the bowl, turning to coat. Cover tightly with plastic wrap or a damp towel.
- Let the dough bulk ferment at room temperature (approx. 70-75°F / 21-24°C) for 1.5-2 hours, or until it has nearly doubled in size.
- Gently turn the dough out onto a lightly floured surface. Shape the dough into a tight boule or batard, creating surface tension.
- Place the shaped dough seam-side up in a proofing basket (banneton) generously dusted with rice flour, or seam-side down on parchment paper.
- Cover the dough and let it proof for 45-75 minutes at room temperature, or refrigerate for 8-12 hours for a slower, flavor-enhancing proof. The dough should look puffy but not fully doubled; it should spring back slowly when gently poked.
- About 30-45 minutes before baking, place your baking stone or Dutch oven (with lid) in the oven and preheat to 475°F (245°C). If using a steam tray method, place an empty metal tray on the bottom rack while preheating.
- If using a proofing basket, gently invert the dough onto a sheet of parchment paper. If proofing on parchment, carefully lift the paper with the dough.
- Score the top of the loaf with a sharp blade.
- Carefully transfer the dough on the parchment paper to the preheated baking stone or into the preheated Dutch oven.
- If using the steam tray method, carefully pour 1-2 cups of boiling water into the hot tray on the bottom rack. Close the oven door quickly.
- If using a Dutch oven, place the lid on the pot.
- Bake at 475°F (245°C) for 15 minutes (with steam or lid on).
- After 15 minutes, carefully remove the steam tray (discard water) or remove the Dutch oven lid.
- Reduce oven temperature to 425°F (220°C). Continue baking for another 25-30 minutes, or until the crust is deep golden brown and crispy, and the internal temperature is 200-210°F (93-99°C).
- Carefully remove the loaf from the oven or Dutch oven.
- Transfer the loaf immediately to a wire cooling rack.
- Let the loaf cool completely (1-2 hours) before slicing to preserve the crispy whole wheat loaf crust.
Conclusion: Enjoying Your Perfectly Crispy Whole Wheat Loaf
Achieving a consistently crispy crust on your whole wheat bread is a rewarding milestone in your baking journey. It's a testament to understanding the interplay of ingredients, the science behind the bake, and the execution of key techniques. By focusing on hydration, proper gluten development, adequate proofing, high baking temperatures, and, crucially, effective steam during the initial phase, you unlock the potential for that coveted crackling crust.
Remember that baking is also about practice and observation. Pay attention to how your dough feels, how it proofs in your specific environment, and how your oven performs. Each bake offers valuable lessons. With the secrets shared here – from selecting the right flour and considering diastatic malt to mastering shaping, proofing, steam, and cooling – you are well-equipped to bake a stunningly crispy whole wheat loaf crust that is sure to impress. Enjoy the process, and most importantly, enjoy the delicious results of your perfectly baked, crispy whole wheat loaf!
Frequently Asked Questions
What are the main challenges in achieving a crispy crust on a whole wheat loaf?
Whole wheat flour can inhibit crust formation due to its higher fiber content and lower gluten development. This can result in a softer, less crispy crust compared to white bread.
What role does hydration play in achieving a crispy whole wheat loaf crust?
Adequate hydration is crucial. Too little water leads to a dry loaf with a hard, undesirable crust. Aim for a slightly wetter dough to promote steam formation during baking.
How can I create steam in my oven to enhance crust crispiness?
Introducing steam during the initial baking phase is essential for crust development. You can achieve this by placing a pan of hot water in the oven or using a Dutch oven to trap moisture.
What baking temperature is ideal for a crispy whole wheat loaf crust?
A higher baking temperature, typically around 450-475°F (232-246°C), helps to rapidly evaporate moisture from the surface, leading to a crispier crust. Monitor the loaf closely to prevent burning.
Besides temperature and steam, what other techniques can contribute to a crispy whole wheat loaf crust?
Brushing the loaf with an egg wash or milk before baking can promote browning and crispness. Scoring the loaf also allows for expansion and controlled crust formation.
Final Reflection: The Unexpected Joys of a Perfectly Crispy Crust
The quest for a flawlessly crispy crust on a whole wheat loaf transcends mere culinary technique; it's a testament to the power of patience, precision, and a deep appreciation for the simple pleasures of homemade bread. In a world of fast food and instant gratification, taking the time to craft a loaf with a satisfyingly crisp exterior and a tender, flavorful interior is a powerful act of self-care and a celebration of the artisanal. This journey, detailed in this article, highlights the surprising impact small adjustments can have on the final product.
The pursuit of the perfect crust has resonated deeply with me, revealing not only the technical aspects of baking but also a deeper connection to the history and tradition of bread making. It's a process that connects us to generations past, a reminder of the simple act of transforming humble ingredients into something nourishing and delightful. As the renowned baker, Jim Lahey, once said, Bread baking is a journey of discovery, a constant learning process, and the reward is a loaf that reflects your effort and attention.
This sentiment perfectly encapsulates the experience of striving for that perfect, crispy whole wheat crust.
Now, I invite you to take what you've learned and embark on your own baking adventure. Don't be afraid to experiment, to adjust techniques, and to embrace the occasional imperfection. The journey to a perfectly crispy crust is as rewarding as the destination itself. Remember the details outlined in this article, but most importantly, remember the joy of creating something delicious with your own two hands. The satisfying crunch of that perfect crust will be your well-deserved reward.
Unlock Your Crusty Whole Wheat Potential!
Thanks for taking the time to delve into the world of perfectly crispy whole wheat bread! We hope you've gained valuable insights into achieving that satisfying crunch. Now it's time to put your new knowledge into practice.
- Bake your dream loaf: Try out one of the techniques we discussed—perhaps the steam method or the dutch oven approach—and see the difference it makes! Note your results and share your experience below.
- Experiment with flours: Don't be afraid to explore different types of whole wheat flour to see how they impact your crust. Which one gives you the crispiest results?
- Share your success (or challenges!): We'd love to hear about your baking journey. Share a picture of your masterpiece (or even your learning experiences!) on social media using #BakeWithEaseCrustyLoaf.
Ready to achieve that picture-perfect crust? What’s your biggest challenge in baking a crispy whole wheat loaf, and how will you overcome it?