
Scoring Rustic Bread: Techniques for Beauty and Oven Spring

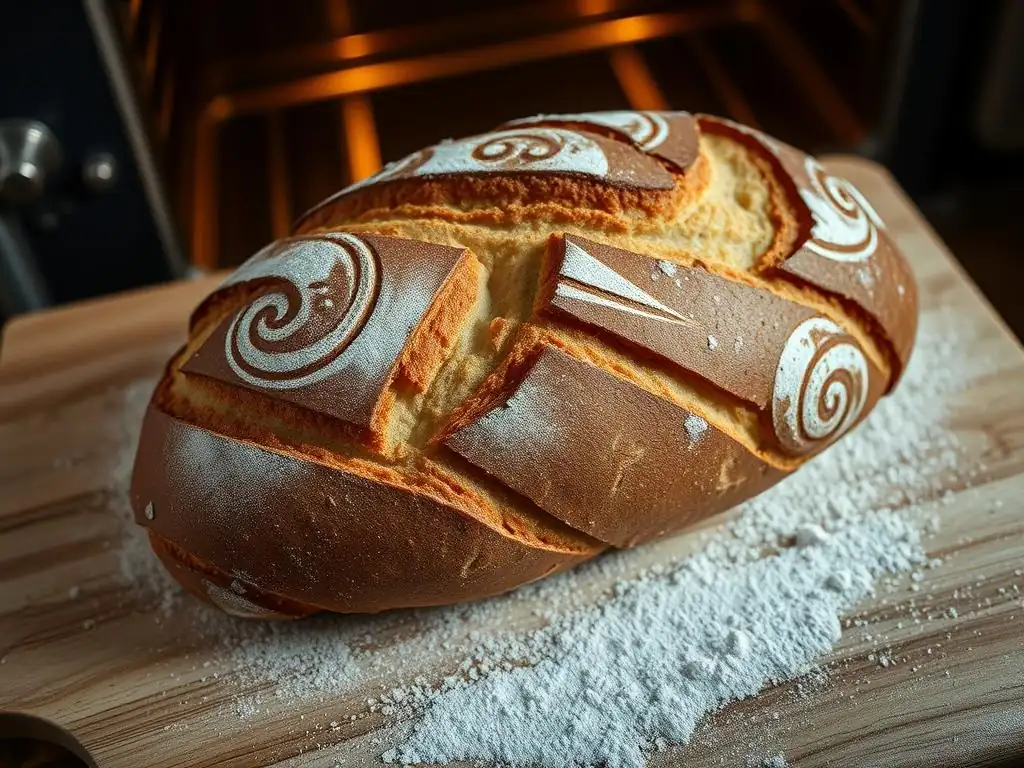
Welcome to BakeWithEase, your kitchen companion for all things baking! Ever wondered how those stunning rustic bread scoring patterns are achieved? They're more than just pretty designs; they're the key to unlocking incredible oven spring. Dive in to discover the secrets behind creating beautiful and perfectly baked loaves, and prepare to elevate your bread baking game beyond the ordinary. Ready to transform your dough into a work of art?
- Introduction to Rustic Bread Scoring
- Essential Tools for Rustic Bread Scoring
- Preparing Your Dough for Scoring
- Basic Rustic Bread Scoring Techniques
- Advanced Rustic Bread Scoring Patterns
- Mastering Depth and Angle in Scoring
- Troubleshooting Common Scoring Problems
- Rustic Bread Scoring Patterns for Different Hydrations
- Post-Scoring Baking Tips for Rustic Bread
- Inspiration: Rustic Bread Scoring Designs
- Conclusion: Enhancing Your Rustic Bread with Effective Scoring
- Frequently Asked Questions
- Final Reflection: The Art and Science of Rustic Bread Scoring
- Unleash Your Inner Baker: Craft the Perfect Rustic Loaf!
Introduction to Rustic Bread Scoring
What is Rustic Bread Scoring? Understanding the Purpose
Rustic bread scoring, often referred to simply as "scoring," is the act of cutting the surface of a loaf of bread dough just before it is baked. These cuts are made with a sharp blade, typically a baker's lame, and serve a crucial functional purpose: controlling the expansion of the dough in the hot oven.
Without scoring, the crust would simply tear haphazardly as the gases inside the dough expand rapidly during the initial phase of baking, known as oven spring. Scoring provides designated weak points for this expansion, allowing the loaf to achieve maximum volume and a desirable shape.
Beyond its practical function, scoring is also an art form. The cuts made on the dough's surface create unique and beautiful patterns that become part of the finished loaf's crust. These rustic bread scoring patterns can range from simple slashes to intricate designs, transforming a plain loaf into a visually appealing centerpiece. Bakers often develop signature patterns, making each loaf a testament to their skill and creativity. The interplay of expansion through the scores results in raised "ears" or flaps of crust, adding texture and visual interest that is highly prized in artisan rustic breads.
Why Scoring Matters: Expansion Control and Visual Appeal
The primary technical reason for scoring is to manage oven spring. As the dough hits the intense heat of the oven (often around 450-500°F or 230-260°C), the yeast activity surges and trapped gases expand rapidly. Water in the dough also turns to steam, further contributing to this expansion. Scoring directs this powerful force, ensuring that the loaf expands upwards and outwards predictably through the cuts. This controlled expansion is vital for achieving good volume and preventing the loaf from bursting uncontrollably. A well-scored loaf will often rise significantly taller and develop a more open crumb structure.
Moreover, rustic bread scoring patterns are fundamental to the aesthetic appeal of artisan loaves. The patterns baked into the crust are a signature element of rustic bread. A simple crosshatch on a boule or a series of parallel slashes on a batard not only guides expansion but also creates a visually stunning contrast between the smooth crust and the raised, blistered edges of the scores.
Bakers spend considerable time perfecting their scoring techniques, understanding that these patterns communicate craftsmanship and care. Effective scoring elevates the final product from a simple loaf of bread to a work of edible art, making it more attractive to the baker and anyone sharing the meal.
A Baker's Guide to Effective Rustic Bread Scoring
Effective rustic bread scoring requires understanding the dough, using the right tools, and practicing the technique. The goal is clean, decisive cuts that are deep enough to guide expansion but not so deep that they deflate the loaf.
The hydration level of the dough significantly impacts how easy it is to score; higher hydration doughs tend to be stickier and require a sharper blade and quicker hand. Proper proofing is also critical; dough that is under-proofed will expand too aggressively and might tear unpredictably, while over-proofed dough might collapse when scored or not have enough energy for good oven spring.
To master rustic bread scoring, focus on using a very sharp blade and making confident, swift cuts. Hesitation can cause the blade to drag and stick, resulting in messy scores. Experiment with different angles and depths to see how they affect the final baked loaf. Pay attention to the dough's surface tension – a well-shaped loaf with good surface tension is easier to score cleanly. Practice is key; don't be discouraged by initial attempts that don't yield perfect results. Each loaf provides an opportunity to refine your technique and explore new rustic bread scoring patterns.
Essential Tools for Rustic Bread Scoring
The Lame: Your Primary Scoring Tool
The lame (pronounced "lahm") is the quintessential tool for scoring bread dough. It is essentially a handle designed to hold a sharp razor blade, providing control and precision when making cuts on the dough's surface. Using a razor blade is crucial because it is incredibly sharp, allowing for clean slices that don't drag or tear the delicate dough. A clean cut encourages the dough to open up beautifully during oven spring. Using anything less sharp, like a regular knife, often results in squished or jagged cuts that hinder optimal expansion and visual appeal.
Lames come in various forms, but their core function remains the same: to safely and effectively hold a blade for scoring. They provide leverage and keep your fingers safely away from the extremely sharp edge. Many bakers find that the angle at which the blade is held by the lame significantly impacts the type of cut they can achieve. A well-designed lame feels comfortable in the hand, allowing for fluid, confident movements across the dough surface, which is essential for creating intricate rustic bread scoring patterns.
Types of Lames: Straight, Curved, and Replaceable Blade
Lames are typically categorized by the shape of the blade holder and whether they use replaceable blades. A common type is the straight lame, which holds the razor blade flat. This is excellent for making straight cuts, such as a single slash down the middle of a batard or simple crosshatch patterns. Straight lames are versatile and a good starting point for beginners learning basic rustic bread scoring patterns. They allow for precise, linear cuts, which are fundamental to many classic rustic loaf designs.
Another popular type is the curved lame, which holds the razor blade in a curved position. This curvature is ideal for creating the iconic "ear" on a loaf – the beautiful flap of crust that lifts up during baking. By holding the curved blade at a shallow angle (around 30 degrees), you can create a score that encourages the dough to peel back as it expands.
Many bakers prefer a curved lame for boules or for achieving specific rustic bread scoring patterns that feature prominent ears. Most modern lames, both straight and curved, use standard double-edged razor blades that are easily and affordably replaceable, ensuring you always have a razor-sharp edge for clean scoring.
Alternative Scoring Tools: Kitchen Shears
While the lame is the standard tool for achieving precise cuts and intricate rustic bread scoring patterns, kitchen shears offer a different approach, particularly effective for certain types of rustic loaves like focaccia or some rustic rolls. Instead of slicing, shears are used to make snips in the dough. This method is particularly useful for creating rustic, jagged edges or for dividing dough into smaller portions before baking. Snips can also be used to create decorative patterns, such as a series of small cuts around the edge of a round loaf.
Using kitchen shears requires a slightly different technique than using a lame. The snips are often made vertically or at a slight angle to the surface of the dough. This can create a more textured, less refined look compared to the clean lines produced by a sharp blade. For some rustic bread scoring patterns, like creating "bursts" or adding texture, shears can be the preferred tool. They are also a handy alternative if a lame isn't available, proving that you can achieve interesting rustic bread scoring effects with common kitchen tools.
Preparing Your Dough for Scoring
Dough Hydration and Scoring Difficulty
The hydration level of your dough plays a significant role in how easy or difficult it is to score effectively. Hydration refers to the ratio of water to flour in your dough, typically expressed as a percentage. Doughs with lower hydration (e.g., 65-70%) are generally stiffer and less sticky. This makes them easier to handle and score, as the blade glides more smoothly over the surface without sticking. You can often take a bit more time to make your cuts on lower-hydration doughs, allowing for more intricate rustic bread scoring patterns.
Conversely, high-hydration doughs (e.g., 75-85% or even higher) are wetter, stickier, and more delicate. Scoring these doughs requires a very sharp blade, a confident and swift hand, and often, a light touch of flour on the surface or the blade itself to prevent sticking. While challenging, mastering scoring on high-hydration doughs is rewarding, as they often yield a more open crumb and significant oven spring when scored correctly. Developing proficiency across different hydration levels is key to achieving beautiful rustic bread scoring patterns on a variety of loaves.
Proper Proofing: Timing for Optimal Scoring
The proofing stage is critical for successful scoring. Dough that is properly proofed will have developed enough gas to expand during baking, but its structure will still be firm enough to accept clean cuts without collapsing. Under-proofed dough is dense and springy; when scored, the cuts might close up slightly, and the loaf may tear unexpectedly during oven spring as it tries to expand beyond the scores.
Over-proofed dough, on the other hand, is often soft, fragile, and may deflate easily when touched or scored. Cuts on over-proofed dough may look beautiful initially but might not open well in the oven because the dough has already expended much of its rising power.
The ideal stage for scoring is when the dough is perfectly proofed – often referred to as being "just right" or having reached about 80-90% of its final proof. At this point, the surface of the dough should feel taut but yielding, and a gentle poke should leave an indentation that slowly springs back. Scoring at this stage ensures that the cuts are clean and that the dough has the energy needed to expand powerfully through the scores during oven spring, resulting in well-defined rustic bread scoring patterns.
Gentle Handling Before Scoring
Before you even pick up your lame, the final handling of the dough before scoring is crucial. After shaping and proofing, the dough is at its most delicate state. Transferring the dough from the proofing basket or surface to your scoring surface (often a piece of parchment paper or a peel) must be done with extreme care to avoid degassing or deflating the loaf. A sudden jolt or rough handling can compromise the structure that has developed during proofing, making clean scoring more difficult and potentially hindering oven spring.
Once the dough is in position for scoring, handle it gently. Avoid pressing down or reshaping the loaf significantly. The surface should remain taut and undisturbed. Some bakers lightly flour the surface of the dough before scoring, which can help the blade glide smoothly, especially on stickier, high-hydration doughs. However, use flour sparingly, as too much can obscure your planned rustic bread scoring patterns and prevent the crust from developing properly. The goal is to maintain the integrity of the dough's structure and surface tension until the moment the blade makes contact.
Basic Rustic Bread Scoring Techniques
The Single Slash: For Oven Spring and Rustic Look
The single slash is perhaps the most fundamental and widely used rustic bread scoring pattern, particularly for oval loaves (batards). It involves making one long cut lengthwise down the center of the loaf. This simple score provides a clear path for the dough to expand during oven spring, resulting in a beautiful, prominent "ear" along the length of the loaf. This technique is effective for achieving good volume and a classic rustic appearance.
To execute a single slash effectively, hold your lame at a shallow angle, typically around 30 degrees relative to the surface of the dough. Make one swift, confident cut from one end of the loaf to the other. The depth of the cut should be about 1/2 inch to 3/4 inch (approximately 1-2 cm), depending on the size of the loaf and dough hydration. A shallower angle helps create that desirable ear, while a slightly deeper cut ensures sufficient expansion. This straightforward technique is excellent for beginners and a staple for many rustic bread scoring patterns on elongated loaves.
Cross Scoring: Even Expansion and Classic Design
Cross scoring is a classic and functional rustic bread scoring pattern, especially popular for round loaves (boules). It typically involves making two intersecting cuts across the top of the loaf. The most common variation is a simple "plus" sign (+) or an "X". This pattern encourages the loaf to expand relatively evenly in multiple directions during oven spring, resulting in a well-rounded, symmetrical shape.
For a basic cross score (+), make one cut straight down the middle of the loaf, then make a second cut perpendicular to the first, also down the middle. For an "X" pattern, make two diagonal cuts that intersect in the center.
The depth for cross scoring is often slightly deeper than for a single slash, perhaps 3/4 inch to 1 inch (approximately 2-2.5 cm), as the goal is even expansion rather than a prominent ear. Cross scoring is a reliable technique that produces a traditional, inviting look and is one of the easiest rustic bread scoring patterns to master.
Simple Overlapping Slashes: Controlled Expansion
Simple overlapping slashes offer a way to control expansion while adding a bit more visual interest than a single slash. This technique involves making several short, overlapping cuts along the surface of the loaf. For a batard, this might mean a series of diagonal slashes that slightly overlap each other. For a boule, it could be a pattern resembling a star or a spiral of overlapping cuts. These rustic bread scoring patterns allow for multiple points of expansion.
When creating overlapping slashes, maintain a consistent depth and angle for each cut to ensure even opening in the oven. For diagonal slashes on a batard, hold the lame at a consistent angle (e.g., 45 degrees) and make cuts about 1/4 inch (approximately 0.5 cm) deep, with each slash starting slightly before the previous one ends. This creates a segmented look that opens beautifully. This technique provides more control over where the dough expands compared to a single large cut and adds a pleasing texture to the final crust.
Advanced Rustic Bread Scoring Patterns
Wheat Stalk Scoring: Step-by-Step Instructions
The wheat stalk pattern is a beautiful and popular advanced rustic bread scoring pattern that mimics the look of a stalk of wheat. It typically runs lengthwise down a batard. To create this design, you first make a single, long cut down the center of the loaf, similar to the initial step for a single slash, but often slightly shallower (around 1/4 inch or 0.5 cm deep). This central score acts as the "stem" of the wheat stalk.
Next, holding the lame almost parallel to the surface of the dough (at a very shallow angle, perhaps 10-20 degrees), make a series of short, curved cuts branching off from the central score. Alternate sides as you move down the loaf, making cuts that curve outwards and slightly upwards, resembling the grains on a wheat stalk. These cuts should be quite shallow, just breaking the surface tension.
The central cut will open significantly during oven spring, while the shallow side cuts will flare out gently, creating the characteristic fanned look of the wheat grains. Mastering the angle and depth of the side cuts is key to achieving a realistic and attractive wheat stalk rustic bread scoring pattern.
Leaf Pattern Scoring: Creating Elegant Designs
Creating a leaf pattern is another elegant way to score rustic bread, often applied to boules or batards. On a boule, a common leaf pattern starts with a central curved cut resembling the main vein of a leaf. This cut is typically made with a curved lame at a moderate depth (around 1/2 inch or 1 cm) to encourage significant opening.
Once the central "vein" is established, use the tip of your lame to make a series of small, shallow cuts branching off from the main vein, mimicking the side veins of a leaf. These smaller cuts should be just deep enough to break the surface tension (perhaps 1/8 inch or 0.3 cm) and should angle outwards towards the edge of the loaf.
On a batard, you might create multiple leaves along the length. The contrast between the deep central cut and the shallow side cuts creates a stunning visual effect as the loaf bakes, making the leaf rustic bread scoring pattern a true work of art.
Geometric Patterns: Intricate and Artistic Scoring
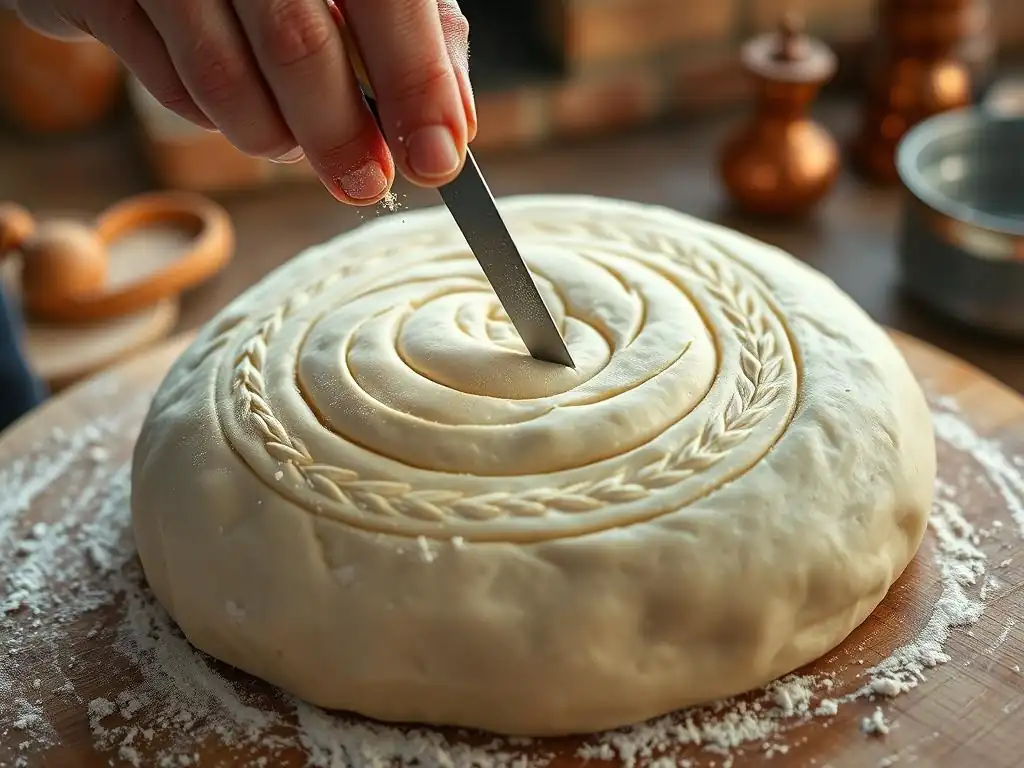
For those seeking a truly artistic challenge, geometric patterns offer endless possibilities for rustic bread scoring. These can include intricate grids, spirals, concentric circles, or abstract designs. Creating geometric patterns often involves a combination of straight and curved cuts made with precision. For a grid, for example, you might make a series of parallel cuts in one direction, then another series of parallel cuts perpendicular to the first, creating squares or diamonds.
Achieving clean geometric rustic bread scoring patterns requires a steady hand and careful planning. It's often helpful to lightly mark the dough surface with flour or a dull tool before cutting to guide your blade. The depth of cuts in geometric patterns can vary depending on the desired effect; deeper cuts will open significantly, while shallower cuts will create finer lines. These patterns are a fantastic way to showcase creativity and skill, transforming a simple loaf into a complex and beautiful piece of edible sculpture.
Mastering Depth and Angle in Scoring
Optimizing Depth for Oven Spring
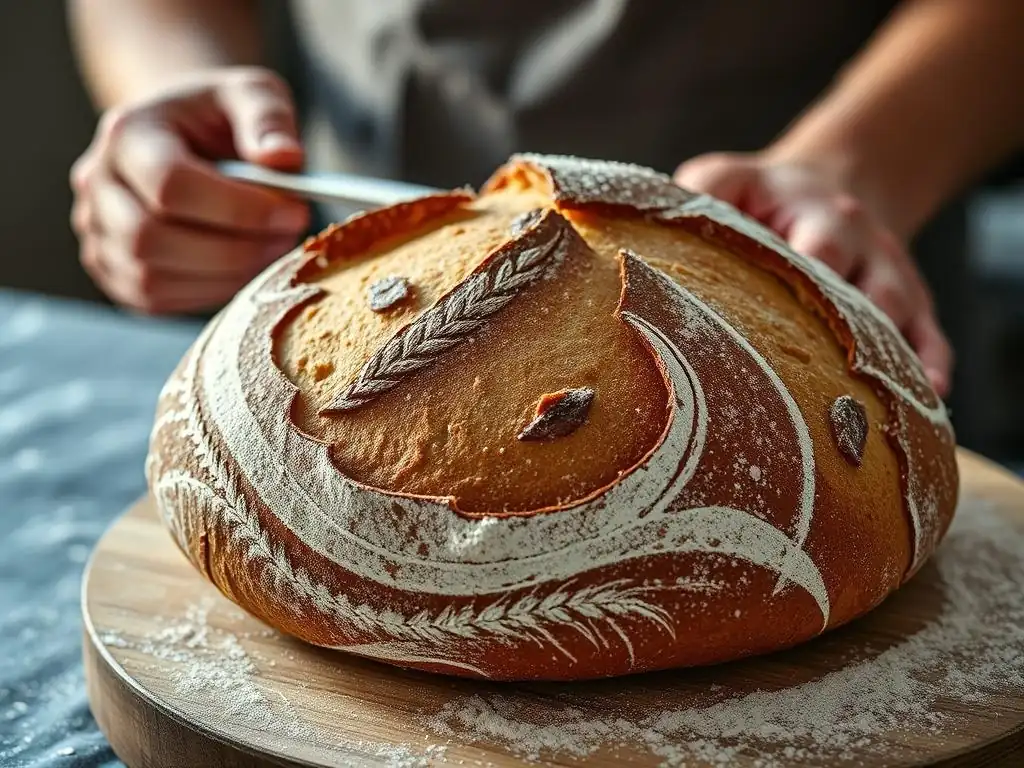
The depth of your score is one of the most critical factors influencing oven spring and the final appearance of your rustic bread scoring patterns. Generally, deeper cuts (around 1/2 to 1 inch or 1-2.5 cm) are made where you want the most significant expansion to occur.
For a single slash on a batard or the main cuts in a cross pattern on a boule, a deeper cut ensures that the dough has ample space to expand upwards and outwards, maximizing loaf volume. Too shallow a cut might not provide enough release point, leading to uncontrolled tearing elsewhere on the crust.
However, not all cuts should be deep. Decorative cuts in complex rustic bread scoring patterns, such as the side veins in a leaf or the individual grains in a wheat stalk, should be much shallower, often just breaking the surface tension (around 1/8 to 1/4 inch or 0.3-0.5 cm). These shallow cuts open gently, creating fine lines and textures that complement the main, deeper cuts. Finding the right depth depends on the specific pattern and the desired outcome – significant expansion or subtle decoration.
Lame Angling for Varied Effects
The angle at which you hold the lame relative to the dough surface profoundly affects how the score opens in the oven. Holding the lame at a shallow angle (around 30 degrees) is key to creating an "ear" – the beautiful flap of crust that peels back from the main cut. This angle directs the expansion primarily upwards and to one side, allowing the edge of the cut to crisp up into a prominent ridge. This technique is fundamental for achieving the classic look of many rustic bread scoring patterns, especially the single slash on a batard.
Holding the lame perpendicular to the dough surface (at 90 degrees) results in a cut that opens more symmetrically, like a gaping mouth. This angle is often used for simple cross cuts on boules or for creating designs where the goal is even opening rather than an ear. Experimenting with angles allows you to control the shape and prominence of the baked scores. A slight variation in angle can dramatically change how your rustic bread scoring patterns develop in the oven.
Avoiding Common Mistakes: Too Shallow or Too Deep
Mistakes in scoring depth are common but easily learned from. Scoring too shallowly is a frequent error, especially for beginners. Cuts that are not deep enough (e.g., less than 1/4 inch or 0.5 cm for a main score) may not provide sufficient release points for the dough's expansion. The crust might still tear randomly in addition to or instead of opening through the scores, resulting in a less attractive loaf and less controlled oven spring.
Conversely, scoring too deeply can also be detrimental. While deep cuts encourage expansion, excessively deep cuts, particularly on slightly over-proofed or weaker doughs, can cause the loaf to collapse or spread excessively rather than rising upwards. For instance, cutting 1.5 inches deep into a small, delicate boule might compromise its structure. Finding the "sweet spot" for depth comes with practice and understanding how your specific dough behaves. Aim for depths that allow for robust expansion without sacrificing the loaf's structural integrity or the clarity of your rustic bread scoring patterns.
Troubleshooting Common Scoring Problems
Dough Sticking to the Lame: Prevention Techniques
One of the most frustrating issues when scoring rustic bread is the dough sticking to the lame. This often results in jagged, messy cuts instead of clean, precise ones. Sticking is more common with high-hydration or very sticky doughs. Several techniques can help prevent this. Firstly, ensure your blade is extremely sharp. A dull blade is much more likely to drag and stick. Replaceable razor blades are ideal because they are inexpensive and can be swapped out frequently.
Secondly, a light dusting of flour on the surface of the dough just before scoring can provide a barrier that helps the blade glide smoothly. Use a fine sieve for an even, thin layer. Alternatively, dipping the blade of your lame in a small amount of water between cuts can also prevent sticking, as the moisture creates a slick surface. Some bakers find that slightly chilling the shaped dough in the refrigerator for 20-30 minutes before scoring helps firm up the surface, making it less prone to sticking and easier to create clean rustic bread scoring patterns.
Uneven Expansion: Identifying Potential Causes
Uneven expansion in your scored rustic bread can be disappointing after putting effort into your rustic bread scoring patterns. This often manifests as one side of the loaf expanding much more than the other, or parts of the scores opening beautifully while others remain closed. Several factors can contribute to this. Uneven shaping can lead to varying surface tension across the loaf; parts with tighter surface tension will expand more forcefully. Inconsistent proofing can also be a culprit; areas that are slightly less proofed might have more energy for expansion.
Improper or inconsistent scoring is another major cause. If your cuts are not uniform in depth or angle, the dough will naturally expand more through the deeper or more optimally angled scores. For example, if one side of a cross cut is deeper than the other, the deeper side will likely open wider.
Uneven heat distribution in your oven can also play a role, causing one side of the loaf to bake and set faster than the other. Pay attention to your shaping technique, proofing time, oven setup, and ensure your scoring cuts are as consistent as possible to achieve symmetrical rustic bread scoring patterns.
Faded Score Marks: Preventing Disappearance During Baking
Sometimes, your beautifully executed rustic bread scoring patterns seem to disappear or become less defined during baking. This can happen if the scores are too shallow, the dough is over-proofed, or there isn't enough steam in the oven. If the cuts are too shallow, they may not provide sufficient weak points for expansion, or the expanding dough might simply close them back up. Over-proofed dough lacks the vigor for a strong oven spring, so the scores might open minimally or not at all.
Lack of steam is a significant factor. Steam keeps the surface of the dough moist and pliable for the first crucial minutes of baking, allowing the crust to stretch and the scores to open fully before the crust sets.
Without adequate steam, the crust forms too quickly and becomes rigid, preventing the scores from expanding properly. Ensure your scores are deep enough for the desired effect, check your proofing time, and implement an effective steam method (like using a Dutch oven, baking stone with a steam tray, or spraying the oven walls) to achieve well-defined and beautiful rustic bread scoring patterns on your finished loaves.
Rustic Bread Scoring Patterns for Different Hydrations
Scoring High-Hydration Doughs: Strategies for Success
Scoring high-hydration rustic bread doughs (75% water or more) presents unique challenges due to their stickiness and delicate nature. The key is speed and confidence. A quick, decisive cut with an extremely sharp blade is essential to avoid dragging and tearing. Many bakers find that a curved lame is easier to maneuver on wet dough, especially for creating ears.
Strategies for success include:
- Use a razor-sharp blade: Replace blades frequently.
- Work quickly: Hesitation leads to sticking.
- Minimize contact time: Get in and out fast.
- Lightly flour the surface: A thin layer of flour can help the blade glide.
- Dip the blade in water: Wetting the blade between cuts can prevent sticking.
- Chill the dough: A short period in the fridge (20-30 mins) can firm up the surface, making it easier to score.
Complex or intricate rustic bread scoring patterns are more difficult on very wet doughs and may not hold their shape as well. Simple, functional scores like a single slash or a basic cross are often more successful and reliable for high-hydration loaves, ensuring good oven spring without risking deflation.
Scoring Lower-Hydration Doughs: Adaptations and Techniques
Lower-hydration rustic bread doughs (typically 65-70% water) are stiffer, less sticky, and hold their shape better, making them much easier to score. You can take more time and be more deliberate with your cuts compared to high-hydration doughs. This makes lower-hydration doughs excellent for practicing and executing more intricate rustic bread scoring patterns.
Adaptations and techniques for lower-hydration doughs:
- More time for detail: You can afford to be slower and more precise.
- Easier to make deep cuts: The dough's structure supports deeper scores without collapsing.
- Holds intricate patterns: Detailed geometric or artistic rustic bread scoring patterns are more likely to remain defined during baking.
- Less need for flour/water on blade: Sticking is less of an issue.
While easier to score, lower-hydration doughs may not achieve the same dramatic oven spring or open crumb as very wet doughs. However, well-executed rustic bread scoring patterns on these loaves will still open beautifully and contribute significantly to the final appearance and texture of the crust.
Scoring Batards vs. Boules: Shape Considerations
The shape of your rustic bread loaf dictates the most common and effective rustic bread scoring patterns. Batards (oval loaves) are typically scored with lengthwise cuts. The most classic is the single slash, often angled to create a prominent ear. Multiple diagonal slashes along the length are also common, providing several points of expansion and creating a visually appealing segmented look. Intricate patterns like the wheat stalk or multiple overlapping ears are also well-suited for the elongated shape of a batard.
Boules (round loaves) lend themselves well to radial or central rustic bread scoring patterns. The cross score (+) or (X) is a fundamental pattern for boules, promoting even, symmetrical expansion. Other popular patterns include a simple square or diamond grid, concentric circles, or artistic designs radiating from the center, such as the leaf pattern. Because boules expand outwards from the center, patterns that allow for this radial expansion are generally most effective for achieving good shape and volume. Choosing the right rustic bread scoring pattern for your loaf shape is key to both aesthetics and function.
Post-Scoring Baking Tips for Rustic Bread
Steam Injection: Essential for Oven Spring
After scoring your rustic bread, the next critical step is getting it into a hot, steamy oven. Steam is absolutely essential during the first 15-20 minutes of baking. The high heat causes rapid expansion (oven spring), and steam keeps the surface of the dough moist and elastic. This prevents the crust from setting too early, allowing the scores to open fully and the loaf to achieve maximum volume. Without sufficient steam, the crust sets almost instantly, restricting expansion and resulting in a denser loaf with poorly opened scores.
There are several ways to create steam in a home oven. Baking in a preheated Dutch oven is one of the most effective methods; the lid traps the moisture released by the dough itself. Alternatively, if baking on a stone or steel, you can place a tray of hot water or ice cubes on a rack below the bread, or spray the oven walls with water just after loading the loaf. Maintaining a steamy environment for the initial phase of baking is paramount for achieving beautiful rustic bread scoring patterns and excellent oven spring.
Baking Temperatures and Times: Achieving a Perfect Crust
Rustic bread is typically baked at high temperatures to achieve a beautiful, crisp crust and optimal oven spring. Common baking temperatures range from 450°F to 500°F (230°C to 260°C). The high initial temperature encourages rapid expansion through the scores. After the initial steam phase (typically 15-20 minutes), the temperature is often reduced slightly (e.g., to 400-425°F or 200-220°C) for the remainder of the bake to ensure the interior cooks through without the crust burning.
Total baking time varies depending on the size and weight of the loaf, but a standard 1-1.5 kg rustic loaf might bake for 30-50 minutes. The goal is a loaf that is deeply golden brown with a firm, crisp crust and an internal temperature of around 200-210°F (93-99°C). The high temperature and proper baking time contribute not only to the internal structure but also to the development of color and texture in your rustic bread scoring patterns.
Monitoring Crust Color: Preventing Burning
Keeping a close eye on the crust color is vital during the baking process to prevent burning, especially on the raised edges of your rustic bread scoring patterns. The tips of ears or the edges of deep cuts can brown faster than the rest of the loaf. Once the steam phase is over and the crust has set, monitor the loaf regularly. If the crust is browning too quickly, you can loosely tent the loaf with aluminum foil for the remaining bake time.
A well-baked rustic loaf should have a rich, deep golden-brown crust. This color indicates good caramelization and flavor development. However, if the crust starts to look very dark brown or black, it is likely burning. Adjust your temperature or tent the loaf accordingly. Achieving the perfect balance of oven spring, interior bake, and crust color, including the definition and color of your rustic bread scoring patterns, is the hallmark of a successful rustic loaf.
Inspiration: Rustic Bread Scoring Designs
Gallery of Rustic Bread Scoring Examples
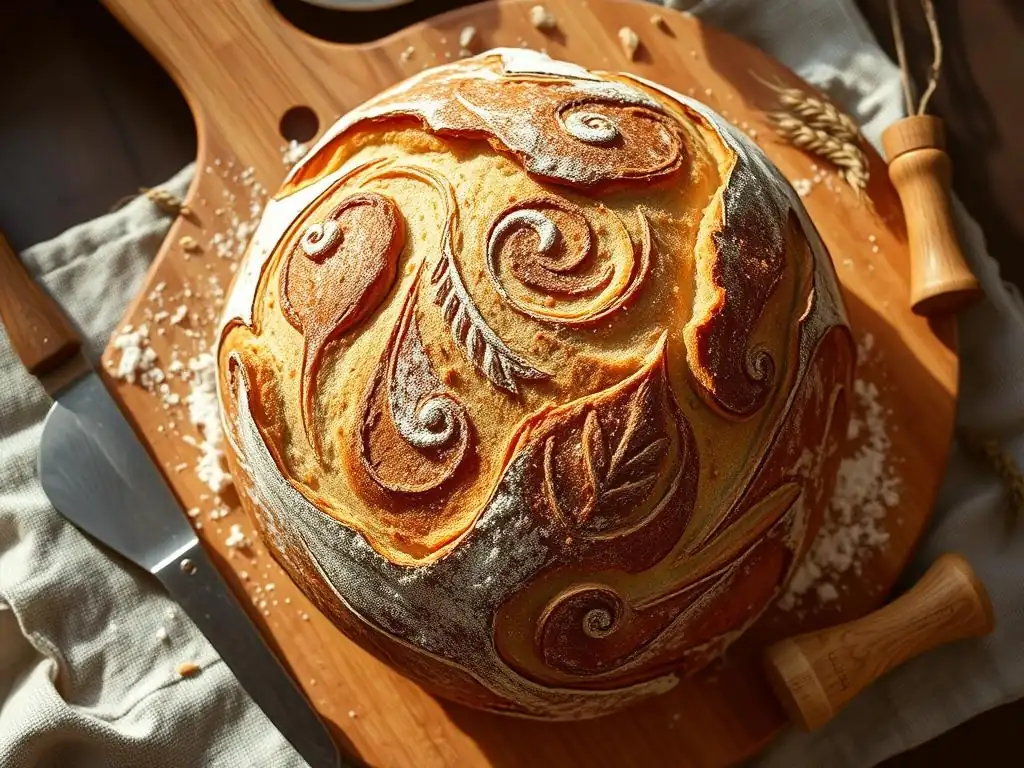
Visual inspiration is a powerful tool for bakers looking to expand their repertoire of rustic bread scoring patterns. Online platforms like Instagram, Pinterest, and dedicated baking forums are treasure troves of stunning examples. You can find everything from simple, elegant single slashes with dramatic ears to incredibly intricate geometric designs that look almost too beautiful to eat. Search for hashtags like #breadscoring, #rusticsourdough, #artisanbread, or #breadart to discover countless creative approaches.
Seeing how other bakers execute different rustic bread scoring patterns can spark ideas for your own loaves. Pay attention to how the scores open, the depth and angle of the cuts, and how the pattern complements the shape of the loaf. Many bakers share their techniques or even short videos demonstrating their scoring process. While we cannot include a physical gallery here, imagining a collection of perfectly baked loaves showcasing diverse and beautiful rustic bread scoring patterns can serve as motivation to practice and experiment.
Resources for Learning New Patterns: Online Communities and Books
To learn new rustic bread scoring patterns and refine your technique, numerous resources are available. Online baking communities and forums are excellent places to ask questions, share your results, and get feedback from experienced bakers. Websites dedicated to bread baking, like this one, often provide tutorials and guides. YouTube is particularly valuable, as watching someone score dough in real-time can be incredibly instructive for understanding angle, depth, and speed.
Baking books, especially those focused on artisan or rustic bread, often include sections on scoring with diagrams and instructions for various rustic bread scoring patterns. Investing in a good baking book can provide a structured way to learn fundamental and advanced techniques. Don't be afraid to start with simple patterns and gradually work your way up to more complex designs as your confidence and skill grow. Practice on smaller loaves or even scrap pieces of dough if you want to perfect a pattern before applying it to a full loaf.
Conclusion: Enhancing Your Rustic Bread with Effective Scoring
Mastering rustic bread scoring is a rewarding journey that significantly impacts both the technical success and the visual appeal of your homemade loaves. Understanding the purpose of scoring – controlling oven spring – is fundamental. Equally important is recognizing scoring as an artistic expression, allowing you to transform simple dough into a beautiful, unique creation through various rustic bread scoring patterns.
From selecting the right tools like a sharp lame, to preparing your dough at the optimal proofing stage, every step contributes to successful scoring. Basic techniques like the single slash and cross score provide functional expansion, while advanced patterns like the wheat stalk or geometric designs offer opportunities for intricate artistry. Paying attention to the depth and angle of your cuts is crucial for dictating how your scores will open in the oven.
By troubleshooting common issues like sticking or uneven expansion and implementing best practices like using steam during baking, you can consistently achieve stunning results. Exploring different rustic bread scoring patterns allows you to add your personal touch to every loaf, making each bake a little more special.
Frequently Asked Questions
How does scoring rustic bread impact the final product?
Scoring allows for controlled expansion during baking, preventing the bread from bursting unpredictably. It also creates beautiful visual patterns and contributes to a better oven spring.
What tools are best for scoring rustic bread?
A lame (a special bread scoring knife) is ideal for clean, precise cuts. Alternatively, a sharp knife or even a razor blade can be used with caution.
What are some basic rustic bread scoring patterns for beginners?
Simple patterns like a single slash, a cross, or a simple arc are great starting points. Experiment with different angles and depths to see how they affect the final loaf.
How deep should I score my rustic bread?
The depth depends on the desired effect and the type of dough. Generally, aim for about 1/4 to 1/2 inch deep. Deeper cuts allow for more expansion.
Why is oven spring important when baking rustic bread?
Oven spring refers to the final rise in the oven, contributing to a lighter and airier crumb. Proper scoring facilitates this process, resulting in a more desirable texture.
Final Reflection: The Art and Science of Rustic Bread Scoring
The perfect rustic loaf isn't just about taste; it's a testament to the interplay of technique and artistry. Understanding scoring patterns isn't merely a matter of aesthetics; it's the key to unlocking the full potential of your sourdough, ensuring even oven spring and a beautifully textured crust. This knowledge, once considered the domain of experienced bakers, is now readily accessible, empowering a new generation of bread enthusiasts.
The journey of mastering rustic bread scoring is a deeply rewarding one. It's a process of observation, experimentation, and ultimately, self-expression. Each carefully planned cut, each subtle variation in depth and angle, contributes to the final masterpiece. As I've explored various techniques and patterns, I've been reminded of the profound connection between craft and creativity. Bread making is a metaphor for life; you put in the work, you nurture the process, and you are rewarded with something beautiful and nourishing.
This quote, though not directly about scoring, perfectly encapsulates the spirit of this pursuit.
Now, it's your turn. Don't be afraid to experiment with different scoring patterns, to push your boundaries, and to find your own unique style. Each loaf you bake, each score you create, is an opportunity to learn, to grow, and to share the joy of crafting truly exceptional bread. Embrace the challenge, embrace the process, and embrace the beauty of a perfectly scored rustic loaf. The journey is as rewarding as the destination.
Unleash Your Inner Baker: Craft the Perfect Rustic Loaf!
Thanks for joining us on this baking journey! We hope you've gained valuable insights into achieving that stunning oven spring and rustic charm in your bread. Ready to put your newfound knowledge into practice?
- Bake your dream loaf today! Experiment with different flours, hydration levels, and scoring patterns to discover your perfect rustic bread recipe. Don't be afraid to get your hands a little messy – the best results often come from a bit of playful experimentation.
- Share your baking triumphs (and challenges!) We'd love to see your creations! Post a picture of your rustic loaf on social media and tag us – let's inspire each other.
- Explore advanced scoring techniques: Dive deeper into the world of bread scoring by searching for videos and tutorials online. There's a whole universe of patterns and styles waiting to be discovered!
What unique scoring pattern will you try next to elevate your rustic bread game?