
Layered GlutenFree Berry Cake for Summer Celebrations: Pro Techniques

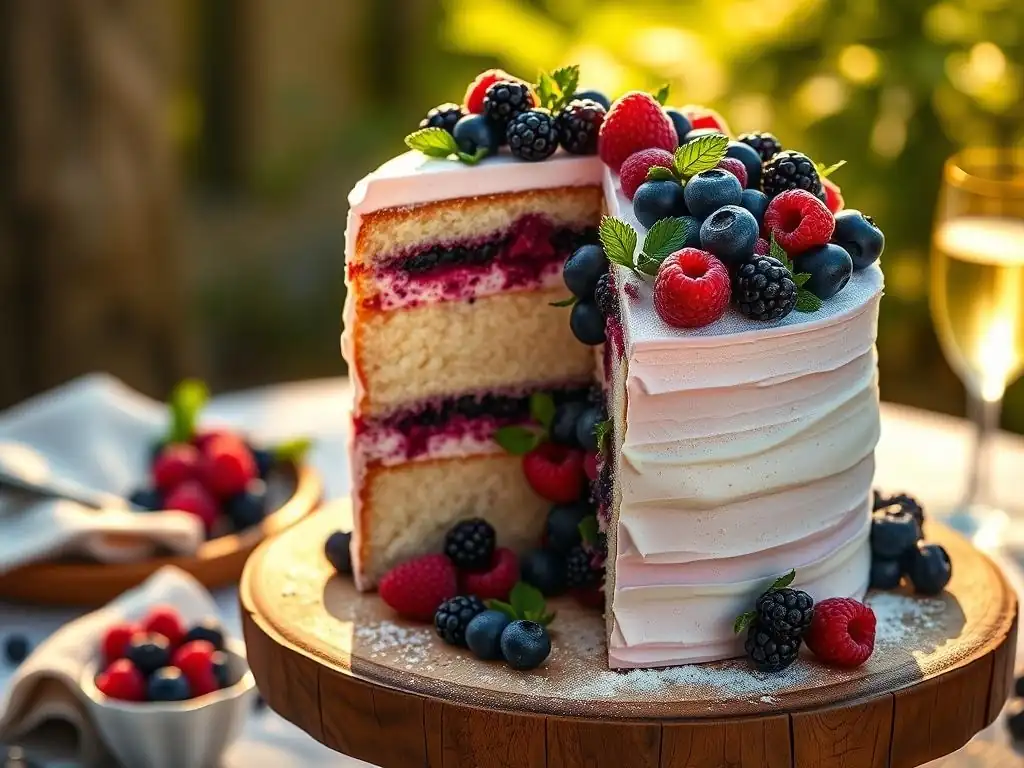
Welcome to BakeWithEase, your kitchen companion for unlocking baking brilliance! Ever dreamt of a show-stopping, layered cake that's both delicious and caters to dietary needs? Our latest guide delves into the secrets of crafting a stunning Glutenfree Berry Cake, perfect for any summer celebration. Discover professional techniques and simple steps that will have everyone asking for the recipe. Intrigued? Let's bake!
- Layered Gluten-Free Berry Cake for Summer Celebrations: Pro Techniques | BakeWithEase
- Introduction: Bake a Stunning Gluten-Free Berry Cake This Summer
- Why Choose Gluten-Free Baking for Summer Celebrations?
- Mastering the Gluten-Free Berry Cake Recipe: A Step-by-Step Guide
- Creating the Creamy Berry Filling and Frosting
- Assembling Your Layered Gluten-Free Berry Cake
- Pro Tips for Gluten-Free Berry Cake Success
- Variations and Adaptations of the Gluten-Free Berry Cake Recipe
- Conclusion: Enjoy Your Delicious Gluten-Free Berry Cake!
-
Frequently Asked Questions
- How can I ensure my gluten-free berry cake is not dry?
- What gluten-free flour blend works best for this layered berry cake recipe?
- Can I use frozen berries instead of fresh berries in the recipe?
- What are some alternatives to the frosting suggested in the Layered Gluten-Free Berry Cake recipe?
- How do I prevent my gluten-free cake layers from sticking to the pan?
- Final Reflection: Savor the Moment, Share the Joy
- Unleash Your Inner Pastry Chef: Bake This Berry Delight!
Layered Gluten-Free Berry Cake for Summer Celebrations: Pro Techniques | BakeWithEase
Introduction: Bake a Stunning Gluten-Free Berry Cake This Summer
Welcome to BakeWithEase! Summer is the perfect time to celebrate with vibrant, fresh desserts, and a layered berry cake is a classic choice. For those navigating dietary needs or simply exploring healthier options, a gluten-free version ensures everyone can enjoy a slice of joy.
This guide will walk you through creating a beautiful and delicious gluten-free berry cake, from selecting the right ingredients to mastering advanced techniques. Forget dry or crumbly gluten-free bakes; we're focusing on achieving a moist, tender crumb packed with the bright flavors of summer berries. Get ready to impress your guests with a showstopping gluten-free berry cake recipe that's as delightful to make as it is to eat.
Why Choose Gluten-Free Baking for Summer Celebrations?
Opting for gluten-free baking opens up possibilities for guests with celiac disease, gluten sensitivities, or those following specific dietary plans. Summer gatherings often bring together diverse groups, and offering a gluten-free dessert ensures inclusivity and thoughtful hospitality. Beyond dietary needs, many find gluten-free cakes to be surprisingly light and tender when properly made, offering a pleasant alternative to traditional wheat-based cakes. Mastering a versatile gluten-free berry cake recipe means you're prepared for any summer event, from casual picnics to elegant garden parties, ensuring everyone can indulge in a festive treat.
Health Benefits and Dietary Considerations of Gluten-Free Desserts
Choosing gluten-free desserts caters directly to individuals with celiac disease, an autoimmune disorder where gluten consumption damages the small intestine. Approximately 1 in 100 people worldwide have celiac disease, making gluten avoidance medically necessary. For these individuals, a carefully prepared gluten-free berry cake is not just a treat but a safe option that prevents serious health complications like nutrient deficiencies, anemia, and osteoporosis.
Beyond celiac disease, many people experience non-celiac gluten sensitivity, which can cause symptoms like bloating, stomach pain, fatigue, and headaches after eating gluten. While not an autoimmune response, avoiding gluten provides significant relief for these individuals.
Offering a gluten-free berry cake allows them to participate in celebrations without discomfort. Furthermore, focusing on whole ingredients often found in gluten-free baking, such as almond flour, coconut flour, and various starches, can sometimes introduce different nutrient profiles compared to standard wheat flour, potentially offering benefits like increased fiber or healthy fats depending on the specific blend used in your gluten-free berry cake recipe.
Summer Berries: The Perfect Gluten-Free Cake Filling and Topping
Summer berries are naturally gluten-free and burst with vibrant colors and flavors, making them ideal for cakes. Strawberries, blueberries, raspberries, and blackberries offer a delightful mix of sweetness and tartness that pairs wonderfully with creamy frostings and light cake textures. Their high water content and natural sugars make them excellent for compotes, coulis, and fresh fillings, adding moisture and intense flavor without relying on artificial additives.
Incorporating summer berries into your gluten-free berry cake recipe not only enhances taste but also boosts nutritional value. Berries are packed with antioxidants, vitamins (like Vitamin C and Vitamin K), and fiber. For instance, one cup of strawberries contains over 100% of the daily recommended intake of Vitamin C, while blueberries are renowned for their high antioxidant levels. Using fresh, seasonal berries ensures peak flavor and nutritional content, elevating a simple gluten-free cake into a healthy and delicious summer dessert that's naturally compatible with a gluten-free lifestyle.
Mastering the Gluten-Free Berry Cake Recipe: A Step-by-Step Guide
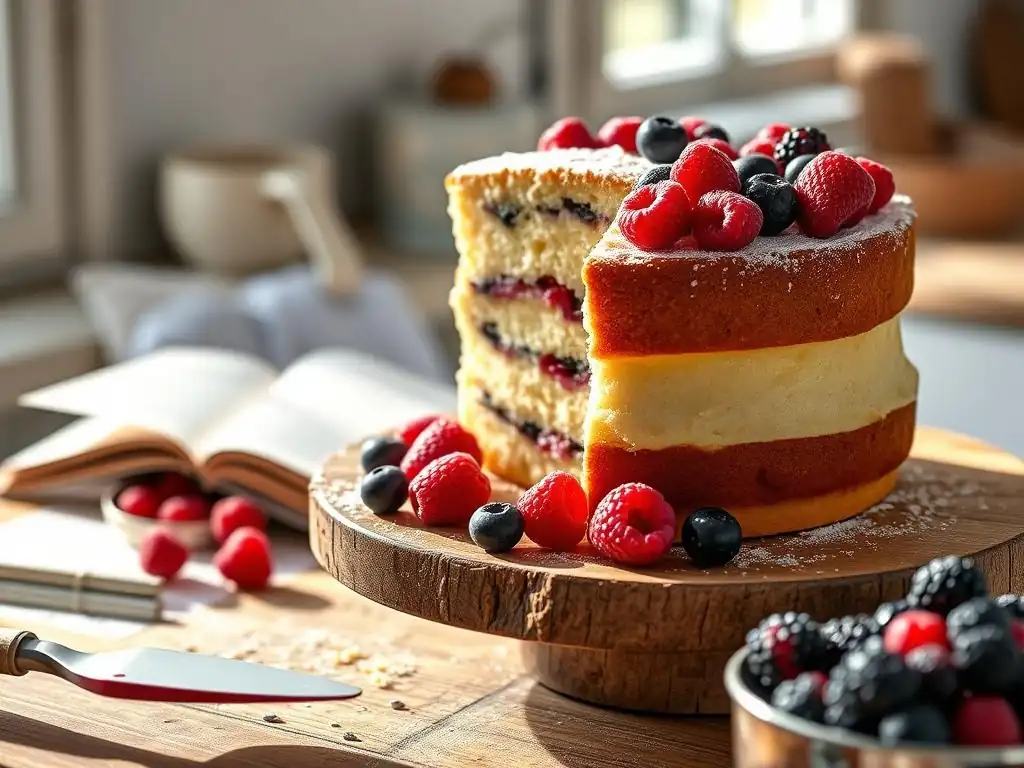
Creating a successful gluten-free berry cake requires attention to detail, particularly when it comes to flour selection and batter consistency. Unlike wheat flour, which relies on gluten development for structure, gluten-free baking uses a blend of different flours and starches to mimic similar properties. Understanding these components and their roles is crucial for achieving a tender crumb and stable structure in your finished cake. Follow these steps to build a beautiful and delicious layered gluten-free berry cake from scratch.
Understanding Gluten-Free Flour Blends for Cakes
Gluten-free flour blends are the cornerstone of successful gluten-free baking. They are typically composed of a mix of grain or nut flours (like rice flour, sorghum flour, oat flour, or almond flour) and starches (like tapioca starch, potato starch, or cornstarch). The combination is designed to provide structure, tenderness, and moisture absorption that gluten-free flours lack individually. A good quality blend is essential for a tender, moist gluten-free berry cake.
The ratio of flours to starches in a blend significantly impacts the final texture. A blend with a higher starch content tends to produce a lighter, more delicate crumb, which is often desirable for cakes. Conversely, a blend with more grain or nut flour might result in a denser cake.
Many commercially available blends are formulated specifically for baking, but understanding their composition helps you troubleshoot or even create your own custom blend for your gluten-free berry cake recipe. For example, a common ratio might be roughly 60% flour (like brown rice, white rice, and sorghum) to 40% starch (tapioca and potato).
Selecting the Right Gluten-Free Flour for Berry Cake
Choosing the appropriate gluten-free flour blend is critical for a moist and tender gluten-free berry cake. All-purpose gluten-free blends from reputable brands like Bob's Red Mill 1-to-1 Baking Flour or King Arthur Baking Gluten-Free All-Purpose Flour are often formulated to substitute cup-for-cup with wheat flour in many recipes, simplifying the process. These blends typically contain a mix of rice flours, sorghum flour, tapioca starch, and potato starch, providing a balanced structure and texture suitable for cakes.
Consider the specific properties you want in your gluten-free berry cake. For a lighter texture, a blend with a higher proportion of starches might be preferable. If you prefer a slightly nuttier flavor and denser crumb, a blend incorporating almond flour or oat flour (ensure certified gluten-free) could be a good choice. Always check the blend's ingredients and recommended uses; some are better suited for bread or pastries than delicate cakes. Using a blend specifically designed for cakes will generally yield the best results for your gluten-free berry cake recipe.
Prepping the Gluten-Free Flour Blend for Optimal Results
Properly preparing your gluten-free flour blend before mixing the batter can significantly improve your gluten-free berry cake's texture. Sifting the flour blend is highly recommended. Gluten-free flours and starches can compact easily in storage, and sifting helps to aerate them, removing lumps and ensuring they disperse evenly throughout the wet ingredients. This leads to a more uniform batter and a finer, less dense crumb in the finished cake.
Measure your gluten-free flour blend accurately, preferably by weight using a kitchen scale (e.g., 1 cup of a standard blend typically weighs around 120-140 grams, but check your package). Volume measurements can be inconsistent, especially with gluten-free flours which vary in density. After measuring, sift the flour blend along with other dry ingredients like baking powder, baking soda, and salt into a bowl. This ensures leavening agents and salt are evenly distributed, which is vital for the cake's rise and overall flavor profile. A well-prepped dry mix is the first step towards a perfect gluten-free berry cake.
Preparing the Berry-Infused Cake Batter
Creating the batter for your gluten-free berry cake involves carefully combining wet and dry ingredients to achieve the right consistency. Unlike wheat batters where overmixing develops tough gluten, gluten-free batters benefit from gentle mixing. The goal is to hydrate the flours and starches without overworking the mixture, which can lead to a dry or gummy texture.
Start by creaming softened butter and sugar until light and fluffy. This process incorporates air, which is essential for leavening, especially in gluten-free cakes that lack the structural support of gluten. Add eggs one at a time, mixing well after each addition. In a separate bowl, whisk together your prepped dry ingredients. Alternate adding small portions of the dry ingredients and a liquid (like milk or buttermilk, often specified in a gluten-free berry cake recipe) to the wet ingredients, beginning and ending with the dry. Mix only until just combined, scraping down the sides of the bowl as needed.
Achieving the Perfect Cake Batter Consistency
The consistency of gluten-free cake batter is slightly different from traditional batter; it might appear thicker or more paste-like initially due to the different absorption rates of gluten-free flours. The ideal consistency for a gluten-free berry cake batter should be smooth and pourable, but not watery. It should fall easily from the spoon in ribbons. If the batter is too thick, the cake can be dense and heavy; if too thin, it might not hold its structure or could sink in the middle.
Ensure your liquid ingredients are at room temperature. Cold liquids can seize the butter, affecting the emulsion and resulting in a lumpy batter. If your batter seems too thick after mixing according to the recipe, you can sometimes add an extra tablespoon or two of milk or buttermilk, mixing gently until the desired consistency is reached. Avoid the temptation to add too much liquid, as this can negatively impact the cake's structure and baking time. Proper consistency is key to a tender and moist gluten-free berry cake.
Incorporating Fresh Berries into the Cake Batter
Adding fresh berries directly into gluten-free cake batter requires a little care to prevent them from sinking to the bottom during baking or making the cake soggy. For a standard gluten-free berry cake recipe, tossing the berries with a tablespoon or two of your gluten-free flour blend before folding them into the batter is a common technique. This light coating helps suspend the berries within the batter as it bakes.
Gently fold the floured berries into the batter using a spatula, being careful not to overmix. Overmixing can crush the delicate berries and distribute their juice unevenly, potentially creating wet spots in the cake. Use about 1 to 1.5 cups of berries for a standard 8 or 9-inch two-layer cake recipe. Ensure the berries are dry before tossing them with flour; excess moisture is the main culprit behind sinking fruit and soggy spots. Even distribution of berries ensures every slice of your gluten-free berry cake offers bursts of fruity flavor.
Baking the Gluten-Free Berry Cake Layers
Baking gluten-free cakes requires precise temperature control and timing. Gluten-free batters can sometimes be more prone to drying out or collapsing if not baked correctly. Preparing your pans properly and understanding the signs of doneness are crucial for achieving perfectly baked layers for your gluten-free berry cake.
Preheat your oven thoroughly to the specified temperature, usually around 350°F (175°C). Ensure the oven has been at temperature for at least 15-20 minutes before placing the cakes inside. Prepare your cake pans by greasing and flouring them with gluten-free flour or using parchment paper rounds on the bottom. This prevents sticking and ensures the delicate gluten-free layers release cleanly after baking. Pour the batter evenly into the prepared pans, smoothing the tops with an offset spatula.
Oven Temperature and Baking Time for Gluten-Free Cakes
Maintaining the correct oven temperature is vital for successful gluten-free baking. An oven that is too hot can cause the cake to rise too quickly and then fall, resulting in a dense center, or it can brown the outside too much before the inside is cooked through. A temperature of 350°F (175°C) is standard for most gluten-free layer cakes. Consider using an oven thermometer to verify your oven's accuracy, as actual temperatures can vary by as much as 25-50°F (15-30°C) from the dial setting.
Baking time for gluten-free berry cake layers typically ranges from 25 to 35 minutes for 8 or 9-inch rounds, but this can vary based on the recipe, pan size, and oven. Start checking for doneness around the 25-minute mark.
The cake is done when the edges begin to pull away slightly from the sides of the pan, the top springs back gently when lightly touched, and a toothpick inserted into the center comes out clean or with a few moist crumbs attached (no wet batter). Avoid opening the oven door too frequently during the first 20 minutes of baking, as sudden temperature drops can cause the cake to sink.
Ensuring Even Baking and Avoiding a Soggy Bottom
Uneven baking and a soggy bottom are common challenges in cake baking, particularly with gluten-free recipes that might have higher moisture content or added fruit like berries. To promote even baking, position your cake pans in the center of the oven rack, ensuring they are not touching each other or the oven walls. If baking multiple layers, use two racks and stagger the pans, rotating them halfway through the baking time (e.g., after 15-20 minutes) to ensure uniform heat distribution.
To avoid a soggy bottom, especially when incorporating fresh berries into your gluten-free berry cake recipe, ensure the berries are tossed in flour as mentioned earlier. Also, make sure the cake is fully baked through. An underbaked cake will have a wet, dense layer at the bottom.
If you notice the edges are browning too quickly while the center is still wet, you can loosely tent the cake pans with aluminum foil for the remaining baking time. Letting the cakes cool in the pan for 10-15 minutes before inverting them onto a wire rack also helps them set properly and reduces the risk of the bottom sticking or becoming compressed.
Creating the Creamy Berry Filling and Frosting
A layered gluten-free berry cake wouldn't be complete without a luscious filling and frosting. These components not only add flavor and moisture but also contribute significantly to the cake's structure and visual appeal. For a summer cake, a light and tangy cream cheese frosting or a fresh berry compote makes the perfect complement to the sweet cake layers and bright berry flavors.
When preparing your filling and frosting, pay attention to temperature. Softened butter and cream cheese are essential for a smooth, lump-free frosting. Similarly, allowing any cooked berry fillings to cool completely before assembling the cake prevents them from melting the frosting or warming the cake layers excessively. Precision in measurement and technique will ensure your frosting is stable and your filling is flavorful, enhancing the overall experience of your gluten-free berry cake.
Making a Light and Fluffy Berry Cream Cheese Frosting
A cream cheese frosting is a classic choice for berry cakes, offering a delightful tangy counterpoint to the sweet berries and cake. For a light and fluffy texture, ensure your cream cheese and butter are properly softened to room temperature. This usually takes about 30-60 minutes out of the refrigerator. Using cold ingredients will result in a lumpy frosting that is difficult to spread.
Begin by beating the softened cream cheese and butter together in a large bowl with an electric mixer until smooth and creamy, which typically takes about 2-3 minutes on medium speed. Gradually add sifted powdered sugar, one cup at a time, mixing on low speed until just combined, then increasing the speed to medium and beating until light and fluffy. Incorporate a splash of vanilla extract and, for a subtle berry flavor and beautiful color, you can add a tablespoon or two of cooled berry puree or coulis.
Be cautious not to add too much liquid, as this can make the frosting too soft. Beat for an additional 2-3 minutes until the frosting is airy and spreadable, perfect for your gluten-free berry cake.
Tips for a Smooth and Stable Gluten-Free Frosting
Achieving a smooth and stable frosting for your gluten-free berry cake is key to successful layering and decoration. Using high-quality, full-fat cream cheese and butter provides the best structure. Ensure all your dairy ingredients are at the correct room temperature; this helps them emulsify properly, preventing separation and lumps. Sifting the powdered sugar is crucial to avoid grainy frosting; even powdered sugar can contain small clumps.
If your frosting seems too soft, especially in warm weather, you can add a bit more sifted powdered sugar (a tablespoon at a time) or chill the frosting in the refrigerator for 15-30 minutes. Chilling helps firm up the fats, making the frosting easier to work with. Conversely, if it's too stiff, you can add a tiny amount of milk or cream (half a teaspoon at a time) and beat until smooth.
For extra stability, particularly if you plan elaborate decorations or the cake will be displayed for an extended period, you can add a teaspoon of meringue powder or a small amount of vegetable shortening (about 1/4 cup per batch of frosting), beating it in thoroughly. These techniques ensure your frosting holds its shape beautifully on your gluten-free berry cake.
Preparing the Layered Berry Filling
A vibrant berry filling adds another layer of flavor and moisture to your gluten-free berry cake. You can use fresh berries directly, make a quick compote, or prepare a smooth coulis. The choice depends on the texture and intensity of flavor you desire. For layering, a slightly thickened filling works best to prevent it from squeezing out the sides when the cake is assembled.
A simple berry compote can be made by simmering about 2-3 cups of mixed berries (like strawberries, blueberries, and raspberries) with 1/4 cup of sugar and a tablespoon of lemon juice in a saucepan over medium heat. Cook, stirring occasionally, until the berries break down slightly and the mixture thickens, about 10-15 minutes.
For a thicker filling, you can mix a teaspoon of cornstarch or tapioca starch with a tablespoon of cold water and stir it into the simmering compote during the last few minutes of cooking. Remove from heat and let it cool completely before using it for your gluten-free berry cake.
Choosing the Best Berries for the Filling
Selecting the right berries significantly impacts the flavor and texture of your layered berry filling. Fresh, in-season berries offer the most intense flavor. Strawberries are classic and sweet, while raspberries provide tartness and a slightly seedy texture. Blueberries become jammy and sweet when cooked, and blackberries offer a deeper, earthier flavor. A mix of berries often provides the most complex and appealing taste profile for a gluten-free berry cake filling.
Consider the moisture content of the berries. Strawberries release a significant amount of liquid when cooked, while blueberries hold their shape better. If using high-moisture berries, you might need to cook the compote longer or use slightly more thickener. Frozen berries can also be used, but they will release more liquid as they thaw and cook, so adjust cooking time accordingly. Ensure any frozen berries are thawed and drained slightly before cooking to control the moisture level in your filling for the gluten-free berry cake.
Making a Berry Compote or Coulis for Layering
A berry compote offers chunks of fruit and a slightly rustic texture, perfect for layering between cake slices. As described earlier, simmering berries with sugar and a thickener works well. Allow the compote to cool fully; warm compote will melt your frosting. For a smoother, more refined filling, a berry coulis is an excellent option.
To make a coulis, simmer berries with a little sugar and lemon juice until softened, about 5-10 minutes. Then, press the mixture through a fine-mesh sieve to remove seeds and skins, resulting in a smooth puree. You can thicken the coulis slightly by simmering the strained liquid further until it reduces to your desired consistency, or by whisking in a cornstarch slurry and briefly simmering. A coulis provides intense berry flavor without the texture of seeds or fruit chunks, creating a clean layer within your gluten-free berry cake. Ensure the coulis is thoroughly chilled before using it for layering.
Assembling Your Layered Gluten-Free Berry Cake
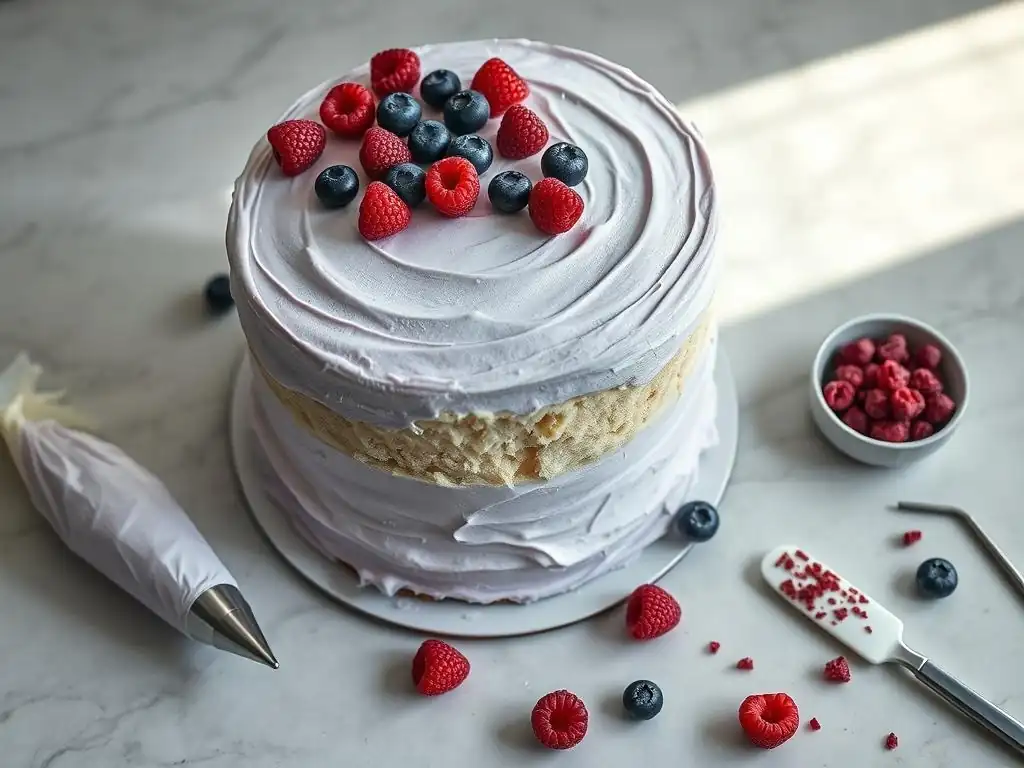
Assembling a layered cake requires patience and a few simple techniques to ensure it stands tall and looks beautiful. Working with cooled cake layers and stable frosting is key. Taking the time to level the layers and build the cake carefully will result in a professional-looking finish for your gluten-free berry cake.
Have all your components ready: cooled cake layers, chilled filling (compote or coulis), and prepared frosting. A rotating cake stand is incredibly helpful for easy frosting and decorating. Gather your tools, such as a long serrated knife for leveling, an offset spatula for spreading, and potentially a piping bag for frosting dams.
Leveling the Cake Layers for a Professional Finish
Leveling cake layers is essential for creating a stable, even stack for your layered gluten-free berry cake. Cakes often dome slightly in the center during baking. To level, place a cooled cake layer on a flat surface. Using a long serrated knife, hold it parallel to the surface and gently saw back and forth, removing the domed top to create a flat surface.
You can use a cake leveler tool for more precision, adjusting it to the desired height. Ensure your cakes are completely cool before attempting to level them; warm cakes are too delicate and will crumble. Save the cake scraps from leveling; they make great cake pops or can be crumbled over ice cream! Leveling ensures each layer of your gluten-free berry cake sits flat, preventing leaning and creating neat layers of filling and frosting.
Layering the Cake with Filling and Frosting
Layering your gluten-free berry cake involves stacking the leveled cake layers with alternate layers of frosting and berry filling. Place the first cake layer flat-side down on your serving plate or cake board. If using a soft filling like compote or coulis, it's wise to pipe a "dam" of frosting around the outer edge of the cake layer first. This ring of frosting acts as a barrier, preventing the filling from squeezing out when the next layer is added.
Spread a generous layer of your berry filling within the frosting dam. Place the second cake layer on top, flat-side up (the cut side should be facing down onto the filling). Gently press down to ensure it's level. Repeat the process for additional layers.
For the top layer, place it flat-side down. Apply a thin "crumb coat" of frosting all over the cake – sides and top. This thin layer traps any loose crumbs. Chill the cake in the refrigerator for 20-30 minutes until the crumb coat is firm before applying the final layer of frosting to your gluten-free berry cake.
Creating a Stable and Visually Appealing Cake
Building a stable layered gluten-free berry cake is crucial, especially for taller cakes or if transporting. Ensure your cake layers are completely cool. Warm layers can melt the frosting and make the cake unstable. Use a sturdy cake board as the base. If making a cake with three or more layers, consider using cake dowels or straws inserted through the bottom layers to support the weight of the layers above.
For visual appeal, aim for even layers of frosting and filling. Use an offset spatula to spread frosting smoothly. For clean sides, apply a generous amount of frosting to the sides and use a bench scraper held perpendicular to the cake board to smooth the sides as you rotate the cake stand. Take your time during assembly; rushing can lead to uneven layers or messy frosting. A well-assembled gluten-free berry cake is a joy to behold before you even start decorating.
Decorating Your Gluten-Free Berry Cake for Summer
Decorating your gluten-free berry cake allows you to add a personal touch and make it celebration-ready. For a summer theme, fresh berries are the obvious and most fitting decoration. They add color, freshness, and reinforce the cake's flavor profile.
After applying the final coat of frosting and smoothing it, you can arrange fresh whole or sliced berries on top in patterns or simply scatter them artfully. Consider adding a few sprigs of fresh mint or small edible flowers for extra color and elegance. For a simple yet effective look, press sliced strawberries or whole raspberries into the sides of the cake. A border piped around the top and bottom edges can also add a polished finish to your gluten-free berry cake.
Easy Summer Cake Decoration Ideas
Simple decorations can make a big impact on your gluten-free berry cake. A rustic look is easily achieved by using an offset spatula to create swirls or peaks in the frosting on top and sides. Then, simply pile fresh mixed berries generously on top. This requires minimal skill but looks beautiful and inviting.
Another easy idea is a "naked" or semi-naked cake look. This involves applying a very thin layer of frosting to the sides, allowing some of the cake layers to show through. You can then add a drip made from white chocolate ganache (ensure chocolate is gluten-free) and decorate the top with a crown of fresh berries and a dusting of powdered sugar. This style is modern and highlights the layers of your gluten-free berry cake and its filling.
Advanced Gluten-Free Cake Decorating Techniques
For those wanting to try more advanced decorating, your gluten-free berry cake provides a great canvas. Once the cake is crumb-coated and chilled, apply a thicker layer of frosting and smooth it perfectly using a bench scraper. You can then use piping bags fitted with various tips to create decorative borders, rosettes, or other patterns on top and around the sides.
Consider making frosting swirls or waves using a large offset spatula. You can also create a watercolor effect by swirling different shades of berry-tinted frosting. For a showstopper, arrange berries and perhaps some edible flowers or chocolate curls in a cascading pattern down one side of the cake. Remember to keep perishable decorations like fresh berries chilled until just before serving your beautifully decorated gluten-free berry cake.
Pro Tips for Gluten-Free Berry Cake Success
Baking gluten-free can sometimes present unique challenges, but with a few pro tips, you can consistently achieve excellent results with your gluten-free berry cake recipe. Understanding common pitfalls and how to avoid them will elevate your baking from good to great, ensuring your cake is moist, tender, and holds together beautifully.
These tips cover crucial aspects like preventing dryness, ensuring the cake doesn't crumble, and handling storage to maintain freshness. Applying these techniques will help you master the art of making a delicious gluten-free berry cake that everyone will rave about, regardless of dietary needs.
Preventing a Crumbly Gluten-Free Cake
A common issue with gluten-free cakes is a tendency to be crumbly. This often stems from an imbalance in the flour blend, insufficient moisture, or improper handling. To prevent a crumbly gluten-free berry cake, ensure your flour blend contains a good mix of flours and starches, as starches help bind the ingredients. Using a recipe specifically formulated for gluten-free baking is always a good starting point.
Adequate moisture is also key. Ensure your recipe includes enough wet ingredients like eggs, butter, milk, or sour cream. Adding an ingredient like xanthan gum or psyllium husk powder (typically 1/2 to 1 teaspoon per cup of gluten-free flour blend) is highly recommended in many gluten-free recipes. These gums act as binders, mimicking the role of gluten and providing elasticity and structure, which significantly reduces crumbling in your gluten-free berry cake. Avoid overmixing the batter, as this can also negatively impact the texture.
Keeping Your Gluten-Free Cake Moist
Moisture is paramount for a delicious gluten-free berry cake. Gluten-free flours tend to absorb more liquid than wheat flour, potentially leading to dry results if the recipe isn't balanced. Using ingredients known for adding moisture, such as buttermilk, sour cream, yogurt, applesauce, or oil (instead of solely butter), can help. Brown sugar also retains more moisture than white sugar.
Do not overbake your cake. Baking even a few minutes too long can dry out a gluten-free cake very quickly. Check for doneness at the lower end of the suggested baking time range. Once baked, allow the cake layers to cool in the pan for only the specified time (usually 10-15 minutes) before transferring them to a wire rack to cool completely.
Cooling cakes upside down on a rack can also help retain moisture by trapping steam. Properly wrapped and stored cake layers (see storage tips below) will also stay moist longer before assembly. These steps are vital for a tender, moist gluten-free berry cake.
Storage and Serving Suggestions for Gluten-Free Berry Cake
Proper storage is essential to maintain the freshness and texture of your gluten-free berry cake. Unfrosted cake layers can be wrapped tightly in plastic wrap once completely cooled and stored at room temperature for 1-2 days, or in the refrigerator for up to 5 days. For longer storage, wrap them well and freeze for up to 2-3 months. Thaw frozen layers in the refrigerator overnight.
Once assembled and frosted, the gluten-free berry cake should be stored in an airtight container in the refrigerator, especially if it contains fresh berries or cream cheese frosting. It will keep well for 3-4 days. Allow the cake to sit at room temperature for about 20-30 minutes before serving to allow the frosting to soften slightly and the flavors to meld. Slicing the cake with a warm, clean knife will result in neater slices, showcasing the beautiful layers of your gluten-free berry cake.
Variations and Adaptations of the Gluten-Free Berry Cake Recipe
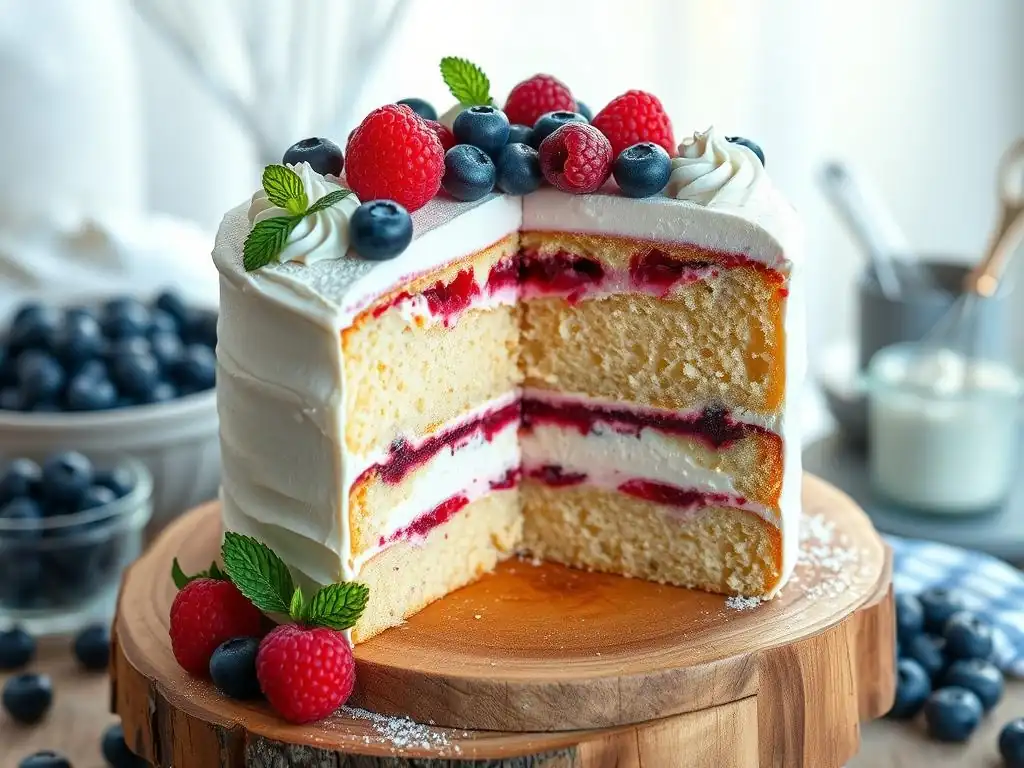
The basic gluten-free berry cake recipe is incredibly versatile and can be adapted to suit different dietary needs or flavor preferences. Exploring variations allows you to customize the cake for specific occasions or simply to try something new. These adaptations demonstrate the flexibility of gluten-free baking and the endless possibilities with summer berries.
Whether you need to make the cake dairy-free, want to experiment with different berry combinations, or wish to add extra layers of flavor with zest or spices, these variations offer exciting ways to modify the core gluten-free berry cake recipe and make it uniquely yours.
Dairy-Free Gluten-Free Berry Cake Option
Creating a dairy-free version of your gluten-free berry cake is straightforward with readily available substitutes. Replace dairy milk with unsweetened non-dairy milk alternatives like almond milk, soy milk, oat milk, or coconut milk beverage. Ensure your non-dairy milk is at room temperature before adding it to the batter.
For butter, use a high-quality dairy-free butter stick that's formulated for baking. These substitutes perform similarly to dairy butter in creaming and adding richness. For the cream cheese frosting, use dairy-free cream cheese alternatives and combine them with dairy-free butter sticks and powdered sugar. Note that dairy-free frostings can sometimes be slightly softer than their dairy counterparts, so chilling is often necessary for stability when assembling your dairy-free gluten-free berry cake.
Different Berry Combinations for a Unique Flavor Profile
While mixed berries are classic, experimenting with specific berry combinations can yield unique and delightful flavor profiles for your gluten-free berry cake. A strawberry-raspberry combination offers a balance of sweetness and tartness, creating a bright, summery taste. Blueberry and lemon zest is another popular pairing; the lemon enhances the natural sweetness of the blueberries.
Consider a blackberry and elderflower pairing for a more sophisticated flavor. The floral notes of elderflower complement the deep, slightly earthy taste of blackberries beautifully. For a truly vibrant cake, use only raspberries for both the cake and filling, leaning into their distinct tartness. Feel free to mix and match based on what's freshest and most appealing to you, customizing the gluten-free berry cake recipe to your personal taste.
Adding Zest or Spices for Extra Flavor
Adding citrus zest or spices can significantly enhance the flavor depth of your gluten-free berry cake, complementing the sweetness of the berries. Lemon zest is a classic pairing with most berries; its bright, aromatic oils lift the overall flavor profile without adding excess liquid. Orange or lime zest can also be used for a different citrus note.
Spices like a pinch of cardamom or a touch of cinnamon can add warmth and complexity, particularly good with blueberries or blackberries. A tiny amount of freshly grated nutmeg can also be surprisingly good in a berry cake. Add zest to the wet ingredients and spices to the dry ingredients when preparing the batter. Experiment with small amounts initially, as spices can be potent. These additions can transform a simple gluten-free berry cake into a more complex and memorable dessert.
Conclusion: Enjoy Your Delicious Gluten-Free Berry Cake!
You've successfully navigated the techniques to bake a stunning, layered gluten-free berry cake! From understanding gluten-free flours and perfecting your batter consistency to creating luscious fillings and frosting, you now have the skills to create a truly exceptional dessert. This gluten-free berry cake recipe is more than just a collection of ingredients; it's a pathway to creating joyful moments and delicious memories, ensuring everyone can partake in the celebration.
With moist layers bursting with fresh berry flavor and creamy frosting, this cake is sure to become a summer favorite. Practice makes perfect, so don't hesitate to bake this gluten-free berry cake again, perhaps trying some of the suggested variations. Enjoy sharing your beautiful creation with friends and family!
Frequently Asked Questions
How can I ensure my gluten-free berry cake is not dry?
To avoid a dry cake, use moist ingredients like applesauce or yogurt. Also, be careful not to overbake the cake; check for doneness a few minutes early.
What gluten-free flour blend works best for this layered berry cake recipe?
A 1:1 gluten-free flour blend with xanthan gum already added is ideal. This type of blend closely mimics wheat flour and ensures a good cake structure.
Can I use frozen berries instead of fresh berries in the recipe?
Yes, you can use frozen berries, but do not thaw them before adding them to the batter. Thawing can make the batter too watery and affect the cake's texture.
What are some alternatives to the frosting suggested in the Layered Gluten-Free Berry Cake recipe?
Consider a dairy-free coconut whipped cream for a lighter option or a simple lemon glaze for a tangy flavor. Cream cheese frosting works well too, if dairy is not a concern.
How do I prevent my gluten-free cake layers from sticking to the pan?
Thoroughly grease and flour your cake pans with a gluten-free flour blend. Alternatively, line the bottom of the pan with parchment paper rounds for easy removal.
The seemingly simple act of baking a gluten-free berry cake transcends mere culinary creation; it becomes a celebration of inclusivity, resourcefulness, and the enduring power of shared joy. In a world increasingly focused on dietary restrictions and mindful eating, this recipe offers a delicious solution that doesn't compromise on flavor or festive spirit. It's a testament to the fact that deliciousness knows no boundaries.
This recipe, born from a desire to create something both beautiful and accessible, reflects a broader cultural shift towards mindful consumption and the celebration of diverse dietary needs. The process of perfecting this gluten-free masterpiece, from sourcing the finest ingredients to mastering the delicate layering technique, has been a deeply rewarding experience. The best things in life are the people we love, the places we've been, and the memories we've made along the way.
This sentiment perfectly encapsulates the spirit of sharing this cake – a symbol of connection and celebration.
Now, I invite you to step into your kitchen, armed with this recipe and a spirit of adventure. Don't just bake a cake; create a memory. Experiment with different berry combinations, adapt the frosting to your preferences, and most importantly, share the delicious results with those you cherish. Let this gluten-free berry cake be a testament to your culinary creativity and a symbol of the joy found in simple, shared moments. The summer awaits – let's bake!
Unleash Your Inner Pastry Chef: Bake This Berry Delight!
Thanks for joining us on this delicious journey into gluten-free baking! We hope you gained valuable insights and inspiration for creating stunning layered cakes. Ready to take your baking skills to the next level?
- Bake the cake: Use our recipe (found throughout the article) to create your own masterpiece. Don't be afraid to experiment with different berry combinations!
- Share your creation: Post a picture of your finished cake on social media and tag us @BakeWithEase—we'd love to see your results!
- Explore more recipes: Dive into our extensive recipe library for even more gluten-free baking inspiration.
What unique twist will you add to this already amazing gluten-free berry cake? Let us know in the comments below!