
Your Journey to Perfectly Tempered Chocolate Starts Here.

Welcome to BakeWithEase, your haven for baking brilliance! Ever dreamt of creating desserts with a professional sheen and a satisfying snap? Unlock the secrets to achieving that perfectly tempered dark chocolate finish with our comprehensive guide. Dive in and discover the techniques that elevate your baking from ordinary to extraordinary, opening a world of possibilities for your next culinary masterpiece. Are you ready to conquer the art of tempering?
- Mastering Chocolate Tempering: A BakeWithEase Guide
- Why Temper Chocolate? Understanding the Importance for Baking
-
Perfectly Tempered Dark Chocolate Recipe: Step-by-Step
- Ingredients for Perfectly Tempered Dark Chocolate
- Equipment Needed for Chocolate Tempering Success
- Step 1: Preparing the Dark Chocolate for Tempering
- Step 2: Melting the Dark Chocolate Properly
- Step 3: Cooling and Seeding the Chocolate (Seeding Method)
- Step 4: Maintaining the Correct Temperature for Tempering Dark Chocolate
- Step 5: Testing Your Tempered Dark Chocolate
- Alternative Chocolate Tempering Methods for Home Bakers
- Troubleshooting Common Chocolate Tempering Problems
- Using Your Perfectly Tempered Dark Chocolate Recipe
- Tips and Tricks for Successful Chocolate Tempering at Home
- Conclusion: Enjoy the Rewards of Perfectly Tempered Dark Chocolate
-
Frequently Asked Questions
- How important is it to temper dark chocolate for baking?
- What's the best way to melt dark chocolate for tempering?
- What are the key temperature ranges to watch for when tempering dark chocolate?
- What happens if my chocolate seizes during the tempering process?
- Can I use tempered dark chocolate for making chocolate-covered strawberries?
- Final Reflection: The Enduring Allure of Perfectly Tempered Chocolate
- Unlock Your Inner Chocolatier: Master the Art of Tempering!
Mastering Chocolate Tempering: A BakeWithEase Guide
Welcome to the world of chocolate tempering, a fundamental skill for any baker looking to achieve professional-quality results. Tempering chocolate isn't just about melting and cooling; it's a precise process that involves controlling temperature to stabilize the chocolate's crystalline structure.
When done correctly, tempered chocolate has a beautiful sheen, a satisfying snap when broken, and remains stable at room temperature without melting or developing a dull, gray appearance. This guide will walk you through the steps to master a perfectly tempered dark chocolate recipe, opening up a world of possibilities for your baking creations, from elegant truffles to glossy chocolate-covered treats.
Achieving perfectly tempered dark chocolate might seem daunting at first, but with a little practice and attention to detail, it's entirely within reach for the home baker. We'll explore the science behind why tempering works, the essential equipment you'll need, and a step-by-step method using the reliable seeding technique. By understanding the principles and following the process carefully, you'll be well on your way to creating stunning confections that impress both visually and texturally. Let's dive into the art and science of tempering chocolate, starting with why this technique is so crucial in the first place.
Why Temper Chocolate? Understanding the Importance for Baking
The Science Behind Tempered Chocolate: Crystal Formation
Chocolate is composed of cocoa butter, which is a polymorphic fat, meaning it can crystallize into different forms depending on how it's heated and cooled. There are six known crystal forms (Type I through Type VI), each with a different melting point and stability. Untempered chocolate contains a mix of unstable crystal forms (Types I, II, III, and IV), which melt easily, resulting in a soft texture and dull finish. The goal of tempering is to encourage the formation of stable Type V crystals, which have a melting point around 88-91°F (31-33°C) for dark chocolate.
When chocolate is melted and then cooled improperly, these unstable crystals dominate. However, by carefully controlling the temperature through melting, cooling, and reheating cycles, we guide the cocoa butter molecules to align into the desired Type V structure. This specific crystalline structure is responsible for the desirable characteristics of tempered chocolate: its firmness, resistance to melting at room temperature, shiny surface, and crisp snap. Understanding this science is the first step in mastering the perfectly tempered dark chocolate recipe.
Benefits of Perfectly Tempered Chocolate: Shine, Snap, and Stability
The most immediate benefits of using perfectly tempered dark chocolate are visible and palpable. Firstly, it boasts a beautiful, glossy sheen that makes finished products look professional and appealing. Think of the mirror-like surface on a chocolate bar or the elegant coating on a bonbon. This aesthetic appeal is directly linked to the uniform alignment of the stable Type V cocoa butter crystals reflecting light evenly.
Secondly, tempered chocolate has a characteristic clean snap when broken. This crisp texture is a hallmark of high-quality chocolate work and is achieved because the stable crystal lattice is firm and brittle at room temperature. Finally, and perhaps most importantly for practical applications, perfectly tempered chocolate is stable.
It sets firmly, releases easily from molds, resists fingerprints, and doesn't melt readily in your hand. This stability makes it ideal for dipping, coating, molding, and creating delicate decorations that hold their shape. Without proper tempering, achieving these results is impossible; the chocolate would be soft, dull, and prone to melting prematurely.
Untempered Chocolate vs. Tempered Chocolate: Key Differences
The contrast between untempered and tempered chocolate is stark and immediately noticeable. Untempered chocolate, often simply melted and cooled without temperature control, typically appears dull, streaky, or gray. This discoloration is known as "bloom," specifically fat bloom, caused by unstable fat crystals migrating to the surface. Its texture is soft and crumbly, lacking any discernible snap when broken. It melts very quickly at room temperature, making it unsuitable for many confectionery applications like dipping or molding.
In contrast, properly tempered chocolate is visually appealing with a consistent, high-gloss finish. It sets up firmly and quickly, usually within minutes at room temperature. When you break a piece, it produces a distinct, sharp snap. Furthermore, tempered chocolate is much more resistant to melting at typical room temperatures, staying solid and stable, which is crucial for products like chocolate bars, bonbons, or dipped fruits that need to maintain their form and appearance. The perfectly tempered dark chocolate recipe ensures you achieve these superior qualities every time.
Perfectly Tempered Dark Chocolate Recipe: Step-by-Step
Creating perfectly tempered dark chocolate involves carefully controlling the temperature through a process that encourages stable crystal formation. The seeding method is one of the most reliable techniques for home bakers, involving melting chocolate and then cooling it down by adding solid, already-tempered chocolate (the "seed"). This seed chocolate contains the stable Type V crystals needed to guide the rest of the melted chocolate into the correct structure.
This step-by-step guide focuses on using the seeding method to achieve a perfectly tempered dark chocolate recipe. We will cover the necessary ingredients and equipment, the precise temperature ranges required, and the techniques for each stage of the process. Following these steps diligently will help you transform simple dark chocolate into a versatile medium ready for dipping, molding, or decorating, resulting in professional-looking treats every time. Let's gather what we need and begin this rewarding process.
Ingredients for Perfectly Tempered Dark Chocolate
The primary ingredient, of course, is dark chocolate. However, not all dark chocolate is created equal for tempering. For best results, use high-quality dark chocolate that contains at least 60-70% cocoa solids and, crucially, is made with 100% cocoa butter (not vegetable oils or other fat substitutes). Couverture chocolate, specifically formulated for tempering, is an excellent choice as it contains a higher percentage of cocoa butter, typically around 32-39%, which makes the tempering process more predictable and the final result glossier and snappier.
You will need a sufficient quantity of chocolate for your project, typically starting with at least 8-10 ounces (about 225-285 grams) to make the process easier to manage, especially when using the seeding method. You will also need about 25-30% of the total weight of chocolate in solid, finely chopped pieces or callets to use as seed chocolate. For example, if you start with 10 ounces of chocolate, you'll need roughly 2.5 to 3 ounces of solid chocolate for seeding. Ensure both the melting chocolate and the seed chocolate are from the same batch and type for consistency.
Equipment Needed for Chocolate Tempering Success
Having the right tools makes the tempering process significantly smoother and more accurate. A reliable digital thermometer is absolutely essential; an instant-read thermometer is highly recommended for quick and precise temperature checks. You will also need a heatproof bowl, preferably glass or stainless steel, to melt the chocolate. Using a double boiler setup (a bowl set over a pot of simmering water) is the gentlest and most controlled way to melt chocolate, although a microwave can be used with extreme caution.
Other helpful tools include a rubber spatula or scraper for stirring and working with the chocolate, and a surface for cooling if using the tablier method (though not strictly necessary for seeding). For the seeding method, ensuring the seed chocolate is finely chopped helps it melt quickly and evenly into the melted chocolate, facilitating the tempering process. A clean, dry workspace is also critical, as even a tiny amount of water can cause chocolate to seize.
Step 1: Preparing the Dark Chocolate for Tempering
Preparation is key to successful chocolate tempering. Start by finely chopping the dark chocolate if you are using bars or blocks. Smaller pieces will melt more evenly and quickly, reducing the risk of scorching. If you are using chocolate callets or wafers designed for melting, chopping is not necessary.
Divide your chocolate into two portions: approximately 70-75% of the total amount for melting and the remaining 25-30% to be used as seed chocolate. Set the seed chocolate aside in a separate bowl. Ensure all your equipment is completely dry before you begin, as moisture is the enemy of melting chocolate. A clean, dry environment helps prevent the chocolate from seizing, where it suddenly turns from a smooth liquid into a thick, pasty mass.
Step 2: Melting the Dark Chocolate Properly
The most controlled way to melt the initial portion of dark chocolate is using a double boiler. Fill a pot with about an inch or two of water and bring it to a gentle simmer. Place the bowl containing 70-75% of your chopped dark chocolate over the pot, ensuring the bottom of the bowl does not touch the water. The steam from the simmering water will gently heat the bowl and melt the chocolate. Stir the chocolate frequently with a dry rubber spatula to ensure even melting and prevent hot spots.
Heat the dark chocolate until it is completely melted and reaches a temperature of approximately 115-120°F (46-49°C). This temperature ensures all the cocoa butter crystals, including the unstable ones, are melted. Remove the bowl from the heat source (the pot of water) as soon as it reaches the target temperature. Ensure no steam or water droplets get into the chocolate. If using a microwave, melt in 20-30 second intervals, stirring thoroughly after each interval, until mostly melted, then stir until smooth, checking the temperature frequently to avoid overheating past 120°F (49°C).
Step 3: Cooling and Seeding the Chocolate (Seeding Method)
Once the dark chocolate is fully melted and has reached the initial temperature of 115-120°F (46-49°C), remove it from the heat and begin the cooling process using the seeding method. Add the reserved 25-30% of solid, finely chopped dark chocolate (the seed chocolate) to the melted chocolate in the bowl.
Stir the mixture continuously with a dry spatula. The solid seed chocolate will help cool down the melted chocolate while introducing stable Type V crystals. As the mixture cools, the seed chocolate will gradually melt, and the stable crystals will encourage the rest of the chocolate to form the desired structure. Continue stirring until the chocolate cools to the working temperature range for dark chocolate, which is typically between 84-88°F (29-31°C). The chocolate should thicken slightly as it cools. Ensure all the seed chocolate pieces have melted and are fully incorporated.
Understanding the Seeding Method for Chocolate Tempering
The seeding method is effective because it provides a ready source of stable Type V cocoa butter crystals. When the melted chocolate is cooled to the correct temperature range (84-88°F / 29-31°C for dark chocolate), these seed crystals act as templates, encouraging the liquid cocoa butter to crystallize around them in the desired Type V form. This process bypasses the formation of undesirable, unstable crystal types that occur when chocolate cools randomly.
Adding 25-30% seed chocolate is usually sufficient to cool the bulk of the chocolate down to the working temperature while providing enough stable crystals. The continuous stirring ensures the temperature is uniform throughout the mixture and helps distribute the seed crystals effectively.
If the chocolate cools too much and starts to become too thick before all the seed melts, you can gently warm it slightly (as described in the next step) to bring it back into the working range. This precise control over temperature and crystal formation is what makes the seeding method a reliable way to achieve a perfectly tempered dark chocolate recipe.
Step 4: Maintaining the Correct Temperature for Tempering Dark Chocolate
After cooling the chocolate with the seed to 84-88°F (29-31°C), you need to gently raise its temperature slightly to the working temperature range for dark chocolate, which is typically 88-91°F (31-33°C). This step melts any unstable crystals that might have formed during the cooling phase while keeping the desired Type V crystals intact and ready to crystallize the rest of the chocolate.
To achieve this, you can place the bowl back over the warm (but not simmering) water bath for just a few seconds at a time, stirring constantly, or use a heat gun on a very low setting, moving it continuously over the surface while stirring. Alternatively, if using a microwave, warm it in 5-10 second bursts, stirring well after each, until it reaches the target temperature.
Be extremely careful not to overheat the chocolate past 91°F (33°C), as this will melt the stable Type V crystals, and you'll have to start the tempering process over. Once the chocolate is within the 88-91°F (31-33°C) range and holds that temperature while remaining fluid, it is considered tempered and ready to use.
Step 5: Testing Your Tempered Dark Chocolate
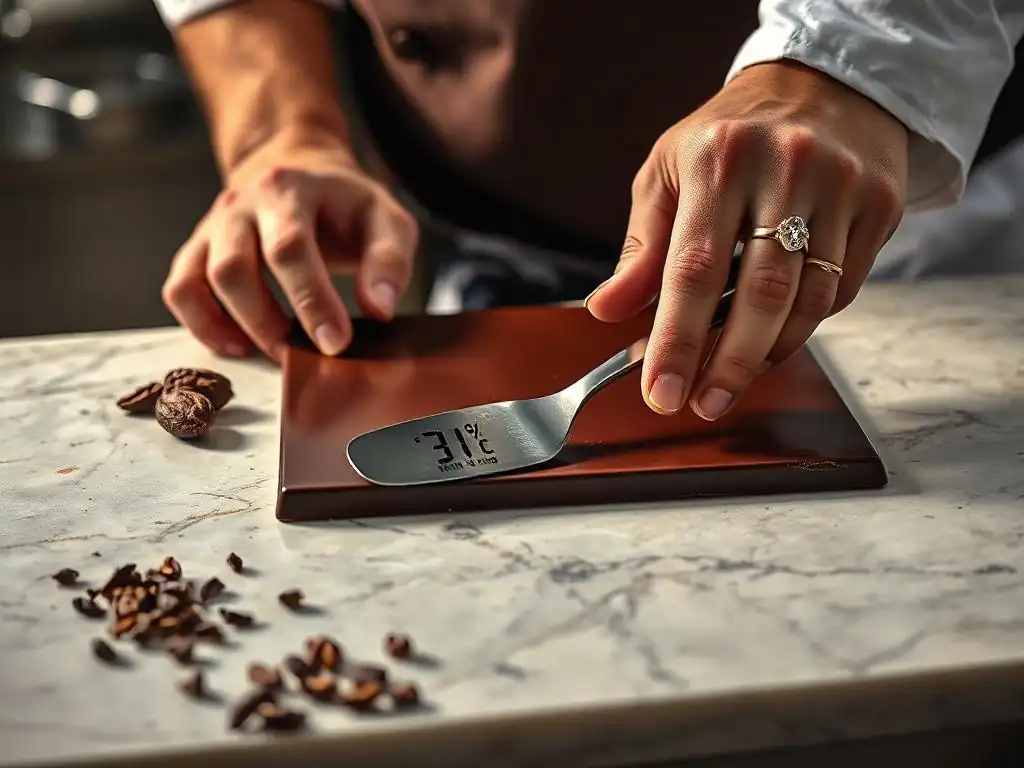
Before using your chocolate for dipping or molding, it's crucial to test if it is properly tempered. A simple and effective test is the "spatula test" or "parchment test." Dip the tip of a clean, dry metal spatula or a small piece of parchment paper into the tempered chocolate. Lift it out and let the excess drip off.
Set the spatula or parchment aside at room temperature (ideally around 68-70°F / 20-21°C) or, even better, place it in the refrigerator for just 3-5 minutes. If the chocolate is properly tempered, it should set quickly, appear glossy, and be firm to the touch with no streaks or dull spots. If it remains soft, sticky, or has dull patches, it is not properly tempered, and you will need to adjust the temperature and potentially repeat the seeding process (usually by adding a bit more seed or gently reheating and recooling).
The Snap Test: Knowing When Your Chocolate is Ready
Another confirmation of successful tempering is the "snap test." Once the chocolate on your test spatula or parchment has fully set (after the 3-5 minutes in the fridge or about 10-15 minutes at room temperature), carefully break the piece of chocolate.
Properly tempered dark chocolate will break with a clean, sharp snap. Untempered or improperly tempered chocolate, on the other hand, will bend, be soft, or break with a crumbly texture rather than a crisp snap. This distinctive snap is a direct result of the stable Type V crystal structure. Achieving this snap indicates you have successfully executed the perfectly tempered dark chocolate recipe and your chocolate is ready for your baking projects. If it doesn't snap, you may need to re-temper by gently reheating slightly and stirring, or cooling and seeding again if it was overheated.
Alternative Chocolate Tempering Methods for Home Bakers
While the seeding method is reliable, other techniques can also achieve perfectly tempered dark chocolate, each with its own advantages and challenges. Exploring these alternatives can help you find the method that best suits your comfort level, available equipment, and the specific project you're working on.
Understanding different approaches expands your skillset and provides flexibility. Whether you have access to a marble slab or prefer using a microwave, there's likely a tempering method that fits your needs. Each method aims to achieve the same goal: creating the stable Type V crystals necessary for that coveted shine, snap, and stability. Let's look at a couple of popular alternatives to the seeding method.
The Tablier Method: Tempering Chocolate on Marble
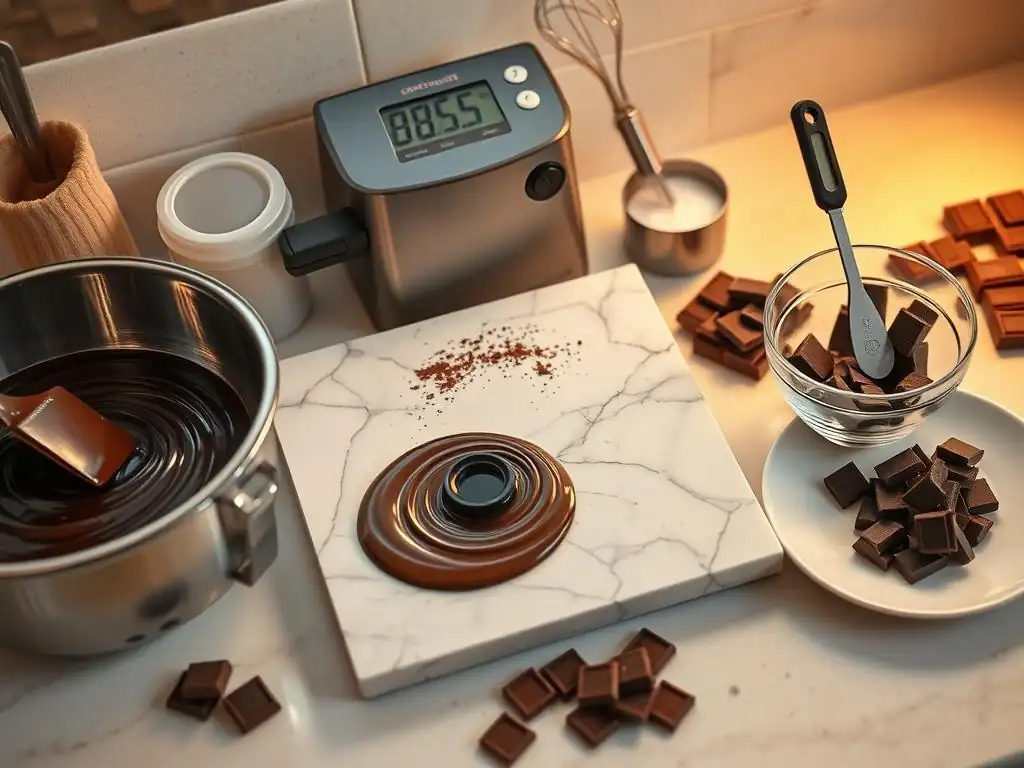
The tablier method, also known as the table method, is a traditional technique often used by professional chocolatiers. It requires a clean, cool surface, typically a marble or granite slab. The process involves melting the bulk of the dark chocolate to 115-120°F (46-49°C), similar to the seeding method.
Then, about two-thirds of the melted chocolate is poured onto the cool marble surface. Using a metal scraper and spatula, the chocolate is spread thinly and continuously worked back and forth across the slab. This movement, combined with the cool surface, rapidly cools the chocolate and encourages crystal formation.
As the chocolate cools and thickens to around 82-84°F (28-29°C), it is scraped back into the bowl with the remaining one-third of warm melted chocolate. Stirring the mixture together brings the overall temperature up to the working range (88-91°F / 31-33°C) and distributes the newly formed stable crystals throughout the batch. This method requires practice to gauge the temperature by feel and appearance.
Tempering Chocolate Using a Microwave
Tempering chocolate in the microwave is a quick and convenient method, particularly for smaller quantities. It's often referred to as the "easy" or "power" tempering method. Start with finely chopped dark chocolate or callets in a microwave-safe bowl. Heat on medium power (around 50%) in 20-30 second intervals, stirring thoroughly after each interval.
The key is to heat the chocolate just enough so that most of it is melted, but some small, solid pieces remain. For dark chocolate, you are aiming to reach a temperature where it's mostly melted but not overheated, typically around 105-110°F (40-43°C), while still containing solid pieces that act as the "seed." Stir the mixture vigorously until the residual heat melts the remaining solid pieces and the chocolate is smooth and reaches the working temperature of 88-91°F (31-33°C).
If it gets too hot, you'll need to cool it down by adding a few more solid pieces and stirring. This method relies on the solid pieces containing stable crystals and the controlled heating preventing the melting of these crystals.
Tempering Chocolate with Sous Vide: A Precise Approach
For home bakers seeking ultimate temperature precision, tempering chocolate using a sous vide immersion circulator is an excellent option. This method removes much of the guesswork associated with temperature control. Start by placing your chopped dark chocolate in a sealed bag (like a vacuum-seal bag or a sturdy zip-top bag with air removed).
Set your sous vide water bath to the melting temperature for dark chocolate, typically around 115-120°F (46-49°C). Submerge the bag of chocolate and let it melt completely, which may take 15-20 minutes depending on the quantity. Once melted, lower the water bath temperature to the crystallization temperature for dark chocolate, around 84-88°F (29-31°C), and leave the bag in the water for another 10-15 minutes, massaging the bag occasionally to encourage even cooling and crystal formation.
Finally, raise the water bath temperature slightly to the working temperature of 88-91°F (31-33°C) and hold the chocolate at this temperature until ready to use. This method is very stable and allows you to hold the chocolate at the correct temperature for extended periods.
Troubleshooting Common Chocolate Tempering Problems
Even with careful execution, you might encounter issues when tempering chocolate. Understanding these common problems and knowing how to address them is part of mastering the technique. Don't be discouraged if your first attempt isn't perfect; practice is key.
Identifying whether your chocolate is improperly tempered is usually straightforward – it will lack shine, be soft, or develop bloom. The good news is that most tempering failures can be corrected by simply re-tempering the chocolate. Let's look at some specific issues you might face and how to troubleshoot them effectively.
Chocolate Seizing: Causes and Solutions
Chocolate seizing is when melted chocolate suddenly turns from a smooth, liquid consistency into a thick, grainy, and unworkable mass. This is almost always caused by the introduction of a small amount of liquid, such as water or steam. Even a single drop of water can cause the sugar particles in the chocolate to clump together, leading to seizing. Overheating chocolate can also sometimes cause it to seize, as it can burn the sugar or protein components.
If your chocolate seizes due to moisture, it is difficult to fully recover it for tempering purposes, especially for coatings or molding. However, you can sometimes salvage it for other uses, like ganache or hot chocolate, by stirring in more liquid (like hot cream or milk) until it forms a smooth, albeit thicker, mixture. To prevent seizing, ensure all your equipment is completely dry, avoid covering the double boiler setup (which traps steam), and keep water away from the melting chocolate.
Bloom on Chocolate: Preventing and Addressing It
Bloom is a common problem in chocolate that hasn't been properly tempered or has been stored incorrectly. There are two types: sugar bloom and fat bloom. Sugar bloom appears as a white, powdery coating and is caused by moisture condensing on the chocolate surface, dissolving the sugar, which then recrystallizes on the surface as the water evaporates. Fat bloom, which looks dull and gray or streaky, is caused by unstable cocoa butter crystals melting and recrystallizing on the surface, often due to temperature fluctuations during cooling or storage of untempered chocolate.
Proper tempering, following the steps for a perfectly tempered dark chocolate recipe, is the best way to prevent fat bloom, as it ensures the stable Type V crystals are dominant. Preventing sugar bloom requires proper storage in a cool, dry place with minimal temperature swings. Unfortunately, bloom affects the appearance and sometimes the texture (making it slightly grainy), but the chocolate is still safe to eat. You can often melt bloomed chocolate down and re-temper it to restore its shine and snap, effectively reversing the effects of bloom.
Uneven Tempering: Achieving Consistent Results
Uneven tempering results in patches of the chocolate being properly tempered (shiny and snappy) while other areas are dull, soft, or bloomed. This often happens when the chocolate is not stirred sufficiently during the cooling or heating phases of tempering. If the temperature is not uniform throughout the batch, some areas may form stable crystals while others form unstable ones or none at all.
To achieve consistent results, ensure you stir the chocolate thoroughly and continuously during the crucial cooling and reheating steps. Use a reliable thermometer to check the temperature in multiple spots in the bowl, not just the surface. If using the seeding method, make sure the seed chocolate is fully melted and distributed. If you notice unevenness after your test, it's best to gently reheat the entire batch slightly (without exceeding the initial melting temperature) and repeat the cooling and tempering steps, ensuring thorough stirring and temperature monitoring throughout the process.
Using Your Perfectly Tempered Dark Chocolate Recipe
Once you have successfully tempered your dark chocolate, a world of creative possibilities opens up in your baking and confectionery endeavors. The perfectly tempered dark chocolate recipe provides a versatile base for a wide array of applications that require chocolate to set firmly, have a beautiful finish, and be stable at room temperature.
From simple dipping projects to more intricate molded creations, tempered chocolate elevates the final product. Its ability to set hard and clean makes it ideal for coatings that snap and release easily from molds. Let's explore some popular ways to utilize your perfectly tempered dark chocolate.
Applications: From Chocolate-Covered Strawberries to Bonbons
Perfectly tempered dark chocolate is essential for making classic treats like chocolate-covered strawberries, pretzels, or nuts. The tempered chocolate forms a thin, crisp shell that hardens quickly, giving them a professional appearance and preventing the chocolate from melting messy at room temperature. Simply dip your prepared items into the tempered chocolate, allowing excess to drip off, and place them on parchment paper to set.
It is also the foundation for creating molded chocolates and bonbons. Pouring tempered chocolate into clean, dry polycarbonate molds allows it to set with a high-gloss finish and release cleanly. You can then fill these shells with ganache, caramel, or other fillings. Creating bark, mendiants (chocolate disks with nuts and dried fruit), or truffles also benefits greatly from using tempered chocolate for coating, ensuring a smooth, non-sticky exterior and a satisfying bite.
Elevating Baking Projects with Tempered Dark Chocolate Decorations
Beyond simple coatings and molded items, tempered dark chocolate can be used to create intricate and elegant decorations for cakes, pastries, and desserts. Its ability to hold shape when set makes it perfect for piping designs, creating chocolate curls, or making delicate chocolate shards or fans.
You can pipe intricate patterns onto parchment paper using a piping bag filled with tempered chocolate. Once set, these can be carefully peeled off and used to adorn cakes or cupcakes. Spreading a thin layer of tempered chocolate onto a cool surface and then scraping it with a knife creates delicate chocolate curls. With a perfectly tempered dark chocolate recipe, your decorative possibilities are vast, allowing you to add a touch of professional flair to all your baked goods.
Storing Tempered Chocolate for Optimal Results
Proper storage is key to maintaining the quality and temper of your dark chocolate. Once tempered and used, allow any leftover chocolate to set completely at room temperature. Do not refrigerate it immediately after use, as sudden temperature changes can negatively impact the temper.
Store set, tempered chocolate in an airtight container in a cool, dry place, ideally at a consistent temperature between 60-68°F (15-20°C). Avoid storing it in the refrigerator unless absolutely necessary, and if you do, place it in an airtight container to protect it from moisture and odors. Properly stored, perfectly tempered dark chocolate can maintain its temper, shine, and snap for several months. If you need to re-use tempered chocolate scraps, you can gently remelt and re-temper them following the same process.
Tips and Tricks for Successful Chocolate Tempering at Home
Mastering the art of chocolate tempering takes practice, but a few key tips can significantly increase your chances of success, especially when working on a perfectly tempered dark chocolate recipe. Paying attention to details and understanding the nuances of the process are crucial.
These tips cover everything from choosing the right chocolate to maintaining precise temperature control, which is arguably the most critical factor in successful tempering. Incorporating these practices into your routine will help you achieve consistent and beautiful results with your tempered dark chocolate.
Choosing the Right Type of Dark Chocolate for Tempering
As mentioned earlier, the quality and type of dark chocolate you use significantly impact the tempering process and the final outcome. Opt for high-quality dark chocolate or, preferably, dark couverture chocolate with a cocoa butter content of 30% or higher. These chocolates contain sufficient cocoa butter to crystallize properly and are specifically formulated for tempering.
Avoid using chocolate chips or baking chocolate that contain stabilizers or vegetable oils instead of 100% cocoa butter. These ingredients alter the fat composition and make proper tempering difficult, if not impossible, to achieve the desired shine and snap. Look for ingredient lists that list cocoa butter as the primary fat source. Using a good quality dark chocolate is the first step towards a perfectly tempered dark chocolate recipe.
Temperature Control: The Key to Perfect Tempering
Precise temperature control is the single most important factor in achieving perfectly tempered dark chocolate. Each stage of the tempering process – melting, cooling, and reheating – requires the chocolate to be within a specific temperature range to encourage the formation of stable Type V crystals and prevent the formation of unstable ones.
For dark chocolate, these ranges are typically:
- Melting: 115-120°F (46-49°C)
- Cooling/Seeding (with stirring): down to 84-88°F (29-31°C)
- Working/Holding: 88-91°F (31-33°C)
Using a reliable digital thermometer and checking the temperature frequently are non-negotiable steps. Avoid overheating the chocolate at any stage, particularly during the final reheating to the working temperature. Just a few degrees too high can melt the stable crystals you've worked to create, requiring you to start over.
Practicing and Refining Your Chocolate Tempering Skills
Like any baking technique, mastering chocolate tempering requires practice. Your first attempt at a perfectly tempered dark chocolate recipe might not be flawless, and that's okay. Don't be discouraged by initial challenges; learning from your mistakes is part of the process.
Start with small batches of chocolate to get a feel for the temperature changes and consistency. Pay close attention to how the chocolate looks and feels at each stage. Keep notes on what worked and what didn't. As you practice, you'll develop a better intuition for the process, and eventually, achieving perfectly tempered dark chocolate will become second nature. The more you practice, the more confident you'll become in handling chocolate and creating beautiful, professional-quality confections.
Conclusion: Enjoy the Rewards of Perfectly Tempered Dark Chocolate
Embarking on the journey to master a perfectly tempered dark chocolate recipe is a rewarding endeavor for any baking enthusiast. While it requires patience, precision, and attention to detail, the results are truly worth the effort. From the stunning, glossy finish to the satisfying snap, properly tempered dark chocolate elevates your homemade treats to a new level of sophistication.
With the knowledge of the science behind tempering, the right equipment, and a reliable method like seeding, you are now equipped to transform ordinary dark chocolate into a versatile medium for countless applications. So, gather your ingredients, prepare your workspace, and dive into the delightful world of chocolate tempering. Enjoy the process, celebrate your successes, and most importantly, savor the delicious rewards of working with perfectly tempered dark chocolate in all your baking adventures.
Frequently Asked Questions
How important is it to temper dark chocolate for baking?
Tempering is crucial for achieving shiny, snap-able chocolate that resists bloom (white streaks) when baked into or used as a coating for your treats. Untempered chocolate can be dull and crumbly.
What's the best way to melt dark chocolate for tempering?
A double boiler is often recommended for gentle, even melting, preventing burning. You can also use a microwave in short intervals, stirring frequently, to avoid overheating.
What are the key temperature ranges to watch for when tempering dark chocolate?
Dark chocolate should be heated to around 115-120°F (46-49°C), cooled to 88-89°F (31-32°C), and then brought back up to 90-92°F (32-33°C) for working. Precise temperatures are vital.
What happens if my chocolate seizes during the tempering process?
Seizing occurs when even a small amount of water enters the chocolate, causing it to become grainy. Try adding a small amount of vegetable oil or shortening to help smooth it out, though it may not fully recover the temper.
Can I use tempered dark chocolate for making chocolate-covered strawberries?
Yes! Perfectly tempered dark chocolate is ideal for creating a smooth, glossy, and delicious coating for strawberries or any other dipped treat. The temper ensures it will set properly.
Final Reflection: The Enduring Allure of Perfectly Tempered Chocolate
The pursuit of perfectly tempered dark chocolate is more than just a recipe; it's a journey into the heart of culinary artistry. Achieving that signature snap, that glossy sheen, and that unforgettable melt-in-your-mouth texture requires precision, patience, and a deep understanding of the cocoa bean's transformative potential. This understanding, once grasped, unlocks a world of creative possibilities for both the seasoned chocolatier and the enthusiastic home baker.
The impact of perfectly tempered chocolate extends far beyond the simple enjoyment of a delicious treat. It represents a connection to a rich history of craftsmanship, a dedication to quality ingredients, and a celebration of the sensory experience. The meticulous process itself is a meditative practice, demanding focus and attention to detail. As the renowned pastry chef, Jacques Torres, once said, Chocolate is a magical ingredient. It's a canvas for creativity, and tempering is the key to unlocking its full potential.
This quote perfectly encapsulates the artistry and dedication involved in achieving that perfect temper.
Now, consider your own journey. What will you create with this newfound knowledge? Will you craft elegant bonbons, decadent truffles, or perhaps a simple, yet exquisitely textured, chocolate bar? The possibilities are as limitless as your imagination. Take the time to experiment, to refine your technique, and to savor the journey as much as the destination. Embrace the challenges, learn from your mistakes, and most importantly, enjoy the process of transforming simple cocoa beans into something truly extraordinary. The world awaits your perfectly tempered masterpiece.
Unlock Your Inner Chocolatier: Master the Art of Tempering!
Thanks for joining us on this delicious journey into the world of chocolate tempering! We hope you now feel confident in tackling this seemingly daunting technique. Ready to put your newfound knowledge into practice?
- Dive into your first tempering project: Choose a simple recipe (like chocolate bark or dipped strawberries) and give it a try. You’ll be amazed at the difference!
- Share your chocolate creations: Show off your perfectly tempered treats on social media and tag us – we'd love to see your masterpieces! #BakeWithEase #ChocolateTempering
- Explore advanced tempering techniques: Once you've mastered the basics, explore different methods and types of chocolate to expand your culinary horizons.
What delicious chocolate creation will you temper first? Let us know in the comments below!