
Controlling Fermentation for Predictable and Delicious Results

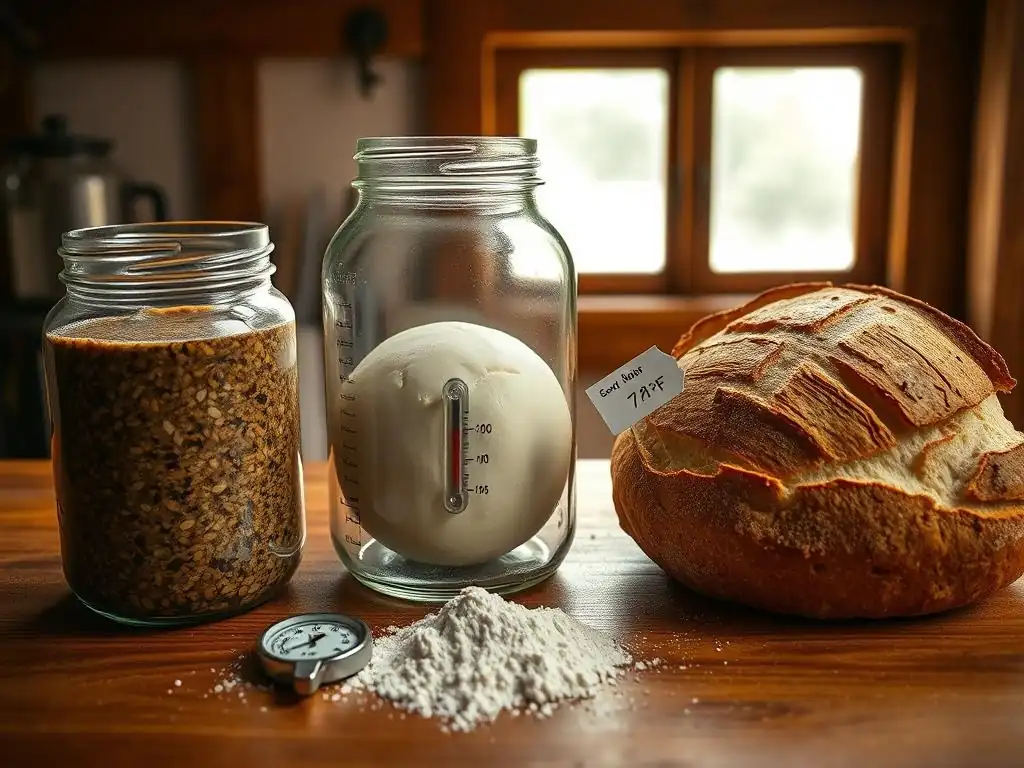
Welcome to BakeWithEase, your kitchen companion for unlocking the secrets of perfect baking! Ever wondered how to achieve consistently amazing sourdough? Dive into our Baking Science Deep Dive and discover the power of predictable sourdough fermentation techniques. Learn how to control the process and eliminate the guesswork, ensuring delicious and repeatable results every time. Ready to master the art of the rise? Let's get started!
- Controlling Sourdough Fermentation for Predictable Results
- Introduction to Predictable Sourdough Fermentation
- Core Principles of Sourdough Fermentation
- Mastering Temperature Control for Consistent Results
- Hydration's Impact on Fermentation and Dough Development
- Flour Selection and its Influence on Fermentation
- Monitoring Fermentation Progress: Visual and Olfactory Cues
- Techniques for Slowing Down or Speeding Up Fermentation
- Troubleshooting Common Fermentation Problems
- Advanced Fermentation Techniques for Enhanced Flavor
- Achieving Predictable Results: A Step-by-Step Guide to Sourdough Fermentation
- Final Thoughts: The Art and Science of Predictable Fermentation
-
Frequently Asked Questions
- How can I achieve more predictable sourdough fermentation?
- What role does temperature play in sourdough fermentation?
- What are some techniques for managing sourdough starter activity?
- How does the hydration level of the dough impact sourdough fermentation?
- What are some common signs of over-fermented sourdough dough?
- Final Reflection: Mastering the Wild Yeast: A Baker's Journey to Predictable Sourdough
- Unlock Your Inner Bread Baker: Master the Art of Fermentation!
Controlling Sourdough Fermentation for Predictable Results
Introduction to Predictable Sourdough Fermentation
Sourdough baking is a beautiful blend of art and science. While it offers incredibly complex flavors and textures, it can sometimes feel unpredictable, especially when it comes to fermentation. Mastering predictable sourdough fermentation techniques is the key to moving beyond guesswork and consistently achieving the results you desire in your bread. This guide will walk you through the fundamental principles and practical steps to gain control over this vital process.
Achieving predictable results in sourdough relies heavily on understanding and manipulating the microbial activity in your starter and dough. Unlike commercial yeast, sourdough fermentation involves a complex ecosystem of wild yeasts and lactic acid bacteria, each contributing unique characteristics. Learning how to guide their activity leads to reliable oven spring, desirable crumb structure, and that signature sourdough tang. It’s about creating an environment where these microbes thrive in a controlled manner.
Why Precise Fermentation Control is Key to Baking Success
Precise control over fermentation is paramount because it directly influences the final characteristics of your loaf. Too little fermentation, and your bread might be dense with a tight crumb and lack flavor development. Too much, and you risk a collapsed structure, gummy texture, and an overly sour taste. For instance, aiming for a 20-30% volume increase during bulk fermentation for a typical loaf often results in optimal gluten development and initial gas production needed for good oven spring. Without this precision, you might end up with wildly different outcomes batch after batch.
Consider the difference between a loaf proofed at room temperature (around 22-24°C or 72-75°F) for 4-6 hours versus one cold-proofed in a refrigerator (around 4°C or 40°F) for 12-24 hours. The room temperature proofing provides rapid gas production but less complex flavor. The cold proofing significantly slows yeast activity but allows lactic acid bacteria to work longer, producing more nuanced sour notes and organic acids that strengthen the gluten network. This demonstrates how precise environmental control directly impacts both the physical structure and the sensory profile of the finished bread, highlighting the importance of predictable sourdough fermentation techniques.
Understanding the Impact of Fermentation on Sourdough Flavor and Texture
Fermentation is the engine that drives both the flavor and texture development in sourdough. During this process, yeasts consume sugars and produce carbon dioxide gas (which leavens the bread) and ethanol. Simultaneously, lactic acid bacteria metabolize sugars into lactic acid and acetic acid.
Lactic acid contributes a milder, yogurt-like tang, while acetic acid adds a sharper, vinegar-like bite. The ratio and overall amount of these acids, which are influenced by fermentation time and temperature, define the sourness profile of your bread. For example, warmer fermentation (above 25°C or 77°F) tends to favor lactic acid production, resulting in a milder sourness, while cooler, longer fermentation (below 20°C or 68°F) encourages acetic acid, leading to a more pronounced tang.
Beyond flavor, fermentation fundamentally alters the dough's physical structure. The carbon dioxide gas produced creates bubbles within the gluten matrix, forming the open, airy crumb characteristic of good sourdough. The acids produced by bacteria also help to condition and strengthen the gluten network, making the dough more extensible and capable of holding its shape during proofing and baking.
An optimally fermented dough will have a balanced structure that allows for significant oven spring and a desirable chewy texture. This intricate interplay between microbial activity and dough structure underscores why mastering predictable sourdough fermentation techniques is so crucial for both taste and crumb.
Core Principles of Sourdough Fermentation
What is Fermentation and How Does it Work in Sourdough?
Fermentation, in the context of bread making, is a metabolic process carried out by microorganisms, primarily yeast and bacteria. In sourdough, this involves a symbiotic relationship between naturally occurring wild yeasts (like Saccharomyces cerevisiae, but also others) and lactic acid bacteria (LAB), predominantly from the Lactobacillus and Pediococcus genera. These microbes consume carbohydrates (sugars) present in the flour.
The yeasts produce carbon dioxide gas, which causes the dough to rise, and ethanol, which mostly evaporates during baking. The bacteria produce various organic acids, primarily lactic acid and acetic acid, which contribute to the sour flavor, improve the dough's structure, and act as natural preservatives.
The process begins the moment water is mixed with flour, activating enzymes that break down starches into simpler sugars that the microbes can consume. Once the sourdough starter is added, or indigenous microbes in the flour and environment become active, fermentation starts. It's a continuous process that occurs from the initial mixing (autolyse and bulk fermentation) through the final proofing stage. The rate at which these processes occur is influenced by external factors like temperature, hydration, and the type of flour used, making predictable sourdough fermentation techniques essential for control.
The Role of Yeast and Bacteria in Sourdough Fermentation
Wild yeasts are the primary leavening agents in sourdough. They consume simple sugars and produce carbon dioxide (CO₂) and ethanol. The CO₂ gets trapped within the elastic gluten network of the dough, causing it to expand and rise. Different strains of wild yeast can also contribute subtle flavor compounds. While Saccharomyces cerevisiae is common, other yeasts like Candida milleri might also be present, influencing the starter's stability and activity. The health and activity of your yeast population are critical for achieving good oven spring and an open crumb structure.
Lactic acid bacteria (LAB) are equally, if not more, important for the signature characteristics of sourdough. They primarily consume sugars and produce lactic acid and acetic acid. These acids significantly lower the pH of the dough, which inhibits the growth of undesirable molds and bacteria, acts as a natural preservative, and contributes to the unique sour flavor.
LAB also produce enzymes that further break down proteins and starches, which can improve the dough's extensibility and the bread's digestibility. The balance and activity of LAB relative to yeast greatly influence the flavor profile; a starter with high LAB activity relative to yeast might rise slowly but produce a very tangy loaf, emphasizing the need for understanding their roles for predictable sourdough fermentation techniques.
Factors Affecting Fermentation Speed: Temperature, Hydration, and Flour Type
Several key factors dictate the speed and characteristics of sourdough fermentation. Temperature is perhaps the most influential. Both yeast and bacteria are highly sensitive to temperature changes. Yeast activity generally peaks between 24-28°C (75-82°F), while LAB activity can be vigorous across a wider range, with different species favoring different temperatures.
Warmer temperatures accelerate fermentation, leading to faster rising and potentially more lactic acid production. Cooler temperatures slow fermentation significantly, allowing for longer bulk ferments and proofs, which can develop more acetic acid and complex flavors. For example, doubling time at 20°C might be 6-8 hours, while at 25°C it could be 4-5 hours.
Hydration level—the ratio of water to flour in your starter and dough—also plays a significant role. Higher hydration doughs (e.g., 80% hydration) ferment faster than lower hydration doughs (e.g., 65% hydration). More water makes the sugars more accessible to the microbes and provides a looser environment for gas expansion. Flour type is another crucial factor.
Flours higher in simple sugars and nutrients, such as whole wheat or rye flour, tend to ferment faster and produce more vigorous starters compared to refined white flour. The protein content and quality in flour also affect the dough structure's ability to capture gases produced during fermentation. Understanding how these three factors interact is fundamental to applying predictable sourdough fermentation techniques.
Mastering Temperature Control for Consistent Results

Temperature is arguably the single most controllable variable affecting fermentation speed and flavor profile. Maintaining a consistent temperature during bulk fermentation and proofing is vital for predictable sourdough fermentation techniques. Small fluctuations can lead to significant differences in fermentation time and the balance of acids produced by bacteria. Aiming for a target temperature and sticking to it helps ensure that your dough develops at the expected rate, allowing you to time your bakes accurately.
The temperature you choose also influences the yeast-to-bacteria activity ratio. Warmer temperatures, typically above 25°C (77°F), encourage yeast activity and tend to favor lactic acid production by bacteria, resulting in a faster rise and a milder tang. Cooler temperatures, below 20°C (68°F), slow down yeast activity more significantly than some types of lactic acid bacteria, favoring acetic acid production.
This leads to slower rising but a more pronounced, vinegary tang. For instance, fermenting at 28°C might lead to a bulk ferment completing in 4 hours, while fermenting the same dough at 20°C might take 8-12 hours, yielding a distinctly different flavor profile.
The Ideal Temperature Range for Sourdough Fermentation
The "ideal" temperature range for sourdough fermentation isn't a single number but rather a spectrum depending on your desired outcome. For a balanced flavor profile with a good mix of rise and tang, many bakers aim for bulk fermentation temperatures between 22-25°C (72-77°F).
In this range, both yeast and bacteria are quite active, leading to a reasonably paced fermentation (often 4-8 hours for bulk, depending on starter strength and hydration) and a pleasant blend of lactic and acetic acids. This mid-range temperature is often recommended for beginners learning predictable sourdough fermentation techniques because it is less prone to over- or under-fermentation errors compared to the extremes.
If you prefer a milder sourness and faster fermentation, pushing the temperature towards 26-28°C (79-82°F) can be effective. This accelerates yeast activity, leading to a quicker rise (bulk ferment potentially in 3-5 hours), while favoring lactic acid production. Conversely, for a more pronounced tang and slower fermentation, temperatures between 18-21°C (64-70°F) are beneficial. This significantly slows yeast but allows acetic acid bacteria to work longer, developing that sharp sourness over an extended period (bulk ferment perhaps 8-14 hours). Understanding how temperature shifts the balance allows you to intentionally steer your fermentation towards specific flavor goals.
Using Temperature to Manipulate Flavor Development
As discussed, temperature is a powerful tool for manipulating the flavor profile of your sourdough. Warmer temperatures (25-28°C / 77-82°F) promote a faster fermentation driven more by yeast and lactic acid bacteria that thrive in warmth. This results in a bread that rises quickly and has a milder, yogurt-like sourness due to higher lactic acid production relative to acetic acid. If you want a less sour loaf, fermenting at the warmer end of the spectrum is a key predictable sourdough fermentation technique.
Conversely, cooler temperatures (18-22°C / 64-72°F) slow down yeast activity more than many acetic acid bacteria. This allows for a longer fermentation period where acetic acid bacteria can produce more of their characteristic sharp, vinegary tang.
Cold proofing in the refrigerator (4-5°C / 40-41°F) is the most common application of this principle, dramatically slowing all microbial activity but allowing enzymatic processes and slow acid development (especially acetic) to continue over 12-48 hours, resulting in a more complex flavor and improved keeping quality. By intentionally choosing your fermentation temperature, you dictate the balance of acids and thus the final flavor of your bread.
Practical Tips for Maintaining Consistent Temperatures: [Yogurt Maker, Wine Cooler, Warm Water Bath]
Maintaining a consistent fermentation temperature can be challenging, especially with fluctuating ambient temperatures. Fortunately, several practical tools and techniques can help.
- Yogurt Maker: Some yogurt makers or similar proofing boxes offer precise temperature control, making them ideal for maintaining a specific warm temperature (e.g., 25°C or 77°F) for small batches of starter or dough.
- Wine Cooler: A wine cooler, designed to maintain temperatures between 10-18°C (50-65°F), is excellent for cooler bulk fermentation or intermediate proofs, promoting acetic acid development and slower overall fermentation.
- Warm Water Bath: For a simple, low-tech solution, place your dough container in a larger container filled with warm water. Monitor the water temperature and replace it as needed to maintain the desired dough temperature. This works well for targeting slightly warmer temperatures like 24°C (75°F).
- Proofing Box/Oven with Light: Some ovens have a "proof" setting, usually around 27-30°C (80-86°F). Alternatively, leaving the oven light on can raise the internal temperature a few degrees above ambient, often reaching 24-26°C (75-79°F) depending on the oven and room temperature. Always check the actual temperature with a thermometer as these methods can vary.
- Insulated Cooler: An inexpensive picnic cooler can act as an insulated environment. Place your dough inside with a container of warm water (for warmth) or ice packs (for coolness) to help stabilize the temperature. Use a thermometer to monitor the air temperature inside.
By utilizing these tools and understanding how they influence the dough's internal temperature, you can implement predictable sourdough fermentation techniques regardless of your kitchen environment.
Hydration's Impact on Fermentation and Dough Development
Hydration, expressed as a percentage of the flour weight, refers to the amount of water in your dough or starter. It significantly impacts the dough's consistency, handling characteristics, and, importantly, the rate of fermentation. A higher hydration dough feels wetter and stickier, while a lower hydration dough is stiffer and easier to handle. The hydration level affects how easily the yeast and bacteria can access the sugars and nutrients in the flour, directly influencing their activity.
High hydration doughs (e.g., 75% hydration and above) typically ferment faster than low hydration doughs (e.g., 60-65%). This is because the increased water makes the dough environment less viscous, allowing the microbes to move more freely and access food sources more easily. Gas produced during fermentation can also expand more readily in a wetter dough, leading to faster volume increases. However, higher hydration also means the gluten network needs to be stronger to support the dough structure, which can be a challenge. Understanding this relationship is key to applying predictable sourdough fermentation techniques based on your chosen hydration level.
Understanding Hydration Levels in Sourdough Starters and Doughs
Sourdough starter hydration is typically expressed as a percentage relative to the flour weight used in feeding. A common standard is a 100% hydration starter, meaning equal weights of flour and water (e.g., 50g flour + 50g water). This consistency makes it easy to measure and track its activity.
However, starters can be maintained at different hydrations, such as 75% hydration (e.g., 50g flour + 37.5g water) or even stiffer starters (e.g., 50-60% hydration). Higher hydration starters tend to be more liquid and show activity (like bubbling) more quickly, while lower hydration starters are thicker and ferment more slowly, potentially developing different flavor profiles. A 100% hydration starter doubling in volume in 4-6 hours at 24°C is a common benchmark for readiness.
Dough hydration refers to the total water weight divided by the total flour weight in the final dough, expressed as a percentage. For example, a dough made with 500g flour and 375g water has 75% hydration (375 / 500 = 0.75 or 75%). This calculation includes the water and flour contributed by the starter.
A typical loaf might range from 65% (stiff, easier to handle) to 85% or even higher (very wet, challenging but can yield an open crumb). The chosen dough hydration significantly impacts handling, fermentation speed, and the final crumb structure. Higher hydration requires more careful handling and techniques like stretch-and-folds or coil folds to develop gluten strength, but it also accelerates fermentation and contributes to a more open crumb if managed correctly, making it a critical factor in predictable sourdough fermentation techniques.
How Hydration Affects Fermentation Speed and Gluten Development
Hydration has a dual impact on sourdough fermentation: it affects both the speed of microbial activity and the development of the gluten network. As mentioned, higher hydration provides a more accessible environment for yeast and bacteria, allowing them to consume sugars and produce gas and acids more rapidly.
A dough at 80% hydration might show significant signs of fermentation (like bubbles and volume increase) much faster than the same dough at 65% hydration, assuming all other factors are equal. This means the timing for bulk fermentation and proofing needs to be adjusted based on the hydration level to achieve predictable results.
Furthermore, hydration influences gluten development. Water is necessary for gluten proteins (glutenin and gliadin) in flour to hydrate and form the viscoelastic network. Higher hydration doughs hydrate faster and can develop gluten with less mechanical kneading, often relying more on autolyse and gentle folding techniques.
However, the gluten strands are more spread out in wetter doughs, requiring more strength development to support the gas produced during fermentation. Lower hydration doughs require more kneading to develop gluten but are inherently stronger and easier to handle. Successfully managing gluten development alongside fermentation timing is crucial for predictable sourdough fermentation techniques, ensuring the dough can hold the gas produced.
Adjusting Hydration for Different Flour Types and Desired Outcomes
The optimal hydration level often depends on the type of flour you are using. Different flours absorb water differently. Whole wheat flour and rye flour, for example, contain more bran and germ, which absorb significantly more water than refined white flour. A dough made with 100% whole wheat flour might require 80-85% hydration to have a similar consistency and handling feel to a white bread dough at 70-75% hydration. Using the same hydration percentage for different flours will lead to vastly different dough consistencies and fermentation behaviors.
Adjusting hydration is also a way to achieve different desired outcomes in your final bread. Higher hydration (above 75%) tends to result in a more open, airy crumb and a thinner, crispier crust, provided the dough is handled and fermented correctly.
Lower hydration (below 70%) results in a denser crumb, a chewier crust, and a dough that is easier to shape and handle, making it a good starting point for beginners learning predictable sourdough fermentation techniques. Experimenting with hydration levels while keeping other factors consistent is a great way to understand its specific impact and tailor your predictable sourdough fermentation techniques to your preference.
Flour Selection and its Influence on Fermentation
The type of flour used is a foundational element in sourdough baking and has a significant impact on the fermentation process. Flour provides the carbohydrates (sugars and starches) that the yeast and bacteria consume, as well as the proteins (glutenin and gliadin) that form the structure of the bread. Different flours vary in their nutritional content for microbes, their enzymatic activity, and their ability to absorb water and form gluten, all of which affect how fermentation proceeds. Choosing the right flour, or blend of flours, is essential for predictable sourdough fermentation techniques.
For example, flours like rye and whole wheat contain a higher proportion of simple sugars and nutrients readily available to the microbes, often leading to a faster and more vigorous initial fermentation compared to highly refined white flour. They also contain more active enzymes (amylase) that break down starches into sugars, providing a sustained food source. However, the bran and germ in whole grain flours can interfere with gluten development and gas retention. Understanding these characteristics allows bakers to select flours that align with their desired fermentation speed, flavor profile, and crumb structure.
The Importance of Flour Type for Optimal Fermentation
The composition of flour directly influences the environment for sourdough microbes. The amount and type of carbohydrates available determine how much gas and acid the yeast and bacteria can produce. Flours with higher levels of simple sugars, like rye, can kickstart fermentation quickly. The presence of specific enzymes, particularly amylase, is also crucial. Amylase breaks down complex starches into fermentable sugars, providing a sustained food source throughout longer fermentation periods. Flours with high amylase activity can support longer, slower ferments and contribute to a slightly sweeter flavor profile, as more sugars are available at the end.
Furthermore, the quality and quantity of protein in the flour affect the dough's ability to trap the carbon dioxide gas produced by yeast. High-protein bread flour forms a strong, elastic gluten network capable of holding onto gas, leading to good volume and an open crumb. Lower-protein flours, like cake flour, produce a weaker network less capable of trapping gas. The interaction between microbial gas production and the dough's structural capacity is critical for a successful rise. Selecting flours that provide both ample food for microbes and the necessary structural components is key to applying predictable sourdough fermentation techniques.
Different Flour Types and Their Fermentation Characteristics: [Bread Flour, Whole Wheat Flour, Einkorn Flour]
Different flour types exhibit distinct fermentation characteristics:
- Bread Flour: Typically a high-protein (12-14%) refined wheat flour. It provides a good balance of fermentable sugars and strong gluten-forming proteins. Starters fed with bread flour are generally reliable and produce doughs that develop a strong structure capable of holding gas well. Fermentation tends to be steady and predictable once the starter is active. A dough made with 100% bread flour at 70% hydration might take 6-8 hours for bulk fermentation at 24°C.
- Whole Wheat Flour: Contains the bran, germ, and endosperm of the wheat kernel. It is richer in nutrients and simple sugars than white flour, often leading to faster initial fermentation and more vigorous starter activity. The bran and germ, however, can interfere with gluten development and potentially contain enzymes that break down gluten if not managed carefully. Whole wheat absorbs more water, so higher hydration is needed. A whole wheat dough might ferment faster initially but require careful monitoring due to potential gluten breakdown. A 100% whole wheat dough at 80% hydration might complete bulk fermentation in 4-6 hours at 24°C.
- Einkorn Flour: An ancient grain with a different gluten structure than modern wheat and lower protein content (around 10-14%). It absorbs less water and ferments differently. Doughs made with einkorn can be stickier and the gluten network is more extensible but less elastic. Fermentation can sometimes be slower than with modern wheat, and the dough may not achieve the same volume increase. Einkorn often imparts a unique, slightly nutty flavor. Understanding these specific characteristics is vital when using such flours for predictable sourdough fermentation techniques.
Blending Flours for Unique Flavor Profiles and Fermentation Control
Blending different flour types is a common strategy to achieve specific flavor profiles, improve dough handling, or fine-tune fermentation. Combining a percentage of whole wheat or rye flour (e.g., 10-30%) with white bread flour is a popular approach. The whole grain provides more nutrients and sugars, boosting fermentation activity and adding complex flavors, while the white bread flour contributes strong gluten for structure and volume. This hybrid approach often yields a dough that ferments reliably and produces a loaf with good structure and enhanced flavor.
Using a small amount of rye flour (e.g., 5-10%) in a predominantly wheat dough is another example. Rye flour contains particularly active enzymes and a high concentration of fermentable sugars, significantly boosting fermentation speed and contributing a distinct tangy flavor. Even a small percentage can accelerate bulk fermentation by an hour or two compared to a 100% white flour dough. Experimenting with different flour blends allows bakers to customize their predictable sourdough fermentation techniques, tailoring the process to achieve specific desired outcomes in terms of speed, flavor, and crumb structure.
Monitoring Fermentation Progress: Visual and Olfactory Cues
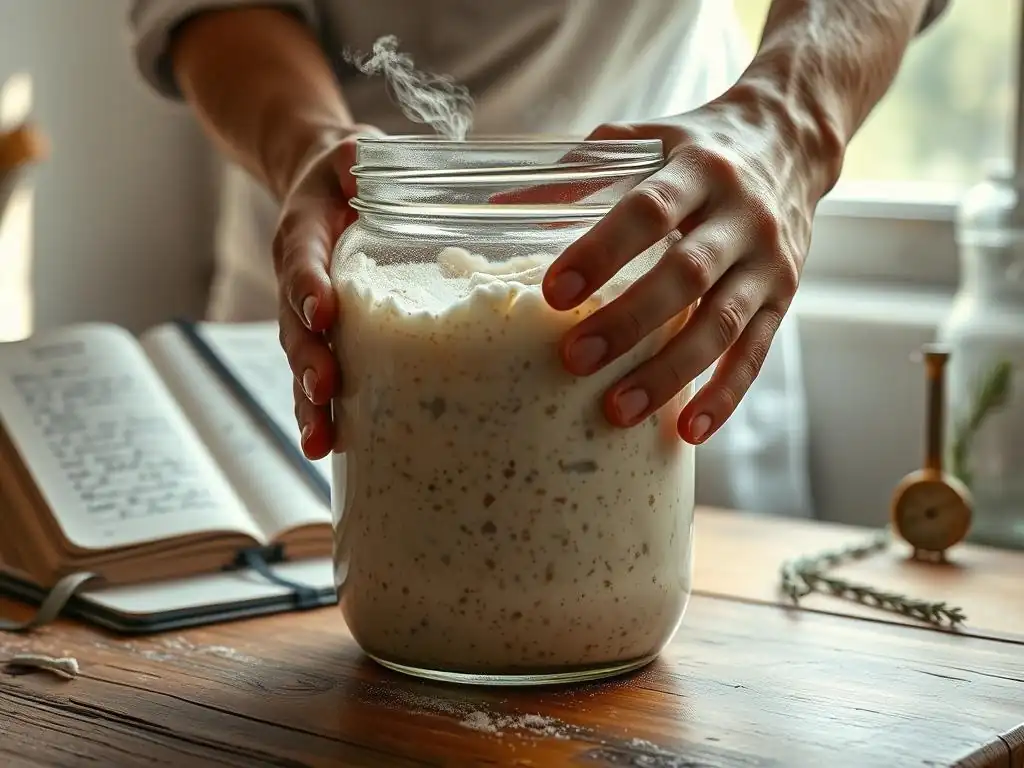
Predictable sourdough fermentation techniques rely heavily on accurate monitoring of the dough's progress. While timing based on temperature and hydration provides a good estimate, the dough itself provides the most reliable indicators of its fermentation stage. Relying solely on time can be misleading because actual fermentation rates can vary based on subtle differences in starter activity, environmental conditions, and flour batches. Learning to read the dough through visual and olfactory cues is essential for consistent results.
Observing the dough's volume increase, the appearance of bubbles, and the changes in its texture are primary visual cues. Smelling the dough provides olfactory cues about the balance of acids being produced. These indicators, when combined, give a comprehensive picture of how fermentation is progressing and when the dough is ready for the next stage, whether it's shaping or baking. Developing your ability to interpret these signs takes practice, but it is fundamental to truly predictable sourdough fermentation techniques.
Recognizing the Signs of Active Fermentation
Several visual signs indicate that your dough is actively fermenting. The most obvious is an increase in volume. As yeast produces CO₂, the dough expands. During bulk fermentation, you're typically looking for a significant increase, often ranging from 20% to 100% depending on the desired outcome and subsequent proofing. The speed of this increase is a direct indicator of microbial activity. For example, a dough that doubles in volume in 4 hours at 25°C is fermenting much faster than one that takes 8 hours.
Beyond overall volume, look for the appearance of bubbles. Small bubbles on the surface of the dough indicate gas production. Larger bubbles forming within the dough, often visible if the dough is in a clear container, show the gas being trapped within the gluten network. The dough's texture will also change; it will become lighter, more airy, and often feel softer and more pliable as fermentation progresses. These visual cues are essential for judging the state of fermentation as part of predictable sourdough fermentation techniques.
Interpreting Dough Volume, Bubble Activity, and Aroma
Interpreting the degree of volume increase is critical. For many standard sourdough loaves, bulk fermentation is considered complete when the dough has increased in volume by about 50-80%. Pushing fermentation beyond this point risks over-proofing during the final stage. Observing the bubble activity provides additional insight; a dough covered in small surface bubbles and showing larger internal bubbles suggests active fermentation and good gas production. If bubbles appear but the overall volume isn't increasing, it might indicate a weak gluten structure unable to trap the gas effectively.
The aroma of the dough is another powerful indicator. A young, under-fermented dough will smell primarily of flour. As fermentation progresses, it will develop a pleasant, slightly yeasty and mildly acidic smell. An optimally fermented dough will have a noticeable, but not overpowering, tangy aroma. An overly fermented dough will often smell strongly alcoholic (from yeast producing ethanol) and excessively sour, sometimes with a sharp, vinegary note indicating high acetic acid production. Learning to correlate these smells with the dough's visual appearance is vital for applying predictable sourdough fermentation techniques successfully.
Using the Float Test to Assess Starter Readiness
The float test is a simple, traditional method to assess if your sourdough starter is sufficiently active and ready to leaven dough. It relies on the principle that a highly active starter, full of trapped CO₂ bubbles, will be less dense than water and will float. To perform the test, gently take a small spoonful (about half a teaspoon) of your starter at its peak activity (when it has significantly increased in volume and is bubbly) and drop it into a glass of room-temperature water.
If the starter floats on the surface of the water, it indicates that it is vigorous and contains enough trapped gas to potentially leaven your dough effectively. If the starter sinks to the bottom, it suggests it hasn't produced enough gas or the gas has escaped, meaning it might not be strong enough to provide adequate lift for your bread. While not foolproof, the float test is a widely used visual cue for assessing starter readiness, complementing other observations like volume increase and bubble activity, and is a helpful component of predictable sourdough fermentation techniques.
Techniques for Slowing Down or Speeding Up Fermentation
Once you understand the factors influencing fermentation, you can employ specific techniques to manipulate its speed. This allows you to fit baking into your schedule, develop specific flavors, or compensate for environmental conditions. Being able to intentionally slow down or speed up fermentation is a hallmark of predictable sourdough fermentation techniques, giving you control over the process rather than being dictated by it.
These techniques often involve adjusting the dough's temperature or altering the starter's feeding schedule. Slowing fermentation is particularly useful for developing more complex flavors and fitting baking around a busy life, often involving refrigeration. Speeding up fermentation is helpful in cooler environments or when you need to bake within a shorter timeframe, often involving warmer temperatures or more active starter.
Retarding Fermentation for Enhanced Flavor Development: [Cold Proofing in the Refrigerator]
Retarding fermentation involves significantly slowing down microbial activity, typically by placing the dough in a cool environment like a refrigerator (around 4-5°C or 40-41°F). At these low temperatures, yeast activity is drastically reduced, almost pausing gas production. However, some lactic acid bacteria remain somewhat active, albeit slowly. This extended, slow fermentation allows enzymes in the flour more time to break down starches into sugars, and the bacteria more time to produce organic acids, especially acetic acid, which is favored at slightly cooler temperatures compared to yeast activity.
Cold proofing (or cold retardation) is the most common application of this technique. After shaping, the dough is placed in the refrigerator for anywhere from 12 to 48 hours. This dramatically slows the final rise but allows for deep flavor development and makes the dough easier to score. A cold-proofed loaf typically has a more complex flavor profile with a noticeable tang compared to a loaf fermented entirely at room temperature. It's a cornerstone of predictable sourdough fermentation techniques for achieving both flavor depth and scheduling flexibility.
Accelerating Fermentation in Cooler Environments: [Using a Proofer or Warm Location]
If your kitchen is cool (e.g., below 20°C or 68°F), fermentation can be very slow, potentially taking excessively long for bulk fermentation or proofing. To accelerate fermentation in cooler environments and achieve predictable sourdough fermentation techniques within a reasonable timeframe, you need to increase the dough's temperature.
Methods to warm the dough include using a dedicated proofing box (which maintains a precise temperature, e.g., 24°C), placing the dough in a warm spot in your house (like near a sunny window, monitoring carefully for overheating), or using the oven with the light on (as discussed earlier). Aiming for a dough temperature of 24-26°C (75-79°F) can significantly speed up fermentation compared to 18°C (64°F).
For instance, a bulk ferment that might take 10-12 hours at 18°C could be completed in 4-6 hours at 25°C. This intentional temperature control helps ensure your dough is ready when you need it to be.
Adjusting Starter Feeding Schedules to Control Fermentation Rate
The activity level of your sourdough starter directly impacts the fermentation rate of your dough. A young, recently fed starter that has just peaked is full of active yeast and bacteria and will initiate fermentation in the dough much faster than a starter that is past its peak or hasn't been fed recently. Adjusting your starter's feeding schedule and using it at the right point in its cycle is a critical aspect of predictable sourdough fermentation techniques.
To accelerate fermentation, use your starter when it is at its peak or just slightly past it – typically when it has roughly doubled or tripled in volume after feeding and is very bubbly. To slow down fermentation, you could potentially use a starter slightly before its peak, though this is less common and requires more experience. More reliably, you can adjust the feeding ratio.
A starter fed with a higher ratio of fresh flour and water (e.g., 1:5:5 starter:flour:water) will take longer to peak than one fed with a lower ratio (e.g., 1:1:1), allowing you to time its readiness for mixing your dough. Controlling your starter's peak activity is a powerful way to ensure predictable sourdough fermentation techniques from the very beginning of your process.
Troubleshooting Common Fermentation Problems
Even with careful planning and the application of predictable sourdough fermentation techniques, problems can sometimes arise. The most common issues are over-fermentation and under-fermentation, which lead to disappointing results. Learning to identify these problems and understand their causes is crucial for improving your sourdough baking and achieving consistency. Troubleshooting involves examining your process, particularly temperature control, hydration, starter activity, and timing.
Less common, but still possible, are issues like inconsistent fermentation within the dough or unusual smells. These often point back to issues with the starter's health or uneven temperature distribution. By systematically evaluating the variables in your process, you can diagnose the problem and adjust your approach for future bakes, making your predictable sourdough fermentation techniques more robust.
Over-Fermentation: Causes and Solutions
Over-fermentation, sometimes called over-proofing, occurs when the dough is allowed to ferment for too long or at too high a temperature. Visually, an over-fermented dough might look very bubbly, potentially starting to collapse or spread out rather than holding its shape. It will often have a very strong, pungent, overly sour or alcoholic smell. The texture might feel fragile and sticky, sometimes described as "soupy." Baking an over-fermented dough typically results in poor oven spring (a flat loaf), a dense or gummy crumb, and an excessively sour flavor.
Common causes include misjudging the fermentation time, the environment being warmer than anticipated, or using too much starter for the amount of flour. To solve over-fermentation issues, review your process: check the actual dough temperature throughout fermentation, reduce the bulk fermentation time, consider reducing the amount of starter used (e.g., from 20% to 15% of flour weight), or try a cooler fermentation temperature in the future. If you catch over-fermentation during bulk, you can sometimes salvage the dough by shaping it immediately and baking without a final proof, or turning it into a flatbread like focaccia.
If caught during final proof, bake immediately. Adjusting your predictable sourdough fermentation techniques based on past experience is key.
Under-Fermentation: Identifying and Rectifying the Issue
Under-fermentation is the opposite problem and occurs when the dough has not fermented long enough or at a sufficiently warm temperature. Visually, an under-fermented dough will not have increased significantly in volume (perhaps only 20-30% increase during bulk when aiming for 50-80%). It will feel dense and tight, lacking airiness. There may be few or no bubbles visible on the surface.
The smell will be primarily floury or only very mildly acidic. Baking an under-fermented dough results in a dense, tight crumb structure, sometimes called "golf ball crumb," and poor oven spring, though it might crack dramatically on the surface. The flavor will be bland, lacking the characteristic sourdough tang.
Common causes include fermenting at too low a temperature, not giving the dough enough time, or using an inactive or insufficient amount of starter. To rectify under-fermentation, ensure your starter is vigorous (use the float test or observe its doubling time). Increase the bulk fermentation time, potentially move the dough to a warmer location (e.g., 24-26°C or 75-79°F), or consider increasing the amount of starter used in your recipe.
If you realize the dough is under-fermented before baking, you can try extending the final proof at room temperature, though this carries some risk. Learning to recognize the signs of under-fermentation is crucial for applying predictable sourdough fermentation techniques effectively.
Dealing with Inconsistent Fermentation Results
Inconsistent fermentation results from batch to batch can be frustrating and often stem from variations in your process that you might not be tracking. One common cause is inconsistent starter activity – if your starter's peak time varies, using it at different points will lead to different fermentation rates in the dough. Another major factor is fluctuating dough temperature. If your kitchen temperature varies significantly or you're not actively controlling dough temperature, fermentation will speed up or slow down unpredictably. For instance, a 5°C difference in ambient temperature can halve or double fermentation time.
To address inconsistency, focus on standardizing your predictable sourdough fermentation techniques. Maintain your starter on a consistent feeding schedule and ratio, using it reliably at its peak. Monitor and control your dough temperature using the methods discussed earlier (proofer, water bath, etc.). Use a timer and scale precisely. Take detailed notes on dough temperature, starter activity, bulk fermentation start/end times, and visual cues for each bake. Over time, comparing your notes will help you identify the variables causing inconsistency and allow you to fine-tune your process for truly predictable results.
Advanced Fermentation Techniques for Enhanced Flavor

Once you have a solid grasp of basic predictable sourdough fermentation techniques and can reliably control temperature, hydration, and timing, you might explore advanced techniques. These methods further manipulate the dough and the microbial environment to enhance flavor complexity, improve dough handling, and achieve specific crumb characteristics. While not strictly necessary for a good loaf, they offer avenues for refining your sourdough art.
Techniques like Autolyse, extended Bulk Fermentation, and incorporating Pre-Ferments like Poolish or Biga from a sourdough base can layer flavors and improve dough structure. They represent intentional modifications to the standard process to achieve nuanced results, building upon the foundation of predictable sourdough fermentation techniques you've already mastered.
Autolyse: Improving Dough Hydration and Fermentation
Autolyse is a simple technique where you mix just the flour and water from your recipe (excluding the starter and salt) and let it rest for 20 minutes to several hours. During this rest period, the flour hydrates fully, and enzymes naturally present in the flour begin to break down proteins and starches. This initial enzymatic activity makes the dough more extensible and easier to handle later. It also kickstarts the hydration process of the flour, making the water more accessible to the microbes when they are added.
Incorporating an autolyse can improve the dough's overall structure and make subsequent kneading or folding more efficient. By allowing the flour to hydrate fully before the starter is added, it can also subtly influence the start of fermentation, potentially leading to a slightly more uniform fermentation later on. While the impact on predictable sourdough fermentation techniques might be indirect, it contributes to a healthier dough environment where fermentation can proceed optimally. A typical autolyse might last 30-60 minutes for most doughs.
Bulk Fermentation: Developing Flavor and Strength
Bulk fermentation (or the "first rise") is the period after mixing the starter and salt into the dough, up until shaping. This is the primary stage where the dough increases significantly in volume and develops much of its flavor and structure. During bulk fermentation, yeast produces most of the CO₂ that will initially inflate the dough, and lactic acid bacteria produce acids that build flavor and strengthen the gluten network. This stage typically involves a series of stretch-and-folds or coil folds to develop gluten strength and equalize dough temperature.
The duration and temperature of bulk fermentation are critical predictable sourdough fermentation techniques. As discussed, warmer temperatures speed it up, while cooler temperatures slow it down, influencing the flavor profile. Monitoring the dough's volume increase (aiming for 50-80% is common) and observing its texture and bubble activity are key indicators of when bulk fermentation is complete. An optimally bulk-fermented dough will be airy, slightly domed on the sides, and show good bubble development, signifying it's ready for shaping.
Pre-Ferments: Poolish, Biga, and Their Impact on Sourdough
While Poolish and Biga are traditionally made with commercial yeast, the concept of using a portion of the flour, water, and a small amount of starter to create a pre-ferment before mixing the main dough can be applied in sourdough for enhanced flavor and structure. A sourdough Poolish is a liquid pre-ferment (typically 100% hydration) made with a small amount of active sourdough starter. A sourdough Biga is a stiffer pre-ferment (lower hydration, e.g., 60-70% hydration). These are allowed to ferment for several hours (often overnight) before being added to the final dough mix.
Using a sourdough pre-ferment allows a small amount of starter to work on a portion of the flour for an extended period, developing complex flavors and increasing microbial activity before it's diluted into the main dough. This can lead to a more predictable and vigorous main fermentation, potentially contributing to a better rise and a more nuanced flavor profile than using the same amount of starter added directly to the entire dough mix. It's an advanced predictable sourdough fermentation technique for those seeking deeper flavor layers.
Achieving Predictable Results: A Step-by-Step Guide to Sourdough Fermentation
Achieving predictable sourdough fermentation techniques consistently boils down to controlling variables and learning to read your dough. This step-by-step outline provides a framework, emphasizing key points to monitor and adjust throughout the process. Following a consistent routine and paying close attention to the dough's signs are more important than rigid adherence to specific times, which will vary based on your conditions.
Remember that predictable sourdough fermentation techniques are built on understanding the microbial activity and creating the right environment for it. This guide covers the process from preparing your starter to the final proofing stage, highlighting the fermentation aspects at each step.
Preparing Your Sourdough Starter for Predictable Fermentation
Your starter's health and activity are the foundation of predictable sourdough fermentation techniques. Ensure your starter is consistently fed on a schedule that aligns with your baking needs (e.g., daily if kept at room temperature, or weekly if refrigerated). Use a consistent feeding ratio (e.g., 1:2:2 or 1:3:3 starter:flour:water by weight) and feed it with the same type of flour.
For baking, use your starter when it is at its peak activity – typically when it has roughly doubled or tripled in volume and is full of bubbles, usually 4-12 hours after feeding, depending on temperature and feeding ratio. Perform the float test if you like, but observing its volume increase and bubble activity is often sufficient. Using your starter reliably at this peak point ensures you are introducing a consistent level of microbial activity into your dough each time.
Mixing and Kneading Your Dough for Optimal Fermentation
Proper mixing and kneading are crucial for developing the gluten network that will trap the gas produced during fermentation. Start by hydrating your flour (autolyse optional, but recommended). Then, mix in your active starter and salt. Ensure these ingredients are thoroughly combined – uneven distribution of starter or salt can lead to inconsistent fermentation pockets in the dough.
Develop the dough's gluten structure through kneading (manual or machine) or a series of stretch-and-folds or coil folds during the initial part of bulk fermentation. A well-developed gluten network is strong enough to capture the CO₂ gas and support the dough's rise, contributing to good volume and crumb structure. The goal is a dough that is smooth, elastic, and passes the windowpane test (you can stretch a small piece thinly without it tearing). This structural integrity is vital for predictable sourdough fermentation techniques.
Bulk Fermentation: Monitoring and Adjusting
Bulk fermentation is where the magic happens. Place your dough in a clear container (for easy monitoring) in a temperature-controlled environment. Aim for a consistent temperature (e.g., 24-25°C or 75-77°F) to ensure predictable timing. Perform stretch-and-folds or coil folds (typically 3-4 sets spaced 30-60 minutes apart during the first few hours) to build strength.
Monitor the dough's volume increase closely. For many recipes, target a 50-80% increase from its initial volume. Observe the surface for bubbles and note the dough's texture and aroma. If fermentation is going faster than expected (e.g., dough is visibly increasing rapidly), consider moving it to a slightly cooler spot. If it's too slow, find a warmer location. Learning to adjust based on these observations, rather than just the clock, is a core predictable sourdough fermentation technique.
- [ ] Monitor dough temperature.
- [ ] Perform stretch-and-folds/coil folds.
- [ ] Observe volume increase (target 50-80%).
- [ ] Note bubble activity and aroma.
- [ ] Adjust temperature if needed.
Shaping and Proofing Your Dough: The Final Stage of Fermentation
Once bulk fermentation is complete, gently shape your dough. The goal is to create tension on the surface while being careful not to degas the dough too much, preserving the CO₂ bubbles developed during bulk. Place the shaped dough seam-side up in a floured proofing basket (banneton).
The final proof is the last stage of fermentation before baking. This can be done at room temperature (e.g., 1-3 hours at 24°C), which is faster but requires careful monitoring, or in the refrigerator (cold proofing, e.g., 12-24 hours at 4°C), which is slower and develops more flavor. A well-proofed dough will have increased noticeably in volume but should still feel airy and slightly resilient when gently poked (the poke test - it should spring back slowly, not completely or not at all).
Over-proofing here will lead to collapse in the oven. Choosing the right proofing environment and duration based on your desired outcome is the final step in applying predictable sourdough fermentation techniques.
Final Thoughts: The Art and Science of Predictable Fermentation
Mastering predictable sourdough fermentation techniques is a journey that blends scientific understanding with sensory observation. While factors like temperature, hydration, and flour type provide a scientific framework, the ability to read your dough – its volume, texture, smell, and feel – is where the art comes in. Each batch of flour, each day's ambient temperature, and even subtle differences in your starter can influence the process.
Embracing experimentation and patient observation are key. Don't be discouraged by less-than-perfect loaves. Each bake is an opportunity to learn how your specific starter and environment interact with your chosen recipe and techniques. By consistently applying predictable sourdough fermentation techniques and carefully noting the outcomes, you will build intuition and control, leading to more reliable and delicious bread.
Embracing Experimentation and Refining Your Techniques
Sourdough baking offers endless possibilities for experimentation. Once you understand the core principles of predictable sourdough fermentation techniques, you can start intentionally varying factors like hydration, fermentation temperature, bulk fermentation duration, or cold proofing time to see how they affect the final bread. Try making the same recipe but bulk fermenting one loaf at 22°C and another at 26°C to taste the difference in tang. Or compare a short bulk ferment followed by a long cold proof versus a long bulk ferment followed by a short cold proof.
Keep detailed notes on your experiments. Record temperatures, times, starter activity, dough consistency, and your observations during bulk and proofing. Note the final outcome: oven spring, crumb structure, and flavor. This systematic approach allows you to refine your predictable sourdough fermentation techniques based on tangible results, gradually developing your own intuition and signature style. Embrace the learning process; it's part of the joy of sourdough.
The Journey to Mastering Predictable Sourdough Fermentation.
Mastering predictable sourdough fermentation is not about achieving identical results every single time, but about understanding the variables well enough to consistently achieve the desired results. It's about moving from hoping your bread turns out well to knowing, with a high degree of certainty, what the outcome will be based on the choices you make during fermentation.
This mastery comes with practice, observation, and a willingness to learn from mistakes. By focusing on controlling temperature, understanding hydration and flour impact, using an active starter, and learning to read the dough's cues, you are well on your way to predictable sourdough fermentation techniques. Enjoy the process, the aroma of fermenting dough, and the incredible satisfaction of consistently baking delicious, beautiful sourdough bread.
Frequently Asked Questions
How can I achieve more predictable sourdough fermentation?
Consistent sourdough fermentation relies on controlling key factors like temperature, hydration, and starter activity. Using a proofing box or maintaining a stable room temperature is crucial.
What role does temperature play in sourdough fermentation?
Temperature directly affects the rate of fermentation. Warmer temperatures accelerate activity, while cooler temperatures slow it down. Aim for a consistent temperature within the ideal range for your starter.
What are some techniques for managing sourdough starter activity?
Regular feeding schedules and maintaining the correct hydration ratio are essential. Observe your starter's rise and fall to understand its activity level and adjust accordingly.
How does the hydration level of the dough impact sourdough fermentation?
Hydration affects the texture and development of the dough. Higher hydration doughs ferment faster and produce a more open crumb. Adjust hydration based on your desired outcome.
What are some common signs of over-fermented sourdough dough?
Over-fermented dough may be sticky, slack, and difficult to handle. It might also have a sour, vinegary smell and produce a flat loaf with a dense crumb.
Final Reflection: Mastering the Wild Yeast: A Baker's Journey to Predictable Sourdough
The quest for predictable sourdough fermentation is not merely a pursuit of consistent loaves; it's a journey towards understanding the intricate dance between flour, water, and time. The techniques explored in this article—from meticulous temperature control to precise hydration adjustments—are crucial not just for achieving consistent results, but for unlocking the full potential of this ancient craft. The ability to predict and control fermentation allows bakers of all levels to elevate their sourdough game, moving beyond happy accidents to intentional creation.
The impact of understanding sourdough fermentation extends far beyond the kitchen. It represents a deeper connection to the natural world, a respect for the living organisms that contribute to the magic of bread making. This journey of learning has profoundly impacted my own baking, transforming it from a sometimes frustrating process into a consistently rewarding experience. Bread making, at its heart, is an act of alchemy, transforming simple ingredients into something truly magical.
This quote, while not directly about sourdough, perfectly encapsulates the feeling of accomplishment and wonder that comes with mastering this complex process.
Now, it's your turn. Consider the lessons learned within these pages. Experiment with the techniques outlined, meticulously record your observations, and embrace the iterative nature of sourdough baking. Don't be afraid to adjust and adapt, for the true reward lies not in perfect loaves every time, but in the continuous learning and the deep satisfaction of crafting something delicious and beautiful with your own two hands. The journey to predictable sourdough fermentation is a lifelong pursuit, and each loaf baked is a testament to your growing mastery.
Unlock Your Inner Bread Baker: Master the Art of Fermentation!
Thanks for joining us on this journey into the fascinating world of fermentation! We hope you now feel more confident in understanding this crucial process for creating truly delicious baked goods. Ready to put your newfound knowledge into practice?
- Dive deeper: Experiment with different fermentation times and temperatures to discover what works best for your recipe and environment. Note your results – this is the key to mastering consistency!
- Share your sourdough story: Post a picture of your latest fermented creation on social media and tag #BakeWithEaseFermentation – we’d love to see your baking triumphs (and even your bloopers! ).
- Try a new challenge: This week, try a recipe you've avoided in the past due to the fermentation process. You'll be surprised at the results!
What unique fermentation technique are you most excited to try next? Let us know in the comments!