
Yeast Fermentation Made Easy: A Beginner's Tutorial


Welcome to BakeWithEase, your personal baking sanctuary! Are you ready to unlock the magic behind perfectly risen doughs and flavorful baked goods? We're diving deep into the science of baking, and today, we're demystifying the process with our Easy Yeast Fermentation Beginner Tutorial. Ever wondered how those tiny organisms transform simple ingredients into airy masterpieces? Prepare to be amazed as we reveal the secrets and provide you with the foundational knowledge to master yeast fermentation. Let's get baking!
- Yeast Fermentation Made Easy: A Beginner's Tutorial for BakeWithEase
- Introduction to Yeast Fermentation for Baking Beginners
- Essential Equipment and Ingredients for Easy Yeast Fermentation
-
Step-by-Step Guide to Yeast Fermentation: A Beginner-Friendly Approach
- Step 1: Activating the Yeast - A Detailed Tutorial
- Step 2: Preparing the Dough - Mixing and Kneading Techniques
- Step 3: The First Rise - Creating the Ideal Fermentation Environment
- Step 4: Shaping the Dough - Gentle Handling for Optimal Results
- Step 5: The Second Rise - Proofing for a Light and Airy Texture
- Troubleshooting Common Yeast Fermentation Problems
- Easy Yeast Fermentation Recipes to Get You Started
- Tips and Tricks for Successful Yeast Fermentation at Home
- Mastering Yeast Fermentation: Beyond the Basics
- Conclusion: Unlock the Secrets of Easy Yeast Fermentation with BakeWithEase
-
Frequently Asked Questions
- What is yeast fermentation and why is it important in baking?
- What are the key ingredients needed for successful yeast fermentation?
- How do I know if my yeast is still active and good to use?
- What is the ideal temperature for yeast fermentation, and why is it important?
- What can I do if my dough isn't rising properly, even after the fermentation process?
- Final Reflection: The Tiny Powerhouse of Yeast and the Joy of Homemade
- Unleash Your Inner Baker: Start Baking with Confidence!
Yeast Fermentation Made Easy: A Beginner's Tutorial for BakeWithEase
Introduction to Yeast Fermentation for Baking Beginners
What is Yeast Fermentation and Why Is It Important in Baking?
Yeast fermentation is a magical process where microscopic, single-celled organisms called yeast consume sugars and produce carbon dioxide gas and alcohol. In baking, this gas gets trapped within the dough's gluten structure, causing it to rise. Think of it as the dough taking a deep breath and expanding!
This rise is absolutely crucial for creating light, airy, and tender baked goods like bread, pizza crust, and many types of rolls. Without proper fermentation, you'd end up with a dense, heavy product more akin to a cracker than a loaf of bread. It's the heart of many baking recipes, transforming simple ingredients into delicious treats.
Beyond just making dough rise, yeast fermentation also significantly contributes to the flavor and aroma of baked goods. As the yeast consumes sugars, it produces various byproducts, including organic acids and alcohols, which develop complex flavors during the long fermentation process and subsequent baking. A slow, cool fermentation, for example, can yield richer, more nuanced flavors than a rapid, warm one. Mastering yeast fermentation is truly key to unlocking the full potential of many popular baking recipes and is a foundational skill for any aspiring baker looking for an easy yeast fermentation beginner tutorial.
Understanding Different Types of Yeast for Baking: Active Dry, Instant, and Fresh
For beginners tackling easy yeast fermentation, understanding the types of yeast available is key. Active dry yeast is a common variety sold in small packets or jars. It consists of dehydrated yeast granules that need to be "activated" or "proofed" in warm liquid (typically water or milk) before being added to other ingredients. This step ensures the yeast is alive and ready to work, and it usually takes about 5-10 minutes for the mixture to become foamy. A standard packet often contains about 2 and a quarter teaspoons, roughly equivalent to 7 grams.
Instant yeast, also known as rapid-rise or bread machine yeast, is processed differently, allowing it to be added directly to the dry ingredients without prior activation. Its granules are smaller, and it's designed to ferment faster than active dry yeast, often requiring only one rise instead of two in some recipes. This makes it particularly convenient for quick recipes or for those new to yeast baking. Fresh yeast, sometimes called compressed yeast, is a moist, block-like form found in the refrigerated section.
It's highly perishable and typically has a shorter shelf life. It's often preferred by professional bakers for its subtle flavor profile, but it requires crumbling and dissolving in liquid before use. Approximately 1 ounce (28 grams) of fresh yeast is roughly equivalent to a standard packet (7 grams) of active dry or instant yeast in leavening power.
The Science Behind Yeast Fermentation: A Simple Explanation
At its core, yeast fermentation in baking is a biological process driven by Saccharomyces cerevisiae, the common baker's yeast. When yeast is introduced to a warm, moist environment with food (sugars), it begins to metabolize. The primary food source is initially simple sugars present in the flour or added directly (like granulated sugar). If simple sugars are scarce, yeast can break down more complex starches in the flour into usable sugars. This metabolic process, in the absence of sufficient oxygen, is called anaerobic respiration or fermentation.
The chemical equation for this process is roughly: Sugar → Ethanol + Carbon Dioxide (CO₂). The carbon dioxide gas is what inflates the dough, creating bubbles and causing it to rise. The ethanol, an alcohol, largely evaporates during the baking process, although it contributes slightly to flavor. As the yeast consumes sugars and produces gas, the dough expands, doubling or even tripling in volume depending on the recipe and conditions. Understanding this simple science helps beginners grasp why certain steps, like providing warmth and time, are essential for successful and easy yeast fermentation.
Essential Equipment and Ingredients for Easy Yeast Fermentation
Must-Have Baking Tools for Successful Yeast Fermentation
While you don't need a professional kitchen setup for easy yeast fermentation, a few basic tools can make the process much smoother and more reliable. A sturdy mixing bowl, large enough to accommodate the dough as it doubles or triples in size, is essential. Glass or plastic bowls are often preferred as they help maintain a consistent temperature. Measuring cups and spoons are critical for accurately portioning ingredients; even slight variations in flour or liquid can impact dough consistency and fermentation. For liquids, a liquid measuring cup with a spout is ideal.
A dough scraper or bench scraper is incredibly useful for handling sticky dough, dividing it, and cleaning up surfaces. For precise temperature control, especially when activating yeast or checking the dough's internal temperature during proofing, an instant-read thermometer or a dedicated dough thermometer is invaluable. Maintaining temperatures within a range like 75-85°F (24-29°C) for rising can significantly improve fermentation speed and consistency. Finally, a clean kitchen towel or plastic wrap is necessary to cover the dough during its rise, preventing it from drying out and forming a crust, which would hinder the fermentation process.
Key Ingredients for Yeast Fermentation: Flour, Water, and Sugar
The foundation of almost any yeast dough involves three primary ingredients: flour, water, and yeast itself. Flour provides the structure through its protein content, gluten, which forms an elastic network that traps the carbon dioxide gas produced by the yeast. All-purpose flour is a great starting point for beginners as it has a moderate protein level (typically 10-12%) suitable for many bread and roll recipes. Bread flour, with a higher protein content (12-14%), develops stronger gluten and is excellent for chewier breads, but it might be slightly trickier for a first-timer.
Water (or sometimes milk or other liquids) is necessary to hydrate the flour and activate the yeast. It allows the gluten proteins to form their network and provides the moist environment yeast needs to thrive. Sugar isn't always strictly necessary added sugar, as yeast can feed on sugars naturally present in flour, but a small amount of added sugar acts as quick fuel for the yeast, kickstarting the fermentation process more rapidly.
Even a single teaspoon of granulated sugar per cup of flour can make a noticeable difference in initial yeast activity, contributing to an easy yeast fermentation beginner tutorial experience. Other ingredients like salt and fat (oil, butter) play roles, but flour, water, and yeast are the absolute core for leavening.
Choosing the Right Water Temperature for Yeast Activation
The temperature of the liquid used to activate yeast is one of the most critical factors for successful easy yeast fermentation, especially for beginners using active dry yeast. Water that is too cold will not wake the yeast up, and water that is too hot can kill it. For active dry yeast, the ideal temperature range is typically between 105°F and 115°F (40°C and 46°C).
This temperature is warm enough to encourage the yeast to become active but not so hot as to damage the delicate organisms. Using a thermometer is highly recommended to ensure you hit this sweet spot consistently.
If you are using instant yeast, the temperature is less critical since it's usually mixed directly with dry ingredients, but the overall dough temperature will still influence fermentation speed. When dissolving instant yeast in liquid (some recipes still call for this), a slightly cooler temperature, around 100°F (38°C), is perfectly fine. For fresh yeast, cooler water around 80-90°F (27-32°C) is often sufficient as it's already active. Regardless of yeast type, ensuring the liquid is within the correct range sets the stage for vigorous yeast activity and a successful rise, making your easy yeast fermentation beginner tutorial efforts pay off.
Step-by-Step Guide to Yeast Fermentation: A Beginner-Friendly Approach
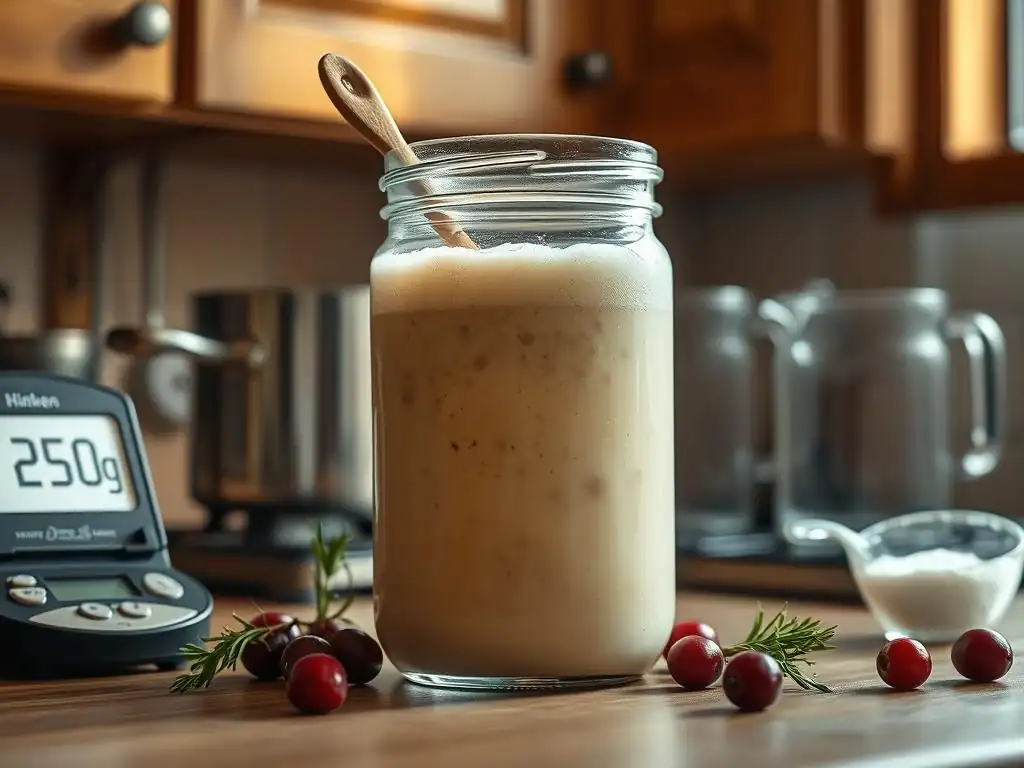
Step 1: Activating the Yeast - A Detailed Tutorial
This step is primarily for those using active dry yeast, though some recipes may call for proofing instant yeast as well. Start by measuring the warm liquid (water or milk) specified in your recipe, ensuring it is within the ideal temperature range, typically 105-115°F (40-46°C) for active dry yeast. Pour this liquid into a small bowl or measuring cup. Add the yeast and a pinch of sugar (if your recipe includes it, or even if it doesn't, a little sugar helps feed the yeast initially). Stir gently to combine.
Let the mixture sit undisturbed for 5 to 10 minutes. During this time, the yeast should begin to consume the sugar and produce carbon dioxide, which will cause foam or bubbles to appear on the surface. A healthy, active yeast mixture will look frothy and have a distinct yeasty aroma. If after 10-15 minutes there is little to no activity (no foam), your yeast may be expired or the water temperature was incorrect. In this case, it's best to start over with fresh yeast and correctly tempered liquid to ensure successful easy yeast fermentation.
Step 2: Preparing the Dough - Mixing and Kneading Techniques
Once your yeast is activated (or if using instant yeast, added directly), combine it with the rest of the liquid ingredients and then the dry ingredients, starting with the flour and salt. Mix everything together in a large bowl using a wooden spoon, spatula, or stand mixer until a shaggy dough forms. At this point, the dough might be sticky, but all the flour should be incorporated.
Kneading is the next crucial step. This develops the gluten structure, which is essential for trapping the gas produced during fermentation. You can knead by hand on a lightly floured surface or use a stand mixer with a dough hook. Hand kneading typically involves folding the dough over itself, pushing it away with the heel of your hand, rotating, and repeating for 8-10 minutes until the dough is smooth and elastic.
With a stand mixer, knead on medium speed for 6-8 minutes. The dough is properly kneaded when it passes the "windowpane test": you can gently stretch a small piece of dough into a thin membrane without it tearing. This developed gluten is key to achieving a light texture through easy yeast fermentation.
Step 3: The First Rise - Creating the Ideal Fermentation Environment
The first rise, often called bulk fermentation, is where the majority of the yeast's work happens. Lightly grease a clean bowl with oil or cooking spray. Shape the kneaded dough into a ball and place it in the bowl, turning it to coat all sides with oil. This prevents a dry skin from forming. Cover the bowl tightly with plastic wrap or a clean kitchen towel. The ideal environment for the first rise is warm and draft-free. A temperature between 75-85°F (24-29°C) is generally optimal for most doughs, leading to a rise within 1 to 2 hours.
You can create a warm spot by placing the bowl in a turned-off oven with the light on (the light bulb provides gentle heat), or near a sunny window (but avoid direct, hot sun). The dough should roughly double in size. To check if it's ready, gently poke it with a floured finger; if the indentation remains, it's done. If it springs back quickly, it needs more time. This patient waiting period is fundamental to achieving successful and easy yeast fermentation.
Step 4: Shaping the Dough - Gentle Handling for Optimal Results
After the first rise, gently "punch down" the dough. This isn't a forceful action but rather a gentle deflation to release some of the built-up gas and redistribute the yeast, sugar, and enzymes for the second rise. Turn the dough out onto a lightly floured surface. Divide the dough if necessary, according to your recipe (e.g., for rolls, loaves, or pizza).
Shape the dough pieces into their final forms – loaves, rolls, pizza rounds, etc. Handle the dough with care during shaping to avoid deflating it too much. The goal is to create some tension on the surface while maintaining the airy structure built during the first fermentation. For loaves, this might involve folding and sealing seams; for rolls, tucking edges underneath to form a tight ball. Proper, gentle shaping sets the stage for an even rise in the next step of your easy yeast fermentation beginner tutorial.
Step 5: The Second Rise - Proofing for a Light and Airy Texture
The second rise, or proofing, is the final rise before baking. Place the shaped dough on baking sheets lined with parchment paper, in loaf pans, or wherever it will be baked. Cover the dough loosely with plastic wrap or a light cloth to prevent drying. The conditions for the second rise are similar to the first: warm and draft-free, ideally 75-85°F (24-29°C). However, this rise is typically shorter, lasting from 30 minutes to 1 hour, depending on the recipe and temperature.
The dough should increase significantly in size again, though perhaps not quite double, and look visibly puffy. To test if it's ready, gently press the side of the dough with your finger. If the indentation springs back slowly and slightly, leaving a small mark, the dough is perfectly proofed. If it springs back immediately, it needs more time. If the indentation remains completely, it may be over-proofed. Proper proofing is crucial for achieving that desirable light and airy texture after baking, a hallmark of easy yeast fermentation success.
Troubleshooting Common Yeast Fermentation Problems

My Yeast Isn't Activating - What Went Wrong?
If you've added active dry yeast to warm water and sugar, waited 5-10 minutes, and see no foam or bubbles, the most likely culprit is either the water temperature or inactive yeast. Check your water temperature again; it should be between 105-115°F (40-46°C). Water that is too cold won't wake the yeast, and water over 130°F (54°C) will kill it instantly. Use a thermometer to be sure.
Another common issue is expired yeast. Yeast is a living organism with a shelf life. Check the expiration date on the packet or jar.
If it's past the date, or if the package has been open for a long time and stored improperly, the yeast may no longer be viable. Always store opened yeast in an airtight container in the refrigerator or freezer to maintain its potency. If your yeast doesn't activate, discard the mixture and start over with fresh yeast and properly tempered water to ensure your easy yeast fermentation beginner tutorial doesn't get derailed at the first step.
Dough Isn't Rising - Identifying and Fixing Issues
A dough that doesn't rise, or rises very slowly, after mixing indicates insufficient yeast activity. Several factors could be at play. First, confirm your yeast was active (if proofing) or is fresh (if using instant). If the yeast was fine, consider the temperature of your ingredients and rising environment. Cold ingredients (like cold flour or water) can significantly slow down fermentation. Ensure your liquid was the correct temperature and that your rising spot is warm enough, ideally 75-85°F (24-29°C). A cooler environment will simply require much longer rising times, sometimes several hours or even overnight in the refrigerator.
Too much salt in the dough can also inhibit yeast activity, as salt draws moisture out of the yeast cells. Make sure you're using the correct amount of salt according to your recipe – typically around 1.5-2% of the flour weight. Lastly, insufficient kneading can result in a weak gluten structure unable to trap the gas, making the dough appear not to rise much. Ensure you've kneaded the dough until it's smooth and elastic. If the dough is just slow, giving it more time in a warm place is often the fix for easy yeast fermentation issues.
Over-Proofing vs. Under-Proofing: How to Tell the Difference
Knowing when your dough is perfectly proofed is key. Under-proofed dough hasn't developed enough gas or flavor. When baked, it will often result in a dense loaf with poor volume and a tight crumb. If you gently poke under-proofed dough, the indentation will spring back immediately. Baking under-proofed dough can sometimes be salvaged, but the texture won't be ideal for your easy yeast fermentation beginner tutorial goals.
Over-proofed dough, on the other hand, has risen too much, and the gluten structure has become weakened and can collapse. This happens when the yeast has consumed most of the available sugars and the gas bubbles have grown too large. When baked, over-proofed dough may collapse in the oven, resulting in a dense, heavy texture, sometimes with large, irregular holes.
If you gently poke over-proofed dough, the indentation will remain completely, and the dough might feel fragile or even start to deflate. While slightly over-proofed dough can sometimes be baked carefully, significantly over-proofed dough is difficult to rescue and often results in a poor final product.
Easy Yeast Fermentation Recipes to Get You Started
Beginner's Bread Recipe: A Simple Introduction to Yeast Baking
Starting with a simple white bread is an excellent way to practice easy yeast fermentation. A basic recipe might involve 3 cups of all-purpose flour (about 360g), 1 packet (2 and a quarter teaspoons, 7g) of active dry yeast, 1 teaspoon of salt (about 6g), 1 tablespoon of sugar (about 12g), and about 1 to 1 and a quarter cups of warm water (240-300ml, 105-115°F). Begin by activating the yeast in the warm water with the sugar for 5-10 minutes until foamy.
Combine the activated yeast mixture with the flour and salt in a large bowl. Mix until a shaggy dough forms, then knead for 8-10 minutes until smooth and elastic. Place the dough in a greased bowl, cover, and let rise in a warm place for 1 to 1.5 hours, or until doubled.
Punch down, shape into a loaf, place in a greased loaf pan, cover, and let rise again for 30-45 minutes until puffy. Bake at 375°F (190°C) for 30-35 minutes, or until golden brown and the internal temperature reaches 200-210°F (93-99°C). This step-by-step process demonstrates the core principles of easy yeast fermentation from start to finish.
Quick Pizza Dough Recipe: Using Yeast for a Delicious Homemade Pizza
Homemade pizza is a fun and rewarding way to utilize your easy yeast fermentation skills. A quick dough recipe often uses instant yeast for a faster rise. You might use 2 cups of all-purpose or bread flour (about 240g), 1 teaspoon of instant yeast (about 3g), 1 teaspoon of salt (about 6g), 1 tablespoon of olive oil (about 14g), and about 3/4 cup of warm water (180ml, around 100°F). Combine the flour, instant yeast, and salt in a bowl. Add the warm water and olive oil and mix until a dough forms.
Knead the dough for 5-7 minutes until smooth. Unlike bread, pizza dough often benefits from a shorter fermentation or even a cold fermentation in the fridge for flavor, but for a quick pizza, a single warm rise works well. Place the dough in a greased bowl, cover, and let rise in a warm place for 30-45 minutes, or until puffy.
Punch down, shape into your pizza crust, add toppings, and bake on a preheated pizza stone or baking sheet at a high temperature, like 450-500°F (230-260°C), for 10-15 minutes. This recipe provides a faster example of easy yeast fermentation compared to traditional bread.
Sweet Roll Dough Recipe: Mastering Yeast Fermentation for Sweet Treats
Yeast fermentation isn't just for savory bakes; it's essential for many sweet treats too, like cinnamon rolls or sticky buns. A typical sweet dough includes milk, eggs, and butter, which enrich the dough but can sometimes slow down fermentation slightly. A recipe might use 3 cups of flour (about 360g), 1 packet (7g) of active dry or instant yeast, 1/4 cup sugar (about 50g), 1/2 teaspoon salt (about 3g), 1/2 cup warm milk (120ml, 105-115°F for active dry, 100°F for instant), 2 large eggs, and 1/4 cup melted butter (about 57g).
Activate yeast in warm milk with a pinch of the sugar (if using active dry). Combine dry ingredients. Add wet ingredients (including yeast mixture, eggs, melted butter) to dry and mix. Knead for 8-10 minutes until smooth. Place in a greased bowl, cover, and let rise for 1-1.5 hours until doubled. Punch down, roll, fill, shape, and place rolls in a baking pan. Cover and let rise again for 30-45 minutes until puffy. Bake according to your specific roll recipe instructions. Sweet doughs demonstrate that easy yeast fermentation can lead to delicious desserts too!
Tips and Tricks for Successful Yeast Fermentation at Home

Optimizing Temperature and Humidity for Yeast Activity
Yeast is highly sensitive to its environment, particularly temperature and humidity. For most standard recipes using active dry or instant yeast, a dough temperature and rising environment of 75-85°F (24-29°C) is ideal for a timely rise (typically 1-2 hours for the first rise). Temperatures significantly cooler will slow fermentation considerably, while temperatures much warmer can over-activate the yeast, leading to off-flavors or over-proofing. Consistency is key for successful easy yeast fermentation.
Humidity also plays a role. A dry environment can cause the surface of the dough to dry out and form a skin, which restricts expansion. Covering the dough with plastic wrap or a damp cloth helps maintain humidity around the dough. Placing the dough in a slightly warm, steamy environment (like a proofing box or a turned-off oven with a pan of hot water) can also help, especially in dry climates. Monitoring both temperature and humidity helps ensure your yeast is working effectively.
Using a Dough Thermometer for Precise Fermentation Control
For bakers who want to move beyond guesswork and achieve consistent results with easy yeast fermentation, a dough thermometer is an invaluable tool. It allows you to check the internal temperature of your dough throughout the mixing and rising process. The ideal dough temperature after mixing is often cited as around 75-78°F (24-26°C). This temperature range ensures the yeast is active but not working so fast that you can't control the process.
You can check the temperature by inserting the thermometer probe into the center of the dough mass. If the dough is too cold after mixing, you can let it rest in a warmer spot; if it's too warm, a brief period in the refrigerator might be needed. Monitoring the dough's temperature during bulk fermentation and proofing also helps you predict rising times more accurately. For example, dough held consistently at 80°F (27°C) will rise faster than dough at 70°F (21°C). Using a thermometer adds a layer of precision to your easy yeast fermentation beginner tutorial.
Storing Yeast Properly to Maintain Its Potency
Proper storage is crucial for keeping your yeast alive and potent, ensuring successful easy yeast fermentation every time you bake. Active dry and instant yeast are best stored in an airtight container in a cool, dry place like a pantry before opening. Once opened, they should be stored in an airtight container in the refrigerator, where they can last for several months, or in the freezer, where they can remain viable for a year or even longer. Freezing doesn't kill the yeast; it simply makes it dormant.
Fresh yeast is much more perishable and must be stored in the refrigerator. It typically only lasts for about 1-2 weeks. Check for signs of spoilage like hardening, discoloration, or a strong, unpleasant odor. Always check the expiration date on any type of yeast before use. Using fresh, properly stored yeast is the first step to a reliable and easy yeast fermentation process, preventing disappointing results from inactive leavening.
Mastering Yeast Fermentation: Beyond the Basics
Advanced Techniques for Flavor Development in Yeast Doughs
Once you're comfortable with the basics of easy yeast fermentation, you can explore techniques that enhance flavor. One common method is cold fermentation, where the dough undergoes a long, slow rise in the refrigerator, often for 12-48 hours. The cooler temperature slows down yeast activity but allows enzymes in the flour to break down starches into more complex sugars, which yeast consumes slowly, producing a wider range of flavorful byproducts.
Another technique is using a pre-ferment, such as a poolish or biga. A poolish is a wet, sponge-like mixture of equal parts flour and water by weight, plus a small amount of yeast, fermented for several hours or overnight. A biga is stiffer, with a lower hydration. Incorporating a pre-ferment into the final dough adds complexity, structure, and a more nuanced flavor profile compared to using yeast directly. These methods showcase how controlling the rate and duration of easy yeast fermentation can dramatically impact the final taste.
Exploring Different Flours and Their Impact on Fermentation
The type of flour you use significantly impacts yeast fermentation and the final dough structure. Flours vary in protein content and composition, which affects how well the gluten network develops and traps gas. High-protein bread flour (12-14% protein) forms a strong gluten structure that can support a vigorous rise and produce chewy bread, but it may require slightly more liquid and longer kneading than lower-protein flours.
Lower-protein flours like cake flour (6-8% protein) or pastry flour (8-9% protein) have weaker gluten, resulting in more tender baked goods. While not typically used for standalone bread, they might be blended with other flours. Whole wheat flour contains bran and germ, which can interfere with gluten development and absorb more liquid, often leading to slower fermentation and denser results unless adjustments are made (like adding vital wheat gluten or increasing hydration). Understanding these differences helps you predict how different flours will behave during your easy yeast fermentation process.
Understanding the Role of Salt in Yeast Fermentation
Salt (sodium chloride) is a critical ingredient in yeast dough, playing multiple roles beyond just flavor. While necessary for taste, salt also controls yeast activity. It slows down fermentation by drawing water out of the yeast cells via osmosis. Without salt, yeast ferments too quickly, leading to less flavor development and potentially over-proofing issues. A typical salt concentration in bread dough is around 1.5-2% of the total flour weight.
Salt also strengthens the gluten network. It helps the gluten proteins align and bond more effectively, resulting in a stronger, more elastic dough that can trap more gas and achieve better volume. Adding salt too early in the process, especially directly onto the yeast, can inhibit or even kill the yeast. For this reason, salt is usually added with the flour or after the yeast has been activated and mixed with some liquid. Proper salt balance is essential for controlled, easy yeast fermentation and optimal dough structure.
Conclusion: Unlock the Secrets of Easy Yeast Fermentation with BakeWithEase
Mastering yeast fermentation is a cornerstone of successful baking, opening the door to a world of delicious breads, rolls, and pastries. While it might seem intimidating at first, understanding the basic science, using the right tools and ingredients, and following a step-by-step process makes yeast fermentation easy for beginners. From activating yeast correctly to troubleshooting common issues like a slow rise, each step contributes to the final texture and flavor of your baked goods.
By practicing with simple recipes like beginner's bread or quick pizza dough, you'll gain confidence in handling yeast and dough. Paying attention to temperature, proper storage, and the subtle signs of proofing will elevate your results. Remember, baking is a journey, and even experienced bakers occasionally encounter challenges. With this easy yeast fermentation beginner tutorial from BakeWithEase, you have the foundation to unlock the secrets of yeast and consistently bake wonderful things. Keep practicing, experimenting, and most importantly, enjoy the process!
Frequently Asked Questions
What is yeast fermentation and why is it important in baking?
Yeast fermentation is the process where yeast consumes sugars and produces carbon dioxide and alcohol. This process is crucial in baking as the carbon dioxide creates air pockets that make dough rise.
What are the key ingredients needed for successful yeast fermentation?
You primarily need yeast (active dry, instant, or fresh), a sugar source (like sugar or honey), and warm liquid (water or milk). The liquid activates the yeast, while the sugar feeds it.
How do I know if my yeast is still active and good to use?
You can test your yeast by mixing it with warm water and sugar. If it foams up within 5-10 minutes, it's active. If not, your yeast may be expired or inactive.
What is the ideal temperature for yeast fermentation, and why is it important?
The ideal temperature range for yeast fermentation is generally between 70-80°F (21-27°C). Temperatures outside this range can either slow down or kill the yeast, affecting the dough's rise.
What can I do if my dough isn't rising properly, even after the fermentation process?
Several factors can contribute, including inactive yeast, incorrect temperature, or insufficient sugar. Ensure your yeast is active, the environment is warm, and the recipe's ingredients are accurately measured.
Final Reflection: The Tiny Powerhouse of Yeast and the Joy of Homemade
The seemingly simple process of yeast fermentation holds a surprising power, impacting not only our kitchens but also our understanding of biology and sustainable food practices. From crafting sourdough bread to brewing your own kombucha, mastering this fundamental process unlocks a world of culinary creativity and self-sufficiency. This knowledge, once confined to specialized fields, is now readily accessible, empowering individuals to connect with their food in a more meaningful way.
The journey of learning yeast fermentation has been a profound one for me, highlighting the interconnectedness of nature and human ingenuity. It's a testament to the power of observation and patience, mirroring the slow, deliberate processes found in nature itself. The art of baking is the art of patience.
This quote, though often applied to baking in general, perfectly encapsulates the essence of successful yeast fermentation – a process that demands respect for time and attention to detail. The reward, however, is immeasurable: the satisfaction of creating something delicious and wholesome from simple ingredients.
Now, it's your turn. Don't be intimidated by the seemingly complex world of yeast fermentation. Take the leap, experiment with different recipes, and embrace the learning process. The satisfaction of crafting your own bread, beer, or other fermented delights is a rewarding experience that will connect you to a rich history of food production and empower you to take control of your culinary destiny. Start small, be patient, and enjoy the journey – the tiny powerhouse of yeast awaits!
Unleash Your Inner Baker: Start Baking with Confidence!
Thanks for joining us on this yeast fermentation journey! We hope you now feel empowered to tackle bread making with newfound confidence. Ready to put your new skills to the test?
- Bake your first sourdough loaf: Grab those ingredients and follow the techniques you've learned. The smell of freshly baked bread will be your reward!
- Share your baking triumphs (or funny mishaps!): Let us know how your first attempt goes! We’d love to see your creations and hear your stories in the comments below.
- Explore advanced fermentation techniques: Dive deeper into the world of yeast – investigate different types of flour, explore various hydration levels, and master shaping techniques. The possibilities are endless!
What unique bread recipe are you excited to try first? Let's discuss!