
Achieving the Ideal Crumb Structure in Both Ciabatta and Rustic Loaves

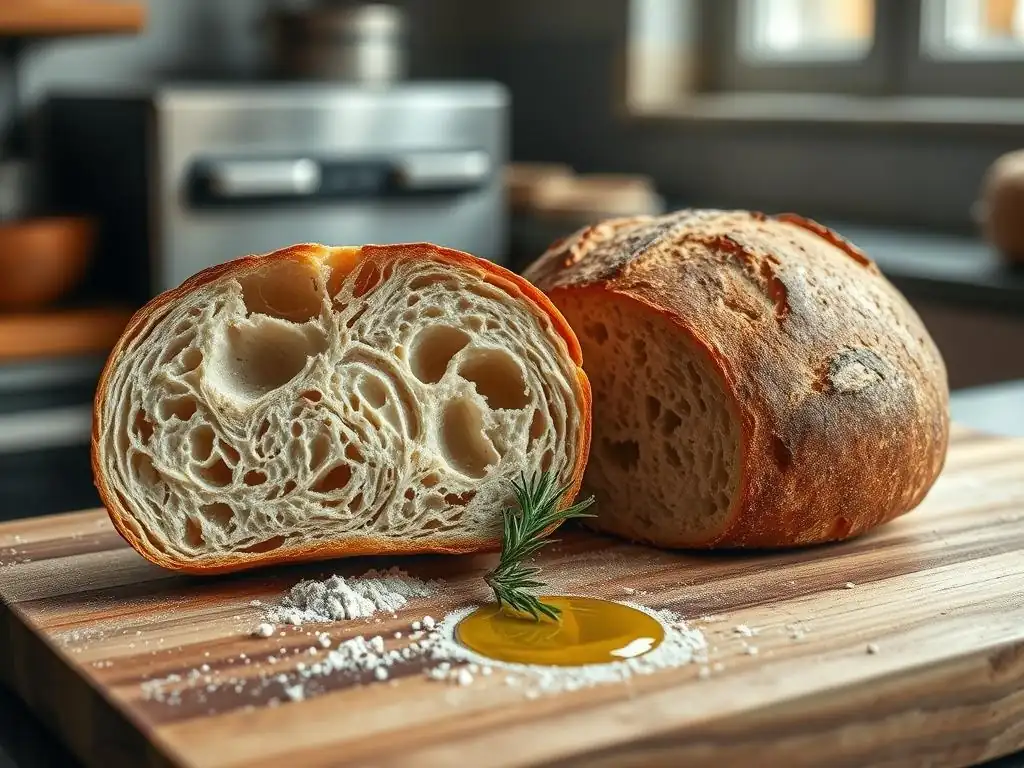
Welcome to BakeWithEase, your passport to effortless baking! Ever wondered how to achieve that coveted, airy crumb structure in your ciabatta loaves? Unlock the secrets to perfect, rustic bread right here. We're about to delve deep into the techniques and tips that will transform your baking, one loaf at a time. Ready to bake a masterpiece? Let's get started!
- Understanding Crumb Structure in Bread Baking
- The Importance of Crumb Structure in Ciabatta and Rustic Breads
-
Key Factors Influencing Crumb Structure in Ciabatta Bread
- Hydration Levels: The Foundation of Ciabatta's Open Crumb
- Flour Selection: Choosing the Right Flour for Optimal Ciabatta Crumb
- Mixing Techniques: Achieving the Proper Dough Consistency for Ciabatta
- Fermentation and Proofing: Creating the Signature Ciabatta Crumb
- Baking Techniques: Transforming Dough into Open-Crumbed Ciabatta
- Mastering Crumb Structure in Rustic Loaves
- Troubleshooting Common Crumb Structure Problems
- Tips and Tricks for Consistent Crumb Structure Success
- Frequently Asked Questions
- Final Reflection: The Art and Science of the Perfect Crumb
- Unleash Your Inner Baker: Master the Crumb!
Understanding Crumb Structure in Bread Baking
The internal texture of a loaf of bread, known as its crumb structure, is far more than just an aesthetic detail; it's a fundamental characteristic that defines the bread's quality, texture, and even flavor. The crumb is essentially the network of baked dough surrounding the air pockets created during fermentation and oven spring. When you slice into a loaf and see an open, airy interior with irregular holes, or a tighter, more even texture, you are observing its crumb structure. This structure is the result of complex interactions between ingredients, mixing, fermentation, and baking.
A well-developed crumb structure contributes significantly to the eating experience. An open crumb, typical of breads like ciabatta, provides a light, airy texture and a satisfying chew. The large surface area exposed to air can also enhance the perception of flavor. Conversely, a tighter, more uniform crumb, found in sandwich breads, offers a consistent texture suitable for slicing. Understanding how to influence this internal structure is key to mastering different bread styles and achieving repeatable, high-quality results in your baking.
The Importance of Crumb Structure in Ciabatta and Rustic Breads
What is Crumb Structure and Why Does it Matter?
Crumb structure refers to the pattern of air pockets and the surrounding baked dough matrix within a loaf of bread. It is formed by the gluten network, which traps the carbon dioxide gas produced by yeast or sourdough during fermentation. The size, distribution, and shape of these air pockets, as well as the thickness of the cell walls, all contribute to the final crumb. It's the internal architecture that gives bread its characteristic texture and feel in the mouth.
For breads like ciabatta and rustic loaves, the crumb structure is not just important; it's a defining feature. An open, airy crumb with irregular holes is the hallmark of authentic ciabatta, contributing to its light chew and ability to soak up olive oil.
In rustic loaves, while the openness might vary, a good crumb indicates proper fermentation and structure development, leading to a loaf that is both flavorful and texturally appealing, often with a satisfying chewiness that complements a crisp crust. A poor crumb structure, such as a dense or gummy interior, significantly detracts from the quality and enjoyment of these breads.
Desirable Crumb Characteristics: Ciabatta vs. Rustic Loaves
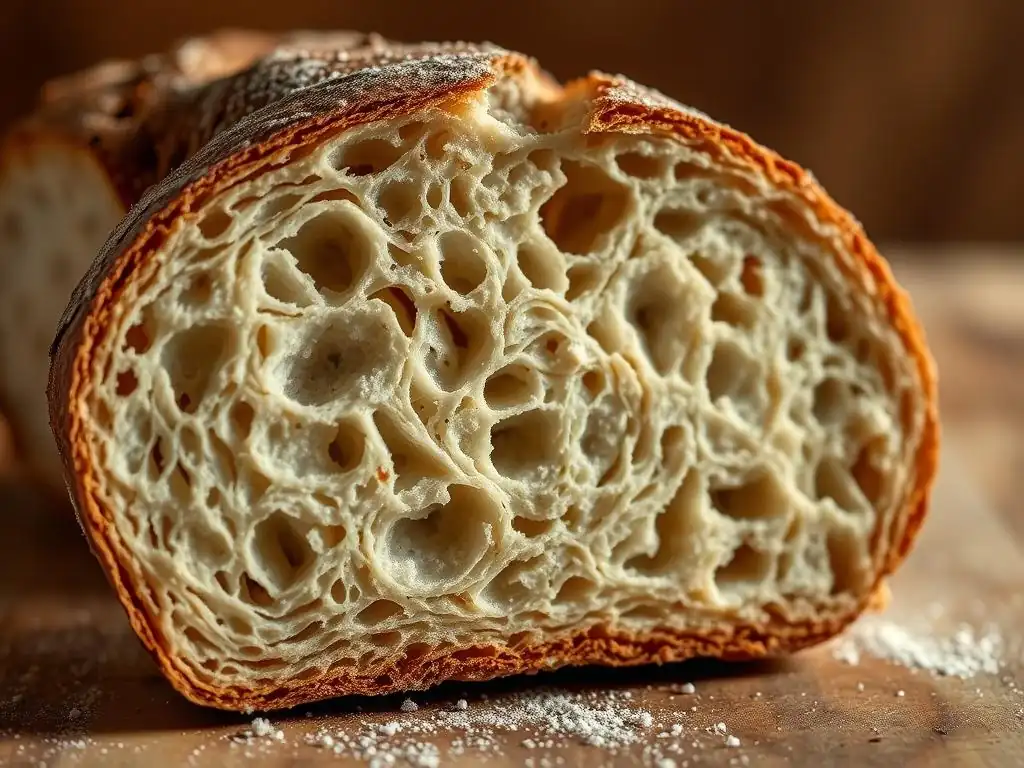
The ideal crumb structure differs between ciabatta and many rustic loaves, reflecting their distinct origins and intended uses. For ciabatta, the gold standard is a dramatically open crumb featuring very large, irregular holes interspersed with smaller ones. The cell walls should be thin, contributing to a light, almost ethereal texture. This creates a visually stunning pattern, sometimes described as a "map" or "atlas" due to the interconnected voids. Achieving this requires high hydration and very gentle handling.
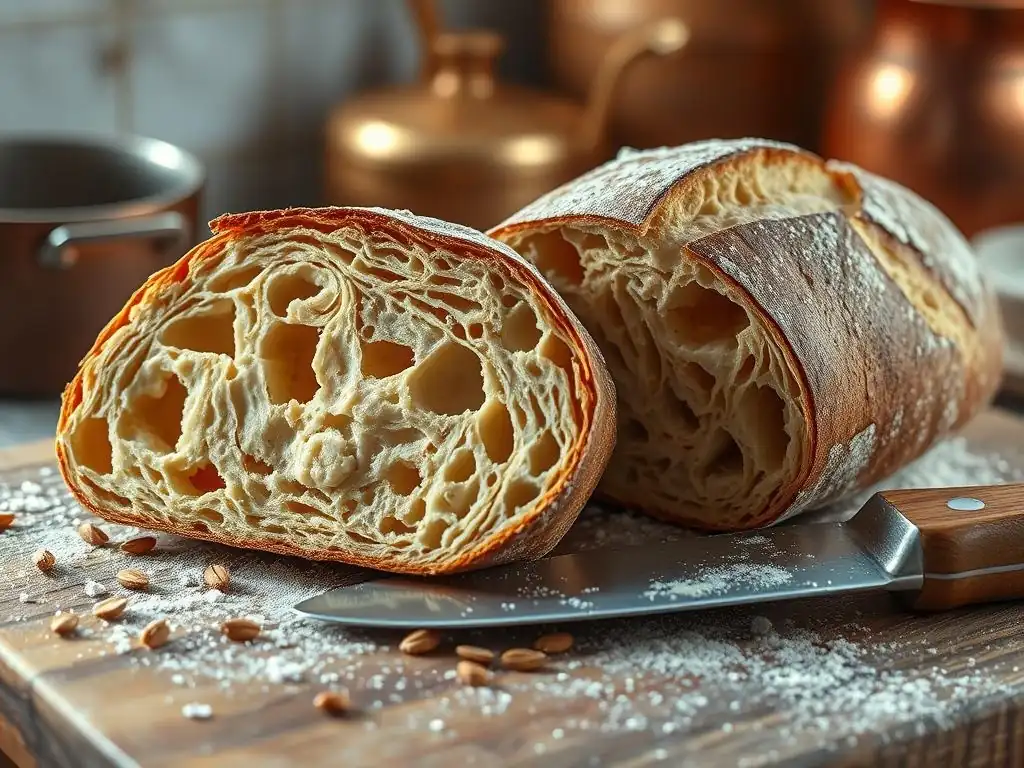
Rustic loaves, particularly sourdough country-style breads, also aim for an open crumb, but it's often more evenly distributed than ciabatta. While large holes are desirable, they are typically not as massive or irregular as those found in classic ciabatta crumb structure. The cell walls might be slightly thicker, providing a satisfying chewiness. The focus for rustic loaves is often on a balance of openness, chew, and the complex flavors developed through fermentation, resulting in a robust yet airy interior that pairs well with hearty meals.
Key Factors Influencing Crumb Structure in Ciabatta Bread
Hydration Levels: The Foundation of Ciabatta's Open Crumb
Hydration percentage is arguably the most critical factor in achieving the signature open crumb structure ciabatta loaves are known for. Hydration is calculated as the weight of water divided by the weight of flour, expressed as a percentage. Authentic ciabatta doughs are typically very high in hydration, often ranging from 75% to 90%, and sometimes even higher. This high water content makes the dough extremely wet, slack, and difficult to handle compared to lower-hydration doughs.
The reason high hydration is so important for ciabatta crumb structure is that the abundance of water allows the gluten network to develop more freely and become highly extensible. This elasticity is necessary to stretch around the large volumes of gas produced during fermentation and oven spring. A drier dough would resist this expansion, resulting in smaller, more uniform air pockets and a tighter crumb. The wet environment also promotes more vigorous yeast activity and gas production.
Flour Selection: Choosing the Right Flour for Optimal Ciabatta Crumb
Choosing the correct type of flour is fundamental when aiming for a specific crumb structure, especially the open crumb structure ciabatta loaves demand. Strong bread flour, typically containing 12% to 14% protein, is essential. This higher protein content means more gluten can be developed when water is added. Gluten forms the structural network that traps the gases produced by the yeast, creating the air pockets that make up the crumb.
Using a flour with insufficient protein, such as all-purpose flour (usually 10-11.5% protein), will result in a weaker gluten network incapable of supporting the large, irregular air pockets characteristic of ciabatta crumb structure. The protein quality also matters; look for flours specifically milled for bread baking, as they contain the right types of protein (gliadin and glutenin) that form strong, elastic gluten. Some bakers prefer specific Italian flours like Tipo 0 or Tipo 00 for bread, provided they have adequate protein levels (check the specifications, as not all Tipo 00 are high-protein).
High-Protein Flour: Building Strength and Structure
High-protein flour is the backbone of a strong gluten network, which is indispensable for creating the open crumb structure ciabatta requires. Proteins like gliadin and glutenin, when hydrated and worked, link together to form gluten. A higher percentage of these proteins means the potential for forming a more robust network. This network needs to be strong enough to withstand the pressure of expanding gases during fermentation and baking, preventing the dough from collapsing.
For ciabatta, this strength must be combined with extensibility – the ability to stretch without tearing. High-protein flours, when properly hydrated and developed, provide this balance. They build a resilient structure that can stretch thinly around large gas bubbles, forming the thin cell walls characteristic of an airy ciabatta crumb. Without sufficient protein, the gluten network would be too weak to support such an open structure, leading to a denser result.
The Role of Gluten Development in Ciabatta's Air Pockets
Gluten development is the process where the protein network forms and strengthens within the dough. As flour and water are mixed, gliadin and glutenin bond, and mechanical action (mixing, kneading, folding) aligns these bonds into an elastic mesh. This mesh is crucial because it acts like a balloon, trapping the carbon dioxide gas produced by the yeast. The quality and extent of gluten development directly dictate the dough's ability to hold gas and thus the resulting crumb structure.
For the large, irregular air pockets desired in ciabatta crumb structure, the gluten needs to be well-developed but also relaxed and extensible. Over-mixing can make the gluten network too tight and difficult to stretch, while under-mixing results in a weak network that can't trap gas effectively. The aim is a balance achieved through proper hydration, appropriate mixing techniques, and sufficient rest periods, allowing the gluten to become both strong and pliable.
Mixing Techniques: Achieving the Proper Dough Consistency for Ciabatta
Due to its extremely high hydration, ciabatta dough is typically too wet and sticky for traditional intensive kneading. Instead, techniques that build strength gradually while minimizing handling are employed. The goal is to develop the gluten network sufficiently to trap gas without degassing the dough or making the gluten too tight. This requires patience and a different approach than kneading a standard bread dough.
Techniques like autolyse followed by periodic stretch and folds are common for ciabatta. This method allows the dough to develop strength and structure over time with minimal mechanical action. The dough should be handled gently throughout the process to preserve the delicate network of air bubbles that are forming. Achieving the right dough consistency – very wet and bubbly, but with noticeable strength when stretched – is key to the final open crumb structure.
Autolyse: Enhancing Dough Hydration and Gluten Development
Autolyse is a simple yet powerful technique that significantly benefits high-hydration doughs like ciabatta. It involves mixing just the flour and water from the recipe and letting the mixture rest for a period, typically 20 minutes to an hour, before adding the salt and leavening. During this rest, the flour fully hydrates, and natural enzymes in the flour begin breaking down proteins, which aids in gluten formation without any mechanical work.
For ciabatta crumb structure, autolyse is invaluable because it makes the very wet dough more manageable later on. It allows the gluten network to start forming in a relaxed state, leading to a more extensible dough that is easier to stretch and fold. This passive development reduces the total mixing time needed and helps achieve a more open and irregular crumb by promoting a relaxed gluten structure from the start.
Gentle Mixing: Avoiding Over-Development of Gluten
Given ciabatta's high hydration, aggressive kneading is counterproductive. Instead, gentle mixing techniques like the 'stretch and fold' method are preferred. After the autolyse (if used) and incorporating other ingredients, the dough is periodically stretched up and folded over itself in the bowl, usually every 30-60 minutes over several hours during bulk fermentation. This builds strength gradually while preserving the delicate air bubbles.
This gentle approach, often done with wet hands to prevent sticking, avoids over-developing the gluten, which could make it too tight and restrict the expansion needed for large holes. It also minimizes degassing the dough, allowing the accumulating carbon dioxide to inflate the gluten network and create the foundation for the open ciabatta crumb structure. The dough transitions from a shaggy mass to a smooth, bubbly structure with good extensibility.
Fermentation and Proofing: Creating the Signature Ciabatta Crumb
Fermentation is the engine that drives crumb structure development in bread. During the bulk fermentation (first rise), yeast or sourdough starter consumes sugars in the flour and produces carbon dioxide gas and alcohol. The gas inflates the gluten network, creating the air pockets, while the alcohol and other byproducts contribute flavor. Proper fermentation is crucial for developing both the structure and the taste of ciabatta.
A long, slow bulk fermentation, often involving several hours at room temperature with periodic stretch and folds, is typical for ciabatta. This allows sufficient gas production to inflate the dough significantly and develop a bubbly, airy structure. Following bulk fermentation, a relatively short proofing period (final rise) is needed. Over-proofing can lead to the gluten structure weakening and collapsing, resulting in a dense crumb instead of the desired open ciabatta crumb structure.
Bulk Fermentation: Developing Flavor and Gas Production
Bulk fermentation is the primary phase where the dough develops its strength, extensibility, and flavor, and where the air pockets that form the crumb structure begin to take shape. Starting after the ingredients are mixed and the leavening is added, this phase typically lasts several hours for ciabatta, often at room temperature. During this time, the yeast is actively producing carbon dioxide gas, which gets trapped within the developing gluten network.
The dough should increase significantly in volume, often doubling or nearly tripling, depending on the recipe and conditions. You'll also notice bubbles forming on the surface and within the dough itself as you perform stretch and folds. Sufficient bulk fermentation ensures enough gas is produced to create an airy interior and allows the gluten structure to strengthen enough to support this gas. Insufficient bulk fermentation is a common cause of a dense crumb structure.
Proofing: Achieving the Right Balance for Oven Spring
Proofing, or the final rise, occurs after the dough has been minimally shaped (or just divided, in the case of ciabatta) and before it is baked. This is a relatively short period where the dough continues to produce gas, preparing it for the intense heat of the oven. The goal is to allow the dough to relax slightly and build up enough internal pressure for a strong "oven spring" – the rapid expansion that occurs when the dough hits the hot oven.
For ciabatta crumb structure, proofing must be carefully monitored. It's often done for a relatively short time, perhaps 30-60 minutes at room temperature, depending on how vigorous the bulk fermentation was. The dough should look inflated and airy. Over-proofing is a risk; if the dough proofs too long, the gluten network can become overstretched and weak, unable to hold the gas. This leads to a loaf that might collapse when handled or result in a poor oven spring and a tight, even crumb structure.
Baking Techniques: Transforming Dough into Open-Crumbed Ciabatta
The final transformation of dough into bread with a beautiful crumb structure happens in the oven. Baking techniques play a crucial role, particularly in the initial stages when oven spring occurs and the crust sets. For ciabatta, high heat and steam are essential for maximizing expansion and achieving the desired open crumb.
Baking at high temperatures (typically 450-500°F or 230-260°C) provides the initial burst of heat needed for rapid gas expansion. Steam is equally important during the first 10-15 minutes of baking; it keeps the surface of the dough moist and pliable, preventing the crust from forming too early and allowing the loaf to expand fully. Proper handling during shaping and transferring to the oven is also vital to preserve the delicate air pockets developed during fermentation.
High Oven Temperature: Generating Steam for Maximum Rise
Baking ciabatta at a high oven temperature is critical for achieving maximum oven spring, which directly impacts the openness of the crumb structure. When the dough enters a hot oven, the gases within it expand rapidly, and the water in the dough turns to steam, causing the dough to puff up dramatically before the crust sets. This rapid expansion stretches the gluten network to its limit, contributing significantly to the large, irregular holes characteristic of ciabatta crumb structure.
Using steam during the initial phase of baking is equally important. Steam keeps the surface of the dough moist and elastic, preventing the crust from hardening too quickly. This allows the loaf to expand freely during oven spring. Without sufficient steam, a hard crust forms prematurely, restricting the dough's expansion and resulting in a smaller loaf with a denser crumb. Home bakers often achieve this by using a baking stone with a tray of hot water, spraying the oven walls, or baking in a preheated Dutch oven (though a Dutch oven often restricts the classic flat ciabatta shape).
Shaping and Handling: Preserving Air Pockets
The way ciabatta dough is handled after bulk fermentation is almost as important as the fermentation itself for preserving the open crumb structure. Ciabatta means "slipper" in Italian, referencing its rustic, often somewhat flat and elongated shape. This shape is achieved with minimal intervention. The dough is typically turned out onto a heavily floured surface, gently stretched or divided, and then transferred to a proofing surface (like floured linen or parchment) without significant shaping or degassing.
The key principle here is to be extremely gentle. The large, irregular air bubbles that have developed during fermentation are delicate. Aggressive kneading, folding, or pressing the dough during shaping will expel these trapped gases, collapsing the structure and resulting in a dense, uniform crumb instead of the desired open crumb structure ciabatta is known for. Think of it as carefully supporting the dough into its final form rather than manipulating it heavily.
Mastering Crumb Structure in Rustic Loaves
Hydration and Flour: Balancing for Flavor and Texture in Rustic Bread
Achieving the desired crumb structure in rustic loaves involves a slightly different balance of hydration and flour types compared to ciabatta. While still aiming for openness, rustic loaves often use a hydration range of 65% to 80%. This slightly lower hydration makes the dough easier to handle and shape into traditional forms like boules or batards, while still allowing for a relatively open crumb. The water content remains crucial for activating enzymes and facilitating gluten development.
Rustic loaves frequently incorporate a blend of flours, often including some percentage of whole wheat or rye flour alongside strong white bread flour. For example, a common blend might be 80% white bread flour and 20% whole wheat. Whole grain flours absorb more water than white flour and contain bran and germ particles that can interfere with gluten development, potentially resulting in a slightly less open crumb than 100% white flour loaves. However, they contribute significant flavor and nutritional value, requiring a balance between openness and these desired characteristics.
Sourdough Starters: Enhancing Flavor and Crumb Complexity
Many rustic loaves, particularly those with a tangy flavor profile, rely on a sourdough starter for leavening. A sourdough starter is a living culture of wild yeast and lactic acid bacteria (LAB) cultivated in a flour and water mixture. Unlike commercial yeast, which primarily produces carbon dioxide, a sourdough starter produces both gas (from wild yeast) and organic acids (from LAB). This dual action significantly impacts both the flavor and the crumb structure of the bread.
A healthy, active sourdough starter is essential for providing the necessary lift to create an open crumb structure in rustic loaves. The wild yeast produces the gas that inflates the dough, while the LAB contribute the characteristic tangy flavor. The slower, more complex fermentation driven by sourdough allows for a longer period of gluten development and gas accumulation, often resulting in a more robust and resilient crumb structure compared to commercial yeast.
Wild Yeast and Lactic Acid Bacteria: Impact on Crumb
The symbiotic relationship between wild yeast and lactic acid bacteria in a sourdough starter has a profound effect on the resulting bread, including its crumb structure. The wild yeast performs the primary leavening function, producing carbon dioxide gas that inflates the dough. Different strains of wild yeast can influence the rate of fermentation and the size of gas bubbles.
Simultaneously, the lactic acid bacteria ferment sugars to produce lactic and acetic acids. These acids not only impart the signature sourdough tang but also play a role in gluten development. The slightly acidic environment created by the LAB helps to strengthen the gluten network by inhibiting enzymes (proteases) that can break down gluten. This results in a more stable and extensible gluten structure, capable of holding more gas and achieving a more open and well-defined crumb structure in rustic loaves.
Kneading and Shaping: Developing Structure in Rustic Dough
Developing a strong yet extensible gluten network through kneading is vital for the crumb structure of rustic loaves. Depending on the hydration level and desired crumb, various kneading methods can be used, including traditional hand kneading, machine kneading, or no-knead methods relying on stretch and folds. The goal is to develop sufficient gluten to create a resilient framework capable of trapping gases and holding the loaf's shape.
Shaping the dough after bulk fermentation is equally important. Techniques like pre-shaping and final shaping create surface tension, which provides structure and helps the loaf hold its form during proofing and baking. This tension directs the oven spring upwards and outwards, contributing to a well-risen loaf with a good crumb structure. The specific shaping technique used will depend on the desired final form, such as a boule (round) or batard (oval).
Understanding Windowpane Test: Assessing Gluten Development
The windowpane test is a classic method used by bakers to assess whether the gluten in their dough is sufficiently developed for a good crumb structure. To perform the test, take a small piece of dough (about the size of a golf ball) and gently stretch it between your fingers and thumbs. If the gluten is well-developed, you should be able to stretch the dough into a thin, translucent membrane – like a windowpane – without it tearing.
If the dough tears easily before becoming translucent, it indicates that the gluten network needs more development through additional kneading or stretch and folds. If it feels very tight and resists stretching, it might be slightly overdeveloped or needs more rest. Achieving a good windowpane signifies that the gluten network is strong and elastic enough to trap the gases produced during fermentation and expand during oven spring, crucial for an open crumb structure in rustic loaves.
Shaping Techniques for Rustic Loaves: Preserving Gas
Proper shaping is essential for building the structure that supports the crumb in rustic loaves like boules and batards. After the bulk fermentation, the dough is typically turned out and gently degassed just enough to handle it. It's then often pre-shaped into a rough ball or log and allowed to rest briefly (15-30 minutes). This allows the gluten to relax before the final shaping.
The final shaping involves folding and tucking the dough to create significant surface tension. For a boule, the edges are folded into the center and the dough is then rounded against the work surface to create a taut skin. For a batard, the dough is folded into a log shape. This surface tension helps the loaf hold its shape during proofing and directs the oven spring upwards, contributing to a better rise and a more desirable crumb structure. Over-handling or aggressive shaping can expel too much gas, resulting in a tighter crumb.
Proofing Rustic Loaves: Achieving Optimal Rise and Crumb Texture
Proofing, the final rise before baking, is a critical stage for the crumb structure of rustic loaves. The duration and temperature of proofing significantly impact how much the dough expands and the condition of the gluten network entering the oven. Proper proofing allows the dough to build sufficient internal pressure for a good oven spring without overstretching the gluten to the point of collapse.
Rustic loaves, especially sourdough, are often proofed for several hours at room temperature or, more commonly, cold-proofed in the refrigerator. Cold fermentation, discussed below, is a popular technique for both flavor and crumb development. The dough should be visibly increased in volume and feel airy and slightly fragile when gently poked. Under-proofing leads to a dense crumb and excessive tearing during oven spring, while over-proofing results in a lack of oven spring and a potentially dense, even crumb.
Cold Fermentation: Slowing Down Fermentation for Complex Flavors
Cold fermentation, or 'retarding' the dough in a refrigerator (typically 38-40°F or 3-4°C) for 12 to 48 hours, is a favored technique for many rustic loaves, particularly sourdough. The cold temperature significantly slows down the yeast activity, slowing gas production. However, it allows the enzymes in the flour and the lactic acid bacteria in sourdough to work over a much longer period, developing complex flavors and improving the dough's structure.
Beyond flavor, cold fermentation benefits the crumb structure in several ways. The extended, slow fermentation allows the gluten network to relax and become more extensible, while the continuous, albeit slow, gas production strengthens the dough's ability to hold air. The cold dough is also firmer and easier to score cleanly just before baking. This often results in a more predictable oven spring and contributes to a more open and evenly distributed crumb structure throughout the rustic loaf.
Baking for the Perfect Rustic Loaf Crumb
The baking process is the final step in setting the crumb structure of a rustic loaf. Applying high heat and creating a steamy environment in the oven are key to maximizing oven spring and achieving a desirable internal texture. The method of baking, such as using a Dutch oven, and monitoring the loaf's internal temperature are crucial for success.
High initial heat causes the dough to expand rapidly, while steam keeps the crust soft, allowing for maximum rise before the crust sets. This combination ensures the air pockets expand fully, contributing to an open crumb. Monitoring the internal temperature confirms the loaf is fully baked, preventing the dreaded gummy crumb that results from underbaking.
Using a Dutch Oven: Creating a Steamy Environment
Baking rustic loaves, particularly sourdough boules, in a preheated Dutch oven has become the standard technique for many home bakers seeking professional-quality results. The heavy cast iron pot and lid, heated to a high temperature (often 450-500°F or 230-260°C), trap the moisture released from the dough as it bakes. This creates a steamy micro-environment around the loaf during the crucial initial phase of baking.
This trapped steam is essential for achieving a good oven spring and a beautiful, open rustic loaf crumb. The steam keeps the surface of the dough moist and pliable for the first 15-20 minutes, preventing a hard crust from forming too early. This allows the loaf to expand fully during the initial heat surge before the lid is removed for the final phase of baking, where the crust browns and crisps. The steam allows the dough to stretch around the expanding gas pockets, promoting a more open crumb structure.
Monitoring Internal Temperature: Ensuring a Well-Baked Loaf
While visual cues like crust color and sound are helpful, using an instant-read thermometer to check the internal temperature is the most reliable way to ensure a rustic loaf is fully baked through. An underbaked loaf, even if the crust looks perfect, will have a gummy, wet, or dense crumb structure because the starches haven't fully gelatinized and the moisture hasn't properly dispersed.
For most rustic loaves, the internal temperature should reach between 200°F and 210°F (93°C and 99°C). Baking to this temperature ensures the crumb is set, preventing gumminess and contributing to a pleasant chew and texture. Insert the thermometer into the thickest part of the loaf, avoiding any large air pockets if possible. Allowing the loaf to cool completely on a wire rack after baking is also essential; slicing hot bread traps steam, which can also lead to a gummy texture.
Troubleshooting Common Crumb Structure Problems
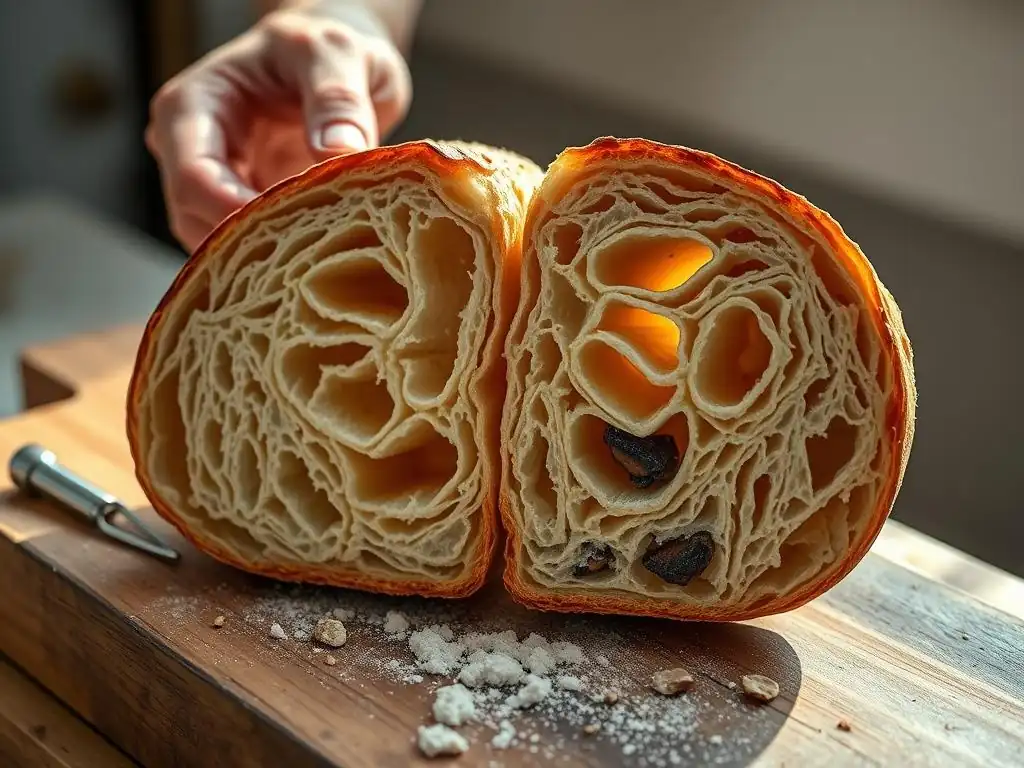
Achieving the ideal crumb structure in ciabatta and rustic loaves can be challenging, and encountering issues is part of the learning process. Common problems include a dense crumb, large and uneven holes, or a gummy texture. Identifying the root cause is the first step to improving your results. These problems often stem from issues with fermentation, gluten development, handling, or baking.
Addressing crumb structure problems requires a systematic approach. Review your process step-by-step: Is your leavening active? Is your dough properly hydrated and the gluten well-developed? Are you handling the dough gently? Is your fermentation and proofing timed correctly? Are you baking at the right temperature with sufficient steam? By carefully evaluating each stage, you can pinpoint where things went wrong and adjust your technique for the next bake.
Dense Crumb: Causes and Solutions
A dense crumb structure is one of the most common and disheartening problems in bread baking. It means the dough didn't trap enough gas or the structure collapsed. Several factors can cause this: inactive yeast or starter, insufficient fermentation time (not enough gas produced), underdeveloped gluten (the network is too weak to hold gas), or using flour with insufficient protein content. Over-proofing is another major culprit; if the dough proofs too long, the gluten can weaken and the structure collapses before it even hits the oven.
To combat a dense crumb, first check your leavening's vitality – is your yeast fresh or your starter active and bubbly? Ensure your bulk fermentation is sufficient; the dough should show significant volume increase and signs of gas production (bubbles). Focus on proper gluten development through mixing and stretch/folds, using the windowpane test as a guide. Be mindful of proofing times; it's often better to slightly under-proof than drastically over-proof. Finally, ensure the loaf is baked thoroughly to the correct internal temperature (200-210°F), as underbaking can also contribute to a heavy, dense texture.
Large, Uneven Holes: Identifying and Correcting the Issue
While large holes are celebrated in ciabatta crumb structure, a rustic loaf with excessively large, uneven holes interspersed with dense areas usually indicates an issue with dough handling or inconsistent fermentation. This often happens when large, isolated pockets of gas are trapped during shaping because the dough wasn't gently degassed enough or handled unevenly. It can also result from uneven mixing or fermentation where gas production was inconsistent throughout the dough mass.
To achieve a more uniform yet still open crumb structure in rustic loaves, ensure your initial mixing incorporates all ingredients evenly. During handling after bulk fermentation, gently turn out the dough and give it a light pre-shape to even out the gas distribution before the final shaping. Avoid aggressively pressing or folding the dough in a way that creates massive, isolated air pockets. For ciabatta, while large holes are desired, excessively uneven distribution might still point to inconsistent handling that collapsed some areas while leaving others with huge voids. Focus on gentle, consistent shaping techniques.
Gummy Crumb: Addressing Underbaking and Dough Handling
A gummy, wet, or sticky crumb, even after the bread has cooled, is almost always a sign of underbaking. If the loaf doesn't reach a sufficient internal temperature (typically 200-210°F or 93-99°C), the starches in the flour don't fully gelatinize, resulting in a sticky, unpleasant texture. This can happen if the oven temperature is too low, if the baking time is too short, or if the crust sets too quickly, preventing heat penetration to the center.
To avoid a gummy crumb structure, always use an instant-read thermometer to verify the internal temperature of your loaf before removing it from the oven. Ensure your oven is properly preheated and calibrated (an oven thermometer helps here). If the crust is browning too quickly, you can loosely tent the loaf with foil for the remainder of the baking time. Additionally, allowing the bread to cool completely on a wire rack before slicing is crucial. Slicing hot bread traps steam inside, which can make the crumb seem gummy even if it's technically baked through.
Tips and Tricks for Consistent Crumb Structure Success
Achieving consistent results with crumb structure ciabatta loaves and other rustic breads requires attention to detail and a willingness to learn from each bake. While the process involves many variables, focusing on a few key areas can dramatically improve your consistency and help you master the desired crumb structure. Precision in measurements, understanding your equipment, and patient practice are fundamental.
Don't be afraid to experiment and adjust. Baking is both a science and an art. Pay close attention to how your dough looks and feels at every stage – it will tell you a lot about its development. Keep notes on your process and results. Over time, you'll develop an intuition for what works in your specific environment with your ingredients, leading to more predictable and successful bakes with beautiful crumb structures.
Measuring Ingredients Accurately: Ensuring Consistency
One of the most impactful steps you can take to ensure consistent crumb structure is to measure your ingredients accurately, especially flour and water. Using a digital kitchen scale is highly recommended. Volume measurements (like cups) are notoriously inaccurate for flour because how much flour fits in a cup varies greatly depending on how it's scooped and packed. This can lead to significant variations in hydration, which directly affects gluten development and crumb structure.
For example, 1 cup of flour can weigh anywhere from 120g to 150g. In a recipe calling for 500g of flour and 375g of water (75% hydration), being off by just 30g of flour (the difference between 120g and 150g per cup if using ~4 cups) can change your hydration percentage by several points. This seemingly small difference can alter the dough's consistency, handling characteristics, and ultimately, the crumb structure ciabatta loaves achieve. Weighing ensures you are always starting with the correct hydration ratio specified in the recipe.
Understanding Your Oven: Adjusting Baking Times and Temperatures
Every oven is different. They can vary significantly in their actual temperature compared to the thermostat setting, and they often have hot or cold spots. Relying solely on your oven's dial can lead to inconsistent baking results and impact your crumb structure. Using an independent oven thermometer placed inside your oven will show you its true temperature and help you identify any major discrepancies.
Knowing how your oven performs allows you to make necessary adjustments. If your oven runs consistently cool, you might need to set it slightly higher or extend the baking time. If it has hot spots, rotating your loaf halfway through baking can help ensure even browning and a uniform crumb structure. Pay attention to how quickly the crust is setting; if it's happening too fast, you might need to reduce the temperature slightly or increase steam early on to allow for better oven spring and crumb development.
Practice Makes Perfect: Refining Your Technique Over Time.
Mastering the art of achieving the ideal crumb structure in ciabatta and rustic loaves is a journey that requires practice and patience. Your first few attempts might not yield the open, airy results you envision, and that's perfectly normal. Each bake provides valuable insights into how your ingredients, environment, and techniques interact. Pay attention to the feel of the dough throughout the process – how does it respond to mixing, stretching, and shaping?
Keeping a baking journal can be incredibly helpful. Note down key details for each bake: ingredients used (including flour brand and protein), hydration percentage, bulk fermentation time and temperature, proofing time and temperature, baking temperature and duration, and observations about the final crumb structure. Was it dense? Too even? Perfectly open? Reviewing these notes over time will help you identify patterns, understand what adjustments lead to desired outcomes, and refine your technique to consistently produce beautiful crumb structure ciabatta loaves and rustic breads.
Frequently Asked Questions
What is the ideal crumb structure for ciabatta loaves?
The ideal crumb structure for ciabatta loaves features large, irregular holes and a soft, airy texture, allowing for a perfect balance of crust and chewiness.
How can I achieve a good crumb structure in my ciabatta?
To achieve a good crumb structure, focus on using high-hydration doughs and ensure proper fermentation and stretching techniques to promote air bubbles.
What role does hydration play in ciabatta crumb structure?
Hydration is crucial in ciabatta baking; a higher water-to-flour ratio helps create a lighter crumb and enhances the bread's open structure.
Are there specific flour types that improve ciabatta's crumb?
Using bread flour or 00 flour can significantly improve ciabatta's crumb structure due to their higher protein content, which supports gluten formation.
Can I adjust the crumb structure in rustic loaves as well?
Yes, you can adjust the crumb structure in rustic loaves by modifying hydration levels, fermentation time, and kneading techniques, similar to ciabatta.
Final Reflection: The Art and Science of the Perfect Crumb
The pursuit of the ideal crumb structure in bread, specifically ciabatta and rustic loaves, is not merely a culinary quest; it's a journey into the heart of baking itself. Understanding the interplay of hydration, fermentation, and baking techniques reveals a fascinating world of texture and flavor, directly impacting the sensory experience of the final product. This knowledge, far from being niche, is increasingly relevant in a food culture that prizes artisanal craftsmanship and the appreciation of quality ingredients.
The exploration of crumb structure has profoundly shaped my own understanding of baking, moving beyond simple recipes to encompass a deeper appreciation for the scientific principles at play. The subtle nuances in texture – from the airy pockets of a perfectly risen ciabatta to the robust chew of a rustic loaf – are a testament to the baker's skill and attention to detail. Bread is the staff of life,
they say, and I believe that the quality of that staff is directly related to the care and understanding invested in its creation. This journey has highlighted the importance of patience, observation, and a willingness to experiment, all crucial elements in achieving baking mastery.
Now, it's your turn. Consider the lessons learned here – the importance of hydration, the magic of fermentation, and the impact of oven spring – and apply them to your own baking endeavors. Don't be afraid to experiment, to adjust techniques, and to strive for that perfect crumb. The reward? Not just a visually stunning loaf, but a deeply satisfying experience that connects you to the ancient art of bread making and the simple pleasure of sharing something delicious with others. Embrace the challenge, and discover the joy of creating truly exceptional bread.
Unleash Your Inner Baker: Master the Crumb!
Thanks for taking the time to explore the art of crafting perfect crumb structure in your ciabatta and rustic loaves! We hope you gained valuable insights into achieving that airy, open texture. Now it’s time to put your new knowledge into practice.
- Bake a test loaf today! Try adjusting your hydration or fermentation time based on what you learned, and document your results. This is the best way to refine your technique.
- Share your baking journey! Post a picture of your masterpiece on social media and tag us – we'd love to see your progress!
- Consider experimenting with different flours to see how they impact the crumb. What unexpected textures will you discover?
Ready to transform your bread baking? What flour are you most excited to try next?