
Baking with Confidence: Your Guide to Ciabatta & Rustic Breads

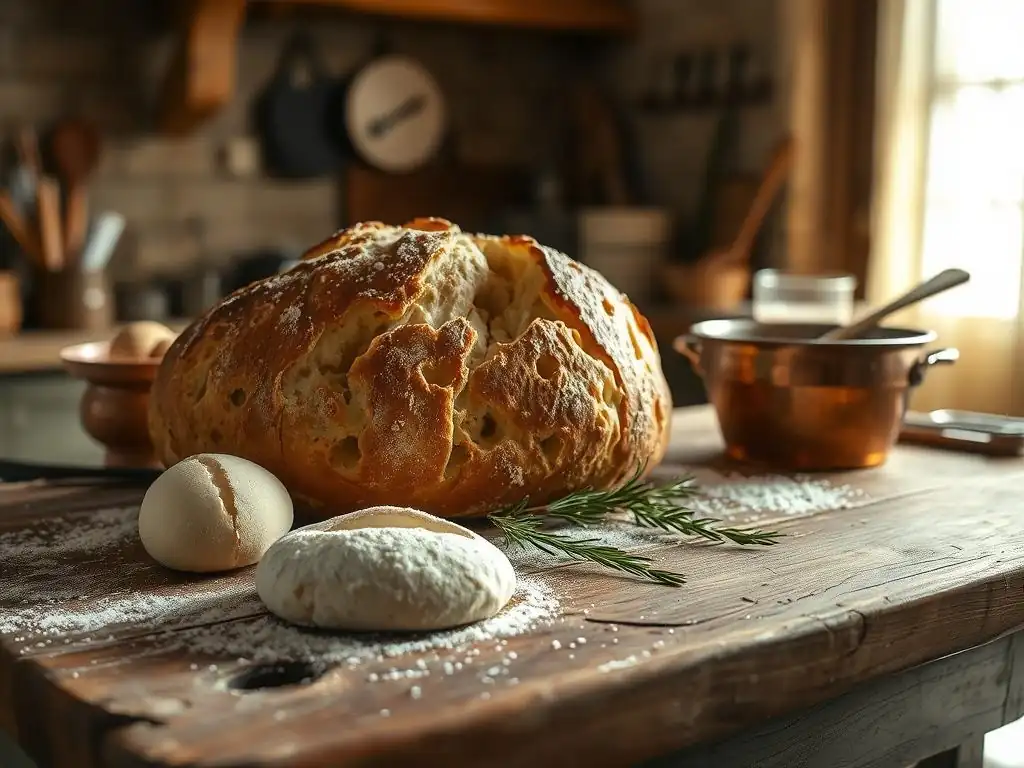
Welcome to BakeWithEase, your trusted companion in the delightful world of baking! Ever dreamt of achieving that perfect, airy loaf? This week, we're unlocking the secrets to crafting a truly exceptional rustic bread, starting with our easy ciabatta bread recipe. Dive in and discover how simple it is to bake a loaf that will impress your family and friends, one delicious bite at a time. Curious about the key to that perfect crumb? Let's get baking!
- Introduction to Baking Ciabatta and Rustic Breads at Home
- Mastering the Easy Ciabatta Bread Recipe: A Step-by-Step Guide
- Exploring Other Rustic Bread Recipes for Home Bakers
- Tips for Storing and Serving Your Homemade Rustic Bread
- The Joy of Baking: Creating Delicious Breads with Confidence
-
Frequently Asked Questions
- What exactly is ciabatta bread, and what makes it unique?
- Is the "Easy Ciabatta Bread Recipe" on BakeWithEase.com truly beginner-friendly?
- What are some key tips for achieving that signature "open crumb" in ciabatta?
- Can I adapt the "Easy Ciabatta Bread Recipe" to include different flavors or ingredients?
- How should I store my homemade ciabatta bread to keep it fresh for as long as possible?
- Final Reflection: The Humble Loaf, the Immense Reward
- Unlock Your Inner Baker: Craft Your Perfect Crust!
Introduction to Baking Ciabatta and Rustic Breads at Home
Why Bake Rustic Bread? The Appeal of Homemade Crusty Bread
There's an undeniable magic in baking bread at home, especially when it comes to rustic varieties like ciabatta. The process transforms simple ingredients – flour, water, yeast, and salt – into something truly special. The aroma that fills your kitchen as the bread bakes is intoxicating, promising a reward far greater than anything store-bought.
Beyond the sensory experience, baking rustic bread allows you to control the quality of ingredients and tailor the loaf to your preferences, whether you desire a darker crust, a softer crumb, or the addition of herbs or seeds. It's a rewarding culinary journey that yields delicious, wholesome results perfect for sharing or savoring yourself.
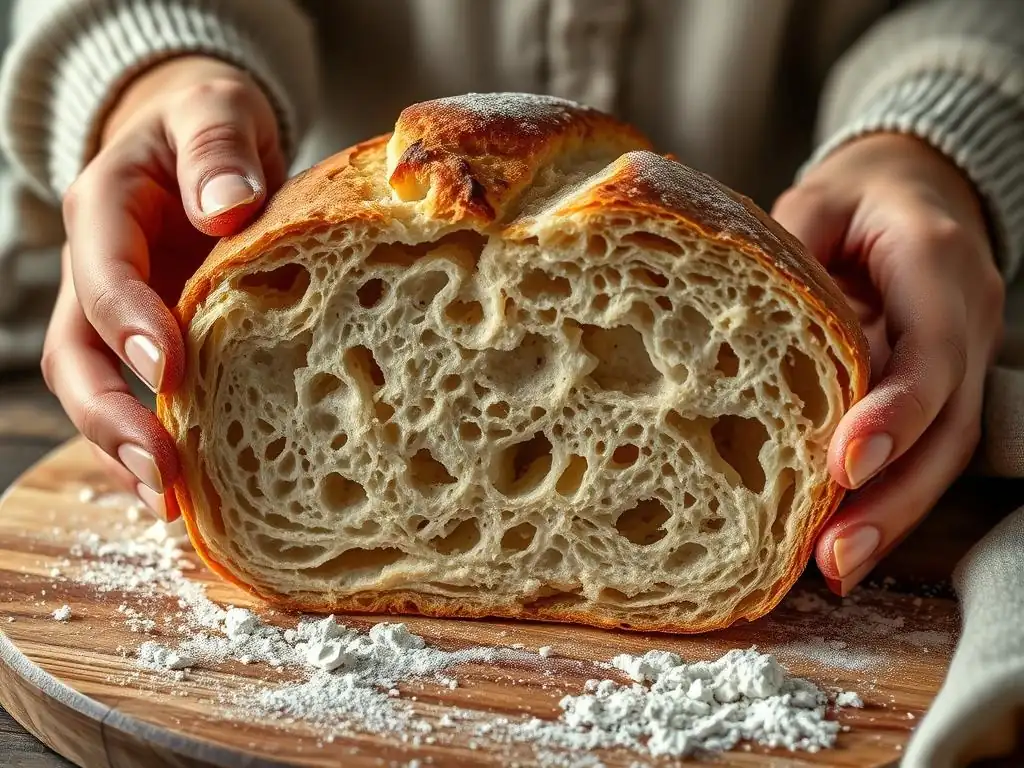
Homemade rustic bread, particularly an easy ciabatta bread recipe, offers a unique texture that's hard to replicate commercially. The combination of a crisp, crackly crust and an interior filled with irregular, open air pockets (known as alveoli) provides a delightful contrast with every bite. This distinctive structure makes it ideal for dipping in olive oil, building hearty sandwiches, or simply enjoying with butter. Mastering an easy ciabatta bread recipe empowers you to create this artisanal quality bread whenever you desire, bringing the rustic charm of a European bakery right into your home kitchen.
BakeWithEase's Approach to Simple Bread Baking
At BakeWithEase, we believe that baking delicious bread, even something as seemingly complex as ciabatta or other rustic loaves, should be accessible and enjoyable for everyone. Our philosophy centers around breaking down traditional techniques into simple, manageable steps. We focus on understanding the 'why' behind each stage – from mixing and kneading (or not kneading!)
to fermentation and baking – so you can build confidence and intuition in your baking skills. We provide clear, concise instructions and helpful tips to guide you through the process, making the journey from raw ingredients to a beautiful, crusty loaf a smooth and rewarding one.
Our approach to an easy ciabatta bread recipe, for instance, strips away unnecessary complexities while retaining the essential elements that give this bread its signature character. We emphasize techniques like high hydration and long, slow fermentation, but explain them in a way that is easy to grasp for beginners. Our goal is to demystify the process, proving that you don't need years of experience or fancy equipment to produce incredible results. With BakeWithEase, you'll discover that baking rustic bread is not only achievable but also deeply satisfying.
Mastering the Easy Ciabatta Bread Recipe: A Step-by-Step Guide
Understanding the Key Ingredients for Authentic Ciabatta
High-Gluten Flour: The Foundation of Ciabatta's Open Crumb
The type of flour you use is paramount when baking ciabatta. High-gluten flour, such as bread flour, is typically recommended because it contains a higher protein content (around 12-14%) compared to all-purpose flour (typically 10-12%). This higher protein level is crucial for developing a strong gluten network. Gluten is the elastic structure that traps the gases produced by yeast, allowing the dough to rise and creating those large, airy pockets characteristic of authentic ciabatta. Without sufficient gluten development, a high-hydration dough like ciabatta would spread out excessively and result in a dense, flat loaf.
While bread flour is ideal for achieving the best results and developing that sought-after open crumb structure in your easy ciabatta bread recipe, you can still make a delicious loaf using all-purpose flour. However, you might find the crumb structure slightly less open, and the dough might be a little trickier to handle due to a weaker gluten network. Some bakers even blend a small amount of whole wheat flour (perhaps 10-15%) with bread flour for added flavor, but for a classic, light ciabatta, high-gluten bread flour is the gold standard.
The Importance of Water Content (Hydration) in Ciabatta Dough
Ciabatta dough is famously wet, boasting a high hydration level, often ranging from 70% to 85% or even higher (hydration is calculated as the weight of water divided by the weight of flour, multiplied by 100). This high percentage of water is fundamental to creating the bread's characteristic open, irregular crumb structure. The excess water allows the gluten network to expand more freely during fermentation and baking, forming large bubbles that become the signature alveoli. Working with such a wet dough can be intimidating at first, as it's sticky and slack, but it's essential for achieving the desired texture.
Handling a high-hydration dough requires a different approach than working with drier doughs. Instead of traditional kneading, techniques like stretch and folds or coil folds are used to develop gluten gently over time. These methods build strength in the dough without forcing out the precious air pockets. Embracing the stickiness is part of the process; using wet hands or a bench scraper can help manage the dough. While a hydration of 80% is common for an easy ciabatta bread recipe, starting slightly lower, say around 75%, can make the dough more manageable for beginners while still yielding excellent results.
Yeast Selection: Choosing the Right Leavening Agent
Yeast is the magical ingredient that makes bread rise, and for an easy ciabatta bread recipe, you typically have a few options: active dry yeast, instant yeast, or fresh yeast. Instant yeast is a popular choice for its convenience; it can be mixed directly into the dry ingredients and typically works a bit faster than active dry yeast. Active dry yeast requires activation in warm water before being added to the flour mixture, a step that confirms the yeast is alive and ready to work. Fresh yeast, less commonly available, is also potent but has a shorter shelf life.
For a slow, flavorful fermentation that truly develops the complex taste of ciabatta, many recipes utilize a poolish or biga, which are types of pre-ferments. These involve mixing a portion of the flour and water with a very small amount of yeast hours or even a day in advance.
Using a pre-ferment, even in an easy ciabatta bread recipe, allows enzymes more time to break down starches into sugars, which the yeast then consumes, producing more flavorful compounds. While instant yeast can be used directly for a quicker loaf, incorporating a small amount into a pre-ferment significantly enhances the depth of flavor and texture.
The Ciabatta Dough Recipe: Detailed Instructions
Step 1: Mixing the Dough - Achieving the Perfect Consistency
Mixing ciabatta dough differs from traditional bread dough because of its high hydration. Instead of vigorous kneading, the initial mix is often just enough to combine the ingredients into a shaggy, wet mass. This can be done by hand using a sturdy spoon or spatula, or in a stand mixer with a dough hook for just 2-3 minutes on a low speed.
The goal isn't to develop gluten at this stage, but merely to hydrate the flour and distribute the yeast and salt evenly. The dough will look very wet and sticky, more like a thick batter than a traditional dough – this is exactly what you want for your easy ciabatta bread recipe.
After the initial mix, it's beneficial to let the dough rest for 20-30 minutes. This resting period, known as autolyse (if only flour and water are mixed initially) or simply a rest, allows the flour to fully absorb the water and the gluten development to begin naturally without mechanical effort. This passive gluten development makes the subsequent folding steps much more effective and easier to perform. Don't be tempted to add more flour at this stage, even if the dough seems too wet; trust the process and the high hydration.
Step 2: Bulk Fermentation - Developing Flavor and Texture
Bulk fermentation, also known as the first rise, is a critical stage where the dough develops flavor, structure, and volume. For ciabatta, this is often a long process, typically lasting 2-4 hours at room temperature (around 70-75°F or 21-24°C), or even longer if done in a cooler environment or using a pre-ferment. During this time, the yeast produces carbon dioxide, causing the dough to rise, while enzymatic activity breaks down starches and proteins, contributing to the bread's aroma and texture. The dough should significantly increase in volume, often doubling or even tripling, and become noticeably bubbly.
Throughout the bulk fermentation, a key technique for high-hydration doughs is performing 'stretch and folds' or 'coil folds'. These are gentle manipulations done every 30-60 minutes during the first 1.5 to 2 hours of fermentation. To perform a stretch and fold, wet your hands slightly, grab one side of the dough, gently stretch it upwards, and fold it over the rest of the dough.
Rotate the bowl and repeat 3-4 times. This process builds strength in the gluten network without degassing the dough too much, helping to create that open crumb. For an easy ciabatta bread recipe, 3-4 sets of folds are usually sufficient.
Step 3: Shaping the Ciabatta Loaves - Gentle Handling is Key
Shaping ciabatta is less about creating tension and more about preserving the air pockets developed during fermentation. After the bulk fermentation is complete, gently scrape the dough out onto a well-floured surface. The dough will be soft, bubbly, and spread out. The goal is to divide the dough into desired loaf sizes (often two or three rectangles) without deflating it. Avoid kneading or handling the dough roughly. Use a bench scraper to gently nudge and shape the dough into rough rectangles or squares.
Once divided, lightly flour the tops of the pieces. You can then gently fold the dough over onto itself once or twice to create a bit of structure, or simply leave them as rough rectangles. The key is to be minimal in your handling.
Prepare a proofing surface, such as a baking sheet lined with parchment paper or a couche (a piece of linen or canvas) heavily floured with rice flour (which prevents sticking better than wheat flour). Carefully lift the shaped dough pieces using a bench scraper and transfer them to the proofing surface, ensuring they are well-separated or supported by folds in the couche to maintain their shape. Remember, the rustic, freeform shape is part of ciabatta's charm.
Step 4: Proofing the Dough - Ensuring a Light and Airy Bread
Proofing (or final fermentation) is the last rise the dough undergoes before baking. For ciabatta, this typically takes 30-60 minutes at room temperature, depending on your kitchen's warmth and how active your yeast is. The dough pieces should visibly puff up and become airy, but they won't double in size like a typical loaf.
You can test if the dough is ready by gently poking it with a floured finger; if the indentation slowly springs back halfway, it's likely ready to bake. If it springs back immediately, it needs more time. If it stays indented completely, it might be slightly over-proofed, but can often still be baked successfully.
Proper proofing is essential for achieving a light and airy interior. If the dough is under-proofed, it might not rise sufficiently in the oven, resulting in a dense crumb. If it's significantly over-proofed, the gluten structure can collapse, leading to a flat loaf.
While the dough is proofing, it's crucial to preheat your oven and baking surface (like a baking stone or steel) thoroughly. This step ensures a strong initial oven spring, which helps lift the dough and create those signature large holes. For an easy ciabatta bread recipe, keeping an eye on the visual cues of the dough puffing up is a reliable indicator.
Step 5: Baking for a Golden Crust - Oven Temperature and Steam
Baking ciabatta requires a hot oven and the introduction of steam. Preheat your oven to a high temperature, typically between 450°F and 500°F (230°C to 260°C). A baking stone or steel placed in the oven during preheating is highly recommended, as it provides a burst of heat from underneath, promoting good oven spring and a crisp bottom crust. While the oven preheats, gently transfer the proofed loaves onto a peel or the back of a baking sheet lined with parchment paper, ready to slide onto the hot stone.
Steam is crucial in the initial stages of baking rustic breads like ciabatta. The steam keeps the surface of the dough moist, allowing it to expand fully before the crust sets. This maximizes oven spring and contributes to a thinner, crispier crust.
Methods for creating steam are discussed in the next section, but it's typically introduced right as the bread goes into the oven. Bake the ciabatta for 20-30 minutes, or until the crust is a deep golden brown and the internal temperature reaches around 205°F (96°C). The high initial temperature helps with oven spring, and you might reduce the temperature slightly (e.g., to 425°F or 220°C) after the first 10-15 minutes to ensure the interior cooks through without the crust burning.
Achieving the Perfect Ciabatta Crust and Crumb: Tips and Tricks
Creating Steam in Your Oven for a Crusty Exterior
Achieving that signature thin, crackly crust on your easy ciabatta bread recipe relies heavily on creating a steamy environment in your oven during the first 10-15 minutes of baking. Steam keeps the surface of the dough pliable, allowing it to expand fully before the crust hardens. Without sufficient steam, the crust forms too quickly, restricting the loaf's rise and resulting in a thicker, less crisp exterior. There are several effective ways to generate steam in a home oven.
One common method is placing a pan (such as a cast iron skillet or a metal tray) on the bottom rack of your oven during preheating. Just before you load the bread, carefully pour a cup of hot water or ice cubes into this hot pan. The water will instantly turn to steam. Be extremely cautious when doing this to avoid burns.
Another method is using a Dutch oven or a lidded baking vessel; the lid traps the moisture released by the dough as it bakes, creating a steamy micro-environment. After 15-20 minutes, you remove the lid to allow the crust to brown and crisp up. For a simpler approach, you can spray the oven walls with water just before loading the bread, though this method produces less steam than others.
Troubleshooting Common Ciabatta Baking Problems
Baking ciabatta can sometimes present challenges, but understanding common issues helps you troubleshoot effectively. One frequent complaint is a loaf that spreads too much and ends up flat. This is often due to insufficient gluten development during bulk fermentation (not enough stretch and folds) or over-proofing, where the dough's structure weakens and can't support its airy volume.
Ensuring you use high-gluten flour and perform the recommended folds during the first rise is key. Another issue might be a tough crust; this can happen if the oven temperature is too low or if there isn't enough steam generated at the beginning of the bake.
Why is My Ciabatta Flat? Avoiding Common Dough Issues
A flat ciabatta loaf is disappointing but usually fixable in future attempts at your easy ciabatta bread recipe. As mentioned, the primary culprits are typically inadequate gluten development or over-proofing. If your dough doesn't feel slightly more structured and cohesive after the stretch and folds compared to the initial mix, you might need to incorporate more folds or ensure your flour has sufficient protein content. Using a stand mixer very briefly (1-2 minutes) after the initial rest can also help jumpstart gluten development for some doughs, although manual folds are preferred to maintain airiness.
Over-proofing occurs when the yeast has exhausted most of its food supply and the gluten structure begins to break down, causing the dough to lose tension and collapse. This is more likely to happen in a warm kitchen or if the fermentation/proofing times are too long. Pay attention to the dough's appearance and feel – it should be bubbly and jiggly but still have some underlying structure.
If it looks extremely gassy and fragile, reduce the proofing time next time. Also, ensure your shaping step is gentle to avoid deflating the dough; simply nudging it into shape and transferring carefully is better than aggressive handling.
Achieving the Signature Ciabatta Air Pockets (Alveoli)
The large, irregular air pockets, or alveoli, are the hallmark of a great ciabatta. Achieving them in your easy ciabatta bread recipe depends on several factors working together. High hydration is fundamental, as the excess water allows the gluten network to stretch more easily around large gas bubbles. Proper gluten development, achieved through gentle stretch and folds rather than aggressive kneading, is also crucial; you want a strong network, but one that is also extensible.
Long, slow fermentation contributes significantly to the development of large alveoli. This allows the yeast to produce gas gradually, giving the gluten time to stretch and form bigger bubbles. Finally, handling the dough gently during shaping and transferring is paramount. Each touch risks deflating the precious air you've worked hard to create. Minimizing manipulation and ensuring a hot oven with good steam for maximum oven spring will help transform those developed air pockets into the beautiful, open crumb structure you desire.
Exploring Other Rustic Bread Recipes for Home Bakers
Easy Rustic Bread Recipe: A Variation on the Ciabatta Theme
Once you've mastered the easy ciabatta bread recipe, you might find yourself eager to explore other rustic bread variations. Many rustic loaf recipes share similar principles with ciabatta – high hydration, minimal kneading, and long fermentation – but offer different flavors and textures through variations in flour, hydration levels, or added ingredients. A basic easy rustic bread recipe often involves a slightly lower hydration than ciabatta (perhaps 70-75%), making the dough a bit easier to handle, while still producing a wonderfully crusty loaf with a satisfyingly open crumb.
These simpler rustic doughs often use a mix of bread flour and a small percentage of whole wheat or rye flour for added depth of flavor. They can be baked in a variety of ways, including on a baking stone with steam, or within a preheated Dutch oven, which is a very forgiving method for beginners as it automatically provides the necessary steam. Experimenting with baking times and temperatures for these variations will help you understand how different doughs behave and how to achieve the perfect crust and crumb tailored to the specific recipe.
Rosemary and Sea Salt Rustic Bread
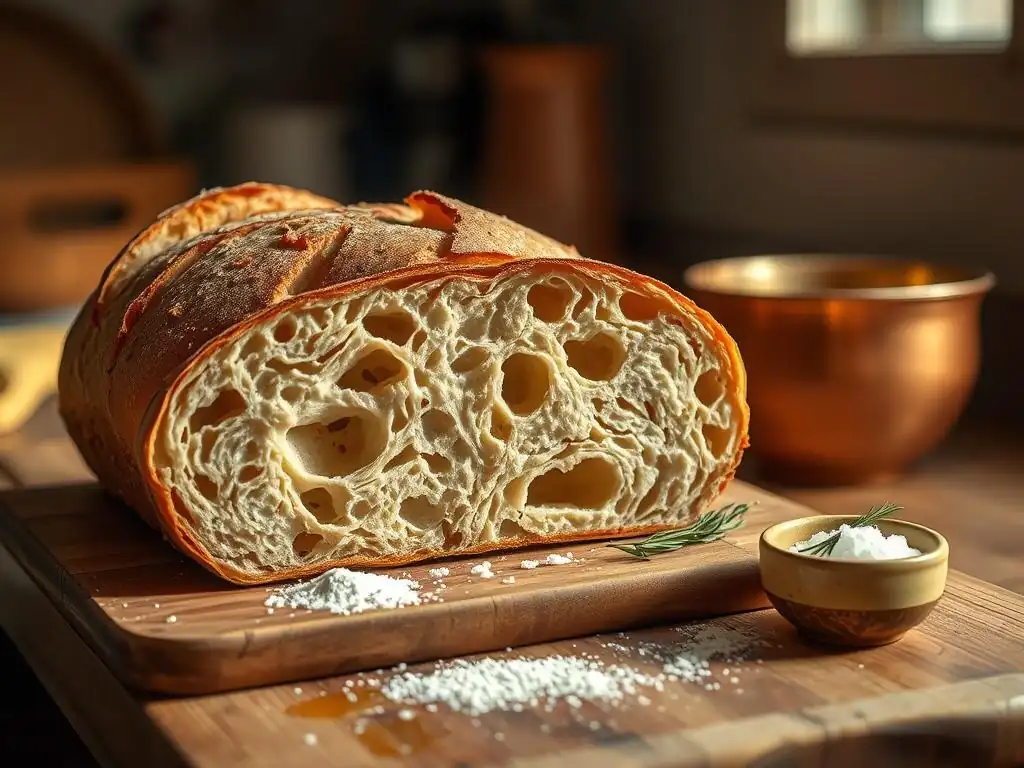
Adding herbs and spices is a fantastic way to customize your easy rustic bread recipe. Rosemary and sea salt is a classic combination that pairs wonderfully with the earthy flavor and open texture of a rustic loaf. To make this variation, simply incorporate about 1-2 tablespoons of finely chopped fresh rosemary and 1-2 teaspoons of flaky sea salt into the dough during the initial mixing stage. Ensure they are evenly distributed throughout the dough.
The process for this rosemary and sea salt rustic bread follows the same steps as a basic rustic loaf or an easy ciabatta bread recipe variation: mix, perform stretch and folds during bulk fermentation, gently shape, proof, and bake with steam. The aroma of the baking bread infused with rosemary is truly divine. This variation is excellent served simply with olive oil, alongside soups and stews, or as part of a cheese board. The salt crystals add a delightful pop of flavor when you bite into the crust.
Sourdough Rustic Bread: Adding Complexity to Your Baking
For those looking to deepen their bread baking skills after mastering yeast-based recipes like the easy ciabatta bread recipe, venturing into sourdough is a natural next step. Sourdough rustic bread uses a 'starter' – a live culture of wild yeast and bacteria – as the leavening agent instead of commercial yeast. This starter contributes a characteristic tangy flavor and creates a unique crumb structure. While the process involves maintaining the starter and often longer fermentation times, the resulting bread offers unparalleled complexity and aroma.
Baking sourdough rustic bread involves similar stages to yeast bread (mixing, bulk fermentation, shaping, proofing, baking), but the timing and techniques are adjusted to the slower action of the wild yeast. Bulk fermentation and proofing can take many hours, often overnight in a cool place. Scoring the loaf before baking is also more critical in sourdough to control oven spring. While it adds a layer of complexity, the satisfaction of baking with a starter you've nurtured is immense, and the flavor payoff is well worth the effort for many bakers.
Beginner's Sourdough Rustic Loaf
Starting your sourdough journey with a simple rustic loaf format can be less intimidating than tackling a high-hydration ciabatta-style sourdough right away. A beginner's sourdough rustic loaf recipe often uses a slightly lower hydration (around 70-75%) and focuses on building confidence with the starter and the longer fermentation cycles. You'll learn how to assess the dough's readiness based on visual cues and feel, rather than just relying on a clock.
A typical process involves feeding your starter, mixing the dough (flour, water, starter, salt), performing stretch and folds over a few hours of bulk fermentation, shaping the loaf (often into a boule or bâtard), proofing it (usually in a proofing basket, potentially overnight in the fridge for convenience and flavor), and baking it, often in a Dutch oven for excellent results. This foundational sourdough rustic loaf provides a solid understanding of the process before you might attempt something like a sourdough easy ciabatta bread recipe.
Tips for Storing and Serving Your Homemade Rustic Bread
Maintaining Freshness: Proper Storage Techniques
Once your beautiful ciabatta or rustic loaf has cooled completely (which is crucial – cutting into hot bread can ruin the crumb! ), proper storage is key to maintaining its freshness and characteristic crust. Rustic breads with their crisp crusts are best stored at room temperature, not in the refrigerator, which can cause them to go stale faster. The ideal method is to store the loaf cut-side down on a clean cutting board. This minimizes exposure of the cut surface to air.
For longer storage, or if the crust begins to soften, you can place the cooled loaf in a paper bag. Avoid plastic bags or airtight containers for the first day or two, as these will trap moisture and soften the crust significantly, defeating one of the main appeals of rustic bread. If you don't plan to eat the bread within 2-3 days, it freezes exceptionally well.
Slice the cooled loaf, or wrap it whole, in plastic wrap followed by aluminum foil or a freezer bag. Frozen bread can last for several months. To enjoy, thaw at room temperature and refresh in a hot oven (around 350°F or 175°C) for 5-10 minutes to revive the crust.
Serving Suggestions: Pairing Ciabatta and Rustic Breads
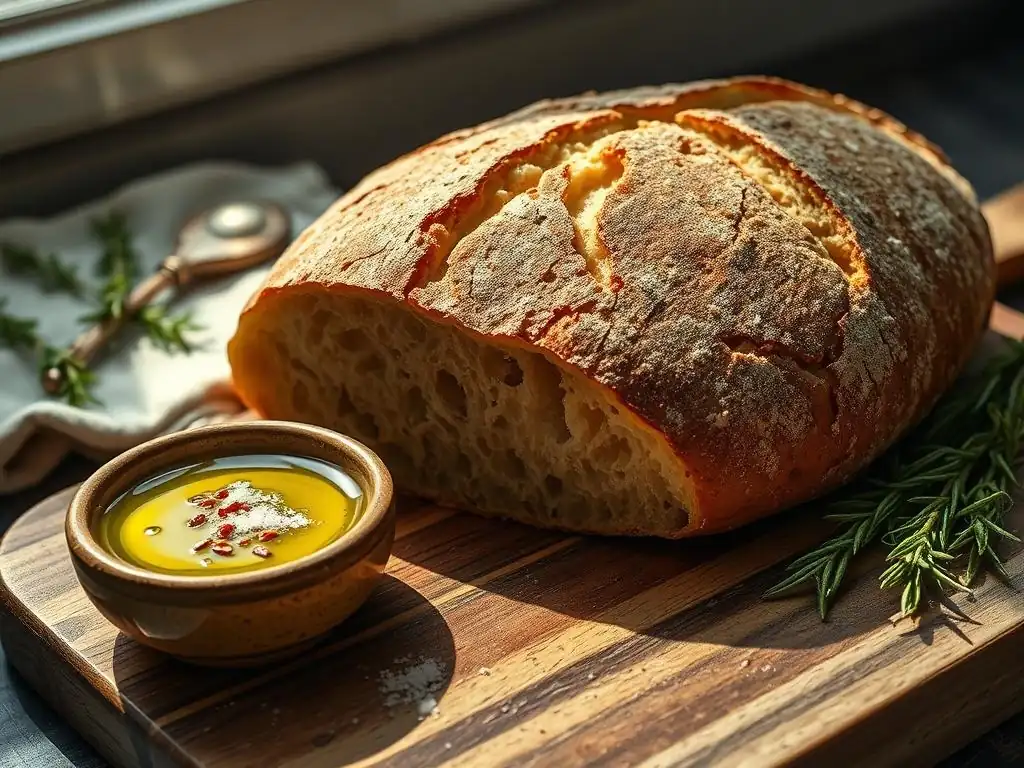
The versatility of homemade ciabatta and rustic breads makes them perfect companions for a wide array of dishes. Their sturdy crust and open crumb make them ideal for dipping. Serve slices with high-quality extra virgin olive oil and a sprinkle of balsamic vinegar, or alongside flavorful soups and stews like French onion soup or a hearty lentil stew, perfect for soaking up every last drop.
For sandwiches, ciabatta rolls or slices are unbeatable. Their structure holds up well to fillings, whether it's a simple Caprese sandwich with fresh mozzarella, tomato, and basil, or a more substantial Italian hero layered with cured meats and cheeses. Toasted slices of rustic bread are also fantastic for bruschetta, topped with diced tomatoes, garlic, and basil, or for making crostini to accompany appetizers. Don't forget the simplest pleasure: warm slices served with just butter, allowing the bread's flavor and texture to truly shine. An easy ciabatta bread recipe opens the door to countless delicious meal possibilities.
The Joy of Baking: Creating Delicious Breads with Confidence
Expanding Your Bread Baking Skills with BakeWithEase
Mastering an easy ciabatta bread recipe is just the beginning of a rewarding journey into the world of bread baking. BakeWithEase is here to support you as you explore further, offering guides on everything from enriched doughs like brioche and challah to mastering sourdough techniques and experimenting with different flours and grains. Each new recipe and technique you try builds upon your foundational knowledge, increasing your confidence and expanding your baking repertoire.
Our resources provide clear explanations of baking science, troubleshooting tips for common issues, and inspiration for new bakes. As you gain experience, you'll develop a better intuition for dough consistency, fermentation times, and oven dynamics. Don't be afraid to experiment – perhaps adding olives or sun-dried tomatoes to your next easy ciabatta bread recipe, or trying a different shaping method for a rustic loaf. Baking is a continuous learning process, and every loaf, whether perfect or slightly imperfect, teaches you something new.
Embrace the Process: Enjoying the Art of Homemade Bread
Beyond the delicious outcome, there is immense joy to be found in the process of baking itself. The tactile experience of working with the dough, the anticipation as it rises, and the transformation that occurs in the oven are deeply satisfying. Baking provides a wonderful opportunity to slow down, focus on the present moment, and create something tangible and nourishing with your own hands.
Sharing your homemade ciabatta or rustic bread with family and friends adds another layer of pleasure. There's a special sense of accomplishment in serving something you've created from scratch. Embrace the occasional challenge; every baker has loaves that don't turn out exactly as planned, but these experiences are valuable learning opportunities. With patience, practice, and the guidance from BakeWithEase, you'll find that baking rustic breads, starting with an easy ciabatta bread recipe, is a fulfilling and delicious art form to master.
Frequently Asked Questions
What exactly is ciabatta bread, and what makes it unique?
Ciabatta is an Italian white bread known for its open crumb structure and crusty exterior. It's unique due to its high hydration dough and rustic, irregular shape.
Is the "Easy Ciabatta Bread Recipe" on BakeWithEase.com truly beginner-friendly?
Yes! The recipe is designed with step-by-step instructions and focuses on easy-to-find ingredients. We aim to make ciabatta accessible to all skill levels.
What are some key tips for achieving that signature "open crumb" in ciabatta?
Proper hydration of the dough and gentle handling during shaping are crucial. Also, allow for sufficient proofing time so the bread is nice and airy.
Can I adapt the "Easy Ciabatta Bread Recipe" to include different flavors or ingredients?
Absolutely! You can incorporate herbs like rosemary, olives, or sun-dried tomatoes. Just be mindful of how added ingredients affect the dough's hydration and consistency.
How should I store my homemade ciabatta bread to keep it fresh for as long as possible?
Store your cooled ciabatta in a paper bag at room temperature for a day or two. For longer storage, slice and freeze it in an airtight container.
Final Reflection: The Humble Loaf, the Immense Reward
The pursuit of the perfect ciabatta, or any rustic bread for that matter, is more than just a recipe; it's a journey of confidence-building in the kitchen. Mastering the seemingly simple art of bread baking unlocks a profound sense of accomplishment, proving that even seemingly complex culinary feats are within reach with patience and practice. This isn't just about making delicious bread; it's about empowering yourself to tackle culinary challenges with newfound assurance.
The influence of homemade bread extends far beyond the simple act of eating. It connects us to a rich culinary history, fostering a sense of tradition and self-sufficiency. Bread is the staff of life,
a proverb often repeated, speaks to its fundamental importance in human sustenance and culture. Baking my own ciabatta has not only provided delicious meals but also a deeper appreciation for the process, the ingredients, and the history behind this simple yet profound food. It’s a tangible connection to something larger than myself.
Now, I invite you to take what you’ve learned here and apply it to your own kitchen. Don't be intimidated by the seemingly complex instructions; embrace the process, celebrate the small victories (like a perfectly formed boule! ), and remember that even a slightly imperfect loaf is a testament to your effort and a delicious reward. The journey of baking is as important as the destination – so roll up your sleeves, gather your ingredients, and discover the confidence that comes with creating something beautiful and delicious with your own two hands.
Unlock Your Inner Baker: Craft Your Perfect Crust!
Thanks for joining us on this delicious journey into the world of ciabatta and rustic breads! We hope you've gained the confidence to tackle these seemingly complex loaves. Now it's time to put your newfound knowledge to the test.
- Bake your own ciabatta this weekend! Use the recipe and techniques from the article as your guide. The smell alone will be worth it!
- Share your baking triumphs (or even your mishaps!) on social media using #BakeWithEaseCiabatta – we’d love to see your creations!
- Explore other rustic bread recipes on our website for even more baking adventures.
Ready to transform your kitchen into a fragrant bakery? What unique twist will you add to your first ciabatta?