
NoKnead GlutenFree Bread Recipe: Effortless Baking

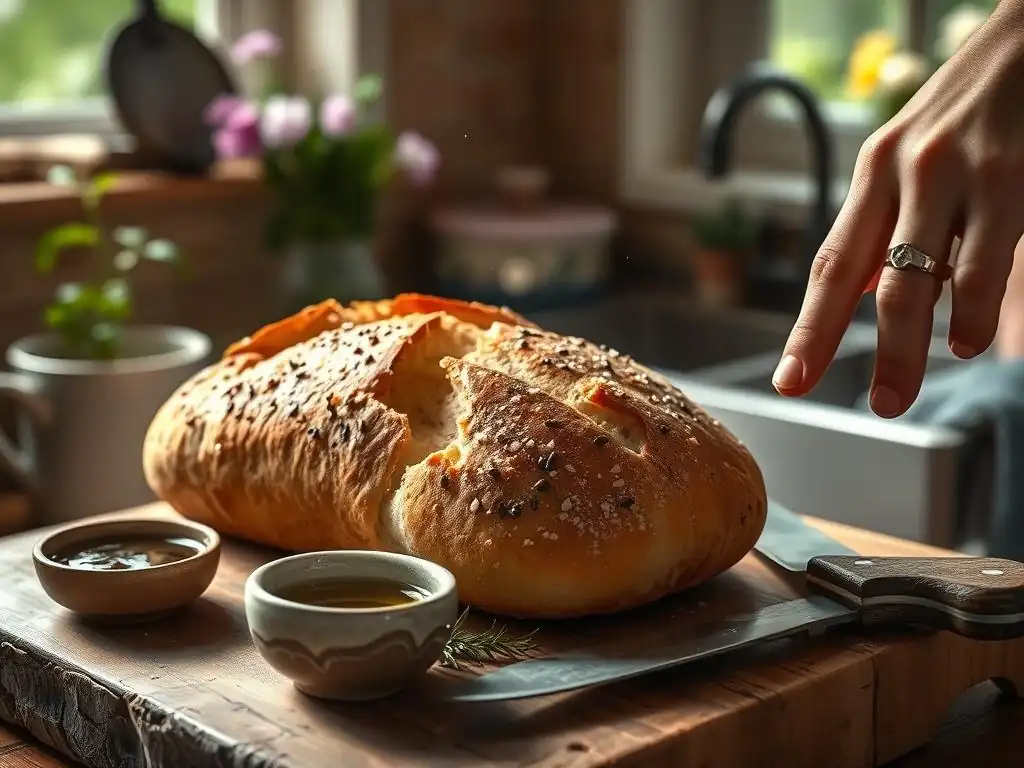
Welcome to BakeWithEase, where baking becomes a joy, not a chore! Are you ready to experience the unbelievable simplicity of our No-Knead Gluten-Free Bread Recipe? Forget the complicated techniques and hours of kneading. We're about to unlock a world of effortless baking, delivering fresh, delicious bread with minimal effort. Curious how it's possible? Let's dive in and discover the secret!
- No-Knead Gluten-Free Bread Recipe: Effortless Baking with BakeWithEase
- Introduction to Effortless Gluten-Free Bread Baking
- Understanding Gluten-Free Baking: Key Ingredients and Considerations
-
The BakeWithEase No-Knead Gluten-Free Bread Recipe: Step-by-Step
- Ingredients for the Perfect Gluten-Free No-Knead Loaf
- Equipment You'll Need for Easy Gluten-Free Baking
- Step 1: Mixing the Gluten-Free Dough
- Step 2: The Long Fermentation: Developing Flavor and Texture
- Step 3: Shaping Your Gluten-Free No-Knead Bread
- Step 4: Baking the Gluten-Free No-Knead Loaf
- Step 5: Cooling and Enjoying Your Homemade Gluten-Free Bread
- Tips and Tricks for Gluten-Free No-Knead Bread Success
- Variations on the BakeWithEase Gluten-Free No-Knead Bread Recipe
- Storing Your Gluten-Free No-Knead Bread
- Conclusion: Enjoying the Ease of Gluten-Free No-Knead Baking
-
Frequently Asked Questions
- What makes this gluten-free no-knead bread recipe "effortless"?
- What kind of gluten-free flour blend works best for this no-knead bread?
- Can I substitute any of the ingredients in this gluten-free no-knead bread recipe?
- How long does the no-knead dough need to rise for this gluten-free bread?
- What temperature should I bake the gluten-free no-knead bread at, and for how long?
- Final Reflection: The Joy of Effortless Gluten-Free Baking
- Unlock Effortless Gluten-Free Baking!
No-Knead Gluten-Free Bread Recipe: Effortless Baking with BakeWithEase
Introduction to Effortless Gluten-Free Bread Baking
Discover the Simplicity of No-Knead Gluten-Free Bread
Embarking on the journey of baking can feel daunting, especially when navigating the complexities of gluten-free flours and techniques. However, the revolutionary no-knead method has transformed home baking, making it accessible and enjoyable for everyone, including those avoiding gluten. This approach minimizes hands-on time, relying instead on a long fermentation period to develop flavor and structure, drastically simplifying the process compared to traditional kneading which is crucial for gluten development in wheat-based breads. For anyone seeking a straightforward way to bake delicious, homemade bread without gluten, learning a gluten-free no-knead bread recipe is a game-changer.
The magic of a no-knead gluten-free bread recipe lies in its minimal requirements: just a bowl, a spoon, and patience. Unlike conventional bread making that demands significant physical effort to build a strong gluten network, this method lets time do the work. The enzymes in the flour break down starches, and the yeast activity produces gases that create air pockets, contributing to the bread's structure and texture over many hours.
This passive development is particularly beneficial for gluten-free doughs, which lack the elastic protein network of wheat and can easily become tough or gummy if overworked. By embracing the no-knead philosophy, you unlock a world of easy, delicious gluten-free baking.
Why Choose a No-Knead Gluten-Free Bread Recipe?
Opting for a gluten-free no-knead bread recipe offers numerous advantages, making it an ideal choice for busy individuals or baking novices. The primary benefit is the sheer reduction in effort. Traditional bread requires kneading for 10-15 minutes or more to develop gluten; this recipe bypasses that entirely. You simply mix the ingredients, wait, shape gently, and bake. This hands-off approach saves valuable time and eliminates the physical strain associated with kneading dense doughs, making fresh, homemade gluten-free bread a realistic possibility for regular enjoyment.
Beyond the ease, a gluten-free no-knead bread recipe often yields a loaf with superior flavor and texture compared to quick mixes or standard gluten-free methods. The extended fermentation period, typically ranging from 12 to 18 hours at room temperature, allows complex flavors to develop. This slow process also improves the dough's hydration and structure, resulting in a loaf with a satisfyingly crisp crust and a tender, open crumb. For those looking for a reliable, delicious gluten-free bread recipe that doesn't demand hours in the kitchen, the no-knead method is an unbeatable solution, consistently delivering impressive results.
Understanding Gluten-Free Baking: Key Ingredients and Considerations
Essential Gluten-Free Flours for No-Knead Bread
Creating a successful gluten-free no-knead bread recipe requires understanding the unique properties of different gluten-free flours and how they interact. Since there's no gluten to provide structure and elasticity, a blend of flours is typically used to mimic the characteristics of wheat flour. This blend usually includes a mix of 'starchy' flours for tenderness and 'protein' or 'whole-grain' flours for structure and flavor. A balanced mix prevents the bread from becoming dense or crumbly, common issues in gluten-free baking.
Selecting the right combination and ratio of flours is crucial for achieving the desired texture and rise in your gluten-free no-knead bread. For example, using too much starch can result in a gummy texture, while relying solely on heavy whole-grain flours might produce a dense loaf. A typical blend for a gluten-free no-knead bread recipe might consist of roughly 40-60% starchy flours (like rice or tapioca) and 40-60% more structured flours (like sorghum, millet, or brown rice). Experimenting with different ratios can help you find the perfect blend for your palate and desired loaf characteristics.
Rice Flour: A Gluten-Free Baking Staple
Rice flour, available in white and brown varieties, is a fundamental ingredient in many gluten-free flour blends, including those for a no-knead gluten-free bread recipe. White rice flour is finely ground and has a neutral flavor, making it versatile for adding bulk without overpowering other ingredients. Brown rice flour, made from the whole grain, offers more fiber, nutrients, and a slightly nutty flavor, contributing to the bread's overall structure and nutritional value.
While rice flour provides structure, it lacks elasticity and can sometimes result in a slightly gritty texture if not finely milled or properly hydrated. In a no-knead context, where hydration is typically high, this grittiness is often minimized. It's important to use a good quality, finely ground rice flour for the best results in your gluten-free no-knead bread recipe, contributing to a balanced crumb structure when combined with other flours.
Tapioca Starch: Achieving the Right Texture
Tapioca starch, derived from the cassava root, is an essential starchy component in many gluten-free baking recipes, including a successful gluten-free no-knead bread recipe. It acts as a binder and provides elasticity and chewiness that are often missing in gluten-free baked goods. When heated, tapioca starch swells and gelatinizes, creating a light, slightly chewy texture and contributing to a crispy crust.
Using tapioca starch in your gluten-free no-knead bread recipe helps lighten the overall texture and prevents the loaf from becoming too dense or dry. It works particularly well in high-hydration doughs, helping to bind the moisture and other flours together. A common ratio might see tapioca starch making up about 15-25% of the total flour blend in a gluten-free no-knead dough, providing that desirable slight chewiness.
Sorghum Flour: Adding Nutty Flavor and Structure
Sorghum flour is a nutritious whole-grain gluten-free flour that brings a slightly sweet, nutty flavor and good structure to baked goods, making it an excellent addition to a gluten-free no-knead bread recipe. It's higher in protein and fiber compared to rice or tapioca flour, contributing to a more robust crumb and better nutritional profile.
Incorporating sorghum flour into your gluten-free no-knead bread recipe helps balance the blend, adding complexity of flavor and improving the loaf's structure without making it heavy. It pairs well with starches like tapioca and lighter flours like rice flour. A typical blend might include sorghum flour making up around 20-30% of the total flour weight to provide structure and a pleasant whole-grain character.
The Importance of Binders in Gluten-Free Bread
Since gluten-free flours lack the sticky, elastic gluten protein network that provides structure and flexibility in wheat bread, binders are indispensable in a gluten-free no-knead bread recipe. These ingredients help hold the dough together, trap gases produced by the yeast, and prevent the final loaf from being crumbly or falling apart. Without effective binders, a gluten-free no-knead dough would likely resemble a batter more than a cohesive dough capable of rising and holding its shape.
Binders improve the texture and structure of gluten-free bread significantly. They mimic some of the functions of gluten by creating a gel-like matrix that gives the dough elasticity and helps form a stable crumb structure. The choice and amount of binder used can dramatically impact the outcome of your gluten-free no-knead bread recipe, influencing everything from the dough's handling properties to the finished loaf's crumb softness and crust crispness.
Xanthan Gum: Your Gluten-Free Baking Friend
Xanthan gum is one of the most widely used binders in gluten-free baking, and it plays a vital role in a successful gluten-free no-knead bread recipe. Produced by the fermentation of sugar by a microorganism, it's a powerful polysaccharide that creates viscosity and elasticity when mixed with liquids. Just a small amount is needed to significantly improve the texture and structure of gluten-free doughs.
In a gluten-free no-knead bread recipe, xanthan gum helps the dough stick together and provides the necessary elasticity to trap the carbon dioxide gas produced during fermentation and proofing. This allows the loaf to rise properly and prevents it from collapsing. Using too much can result in a gummy or dense texture, while too little will lead to a crumbly loaf. A common ratio is about 1 teaspoon per cup of gluten-free flour blend in yeast-leavened bread, though this can vary slightly depending on the specific flours used.
Psyllium Husk: A Natural Binder for Enhanced Elasticity
Psyllium husk, derived from the seeds of the Plantago ovata plant, is another excellent natural binder increasingly popular in gluten-free no-knead bread recipes. When mixed with liquid, psyllium husk forms a viscous, gel-like substance that provides structure, elasticity, and moisture retention to gluten-free doughs. It's particularly effective at mimicking the stretchiness of gluten.
Adding psyllium husk (either whole or powdered) to your gluten-free no-knead bread recipe can significantly improve the crumb structure, making it more open and less likely to be dense or gummy. It also helps the dough handle better, making it easier to shape despite the lack of gluten. Psyllium husk can absorb a significant amount of water, so it's crucial to ensure adequate hydration in the recipe. A typical amount might be 1-2 tablespoons of whole psyllium husk or 1-1.5 tablespoons of psyllium husk powder per cup of flour blend.
The BakeWithEase No-Knead Gluten-Free Bread Recipe: Step-by-Step
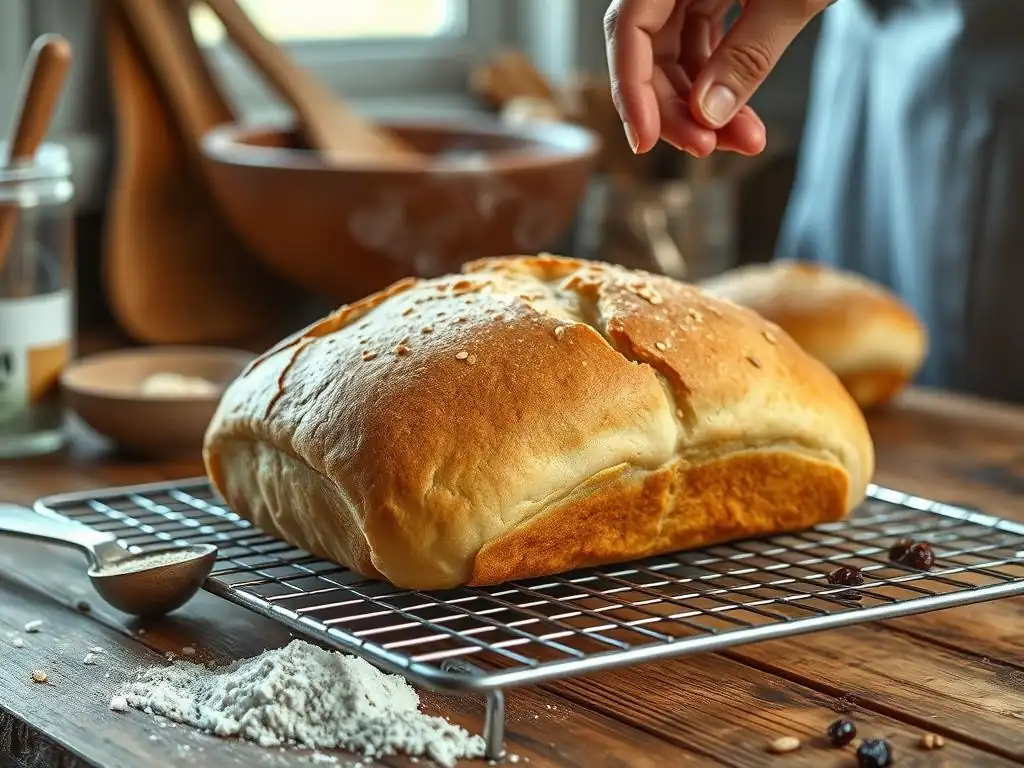
Ingredients for the Perfect Gluten-Free No-Knead Loaf
Crafting a delicious gluten-free no-knead bread recipe begins with selecting the right ingredients in the correct proportions. The success of this method hinges on a high hydration level and a balanced blend of flours and binders. Ensuring your ingredients are fresh, especially the yeast, is paramount for a good rise. Using room temperature water helps activate the yeast effectively.
Here's a general list of ingredients you will need for a standard gluten-free no-knead bread recipe, designed for simplicity and great results:
- Gluten-free flour blend (a mix of rice flour, sorghum flour, tapioca starch)
- Psyllium husk or xanthan gum (or a combination)
- Salt (enhances flavor and controls yeast activity)
- Instant dry yeast (no need to proof beforehand)
- Warm water (around 105-115°F or 40-46°C is ideal)
- Optional: a touch of sugar or honey (feeds the yeast)
Precise Measurements for Optimal Results
Accuracy in measuring ingredients is particularly important in gluten-free baking because the absence of gluten means there's less room for error in hydration and structure. While traditional baking often uses volume measurements, weighing your flours and starches provides the most consistent results. A digital kitchen scale is a valuable tool for any gluten-free baker aiming for reliable outcomes with their gluten-free no-knead bread recipe.
For instance, one cup of a gluten-free flour blend can vary in weight depending on how it's scooped, potentially ranging from 120g to 140g. This variation can significantly impact the dough's hydration. Using weights ensures you have the precise amount of dry ingredients relative to the liquid, leading to the correct dough consistency needed for a successful no-knead gluten-free bread recipe. Aim for a hydration level typically between 85% and 100% (water weight relative to flour weight) for this style of bread.
Equipment You'll Need for Easy Gluten-Free Baking
One of the appeals of the no-knead method for a gluten-free bread recipe is its minimal equipment requirement. You don't need a stand mixer or special kneading tools. Most of what you need is likely already in your kitchen, making this an accessible baking project.
Here is a list of essential equipment for baking a gluten-free no-knead loaf:
- A large mixing bowl
- A wooden spoon or sturdy spatula
- Measuring cups and spoons (or preferably, a kitchen scale)
- Plastic wrap or a damp tea towel for covering the bowl
- Parchment paper
- A heavy-bottomed pot with a lid (like a Dutch oven) or a baking stone/steel and a tray for steam.
Step 1: Mixing the Gluten-Free Dough
The initial mixing is the only hands-on part of preparing the dough for your gluten-free no-knead bread recipe. The goal is simply to combine all the ingredients until no dry flour remains. This stage is quick and easy, taking only a few minutes.
Ensure you have all your measured ingredients ready before you begin. The process involves combining dry ingredients first, then adding the wet, and mixing until just combined.
Combining Dry Ingredients for Even Distribution
Start by whisking together all your dry ingredients in the large mixing bowl. This includes your gluten-free flour blend, salt, yeast, and binder (xanthan gum or psyllium husk). Whisking ensures that the yeast, salt, and binder are evenly distributed throughout the flour blend. This prevents pockets of unmixed ingredients and helps the yeast activate uniformly once the liquid is added, which is key for a consistent rise in your gluten-free no-knead bread recipe.
Proper distribution of the binder is especially important. If xanthan gum or psyllium husk is not evenly mixed with the flour before adding liquid, it can clump, leading to uneven texture in the final loaf. A thorough whisking for about 30 seconds is usually sufficient to prepare the dry mix for the next step.
Adding Wet Ingredients and Achieving the Right Consistency
Once the dry ingredients are mixed, pour in the warm water. Use a wooden spoon or sturdy spatula to mix everything together. Stir until all the flour is incorporated and you have a wet, shaggy dough. Unlike wheat dough, gluten-free no-knead dough will be quite sticky and more like a thick batter than a traditional bread dough. Do not overmix; mixing until just combined is enough.
The consistency should be very wet – sticky and difficult to handle by hand. This high hydration is characteristic of the no-knead method and is essential for developing a good crumb structure without kneading. If the dough seems too dry, add a tablespoon or two more water. If it seems excessively soupy (though unlikely if measurements are precise), a tablespoon or two of flour blend can be added, but aim for very wet. Cover the bowl tightly with plastic wrap or a damp tea towel.
Step 2: The Long Fermentation: Developing Flavor and Texture
The long fermentation period is the cornerstone of the no-knead method and where most of the magic happens for your gluten-free no-knead bread recipe. This slow process allows the yeast to work its wonders, producing carbon dioxide that leavens the dough and organic acids that contribute significant flavor complexity.
This fermentation typically lasts between 12 and 18 hours at room temperature. During this time, the dough will rise and develop bubbles, indicating the yeast is active. The long, slow rise also helps the gluten-free flours absorb the liquid fully and allows the binders to hydrate completely, improving the dough's structure without any manual intervention.
Room Temperature Fermentation: The Key to No-Knead Bread
The ideal temperature for the long fermentation of a gluten-free no-knead bread recipe is typical room temperature, roughly 68-75°F (20-24°C). At this temperature range, the yeast activity is slow and steady, allowing for maximum flavor development over the extended period. Placing the covered bowl on your kitchen counter away from direct sunlight or drafts is usually sufficient.
During this 12-18 hour rest, you will notice the dough slowly expanding and the surface becoming dotted with bubbles. The dough may double in size, though the exact rise can vary depending on the yeast's vigor and the room temperature. This patient waiting period is crucial; it's where the simple mixture transforms into a dough ready to become a flavorful loaf of gluten-free no-knead bread.
Adjusting Fermentation for Temperature and Humidity
Environmental factors like room temperature and humidity can influence the fermentation time of your gluten-free no-knead bread recipe. In warmer kitchens (above 75°F/24°C), the dough may ferment faster, potentially being ready in closer to 12 hours. In cooler kitchens (below 68°F/20°C), it might take longer, possibly up to 20 hours. It's best to watch the dough rather than strictly adhere to a time. The dough should look noticeably risen and bubbly.
High humidity might make the dough feel stickier, while low humidity could potentially dry the surface if not covered properly. Always ensure the bowl is well-covered to prevent the dough from drying out, which can inhibit the rise. If your kitchen is particularly warm, you can shorten the fermentation slightly, or if very cool, extend it until the dough shows clear signs of activity and rise.
Step 3: Shaping Your Gluten-Free No-Knead Bread
After the long fermentation, your gluten-free no-knead dough will be wet, sticky, and bubbly. Unlike wheat doughs that are kneaded to develop strength before shaping, gluten-free doughs require a much gentler touch. The goal is to handle the dough minimally to avoid degassing it too much while still forming a cohesive shape for baking.
Prepare your surface with a generous dusting of gluten-free flour (rice flour works well) or line a proofing basket/bowl with a floured tea towel or parchment paper. Gently scrape the dough out of the bowl onto the floured surface or into your prepared proofing vessel.
Gently Handling the Delicate Gluten-Free Dough
Gluten-free dough lacks the robust, elastic network of gluten, making it more delicate and prone to tearing or losing structure if handled roughly. When working with your fermented gluten-free no-knead dough, use a light touch. Avoid punching it down or kneading it. The aim is simply to gather the dough and form it into a loose shape.
Using a bench scraper can be helpful for maneuvering the sticky dough. If shaping on a floured surface, gently fold the edges of the dough towards the center a few times to create some surface tension, being careful not to deflate it completely. This minimal handling preserves the airy structure developed during the long fermentation, which is vital for a light crumb in your gluten-free no-knead bread recipe.
Creating a Round Boule Shape
For a classic loaf shape, gently pull and tuck the edges of the dough underneath to form a rough ball or 'boule'. The surface tension created by tucking helps the loaf hold its shape during baking and encourages a good oven spring. If using a proofing basket (banneton), place the dough seam-side up. If proofing in a bowl with a floured cloth, place it seam-side down.
Once shaped, the dough needs a short second rest (proofing) before baking. Cover the shaped dough loosely with plastic wrap or another floured cloth. This proofing period is much shorter than the initial fermentation, usually 30-60 minutes, depending on the room temperature. The dough should look slightly puffy but should not double in size again. This final rest allows the dough to relax and build up a little more gas before hitting the hot oven, contributing to the final texture of your gluten-free no-knead bread recipe.
Step 4: Baking the Gluten-Free No-Knead Loaf
Baking is where the structure developed during fermentation and proofing is set. The high heat of the oven, especially when combined with steam, is crucial for achieving a beautiful rise and a crisp crust on your gluten-free no-knead bread. The initial burst of heat causes rapid expansion of gases within the dough, known as oven spring.
Using a very hot oven and creating a steamy environment are key techniques often employed when baking a gluten-free no-knead bread recipe. The high heat helps the crust set quickly while the steam keeps the surface moist, allowing the loaf to expand fully before the crust hardens.
Preheating Your Oven for the Perfect Crust
A properly preheated oven is essential for achieving a great crust and optimal oven spring in your gluten-free no-knead bread recipe. Preheat your oven to a high temperature, typically between 450-475°F (230-245°C). It's not just about the air temperature; you also need any baking vessel or stone to be thoroughly heated through.
If using a Dutch oven or baking stone, place it in the oven before preheating. Allow the oven and the vessel/stone to preheat for at least 30-45 minutes after the oven indicates it has reached the target temperature. This ensures the baking surface is hot enough to give the dough an immediate burst of heat from underneath, crucial for a good rise and a crispy bottom crust on your gluten-free no-knead bread.
Using a Dutch Oven for Optimal Baking
Baking your gluten-free no-knead bread recipe in a preheated Dutch oven is a highly recommended method. The heavy lid traps steam released from the dough as it bakes, creating the ideal steamy environment needed for maximum oven spring and a beautifully crisp crust. The cast iron also retains heat exceptionally well, providing even baking.
Carefully transfer the proofed dough into the preheated Dutch oven (using parchment paper as a sling is easiest). Place the lid on and bake for the first portion of the baking time (e.g., 30 minutes) with the lid on. Then, remove the lid and continue baking for another 15-25 minutes until the crust is deeply golden brown and the internal temperature reaches around 200-210°F (93-99°C). This two-stage baking process mimics professional bakery conditions and works wonderfully for a gluten-free no-knead bread recipe.
Baking on a Baking Stone with a Steam Bath
If you don't have a Dutch oven, you can still achieve excellent results by baking your gluten-free no-knead bread recipe on a preheated baking stone or steel. To create the necessary steam, place a metal tray or cast iron pan on the rack below the stone during the preheating phase. Just before you slide the dough onto the hot stone, carefully pour about a cup of hot water into the hot tray/pan. This will create a burst of steam.
Quickly close the oven door after adding the water and the dough to trap the steam. The steam bath helps keep the surface of the loaf soft initially, allowing it to expand fully before the crust sets. Bake at the high temperature with steam for the first 15-20 minutes, then you can carefully open the oven door briefly to let some steam escape for the remainder of the baking time to help the crust crisp up. This method, while requiring a bit more care with steam, can still produce a wonderful gluten-free no-knead bread recipe.
Step 5: Cooling and Enjoying Your Homemade Gluten-Free Bread
Once your gluten-free no-knead bread recipe has finished baking and has a beautiful golden crust, resist the urge to slice into it immediately! The cooling process is just as important as the baking itself for developing the final texture and flavor.
Carefully remove the hot loaf from the oven and the Dutch oven/stone. Transfer it to a wire cooling rack. The rack allows air to circulate around the entire loaf, preventing the bottom crust from becoming soggy as it cools.
Allowing the Bread to Cool Completely
Allow your gluten-free no-knead bread to cool completely on the wire rack. This can take anywhere from 1 to 2 hours, or even longer for a very large loaf. During cooling, the internal structure of the bread sets, moisture redistributes evenly throughout the crumb, and the flavors continue to develop.
Cutting into hot bread, especially gluten-free bread, can result in a gummy or dense texture because the starches haven't fully set. Patience during this cooling phase is rewarded with a loaf that has the best possible texture and flavor, showcasing the success of your gluten-free no-knead bread recipe.
Slicing and Serving Your Freshly Baked Gluten-Free Loaf
Once fully cooled, your homemade gluten-free no-knead bread is ready to be sliced and enjoyed. Use a sharp serrated knife for clean cuts through the crust and crumb. Slice the loaf to your desired thickness.
Serve your delicious gluten-free no-knead bread warm or at room temperature. It's wonderful simply with butter, alongside soup or salad, or used for sandwiches. Relish the satisfaction of having baked a fantastic loaf of gluten-free bread effortlessly using the no-knead method!
Tips and Tricks for Gluten-Free No-Knead Bread Success
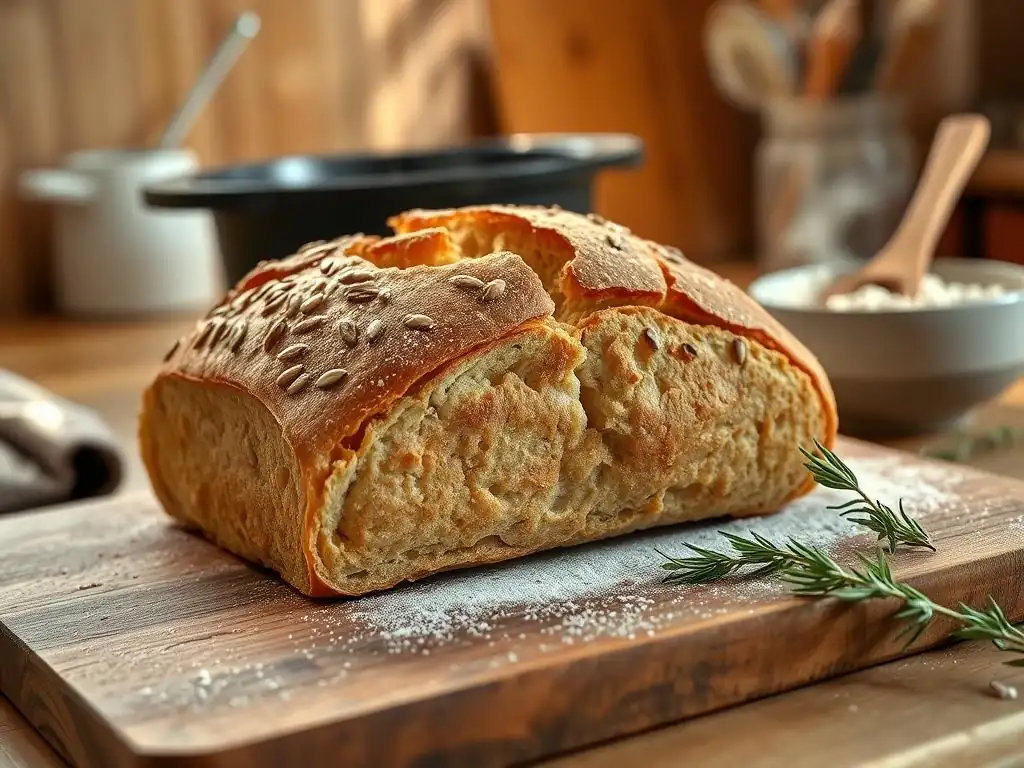
Even with a simple gluten-free no-knead bread recipe, a few tips can help ensure consistently excellent results. Gluten-free baking can sometimes be finicky, but understanding common pitfalls and how to avoid them makes the process much smoother and more rewarding.
Paying attention to details like ingredient temperature, proper fermentation cues, and cooling time can elevate your gluten-free no-knead bread from good to truly outstanding. These small adjustments can make a significant difference in the final loaf's appearance, texture, and taste.
Achieving the Perfect Crust Color
A deep golden-brown crust isn't just for looks; it contributes significantly to the flavor and texture of your gluten-free no-knead bread. If your crust is too pale, it might indicate that the bread hasn't baked long enough or at a high enough temperature. Ensure your oven is accurately calibrated and preheated sufficiently, including your baking vessel.
If baking in a Dutch oven, remove the lid for the final 15-25 minutes to allow the crust to brown. If baking on a stone, ensure adequate steam during the initial phase, then allow the crust to crisp up. Sometimes, brushing the loaf with a little water or oil before the final baking stage (after removing the lid or steam) can help promote browning. Baking until the internal temperature reaches 200-210°F (93-99°C) is a reliable indicator of doneness and contributes to a good crust.
Preventing a Gummy Texture
A gummy texture is a common issue in gluten-free baking but can often be avoided in a gluten-free no-knead bread recipe with careful attention. The primary culprits are often underbaking, insufficient cooling, or using too much starch/binder without adequate hydration. Ensure your bread is baked thoroughly until the internal temperature is above 200°F (93°C).
Equally important is allowing the bread to cool completely on a wire rack before slicing. This crucial step allows the internal structure to set and moisture to redistribute, preventing that undesirable gummy layer. Using a balanced flour blend with sufficient protein/whole-grain flours alongside starches, and ensuring accurate hydration based on the recipe, also helps mitigate this issue.
Troubleshooting Common Gluten-Free Baking Issues
Despite following a gluten-free no-knead bread recipe, you might occasionally encounter issues. Understanding the potential causes can help you adjust for your next bake. Common problems include loaves that are too dense, crumbly, or don't rise properly.
Keep a baking journal to note the temperature of your kitchen, the exact measurements used, fermentation time, and the outcome. This helps you identify patterns and make informed adjustments. For example, if your loaf is consistently dense, you might need warmer water, fresher yeast, a longer fermentation, or slightly more hydration.
Addressing a Dense or Heavy Loaf
A dense or heavy loaf in a gluten-free no-knead bread recipe is often a sign of insufficient rise or structure. This could be due to inactive yeast (check the expiration date and water temperature), fermentation that was too short or too long, or a dough consistency that was too dry. Ensure your water is warm enough (around 105-115°F or 40-46°C) to activate the yeast but not so hot that it kills it.
Verify that your fermentation environment is appropriate – not too cold. The dough should show visible signs of activity and increase in volume, even if it doesn't double. Also, confirm you used the correct amount of binder (xanthan gum or psyllium husk), as too little can result in poor structure and a dense loaf.
Dealing with a Crumbly Texture
If your gluten-free no-knead bread is crumbly, it typically indicates a lack of binding or insufficient moisture. This could be due to not enough binder (xanthan gum or psyllium husk) in the recipe, too much of a 'dry' or non-binding flour (like plain rice flour) in the blend, or simply not enough water.
Ensure you measured your binder accurately according to the gluten-free no-knead bread recipe, typically 1-2% of the flour weight. If using a custom flour blend, ensure there's a sufficient ratio of starches and binders to provide structure and cohesion. Next time, try increasing the water slightly (a tablespoon or two) to see if a higher hydration improves the crumb's structure and reduces crumbling.
Variations on the BakeWithEase Gluten-Free No-Knead Bread Recipe
Once you've mastered the basic gluten-free no-knead bread recipe, don't hesitate to experiment and add your own creative twists! The simple base dough is incredibly versatile and can be enhanced with various additions to change its flavor, texture, and nutritional profile.
Adding ingredients like seeds, nuts, herbs, or spices can transform your simple gluten-free no-knead loaf into something uniquely yours, perfect for different meals and occasions. These variations not only add flavor but can also contribute to the bread's texture and visual appeal.
Adding Seeds and Nuts for Enhanced Flavor and Texture
Incorporating seeds and nuts is a popular way to add crunch, flavor, and nutritional boost to your gluten-free no-knead bread recipe. Seeds like sunflower, pumpkin, flax, chia, or sesame, and chopped nuts like walnuts or pecans, work wonderfully.
You can add them directly into the dough during the initial mixing phase, typically around 1/4 to 1/2 cup per loaf. For extra texture and visual appeal, you can also sprinkle seeds on the top of the loaf just before baking. Seeds and nuts add healthy fats, fiber, and protein, making your gluten-free no-knead bread even more wholesome and satisfying.
Incorporating Herbs and Spices for a Savory Twist
For a savory loaf, consider adding dried herbs or spices to your gluten-free no-knead bread recipe. Rosemary, thyme, oregano, garlic powder, or onion powder can infuse the bread with delicious aromas and flavors, perfect for serving with savory dishes or enjoying on their own.
Mix 1-2 teaspoons of dried herbs or spices into the dry ingredients before adding the water. For a stronger flavor, you can use fresh herbs, but add them during the shaping stage to prevent them from wilting excessively during the long fermentation. This simple addition can turn a basic gluten-free no-knead loaf into a fragrant, flavorful centerpiece.
Creating a Gluten-Free Sourdough Starter
For the adventurous baker, the no-knead method is also compatible with gluten-free sourdough. Instead of commercial yeast, you use a gluten-free sourdough starter to leaven the dough. This process requires maintaining a starter (a fermented mixture of gluten-free flour and water) and adapting the timing, as sourdough fermentation is typically slower than commercial yeast.
Using a gluten-free sourdough starter adds a characteristic tangy flavor and chewier texture to your gluten-free no-knead bread recipe. The process involves feeding the starter, allowing it to become active, and then using a portion of it in your dough mixture instead of instant yeast. The initial long fermentation might be similar, but the proofing time can vary. While more complex than using commercial yeast, it offers a depth of flavor beloved by many bread enthusiasts.
Storing Your Gluten-Free No-Knead Bread
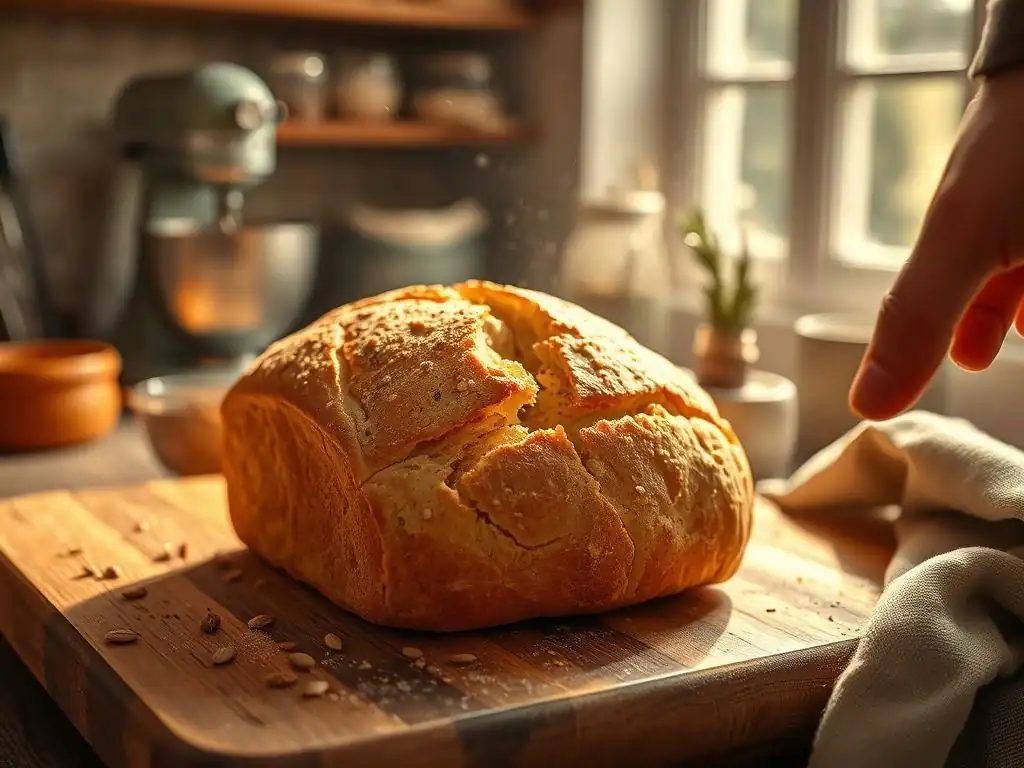
Proper storage is key to keeping your homemade gluten-free no-knead bread fresh and delicious for as long as possible. Gluten-free bread tends to dry out faster than wheat bread due to the absence of gluten, which helps retain moisture. Storing it correctly helps maintain its texture and prevents it from becoming stale too quickly.
Always ensure the loaf is completely cooled before storing it. Storing warm bread will trap moisture and can make the crust soggy and potentially lead to mold growth.
Keeping Your Bread Fresh and Delicious
For short-term storage (1-2 days), store your gluten-free no-knead bread at room temperature. The best way to keep the crust crisp is to store the loaf cut-side down on a cutting board, loosely covered with a tea towel. This allows the crust to breathe while protecting the cut surface.
If you prefer a softer crust or live in a dry environment, you can store the cooled loaf in a bread box or a paper bag. Avoid airtight plastic bags or containers at room temperature for extended periods (more than a day), as they can make the crust soft and promote mold, especially in humid conditions. For slightly longer storage at room temperature (up to 3-4 days), consider wrapping the cooled loaf tightly in plastic wrap or placing it in a reusable bread bag.
Freezing for Longer Storage
Freezing is an excellent option for storing your gluten-free no-knead bread if you won't consume the entire loaf within a few days. Freezing preserves the bread's freshness and texture much better than refrigeration, which can actually accelerate staling.
To freeze, ensure the loaf is completely cool. You can freeze the whole loaf, half loaves, or individual slices. Wrap the bread tightly in plastic wrap, then in aluminum foil or place it in a freezer-safe bag. Properly wrapped, gluten-free no-knead bread can be stored in the freezer for up to 2-3 months. To thaw, simply unwrap and let it sit at room temperature, or warm slices directly in a toaster or oven.
Conclusion: Enjoying the Ease of Gluten-Free No-Knead Baking
Baking your own gluten-free bread doesn't have to be a complicated chore. The no-knead method offers a remarkably simple and effective path to achieving delicious, homemade gluten-free bread with minimal effort. By understanding the role of different gluten-free flours and binders and embracing the power of time and high hydration, you can consistently produce loaves with wonderful texture and flavor.
Mastering the art of a gluten-free no-knead bread recipe is truly within reach for any home baker. From the initial easy mix to the long, passive fermentation and the final bake in a steamy environment, each step is designed for simplicity and success. We hope this guide empowers you to bake with ease and confidence, enjoying the rewarding process and the incredible taste of fresh, homemade gluten-free no-knead bread. Happy baking from BakeWithEase!
Frequently Asked Questions
What makes this gluten-free no-knead bread recipe "effortless"?
This recipe is considered effortless because it eliminates the need for traditional kneading, a time-consuming process. You simply mix the ingredients, let it rise, and bake! The simplicity is key.
What kind of gluten-free flour blend works best for this no-knead bread?
A high-quality gluten-free all-purpose flour blend that contains xanthan gum is recommended. Look for a blend designed for bread making to achieve the best texture and rise.
Can I substitute any of the ingredients in this gluten-free no-knead bread recipe?
While substitutions can be made, they may affect the final texture and rise. For the best results, it's recommended to follow the recipe closely, especially with the gluten-free flour and binding agents.
How long does the no-knead dough need to rise for this gluten-free bread?
The dough typically requires a longer rise time compared to wheat-based bread, usually around 12-18 hours at room temperature. This allows the gluten-free ingredients to fully hydrate and develop flavor.
What temperature should I bake the gluten-free no-knead bread at, and for how long?
Bake the bread in a preheated oven at around 450°F (232°C) for approximately 45-55 minutes. Using a Dutch oven helps trap steam, creating a crusty exterior and a soft interior.
Final Reflection: The Joy of Effortless Gluten-Free Baking
The accessibility of delicious, homemade gluten-free bread is no longer a distant dream; it's a reality within reach. This no-knead recipe demystifies the process, proving that creating a satisfying loaf doesn't require hours of strenuous work or specialized equipment. The simplicity of this method opens up a world of culinary possibilities for those following a gluten-free diet, offering a taste of home-baked goodness without the usual frustrations.
This recipe's impact extends beyond just providing a convenient baking solution. It represents a shift in the perception of gluten-free baking, moving away from the often-held belief that it's inherently difficult and time-consuming. The best things in life are simple,
a phrase often repeated, rings especially true when considering the satisfaction derived from this recipe. The ease of preparation allows individuals to focus on the joy of baking and sharing the results, fostering a sense of connection and accomplishment.
Now, consider your own kitchen. Imagine the aroma of freshly baked gluten-free bread filling your home, a testament to your own culinary prowess. This recipe isn't just a set of instructions; it's an invitation to experiment, to adapt, to personalize. Try adding different seeds, herbs, or fruits to create your signature loaf. Embrace the simplicity, enjoy the process, and share the delicious results with those you love. The journey to effortless gluten-free baking begins with you.
Unlock Effortless Gluten-Free Baking!
Thanks for joining us on this gluten-free baking journey! We hope you found the No-Knead recipe both enlightening and delicious. Now it's time to put your new skills to the test!
- Bake your own loaf: Grab those ingredients and let's get baking! The satisfaction of a perfectly risen, gluten-free loaf is truly rewarding.
- Share your success: Post a picture of your masterpiece on social media and tag us @BakeWithEase – we’d love to see your creations!
- Explore more gluten-free recipes: Dive deeper into our recipe archive for more delicious and easy-to-follow recipes.
Ready to experience the joy of effortlessly baking delicious, gluten-free bread?