
The Beginner's Guide to Baking Your First Ciabatta Loaf

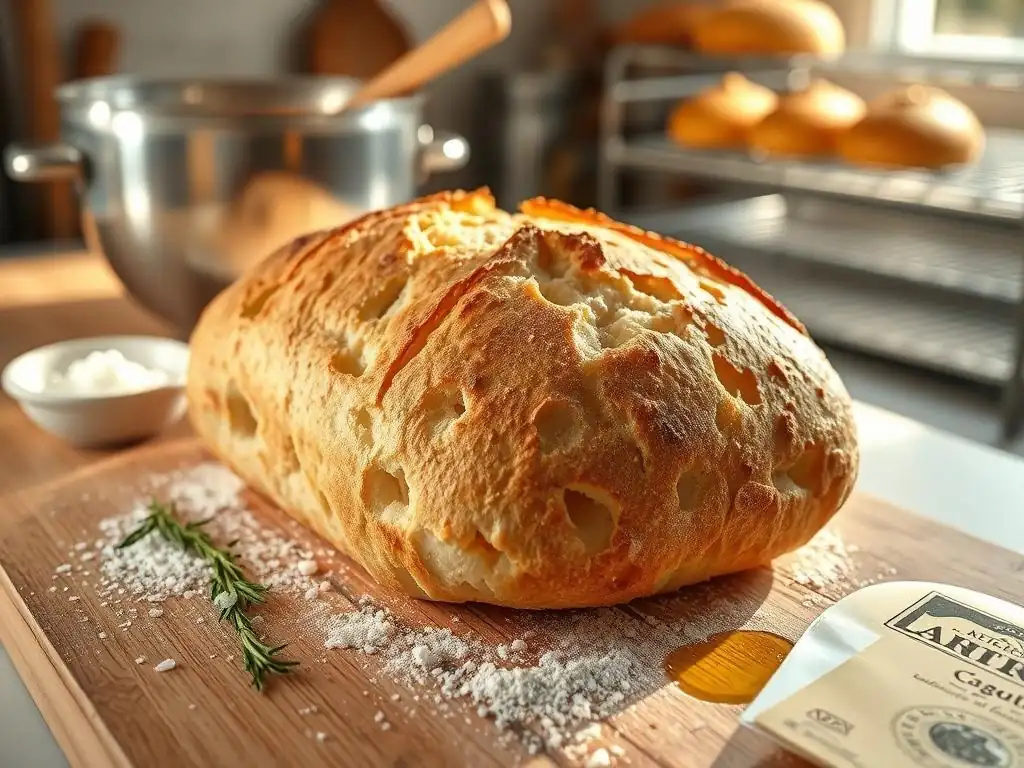
Welcome to BakeWithEase, your trusted companion on your baking journey!
Ever dreamed of pulling a perfectly crusty, airy loaf of ciabatta from your oven? It's closer than you think! This guide unlocks the secrets behind crafting your very own artisan bread at home. Jump right into our Easy Ciabatta Loaf Recipe and discover how surprisingly simple it is to achieve bakery-worthy results. Ready to impress your friends and family with the taste of Italy? Let's get baking!
- BakeWithEase's Step-by-Step Ciabatta Recipe for Beginners
- Why Ciabatta? Discover the Joy of Rustic Bread Baking
- Easy Ciabatta Loaf Recipe: Ingredients and Equipment Checklist
- Step-by-Step Guide to Making Your First Ciabatta Loaf
- Troubleshooting Your Ciabatta: Common Problems and Solutions
- Storing Your Homemade Ciabatta for Freshness
- Mastering Ciabatta: Advanced Techniques and Variations
- Enjoying Your Easy Ciabatta Loaf Recipe: Serving Suggestions and Pairings
-
Frequently Asked Questions
- What makes this ciabatta loaf recipe considered "easy" for beginners?
- How long does it typically take to bake a ciabatta loaf using this recipe?
- What if I don't have a stand mixer? Can I still make this ciabatta loaf?
- What are some common mistakes beginners make when baking ciabatta, and how can I avoid them?
- Can I customize this ciabatta loaf recipe with different flavors or toppings?
- Final Reflection: The Humble Ciabatta and the Joy of Baking
- Unleash Your Inner Baker: Craft Your First Perfect Ciabatta!
BakeWithEase's Step-by-Step Ciabatta Recipe for Beginners
Making your first loaf of ciabatta might seem intimidating with its airy texture and rustic appearance, but with the right guidance, it's entirely achievable for beginners. This guide from BakeWithEase breaks down the process into simple, manageable steps, focusing on the core techniques that give ciabatta its unique character. Our goal is to equip you with the knowledge and confidence to bake a delicious, crusty easy ciabatta loaf recipe right in your own kitchen.
We'll walk you through everything from understanding the basic science behind ciabatta's structure to mixing, folding, and baking. By the end of this guide, you'll not only have a beautiful loaf of bread to show for your efforts but also a solid foundation in working with high-hydration doughs, a skill that translates to many other rustic bread recipes. Get ready to discover the simple joy of baking authentic Italian bread at home!
Why Ciabatta? Discover the Joy of Rustic Bread Baking
Ciabatta, meaning "slipper" in Italian, gets its name from its flat, elongated shape. It's celebrated for its incredibly open, airy crumb and delightfully crispy crust. Unlike dense, structured loaves, ciabatta embraces a more relaxed, rustic form, making it forgiving for beginner bakers. Its simple ingredient list highlights the quality of each component, resulting in a bread that's both flavorful and versatile.
Baking an easy ciabatta loaf recipe allows you to connect with traditional bread-making methods. The process, while requiring patience during fermentation, is relatively hands-off compared to kneading a stiff dough. It's an excellent way to learn about dough hydration, the importance of fermentation for flavor, and how steam in the oven contributes to a perfect crust. Plus, the satisfaction of pulling a warm, crusty loaf of homemade ciabatta from your oven is truly unparalleled.
Understanding Ciabatta's Unique Texture and Flavor
Ciabatta's defining characteristic is its incredibly open, irregular crumb structure, often riddled with large holes. This is achieved through a combination of high hydration (using a lot of water relative to flour), minimal kneading, and long fermentation periods, often starting with a pre-ferment like a poolish. The high water content creates a very wet, sticky dough that develops gluten structure primarily through time and gentle folding rather than vigorous kneading. This gentle handling preserves the gas bubbles created by the yeast, leading to the signature airy interior.
The flavor of ciabatta is complex yet clean, primarily derived from the fermentation process. A long, slow fermentation, especially when using a poolish fermented overnight, allows enzymes to break down starches into sugars, which are then consumed by the yeast, producing flavorful compounds. This extended fermentation also develops mild acidity, contributing to the bread's overall taste profile. The crispy, caramelized crust, formed by baking at high temperatures with steam, adds another layer of flavor and texture, contrasting beautifully with the soft, chewy interior.
Simple Ingredients, Authentic Taste: Your First Ciabatta Adventure
One of the most appealing aspects of an easy ciabatta loaf recipe is its simplicity. At its core, ciabatta requires just four basic ingredients: flour, water, yeast, and salt. The magic lies not in a long list of components, but in the quality of these few ingredients and the technique used to combine them. Using high-quality ingredients ensures the best possible flavor and texture in your final loaf. For example, opting for a good quality bread flour with a protein content around 12-14% provides the necessary gluten structure to support the high hydration of the dough.
Embarking on your first ciabatta bake is an adventure into the fundamentals of bread. You'll learn how the ratio of water to flour dramatically impacts dough handling and the resulting crumb. You'll see how yeast, given sufficient time and the right environment, transforms a simple mixture into a living, breathing dough ready for the oven. Even salt, often overlooked, plays a crucial role, not just for flavor but also for controlling the yeast's activity and strengthening the gluten network. This focus on simple, quality ingredients makes the process approachable and the results incredibly rewarding.
Easy Ciabatta Loaf Recipe: Ingredients and Equipment Checklist
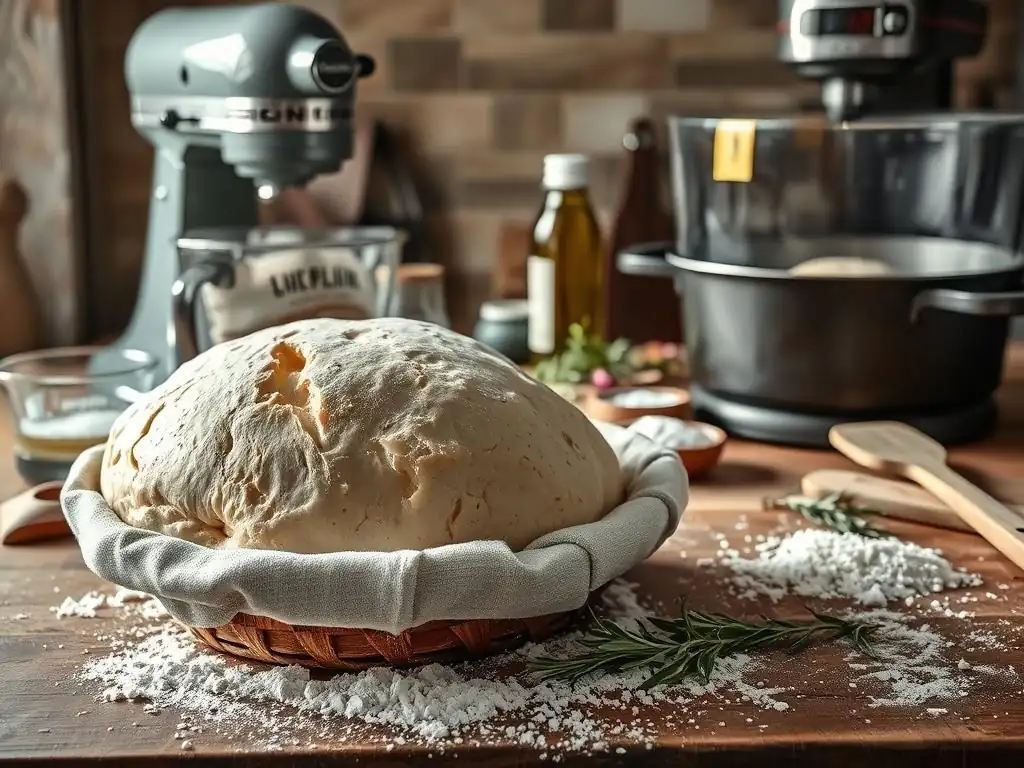
Ready to bake your first ciabatta? Having the right ingredients and tools on hand makes the process much smoother. This section details the essentials you'll need.
The Essential Ingredients for a Perfect Ciabatta
Here are the core ingredients for your easy ciabatta loaf recipe:
- High-protein bread flour
- Lukewarm water
- Active dry yeast or instant yeast
- Fine sea salt or table salt
High-Protein Flour: The Key to Ciabatta's Structure
High-protein flour, typically labeled as "bread flour," is crucial for baking ciabatta. The higher protein content means more gluten-forming proteins (glutenin and gliadin). When hydrated and developed, these proteins create a strong, elastic network capable of trapping the large volumes of carbon dioxide gas produced during the long fermentation.
This strong network is what allows the ciabatta dough, despite being very wet, to hold its shape and develop that signature open, airy crumb. Look for a flour with a protein content of at least 12%, and ideally 13% or 14%. Using an all-purpose flour (typically 10-11% protein) will result in a weaker dough, which might collapse and produce a denser loaf.
Consider the protein content listed on the nutrition label of your flour bag. For instance, King Arthur Bread Flour often has around 12.7% protein, while some specialized Italian bread flours might reach 13-14%. This higher percentage directly correlates with the dough's ability to handle the high hydration characteristic of ciabatta (often 75-85% hydration, meaning 75-85g of water per 100g of flour). A stronger gluten network is simply essential for supporting that much water and creating the desired open structure without the dough turning into a pancake.
Water: Hydration for a Chewy Crust and Open Crumb
Water is not just a solvent in bread making; it's a critical ingredient that directly impacts the dough's consistency, the development of gluten, and the final texture of the crumb and crust. For ciabatta, the dough is intentionally high in hydration, meaning it contains a large proportion of water relative to flour.
This high water content is key to achieving the moist, open, and irregular crumb structure that defines ciabatta. It makes the dough wet and sticky, which can feel challenging at first, but this is exactly what facilitates the formation of those large, beautiful air pockets during fermentation and baking.
The specific hydration level for an easy ciabatta loaf recipe can vary, but it's typically in the range of 75% to 85% hydration. For example, if you use 500 grams of flour, an 80% hydration dough would require 400 grams (or milliliters) of water. Using lukewarm water (around 90-100°F or 32-38°C) is often recommended as it helps activate the yeast more quickly, especially in the initial stages like preparing the poolish. However, the exact temperature can be adjusted based on your ambient kitchen temperature and how quickly you want the fermentation to proceed.
Yeast: Activating the Flavor and Rise
Yeast is the living organism responsible for fermentation, the process that produces carbon dioxide gas, causing the dough to rise, and generates many of the complex flavors in bread. For ciabatta, you can typically use either active dry yeast or instant yeast. The amount needed depends on the type of yeast, the recipe's fermentation schedule, and the temperature of your kitchen. A small amount of yeast used over a long, slow fermentation period (like in the poolish, often 12-18 hours) develops more complex flavors than a larger amount used for a quick rise.
For a typical easy ciabatta loaf recipe using a poolish, you might use as little as 0.5 to 1 gram of instant yeast for the poolish itself (made with perhaps 150g flour and 150g water), and then another 1-2 grams for the final dough mixture (using the remaining flour and water). These small quantities, especially in the poolish, work slowly overnight, breaking down starches and creating a flavorful base.
If using active dry yeast, you'll generally use slightly more (about 20-25% more by weight) and rehydrate it in a small amount of warm water before adding it to your ingredients.
Salt: Enhancing Flavor and Controlling Fermentation
Salt is a vital ingredient in virtually all bread recipes, and the easy ciabatta loaf recipe is no exception. Its primary role is to enhance the flavor of the bread, making the natural flavors developed during fermentation more pronounced. Without salt, bread can taste bland and flat. Beyond flavor, salt plays a crucial technical role: it strengthens the gluten network, contributing to a better crumb structure, and it helps regulate the yeast's activity. Salt slows down fermentation slightly, which can be beneficial in a long fermentation process like ciabatta, preventing the dough from over-proofing too quickly.
The amount of salt used in bread is typically between 1.8% and 2.2% of the total flour weight. For example, in a recipe using 500 grams of flour, you would likely use between 9 and 11 grams of salt. Using too little salt will result in a bland bread and potentially dough that ferments too quickly. Using too much salt can inhibit yeast activity excessively, leading to a dense loaf, and make the bread unpleasantly salty. Fine sea salt or table salt are commonly used, but ensure it's evenly distributed throughout the dough during mixing.
Must-Have Equipment for Baking Ciabatta at Home
Having the right tools makes the process smoother and improves your results.
- Large mixing bowls
- Digital kitchen scale
- Dough scraper (bench scraper)
- Proofing containers or surface
- Baking stone, steel, or Dutch oven
- Oven thermometer (optional but helpful)
- Parchment paper (optional but helpful)
Mixing Bowls: Choosing the Right Size and Material
You'll need at least two mixing bowls for making ciabatta: one for the poolish and one large enough to hold the final dough as it ferments and expands. Since ciabatta dough is high-hydration and undergoes significant fermentation, the final dough bowl needs to be quite large – at least 4 to 6 quarts (approximately 4-6 liters) for a recipe using 400-500 grams of flour. This allows ample room for the dough to double or even triple in size during bulk fermentation without overflowing.
The material of the bowl can be glass, plastic, or metal. Glass bowls are great for visibility, allowing you to easily see the dough's development, but they can be heavy. Plastic bowls are lightweight and inexpensive. Metal bowls are durable. The key is size. Ensure the bowl for the final dough is large enough to accommodate significant expansion. For the poolish, a smaller bowl (1-2 quarts) is sufficient, as it will only contain a portion of the total flour and water. Using a clear container for the poolish can be particularly helpful in observing its activity overnight.
Kitchen Scale: Precise Measurements for Consistent Results
In baking, precision is paramount, and this is especially true for high-hydration doughs like ciabatta where the ratio of water to flour is critical. Measuring ingredients by volume (cups and spoons) can be highly inaccurate; the amount of flour in a cup can vary significantly depending on how it's scooped and leveled, potentially by as much as 20%. Using a digital kitchen scale to measure ingredients by weight (grams) eliminates this variability, ensuring that you use the exact proportions specified in the easy ciabatta loaf recipe.
For example, if a recipe calls for 500g of flour and 400g of water (80% hydration), measuring accurately by weight guarantees that hydration level is correct. A slight variation in flour weight when using cups could significantly alter the dough's consistency, making a wet dough even wetter and unmanageable, or a properly wet dough too stiff, impacting the final crumb. A good digital scale is relatively inexpensive, widely available, and is arguably the most important tool for consistent bread baking results.
Dough Scraper: Handling Sticky Ciabatta Dough
Ciabatta dough, by design, is very wet and sticky. Trying to handle it with just your hands can be frustrating, leading to dough clinging everywhere. This is where a dough scraper, also known as a bench scraper, becomes indispensable. This simple tool, typically a flat piece of metal or plastic with a handle, is perfect for scraping the sticky dough from your work surface or mixing bowl. It allows you to gather, fold, and divide the dough with minimal sticking to your hands.
When working with sticky dough, you can use the scraper to gently lift and fold the dough during bulk fermentation (the process of developing strength through folds). You can also use it to divide the dough into loaves on a lightly floured surface without it turning into a sticky mess. A metal bench scraper with a sharp edge is particularly effective for cleanly dividing dough portions. Using a dough scraper makes working with the high-hydration easy ciabatta loaf recipe dough much more manageable and less messy.
Baking Stone or Dutch Oven: Achieving a Crispy Crust
Achieving ciabatta's signature crispy, crackly crust requires high heat and steam in the oven. A preheated baking stone, baking steel, or Dutch oven are excellent tools for this. A baking stone or steel, placed in the oven while it preheats, stores a significant amount of heat. When the dough is placed directly on this hot surface, it receives a powerful burst of heat from below, causing rapid oven spring (the final rise in the oven) and quickly setting the crust.
Alternatively, baking in a preheated Dutch oven creates its own steamy environment. The lid traps the moisture released by the dough as it bakes, providing the necessary steam for the first part of the bake. This steam keeps the crust soft and pliable, allowing the loaf to expand fully before the crust hardens. After a period with the lid on (e.g., 20 minutes), removing it allows the crust to dry out and brown beautifully. Both methods are effective for getting that professional-looking, crispy crust on your easy ciabatta loaf recipe.
Step-by-Step Guide to Making Your First Ciabatta Loaf
Let's get baking! Follow these steps carefully to create your delicious homemade ciabatta.
Step 1: Preparing the Poolish (Sponge)
Many easy ciabatta loaf recipes start with a poolish, a type of pre-ferment. This simple mixture of equal parts flour and water by weight, plus a tiny amount of yeast, is allowed to ferment for several hours, often overnight. The poolish adds significant depth of flavor and contributes to the open crumb structure of the final bread.
Combining Flour, Water, and Yeast for the Poolish
To make the poolish, you'll typically combine 150-200 grams of bread flour with an equal amount (150-200 grams) of lukewarm water. Add a very small amount of yeast, perhaps just 0.5 to 1 gram of instant yeast. Whisk these ingredients together in a medium bowl until no dry flour remains and the mixture is smooth, resembling a thick batter or a very wet pancake batter. Cover the bowl loosely with plastic wrap or a damp towel.
The goal here is to create a simple starter that will become active and bubbly over a long period. The small amount of yeast ensures a slow, controlled fermentation. The high hydration of the poolish allows the yeast to work efficiently and begin developing flavor compounds. Ensure the bowl is large enough to accommodate the poolish doubling in size.
Allowing the Poolish to Ferment Overnight
Place the covered poolish at room temperature (ideally between 68-75°F or 20-24°C) for 12 to 18 hours, or until it is bubbly, foamy on top, and has increased significantly in volume. You'll know it's ready when the surface is covered in bubbles, and if you gently shake the bowl, the mixture jiggles and shows signs of activity throughout. It should also smell slightly alcoholic and pleasantly fermented.
If your kitchen is warmer, the poolish might be ready sooner (e.g., 10-12 hours at 78°F). If it's cooler (e.g., 65°F), it might take longer (up to 20 hours). The long fermentation time allows enzymes to break down starches into sugars, which the yeast then converts into carbon dioxide, alcohol, and organic acids, all contributing to the flavor and texture of your easy ciabatta loaf recipe. Don't rush this step; the flavor development is key.
Step 2: Mixing the Ciabatta Dough
Once your poolish is active and ready, it's time to mix the final dough. This involves combining the poolish with the remaining ingredients.
Combining the Poolish with Remaining Ingredients
In your large mixing bowl, combine the ripe poolish with the rest of the water called for in your easy ciabatta loaf recipe. Add the remaining flour, yeast, and salt. Using a sturdy spoon, spatula, or your hands, mix everything together until there are no dry pockets of flour visible. The dough will be very wet, shaggy, and sticky – this is expected!
Unlike kneading a stiff dough, you're not aiming for a smooth, elastic ball at this stage. The goal is simply to hydrate all the ingredients and start the gluten development process. A stand mixer with a dough hook can also be used on low speed for 5-7 minutes, but mixing by hand is perfectly fine and allows you to get a feel for the dough's unique consistency.
Achieving the Right Dough Consistency: Sticky and Wet
The defining characteristic of ciabatta dough is its high hydration, making it exceptionally sticky and wet. It won't form a neat ball like typical bread dough; instead, it will be a loose, shaggy mass that clings to the bowl and your hands. This is the correct consistency and is essential for developing the open crumb structure. Resist the urge to add more flour to make it easier to handle.
Think of the dough's consistency like thick, sticky glue or a very wet sponge. When you try to pick it up, it will stretch and tear, not hold a tight structure. This wetness allows for greater mobility of the gluten strands and trapped gases, leading to larger bubbles and a more open interior. Trust the process and embrace the stickiness – it's a sign you're on the right track for your easy ciabatta loaf recipe.
Step 3: Bulk Fermentation and Folding
Bulk fermentation is the first rise of the entire dough mass. It's a critical phase where the dough develops strength, flavor, and gas bubbles. For ciabatta, instead of kneading, we use a series of gentle folds to build structure.
The Importance of Bulk Fermentation for Flavor Development
Bulk fermentation is where the magic of flavor development truly happens in bread like ciabatta. Over a period of several hours (typically 2-4 hours at room temperature, or longer in a cooler environment), yeast and bacteria in the dough consume sugars and produce acids, alcohols, and other compounds that contribute to the bread's complex taste. The longer the bulk fermentation (within limits), the more pronounced these flavors become.
During this time, the gluten network continues to develop simply through the dough resting and the action of enzymes. The dough will visibly increase in volume, becoming lighter and more aerated. For an easy ciabatta loaf recipe, a bulk fermentation of 2.5 to 3 hours at around 72°F (22°C), with periodic folds, is often sufficient to develop both structure and good flavor. The dough should increase by about 50-75% in volume during this stage.
Gentle Folding Techniques for Strength and Structure
Because ciabatta dough is too wet to knead traditionally, strength and structure are developed through a series of "stretch and folds." This technique involves gently stretching a portion of the dough up and folding it back over itself. This action aligns the gluten strands, building structure without degassing the dough too much.
Typically, you'll perform 3-4 sets of folds during the bulk fermentation, spaced 30-45 minutes apart. To perform a fold, wet your hands slightly to prevent sticking. Grab one edge of the dough, gently stretch it upwards, and fold it over the center of the dough mass. Rotate the bowl a quarter turn and repeat with the next edge.
Do this 4 times (once for each side) for each set of folds. By the third or fourth set, you'll notice the dough becoming significantly stronger and more elastic, holding its shape better despite its wetness. This is a key step in achieving a beautiful open crumb in your easy ciabatta loaf recipe.
Step 4: Shaping the Ciabatta Loaf
Ciabatta is known for its rustic, freeform shape. The goal during shaping is to handle the dough gently to preserve the air bubbles created during fermentation.
Dividing the Dough into Individual Loaves
After bulk fermentation, gently turn the dough out onto a generously floured surface. Use your dough scraper to help ease it out without tearing. The dough will spread out into a rough rectangle or square. Lightly flour the top surface. Using your dough scraper, gently divide the dough into the desired number of loaves. For a standard easy ciabatta loaf recipe yield, you might divide the dough into two or three equal pieces.
Try to make clean cuts with the scraper rather than sawing through the dough, which can deflate it. The goal is minimal handling. Don't try to shape tight, neat rounds or logs. Ciabatta is meant to be rustic. Simply separate the portions, aiming for roughly equal sizes if making multiple loaves.
Gentle Shaping Techniques to Avoid Deflating the Dough
Ciabatta shaping is less about forming a tight structure and more about gently coaxing the dough into a usable shape while preserving the airy interior. Once divided, gently stretch each piece of dough into a rough rectangle or square. Then, working from one of the longer sides, gently fold the dough over itself, like folding a letter into thirds. You can do this once or twice, depending on the dough's extensibility and your desired shape.
Transfer the shaped loaves immediately to a well-floured surface or couche (a linen baker's cloth) for proofing. The key is to use a light touch throughout this process. Avoid pressing down hard on the dough or repeatedly handling it. The goal is just enough shaping to give the loaf some structure for handling and baking, while keeping those precious air bubbles intact for your easy ciabatta loaf recipe's open crumb.
Step 5: Proofing the Ciabatta
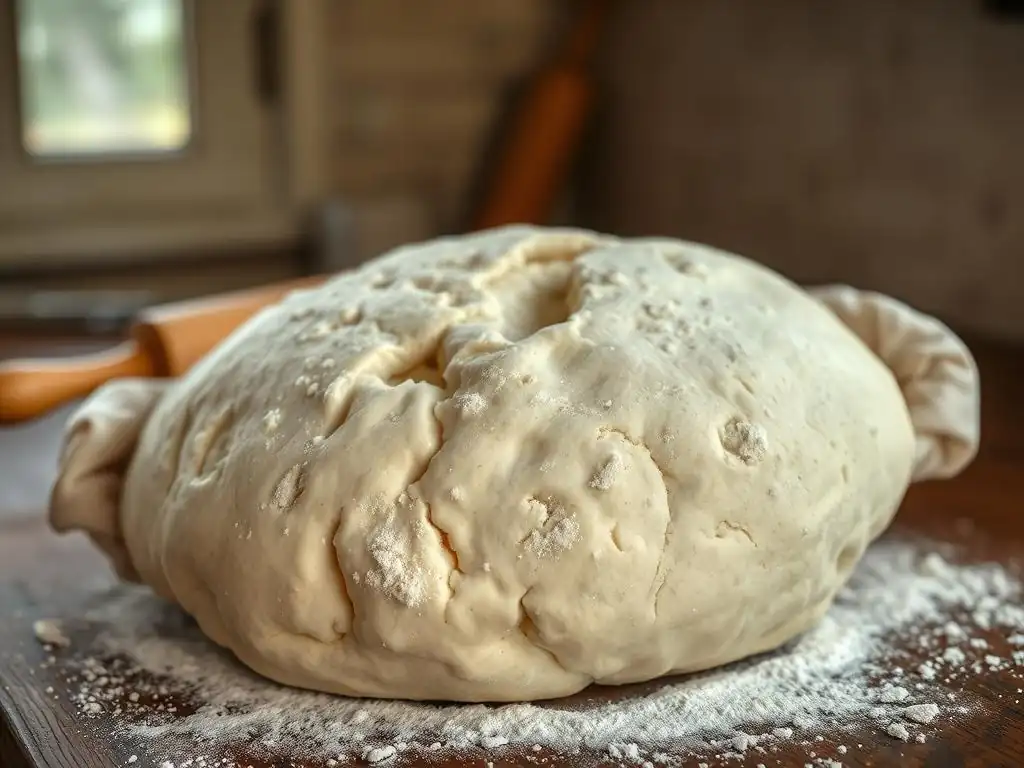
Proofing is the final rise before baking. This short rest allows the shaped loaves to lighten up and prepare for oven spring.
Proofing Environment: Temperature and Humidity
Ciabatta loaves are typically proofed for a relatively short period compared to the bulk fermentation, often 30-60 minutes. The ideal proofing environment is warm and slightly humid. Room temperature (around 70-75°F or 21-24°C) is suitable. To create a humid environment, you can place the loaves on a well-floured surface or couche on a baking sheet and loosely cover them with plastic wrap or a clean kitchen towel.
If using a couche, generously flour it with a mixture of rice flour and bread flour (e.g., 50/50) to prevent the wet dough from sticking. Arrange the loaves with folds of the couche between them to help them maintain their shape. The warmth helps the yeast produce a final burst of gas, while the humidity prevents the surface of the dough from drying out, which would restrict oven spring.
Knowing When the Ciabatta is Ready to Bake
Determining when ciabatta is perfectly proofed can be tricky, as it doesn't double in size like some other breads. It should look noticeably puffy and feel very light and airy when gently lifted (using a scraper). A common test is the "poke test": gently press the surface of the dough with a floured finger. If the indentation springs back slowly and only partially, the dough is likely ready to bake.
If the indentation springs back immediately, it needs more proofing time. If the indentation stays completely, it might be slightly over-proofed, which can lead to a flat loaf with less oven spring. Aim for that sweet spot where it bounces back slowly. This typically occurs within 30-60 minutes at room temperature for an easy ciabatta loaf recipe after shaping, but always rely on the visual cues and the poke test rather than just the clock.
Step 6: Baking Your Ciabatta Loaf
Baking ciabatta correctly requires high heat and steam to achieve that wonderful crispy crust and maximum oven spring.
Preheat Your Oven for a Crispy Crust
High heat is essential for a crispy ciabatta crust and good oven spring. Preheat your oven to a high temperature, typically between 450°F and 500°F (230°C and 260°C). If using a baking stone or steel, place it in the oven before turning it on and allow it to preheat for at least 30-60 minutes after the oven reaches the target temperature. This ensures the stone/steel is thoroughly heated, providing that crucial initial burst of heat to the dough.
This intense heat helps to quickly set the crust while the interior is still expanding, leading to a better rise. For an easy ciabatta loaf recipe, don't skip this long preheating step. An accurately calibrated oven is also important, so using an oven thermometer can be helpful to confirm the actual temperature.
Creating Steam for Optimal Oven Spring
Steam is critical during the initial phase of baking ciabatta. It keeps the surface of the dough moist and pliable, allowing the loaf to expand freely in the hot oven before the crust hardens. Without sufficient steam, the crust forms too quickly, restricting oven spring and resulting in a denser loaf. There are several ways to create steam in a home oven.
One common method is to place a steam pan (an old baking pan or cast-iron skillet) on the bottom rack of the oven while it preheats. Just before loading the bread, carefully pour a cup of boiling water into the hot steam pan. Close the oven door quickly to trap the steam.
Alternatively, if using a Dutch oven, the lid creates a self-contained steamy environment. Some bakers spray the oven walls with water or place ice cubes in the steam pan. The goal is a burst of steam for the first 10-15 minutes of baking your easy ciabatta loaf recipe.
Baking Time and Temperature for a Golden-Brown Crust
Once the oven is preheated and you've created steam, carefully transfer the proofed ciabatta loaves to the hot baking stone or into the preheated Dutch oven. If using a stone/steel, you can transfer them using a pizza peel dusted with cornmeal or semolina, or by gently sliding them off the parchment paper they proofed on.
Bake at the high temperature (e.g., 475°F/245°C) for the first 15-20 minutes with steam (or with the Dutch oven lid on). After this initial period, remove the steam pan (or Dutch oven lid) and reduce the oven temperature slightly, perhaps to 425-450°F (220-230°C). Continue baking for another 15-25 minutes, or until the ciabatta loaves are deeply golden brown and sound hollow when tapped on the bottom. The internal temperature should register around 205-210°F (96-99°C). The total baking time for an easy ciabatta loaf recipe is typically 30-45 minutes, depending on size and your oven.
Step 7: Cooling and Enjoying Your Homemade Ciabatta
The final, crucial step before enjoying your ciabatta is letting it cool properly.
Allowing the Ciabatta to Cool Completely Before Slicing
It's tempting to slice into a warm loaf of ciabatta right out of the oven, but resist the urge! Bread continues to cook internally as it cools on the counter. Starches are setting, and moisture is distributing evenly throughout the loaf. Slicing too early traps steam, resulting in a gummy, doughy interior rather than the desired open, airy crumb.
Place the baked ciabatta loaves on a wire cooling rack immediately after removing them from the oven. This allows air to circulate around the entire loaf, preventing the bottom crust from becoming soggy. Let the loaves cool completely, which can take 1-2 hours, depending on their size. Patience at this stage is rewarded with the perfect texture in your easy ciabatta loaf recipe.
Serving Suggestions: From Sandwiches to Bruschetta
Once fully cooled, your homemade ciabatta is ready to be enjoyed! Its versatile nature makes it perfect for a variety of uses. Slice it horizontally for incredible sandwiches filled with Italian meats, cheeses, and vegetables. The sturdy crust and airy interior are ideal for soaking up juices and fillings.
Cut it into thick slices, toast them, and rub with garlic, drizzle with olive oil, and top with fresh tomatoes for classic bruschetta. It's also wonderful simply dipped in good quality olive oil and balsamic vinegar. Serve it alongside soups, stews, or pasta dishes to sop up sauces. The open crumb also makes it fantastic for garlic bread. Enjoy the simple pleasure of this rustic, flavorful bread you baked yourself following our easy ciabatta loaf recipe!
Troubleshooting Your Ciabatta: Common Problems and Solutions
Don't be discouraged if your first ciabatta isn't perfect. Baking is a skill that improves with practice. Here are some common issues and how to address them.
My Ciabatta is Flat: Understanding the Causes of Poor Rise
A flat ciabatta loaf is a common frustration for beginner bakers tackling an easy ciabatta loaf recipe. Several factors can contribute to poor rise. One major cause is insufficient gluten development. While ciabatta uses gentle folding instead of kneading, the dough still needs structure to hold its shape and trap gas. If the bulk fermentation and folding steps weren't adequate, the dough might not have built enough strength. Ensure you perform the recommended number of folds and that the dough shows signs of increased strength and elasticity by the end of bulk fermentation.
Another cause could be over-proofing or under-proofing during the final proofing stage. If the dough proofs for too long, the gluten structure can weaken, and the gas bubbles might pop, leading to collapse. If it doesn't proof long enough, it might not have enough gas built up for good oven spring. Yeast viability is also key; ensure your yeast is fresh and active. Lastly, insufficient heat and steam in the oven can restrict oven spring, causing the loaf to spread rather than rise upwards. Make sure your oven and baking surface are fully preheated and you generate adequate steam.
My Ciabatta is Too Dense: Tips for Achieving an Open Crumb
A dense ciabatta, lacking the signature open, airy crumb, is often related to how the air bubbles were handled throughout the process. The primary culprit is often degassing the dough too much. This can happen during mixing if you over-mix (especially in a stand mixer), during folding if you are too rough, or most commonly, during shaping if you handle the dough too vigorously, punching down or pressing out the gas. Ciabatta shaping should be incredibly gentle, focusing on folding rather than degassing.
Using flour with insufficient protein content can also lead to a dense crumb, as the weak gluten network cannot support the high hydration and trapped gases. Ensure you are using high-protein bread flour (12%+). Incorrect hydration (too little water) will also make the dough stiffer and less likely to develop an open crumb. Finally, insufficient fermentation time can result in fewer gas bubbles being produced in the first place. Ensure your poolish is fully active and your bulk fermentation is long enough to develop significant volume and aeration before shaping your easy ciabatta loaf recipe.
My Ciabatta Crust is Too Hard: Controlling Crust Thickness
While ciabatta is known for its crispy crust, sometimes it can turn out excessively hard or thick. This is often related to the baking process, specifically the amount of steam and the baking temperature/time. Insufficient steam during the initial phase of baking causes the crust to set too quickly and harden before the loaf has fully expanded. Ensure you are generating enough steam for the first 10-15 minutes of baking, using methods like a steam pan with boiling water or a Dutch oven.
Baking at too high a temperature for too long can also lead to an overly hard crust. While high heat is needed initially for oven spring, reducing the temperature slightly after the steaming period helps the interior cook through without the crust becoming excessively thick or burnt. Conversely, not baking long enough might result in a pale crust, but over-baking to achieve color can make it hard. Aim for a balance – a deep golden-brown color and a hollow sound when tapped indicates it's done, but avoid prolonging the bake unnecessarily if the crust color is already achieved.
Storing Your Homemade Ciabatta for Freshness
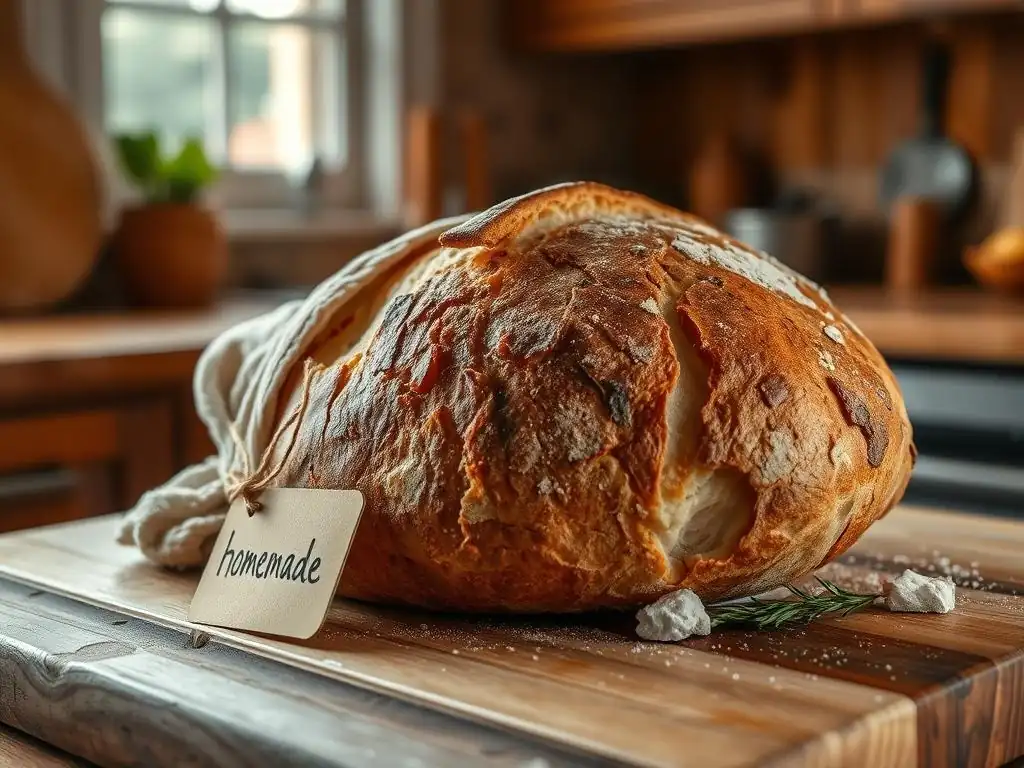
Proper storage helps maintain the texture and flavor of your beautiful homemade ciabatta.
Proper Storage Techniques to Maintain Texture and Flavor
Once your ciabatta has cooled completely, it's best enjoyed fresh, ideally within 12-24 hours of baking. The crispy crust is at its peak on the day it's baked. To store it for a day or two, the best method is typically to store it at room temperature. Avoid refrigerating bread, as this actually causes it to stale faster than leaving it on the counter.
For optimal crust crispness on the first day, store the loaf uncovered or loosely wrapped in a paper bag. This allows the crust to remain airy. If you need to store it for slightly longer (2-3 days) and are less concerned about peak crispness, you can wrap the cooled loaf tightly in plastic wrap or place it in a sealed plastic bag to prevent it from drying out. This will soften the crust but keep the interior from becoming hard.
Freezing Ciabatta for Longer Shelf Life
If you won't finish your easy ciabatta loaf recipe within a few days, freezing is the best way to preserve its quality for longer. Ensure the loaf is completely cooled before freezing. You can freeze the whole loaf or slice it first. Freezing slices allows you to thaw only what you need.
Wrap the cooled ciabatta tightly in plastic wrap, then wrap it again in aluminum foil or place it in a freezer-safe bag. This double layer of protection helps prevent freezer burn. Frozen ciabatta can be stored for up to 3-4 months. To thaw, simply remove from the freezer and let it sit at room temperature for a few hours. For best results, reheat thawed ciabatta in a preheated oven (350-400°F / 175-200°C) for 5-10 minutes to refresh the crust and warm the interior.
Mastering Ciabatta: Advanced Techniques and Variations
Once you've successfully baked your first easy ciabatta loaf recipe, you might want to explore variations and advanced techniques to further refine your skills and experiment with flavors.
Experimenting with Different Flours for Unique Flavors
While strong bread flour is the standard for ciabatta, experimenting with small amounts of other flours can add complexity and nuance to the flavor and texture. For instance, substituting 10-20% of the bread flour with whole wheat flour will add nutty notes and a slightly denser, chewier texture. Using a small percentage of rye flour (5-10%) can introduce subtle tanginess and earthy undertones.
You could also try incorporating a small amount of Italian Tipo 00 flour, often used for pasta or pizza. While lower in protein than bread flour, a small percentage can contribute to a slightly softer interior crumb when blended with strong bread flour. Always remember that substituting flours will likely affect the dough's hydration needs and handling characteristics, so be prepared to adjust the water slightly based on how the dough feels.
Adding Seeds and Herbs for Enhanced Taste and Texture
Elevate your easy ciabatta loaf recipe by incorporating seeds or herbs. Toasted seeds like sesame, poppy, sunflower, or pumpkin seeds can be added to the dough during the final mixing stage. This adds a delightful crunch and nutty flavor. A common variation is ciabatta alle olive, incorporating chopped olives into the dough.
Fresh or dried herbs like rosemary, oregano, or thyme can also be mixed into the dough for an aromatic bread perfect for savory dishes. For a more intense flavor, you can infuse the water used in the recipe with herbs before adding it to the flour. The amount of add-ins is typically around 10-20% of the total flour weight, but start with a smaller amount (e.g., 5-10%) for your first attempt to see how it affects the dough handling and structure.
Sourdough Ciabatta: Taking Your Baking to the Next Level
For experienced bakers looking to deepen their ciabatta journey, converting an easy ciabatta loaf recipe to a sourdough version is a rewarding challenge. This involves replacing the commercial yeast, or a portion of it, with a mature sourdough starter. Sourdough fermentation is slower and more complex, developing a characteristic tangy flavor and often contributing to an even more open, irregular crumb structure.
A typical sourdough ciabatta recipe might use a liquid sourdough starter (100% hydration) in place of the poolish and commercial yeast. The fermentation times will be significantly longer, both for the levain (sourdough equivalent of poolish) and the bulk fermentation, and will be highly dependent on the starter's activity and ambient temperature. Mastering sourdough ciabatta requires patience and learning to read the dough's fermentation cues without relying on commercial yeast's predictable timeline, but the resulting depth of flavor is often considered superior.
Enjoying Your Easy Ciabatta Loaf Recipe: Serving Suggestions and Pairings
You've baked it, cooled it, and now it's time to savor the fruits of your labor!
Perfect Pairings: From Cheese to Olive Oil
Homemade ciabatta is incredibly versatile and pairs wonderfully with a wide array of foods. Its open crumb is ideal for soaking up liquids, making it a perfect companion for high-quality extra virgin olive oil, perhaps with a splash of balsamic vinegar for dipping. A simple platter of fresh mozzarella, ripe tomatoes, and basil is elevated by slices of warm ciabatta.
Consider pairing it with various cheeses, from soft and creamy burrata or ricotta to aged hard cheeses like Parmigiano-Reggiano. It's also fantastic with cured meats like prosciutto or salami. The crusty exterior and chewy interior provide a delightful textural contrast to smooth or rich toppings and spreads.
Serving Suggestions: From Sandwiches to Bruschetta
As mentioned earlier, ciabatta makes magnificent sandwiches. Its sturdy structure holds up well to hearty fillings. Try classic Italian combinations or get creative with your favorites. Sliced horizontally and lightly toasted, it forms the perfect base for bruschetta, topped with marinated tomatoes, roasted peppers, or pesto.
Cubes of ciabatta can be toasted and added to salads like panzanella, where they soak up the dressing. It's also excellent served warm alongside pasta dishes to mop up rich sauces, or with a bowl of hearty soup or stew on a cold day. However you choose to enjoy your easy ciabatta loaf recipe, the experience of eating bread you baked yourself is uniquely satisfying.
Frequently Asked Questions
What makes this ciabatta loaf recipe considered "easy" for beginners?
This recipe focuses on simplified techniques and readily available ingredients, avoiding complex steps that can overwhelm new bakers. It offers a step-by-step guide to ensure success.
How long does it typically take to bake a ciabatta loaf using this recipe?
The total time, including preparation, proofing, and baking, is approximately 3-4 hours. However, most of this time is dedicated to the dough proofing process.
What if I don't have a stand mixer? Can I still make this ciabatta loaf?
Yes, you can! While a stand mixer is helpful, the dough can also be mixed by hand. Just be prepared to put in a little more elbow grease!
What are some common mistakes beginners make when baking ciabatta, and how can I avoid them?
Common mistakes include over-mixing the dough, which leads to a tough loaf, and under-proofing, which results in a dense loaf. Follow the recipe instructions carefully and be patient!
Can I customize this ciabatta loaf recipe with different flavors or toppings?
Absolutely! Once you're comfortable with the basic recipe, you can experiment with adding herbs, olives, or sun-dried tomatoes to the dough. A sprinkling of coarse sea salt on top before baking also adds a nice touch.
Final Reflection: The Humble Ciabatta and the Joy of Baking
The seemingly simple act of baking a ciabatta loaf transcends mere culinary creation; it's a journey of discovery, patience, and ultimately, immense satisfaction. This guide aimed to demystify the process, proving that even beginners can achieve a beautiful, airy, and delicious ciabatta, challenging the perception that artisan bread is only for experienced bakers. The ease of the recipe, coupled with the rewarding results, makes it an accessible entry point into the world of bread making for anyone.
The influence of homemade bread, particularly something as visually stunning as a well-baked ciabatta, extends far beyond the kitchen table. It fosters a connection to the process of food creation, a sense of accomplishment, and a deeper appreciation for the ingredients and the craft itself. The aroma alone can transform a space, bringing a sense of warmth and comfort. As the renowned baker, Jim Lahey, once said, Bread baking is a metaphor for life. You have to be patient, you have to nurture it, and you have to trust the process.
This perfectly encapsulates the experience of baking this ciabatta, a journey that mirrors the rewarding aspects of life itself.
Now, I invite you to roll up your sleeves, gather your ingredients, and embark on your own ciabatta adventure. Don't be intimidated by the seemingly complex instructions; embrace the process, enjoy the journey, and savor the incredible reward of a perfectly crusty, airy loaf baked by your own hands. The satisfaction you'll feel is far greater than any store-bought loaf can offer, and the skills you'll gain will open up a world of baking possibilities. So, what are you waiting for? Let's get baking!
Unleash Your Inner Baker: Craft Your First Perfect Ciabatta!
Thanks for taking the time to explore the wonderful world of ciabatta baking! We hope you now feel confident and excited to tackle this rewarding challenge. Ready to put your new skills to the test?
- Bake your own ciabatta loaf today! Use the recipe and techniques from the article as your guide, and don't be afraid to experiment with different flours or herbs. This is your chance to truly personalize this delicious bread.
- Share your baking journey! Post a picture of your creation on social media using #BakeWithEaseCiabatta and tag us – we’d love to see your masterpiece!
- Explore other artisan bread recipes on BakeWithEase.com. Expand your baking horizons and discover new, delicious possibilities.
What unique twist will you add to your very first ciabatta? Let us know in the comments below!