
Beginner's Guide to Dark Rye Sourdough

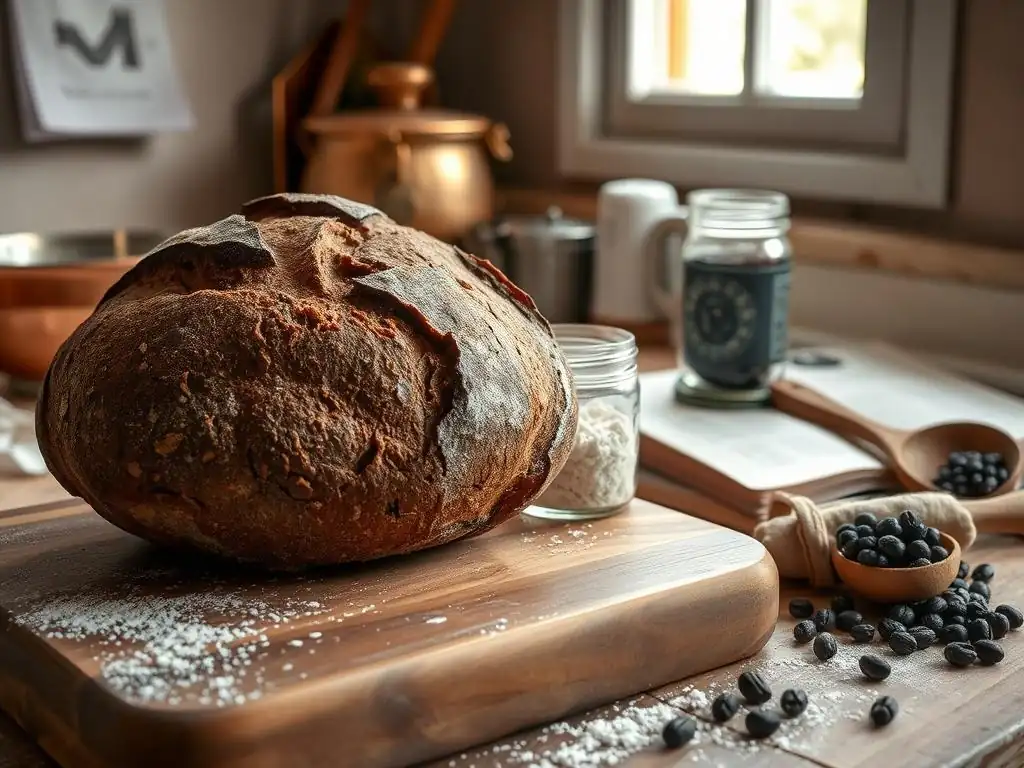
Welcome to BakeWithEase, your kitchen companion for all things baking! Ever dreamt of crafting a deeply flavorful, rustic loaf? Dive in and discover our beginner-friendly guide to Easy Dark Rye Sourdough. Unlock the secrets to this surprisingly simple process and prepare to impress with your homemade artisan bread. But that's just the beginning – explore our treasure trove of recipes and techniques to elevate your baking game, one delicious creation at a time!
- Introduction to Dark Rye Sourdough Baking
- Essential Ingredients
- Equipment Needed
- Step-by-Step Guide
- Troubleshooting
- Storing Your Sourdough
- Recipe Variations
- Conclusion
-
Frequently Asked Questions
- What makes this dark rye sourdough recipe "easy," especially for beginners?
- What specific ingredients are crucial for achieving that characteristic dark color and rye flavor?
- How does this recipe differ from traditional dark rye sourdough recipes?
- Can I substitute any of the ingredients, and if so, what are the potential consequences?
- What are some common mistakes beginners make when baking dark rye sourdough, and how can I avoid them?
- Final Reflection: The Enduring Allure of Dark Rye Sourdough
- Unleash Your Inner Baker: Craft Your Perfect Dark Rye Sourdough!
Introduction to Dark Rye Sourdough Baking
What is Dark Rye Sourdough?
Dark rye sourdough is a hearty bread made primarily with dark rye flour and leavened using a sourdough starter, also known as a natural leaven or wild yeast culture. Unlike loaves made solely with white wheat flour, dark rye sourdough boasts a dense, moist crumb and a deep, complex flavor profile with characteristic tanginess. The use of dark rye flour, which contains the whole grain including more of the bran and germ compared to lighter flours, contributes to its darker color, unique texture, and nutritional richness, including higher levels of fiber and certain minerals.
This traditional bread has been a staple in many cultures for centuries, particularly in Eastern and Northern Europe. Its distinct taste comes from the fermentation process facilitated by the sourdough starter, which breaks down sugars and starches in the flour, producing organic acids (like lactic and acetic acid) and carbon dioxide.
The higher proportion of rye flour, especially dark rye, interacts differently with gluten development than wheat flour, resulting in a loaf that relies more on the structural integrity created by pentosans (complex carbohydrates) and the starter's activity for its rise and texture, rather than a strong gluten network typical of wheat breads.
Simplified Approach to Dark Rye Sourdough
Creating an easy dark rye sourdough doesn't have to be intimidating, even for beginners. The key is to break down the process into manageable steps and understand the unique properties of rye flour and sourdough starters. Our simplified approach focuses on straightforward techniques and forgiving methods designed to build confidence. We'll guide you through maintaining a robust starter, mixing the dough with minimal fuss, and using equipment that makes baking at home accessible and yields great results.
This guide cuts through the complexity often associated with sourdough baking by providing clear instructions and realistic expectations. For instance, we'll discuss hydration levels that are typically easier to handle for rye dough (often slightly lower than high-hydration wheat doughs, perhaps around 70-75% hydration relative to flour weight) and fermentation times that are typical but emphasize watching the dough, not just the clock. By focusing on the fundamentals and offering practical tips, baking a delicious, easy dark rye sourdough becomes a rewarding and achievable goal for anyone starting their sourdough journey.
Essential Ingredients
Understanding Rye Flour
Types of Rye Flour
Rye flour comes in various grades, primarily determined by how much of the bran and germ are included during milling. Light rye flour contains mostly the endosperm, similar to white wheat flour. Medium rye flour includes more of the bran and germ, offering a slightly darker color and stronger flavor. Dark rye flour, the focus for easy dark rye sourdough, is milled from the whole rye grain, including a significant portion of the bran and germ.
This results in a darker color, a more robust, earthy flavor, and higher nutritional content. Pumpernickel flour is the coarsest grind of dark rye flour, often used in very dense, traditional loaves. For a beginner's easy dark rye sourdough, a standard dark rye flour is ideal.
Role of Rye Flour
Rye flour plays a crucial role in dark rye sourdough, defining its characteristic flavor, color, and texture. Unlike wheat flour, rye flour has a lower gluten content, and the gluten it does contain behaves differently due to the presence of pentosans and enzymes. These pentosans absorb a significant amount of water and contribute to the dough's stickiness and density.
During fermentation, rye flour's enzymes remain active even at lower pH levels (created by the sourdough starter), which can break down starch rapidly. The sourdough starter's acidity helps to inhibit some of this enzymatic activity, making the structure more stable. This unique composition means rye dough requires different handling – less kneading and more gentle folding – compared to wheat dough, contributing to the dense, moist crumb typical of dark rye bread.
The Sourdough Starter
Maintaining a Healthy Starter
A healthy, active sourdough starter is the heart of any sourdough bread, especially an easy dark rye sourdough. It's a living culture of wild yeasts and lactic acid bacteria that work together to leaven the bread and develop flavor. Maintaining it typically involves regular feeding with flour and water.
A common feeding ratio is 1:1:1 by weight (1 part starter, 1 part flour, 1 part water). For a rye starter, you might feed it with a mix of rye and wheat flour, or even just rye flour. A starter is considered healthy when it consistently doubles or triples in size within 4-8 hours after feeding at room temperature (around 70-78°F or 21-26°C), has a pleasant, slightly tangy aroma, and is bubbly and active.
Consistency in feeding is key to a robust starter. If you bake frequently (several times a week), keeping your starter at room temperature with daily feedings is best. For less frequent baking, storing your starter in the refrigerator and feeding it once a week is sufficient. Before baking, you'll need to revive a refrigerated starter with a couple of room-temperature feedings until it becomes active again. A healthy starter ensures reliable leavening for your easy dark rye sourdough, contributing to a good rise and desirable texture.
Feeding Schedule
The feeding schedule for your sourdough starter depends on how often you bake and where you store it. For a starter kept at room temperature, daily feeding is generally recommended to keep the yeast and bacteria active and in balance. This prevents the starter from becoming too acidic and ensures it has enough "food" (flour) to remain vigorous.
A typical schedule might involve discarding a portion of the starter and feeding the remainder at roughly the same time each day. For instance, discard all but 50g, then feed with 50g flour (e.g., 25g rye, 25g bread flour) and 50g water.
If you store your starter in the refrigerator, you can feed it less often, typically once every 7-10 days. The cold temperature slows down the microbial activity significantly. When you're ready to bake your easy dark rye sourdough, take the starter out of the fridge, discard most of it, and feed it at room temperature. You'll likely need 1-3 feedings over 12-24 hours until it's bubbly, active, and passes the float test (a small dollop floats in water), indicating it's ready to use for your levain.
Other Key Ingredients
Importance of Water Temperature
The temperature of the water used in sourdough baking, especially for an easy dark rye sourdough, is more important than you might think. Water temperature directly influences the dough's final temperature, which in turn affects the rate of fermentation. Yeast and bacteria in the starter are most active within a specific temperature range, roughly 75-80°F (24-27°C). Using water that is too cold (below 70°F or 21°C) will slow down fermentation significantly, potentially leading to a dense loaf and underdeveloped flavor.
Conversely, using water that is too hot (above 90°F or 32°C) can stress or even kill the delicate microorganisms in your starter. Aim for water that is comfortably warm to the touch, typically between 80-85°F (27-29°C), especially if your kitchen is cool. This helps bring the dough to an optimal temperature for bulk fermentation and ensures your easy dark rye sourdough proofs correctly. Using a thermometer to check water temperature adds precision to this critical step.
Choosing the Right Salt
Salt is a vital ingredient in any bread recipe, including easy dark rye sourdough, playing multiple roles beyond just flavor enhancement. Salt helps control the rate of fermentation by slowing down yeast activity, which is crucial for developing complex flavors and preventing the dough from overproofing too quickly. It also strengthens the dough structure, tightening the protein network (even in rye, where gluten development is limited) and contributing to better handling and oven spring. For a typical loaf using around 500g of flour, you'd likely use about 9-11g of salt, which is roughly 1.8-2.2% of the total flour weight.
The type of salt matters less than its purity and consistency. Non-iodized salt, such as fine sea salt or kosher salt, is generally preferred by bakers. Iodized salt can sometimes impart a slightly metallic flavor and might interfere with fermentation, though this effect is often debated and minimal in most home baking scenarios. Ensure the salt dissolves well into the dough; finely ground salt incorporates more easily than coarse flakes. Proper salt inclusion is essential for the structure and balanced taste of your easy dark rye sourdough.
Optional Additions
While dark rye flour, water, salt, and sourdough starter are the core components of an easy dark rye sourdough, optional additions can enhance flavor and texture. Seeds are a popular choice, adding crunch, nutrition, and visual appeal. Caraway seeds, for example, are a traditional pairing with rye bread, offering a distinctive aromatic note. Other seeds like sunflower, pumpkin, flax, or sesame can also be incorporated, often soaked first to prevent them from absorbing moisture from the dough. A common addition rate might be 5-10% of the total flour weight in seeds.
Other additions might include a touch of sweetener like honey or molasses, which complement the deep flavors of dark rye and can also provide a little extra food for the starter, potentially aiding crust color development. Spices like ground coriander or fennel are also sometimes used. For a richer crumb, a small amount of butter or oil could be included, although traditional dark rye sourdough is often lean. When adding ingredients to your easy dark rye sourdough, consider their impact on hydration and adjust water accordingly if adding significant quantities of dry ingredients like seeds.
Equipment Needed
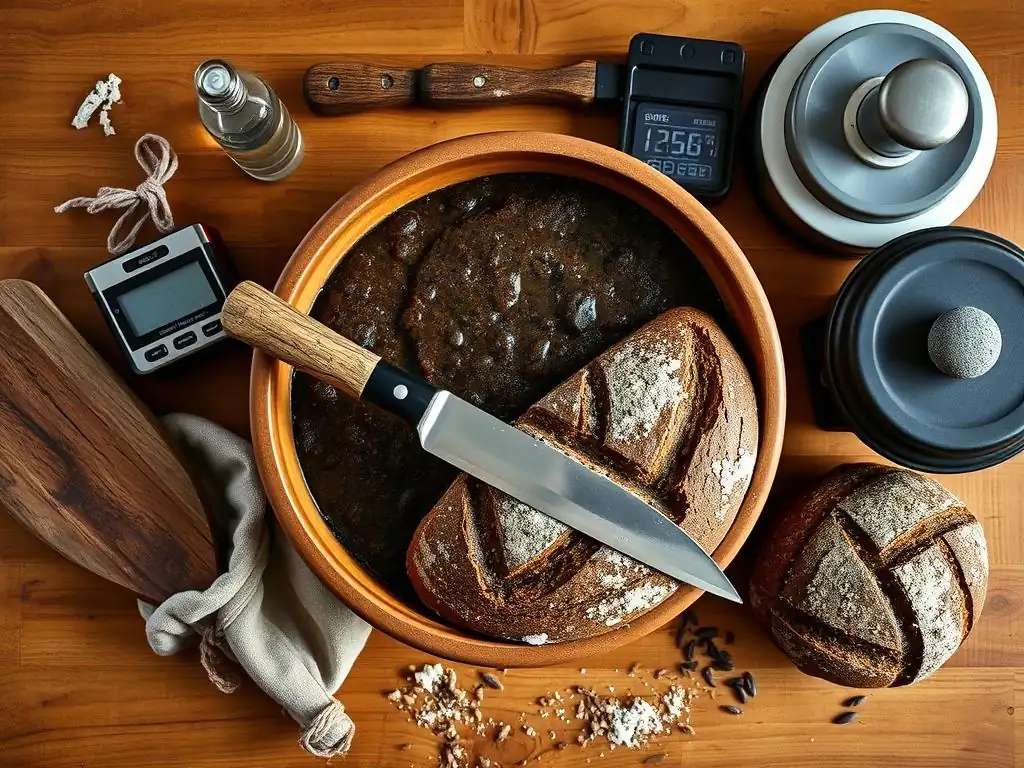
Essential Baking Tools
Mixing Bowls and Proofing Basket
For making easy dark rye sourdough, you'll need a few basic tools. Several mixing bowls are essential: one for preparing your levain (the portion of starter used for the dough), one large bowl for mixing the main dough ingredients, and potentially a smaller one for weighing ingredients. Glass, plastic, or stainless steel bowls all work well. The size of the main mixing bowl should be generous enough to accommodate the dough as it ferments and expands, perhaps holding 4-6 liters for a standard loaf.
A proofing basket, also known as a banneton, is highly recommended for shaping and holding the dough during its final rise (proofing). These baskets, typically made from rattan or cane, are dusted with flour (often rice flour to prevent sticking) and help the dough maintain its shape, especially important for the often stickier rye dough, while also creating attractive patterns on the crust.
A standard 9- or 10-inch round or oval basket is suitable for a loaf made with 500g of flour. If you don't have a banneton, a bowl lined with a well-floured kitchen towel can serve as an alternative for your easy dark rye sourdough.
Dutch Oven or Baking Stone
To achieve a crusty exterior and good oven spring in your easy dark rye sourdough, creating a steamy environment during the initial part of baking is crucial. A Dutch oven is one of the most effective tools for home bakers. It's a heavy pot, usually cast iron (enameled or bare), with a tight-fitting lid.
Preheating the Dutch oven in a hot oven and then placing the dough inside and covering it traps the moisture released by the dough as it heats up, simulating a professional steam-injected oven. This steam keeps the crust soft initially, allowing the loaf to expand fully before the crust sets.
Alternatively, a baking stone or steel combined with a steam setup can be used. A baking stone or steel is preheated in the oven and provides a hot surface for the dough, promoting rapid oven spring. To create steam with a stone/steel, you'd typically place a tray of hot water or ice cubes on a rack below the stone just before loading the bread. While a stone/steel setup can work, many beginners find the Dutch oven method simpler and more reliable for achieving excellent results with easy dark rye sourdough.
Measuring Tools and Thermometers
Accurate Measurements
Precision in measuring ingredients is fundamental to successful baking, especially when working with sourdough and different flour types like dark rye. While some experienced bakers can work by feel, using a digital kitchen scale to weigh ingredients is highly recommended, particularly for flour and water. Volume measurements (cups, spoons) are less accurate because the same volume of flour can vary significantly in weight depending on how it's packed.
For instance, 1 cup of dark rye flour could weigh anywhere from 100-130 grams. Recipes using baker's percentages (where ingredients are listed as a percentage of the total flour weight) rely on weight measurements for consistency.
Weighing ensures you are using the correct ratios of flour, water, starter, and salt specified in the recipe, which is critical for managing the hydration and fermentation of easy dark rye sourdough. Using a scale eliminates guesswork and helps replicate results. Measuring spoons for smaller quantities like salt or optional additions are also necessary. Accurate measurements are a cornerstone of consistent baking outcomes.
Using a Thermometer
A thermometer is an invaluable tool for making easy dark rye sourdough, primarily for monitoring temperatures at different stages. An instant-read thermometer is useful for checking the temperature of your water before mixing the dough to ensure it's in the optimal range (e.g., 80-85°F or 27-29°C) for starter activity. It can also be used to check the temperature of your dough during bulk fermentation if you're aiming for a specific target dough temperature (often around 75-78°F or 24-26°C) to control fermentation speed.
Furthermore, a thermometer is essential for determining when your baked easy dark rye sourdough is fully cooked. The internal temperature of a finished loaf should reach approximately 200-210°F (93-99°C). Baking by internal temperature is more reliable than relying solely on visual cues, especially with dark rye bread, which has a darker crust. Using a thermometer ensures your bread is properly baked through, preventing a gummy or undercooked center.
Step-by-Step Guide
Step 1: Preparing the Levain
Combining Starter, Rye Flour, and Water
The first step in making an easy dark rye sourdough is preparing the levain, which is essentially a build of your active sourdough starter specifically for this bake. This ensures you are using the starter at its peak activity. Typically, you'll take a small amount of your active starter and feed it with a specific ratio of flour (often a mix of rye and bread flour, or just rye flour) and water.
A common ratio for a levain is 1:2:2 (1 part starter, 2 parts flour, 2 parts water by weight). For example, you might combine 20g active starter with 40g dark rye flour and 40g water in a clean jar or bowl.
Mix these ingredients thoroughly until no dry flour remains. The consistency should be like a thick batter. Cover the container loosely to allow gases to escape but prevent drying out. Using a clear container can help you easily monitor its activity. This mixture will ferment and become bubbly and active over several hours, ready to be incorporated into your main dough.
Fermentation Time and Temperature
The time it takes for your levain to become ready depends heavily on the ambient temperature. At typical room temperature (around 70-75°F or 21-24°C), a levain fed at a 1:2:2 ratio might be ready in 6-8 hours. It's ready when it has significantly increased in volume (often doubling or tripling), is bubbly throughout, and smells pleasantly tangy. If you drop a small amount into water, it should float. If your kitchen is warmer (78°F or 26°C+), it might be ready faster, perhaps in 4-6 hours. In cooler temperatures (below 70°F or 21°C), it could take 10-12 hours or longer.
Timing the levain correctly is important for an easy dark rye sourdough; using it too early might result in a less active dough, while using it too late (after it has peaked and started to collapse) can also affect the final rise. Observe its activity: look for maximum volume and many bubbles on the surface and sides. Once it reaches its peak and is ready, you can proceed to the next step or place it in the refrigerator for a few hours if needed, which slows down the process.
Step 2: Mixing the Dough
Autolyse: Hydrating the Flour
The autolyse step is a simple but effective technique that can improve the texture of your easy dark rye sourdough. It involves mixing just the flour and water from your recipe and letting them rest for a period before adding the starter and salt. This allows the flour to fully hydrate and begins the process of enzymatic breakdown of starches and proteins. For rye dough, which doesn't develop gluten as strongly as wheat, the autolyse still helps the flour absorb water evenly and makes the subsequent mixing easier.
Combine your dark rye flour (and any other flours specified) with the recipe's water in your mixing bowl. Mix just until no dry flour is visible. The mixture will be shaggy and uneven. Cover the bowl and let it rest for 30 minutes to an hour at room temperature. During this time, the flour particles absorb the water, and the dough becomes smoother and more cohesive. This preliminary hydration is particularly beneficial for the thirsty nature of dark rye flour.
Incorporating the Levain and Salt
After the autolyse period, it's time to add the active levain and salt to your easy dark rye sourdough dough. Add the required amount of levain to the dough in the bowl. Dimpling the surface of the dough slightly can help distribute the levain. Sprinkle the measured salt over the top. Now, the goal is to thoroughly mix these additions into the dough. You can do this by hand using a pinching or folding motion, or with a stand mixer fitted with a dough hook on a low speed.
Mix until the levain and salt are fully incorporated and the dough feels slightly more cohesive, though rye dough will remain stickier and less elastic than wheat dough. This mixing might take 5-10 minutes by hand or 3-5 minutes in a mixer. Ensure there are no pockets of unmixed levain or salt. Once combined, the dough is ready for the bulk fermentation stage, where the starter will begin its work of leavening and developing flavor.
Step 3: Bulk Fermentation (First Rise)
Understanding Bulk Fermentation
Bulk fermentation, or the first rise, is the most critical stage for developing flavor and structure in your easy dark rye sourdough. This is the period from when the levain and salt are incorporated until the dough is shaped. During bulk fermentation, the yeast in the starter produces carbon dioxide gas, causing the dough to rise, while the lactic acid bacteria produce organic acids that contribute to the characteristic sourdough tang and help condition the dough. The length and temperature of bulk fermentation significantly impact the final bread.
The ideal temperature for bulk fermentation of easy dark rye sourdough is typically between 75-80°F (24-27°C). At these temperatures, bulk fermentation might take anywhere from 4 to 8 hours, depending on the strength of your starter, the dough temperature, and the hydration level. You are looking for signs of fermentation rather than just a specific time: the dough should increase in volume by about 30-50%, show some bubbles on the surface, and feel lighter and slightly more airy. Rye dough doesn't typically double during bulk fermentation like wheat dough might.
Folding the Dough
Because rye dough has less gluten development than wheat dough, intensive kneading isn't effective. Instead, structure is built through gentle handling and periodic folds during bulk fermentation. Folds help distribute yeast and bacteria, equalize temperature, and build some tension in the dough. For an easy dark rye sourdough, performing 2-3 sets of folds within the first 2-3 hours of bulk fermentation is usually sufficient.
To perform a set of folds, wet your hands slightly to prevent sticking. Gently lift one side of the dough from underneath, stretch it upwards slightly, and fold it over the center of the dough. Rotate the bowl and repeat this process with the other three sides (top, bottom, and remaining side). Allow the dough to rest for 30-45 minutes between each set of folds. After the last set, let the dough rest undisturbed until the end of bulk fermentation, observing its volume increase and signs of activity.
Step 4: Shaping the Loaf
Gentle Shaping Techniques
Shaping rye dough for your easy dark rye sourdough requires a gentle touch compared to high-gluten wheat doughs. Rye dough is often stickier and less elastic. The goal of shaping is to create surface tension and a relatively tight structure that will hold its form during proofing and baking, without degassing the dough too much. Lightly flour your work surface and your hands. Gently ease the dough out of the bulk fermentation container.
For a round loaf (boule), gently fold the edges of the dough towards the center to create a rough ball. Then, using the sides of your hands or a bench scraper, gently pull the dough towards you across the surface to create tension on the bottom, forming a smooth, taut top surface. Avoid excessive handling or pressing down hard.
For an oval loaf (batard), gently shape into a rectangle, fold the top down to the center, the bottom up to meet it, and then fold in half lengthwise, sealing the seam with the heel of your hand. Roll gently to elongate if needed, creating tension along the seam.
Preparing the Proofing Basket
Properly preparing your proofing basket (banneton) is essential to prevent your sticky dark rye sourdough dough from adhering to it during the final proof. Dust the basket generously with flour. Rice flour is often preferred because its starch granules don't absorb moisture as readily as wheat flour, making it an excellent non-stick agent. You can mix rice flour with a little rye flour or use 100% rice flour. Ensure the flour gets into all the crevices of the basket's pattern.
After shaping, gently place the dough seam-side up into the floured proofing basket. The seam-side up placement means that when you invert the dough onto your baking surface, the smooth, taut surface created during shaping will be on top, ready for scoring. If using a bowl lined with a towel, flour the towel generously as well. Cover the basket with a plastic bag or a damp towel to prevent the dough surface from drying out during proofing.
Step 5: Cold Proofing
Benefits of Cold Proofing
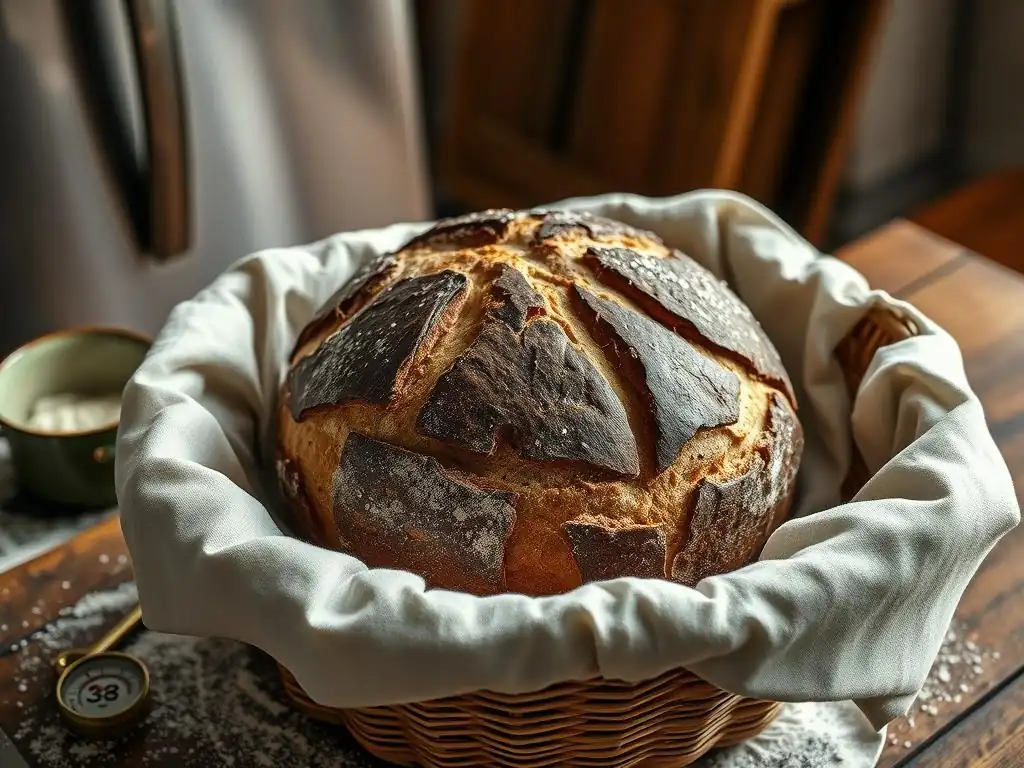
Cold proofing, or retarding the dough in the refrigerator for the final rise, offers several significant benefits for your easy dark rye sourdough. Firstly, the cold temperature dramatically slows down fermentation, allowing you to control the final proofing time and bake the bread on your schedule, rather than being dictated by the dough's rapid rise at room temperature. This flexibility is a major advantage for home bakers.
Secondly, and perhaps more importantly for flavor, cold proofing allows the organic acids produced by the lactic acid bacteria in the starter more time to develop. This results in a more complex, nuanced flavor profile with a pleasant tanginess that complements the richness of dark rye. Cold proofing also helps firm up the dough, making it easier to score neatly just before baking. An easy dark rye sourdough benefits greatly from this extended, slow fermentation in the cold.
Optimal Cold Proofing Time
The optimal time for cold proofing easy dark rye sourdough can vary, but a common range is 8 to 16 hours in a refrigerator set between 38-40°F (3-4°C). Some bakers even cold proof for up to 24 hours or occasionally longer. For a beginner, starting with 12-16 hours is a good target. During this time, the dough will rise slowly, maybe increasing in volume by another 20-30% (total rise from post-shaping). The dough will feel cool and firm to the touch.
You'll know the cold proof is sufficient when the dough looks slightly expanded but not fully proofed (it will get its final push in the oven) and feels resilient when gently poked. If it springs back immediately, it might need a little more time. If the poke leaves a permanent indentation, it might be slightly overproofed. Cold proofing is relatively forgiving within a reasonable window, making it a great technique for achieving a good result with your easy dark rye sourdough.
Step 6: Baking the Sourdough
Preheating the Dutch Oven or Baking Stone
Properly preheating your oven and baking vessel is crucial for achieving a good crust and oven spring in your easy dark rye sourdough. If using a Dutch oven, place it with the lid on in your oven and preheat to a high temperature, typically between 450-500°F (230-260°C). Allow it to preheat for at least 30-45 minutes after the oven reaches temperature. This ensures the Dutch oven is uniformly hot and will transfer heat efficiently to the dough.
If using a baking stone or steel, place it on a rack in the oven and preheat to the same high temperature, again for at least 30-45 minutes. If you are using a steam setup (like a tray for water/ice), place that in the oven during preheating as well. A well-preheated vessel provides the initial burst of heat needed to create steam around the loaf (in a Dutch oven) and promotes rapid expansion before the crust hardens, contributing to good oven spring in your easy dark rye sourdough.
Scoring the Loaf
Scoring is the act of cutting the surface of the dough just before baking. It serves two main purposes for easy dark rye sourdough. First, it acts as a controlled release point for the expanding gases inside the loaf during oven spring. Without scoring, the loaf might burst unpredictably at its weakest point. Second, scoring allows you to create decorative patterns on your bread. Use a very sharp blade, like a razor blade (often mounted on a handle called a "lame"), or a sharp knife.
Remove the dough from the proofing basket by gently inverting it onto a piece of parchment paper or directly into the preheated Dutch oven. With a swift, confident motion, make cuts about 1/2 inch deep into the surface of the dough. Simple cuts like a single slash down the middle (for a batard) or a cross pattern (for a boule) are effective and easy for beginners. Work quickly to get the loaf into the hot oven before it starts to deflate.
Baking Time and Temperature
Baking time and temperature for easy dark rye sourdough typically involves starting at a high temperature with steam (or in a covered Dutch oven) and then reducing the temperature and removing the steam source to finish baking and develop the crust. A common method using a Dutch oven is to bake covered at 475°F (245°C) for 20-25 minutes. This initial phase traps steam, allowing the dough to expand.
After the initial covered bake, remove the lid of the Dutch oven (or the steam tray from the oven) and reduce the temperature to around 425-450°F (220-230°C). Continue baking for another 20-30 minutes, or until the crust is a deep brown color and the internal temperature of the loaf reaches 200-210°F (93-99°C) when measured with an instant-read thermometer. The total baking time for a standard-sized loaf (approx. 500g flour) is usually between 45-55 minutes.
Step 7: Cooling and Slicing
Allowing the Bread to Cool Completely
One of the most important, yet often overlooked, steps for any sourdough bread, especially a moist easy dark rye sourdough, is allowing it to cool completely after baking. While it's tempting to slice into a warm loaf, the internal structure is still setting, and moisture is redistributing within the crumb. Slicing too early can result in a gummy texture and a less defined crumb structure.
Transfer the baked loaf to a wire cooling rack immediately after removing it from the oven or Dutch oven. This allows air to circulate around the entire loaf, preventing the bottom crust from becoming soggy. A standard-sized loaf should cool for at least 2-3 hours at room temperature before slicing. For larger or denser loaves, it might take even longer. Patience during this cooling phase is rewarded with the best possible texture and flavor from your easy dark rye sourdough.
Tips for Slicing
Once your easy dark rye sourdough is completely cool, it's ready to be sliced and enjoyed. Using the right tool makes a big difference. A serrated bread knife is the best choice for slicing through the crusty exterior and moist, dense crumb of rye bread. A sharp serrated knife will saw cleanly through the loaf without crushing it.
Place the loaf on a stable cutting surface. For even slices, you can use a bread slicing guide if desired. Use a gentle sawing motion rather than pressing down hard, letting the serrations do the work. Slice the entire loaf at once if you plan to eat it quickly, or slice only what you need and store the rest as a whole loaf to maintain freshness. Enjoy the fruits of your labor – your delicious, easy dark rye sourdough!
Troubleshooting
Dense or Gummy Texture
A dense or gummy texture is a common issue with sourdough, particularly when working with rye flour in an easy dark rye sourdough. This often indicates that the dough was either underproofed or underbaked. If the dough didn't ferment long enough during bulk fermentation or cold proofing, the yeast didn't produce enough gas to create an open structure, resulting in a heavy loaf. Similarly, if the bread didn't bake long enough or at a sufficient temperature, the starches may not have fully gelatinized and set, leading to a gummy interior even if the crust looks done.
To troubleshoot, ensure your starter is very active before making the levain. Pay close attention to the signs of fermentation during bulk fermentation (30-50% volume increase, bubbles) rather than just relying on time, as temperature varies. Extend the cold proofing time if needed. Crucially, always check the internal temperature with a thermometer (aiming for 200-210°F or 93-99°C) before declaring the bread done, regardless of how the crust looks.
Lack of Oven Spring
Lack of oven spring, where the loaf doesn't expand much in the oven, can be disappointing. For an easy dark rye sourdough, this could be due to several factors. An inactive starter or levain is a primary culprit; if your starter isn't vigorous, it won't produce enough gas to lift the loaf. Underproofing can also lead to poor oven spring because the dough hasn't developed enough gas. Conversely, severe overproofing can also cause collapse, as the dough structure weakens after peak fermentation.
Other reasons include insufficient surface tension built during shaping (the loaf spreads rather than rising) or not baking in a sufficiently hot, steamy environment (the crust sets too quickly, preventing expansion). Ensure your starter is active, observe the dough carefully during bulk and cold proofing for optimal fermentation signs, practice gentle but effective shaping, and always preheat your Dutch oven or baking stone thoroughly at a high temperature to maximize the initial burst of steam and heat.
Sourness Issues
The level of sourness in easy dark rye sourdough is a matter of personal preference and can be controlled to some extent. Excessive sourness often results from prolonged fermentation at cooler temperatures, which favors the production of acetic acid by the bacteria. Using a starter that hasn't been fed recently or one that is consistently kept in the refrigerator can also contribute to higher acidity.
If you prefer a less sour loaf, try adjusting your starter maintenance. Feed your starter more frequently (daily at room temperature) before making your levain, or use a higher feeding ratio (e.g., 1:3:3 or 1:4:4) to dilute the acidity. For the dough itself, aim for bulk fermentation at a slightly warmer temperature (upper end of the 75-80°F range if possible) which favors lactic acid production (milder tang) over acetic acid. Reducing the cold proofing time slightly can also help minimize acetic acid development, though it might slightly reduce flavor complexity.
Dough Spreading
If your easy dark rye sourdough dough spreads out flatly after shaping or during baking instead of holding its height, it's likely due to insufficient structure or overproofing. Rye dough is naturally less structured than wheat dough, so building tension during shaping is important, but gentle handling is key. Over-mixing can sometimes break down the limited structure in rye dough, while under-mixing might mean the ingredients aren't fully cohesive.
Overproofing is a very common cause of spreading. If the dough ferments for too long, the gluten (even the limited amount in rye) can degrade, and the gas production peaks and starts to decline, leaving the dough weak and unable to hold its shape. Ensure you are not letting your dough bulk ferment or cold proof for too long.
Watch for the signs of fermentation (volume increase, bubbles) and remember that rye dough won't typically double. Use a well-floured proofing basket to help the dough maintain its shape during the final rise, and handle the dough gently when transferring it to the oven.
Storing Your Sourdough
Best Practices
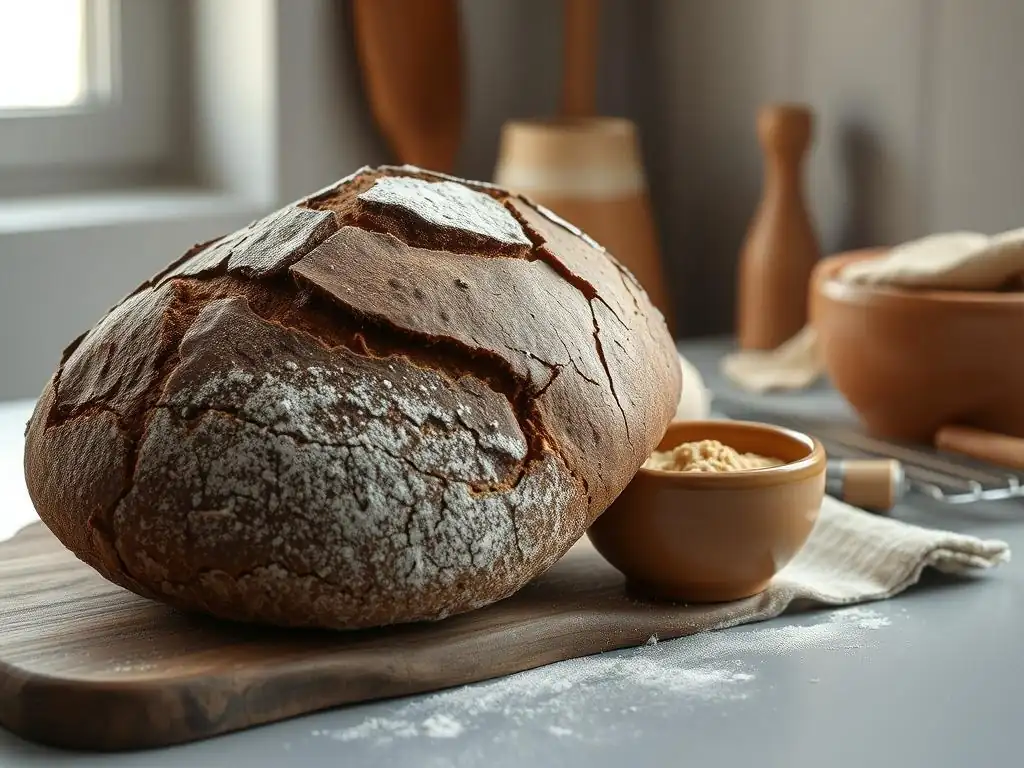
Proper storage is essential to keep your easy dark rye sourdough fresh and delicious. Once the loaf has completely cooled, store it at room temperature. Avoid refrigerating sourdough, as the cold can accelerate staling. The best way to store it depends on how quickly you plan to eat it. For short-term storage (1-2 days), simply placing the cut side down on a cutting board works well to prevent drying.
For longer storage at room temperature (up to 3-4 days), wrap the loaf tightly. Options include a linen bread bag (which allows some airflow while preventing excessive drying), a paper bag inside a plastic bag, or beeswax wraps. Avoid airtight plastic bags if the bread is still slightly warm, as this can trap moisture and make the crust soft. Store sliced bread in a sealed container or bag to prevent the slices from drying out.
Freezing and Thawing
Freezing is an excellent way to preserve easy dark rye sourdough for longer periods, up to several months, without significant loss of quality. The key is to freeze it while it's still fresh. Ensure the loaf is completely cooled. You can freeze the whole loaf, half a loaf, or even individual slices. Wrap the bread tightly in plastic wrap, ensuring there are no air pockets, and then place it in a freezer-safe bag or aluminum foil. Double-wrapping provides extra protection against freezer burn.
To thaw a whole or half loaf, remove it from the freezer wrapping and let it thaw at room temperature on a wire rack. This can take several hours. For a crisper crust, you can reheat the thawed loaf in a preheated oven at around 350°F (175°C) for 10-15 minutes. Individual slices can be toasted directly from frozen or allowed to thaw for a few minutes before toasting. Freezing allows you to enjoy your easy dark rye sourdough whenever you like.
Recipe Variations
Adding Seeds and Grains
Adding seeds and grains is a popular way to enhance the texture, flavor, and nutritional value of easy dark rye sourdough. Incorporating seeds like sunflower, pumpkin, flax, or caraway directly into the dough during the mixing phase works well. Typically, you might add seeds equivalent to 5-10% of the total flour weight. Soaking seeds overnight before adding them can prevent them from absorbing moisture from the dough and keep them tender.
You can also add cooked grains, such as rye berries, farro, or even cooked oats. These additions contribute moisture and a pleasant chewiness to the crumb. A common approach is to prepare a "soaker" or "porridge" with grains and water, letting it cool, and then mixing it into the dough during the main mix. For instance, cooking 50g of rye berries might yield about 100-120g of cooked weight to add to your easy dark rye sourdough dough, providing a delightful textural contrast.
Exploring Different Rye Flour Combinations
While this guide focuses on dark rye sourdough, you can explore variations by combining dark rye flour with other flours. Using a mix of dark rye and bread flour (a strong wheat flour) is common. A mix like 60% dark rye and 40% bread flour will result in a slightly lighter texture and crumb compared to 100% dark rye, while still retaining the characteristic rye flavor. This can be a good intermediate step after mastering an easy dark rye sourdough with a higher rye percentage.
You could also experiment with light or medium rye flour for a milder flavor and lighter color. Combining dark rye with whole wheat flour or even a small percentage of spelt flour can also introduce different nutty or sweet undertones. When altering the flour composition for your easy dark rye sourdough variation, remember that different flours absorb water differently, so you may need to adjust the hydration slightly.
Variation with Coffee
Adding coffee is an intriguing variation for easy dark rye sourdough that complements the deep, earthy notes of the rye. You can incorporate coffee in several ways. Using strong brewed coffee or espresso as part of the liquid component is one method. Replace a portion of the water in the recipe with cooled coffee. For example, if your recipe calls for 350g of water, you might use 300g water and 50g strong coffee. This adds a subtle depth of flavor and can deepen the color of the crumb and crust.
Alternatively, you can add a small amount of instant coffee or espresso powder (perhaps 1-2 teaspoons per 500g of flour) directly to the dry ingredients. This provides a more concentrated coffee flavor. Another approach is to incorporate spent coffee grounds (from brewing) into the dough, which adds texture and a mild coffee note, similar to adding seeds. This coffee variation provides a unique twist on the classic easy dark rye sourdough profile.
Conclusion
Continuing Your Baking Education
Mastering easy dark rye sourdough is a rewarding step in your baking journey. While this guide provides a solid foundation, the world of sourdough is vast and offers endless possibilities for exploration. Each bake is a learning experience, teaching you about dough behavior, fermentation signs, and the nuances of working with natural leaven. Don't be discouraged by less-than-perfect loaves; they are valuable lessons.
Continue to experiment with different hydration levels, fermentation times, and techniques. Try varying the types of rye flour or incorporating different grains and seeds as suggested in the variations section. Read other resources, watch videos, and perhaps even join a local baking group. The more you bake, the more intuitive the process will become, building your confidence to tackle even more complex breads. Your success with this easy dark rye sourdough is just the beginning!
One of the greatest joys of baking, especially making a delicious easy dark rye sourdough, is sharing it with others. The rich aroma and hearty flavor of homemade sourdough are sure to be appreciated by friends and family. Slice up your beautiful loaf and serve it simply with butter, use it for robust sandwiches, or pair it with cheese and charcuterie.
Consider gifting a loaf to a neighbor or bringing one to a potluck. Sharing your baking not only spreads joy but also provides valuable feedback. Don't hesitate to talk about your process – the challenges and triumphs – as it can inspire others to start their own baking adventures. Your easy dark rye sourdough is more than just bread; it's a product of patience, care, and the fascinating science of fermentation, meant to be shared and enjoyed.
Frequently Asked Questions
What makes this dark rye sourdough recipe "easy," especially for beginners?
This recipe focuses on simpler techniques and readily available ingredients, using a shorter fermentation time compared to traditional dark rye sourdough recipes. It also offers clear, step-by-step instructions to guide beginners.
What specific ingredients are crucial for achieving that characteristic dark color and rye flavor?
The key is using a high-quality dark rye flour. Molasses or cocoa powder can also be added to enhance the color and depth of flavor.
How does this recipe differ from traditional dark rye sourdough recipes?
Traditional recipes often involve longer fermentation periods and specialized techniques like using a rye starter. This recipe simplifies the process with a more accessible approach and quicker results.
Can I substitute any of the ingredients, and if so, what are the potential consequences?
Substituting flours may alter the texture and flavor. Using a different sweetener instead of molasses will impact the color and sweetness. Always consider the impact of substitutions.
What are some common mistakes beginners make when baking dark rye sourdough, and how can I avoid them?
Over-proofing is a common issue. Closely monitor the dough's rise and use the poke test. Also, avoid over-mixing, as rye flour can become gummy and dense.
Final Reflection: The Enduring Allure of Dark Rye Sourdough
Mastering the art of dark rye sourdough isn't just about baking bread; it's about embracing a process, a tradition, and a deeply satisfying connection to the craft of baking. This beginner's guide aimed to demystify the seemingly complex world of dark rye, proving that even this intensely flavorful bread can be accessible to home bakers. The journey, as you've discovered, is as rewarding as the final loaf.
The enduring appeal of sourdough, particularly dark rye, lies in its unique character and the tangible connection it fosters with the past. It's a testament to the power of simple ingredients transformed through time and patience. The rich, complex flavors and satisfying chewiness are a reward in themselves, but the process itself—the nurturing of the starter, the careful attention to fermentation—offers a meditative quality often missing in our fast-paced lives. Bread is the staff of life,
they say, and in the case of sourdough, it's a staff imbued with history, tradition, and a profound sense of accomplishment.
Now, it's your turn. Don't be intimidated by the seemingly complex steps outlined in this guide. Embrace the challenge, experiment with different flours and techniques, and most importantly, enjoy the journey. The satisfaction of crafting your own loaf of dark rye sourdough, from starter to oven, is an experience unlike any other. So, gather your ingredients, find your rhythm, and let the magic of sourdough unfold. Your first (and many more to come!) perfectly crusty loaf awaits.
Unleash Your Inner Baker: Craft Your Perfect Dark Rye Sourdough!
Thanks for joining us on this sourdough journey! We hope you now feel empowered to tackle the rich and complex world of dark rye. Ready to put your new knowledge into practice?
- Bake your first dark rye sourdough loaf: Use the recipe and techniques discussed to create your own masterpiece. Don't be afraid to experiment—that's where the real magic happens!
- Share your baking adventures: Post a picture of your loaf on social media and tag us! We’d love to see your creations.
- Consider journaling your baking process: Note down what worked, what didn't, and how you'd adjust next time. This will become an invaluable resource as you continue to improve your skills.
So, what unique ingredient will you try in your next dark rye sourdough experiment?