
Mastering the Stretch and Fold: Building Dough Structure Efficiently


Welcome to BakeWithEase, your partner in crafting delightful baked goods! Ever wondered how to achieve that perfect, airy crumb in your sourdough? This article dives deep into a crucial technique: the stretch and fold. Discover how this simple method can dramatically improve your dough's structure and strength, leading to loaves that are both beautiful and bursting with flavor. Intrigued? Let's unlock the secrets to effortless sourdough success!
- Introduction to the Stretch and Fold Technique
- Understanding Gluten Development
- The Stretch and Fold Technique: A Step-by-Step Guide
- Benefits of Stretch and Fold vs. Traditional Kneading
- Troubleshooting Common Stretch and Fold Issues
- Stretch and Fold Variations for Different Dough Types
- Optimizing Your Dough with Stretch and Fold
- Beyond the Basics: Advanced Techniques
- Stretch and Fold in Pizza Dough: Achieving the Perfect Crust
- Conclusion: Mastering Dough Structure
-
Frequently Asked Questions
- What exactly is the stretch and fold technique in sourdough baking?
- Why is stretch and fold preferred over kneading for sourdough?
- How often should I perform stretch and folds when making sourdough?
- What are the benefits of using the stretch and fold method for sourdough?
- Can I over-stretch and fold my sourdough dough?
- Final Reflection: The Enduring Power of the Stretch and Fold
- Unleash Your Inner Baker: Craft Perfect Dough Every Time!
Introduction to the Stretch and Fold Technique
The stretch and fold technique is a fundamental method in modern bread baking, particularly favored for high-hydration doughs and sourdoughs. Unlike traditional kneading, which involves vigorous manipulation of the dough on a surface, stretch and fold is a gentler approach performed directly in the mixing bowl. This method allows the dough to develop structure and strength over time with minimal effort, making it accessible for bakers of all levels. It's a cornerstone for achieving the airy, open crumb structure often desired in artisan breads.
This technique relies on the dough's own weight and elasticity to build a robust gluten network. By periodically stretching the dough upwards and folding it back onto itself, you align the gluten strands, trapping air and creating tension. This process is typically repeated several times over a period, allowing the dough to rest and relax between sessions. The result is a dough that is more manageable, elastic, and capable of holding its shape, leading to better oven spring and a superior final loaf texture.
Why Use Stretch and Fold?
Using the stretch and fold method offers significant advantages over continuous kneading, especially when working with wetter doughs or when you prefer a less hands-on approach. For many bakers, it's a revelation, transforming sticky, unmanageable dough into a smooth, elastic mass with surprisingly little effort. This technique is particularly effective for developing the structure needed for open-crumb breads like ciabatta or rustic sourdough loaves, where excessive kneading can sometimes lead to a tighter crumb.
Furthermore, stretch and fold is remarkably time-efficient in terms of active working time. Instead of kneading for 10-15 minutes straight, you might perform just a few minutes of stretching and folding every 30-60 minutes. This allows you to multitask while your dough develops strength during its resting periods. It's a method that respects the dough's natural development, allowing time and gentle handling to do much of the work, resulting in a stronger, more extensible dough base for your baking projects.
The Benefits of Improved Dough Strength
Improved dough strength, a direct outcome of effective stretch and fold, is crucial for successful baking. A strong dough can hold its shape better during bulk fermentation and proofing, preventing it from spreading out into a flat disc. This inherent structure provides the scaffolding necessary for the dough to rise upwards rather than outwards during baking, contributing significantly to oven spring – the final burst of rising in the hot oven.
A well-developed gluten network also creates better gas retention. As yeast produces carbon dioxide, the elastic gluten traps these gases, forming bubbles that contribute to the open, airy crumb structure. Without sufficient strength, the dough would collapse, resulting in a dense, heavy loaf. For instance, an 80% hydration sourdough dough would be incredibly difficult to handle and shape without the structural integrity built through several rounds of stretch and fold, which allows it to maintain volume and develop that characteristic bubbly texture.
Understanding Gluten Development
Gluten development is the cornerstone of bread structure. It's the magical transformation that happens when water meets flour, specifically the proteins glutenin and gliadin. When these proteins hydrate and are worked, they link together, forming an elastic network known as gluten. This network is what gives dough its elasticity and extensibility, allowing it to be stretched and shaped without tearing and, crucially, enabling it to trap the gases produced by yeast or sourdough starter, causing the dough to rise.
The level of gluten development directly impacts the final texture of your baked goods. A well-developed gluten network results in a dough that is smooth, elastic, and resilient, capable of producing loaves with a beautiful open crumb and excellent volume. Conversely, underdeveloped gluten will result in a slack, sticky dough that's hard to handle and yields dense, flat bread. Understanding how to effectively develop this network is key to mastering bread baking.
The Role of Gluten in Dough Structure
The gluten network acts like a balloon within the dough. As fermentation produces carbon dioxide gas, this elastic network stretches and expands, allowing the dough to increase in volume. Think of it as the internal framework that holds everything together.
In a high-hydration dough, where there's a lot of water relative to flour, this network is even more critical because the extra moisture makes the dough naturally slacker and stickier. For example, a dough with 75% hydration relies heavily on a strong gluten structure to maintain its shape and rise properly, whereas a lower hydration dough (say, 60%) is more forgiving due to less water weakening the structure initially.
Beyond gas retention, gluten also provides the chewiness and texture characteristic of many breads. The aligned protein strands give the crumb its structure, creating those desirable holes (alveoli) in artisan loaves. Without sufficient gluten development, the dough lacks the strength to support these structures, leading to a tight, uniform crumb. This is why techniques like stretch and fold are so vital for achieving the desired texture in breads, especially those using wild yeast like stretch and fold sourdough dough.
How Stretch and Fold Enhances Gluten Network Formation
Stretch and fold is an incredibly effective method for enhancing gluten network formation through hydration and gentle alignment. By allowing the dough to rest between folding sessions, the water has time to fully hydrate the flour proteins. When you then stretch and fold, you are physically aligning these hydrated gluten strands, making the network stronger and more organized. This process builds structure without the potential stress and tearing that can occur with aggressive kneading, particularly beneficial for delicate doughs.
Each stretch and fold session builds upon the previous one. The initial folds might feel loose and the dough quite extensible, but with subsequent rounds performed at intervals (often 30-60 minutes apart), you'll notice the dough becoming progressively smoother, more elastic, and resistant to tearing. This gradual development allows the gluten to relax and strengthen naturally over time, leading to a highly extensible and resilient dough that can trap gas efficiently and hold its shape beautifully throughout fermentation and baking.
The Stretch and Fold Technique: A Step-by-Step Guide
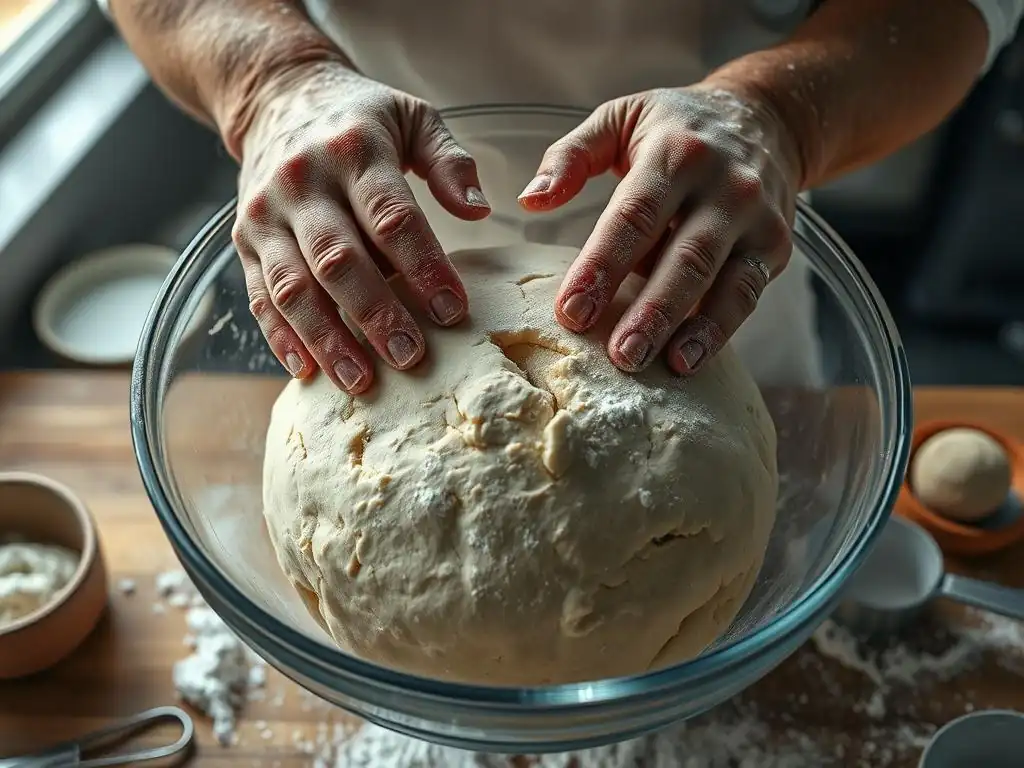
Mastering the stretch and fold technique is straightforward once you understand the basic movements and timing. The key is patience and observation, allowing the dough to tell you what it needs. This method is particularly well-suited for developing structure in wetter doughs that would be difficult to knead vigorously on a surface.
Here's a general breakdown of the process, which can be adapted based on your specific recipe and dough type. Remember, the goal is to build tension and align gluten strands without tearing the dough.
Preparing Your Dough for Stretch and Fold
Before you begin the stretch and fold process, your dough should have completed its initial mixing phase and undergone a brief rest period, often called autolyse or just a short bench rest (15-30 minutes). This rest allows the flour to fully hydrate, making the dough more pliable and easier to work with. Ensure your dough is in a lightly oiled bowl or container large enough to accommodate its expansion during bulk fermentation.
Have a small bowl of water nearby to lightly wet your hands. This prevents the sticky dough from adhering to your fingers and makes the stretching and folding motion smoother. The amount of water needed is minimal – just enough to create a slick surface on your hands.
Performing the First Stretch and Fold
To perform the first stretch and fold, dip your hand lightly in water. Reach under the dough on one side, grab a portion of the dough from the bottom, lift it gently, stretching it upwards. Stretch it as far as it will go without tearing. Typically, you'll stretch it up and over itself towards the opposite side of the bowl.
Rotate the bowl 90 degrees and repeat the process: dip your hand, reach under, lift and stretch the dough upwards, and fold it over itself. Continue rotating the bowl and repeating this action until you have completed stretches and folds from all four sides (North, South, East, West). This completes one round of stretch and fold. Cover the bowl and let the dough rest.
Subsequent Stretch and Folds: Timing and Frequency
The timing and frequency of subsequent stretch and fold rounds depend on the recipe, dough hydration, and ambient temperature. A common schedule for stretch and fold sourdough dough might involve performing 3-5 rounds of folds every 30-60 minutes during the initial part of the bulk fermentation. For example, you might do a fold at 0, 30, 60, 90, and 120 minutes after mixing.
Observe the dough after each round. You'll notice it becomes progressively smoother, tighter, and holds its shape better. The goal is to continue folding until the dough shows significant strength and can hold a taut ball shape briefly. High-hydration doughs may require more folds or longer rest periods between folds than lower hydration doughs. Stop folding when the dough feels sufficiently strong and elastic, even if you haven't reached a specific number of folds listed in a recipe – learn to read your dough!
Benefits of Stretch and Fold vs. Traditional Kneading
Comparing stretch and fold to traditional kneading reveals distinct advantages, making the former a preferred method for many modern bread bakers. While traditional kneading is effective for developing gluten in lower hydration doughs, stretch and fold excels with wetter doughs and offers a less labor-intensive path to excellent structure.
One primary benefit is the reduced active working time. Instead of continuously kneading for 10-15 minutes or more, you perform short bursts of activity (a few minutes of folding) interspersed with longer rest periods (30-60 minutes). This passive development of gluten allows the baker to step away, making it a more convenient technique for busy schedules.
Gentle Handling for Delicate Doughs
Stretch and fold is significantly gentler on the dough than vigorous kneading. This is particularly important for delicate or high-hydration doughs, which can become sticky and difficult to manage when kneaded aggressively. The gentle stretching and folding motion minimizes the risk of tearing the developing gluten network, allowing it to form more smoothly and evenly.
For instance, an enriched dough containing butter, eggs, or milk can be quite tender. Traditional kneading might warm the butter too much or overwork the dough, leading to a tough result. Stretch and fold allows these ingredients to be incorporated and the gluten to develop gradually without excessive force, preserving the dough's delicate texture and richness. This gentle touch is key to achieving a soft, tender crumb in enriched breads.
Achieving Optimum Dough Strength Without Over-Kneading
One challenge with traditional kneading is the risk of overworking the dough, which can lead to a tight, tough result. Stretch and fold mitigates this risk because the gluten development happens more gradually over time, interspersed with rest periods where the dough relaxes. This allows you to build significant strength and elasticity without reaching the point of tearing or tightening the gluten network excessively.
By observing the dough's progress during the rest periods and after each fold, you can gauge its strength and stop folding when it reaches the desired state – typically when it holds its shape and shows good tension. This iterative process allows for more precise control over gluten development, ensuring you achieve optimum strength for excellent oven spring and crumb structure without sacrificing tenderness. For example, a sourdough starter-leavened dough using stretch and fold sourdough dough technique benefits greatly from this controlled development, resulting in a balanced crumb structure.
Time Efficiency for Busy Bakers
While the overall bulk fermentation time might be longer with stretch and fold compared to intensive kneading, the active time spent working the dough is dramatically reduced. Instead of dedicating a solid block of time to kneading, you perform short sets of folds (typically 4-8 folds per round) every half hour or hour.
This means you can start your dough, perform a quick set of folds, and then go about other tasks while the dough rests and the gluten develops passively. For someone with a busy schedule, this distributed effort is far more manageable than a continuous kneading session. Over a few hours, you build incredible dough strength with just minutes of actual hands-on work, making artisan bread baking more accessible to home bakers.
Troubleshooting Common Stretch and Fold Issues
Even with a seemingly simple technique like stretch and fold, you might encounter issues. Recognizing these problems and knowing how to address them is part of the learning process in mastering dough handling. Common issues often relate to dough hydration, fermentation activity, or technique execution.
Learning to read your dough is the most important skill. Is it too sticky to handle? Does it feel overly tight or resistant? Is the structure uneven? These are all signs that the dough needs adjustment or a change in approach.
Dough Too Sticky: Adjusting Hydration
A common issue, especially with high-hydration doughs, is excessive stickiness, making the stretch and fold difficult. While some stickiness is normal with wetter doughs (like those above 75% hydration), if it's unmanageable even with wet hands, your dough might be over-hydrated or underdeveloped. If you're early in the process, you can try incorporating a small amount of additional flour (a tablespoon or two at a time) during your first few folds.
Alternatively, ensure you are using enough water on your hands; a good slick surface is crucial. If the dough is still very sticky after several folds and rest periods, it might simply need more time for the gluten to develop and absorb the water. Continue with the scheduled folds, and you'll likely find the dough becomes easier to handle as its structure builds. Sometimes, simply letting it rest for a longer period (e.g., 45-60 minutes instead of 30) between folds helps the flour hydrate more fully.
Dough Too Tight: Signs of Over-Fermentation
If your dough feels very tight, resistant, and difficult to stretch during the fold, it could be a sign that the bulk fermentation is progressing too quickly or that you've performed too many folds for the dough's current state. Dough that feels tight and tears easily when stretched is often over-proofed or has been overworked.
Check the dough's temperature; if it's too warm (above 80°F/27°C), fermentation will accelerate, leading to rapid gluten development and potential tightness. Try reducing the number of folds or increasing the rest time between them. If the dough is already very gassy and puffy, it might be time to move on to shaping, even if you haven't completed the planned number of folds. For stretch and fold sourdough dough, monitoring the activity of your starter and the ambient temperature is key to avoiding this issue.
Uneven Dough Structure: Correcting Technique
Sometimes, after several folds, you might notice that parts of the dough feel stronger and more developed than others, resulting in an uneven texture. This can happen if you aren't consistently stretching and folding all parts of the dough or if your technique isn't uniform.
Ensure you are rotating the bowl fully (90 degrees each time) and reaching under a different section of the dough with each fold. Try to lift and stretch the dough evenly from the bottom, bringing it up and over the entire mass. If a section feels weaker, give it a little extra attention in subsequent folds, perhaps stretching it first before folding it over the stronger part. Consistency in your motion and coverage will lead to a more uniformly developed gluten network throughout the dough.
Stretch and Fold Variations for Different Dough Types
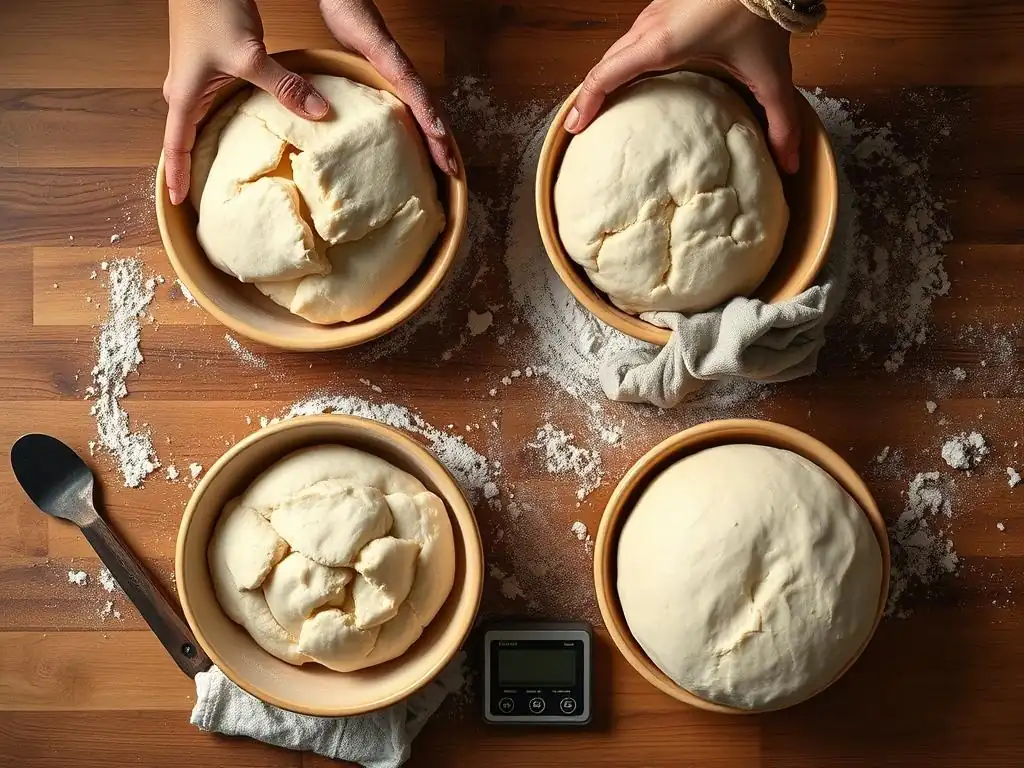
The basic stretch and fold principle can be adapted to suit a variety of dough types, from very wet ciabatta doughs to richer brioche and hearty whole wheat loaves. Understanding these variations allows you to apply the technique effectively regardless of the recipe.
The hydration level and the presence of enriching ingredients (like fats and sugars) significantly influence how the dough behaves and how many folds it might need. A very wet dough requires a different touch than a drier, stiffer dough.
Stretch and Fold for High-Hydration Doughs
High-hydration doughs (typically 75% water or more relative to flour) are where the stretch and fold technique truly shines. These doughs are too sticky and slack for traditional kneading on a surface. Stretch and fold allows you to build tension and structure directly in the bowl. You might need to use wetter hands and perform more folds (perhaps 4-6 rounds) over a longer period (every 30-45 minutes) compared to lower hydration doughs.
The key is to be gentle and patient. Don't force the stretch; just go as far as the dough allows without tearing. As you perform subsequent folds, you'll notice the dough transforming from a shaggy, sticky mass into a smooth, elastic, and manageable ball. The high water content in these doughs contributes to a very open, airy crumb when the gluten is sufficiently developed through this method.
Adapting the Technique for Enriched Doughs
Enriched doughs, containing ingredients like butter, eggs, sugar, and milk, behave differently than lean doughs (flour, water, salt, yeast). The fat and sugar can interfere with gluten development, making these doughs feel softer and sometimes less elastic initially. Stretch and fold is an excellent method for developing gluten in enriched doughs gently.
You might incorporate the enriching ingredients after the initial mixing and first rest (autolyse), then begin the stretch and fold sequence. Due to the softening effect of fats, enriched doughs might require fewer, gentler folds or longer rest periods between folds. Observe the dough; it should become smooth and elastic but will likely feel softer and less taut than a lean dough of similar hydration. For example, a brioche dough might only need 2-3 gentle rounds of stretch and fold over 2-3 hours.
Using Stretch and Fold with Whole Wheat Dough
Whole wheat flour contains bran and germ particles that can physically cut through the developing gluten strands, making it more challenging to build a strong network. Stretch and fold is beneficial for whole wheat doughs because it's a gentler approach than aggressive kneading, which can further damage the gluten.
Whole wheat doughs often benefit from a longer autolyse period (60 minutes or more) to allow the bran to soften and absorb water, reducing its interference with gluten development. You might also increase the hydration slightly compared to a white flour dough. Perform 3-4 rounds of stretch and fold every 45-60 minutes.
Pay attention to the dough's strength; it will likely feel less elastic than white flour dough, but you should still be able to build enough tension to support a good rise. The stretch and fold sourdough dough method works exceptionally well with whole wheat sourdough, producing hearty, well-structured loaves.
Optimizing Your Dough with Stretch and Fold
Optimizing your dough using the stretch and fold technique involves more than just performing the motions; it requires strategic timing and keen observation. Integrating this method effectively into your baking process means understanding when to fold, how to monitor progress, and how to assess the dough's readiness for the next stage.
The goal is to build just the right amount of strength – enough for excellent structure and oven spring, but not so much that the dough becomes tight or loses its extensibility. This balance is achieved through careful timing and responsiveness to the dough's feel.
Incorporating Stretch and Fold into Your Baking Schedule
Stretch and fold should be incorporated during the bulk fermentation phase, after the initial mixing and any autolyse period. The typical schedule involves performing several rounds of folds over the first 2-3 hours of bulk fermentation, with rest periods (usually 30-60 minutes) in between.
For example, if your total bulk fermentation is 4 hours, you might perform folds at the 0, 30, 60, 90, and 120-minute marks. After the last fold, the dough rests undisturbed for the remainder of the bulk fermentation time. This front-loads the structure development, allowing the dough to relax and build gas during the later stages. Adjust the frequency and number of folds based on your dough's hydration and how quickly it's developing strength.
Monitoring Dough Development After Each Stretch and Fold
Between each stretch and fold session, and especially after the final fold, it's crucial to monitor the dough's development. Observe how much it's rising, look for signs of gas production (bubbles on the surface), and feel its texture. After a successful fold, the dough should feel tighter and hold its shape better.
As bulk fermentation progresses, the dough will become increasingly aerated and puffy. You can also perform a "windowpane test" cautiously (though this can be difficult with very wet doughs): gently stretch a small piece of dough; if you can stretch it thin enough to see light through it without tearing, the gluten is well-developed. Pay attention to the dough's volume increase; it should roughly double (or increase by 75-100%) by the end of bulk fermentation, depending on the recipe and temperature.
Assessing Dough Readiness for Shaping
Knowing when your dough is ready for shaping is a critical step that follows the stretch and fold phase. The dough should feel alive, airy, and significantly increased in volume since mixing. It should also possess good strength and elasticity, a result of the successful stretch and fold rounds.
A key indicator is the "poke test." Lightly flour a finger and gently press into the dough about half an inch deep. If the indentation slowly springs back only halfway, the dough is typically ready for shaping. If it springs back immediately, it needs more time. If it leaves a permanent indentation and deflates slightly, it might be slightly over-proofed. The dough should also feel strong enough to hold tension during the pre-shaping and final shaping stages.
Beyond the Basics: Advanced Techniques
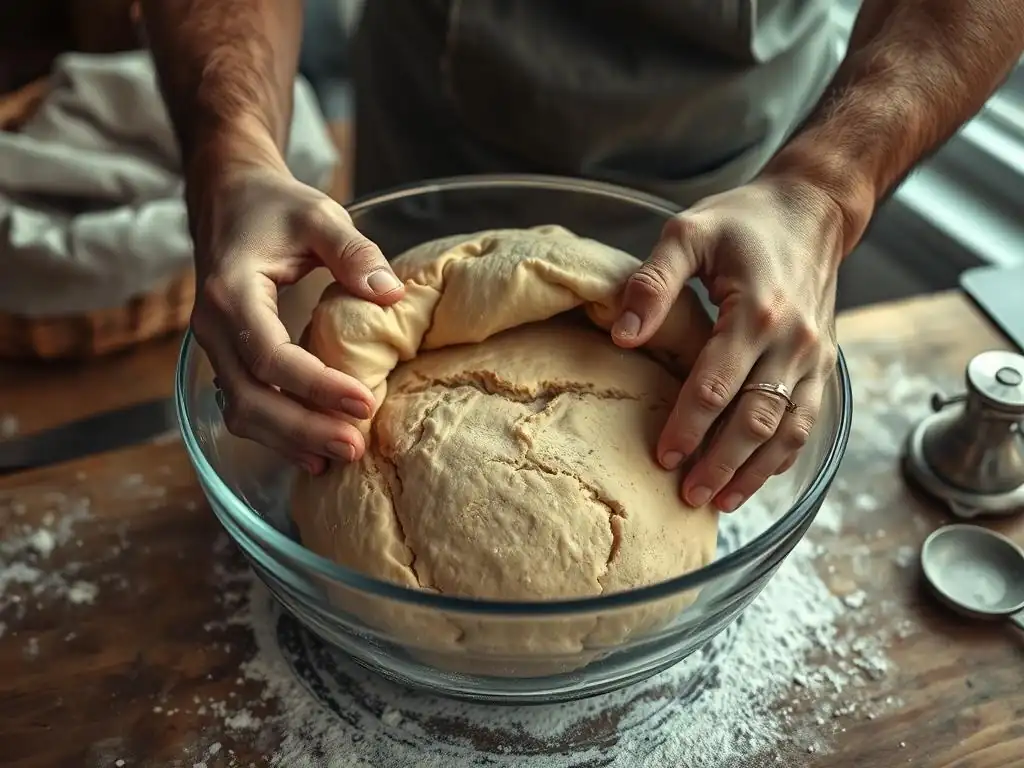
Once you've mastered the fundamental stretch and fold, you can explore more advanced techniques that build upon the same principles of dough strengthening and structure development. These methods are often used by experienced bakers to achieve specific crumb textures and dough handling characteristics.
Techniques like coil folds and lamination offer alternative or supplementary ways to build exceptional dough structure, particularly beneficial for very high-hydration doughs or for creating specific bread types like croissants or puff pastry.
Coil Folds: An Alternative Method
Coil folds are a variation on the stretch and fold technique, particularly useful for very wet or large batches of dough. Instead of lifting and folding from the sides of the bowl, you gently lift the dough from the center using both hands underneath, allowing the edges to tuck underneath themselves as gravity pulls them down. This creates a coiled effect, hence the name.
To perform a coil fold, wet your hands slightly. Reach under the center of the dough in the bowl or container. Gently lift the dough, letting the edges fall and coil underneath. Place the dough back down gently. Rotate the bowl 180 degrees and repeat. This is typically done 2-3 times per round. Coil folds are very gentle and build tension from the bottom up, effective for strengthening slack dough without excessive handling.
Laminating Dough: Extreme Dough Strengthening
Laminating is an advanced technique that involves stretching the dough into a large, thin rectangle (like a sheet of pastry) and then folding it multiple times, often incorporating butter between layers (as in croissants or puff pastry). While often associated with enriched doughs, laminating can also be used with lean bread doughs to create an incredibly strong and organized gluten structure.
For a lean dough, laminating involves stretching the dough very thin (often with the help of a little flour or water on the surface) and then folding it like a business letter (thirds) or in quarters. This aligns the gluten strands horizontally and vertically, creating exceptional strength and layers. This technique is usually performed once or twice during bulk fermentation after some initial stretch and folds, providing a significant boost in structure.
Combining Stretch and Fold with Other Techniques
Many bakers combine stretch and fold with other techniques to optimize dough development. For instance, you might start with a brief autolyse, followed by a few rounds of stretch and fold in the bowl. For very high-hydration doughs, you might then switch to coil folds for subsequent rounds as the dough becomes looser.
For sourdough, combining stretch and fold sourdough dough methods with a lamination step can yield particularly impressive results, producing loaves with a strong rise and a very open, almost lacy crumb. The specific combination and timing of techniques depend on the desired outcome and the nature of the dough, allowing for great flexibility and experimentation in your baking process.
Stretch and Fold in Pizza Dough: Achieving the Perfect Crust
While often discussed in the context of loaf breads, the stretch and fold technique is equally valuable for pizza dough. A well-structured pizza dough is key to achieving that desirable balance of a chewy interior, airy edge (cornicione), and crispy bottom crust. Stretch and fold helps develop the gluten needed to handle the stretching involved in shaping a pizza base and provides the strength for good oven spring.
Using stretch and fold for pizza dough contributes to a dough that is easier to work with, less prone to tearing when stretched, and capable of developing beautiful large bubbles in the crust during baking. It's a simple way to elevate your homemade pizza from good to outstanding.
Enhancing Pizza Dough Structure with Strategic Folding
For pizza dough, developing sufficient but not excessive gluten is important. You need strength to stretch the dough thin without it snapping back or tearing, but you don't want it so tight that it's hard to shape. Stretch and fold is perfect for this balanced development. Performing 2-3 rounds of stretch and fold during the bulk fermentation (say, every 30-45 minutes) builds the necessary elasticity and extensibility.
This strategic folding aligns the gluten network, making the dough smooth and pliable. When you go to shape your pizza, you'll find the dough stretches easily from the center outwards without resisting or contracting excessively. This leads to a more uniformly thin base and a more pronounced, airy edge.
Stretch and Fold for Improved Oven Spring in Pizza
Oven spring isn't just for loaves; it's crucial for the perfect pizza crust too. Good oven spring in pizza dough results in a puffy, airy cornicione (the edge crust) with large, irregular holes, indicating a light texture. The strength built through stretch and fold directly contributes to this.
As the pizza hits the hot oven, the trapped gases expand rapidly. A dough with a strong, elastic gluten network developed through stretch and fold is capable of capturing this expansion, causing the edges to puff up dramatically. Without sufficient structure, the dough would spread flat, resulting in a dense, flat crust. This technique is particularly effective when aiming for Neapolitan-style pizza crusts with their characteristic airy bubbles.
Pizza Dough Recipe with Stretch and Fold
Here is a simple example of how stretch and fold can be incorporated into a basic pizza dough recipe schedule:
- Ingredients: 500g bread flour, 350g water (70% hydration), 10g salt, 2g instant yeast (or 100g active sourdough starter for stretch and fold sourdough pizza dough).
- Method:
- Combine flour and water, mix until shaggy. Rest (autolyse) for 30 minutes.
- Add salt and yeast (or starter). Mix until just combined.
- Rest 30 minutes.
- Perform First Stretch and Fold: Wet hands, lift and fold dough from 4 sides. Rest 30 minutes.
- Perform Second Stretch and Fold: Repeat the folding process. Rest 45 minutes.
- Perform Third Stretch and Fold: Repeat. Rest for remainder of bulk fermentation (e.g., another 1-2 hours, depending on temperature, until dough is visibly risen and bubbly).
- Divide, ball, and cold ferment in fridge (12-72 hours recommended for flavor).
- Shape and bake.
This schedule ensures the dough develops excellent strength and flavor, leading to a superior pizza crust compared to dough simply kneaded briefly.
Conclusion: Mastering Dough Structure
Mastering dough structure is arguably the most important skill in bread baking, and the stretch and fold technique is a powerful tool for achieving it. By understanding how gluten develops and how gentle handling can build strength over time, you unlock the potential for loaves and pizzas with incredible texture and rise.
The stretch and fold method, whether applied to a lean sourdough, an enriched brioche, or a simple pizza dough, simplifies the process of building a robust gluten network, especially for wetter doughs. It replaces strenuous kneading with short, manageable intervals of activity, making artisan baking more accessible and enjoyable.
The Importance of Understanding Dough Handling
Beyond following a recipe, understanding why you perform techniques like stretch and fold is crucial. It's about learning to read your dough – its stickiness, its extensibility, its ability to hold tension. This intuition comes with practice and observation. A dough that feels too slack needs more folds or a longer rest; one that feels too tight needs gentler handling or less folding.
Developing this feel for the dough allows you to adapt recipes and techniques to your specific environment (kitchen temperature, flour type) and ensures consistent, successful results. It moves you from being a recipe follower to a true baker.
Continuously Improving Your Technique
Like any skill, mastering the stretch and fold technique and dough handling requires practice. Pay attention to how the dough feels before and after each fold. Note how it behaves during bulk fermentation. Compare the results of different folding schedules or variations (like coil folds).
Experiment with different hydration levels and flour types to see how they impact the dough and the effectiveness of the folds. Each bake is an opportunity to refine your touch and deepen your understanding of dough. Embrace the process, learn from each batch, and you'll find your bread and pizza crusts steadily improving, leading to truly masterful results.
Frequently Asked Questions
What exactly is the stretch and fold technique in sourdough baking?
The stretch and fold technique is a method of developing dough strength and gluten structure without traditional kneading. It involves gently stretching a portion of the dough upwards and folding it over onto itself, repeated several times.
Why is stretch and fold preferred over kneading for sourdough?
Stretch and fold is often preferred because it's gentler on the sourdough starter and promotes better gluten development over time. It also allows for more even hydration throughout the dough.
How often should I perform stretch and folds when making sourdough?
Typically, you'll perform stretch and folds 3-6 times during the bulk fermentation process. The frequency depends on the dough's strength and hydration, as well as the recipe.
What are the benefits of using the stretch and fold method for sourdough?
It leads to a stronger gluten network, resulting in a better rise and a more open crumb structure. It also helps distribute gases and nutrients more evenly.
Can I over-stretch and fold my sourdough dough?
Yes, overdoing it can lead to a tight and dense dough, hindering its ability to rise properly. It's important to observe the dough and stop when it feels strong and elastic.
Final Reflection: The Enduring Power of the Stretch and Fold
Mastering the stretch and fold isn't just about technique; it's about understanding the very soul of sourdough. This seemingly simple action unlocks a world of possibilities, transforming a simple mixture of flour and water into a beautifully structured, flavorful loaf. The impact of this technique extends far beyond the kitchen, offering a powerful metaphor for mindful creation and patient growth.
The stretch and fold, in its repetitive simplicity, mirrors the slow, deliberate process of life itself. Each gentle manipulation builds strength and complexity, much like our own experiences shape and define us. The patience required resonates deeply with the ethos of sourdough baking, reminding us that true excellence often emerges from a commitment to process over instant gratification. The reward of patience is always sweet.
This quote, though often applied to different contexts, perfectly captures the essence of mastering the stretch and fold and the rewards it brings.
Now, consider your own "dough." What aspects of your life require the same gentle, persistent attention? Where can you apply the principles of mindful manipulation, building strength and resilience through consistent effort? Embrace the process, find joy in the repetition, and watch as your own "loaf" rises to its full potential. The journey of mastering the stretch and fold is not just about baking bread; it's about cultivating a deeper understanding of yourself and the world around you.
Unleash Your Inner Baker: Craft Perfect Dough Every Time!
Thanks for taking the time to explore the art of dough structure with us! We hope you now feel more confident in your baking abilities. Ready to put your newfound knowledge into practice?
Here's how you can take your baking to the next level:
- Master the Stretch and Fold: Practice the technique outlined in the article on your next dough batch. Pay close attention to the changes in texture and elasticity. This is the key to unlocking perfectly textured bread!
- Experiment with Different Flours: Try substituting different types of flour (whole wheat, rye, etc.) to see how it impacts the dough's structure. Document your results—you might discover your new favorite bread!
- Share your baking journey! Tell us about your experiences—what worked well, what challenges you faced, and what delicious creations you made.
So, what amazing dough creations will you be crafting this week?