
Bread Collapsed After Baking? Here's Why It Sank

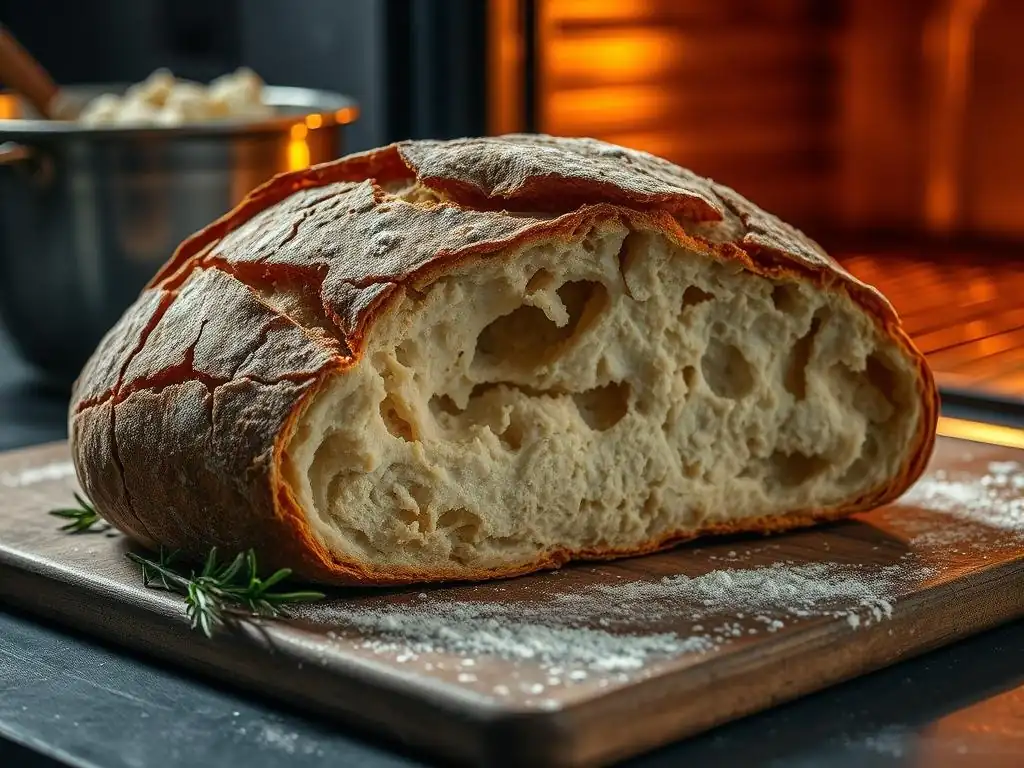
Welcome to BakeWithEase, your partner in creating delicious baked goods! Ever wondered why your bread sinks after baking, leaving you with a disheartening loaf? Discover the secrets behind achieving perfectly risen bread in our comprehensive guide. Let's unravel the mysteries of bread baking and transform your kitchen into a haven of delightful aromas and flawless results!
- Understanding Sourdough Starter Activity: A Baker's Guide
- Common Reasons Why Your Sourdough Starter Isn't Doubling
- Diagnosing Your Sourdough Starter's Problem: A Step-by-Step Approach
- Fixing a Sluggish Starter: Solutions for Reviving Your Culture
- Advanced Sourdough Techniques to Boost Starter Activity
- Using a Weak Starter: Recipes for Discard
- BakeWithEase Tips for a Vigorous Starter
- Frequently Asked Questions
- Final Reflection: The Humble Loaf and the Lessons Within
- Unlock Your Baking Potential: Rise Above Soggy Bread!
Understanding Sourdough Starter Activity: A Baker's Guide
A sourdough starter is a living culture, a symbiotic community of wild yeasts and lactic acid bacteria. These microorganisms work together, feeding on flour and water, to produce carbon dioxide gas and organic acids. The gas production is what causes the starter to rise and double (or even triple) in volume after feeding, which is a key indicator of its health and readiness for baking. The acids contribute to the distinctive tangy flavor of sourdough bread.
Observing your sourdough starter's activity is crucial for successful baking. A vigorous starter, one that reliably doubles within a predictable timeframe (often 4-12 hours depending on temperature and feeding ratio), has the power to leaven bread effectively.
When a starter is sluggish or fails to double, it lacks the necessary microbial activity to make your dough rise properly, potentially leading to dense loaves or the common issue of why bread sinks baking after coming out of the oven. Understanding the signs of a healthy, active culture – like numerous bubbles, a light and airy texture, and predictable expansion – is the first step in troubleshooting.
Common Reasons Why Your Sourdough Starter Isn't Doubling
Incorrect Hydration Ratio: Affecting Fermentation
The hydration ratio of your sourdough starter refers to the proportion of water to flour by weight. A common ratio is 1:1 (100% hydration), meaning equal weights of flour and water, resulting in a consistency like thick batter or paste.
If your starter is too dry (lower hydration, e.g., 80% water to flour), the yeast and bacteria have less mobility to access food and reproduce efficiently, slowing down fermentation and gas production. Conversely, a very wet starter (high hydration, e.g., 150% or more) can rise quickly but may not hold its structure well, making it harder to observe true doubling, and the culture might become too diluted to be vigorous.
Maintaining the correct hydration is vital because it impacts the starter's consistency and the environment for the microbes. A starter that is too stiff might show activity but won't expand dramatically, while one that is too liquid might expand but collapse quickly, making it hard to catch at its peak. Many bakers find the 1:1 ratio at 100% hydration to be a reliable standard for observing activity and achieving consistent results, noting that 50 grams of flour combined with 50 grams of water creates this ideal texture for monitoring rise.
Temperature Issues: Too Cold or Too Hot
Temperature plays a significant role in the metabolic rate of the wild yeasts and bacteria in your starter. The optimal temperature range for most sourdough starters is between 70°F and 80°F (21°C to 27°C). If your starter is kept in a colder environment, say below 65°F (18°C), the microbial activity slows down considerably. This results in very slow or minimal rising and a failure to double within a reasonable timeframe, even if the starter is otherwise healthy.
Conversely, temperatures consistently above 80°F (27°C), and especially above 90°F (32°C), can stress or even kill the beneficial microbes. While initial activity might seem rapid in warmer conditions, prolonged high temperatures can lead to an imbalance in the culture, favoring less desirable organisms or simply exhausting the yeast too quickly. For example, a starter left in a hot car or near a heating vent could easily overheat and become inactive. Aiming for a stable temperature within the optimal range is key to consistent doubling.
Flour Quality: Lack of Nutrients for Yeast
The type and quality of flour you feed your sourdough starter directly impact its health and activity. Wild yeasts and lactic acid bacteria thrive on the complex carbohydrates and nutrients found in flour, particularly in the bran and germ. Using highly processed or bleached white flour, which has had much of its nutritional content stripped away, can result in a sluggish starter because there isn't enough readily available food for the microbes to feast upon and produce gas effectively.
Many experienced bakers recommend using unbleached all-purpose flour, bread flour, or incorporating a percentage of whole wheat or rye flour into the feeding mix. For instance, feeding a starter with a blend of 80% unbleached white flour and 20% whole rye flour often provides a significant boost in activity compared to using only bleached white flour, as rye flour is particularly rich in enzymes that break down starches into simple sugars, which the yeast can quickly consume.
The protein content of flour also matters; bread flour (typically 12-14% protein) can sometimes provide more structure for the starter to hold its rise than lower-protein flours.
Infrequent Feeding: Starving the Culture
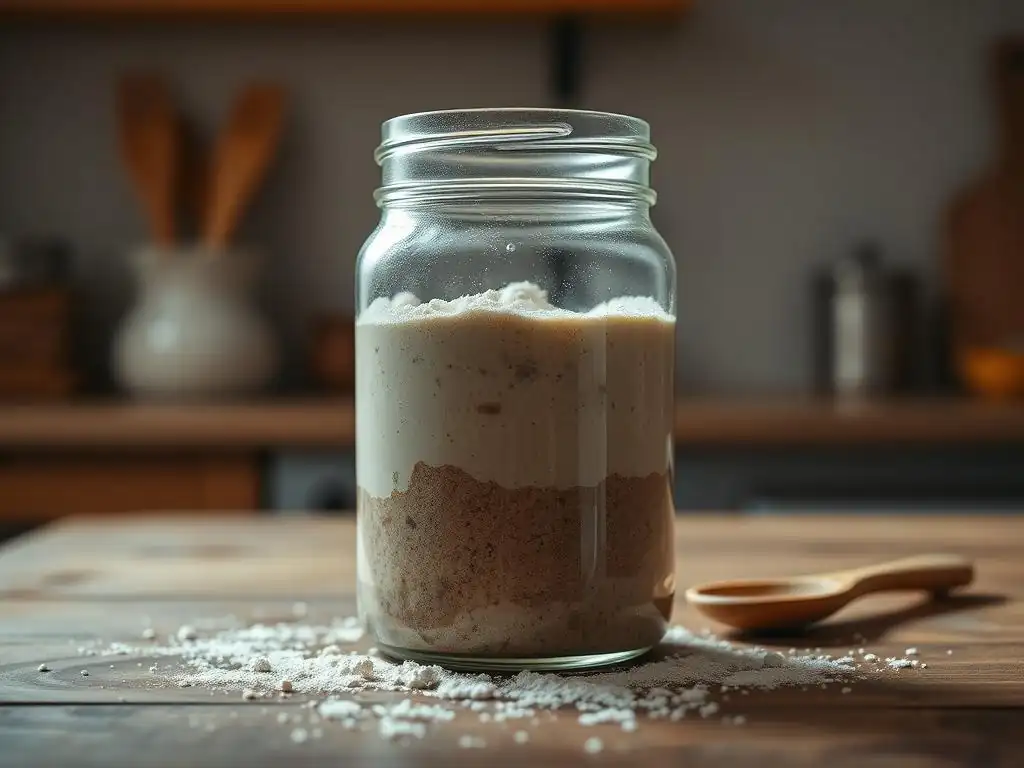
A sourdough starter is a living ecosystem that requires regular nourishment. When you feed your starter, you are providing fresh flour and water for the yeast and bacteria to consume. If you don't feed your starter often enough, especially when kept at room temperature, the microbes will quickly consume all the available food, produce their waste products (acids and alcohol), and then essentially starve. An unfed starter will eventually become dormant and inactive, failing to double because the population of active microbes has diminished significantly.
At room temperature (around 70-75°F or 21-24°C), an active starter typically needs to be fed every 12-24 hours, depending on the feeding ratio and temperature. If you are only feeding once every few days at room temperature, it's highly likely your starter is simply running out of food between feedings, leading to weak activity. A starter that hasn't been fed for several days might develop a layer of liquid (hooch) on top and smell strongly of alcohol or acetone, clear signs that it's hungry and its activity is suppressed.
Inactive Starter: Newly Created or Neglected
If your sourdough starter is less than 2-3 weeks old, it may not yet be strong enough to reliably double in volume. The first week or two of creating a starter involves establishing a stable culture, which can go through various phases of activity and inactivity as different microbes colonize and compete. During this initial period, inconsistent rising and failure to double are completely normal, and patience and consistent feeding are required to build a robust culture capable of leavening bread.
Similarly, a starter that has been neglected for a long time, perhaps left in the fridge for months without feeding, can become very inactive. While refrigeration slows down the microbes, they still consume food over time. A neglected starter might show minimal or no bubbles and fail to rise after feeding because the population of active yeast and bacteria is very low. Reviving such a starter requires consistent, frequent feeding at optimal temperatures over several days or even a week to rebuild the microbial community and restore vigorous activity capable of doubling.
Contamination: Unwanted Bacteria or Mold
While a sourdough starter is primarily composed of beneficial yeasts and lactic acid bacteria, it is also susceptible to colonization by unwanted microorganisms, including molds and harmful bacteria. If your starter develops mold – which can appear as fuzzy patches of various colors like pink, orange, green, or black – it indicates contamination that can weaken or kill the desired culture. Similarly, certain harmful bacteria can outcompete the beneficial ones, leading to off-smells (beyond the usual tangy or alcoholic notes) and a lack of healthy activity.
Contamination often occurs due to unclean jars, utensils, or airborne spores. While a healthy, acidic starter is quite resistant to invaders, a weak or neglected starter is more vulnerable. If you see any signs of mold, it's generally recommended to discard the entire starter and begin anew, as mold spores can be pervasive. Preventing contamination involves using clean, sanitized jars and spoons for feeding and storage, and keeping the starter covered (but allowing some airflow) to prevent airborne spores from settling.
Diagnosing Your Sourdough Starter's Problem: A Step-by-Step Approach
Visual Inspection: Identifying Signs of Mold or Inactivity
Begin by simply looking at your sourdough starter. A healthy, active starter, especially several hours after feeding, should show visible signs of fermentation: bubbles throughout the culture, a light and airy texture, and an increase in volume. If your starter appears flat, dense, or has very few bubbles, it's likely inactive or sluggish. Note the texture on the surface; is it smooth or are there small craters from burst bubbles?
Pay close attention to any unusual colors or textures. Any fuzzy growth, discoloration (such as pink, orange, green, or black spots), or a strange crust that isn't dried starter could indicate mold. If you see hooch (a layer of liquid, typically clear or brownish) on top, it's a sign that the starter has run out of food, but it doesn't necessarily mean contamination unless it's moldy. A strong, unpleasant smell (like rotten food, not just tangy or alcoholic) can also signal contamination by unwanted bacteria.
Float Test: Assessing Starter Readiness
The float test is a simple way to gauge if your starter is active enough to leaven bread, although it's not a perfect indicator of overall health. To perform the test, gently take a small spoonful (about 1/2 to 1 teaspoon) of your starter at its peak activity (when it looks most bubbly and expanded, typically several hours after feeding). Carefully drop this spoonful into a glass of room-temperature water.
If the starter floats on the surface of the water, it means it's full of carbon dioxide gas produced by the yeast and is likely active enough for baking. The buoyancy comes from the trapped gas. If the starter sinks to the bottom, it indicates that it hasn't produced enough gas to be buoyant, suggesting it's not yet at its peak activity or is generally sluggish. While a sinking starter can still be healthy, it might not provide enough lift for your bread dough, potentially contributing to issues like why bread sinks baking.
Temperature Monitoring: Ensuring Optimal Conditions
Check the temperature of the environment where your sourdough starter is kept. Use a simple room thermometer or even a digital probe thermometer placed near the starter jar. Remember, the ideal range for robust activity is typically 70°F to 80°F (21°C to 27°C). If your room temperature is consistently below this range, say around 60°F (15°C), this is a very likely reason for slow or minimal doubling.
Consider also the temperature of the water you use for feeding. Using cold water (e.g., straight from the tap at 50°F or 10°C) can temporarily lower the starter's temperature and slow down activity, especially in a cooler room. Aim for water that is lukewarm, around 75-80°F (24-27°C), to give your starter a warm boost at feeding time. Monitoring the actual temperature where the starter lives provides concrete data for troubleshooting.
Hydration Check: Verifying Correct Ratio
Evaluate the consistency of your starter after feeding. If you are aiming for a standard 100% hydration (1:1 flour to water by weight), the starter should have a thick, paste-like consistency, similar to a very thick pancake batter or peanut butter. If it's very stiff and hard to stir, it's likely too dry (low hydration). If it's very runny and pours easily, it's too wet (high hydration).
You can verify your hydration ratio by weighing your ingredients precisely during feeding. For example, if you consistently feed with 50 grams of flour and 50 grams of water, you are maintaining 100% hydration. If you use 50 grams of flour and only 40 grams of water, your hydration is 80% (40g water / 50g flour * 100 = 80%). If your starter's consistency doesn't match what's typical for your intended hydration, it could be contributing to inhibited or hard-to-observe activity.
Flour Analysis: Evaluating Nutritional Content
Consider the type of flour you are using. Is it bleached or unbleached? What is its protein content? Look at the nutritional information on the flour bag. Unbleached flours, especially those with higher protein content like bread flour (often 12-14% protein), tend to provide more complex sugars and nutrients for the starter compared to lower protein, bleached all-purpose flour (often 10-12% protein).
If you are using only bleached white flour and experiencing sluggishness, try incorporating a small amount of whole grain flour, such as rye or whole wheat. Even replacing just 10-20 grams of the white flour in your typical feeding (e.g., feeding with 40g white flour and 10g rye flour instead of 50g white flour) can introduce a significant amount of nutrients and enzymes that can wake up a sleepy starter. Observe if the starter shows more vigorous bubbling and a faster rise after switching or supplementing the flour type.
Fixing a Sluggish Starter: Solutions for Reviving Your Culture

Adjusting the Hydration: Fine-Tuning the Liquid Ratio
If you've determined your starter's hydration is off, you can adjust it during subsequent feedings. If it's too stiff (low hydration), increase the amount of water slightly in your next feeding. For example, if you were feeding 50g flour with 40g water (80% hydration), try feeding with 50g flour and 50g water (100% hydration) to loosen it up. If it's too wet (high hydration), decrease the amount of water or increase the amount of flour. Consistency is key; aim for a thick, but easily stirrable, batter-like texture for 100% hydration.
Make gradual adjustments rather than drastic changes. Increase or decrease the water by just 5-10 grams at a time over a few feedings until you achieve the desired consistency. A starter that is too dry can be slow to show outward signs of expansion, while one that is too wet might expand but lack the internal structure to hold that expansion visibly as doubling. Getting the hydration right helps the microbes access food and allows you to accurately observe its rise.
Calculating the Baker's Percentage for Hydration
Baker's Percentage is a useful tool for understanding and controlling hydration. It's calculated based on the weight of the flour, which is always considered 100%. The percentage of other ingredients, like water, is calculated relative to the flour weight. The formula for hydration is (Weight of Water / Weight of Flour) * 100 = Hydration Percentage.
For example, if you feed your starter with 100 grams of flour and 100 grams of water, the hydration is (100g water / 100g flour) * 100 = 100%. If you use 120 grams of water and 100 grams of flour, the hydration is 120%. Understanding this calculation allows you to precisely control the consistency and ensure you are consistently feeding at your target hydration level, which is crucial for observing predictable doubling patterns.
Observing Consistency Changes After Feeding
After mixing your starter with fresh flour and water, pay attention to its consistency. A well-hydrated starter (like 100%) should feel cohesive but not dense. It should be smooth and thick enough to hold some shape but still be easily stirred with a spoon. If it forms a tight, shaggy ball, it's likely too dry. If it immediately spreads out into a puddle, it's too wet.
As the starter ferments over the next few hours, the consistency will change slightly, becoming more airy and bubbly. However, the initial mixed consistency is your first indicator of whether your hydration adjustment was successful. If your starter consistently feels too dry or too wet after mixing, that's a sign that your hydration ratio needs tweaking in the next feeding until you achieve the desired feel and appearance for your target percentage.
Controlling Temperature: Creating a Warm Environment
If your environment is too cold, find a warmer spot for your starter. Ideal spots include the top of the refrigerator (heat rises), inside a turned-off oven with the light on (monitor temp closely, it can get hot! ), or even in a proofing box if you have one. The goal is to consistently keep the starter between 70°F and 80°F (21°C to 27°C). Even a few degrees difference can significantly impact activity speed.
For instance, moving a starter from a 65°F (18°C) countertop to a spot near the fridge at 75°F (24°C) can often cut the doubling time in half. If using the oven-with-light method, use an oven thermometer to ensure the temperature doesn't exceed 85°F (30°C) for extended periods, as this can stress the culture. Creating a stable, warm environment is one of the most effective ways to encourage your starter to double reliably.
Using a Proofing Box or Warm Spot
Dedicated proofing boxes or warming mats designed for seedlings can provide precise temperature control for your starter. These devices often allow you to set a specific temperature, ensuring your starter stays within the optimal 75-80°F range consistently. If you don't have specialized equipment, improvised warm spots can work well.
Popular improvised warm spots include placing the starter in the microwave (turned off) with the door slightly ajar to trap warmth, or placing it inside a cooler or box with a warm (not hot) water bottle next to it. Always use a thermometer to verify the actual temperature within these improvised environments. A consistent temperature around 75°F (24°C) is often the sweet spot for encouraging robust doubling within 6-8 hours with a standard feeding ratio.
Monitoring Temperature with a Thermometer
Simply placing a thermometer next to your starter jar or even taping one to the outside of the jar provides essential data. Check the temperature at different times of the day to understand the fluctuations in your chosen spot. If the temperature drops significantly overnight, this could explain why your starter is slow to double by morning.
Knowing the actual temperature allows you to confirm if temperature is the limiting factor. If your starter is consistently at 68°F (20°C) and sluggish, you know you need to find a warmer spot. If it's already at 78°F (26°C) and still not doubling, temperature is likely not the primary issue, and you should investigate other factors like feeding frequency or flour type. Temperature monitoring removes the guesswork.
Switching Flour: Experimenting with Different Types
If you suspect your flour isn't providing enough nutrients, try switching to a higher-quality unbleached flour or incorporating some whole grain. A simple test is to take a small portion of your sluggish starter and feed it separately with a mix that includes 10-20% rye or whole wheat flour (e.g., 40g white flour, 10g rye flour, 50g water).
Observe this small test batch over the next 12-24 hours. If this test batch shows significantly more activity and bubbles, and perhaps even doubles, compared to your main starter fed with only white flour, you've likely found the culprit. Incorporating whole grain flour provides more minerals, enzymes, and readily available sugars that the microbes love, often giving a noticeable boost in fermentation speed and gas production.
Using Whole Wheat or Rye Flour for Nutrients
Whole grain flours like whole wheat and rye contain the germ and bran of the grain, which are rich in nutrients and enzymes that are particularly beneficial for sourdough cultures. These enzymes help break down complex starches in the flour into simpler sugars that the yeast can easily consume for energy and gas production.
Adding even a small percentage of whole grain flour to your regular feeding mix can significantly increase the metabolic activity of your starter. For example, replacing 10-25% of your white flour with rye flour is a common technique used by bakers to boost a sluggish starter or maintain a very active one, as rye is especially effective at stimulating microbial growth and enzyme activity.
Observing Activity with Different Flours
When you switch the type of flour you use for feeding, carefully observe the starter's response over the next few feedings. Look for an increase in the speed and volume of the rise. Does it reach its peak height faster? Are there more bubbles visible throughout the starter? Does it achieve doubling more reliably?
Comparing the behavior of a starter fed with only white flour versus one fed with a mix including whole grain flour can provide clear evidence of the impact of flour quality. If the starter fed with the mix consistently shows more vigorous activity, it indicates that the added nutrients are making a difference and that flour quality was likely a contributing factor to the lack of doubling.
Increasing Feeding Frequency: Providing More Food
If your starter is at room temperature (70-75°F) and you are only feeding it once every 24 hours, try switching to feeding it twice a day, roughly 12 hours apart. This ensures the microbes have a constant supply of fresh food before they consume everything and become inactive. Increasing feeding frequency is particularly effective for starters that show some initial activity but then fall quickly or seem sluggish after the first few hours post-feeding.
Feeding twice a day provides a more consistent energy source, allowing the microbial population to grow and maintain high activity levels. After a few days of twice-daily feeding at an optimal temperature with good flour, you should observe a significant increase in activity and more reliable doubling. Once the starter is consistently doubling within 4-8 hours after feeding, you can consider scaling back to once a day if preferred, but twice a day is a standard method for building and maintaining a very vigorous culture.
Establishing a Consistent Feeding Schedule
Consistency in feeding time helps establish a predictable cycle for your starter's activity. Just like people thrive on routine, sourdough microbes perform best when fed at regular intervals. Aim to feed your starter around the same time(s) each day, whether it's once or twice daily.
For a starter kept at room temperature, feeding every 24 hours (e.g., every morning) or every 12 hours (e.g., morning and evening) works well. This routine helps you anticipate when the starter will be at its peak (often 4-8 hours after feeding, depending on temperature and ratio) and ensures it doesn't go too long without food. A consistent schedule makes it easier to observe patterns in its activity and troubleshoot issues.
Observing the Rise and Fall After Feeding
When feeding regularly and consistently, you should observe your starter rise after being fed, reach a peak height, and then slowly start to fall as it consumes the food and the gas production slows. For a starter to be considered vigorous and ready for baking, it should ideally double or even triple in volume and then begin to fall slightly before its next scheduled feeding.
If your starter rises a little but never doubles, or if it rises and falls very quickly (e.g., peaks and falls within 3-4 hours), it might indicate it needs more frequent feeding or a larger feeding ratio (feeding it more flour relative to the amount of starter you keep). Observing the full cycle of rise and fall helps you understand its feeding needs and assess its strength.
Reviving an Inactive Starter: Patience and Persistence
If your starter has become completely inactive, either from neglect or being newly created and not yet established, revival requires patience and consistent effort. Start by discarding most of the inactive starter, leaving only a small amount (e.g., 10-20 grams). Feed this small amount with fresh flour and water at an optimal ratio (e.g., 1:5:5 starter:flour:water ratio, so 10g starter, 50g flour, 50g water) using good quality flour, ideally with some whole grain.
Place the starter in a warm spot (75-80°F or 24-27°C) and feed it consistently, either once or twice daily using the same ratio. For a neglected starter, it might take several days (3-7 or even longer) of consistent feeding before you start to see reliable bubbling and rising again. For a new starter, this phase is normal and can take 1-2 weeks. Don't give up too soon; persistence with proper feeding and temperature control is usually the key to bringing an inactive starter back to life.
Advanced Sourdough Techniques to Boost Starter Activity
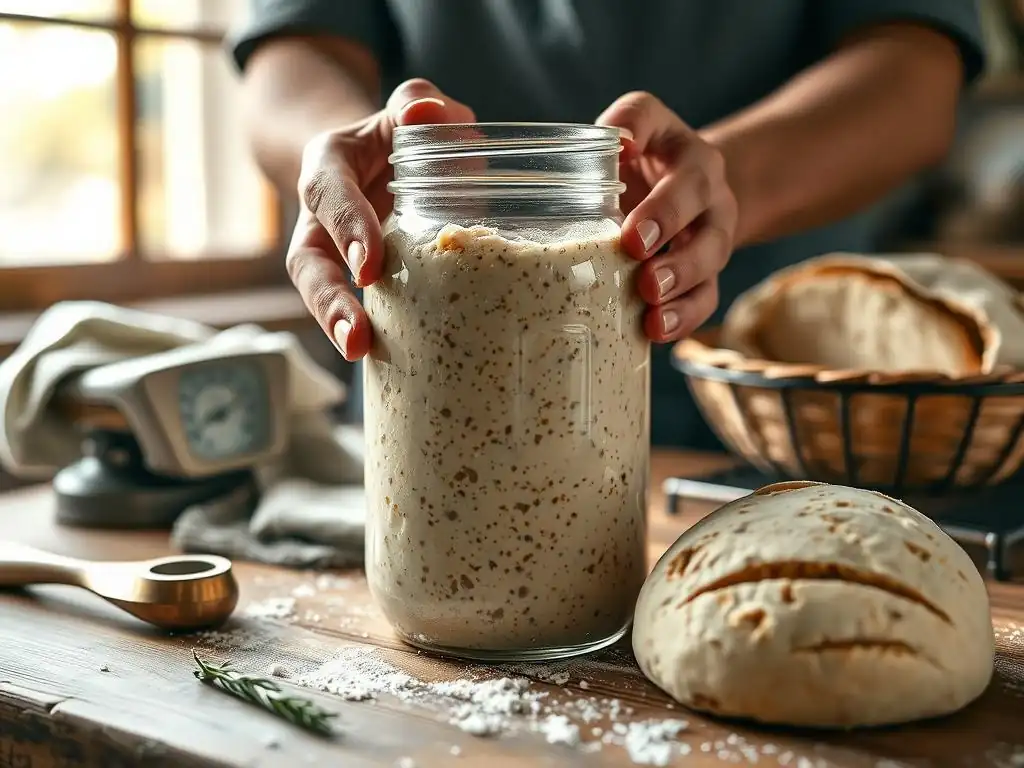
Using Pineapple Juice: Creating an Acidic Environment
For newly created starters (in the first few days), using unsweetened pineapple juice instead of water for the initial feedings can help establish a healthy microbial balance. The acidity of the pineapple juice lowers the pH of the mixture, creating an environment that is less hospitable to certain undesirable bacteria that can sometimes colonize a young starter and cause off-smells or inhibit the growth of beneficial yeast and lactic acid bacteria.
After the first 2-3 days of using pineapple juice, switch back to using filtered water for all subsequent feedings. This technique is primarily used in the very early stages of building a starter from scratch to give the desirable microbes a head start. It's not typically used for maintaining an established starter, which should be acidic enough on its own to ward off invaders.
Adding a Pinch of Sugar: Providing a Quick Energy Source
A tiny pinch of sugar (like 1/4 teaspoon for a typical feeding of 50-100g flour) can provide a quick burst of easily accessible food for the yeast in a sluggish starter. While the yeast ultimately feeds on the complex carbohydrates in the flour, breaking them down takes time. A small amount of simple sugar can kickstart fermentation and gas production, giving the starter a noticeable boost in activity.
This technique should be used sparingly and is best for temporarily boosting a slow starter, not as a regular addition to a healthy, active one. Too much sugar can negatively impact the starter's balance. A small amount, however, can sometimes be the nudge a sleepy starter needs to wake up and start doubling again, helping prevent disappointment like why bread sinks baking due to insufficient leavening.
Maintaining a Mother Culture: Ensuring Long-Term Viability
To safeguard your sourdough journey, consider maintaining a "mother culture." This is a small, robust amount of your main starter that you keep separately, often stored in the refrigerator and fed less frequently (e.g., once every 1-2 weeks). If your main working starter, which you keep at room temperature and feed daily, ever becomes contaminated, completely inactive, or otherwise fails, you have a backup from which you can start again.
Keeping a mother culture ensures the long-term viability of your specific strain of sourdough microbes. It's like having a genetic backup. Feed it with your usual ratio and flour, let it become active, and then place it in the fridge. When you need it, take a small amount, feed it at room temperature daily for a few days until it's vigorous, and you'll have your active starter back.
Using a Weak Starter: Recipes for Discard
If your starter is still sluggish or you are in the process of reviving it and generating a lot of "discard" (the portion you remove before feeding), don't throw it away! While it may not have the leavening power to make a loaf of bread rise significantly, it still contains flavor and can be used in various recipes where chemical leaveners (like baking soda or powder) or other yeasts provide the lift.
Using discard is a great way to minimize waste and add a subtle tangy flavor to baked goods. Look for recipes specifically designed for sourdough discard, which often don't rely on the starter's ability to rise.
Sourdough Pancakes: Utilizing Discarded Starter
Sourdough discard pancakes are a popular and easy way to use up that inactive starter. The discard adds a lovely tang to the batter, enhancing the flavor profile compared to regular pancakes. The leavening in these recipes typically comes from baking powder and/or baking soda, which react with the acidity of the discard (and other ingredients like buttermilk) to create light and fluffy pancakes.
You can often substitute sourdough discard cup-for-cup for some of the liquid in your favorite pancake recipe, adjusting other liquid amounts as needed to get the right batter consistency. The discard provides flavor but you don't need to wait for it to be bubbly or doubled.
Sourdough Crackers: Baking with Inactive Culture
Another excellent use for inactive sourdough starter is making sourdough crackers. These recipes typically involve mixing discard with flour, melted butter or oil, salt, and sometimes seeds or herbs. The mixture is rolled very thinly and baked until crisp.
Since crackers don't require significant leavening, the inactivity of the starter is irrelevant in terms of rise. The discard contributes flavor and helps create a tender, flaky texture. It's a simple and rewarding way to use up large amounts of discard that might accumulate while you are working to revive a sluggish starter and prevent issues like why bread sinks baking when you eventually use your revived culture.
BakeWithEase Tips for a Vigorous Starter
Maintain Consistent Feeding Times: Promote Regular Activity
Feeding your sourdough starter at consistent times each day helps establish a predictable microbial cycle. Whether you feed once every 24 hours or twice every 12 hours, sticking to a schedule (e.g., 8 AM daily, or 8 AM and 8 PM daily) allows the yeast and bacteria to anticipate their food source. This routine promotes more stable and vigorous activity, making it easier to know when your starter will be at its peak and ready to use for baking.
A regular feeding schedule also helps you observe patterns in your starter's behavior. You'll learn how quickly it rises, how long it stays at its peak, and when it starts to fall. This understanding is crucial for successful baking and for quickly identifying when something is off, such as if it's suddenly slower to double than usual.
Use Filtered Water: Avoid Chlorine and Other Chemicals
Tap water in many areas contains chlorine or chloramine, chemicals added by municipalities to kill bacteria in the water supply. While safe for drinking, these chemicals can also inhibit or even kill the beneficial bacteria and yeast in your sourdough starter, slowing down fermentation and reducing activity.
Using filtered water, bottled spring water, or even just letting tap water sit out uncovered for 24 hours (to allow chlorine to dissipate, though this doesn't remove chloramine) can make a significant difference in your starter's health and vigor. Providing your microbes with clean, chemical-free water ensures they can focus on consuming the flour and producing the gas needed for doubling and successful bread baking.
Observe and Adjust: Adapt to Your Starter's Needs
Every sourdough starter is unique, influenced by the specific microbes present, the flour used, the local environment, and even the baker's habits. The most important tip for maintaining a vigorous starter is to observe its behavior closely and be willing to adjust your care routine based on what you see. Does it seem sluggish? Check the temperature. Is it rising but quickly falling? Maybe increase the feeding ratio or frequency.
Pay attention to the visual cues (bubbles, texture, rise) and smells. Learn what a healthy starter looks and smells like for you in your environment. Be prepared to experiment with different feeding ratios (e.g., 1:1:1, 1:2:2, 1:5:5 starter:flour:water), temperatures, and flour types until you find the combination that results in a consistently active culture that reliably doubles. Patience, observation, and adaptation are key to mastering your sourdough starter and avoiding issues like why bread sinks baking.
Frequently Asked Questions
What causes bread to sink after baking?
Bread can collapse after baking due to several factors, including insufficient gluten development, an excessive amount of moisture, or over-proofing the dough before baking.
How can I prevent my bread from sinking?
To avoid a sinking loaf, ensure proper kneading to develop gluten, monitor proofing times, and use the right amount of yeast for your recipe.
Is there a specific temperature for baking bread?
Yes, the oven temperature is crucial for proper baking. Most bread recipes require an initial high temperature to create a good rise, followed by a lower temperature for even cooking.
What role does yeast play in bread rising?
Yeast is a leavening agent that produces gas during fermentation, which helps dough rise. If the yeast is inactive or used in excess, it can lead to collapse.
When should I check my bread for doneness?
You should check your bread for doneness when it has a golden brown crust and sounds hollow when tapped on the bottom. Using an instant-read thermometer, the internal temperature should be around 190-210°F (88-99°C).
Final Reflection: The Humble Loaf and the Lessons Within
The seemingly simple act of baking bread reveals a complex interplay of science and artistry, and understanding why a loaf might sink after baking is key to mastering this ancient craft. A perfectly risen, golden-brown loaf is a testament to careful attention to detail, but even the most experienced bakers face the occasional deflated disappointment. This article has explored the numerous reasons behind a sunken bread, from improper kneading to insufficient proofing, highlighting the delicate balance required for baking success.
The journey of baking, much like life itself, is filled with unexpected challenges and rewarding triumphs. The frustration of a collapsed loaf can be profound, but the lessons learned from analyzing the failure are invaluable. It's a reminder that even in the seemingly straightforward pursuit of a perfect loaf, there's a deeper story to be told – a story of patience, precision, and the understanding of fundamental principles. The best bread is made with love, and a little bit of science.
– Unknown. This quote encapsulates the essence of successful bread baking, emphasizing the importance of both technical skill and emotional investment.
Now, consider your own baking journey, or perhaps a parallel challenge in your life. What seemingly small details have led to unexpected outcomes? What lessons have you learned from your "sunk loaves," and how have you adapted your approach? Take this opportunity to reflect on the importance of understanding the underlying principles, whether in baking or in any other endeavor. Embrace the failures, learn from them, and continue to rise to the occasion, one perfectly risen loaf (or successful endeavor) at a time.
Unlock Your Baking Potential: Rise Above Soggy Bread!
Thanks for taking the time to explore the reasons behind that disappointing bread sink! We hope you gained valuable insights into achieving perfectly risen loaves. Now, let's put that knowledge into action.
- Experiment with a new flour: Try a high-protein flour next time to see how it affects the structure of your dough. This is your key to unlocking consistently successful baking.
- Share your baking journey: Tell us about your bread-baking experiences – both triumphs and challenges – in the comments below! Let's learn from each other.
- Challenge yourself with a new recipe: Find a recipe that pushes your skills – perhaps a sourdough starter or an artisan loaf.
Ready to bake a better loaf tomorrow? What small change will you make in your next baking project to improve your results?