
Create Your Own Rye Sourdough Starter

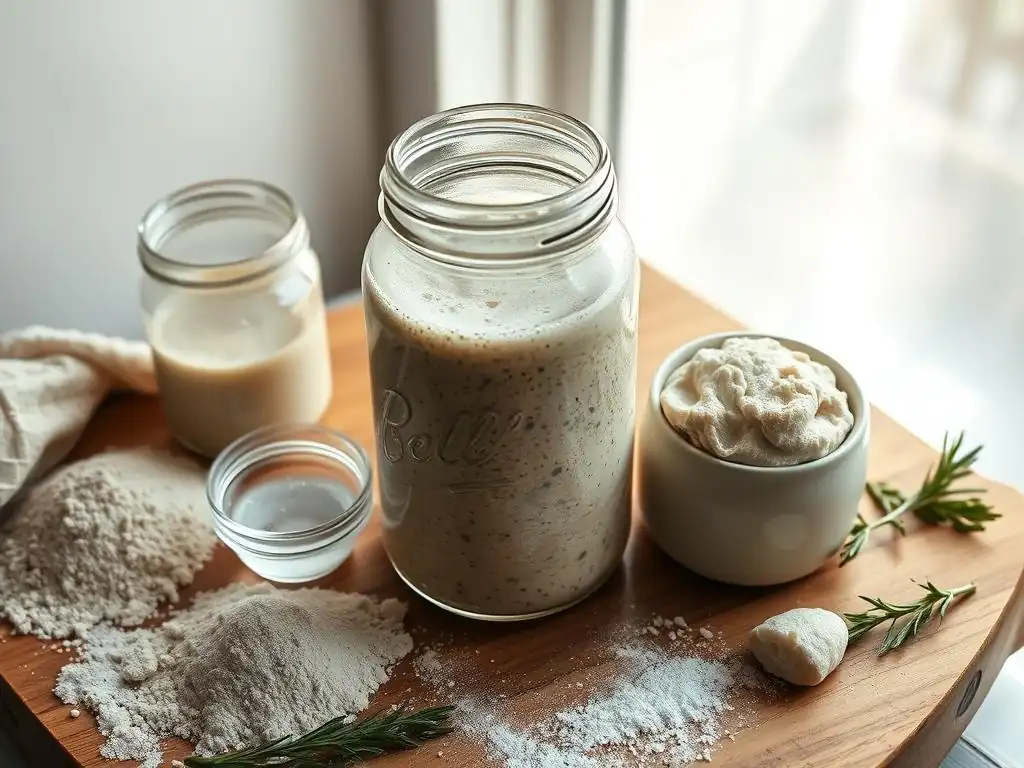
Welcome to BakeWithEase, your partner in baking adventures!
Unlock the rich, complex flavors of homemade bread with our guide to crafting your very own rye sourdough starter. Curious about how to create a thriving culture that adds depth and character to your loaves? Follow our easy rye sourdough starter recipe and embark on a journey to baking artisan breads at home. Discover the secrets to a perfect rise and incredible taste – your baking journey starts here!
- Crafting a Robust Rye Sourdough Starter: A Comprehensive Guide
- Introduction to Rye Sourdough Starters for Enhanced Flavor
- Building Your Rye Sourdough Starter: Simple Step-by-Step Process
- Day 1: Initiating Fermentation with Rye Flour and Water
- Days 2-7: Regular Feeding and Monitoring Starter Activity
- Achieving Peak Performance: Strengthening Your Rye Sourdough Starter
- Baking with Your Rye Sourdough Starter: Creating Delicious Bread
- Long-Term Starter Care: Preserving Your Rye Sourdough
- Advanced Rye Sourdough Techniques: Refining Your Craft
- Troubleshooting Your Rye Sourdough Starter: Identifying and Resolving Problems
- Conclusion: Savoring the Rewards of Homemade Rye Sourdough
-
Frequently Asked Questions
- What exactly is a rye sourdough starter, and why use rye flour?
- How long does it typically take to create a rye sourdough starter?
- What are the key signs that my rye sourdough starter is ready to bake with?
- What kind of rye flour is best for making a sourdough starter?
- What should I do if my rye sourdough starter isn't rising or showing any activity?
- Final Reflection: The Enduring Magic of a Simple Rye Starter
- Unleash Your Inner Baker: Craft Your Rye Sourdough Starter Today!
Crafting a Robust Rye Sourdough Starter: A Comprehensive Guide
Introduction to Rye Sourdough Starters for Enhanced Flavor
Creating your own sourdough starter from scratch is a rewarding journey, and opting for a rye starter offers a unique path filled with deep flavor and robust activity. Unlike starters made solely with white flour, a rye sourdough starter tends to be more vigorous and quicker to establish, thanks to the higher concentration of enzymes and nutrients present in rye flour.
This makes it an excellent choice for bakers looking for a reliable leavening agent that also contributes significantly to the final bread's character. Getting started with a rye sourdough starter recipe can feel daunting, but it's surprisingly straightforward with the right guidance.
This guide will walk you through each step of cultivating a vibrant rye sourdough starter, from the initial mix of flour and water to maintaining its health for years to come. You'll learn how to read your starter's cues, understand the science behind the fermentation process, and troubleshoot common issues. Whether you're new to sourdough or looking to diversify your starter collection, an easy rye sourdough starter recipe like this one is your gateway to baking delicious, tangy rye breads and other baked goods with unparalleled depth of flavor.
The Distinctive Advantages of Rye Flour in Sourdough Starters
Rye flour boasts several inherent qualities that make it particularly effective for initiating and maintaining a sourdough starter. Its high enzyme activity, specifically amylase, helps break down complex carbohydrates into simpler sugars, providing abundant food for the wild yeasts and bacteria. This accelerated sugar production often leads to a more rapid development of microbial activity compared to starters made with lower-enzyme flours like refined white flour. Furthermore, rye flour's nutritional profile supports a diverse and resilient microbial population, contributing to a stable and powerful starter culture.
Beyond its functional benefits, rye flour adds a unique character to the starter itself. It imparts a deeper, more complex aroma and a tangier profile right from the start. For those seeking a robust starter that can handle higher percentages of rye in their final bread recipes, beginning with a rye-based culture is a logical and beneficial choice. This easy rye sourdough starter recipe leverages these advantages to help you establish a strong foundation for your baking endeavors.
Exploring the Flavor Profile and Baking Qualities of Rye Sourdough
A rye sourdough starter imparts a distinct flavor profile to baked goods that is difficult to achieve with other starters. It contributes notes that are often described as earthy, tangy, slightly sour, and sometimes even subtly sweet or malty, depending on the type of rye flour used and the starter's maturity. This complex flavor marries exceptionally well with the inherent taste of rye flour in the final bread, resulting in loaves with incredible depth and aroma.
From a baking perspective, a well-maintained rye sourdough starter is known for its leavening power. While rye flour itself contains less gluten than wheat flour, the strong microbial activity in a rye starter effectively breaks down components in the dough, leading to good rise and a desirable crumb structure in rye or mixed-flour loaves. Using an easy rye sourdough starter recipe sets you up to bake everything from dense, traditional pumpernickel to lighter rye sandwich loaves, all infused with that signature sourdough tang and the unique characteristics of rye.
Building Your Rye Sourdough Starter: Simple Step-by-Step Process
Embarking on the journey to create your homemade rye sourdough starter is a rewarding project that requires only two simple ingredients and a little patience. The process essentially involves mixing rye flour and water and then regularly feeding this mixture to encourage the growth of naturally occurring wild yeasts and lactic acid bacteria from the environment and the flour itself. These microorganisms are what give sourdough its leavening power and its characteristic tangy flavor.
Following this simple rye sourdough starter recipe will guide you through the initial steps and the crucial daily maintenance required to cultivate a healthy, active starter. The key is consistency in feeding and observation. Within about 7 to 14 days, depending on environmental conditions, you should have a bubbly, active culture ready to leaven your first loaf of delicious rye sourdough bread.
Ingredients for a Thriving Rye Sourdough Starter
To make your rye sourdough starter, you need just two fundamental ingredients: rye flour and water. The type of rye flour can influence the starter's development and final flavor. While any rye flour will work, organic whole rye flour is often recommended because it typically contains a higher concentration of the wild yeasts and bacteria needed to kickstart fermentation. Approximately 500 grams to 1 kilogram of rye flour will likely be sufficient for building and maintaining a starter for several weeks before it's fully mature and you begin baking regularly.
The water you use is also important. Unchlorinated water is best, as chlorine can inhibit microbial activity. Filtered tap water, bottled spring water, or boiled and cooled tap water are all good options. Avoid distilled water, as it lacks the minerals that can benefit microbial health. You'll need roughly an equal weight of water to flour for the initial mix and subsequent feedings, so having access to at least 500 ml to 1 liter of suitable water is advisable.
Essential Tools for Starter Development
You don't need specialized equipment to create a rye sourdough starter, but a few basic tools will make the process much easier and more accurate. A clean glass jar or plastic container with a loose-fitting lid is essential for housing your starter. Glass is often preferred because it allows you to easily observe the activity (bubbles, rise) inside. A jar with a capacity of at least 1 liter is recommended, as the starter will expand.
Accuracy in measuring ingredients is crucial, especially in the early stages. A digital kitchen scale is highly recommended for measuring flour and water by weight, which is far more precise than using volume measurements. You will also need a spoon or spatula for mixing and a rubber band or marker to indicate the starter's level on the jar, helping you track its rise. Keeping these simple tools clean is important to prevent unwanted mold or bacteria from interfering with your starter's development.
Day 1: Initiating Fermentation with Rye Flour and Water

The first day of creating your rye sourdough starter is the simplest: you combine equal parts rye flour and water. This initial mixture provides the necessary environment and food source for the wild microorganisms to begin multiplying. It's the foundational step of this easy rye sourdough starter recipe, setting the stage for the complex microbial ecosystem that will become your leavening agent.
By mixing the ingredients thoroughly, you ensure that the flour is fully hydrated and the yeasts and bacteria are evenly distributed throughout the mixture. This is where the magic begins, as these dormant microbes start to wake up and consume the sugars in the flour, initiating the fermentation process that will transform a simple paste into a lively, bubbly starter.
The Initial Mixture: Laying the Foundation for Your Starter
To begin, measure out equal weights of rye flour and unchlorinated water. A common starting point is 50 grams of rye flour and 50 grams of water. Combine these in your clean jar and mix thoroughly with a spoon or spatula until no dry spots of flour remain. The mixture should have the consistency of a thick batter or paste.
Once mixed, scrape down the sides of the jar to keep it tidy and place a loose-fitting lid or plastic wrap secured with a rubber band over the top. The lid should not be airtight, as gases produced during fermentation need to escape. Place a rubber band around the jar at the level of the starter to monitor its rise over the next 24 hours. Keep the jar at room temperature, ideally in a spot that is relatively warm and consistent.
Temperature Control: Optimizing the Fermentation Environment
Maintaining a consistent and appropriate temperature is one of the most critical factors in successfully developing a healthy rye sourdough starter. Wild yeasts and bacteria thrive in specific temperature ranges. An ideal environment for initial starter development is typically between 70°F and 80°F (21°C to 27°C). Temperatures significantly below this range will slow down activity considerably, potentially leading to mold or dormancy, while excessive heat can kill the beneficial microbes.
If your kitchen is cooler than this range, finding a warmer spot can help. Options include near a warm appliance (but not directly on top), inside a microwave or oven (turned off, but with the light on), or in a proofing box if you have one. Aim for stability; wild temperature swings can stress the starter. Consistent warmth encourages the right balance of yeast and bacterial activity, essential for a vigorous and tangy starter.
Days 2-7: Regular Feeding and Monitoring Starter Activity
The period from day 2 through day 7 is crucial for establishing a strong and active rye sourdough starter. During this time, you will begin a routine of regular feeding, which involves discarding a portion of the starter and replenishing it with fresh flour and water. This process removes metabolic waste products, provides new food, and helps control the starter's volume, ensuring that the microbial population remains healthy and active.
Consistent feeding is the cornerstone of this easy rye sourdough starter recipe. As you feed your starter daily, you'll start to observe changes: bubbles forming, the mixture rising, and a distinct aroma developing. These are all signs that the fermentation process is underway and your starter is on its way to becoming a powerful leavening agent. Patience is key during this phase; some days may show less activity than others, which is normal.
Consistent Feeding: The Key to a Healthy Starter
Starting on Day 2 (approximately 24 hours after the initial mix), it's time for the first feeding. The standard approach is to discard a portion of the starter and feed the remainder with fresh flour and water, typically in a 1:1:1 ratio by weight (starter:flour:water). For instance, you might keep 50 grams of your existing starter and mix it with 50 grams of rye flour and 50 grams of water. Discard the rest (about 50 grams in this example).
Repeat this feeding process daily, around the same time each day. As the starter becomes more active, you might notice it peaking and then falling between feedings. This 'peak' is the ideal time to feed, as the microbes have consumed most of the available food. Consistent daily feeding at roughly 24-hour intervals provides a steady supply of nutrients and helps cultivate a robust microbial community.
Visual and Aromatic Cues: Interpreting Starter Behavior
Observing your rye sourdough starter is essential during its development. Visually, you should start seeing small bubbles forming throughout the mixture, especially after feeding. As it gains strength, you'll notice it rising significantly after feeding, potentially doubling or even tripling in volume before falling back down. Use the rubber band marker on the jar to track its peak height.
Aromatically, the starter will evolve. Initially, it might smell slightly unpleasant, perhaps like gym socks or cheese – this is normal and indicates bacterial activity. As the desired lactic acid bacteria take hold, the smell will become more pleasant, tangy, and slightly sour, perhaps reminiscent of yogurt or mild vinegar. A mature, healthy starter should smell pleasantly tangy and yeasty when it's active. A strong, offensive smell (like acetone or nail polish remover) might indicate it's hungry and needs more frequent feeding or a larger feeding ratio.
Addressing Common Challenges in Starter Development
It's common to encounter periods of sluggishness or unexpected smells while developing a rye sourdough starter. If activity seems slow, ensure the temperature is consistently warm (70°F-80°F). A cooler environment is the most frequent cause of slow development. If you see a layer of liquid on top (called 'hooch'), it means the starter is hungry; you can pour it off or stir it in before feeding.
Mold is a less common but more serious issue. If you see any fuzzy, colored spots (white, green, black), unfortunately, it's best to discard the entire starter and begin again with fresh ingredients and clean equipment. This is why starting with clean tools and unchlorinated water is so important. Persisting with the daily feeding routine, even if activity seems low for a day or two, is usually the best approach to overcoming initial hurdles.
Achieving Peak Performance: Strengthening Your Rye Sourdough Starter
Once your rye sourdough starter is consistently doubling or tripling in volume within 4-8 hours after feeding and smells pleasantly tangy, it's considered mature and ready for baking. This typically happens between 7 and 14 days, though it can take longer depending on conditions. Achieving peak performance means your starter is reliably active and has developed a good balance of yeasts and bacteria, providing consistent leavening and flavor.
Maintaining this peak performance involves understanding how to feed your starter effectively and manage the discarded portion. This ensures your starter remains vigorous and ready to be converted into a levain for your baking projects. A strong starter is the foundation of a successful easy rye sourdough starter recipe for delicious bread.
Techniques for Enhancing Starter Activity and Flavor
To encourage maximum activity and deepen the tangy flavor of your rye sourdough starter, consider slightly adjusting your feeding strategy. If your starter is consistently peaking very quickly (within 3-4 hours), you might increase the feeding ratio (e.g., from 1:1:1 to 1:2:2 or 1:3:3 starter:flour:water). This provides more food for the microbes, allowing them to build greater strength and develop more complex flavors over a longer feeding cycle.
Using a mix of rye flour and strong bread flour for some feedings can also boost activity, as bread flour provides plenty of gluten-forming proteins, which can contribute to a more open structure in the starter itself, making it easier to see fermentation signs. However, sticking primarily to rye flour will maintain its distinct character. Experimenting slightly with water temperature (using water slightly warmer than room temperature, around 80°F-85°F or 27°C-30°C) can also give a temporary boost to microbial activity.
Discard Management and Feeding Ratios: Maintaining Equilibrium
Regular discarding is essential for maintaining a manageable volume of starter and ensuring that the microbes always have access to fresh nutrients. The discarded portion isn't waste; it can be used in many recipes like pancakes, crackers, muffins, or even composted. When your starter is mature and active, you might keep as little as 10-20 grams and feed it with 50-100 grams each of flour and water (a 1:5:5 ratio, for example), depending on how much starter you need for baking or storage.
The feeding ratio (starter:flour:water) directly impacts the time it takes for the starter to peak. A 1:1:1 ratio leads to faster fermentation, while a 1:5:5 ratio results in slower, longer fermentation. For daily maintenance at room temperature when you plan to bake often, a 1:3:3 ratio is a common and effective balance. If storing in the fridge, you'll use a different approach, discussed later. The key is to feed when the starter is hungry, typically after it has peaked and started to fall.
Baking with Your Rye Sourdough Starter: Creating Delicious Bread
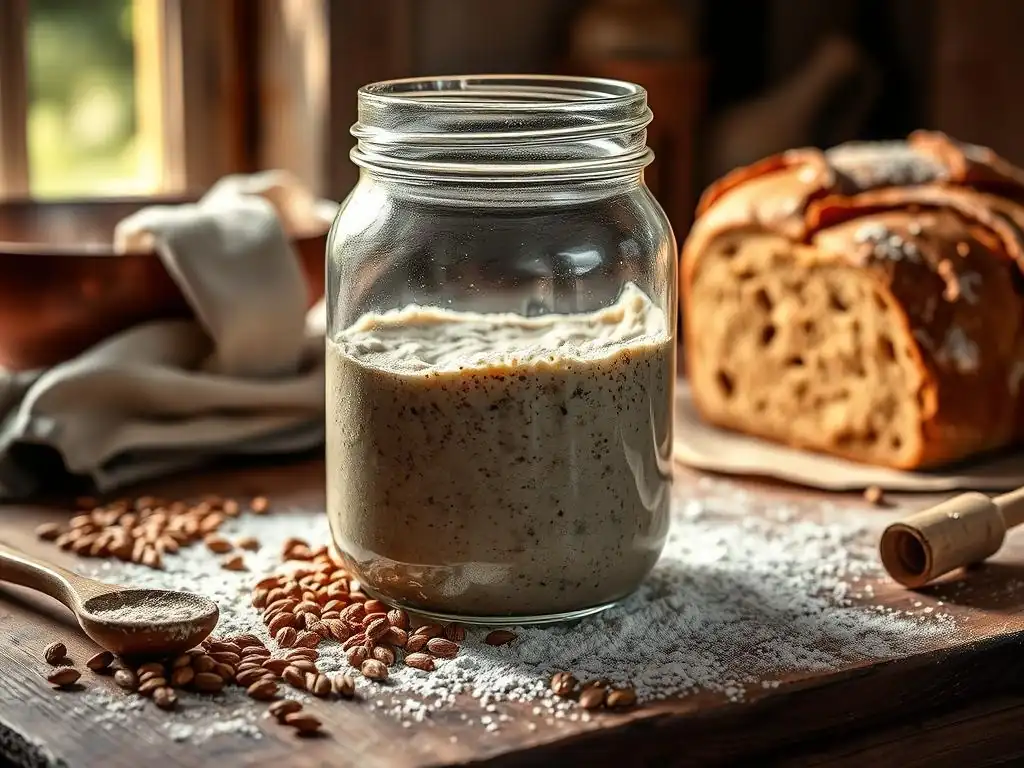
The culmination of your efforts in cultivating a vibrant rye sourdough starter is using it to bake incredible bread. A mature starter is not used directly in bread dough; instead, a portion of it is used to create a 'levain' (also known as a 'leaven' or 'preferment'). This step activates a smaller amount of your starter with a specific ratio of fresh flour and water, bringing it to peak activity just before mixing your dough.
Using your active rye sourdough starter in this way ensures that you are introducing a population of highly active yeasts and bacteria into your bread dough, providing reliable leavening and contributing that signature tangy flavor. This section prepares you to take the next step from maintaining your starter to transforming it into the key ingredient for baking.
Preparing a Levain: Activating Your Starter for Baking
Approximately 6-12 hours before you plan to mix your bread dough (the timing depends on your starter's activity and kitchen temperature), you will prepare a levain. This involves taking a small amount of your mature rye sourdough starter (e.g., 20-30 grams) and mixing it with a larger proportion of fresh flour and water (e.g., 100 grams of flour and 100 grams of water for a 1:5:5 ratio). The type of flour used for the levain can be the same rye flour or a mix, depending on the bread recipe.
Mix the starter, flour, and water in a separate container until well combined. Cover it loosely and let it sit at room temperature. The levain is ready when it has significantly increased in volume (often doubling or tripling), is bubbly and airy, and passes the float test (a small spoonful floats in water). This indicates that the yeasts have produced enough gas to make it buoyant, signifying peak activity.
Classic Rye Sourdough Bread Recipe: A Detailed Guide
While this guide focuses on creating the starter, the ultimate goal is baking bread. A classic rye sourdough bread recipe typically combines rye flour, bread flour (for structure), water, salt, and the active rye levain you prepared. The process involves mixing, bulk fermentation (where the dough rises), shaping, and final proofing before baking.
The percentage of rye flour in the bread can vary from as little as 20% to 100%. Using your homemade rye sourdough starter, even in a loaf with only 20-30% rye, will contribute a noticeable depth of flavor. Baking involves high temperatures, often starting around 450°F to 500°F (230°C to 260°C), sometimes in a Dutch oven, to achieve a good crust and oven spring.
Long-Term Starter Care: Preserving Your Rye Sourdough
Once your rye sourdough starter is mature and active, you don't need to keep it at room temperature with daily feedings unless you are baking frequently. For most home bakers, storing the starter in the refrigerator is the most practical solution. Refrigeration significantly slows down microbial activity, reducing the need for frequent feeding and making long-term maintenance much easier.
Proper storage ensures that your carefully cultivated rye sourdough starter remains viable and ready to be reactivated whenever you're ready to bake. This section covers the best practices for storing your starter and bringing it back to life after a period of dormancy.
Storage Strategies: Refrigeration and Reactivation
To store your active rye sourdough starter in the refrigerator, feed it as usual, let it sit at room temperature for 1-2 hours to start fermentation, and then place it in a clean jar with a loose lid in the fridge. The cold temperature will slow down the microbes.
For maintenance, you typically only need to feed your refrigerated starter once a week or every two weeks. Take it out, let it warm up for an hour or two, discard a portion, feed it with fresh rye flour and water, let it sit at room temperature for 1-2 hours, and then return it to the fridge.
When you want to bake after storing your starter in the fridge, you'll need to reactivate it. Take it out of the fridge, discard all but a small amount (e.g., 20-30 grams), and feed it with fresh flour and water. Feed it at room temperature once or twice a day for 1-3 days until it consistently doubles or triples within 4-8 hours after feeding. It should show strong activity and smell pleasantly tangy before you use it to build a levain for baking.
Revitalizing an Inactive Rye Sourdough Starter
Sometimes, even with regular feeding, a refrigerated starter might seem sluggish or develop a strong hooch layer and a pungent, vinegary smell. This usually means it's hungry and needs a few consistent feedings to regain strength. Take it out of the fridge, discard most of it, and feed it with fresh flour and water.
Feed it every 12 or 24 hours at room temperature, depending on how quickly it shows signs of life. If it's very sluggish, feeding a slightly thicker consistency (less water) or using slightly warmer water (around 80°F/27°C) can sometimes help. Be patient; it might take 2-3 days of regular feeding to get it back to its peak activity before you can use it reliably for baking.
Advanced Rye Sourdough Techniques: Refining Your Craft
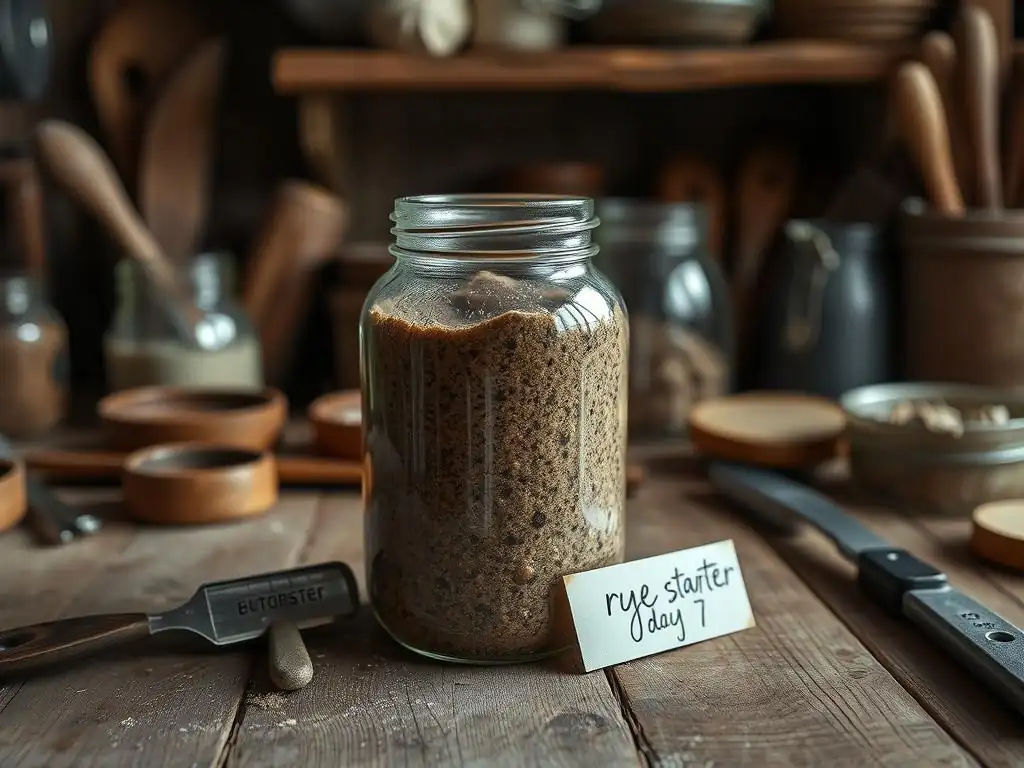
Once you are comfortable with the basics of maintaining and baking with your easy rye sourdough starter, you might want to explore techniques to further refine your results and deepen your understanding of this fascinating process. Experimenting with different variables can lead to exciting discoveries and allow you to tailor your starter's characteristics to specific baking goals.
Advanced techniques often involve subtle adjustments to ingredients, hydration, and feeding schedules. These explorations can significantly impact the flavor, texture, and overall performance of both your starter and the bread you bake with it.
Exploring the Impact of Different Rye Flour Varieties
Not all rye flour is created equal, and the type you use can subtly influence your starter and final bread. Light rye flour, which has had most of the bran and germ removed, will produce a starter that is less dense and might have a milder flavor compared to whole rye flour. Whole rye flour, containing the entire grain, is rich in nutrients and enzymes, often leading to a more vigorous starter with a deeper, earthier flavor profile.
Pumpernickel flour, a very coarse form of whole rye flour, can also be used. It provides a very robust starter with intense flavor. Experimenting with feeding your starter exclusively with one type of rye or using a blend can help you understand how these variations affect fermentation speed, aroma, and the ultimate taste of your bread. For instance, maintaining a starter solely on whole rye might yield a tangier loaf than one maintained on light rye.
Mastering Hydration Levels for Optimal Dough Performance
The hydration level (the ratio of water to flour by weight) of your starter impacts its consistency and activity. A 100% hydration starter (equal weights of water and flour) is the most common and results in a thick, pourable batter. This consistency is easy to work with and provides a good balance of yeast and bacterial activity.
However, you can experiment with higher or lower hydration levels. A stiffer starter (lower hydration, e.g., 70-80% hydration) tends to develop acidity more slowly and can be useful for specific types of bread, sometimes contributing to a milder tang. A very wet starter (higher hydration, e.g., 120% hydration) ferments faster and can contribute to a more open crumb structure in bread. Understanding how hydration affects your rye sourdough starter allows you to adjust it based on your baking schedule or desired bread characteristics.
Troubleshooting Your Rye Sourdough Starter: Identifying and Resolving Problems
Even with careful attention, your rye sourdough starter might occasionally present challenges. Recognizing common issues and knowing how to address them is part of the sourdough journey. Problems like mold, unusual smells, or a lack of activity can usually be resolved with simple adjustments to feeding or environment.
This section helps you diagnose potential problems with your easy rye sourdough starter recipe and provides practical steps to get it back on track, ensuring you can continue baking delicious bread without interruption.
Addressing Mold Growth, Off-Putting Smells, or Dormancy
As mentioned earlier, any sign of fuzzy mold (white, green, black, or pink/orange) on your starter or hooch means it has been contaminated and should be discarded entirely. It's not safe to salvage a moldy starter. Clean your container thoroughly and start fresh.
Off-putting smells that are not tangy or yeasty (like strong acetone, cheese, or rancid odors) usually indicate an imbalance in the microbial population, often due to irregular feeding or suboptimal temperatures. Consistent daily feeding at room temperature for several days, using fresh flour and water, is usually enough to correct the balance and return the smell to a pleasant tang.
Dormancy, or lack of activity, is most often caused by cold temperatures or infrequent feeding. Ensure your starter is in a warm spot (70°F-80°F) and feed it consistently every 24 hours (or even every 12 hours if very sluggish) until it shows reliable doubling.
Adapting Feeding Regimens for Consistent Results
Achieving consistent results with your rye sourdough starter requires adapting your feeding regimen based on its behavior and your environment. If your starter is peaking and falling very quickly (e.g., within 4 hours), it's telling you it needs more food or is too warm. You can increase the feeding ratio (e.g., 1:1:1 to 1:2:2 or 1:3:3) or move it to a slightly cooler spot.
If your starter is very slow to rise (e.g., taking over 12 hours to peak), it might be too cold or need more frequent feeding. Try moving it to a warmer location or feeding it every 12 hours instead of 24. Pay attention to when your starter peaks; ideally, you want to feed it close to its peak or slightly after it has begun to fall. Adjusting your feeding ratio and schedule based on observation is key to maintaining a consistently active starter.
Conclusion: Savoring the Rewards of Homemade Rye Sourdough
Creating and maintaining a rye sourdough starter is a deeply satisfying aspect of baking. It connects you to a traditional, natural leavening process and opens up a world of flavor possibilities, particularly within the realm of rye bread. By following this easy rye sourdough starter recipe, you've cultivated a living culture that will not only leaven your bread but also infuse it with a unique tang and aroma that store-bought yeast simply cannot replicate.
The journey from flour and water to a bubbly, active starter, and finally to a beautiful loaf of rye sourdough bread, is incredibly rewarding. Each loaf baked with your starter carries a piece of that cultivated culture, a testament to your patience and care.
The Fulfillment of Baking with a Cultivated Starter
There's a profound sense of accomplishment that comes from baking a loaf of bread leavened by your own homemade rye sourdough starter. You have nurtured this culture, learned to understand its needs, and guided it to the point where it can transform simple ingredients into something truly magical. The control you gain over the fermentation process allows for a depth of flavor and complexity in your bread that is unparalleled.
Beyond the delicious outcome, the process itself is fulfilling. The daily ritual of feeding, observing the bubbles and rise, and smelling the developing tang connects you to the craft of baking on a deeper level. It's a practice in patience, observation, and working with natural processes, culminating in the incredible satisfaction of slicing into a warm, fragrant loaf of rye sourdough you made from scratch.
Expanding Your Rye Sourdough Repertoire
With a thriving rye sourdough starter at your disposal, you are now equipped to explore a wide variety of rye baking. Beyond classic loaves, your starter can be used in recipes for rye rolls, pumpernickel bread, rye bagels, or even pastries like rye-based cakes or cookies that benefit from a touch of tang.
Experiment with different percentages of rye flour in your dough, incorporate add-ins like caraway seeds or molasses, or explore different shaping and baking techniques. Your easy rye sourdough starter is a versatile tool that invites endless creativity in the kitchen, allowing you to discover your favorite ways to use this unique and flavorful culture.
Frequently Asked Questions
What exactly is a rye sourdough starter, and why use rye flour?
A rye sourdough starter is a fermented mixture of rye flour and water that cultivates wild yeasts and bacteria. Rye flour encourages faster and more robust fermentation compared to all-purpose flour, making it easier to start.
How long does it typically take to create a rye sourdough starter?
Creating a rye sourdough starter usually takes 7-10 days. This timeframe allows the yeast and bacteria to multiply and establish a stable fermentation process.
What are the key signs that my rye sourdough starter is ready to bake with?
A ready starter will have doubled in size within a few hours of feeding and show signs of active bubbling. It should also have a slightly tangy, sour aroma.
What kind of rye flour is best for making a sourdough starter?
While you can use light or dark rye flour, whole rye flour is generally recommended for a sourdough starter. Its higher fiber and nutrient content provide more food for the yeast and bacteria.
What should I do if my rye sourdough starter isn't rising or showing any activity?
Be patient and continue feeding it consistently. Ensure the starter is kept in a warm environment, around 70-75°F (21-24°C). If it still doesn't activate after 10 days, you may need to start over.
Final Reflection: The Enduring Magic of a Simple Rye Starter
The humble rye sourdough starter, once a niche pursuit, is experiencing a remarkable resurgence, proving that the age-old art of bread making remains deeply relevant in our modern world. This renewed interest speaks to a growing desire for connection to our food, a yearning for simpler processes, and a recognition of the unique flavors and textures that only a homemade starter can provide. It's a testament to the enduring power of tradition in a fast-paced world.
Creating a rye sourdough starter is more than just following a recipe; it's embarking on a journey of discovery. It's a tangible connection to generations of bakers who have nurtured these living cultures, a testament to the patience and care required to coax life from simple flour and water. The process itself is meditative, a quiet rhythm of feeding and observing that fosters a sense of accomplishment and connection to something larger than oneself. Bread is the staff of life,
they say, and in making your own starter, you are truly participating in that life-giving process.
Now, you hold the power to cultivate your own unique rye sourdough starter. Consider this not just an accomplishment, but a beginning. Experiment with different flours, observe the subtle changes in your starter's activity, and most importantly, enjoy the journey of baking with a starter you've nurtured from its very inception. The delicious, tangy loaves you create will be a testament to your patience and a delicious reward for your efforts. Embrace the process, and let the magic of sourdough enrich your life.
Unleash Your Inner Baker: Craft Your Rye Sourdough Starter Today!
Thanks for joining us on this sourdough journey! You've now learned the secrets to creating a vibrant, flavorful rye sourdough starter – a true testament to baking patience and skill. Ready to put your knowledge into practice?
- Begin your rye sourdough adventure: Follow the detailed steps outlined in the article to mix your starter, and prepare for the exciting (and slightly unpredictable!) journey ahead. This is your chance to create something truly unique!
- Share your progress: Post photos of your starter's development on social media using #BakeWithEaseRyeSourdough – let's inspire each other!
- Explore other sourdough variations: Dive deeper into the world of sourdough with our other articles on different flour types and baking techniques. What other flavor profiles will you explore?
What unique twist will you add to your rye sourdough starter to make it truly your own?