
Your First GlutenFree Sourdough Starter: A Simple Method


Welcome to BakeWithEase, your guide to effortless baking!
Are you ready to embark on a delicious journey into the world of gluten-free sourdough? Unlock the secrets to creating your own Glutenfree sourdough starter method and discover how surprisingly simple it can be. Intrigued? Let's get started and cultivate your very own bubbling batch of gluten-free goodness!
- Creating a Buckwheat Sourdough Starter: A Guide for Home Bakers
- Introduction to Buckwheat Sourdough Starters
- The Buckwheat Sourdough Starter Method: A Step-by-Step Guide
- Maintaining Your Buckwheat Sourdough Starter
- Baking Your First Buckwheat Sourdough Loaf
- Troubleshooting Buckwheat Sourdough Bread
- Advanced Buckwheat Sourdough Techniques
- Conclusion: Embrace the Art of Buckwheat Sourdough Baking
-
Frequently Asked Questions
- What exactly is a gluten-free sourdough starter?
- Why would I choose a gluten-free sourdough starter over a regular one?
- What are the key ingredients needed to create a gluten-free sourdough starter?
- How long does it typically take to create a viable gluten-free sourdough starter?
- What are some common signs that my gluten-free sourdough starter is ready to use?
- Final Reflection: The Joyful Rise of Gluten-Free Sourdough
- Unleash Your Inner Baker: Start Your Gluten-Free Sourdough Journey!
Creating a Buckwheat Sourdough Starter: A Guide for Home Bakers
Introduction to Buckwheat Sourdough Starters
Creating a sourdough starter from scratch is a rewarding process, and opting for a gluten-free base like buckwheat opens up the world of sourdough baking to even more people. This guide focuses specifically on the buckwheat glutenfree sourdough starter method, offering a simple, step-by-step approach. Unlike traditional wheat starters, a buckwheat starter behaves slightly differently due to the absence of gluten, but it can still develop into a robust and active culture capable of leavening delicious bread.
Embarking on the journey of cultivating a buckwheat sourdough starter is an accessible way to enjoy homemade gluten-free bread with unique characteristics. This method is designed for home bakers, simplifying the process of establishing a thriving culture. By following these steps, you'll learn how to nurture a mix of buckwheat flour and water into a bubbly, active starter ready to transform your baking. The process requires patience and consistent feeding, but the result is a versatile starter perfect for various gluten-free baking projects.
Why Bake with Buckwheat Sourdough? Benefits & Flavor Profile
Baking with a buckwheat glutenfree sourdough starter offers several distinct advantages, particularly for those seeking gluten-free options. Firstly, it provides a reliable leavening agent for gluten-free flours, which can often be dense or difficult to work with using commercial yeast alone. The fermentation process also contributes to better digestibility of the grains. Furthermore, buckwheat is naturally gluten-free, making this starter method ideal for individuals with celiac disease or gluten sensitivity.
Beyond the practical benefits, a buckwheat sourdough starter imparts a unique flavor profile to baked goods. Buckwheat flour itself has an earthy, slightly nutty taste, which is amplified and complemented by the fermentation process. While traditional wheat sourdough can have a tangy, sometimes sharp flavor, buckwheat sourdough often presents a more mellow, earthy tang with subtle sweet undertones. This distinctive taste pairs wonderfully with seeds, nuts, and other hearty additions often found in gluten-free baking.
Understanding Buckwheat Flour for Sourdough Starters
Buckwheat flour, despite its name, is not related to wheat and is botanically a fruit seed. It's a pseudo-cereal known for its nutritional value, including protein and fiber. When used in a glutenfree sourdough starter method, its properties differ significantly from wheat flour. Buckwheat flour tends to absorb water quickly but doesn't form a cohesive gluten network, which affects the texture and structure of the starter itself – it might appear more like a thick paste or batter rather than a stretchy dough.
Choosing the right buckwheat flour is important for your starter's success. Opt for finely ground, whole grain buckwheat flour if possible, as it contains more nutrients that wild yeasts and bacteria feed on. Ensure it's certified gluten-free if cross-contamination is a concern. Store the flour in a cool, dark place, ideally in an airtight container, to maintain freshness and prevent spoilage, which could negatively impact your glutenfree sourdough starter method.
The Buckwheat Sourdough Starter Method: A Step-by-Step Guide

Creating a thriving glutenfree sourdough starter using buckwheat flour is a process that unfolds over several days. This method relies on the wild yeasts and bacteria present in the flour and the environment to colonize and ferment the mixture. Patience is key, as the activity level can vary depending on factors like temperature and the flour used. Following a consistent feeding schedule is crucial for developing a strong and reliable starter culture.
This step-by-step guide walks you through the initial mixing, daily feeding regimen, and maturation phases. We'll cover what to look for at each stage and how to address common issues that might arise. By adhering to this simple buckwheat glutenfree sourdough starter method, you'll cultivate a vibrant culture ready to leaven your gluten-free bread and other baked goods, providing that characteristic sourdough flavor and texture.
Day 1: Initial Mix - Combining Buckwheat Flour and Water
To begin your buckwheat glutenfree sourdough starter method, you'll need a clean glass jar, buckwheat flour, and non-chlorinated water (filtered or tap water left out for 24 hours works well). Weighing your ingredients is the most accurate way to ensure consistency. A common starting ratio is equal parts flour and water by weight.
Measure 50 grams of buckwheat flour and 50 grams of non-chlorinated water into your jar. Stir the mixture thoroughly with a spoon or spatula until no dry bits of flour remain and it forms a thick, paste-like consistency. Scrape down the sides of the jar to keep it tidy. Loosely cover the jar with a lid, plastic wrap, or a clean cloth secured with a rubber band to allow air exchange while preventing contaminants. Place the jar in a warm spot, ideally between 70-78°F (21-26°C), away from direct sunlight.
Day 2-7: The Feeding Process - Nurturing Your Starter
Starting on Day 2, you'll begin the daily feeding routine for your buckwheat glutenfree sourdough starter. Each day, you'll discard a portion of the starter and feed the remainder with fresh flour and water. This process removes some of the less active or undesirable microbes and provides fresh food for the thriving ones, helping to build a strong, active culture.
On Day 2 and subsequent days, discard about half of the starter from the jar. Then, add 50 grams of fresh buckwheat flour and 50 grams of non-chlorinated water to the remaining starter. Stir well until combined, scrape down the sides, loosely cover, and return to its warm spot. Repeat this feeding process once every 24 hours during this initial week. Consistency in feeding time is beneficial but not strictly necessary in the early stages.
What to Look For: Signs of Activity in Your Buckwheat Starter
Within the first few days of following this buckwheat glutenfree sourdough starter method, you should start seeing signs of fermentation. Small bubbles on the surface or throughout the mixture are a good indicator that microbial activity is beginning. You might also notice a slight increase in the volume of the starter after feeding, although the rise might not be as dramatic as with a wheat starter due to the lack of gluten structure.
The smell of your starter will also change over time. Initially, it might just smell like wet flour. As fermentation progresses, it will develop a more complex aroma. In the early days, it might smell slightly yeasty, alcoholic, or even a bit like gym socks – this is normal as different microbes compete. A mature, healthy buckwheat starter will eventually develop a pleasant, tangy, slightly sour, and sometimes fruity or earthy aroma.
Troubleshooting: Common Issues and Solutions (e.g., Kahm Yeast, Slow Rise)
It's common to encounter a few hurdles while establishing your buckwheat glutenfree sourdough starter. One frequent issue is the appearance of a white, fuzzy, or powdery film on the surface, known as Kahm yeast. This is generally harmless and is a sign of certain yeasts proliferating. You can usually just scrape it off, discard that portion, and continue feeding your starter as usual. Ensuring the starter isn't too dry and is covered properly can help prevent Kahm yeast.
Another common problem is a slow or seemingly inactive starter. If you're not seeing many bubbles or much rise after several days, check the temperature of your environment. Colder temperatures significantly slow down fermentation. Try moving the starter to a warmer location (e.g., near a warm appliance, but not directly on it). Ensure you are using non-chlorinated water and fresh flour. Sometimes, simply giving it more time and maintaining the consistent feeding schedule is all that's needed for your glutenfree sourdough starter method to take hold.
Day 8-14: Strengthening Your Starter - Consistency is Key
As you move into the second week of the buckwheat glutenfree sourdough starter method, your goal is to build consistency and strength in your culture. The daily feeding routine continues, but you should start seeing more predictable activity. A healthy starter will regularly show signs of fermentation within a few hours of feeding and might double in size or show significant bubbling by the next feeding.
During this period, maintaining a consistent feeding schedule (e.g., feeding every 24 hours around the same time) is more important than ever. This regular input of fresh food encourages the desirable yeast and bacteria to flourish and outcompete less beneficial microbes. The starter's aroma should also become more consistently pleasant and tangy. Don't be discouraged if some days seem less active than others; daily variations are normal.
Discarding and Feeding: Establishing a Regular Routine
The discard and feed process remains central to strengthening your buckwheat glutenfree sourdough starter. Continuing to discard a portion before each feed ensures that the starter doesn't become too large and that the microbes always have access to a fresh supply of nutrients. A standard feeding ratio is 1:1:1 by weight (1 part old starter, 1 part fresh flour, 1 part fresh water). For example, if you leave 50 grams of starter, you would feed it with 50 grams of buckwheat flour and 50 grams of water.
Consistency in this ratio and timing helps regulate the starter's acidity and microbial balance. By consistently feeding, you are creating an environment where the desirable lactic acid bacteria and wild yeasts thrive. This regular maintenance is the foundation of a strong and reliable glutenfree sourdough starter method, preparing it for active leavening in your baking projects.
Visual Cues: Recognizing a Mature Buckwheat Sourdough Starter
By the end of the second week, or sometimes sooner depending on conditions, your buckwheat glutenfree sourdough starter should show clear signs of maturity. The most reliable indicator is its ability to consistently double in size (or show a significant, predictable rise) within 4-8 hours after being fed, especially if kept at a warm temperature (around 75°F or 24°C). You can mark the level of the starter on the jar with a rubber band after feeding to track its rise.
Other visual cues include a consistently bubbly texture throughout the starter, not just on the surface. When you stir it, it should feel airy and slightly spongy. The aroma should be pleasantly tangy and yeasty, without strong off-putting smells like alcohol or acetone (which indicate it's hungry). A mature starter will also be able to pass the "float test" – a small spoonful of active starter should float when dropped into a glass of water, indicating sufficient carbon dioxide production. Achieving this consistent activity means your glutenfree sourdough starter method has been successful, and it's ready for baking.
Maintaining Your Buckwheat Sourdough Starter
Once your buckwheat glutenfree sourdough starter is mature and consistently active, you have a few options for maintaining it depending on how often you plan to bake. Regular maintenance is key to keeping the culture healthy and ready for use. Whether you bake daily, weekly, or less often, establishing a routine will ensure your starter remains viable.
The primary requirement for maintaining your starter is regular feeding. This replenishes the food source for the microbes and keeps the population balanced. Understanding different feeding schedules and storage methods allows you to integrate the care of your glutenfree sourdough starter seamlessly into your baking habits. Proper maintenance ensures your starter is always strong enough to provide reliable leavening for your gluten-free recipes.
Daily Care: Feeding Schedules and Storage Options
If you plan to bake frequently, perhaps daily or every few days, keeping your buckwheat glutenfree sourdough starter at room temperature with daily feedings is ideal. Feed it once every 24 hours using the 1:1:1 ratio (starter:flour:water by weight) as described previously. This schedule keeps the starter highly active and ready to use shortly after it peaks (usually 4-8 hours after feeding at room temperature).
Store the starter in a clean jar with a loose lid or covering that allows air exchange. Ensure the ambient temperature is relatively stable, ideally between 70-78°F (21-26°C). Daily feeding requires using or discarding a portion of the starter, which can accumulate over time. This regular activity ensures your glutenfree sourdough starter method remains robust and ready for immediate use.
Long-Term Storage: Refrigeration Techniques
For bakers who don't bake daily, storing the buckwheat glutenfree sourdough starter in the refrigerator is a convenient option. Refrigeration significantly slows down the fermentation process, meaning the starter requires much less frequent feeding. This is an excellent way to maintain your culture with minimal effort.
Before refrigerating, feed your starter as usual and let it sit at room temperature for 1-2 hours to start the fermentation process. Then, place the loosely covered jar in the refrigerator. In the fridge, your starter will only need to be fed about once a week. When feeding, take it out, discard a portion, feed it with fresh flour and water, stir, and immediately return it to the fridge. Using this method helps preserve your glutenfree sourdough starter without daily commitment.
Reviving a Refrigerated Buckwheat Sourdough Starter
When you're ready to bake after storing your buckwheat glutenfree sourdough starter in the refrigerator, you'll need to revive it to its full activity. This process typically takes 1-3 days, depending on how long it has been refrigerated and its initial strength.
Take your starter out of the fridge. Discard all but a small amount (e.g., 20-30 grams). Feed this small amount with fresh flour and water using a higher ratio, such as 1:2:2 or 1:3:3 (starter:flour:water by weight). For example, feed 20g starter with 40g flour and 40g water. Leave it at room temperature and feed it every 12-24 hours, discarding most of it before each feed, until it is consistently doubling or tripling in size within 4-8 hours after feeding. This revival process ensures your glutenfree sourdough starter method yields a culture strong enough for leavening.
Baking Your First Buckwheat Sourdough Loaf
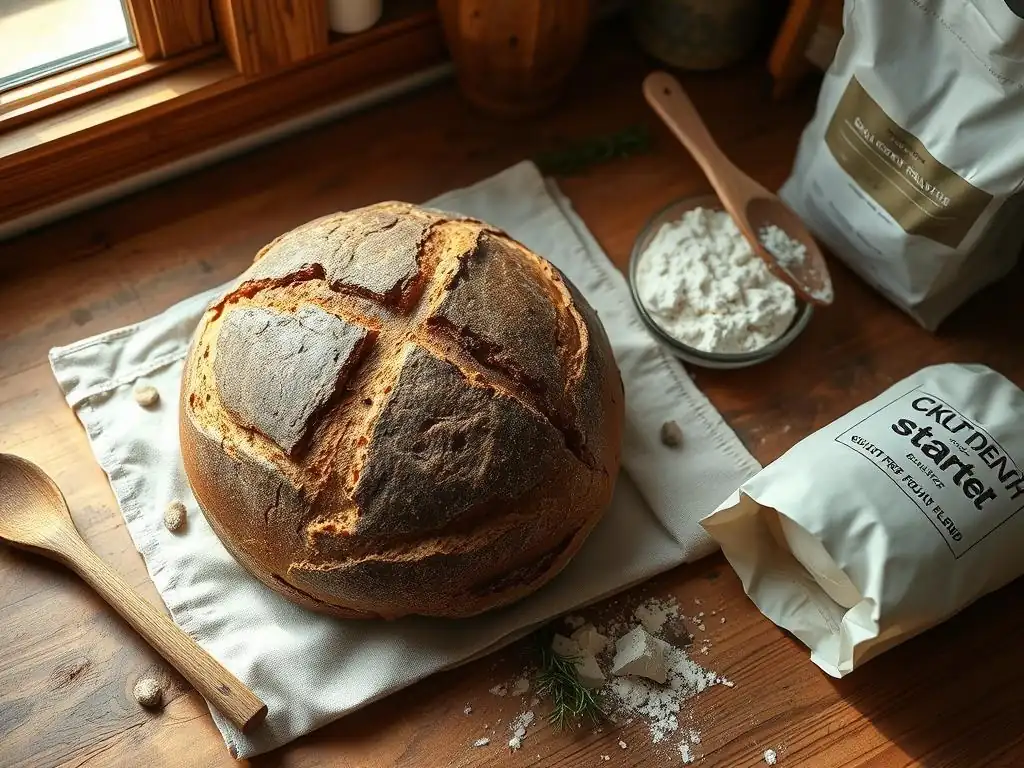
With a strong and active buckwheat glutenfree sourdough starter ready, you're prepared to bake your very first loaf! Baking gluten-free sourdough bread requires some adjustments compared to traditional wheat bread, primarily due to the different properties of gluten-free flours like buckwheat. This section provides a simple recipe and essential tips to help you achieve a successful bake.
Working with gluten-free dough can feel different – it's often more like a thick batter than an elastic dough. Don't expect the same kind of windowpane test results you'd get with wheat. Patience and understanding the unique characteristics of gluten-free flour blends are key to mastering the buckwheat glutenfree sourdough starter method in practice.
Buckwheat Sourdough Bread Recipe: A Simple Loaf
Here is a basic structure for a simple buckwheat sourdough bread using your active starter. This recipe focuses on a blend of gluten-free flours for better structure and texture.
- Ingredients:
- 100 grams active buckwheat glutenfree sourdough starter
- 350 grams warm water (around 85-90°F / 29-32°C)
- 300 grams gluten-free bread flour blend (ensure it contains starches and gums for structure, e.g., rice flour, sorghum flour, tapioca starch, xanthan gum)
- 100 grams buckwheat flour
- 8-10 grams salt
- Optional: Seeds (sunflower, pumpkin), nuts, or dried herbs
- Instructions:
- In a large bowl, whisk together the active starter and warm water until the starter is dispersed.
- Add the gluten-free bread flour blend, buckwheat flour, and salt (and any optional additions).
- Mix with a spoon or spatula until a cohesive, sticky dough forms. It will be more like a thick batter than a traditional dough.
- Cover the bowl and let it rest for 30 minutes (autolyse equivalent).
- Perform a series of folds over the next 2-3 hours. With wet hands or a wet spatula, gently stretch and fold the dough over itself in the bowl every 30-45 minutes.
- After the folding period, cover the bowl and let the dough bulk ferment at room temperature until it has visibly increased in size (perhaps 30-50%) and appears bubbly (this could take 4-8 hours depending on temperature and starter strength).
- Gently shape the dough (it will be loose) and place it into a proofing basket or bowl lined with a floured cloth.
- Cover and refrigerate for 8-12 hours for the final proof. This develops flavor and makes the dough easier to handle.
- Preheat your oven to 450°F (230°C) with a Dutch oven or baking stone inside for at least 30 minutes.
- Carefully transfer the cold dough to the hot Dutch oven or baking surface. Score the top if desired (gluten-free dough can be tricky to score).
- Bake covered (if using a Dutch oven) for 20-25 minutes.
- Remove the lid (or add steam if using a stone) and continue baking for another 25-30 minutes until the crust is golden brown and the internal temperature reaches 200-210°F (93-99°C).
- Cool completely on a wire rack before slicing (this is crucial for gluten-free bread texture).
Tips for Successful Buckwheat Sourdough Baking
Baking with a buckwheat glutenfree sourdough starter presents unique challenges and rewards. Paying attention to a few key factors can greatly improve your results. Understanding how gluten-free flours behave and adjusting your technique accordingly is essential for achieving a well-risen, flavorful loaf.
One important tip is to be gentle with the dough. Unlike wheat dough, gluten-free dough doesn't develop elasticity through vigorous kneading. Overworking it can actually break down the structure provided by starches and gums. Focus on gentle folding techniques to build some structure and incorporate air without tearing the delicate matrix.
Hydration Levels: Adjusting for Buckwheat Flour
Gluten-free flours, including buckwheat, often absorb water differently than wheat flour. Gluten-free sourdough doughs are typically higher in hydration than traditional sourdoughs to compensate for the lack of gluten structure and prevent a dry, crumbly loaf. Hydration levels for gluten-free sourdough often range from 80% to over 100% (relative to the total flour weight).
The provided recipe uses about 87.5% hydration (350g water / 400g total flour). You may need to adjust the water slightly based on the specific gluten-free flour blend you use, as absorption rates vary. A wetter dough can be trickier to handle but often results in a lighter, more open crumb. Don't be afraid of a sticky dough; it's normal for gluten-free sourdough.
Mixing Techniques: Gentle Handling for Best Results
When mixing your buckwheat sourdough dough, avoid the aggressive kneading techniques used for wheat bread. Instead, focus on incorporating the ingredients thoroughly until no dry flour remains. After the initial mix, rely on gentle stretch and fold maneuvers. These are performed by wetting your hands and gently pulling a section of the dough up and folding it over the rest, rotating the bowl and repeating several times.
Perform these folds every 30-60 minutes during the bulk fermentation period. This process helps to build tension and structure in the dough using the starches and gums in the gluten-free blend without developing gluten. Gentle handling prevents the dough from becoming dense or gummy and encourages a better rise when using the buckwheat glutenfree sourdough starter method.
Baking Temperatures and Times: Achieving a Perfect Crust and Crumb
Proper baking temperature and time are critical for gluten-free sourdough. Baking at a high initial temperature, often around 450-475°F (230-245°C), helps achieve good oven spring – the final burst of rising in the oven. Baking in a preheated Dutch oven is highly recommended as it traps steam around the loaf, keeping the crust soft initially to allow for maximum expansion before developing a crisp crust.
After the initial period of covered baking (usually 20-30 minutes), removing the lid allows the crust to brown and crisp up. The total baking time can range from 45 to 60 minutes, depending on the loaf size and your oven. Baking until the internal temperature reaches 200-210°F (93-99°C) ensures the loaf is cooked through. Crucially, let the loaf cool completely, ideally for 2-4 hours, before slicing. Slicing too early can result in a gummy texture, a common issue with gluten-free bread.
Troubleshooting Buckwheat Sourdough Bread
Even with a strong buckwheat glutenfree sourdough starter and a good recipe, baking perfect gluten-free bread can sometimes be challenging. Several common issues might arise, leading to disappointing results. Understanding the potential problems and their causes will help you diagnose issues and improve your technique over time.
Troubleshooting is a normal part of the baking journey, especially when working with gluten-free flours and wild yeast cultures. By learning to identify the signs of an under-proofed, over-proofed, or improperly baked loaf, you can adjust your process for future bakes. Persistence and careful observation are key to mastering the buckwheat glutenfree sourdough starter method in your bread baking.
Common Problems and How to Fix Them
Dealing with common gluten-free bread issues involves understanding the role of fermentation, hydration, and baking. Don't get discouraged by early failures; each loaf is a learning opportunity. Keep a baking journal to track your process, ingredients, temperatures, and timings – this data will be invaluable for identifying patterns and making necessary adjustments to your buckwheat glutenfree sourdough starter method and recipe.
For instance, if your loaf spreads out flat instead of rising upwards, it could be due to weak starter activity, insufficient proofing, or improper shaping. If the crust is pale and soft, the oven temperature might be too low, or it didn't bake long enough uncovered. Addressing these specific issues systematically will lead to better bread with your glutenfree sourdough starter.
Dense or Gummy Bread: Addressing Texture Issues
A dense or gummy texture is one of the most frequent complaints about homemade gluten-free bread. This can be caused by several factors when using a buckwheat glutenfree sourdough starter. One major culprit is underbaking; gluten-free bread needs to reach a high internal temperature to set properly. Ensure your loaf bakes until it hits at least 200°F (93°C) internally and cool it completely before slicing.
Another cause can be insufficient hydration or using a flour blend that lacks enough starch or gum for structure. Experiment with slightly higher hydration levels in your recipe. Over-mixing the dough can also damage the delicate structure. Finally, slicing the bread while it's still warm traps moisture and can result in a gummy texture. Patience during the cooling phase is paramount for a good crumb.
Flat Loaf: Improving Rise and Oven Spring
A flat loaf often indicates issues with leavening or dough handling. Firstly, ensure your buckwheat glutenfree sourdough starter is truly active and at its peak when you use it – it should be bubbly and have recently peaked after a feed. If the starter is weak, it won't provide enough lift.
Proofing time and technique are also critical. Over-proofing can cause the dough structure to collapse before it even hits the oven, while under-proofing won't allow enough gas to build up for a good rise. With gluten-free dough, gentle handling during shaping and transferring to the oven is crucial to avoid deflating the delicate structure. Using a proofing basket and baking in a hot Dutch oven can provide support and steam, aiding oven spring when using your glutenfree sourdough starter method.
Sourness Level: Adjusting Fermentation Time
The level of sourness in your buckwheat sourdough bread is primarily controlled by the fermentation time and temperature. Longer, cooler fermentation (like an overnight cold proof in the refrigerator) tends to develop more complex, sour flavors. Shorter, warmer fermentation periods will result in a milder, less tangy loaf.
If your bread is too sour, try reducing the bulk fermentation time at room temperature or feeding your starter more frequently to make it less acidic before baking with it. If it's not sour enough, extend the cold proofing period in the refrigerator. Adjusting these fermentation parameters allows you to fine-tune the flavor profile of bread baked with your buckwheat glutenfree sourdough starter.
Advanced Buckwheat Sourdough Techniques

Once you've mastered the basic buckwheat glutenfree sourdough starter method and baked a few successful loaves, you might want to explore more advanced techniques. These methods can help you achieve different textures, incorporate various flavors, and expand your baking repertoire beyond a simple loaf.
Experimentation is a key part of sourdough baking. Playing with variables like hydration, flour blends, and additions can lead to exciting new results. Your strong buckwheat glutenfree sourdough starter is a versatile base for exploring these possibilities and tailoring your baking to your preferences.
Exploring Different Hydration Levels in Buckwheat Sourdough
As mentioned earlier, gluten-free doughs benefit from higher hydration. Once comfortable with a standard recipe, try increasing the water percentage gradually (e.g., from 87.5% to 95% or even 100%). Higher hydration typically results in a more open, airy crumb but makes the dough stickier and harder to handle.
Working with very wet gluten-free doughs often requires using techniques like 'no-knead' mixing or relying heavily on stretch and folds in the bowl. Shaping might involve simply pouring the dough into a loaf pan or using a very well-floured proofing basket and parchment paper for easy transfer to the oven. Mastering high hydration takes practice but can yield superior texture with your buckwheat glutenfree sourdough starter.
Adding Flavor: Incorporating Seeds, Nuts, and Dried Fruits
Buckwheat's earthy flavor profile pairs wonderfully with various additions. Incorporating seeds, nuts, or dried fruits can add texture, nutrition, and layers of flavor to your sourdough bread. Common additions include sunflower seeds, pumpkin seeds, walnuts, pecans, cranberries, or raisins.
Mix these additions into the dough during the initial mixing phase or during the first set of folds. A good starting point is adding 10-20% of the total flour weight in additions (e.g., 40-80 grams for a 400g flour recipe). Toasting seeds or nuts lightly before adding them can enhance their flavor. These additions complement the unique taste developed through the buckwheat glutenfree sourdough starter method.
Buckwheat Sourdough Pancakes Recipe
Your active buckwheat glutenfree sourdough starter isn't just for bread! It can be used to leaven other baked goods, adding a delightful tang and lightness. Sourdough pancakes are a popular option, and they are incredibly easy to make.
Mix 100 grams of active buckwheat glutenfree sourdough starter with 100 ml of milk (dairy or non-dairy) and 100 grams of buckwheat flour the night before. Cover and leave at room temperature overnight. The next morning, stir in an egg, a tablespoon of oil or melted butter, a tablespoon of sweetener (sugar, maple syrup), a teaspoon of baking powder, and a pinch of salt. Cook on a hot, greased griddle like regular pancakes. This simple recipe demonstrates the versatility of your homemade buckwheat starter.
Conclusion: Embrace the Art of Buckwheat Sourdough Baking
Successfully creating and maintaining a buckwheat glutenfree sourdough starter is a rewarding achievement. You've cultivated a living culture capable of transforming simple ingredients into delicious, naturally leavened baked goods. This journey through the buckwheat glutenfree sourdough starter method opens up a world of possibilities for enjoying flavorful, gluten-free bread and other treats.
While the process requires patience and consistency, the unique earthy flavor and satisfying texture of buckwheat sourdough make it well worth the effort. You now have the skills to nurture your starter and use it to bake a variety of items, from rustic loaves to light pancakes.
The Journey Continues: Experimentation and Refinement
Creating your first buckwheat glutenfree sourdough starter and baking a loaf is just the beginning. The art of sourdough baking is one of continuous learning and refinement. Don't hesitate to experiment with different gluten-free flour blends in your bread recipes, adjust hydration levels, or incorporate new flavors.
Your active buckwheat glutenfree sourdough starter is a robust culture that will continue to thrive with consistent care. Keep baking, keep experimenting, and enjoy the delicious results of your homemade sourdough journey. Each loaf is a chance to learn and improve your craft using the versatile buckwheat glutenfree sourdough starter method you've mastered.
Frequently Asked Questions
What exactly is a gluten-free sourdough starter?
It's a fermented culture of gluten-free flour and water that contains wild yeasts and bacteria. This culture is used to leaven gluten-free bread, providing the characteristic tangy sourdough flavor and airy texture.
Why would I choose a gluten-free sourdough starter over a regular one?
If you have gluten sensitivities or celiac disease, a gluten-free starter is essential. It allows you to enjoy sourdough bread without triggering any adverse reactions, using alternative flours like rice or buckwheat.
What are the key ingredients needed to create a gluten-free sourdough starter?
You'll primarily need a gluten-free flour blend (often rice flour, tapioca starch, and potato starch), filtered water, and a clean jar. Some recipes might also suggest a small amount of fruit juice to encourage initial fermentation.
How long does it typically take to create a viable gluten-free sourdough starter?
It usually takes between 5 to 10 days to establish a mature gluten-free sourdough starter. This timeframe depends on factors like room temperature and the specific flour blend used.
What are some common signs that my gluten-free sourdough starter is ready to use?
Look for consistent bubbling and rising after each feeding. A slightly sour aroma and a light, spongy texture are also good indicators that your starter is active and ready for baking.
Final Reflection: The Joyful Rise of Gluten-Free Sourdough
The quest for a thriving gluten-free sourdough starter is more than just a baking project; it's a testament to human ingenuity and our enduring connection to food. This simple method, detailed throughout this article, empowers anyone, regardless of dietary restrictions, to experience the magic of sourdough. The increasing popularity of gluten-free diets highlights a growing need for accessible and reliable recipes, and this starter method aims to fill that gap.
The journey of nurturing a gluten-free sourdough starter mirrors the journey of self-discovery. It requires patience, observation, and a willingness to adapt. The subtle changes in the starter's texture and activity become a source of fascination, a tangible representation of the intricate biological processes at play. The sourdough starter is a living thing, a testament to the power of nature and our ability to harness it.
This simple act of baking becomes a powerful connection to tradition, even within the context of a modern dietary need.
Now, it's your turn. Consider the possibilities: the crusty loaves, the tangy aroma, the satisfaction of creating something delicious and nourishing from scratch. Don't be intimidated by the seemingly complex process; embrace the challenge, nurture your starter, and discover the unique rewards of gluten-free sourdough baking. The journey may have its ups and downs, but the taste of your first loaf will be a testament to your perseverance and a delicious reward for your efforts.
Unleash Your Inner Baker: Start Your Gluten-Free Sourdough Journey!
Thanks for taking the time to explore the world of gluten-free sourdough! You've just learned a simple and effective method to create your own starter – a truly rewarding experience. Now it's time to put your knowledge into action.
- Begin your gluten-free sourdough adventure! Mix your starter ingredients and watch the magic unfold. Document your progress – it’s a fun journey!
- Share your excitement! Tell your friends and family about your new sourdough project and inspire them to try it too.
- Explore other gluten-free baking recipes on BakeWithEase.com (You can add this link here, but it is not needed for this exercise) to expand your baking horizons.
What unique flavor combinations will you try with your homemade gluten-free sourdough starter?