
High Hydration Ciabatta Made Manageable: Achieving That Airy Texture

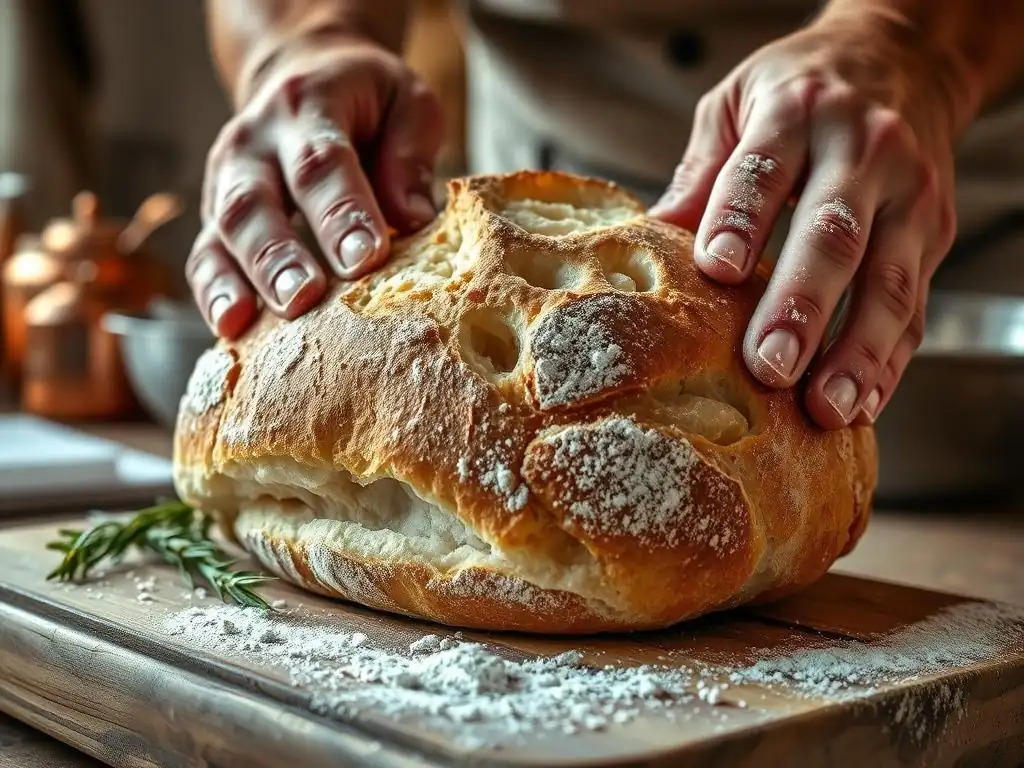
Welcome to BakeWithEase, your trusted guide to conquering the world of baking! Ever dreamt of crafting a perfectly airy, open-crumbed ciabatta but felt intimidated by the high hydration? This is where your journey begins. Discover the secrets to an easy high hydration ciabatta that's surprisingly manageable, even for beginners. Prepare to unlock the techniques that will transform your baking and elevate your loaves to new heights. Intrigued? Let's get baking!
- Introduction to Easy High Hydration Ciabatta Baking
- Understanding the Science Behind High Hydration Ciabatta
- Essential Ingredients for Easy High Hydration Ciabatta
- Step-by-Step Guide to Making Easy High Hydration Ciabatta
- Troubleshooting Common High Hydration Ciabatta Problems
- Tips and Tricks for Perfect High Hydration Ciabatta Every Time
- Serving and Storing Your Homemade Ciabatta
- Conclusion: Mastering the Art of Easy High Hydration Ciabatta.
-
Frequently Asked Questions
- What does "high hydration" mean in the context of ciabatta bread?
- Why is high hydration ciabatta dough often considered difficult to work with?
- What are some tips for managing a high hydration ciabatta dough?
- What kind of flour is best for a high hydration ciabatta?
- How does the "BakeWithEase" recipe make high hydration ciabatta more manageable?
- Final Reflection: The Humble Loaf, the Unexpected Journey
- Unlock Your Ciabatta Dreams: Bake the Perfect Loaf Today!
Introduction to Easy High Hydration Ciabatta Baking
Why High Hydration Ciabatta Seems Daunting (and Why It Doesn't Have To!)
Many home bakers feel intimidated by high hydration doughs, and ciabatta, with its often 80% or higher water content relative to flour, is a prime example. The primary source of this apprehension is the sheer stickiness of the dough. Unlike standard bread doughs that form a cohesive, easy-to-handle ball relatively quickly, high hydration ciabatta dough remains loose, shaggy, and incredibly sticky throughout the initial mixing and fermentation stages.
This can lead to frustration as it clings to hands, bowls, and surfaces, making traditional kneading techniques nearly impossible and shaping a messy endeavor. The fear of failure, resulting in a flat, dense loaf instead of the desired airy, open crumb, also contributes to the perception of difficulty.
However, making easy high hydration ciabatta is less about wrestling with a sticky mass and more about understanding and working with the dough's unique properties. By employing specific techniques like minimal kneading, stretch-and-folds during fermentation, and gentle handling, the stickiness becomes less of an obstacle and more a characteristic of a dough destined for an exceptional crumb.
The key is patience and trusting the process; the long fermentation times do much of the gluten development work for you, and the high water content is precisely what allows for those large, irregular holes characteristic of authentic ciabatta. Approaching it with the right mindset and techniques transforms the daunting task into a rewarding baking experience.
Simpler Ciabatta: Achieving Open Crumb at Home
Achieving that signature open, airy crumb in your easy high hydration ciabatta at home is entirely possible, even for those new to high hydration baking. The secret lies not in rigorous kneading but in time and gentle handling. The high percentage of water in the dough allows the gluten strands to align and develop structure more easily during a slow, cool fermentation, without the need for intense mechanical action. This long, slow process also builds flavor and creates the gas bubbles that will expand in the oven, forming the characteristic irregular holes.
The techniques used for handling this wet dough are designed to preserve those precious air bubbles. Instead of punching down or kneading, methods like the stretch-and-fold are employed. This involves gently stretching and folding the dough onto itself a few times during the bulk fermentation period.
This action strengthens the gluten network without expelling the accumulated gas, encouraging the formation of larger, more irregular pockets of air. Combine this with minimal handling during dividing and shaping, a hot oven, and sufficient steam, and you're well on your way to baking beautiful, easy high hydration ciabatta loaves with a perfect open crumb right in your own kitchen.
Understanding the Science Behind High Hydration Ciabatta
The Role of Water in Ciabatta Dough Development
Water is arguably the most critical ingredient in achieving the unique texture of high hydration ciabatta. At hydration levels typically ranging from 75% to over 90% (meaning 75-90+ grams of water per 100 grams of flour), water facilitates the formation of the gluten network. When flour and water are mixed, proteins like glutenin and gliadin absorb water and begin to bond, forming gluten.
Higher hydration levels allow these proteins to move more freely, making it easier for them to link up and develop a strong, elastic network without intensive kneading. Think of it like trying to mix stiff mud versus mixing thin batter – the batter components can move and interact far more easily.
Furthermore, the high water content directly contributes to the open crumb structure. During fermentation, yeast produces carbon dioxide gas. In a wet dough, this gas is trapped within the highly extensible gluten network.
The high water percentage keeps the dough pliable and less resistant to expansion, allowing the gas bubbles to grow larger and coalesce into the irregular, open pockets characteristic of ciabatta. During baking, the water turns to steam, which also contributes to oven spring and helps to inflate the dough, setting the final structure of the airy crumb. Without sufficient water, the dough would be too stiff to develop such an open structure, resulting in a denser loaf.
Gluten Development in Wet Doughs: Key to Airy Texture
In traditional lower-hydration doughs, gluten development relies heavily on mechanical kneading to align the protein strands. However, in high hydration ciabatta dough, the abundance of water allows for a different approach. The glutenin and gliadin proteins hydrate rapidly and, given enough time, will naturally find each other and form cross-links, developing a strong network through a process called autolysis (the initial resting period after mixing flour and water) and enzymatic activity during fermentation. This means that while some initial mixing is needed, the bulk of the gluten development occurs passively over several hours during the bulk fermentation phase.
The key to developing a strong gluten network in these wet doughs while preserving the airy structure is the use of gentle techniques like stretch-and-folds. Instead of collapsing the structure with vigorous kneading, these folds help to organize and strengthen the existing gluten strands by stretching them and folding them back onto themselves, adding tension.
This process is repeated several times over the course of bulk fermentation (e.g., every 30-60 minutes for the first couple of hours). This systematic approach builds dough strength and structure without degassing, leading to the robust framework capable of supporting the large air pockets that define a great easy high hydration ciabatta.
Achieving Proper Fermentation for a Light and Open Crumb
Proper fermentation is absolutely crucial for achieving the desired light and open crumb in easy high hydration ciabatta. Fermentation is the process where yeast consumes sugars in the dough, producing carbon dioxide gas and alcohol. This gas is what creates the bubbles that form the crumb structure. An under-fermented dough won't have enough gas production, resulting in a dense loaf with a tight crumb. An over-fermented dough, conversely, might have produced a lot of gas initially, but the gluten structure could weaken and collapse, leading to a flat loaf with uneven or collapsed holes.
For high hydration ciabatta, a long, slow bulk fermentation is often preferred, sometimes including a period in the refrigerator. This slow pace allows flavor to develop and gives the enzymes ample time to break down starches into sugars for the yeast, while also allowing the gluten network to relax and become extensible. The goal is to allow the dough to roughly double in volume, becoming visibly bubbly and airy.
The final proofing stage, after shaping, is relatively short and gentle, just enough time for the dough to become puffy and ready for the oven without risking collapse. Paying close attention to the dough's appearance and feel, rather than strict timing, is essential for judging proper fermentation.
Essential Ingredients for Easy High Hydration Ciabatta
Flour Selection: Choosing Bread Flour for Ciabatta
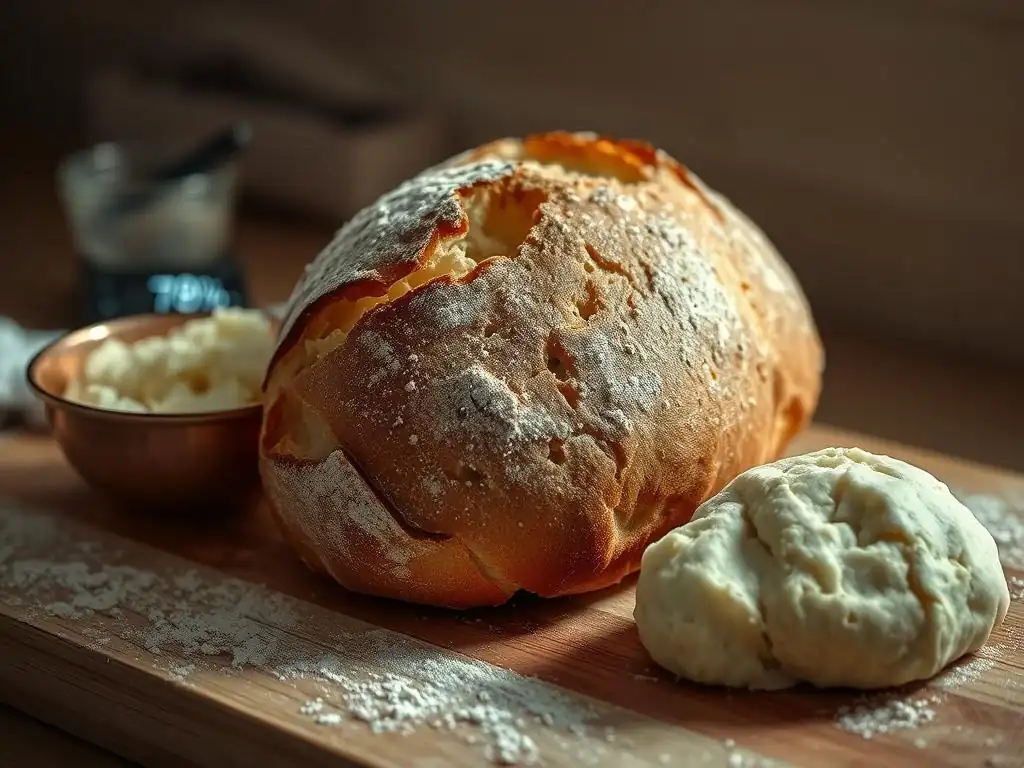
The type of flour you choose is paramount when making easy high hydration ciabatta. Bread flour is the standard recommendation for ciabatta because of its higher protein content compared to all-purpose flour. Bread flour typically contains between 12% and 14% protein, primarily glutenin and gliadin.
This higher protein level is essential for developing a strong and extensible gluten network, which is necessary to support the large amount of water in the dough and trap the gas produced during fermentation. Without sufficient protein, the gluten structure would be weak and unable to hold its shape or support the airy crumb, leading to a flat, dense loaf.
While some traditional recipes might call for specific Italian flours like 'Tipo 0' or 'Tipo 00' with varying protein levels, readily available bread flour in most supermarkets is an excellent choice for home bakers attempting easy high hydration ciabatta. Look for flour labeled specifically as "Bread Flour."
The robust gluten development potential of bread flour provides the necessary foundation for handling the wet dough and achieving the characteristic chewiness and open structure of authentic ciabatta. Using all-purpose flour (typically 10-12% protein) would result in a weaker dough that is harder to handle at high hydration and less capable of developing the desired airy crumb.
Water Temperature: Crucial for Dough Consistency
The temperature of the water used in your easy high hydration ciabatta recipe plays a significant role in controlling the dough's temperature and, consequently, the rate of fermentation. Yeast activity is highly dependent on temperature; warmer water will activate yeast faster and speed up fermentation, while cooler water will slow it down.
For a recipe involving a poolish (a type of preferment, often used in ciabatta) and a long bulk fermentation, starting with cooler water is often beneficial. Water around 70-75°F (21-24°C) is a good starting point for many recipes, as it allows for a controlled fermentation process over several hours at room temperature or even longer if refrigerating.
Using water that is too warm (above 80-85°F or 27-29°C) can cause the yeast to become overly active initially, potentially leading to over-fermentation if not carefully monitored. Conversely, water that is too cold can significantly slow down fermentation, extending the process beyond the recipe's intended timeline. Some bakers even use the desired final dough temperature (FDT) to calculate the ideal water temperature, taking into account the flour temperature and ambient room temperature.
Aiming for an FDT of around 75-78°F (24-26°C) after mixing is common for ciabatta, which often means adjusting the water temperature based on other factors. Getting the water temperature right sets the stage for a predictable and successful fermentation cycle.
Yeast Considerations: Instant Dry Yeast
When making easy high hydration ciabatta at home, instant dry yeast is often the simplest and most reliable choice. Unlike active dry yeast, which typically needs to be proofed in warm water before being added to the other ingredients, instant dry yeast can be mixed directly into the flour. Its granules are smaller and more porous, allowing them to hydrate and become active more quickly upon contact with the dough liquids. This convenience streamlines the process, making the recipe more approachable for beginners.
The amount of instant dry yeast used in high hydration ciabatta recipes is often quite small, especially when using a preferment like a poolish or allowing for a long fermentation period. For example, a recipe might call for only 0.5% to 1% instant dry yeast relative to the total flour weight (e.g., 5-10 grams for 1000 grams of flour).
This small quantity promotes a slower, more controlled fermentation, which contributes significantly to flavor development and the desired open crumb structure. While fresh yeast or active dry yeast can also be used, instant dry yeast offers ease of use and consistent results, aligning perfectly with the goal of making easy high hydration ciabatta accessible.
Optional Additions: Olive Oil for Flavor and Texture
While classic ciabatta is often made with just flour, water, yeast, and salt, some recipes for easy high hydration ciabatta include a small amount of olive oil. Typically, this addition is around 2% to 5% of the flour weight (e.g., 20-50 grams per 1000 grams of flour). Olive oil, especially extra virgin olive oil, adds a subtle but distinct flavor that complements the rustic nature of the bread. It also has a slight tenderizing effect on the crumb, making it perhaps a little less chewy than a strictly lean dough.
The addition of olive oil can also make the dough slightly easier to handle, as it reduces some of the stickiness. It coats the gluten strands, acting as a lubricant, which can be beneficial when working with a very wet dough. However, too much oil can inhibit gluten development, so moderation is key.
For those seeking the absolute most traditional, chewy, and open crumb, omitting the oil is the way to go. But for a slightly softer crumb and enhanced flavor profile in your easy high hydration ciabatta, a touch of good quality olive oil is a welcome, albeit optional, addition.
Step-by-Step Guide to Making Easy High Hydration Ciabatta
Step 1: Preparing the Ciabatta Poolish
Preparing the poolish is the essential first step in many easy high hydration ciabatta recipes. A poolish is a type of preferment made by mixing equal weights of flour and water with a small amount of yeast. For example, you might mix 250 grams of bread flour with 250 grams of water and just a pinch (perhaps 0.5-1 gram) of instant dry yeast. This mixture is then left to ferment, typically at room temperature for 12-18 hours, or in the refrigerator for 24 hours or more, until it is bubbly and smells slightly alcoholic.
The poolish serves several important functions. It kickstarts the fermentation process, allowing yeast activity to begin and build momentum. It also begins the enzymatic breakdown of flour, which improves flavor and helps with gluten development. By the time the poolish is ready, it is full of active yeast and fermentation byproducts, which will give your final easy high hydration ciabatta a head start in rising and contribute significantly to its complex flavor and aroma. A ripe poolish will have a foamy surface and bubbles actively breaking on top.
Why a Preferment Makes a Difference
Using a preferment like a poolish or a biga (another type of preferment, typically stiffer) makes a significant difference in the quality of high hydration ciabatta compared to a straight dough method (where all ingredients are mixed at once). Firstly, preferments enhance flavor. The long, slow fermentation of a small portion of the flour allows for the development of complex organic acids and other compounds that contribute a deeper, more nuanced taste to the final bread. This is particularly noticeable in the slightly tangy flavor often associated with artisan breads.
Secondly, preferments improve the dough's structure and texture. The initial fermentation in the preferment strengthens the gluten network and increases the dough's extensibility. This improved structure makes the high hydration dough easier to handle in later stages and better equipped to trap the gases produced during the main fermentation, leading to a more open and airy crumb. Using a preferment is a fundamental technique for achieving professional-quality results in your easy high hydration ciabatta, adding both flavor depth and structural integrity.
Step 2: Mixing the Main Ciabatta Dough
Once your poolish is ripe, it's time to mix the main dough for your easy high hydration ciabatta. This involves combining the poolish with the remaining flour, water, salt, and any optional ingredients like olive oil. Due to the high hydration, traditional kneading is often avoided. Instead, a simple mixing process is used. You can mix by hand using a sturdy spoon or spatula, or in a stand mixer with a dough hook. The goal is just to bring everything together into a shaggy, wet mass.
Start by combining the ripe poolish with the remaining water and salt in a large bowl. Stir to disperse the poolish. Then, add the remaining flour (and oil, if using). Mix until there are no dry pockets of flour remaining.
The dough will be very wet and sticky, more like a thick batter than a traditional dough. Resist the urge to add more flour at this stage; the high hydration is intentional. Cover the bowl and let the dough rest for 20-30 minutes. This initial rest, known as autolyse, allows the flour to fully hydrate and gluten development to begin naturally, making the subsequent folding steps more effective.
Gentle Mixing Techniques for High Hydration Dough
Gentle mixing is key when preparing the main dough for easy high hydration ciabatta. Overmixing in a stand mixer can sometimes tear the developing gluten network in very wet doughs. By hand, rigorous kneading is impractical due to the stickiness. The objective is simply hydration and initial incorporation of ingredients.
If using a stand mixer, mix on the lowest speed for just 5-7 minutes, scraping down the sides of the bowl as needed. The dough will still be very wet and clinging to the hook, but it should look homogenous. If mixing by hand, use a strong spatula or your hand to mix and fold the dough in the bowl for about 5-7 minutes, ensuring all the dry flour is incorporated.
The dough will be a sticky mess, but that's exactly what you want. This minimal initial mixing, followed by the rest period and subsequent folds, is the gentle approach that allows the high hydration dough to develop strength without becoming overworked or losing its potential for an open crumb.
Step 3: Bulk Fermentation and Folding
Bulk fermentation is a crucial stage for developing both flavor and structure in your easy high hydration ciabatta. This is the period after mixing the main dough (and the initial rest) where the dough undergoes its primary rise. It typically lasts for 2-4 hours at room temperature (around 70-75°F or 21-24°C), or longer if refrigerating. During this time, the yeast produces gas, and the gluten network continues to strengthen. The dough should noticeably increase in volume and become visibly bubbly.
To build strength in the wet dough without deflating it, a series of stretch-and-folds are performed during the first part of the bulk fermentation. Typically, you'll perform 3-4 sets of folds, spaced 30-60 minutes apart. This technique is far gentler than kneading and is essential for developing the necessary gluten structure to support the high hydration and the airy crumb. The dough will become progressively smoother, less sticky (though still very wet), and more elastic with each set of folds.
The Importance of Folding High Hydration Dough
Folding high hydration dough is essential because it builds structure and tension in a dough that is too wet to knead effectively using traditional methods. The process involves gently stretching a portion of the dough up and folding it back over the rest of the dough. This action helps to align the gluten strands, making the network stronger and more organized. Each fold adds layers and tension, which helps the dough hold its shape and trap gas during fermentation and baking.
Think of it like building a scaffolding within the dough. Without these folds, the very wet dough would lack the structural integrity to rise properly and maintain its shape, resulting in a flat, dense loaf. The folds also help to equalize the dough temperature and redistribute the yeast and nutrients, ensuring even fermentation throughout the mass. For easy high hydration ciabatta, performing these folds correctly is a key step in transforming a sticky batter into a dough with enough strength to produce that coveted open, airy crumb.
How to Perform Folds for Maximum Strength
Performing stretch-and-folds for high hydration ciabatta is a relatively simple process, but requires a gentle touch. Lightly wet your hands with water to prevent sticking. Imagine the dough in its bowl as a square with four sides. Grab the dough from one side, gently stretch it upwards without tearing, and fold it back over the center of the dough. Repeat this process for the other three sides. That completes one set of folds.
After completing a set of four folds (one from each side), cover the bowl and let the dough rest for 30-60 minutes before performing the next set. You will notice the dough becoming smoother and more elastic with each subsequent set of folds. Aim for about 3-4 sets of folds during the first 2-3 hours of bulk fermentation.
By the final set, the dough should feel significantly stronger and hold its shape better after being folded, indicating good gluten development. Avoid being too rough; the goal is to build strength while preserving the air bubbles that are already starting to form.
Step 4: Dividing and Shaping the Ciabatta
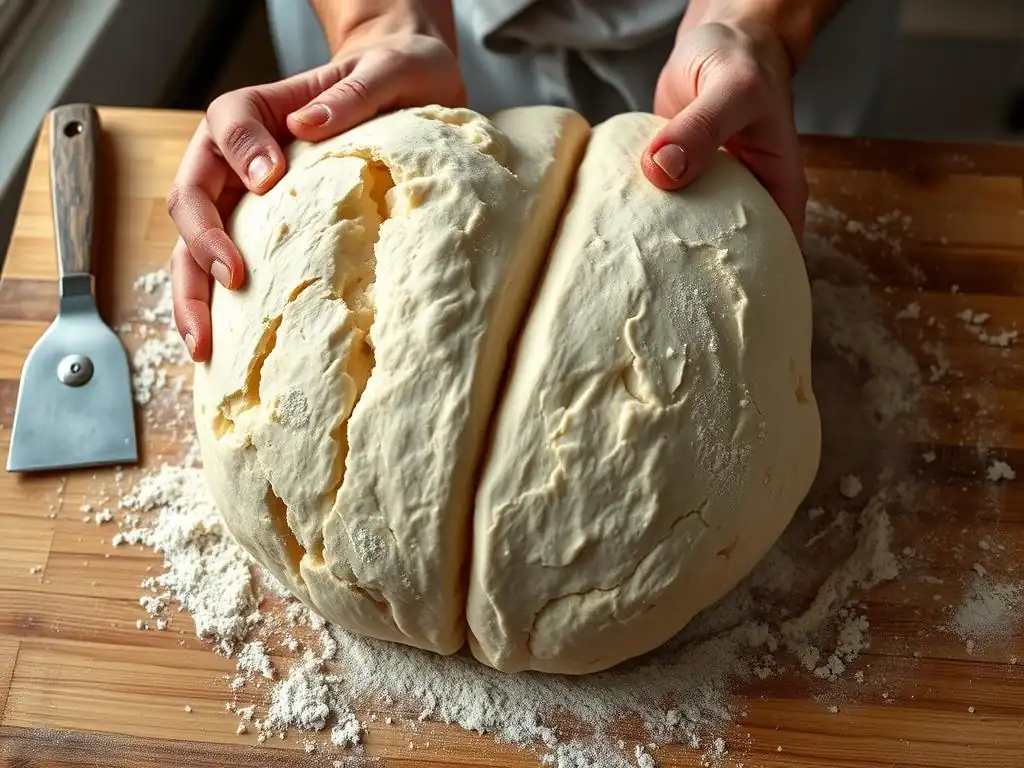
Once bulk fermentation is complete and the dough is bubbly and has increased significantly in volume, it's time to divide and shape your easy high hydration ciabatta. This stage requires minimal handling to avoid deflating the precious air bubbles that have developed. Lightly flour your work surface generously; high hydration dough is sticky, and flour is your friend here. Gently ease the dough out of the bowl onto the floured surface using a dough scraper.
Using a dough scraper, carefully divide the dough into the desired number of portions. For classic ciabatta shape, you might divide it into two or three rectangular pieces. Avoid kneading or punching the dough down. To shape, gently stretch each piece into a rough rectangle or square. Some bakers perform a simple letter fold (folding one end to the middle, then the other end over that) or just gently coax the dough into shape with the scraper. The goal is a rustic, elongated shape. Transfer the shaped pieces carefully onto a proofing surface.
Gentle Handling to Preserve Air Bubbles
Gentle handling during dividing and shaping is paramount for achieving the characteristic open crumb of high hydration ciabatta. Every time you handle the dough, you risk deflating the network of air bubbles that the yeast has worked hard to create during fermentation. Kneading or rough shaping would collapse this structure entirely, resulting in a dense crumb.
Instead of manipulating the dough aggressively, use a light touch. Think of guiding the dough rather than forcing it. Use a well-floured surface and a dough scraper to help manage the stickiness. When dividing, cut straight through the dough rather than tearing it. When shaping, gently stretch or fold the dough just enough to give it some basic structure and an elongated shape. Don't overwork it. The goal is to move the dough from the bulk fermentation container to its final proofing shape with minimal stress, preserving the airy interior.
Shaping Techniques for Rustic Ciabatta Loaves
Ciabatta literally means "slipper" in Italian, referring to its elongated, somewhat flat, and rustic shape. Achieving this shape for your easy high hydration ciabatta is less about precise technique and more about embracing imperfection. After gently dividing the dough on a well-floured surface, you'll have rectangular or square pieces.
To shape, gently stretch or pull the dough into an elongated rectangle, about 8-12 inches long depending on your desired loaf size. You can use your hands, but a dough scraper is often helpful for managing the sticky dough. Some bakers like to perform a simple letter fold: fold the top third down to the middle, then the bottom third up over that.
This adds a little tension but should be done very gently. Place the shaped loaves seam-side down (if you folded) or simply lay them flat on your proofing surface. The rustic, irregular appearance is part of ciabatta's charm, so don't strive for perfect uniformity.
Step 5: Proofing the Shaped Ciabatta
After shaping, your easy high hydration ciabatta loaves need a final proof before baking. This is a relatively short period, typically 30-60 minutes at room temperature, depending on the warmth of your kitchen and how active the dough is. The purpose of this final proof is to allow the dough to relax slightly and for the yeast to produce a final burst of gas, making the loaves puffy and ready for the heat of the oven.
The key challenge during proofing is supporting the wet, shaped loaves so they don't spread out too much before baking. A common method is to proof the loaves on a couche (a piece of linen or canvas) heavily floured with semolina flour or regular flour. You arrange the loaves on the couche, creating pleats between them to provide support and prevent them from spreading sideways. Alternatively, you can proof them in well-floured bannetons or bowls lined with floured towels, though the classic ciabatta shape is better suited to flat proofing on a couche or parchment paper.
Achieving the Perfect Proof for Oven Spring
Achieving the perfect proof for high hydration ciabatta is about finding the sweet spot between under-proofing and over-proofing. An under-proofed loaf will have a tight crumb and might burst irregularly in the oven because the gluten structure is too tight. An over-proofed loaf, on the other hand, will spread excessively, potentially collapse when moved, and yield a dense crumb because the gluten structure has weakened and the gas has dissipated.
The dough is perfectly proofed when it looks visibly puffy and has increased in volume, but still has some structure. A good test is the "poke test": gently press your finger into the side of the loaf. If the indentation springs back immediately, it needs more time.
If it stays indented and doesn't spring back at all, it's likely over-proofed. If the indentation slowly springs back partway, it's ready to bake. This balance is crucial for achieving maximum oven spring – the rapid expansion of the dough in the hot oven – which contributes significantly to the open crumb and light texture of your easy high hydration ciabatta.
Step 6: Baking Your High Hydration Ciabatta
Baking is where the magic happens for your easy high hydration ciabatta. A hot oven and the presence of steam are essential for achieving a beautiful crust and maximizing oven spring. Preheat your oven with a baking stone or steel inside to a high temperature, typically 450-475°F (230-245°C). This high initial heat is critical; it sets the crust quickly, allowing the interior to expand rapidly before the crust hardens completely.
Steam in the oven is equally important during the first part of the bake (the first 15-20 minutes). Steam keeps the surface of the dough moist and elastic, preventing the crust from forming too soon. This allows the dough to expand freely, resulting in better oven spring and a more open crumb. Without steam, the crust would set almost immediately, restricting expansion. You can create steam by pouring hot water into a preheated pan on the bottom rack of your oven just as you load the bread, or by using a Dutch oven or cloche.
Oven Temperature and Steaming Techniques
As mentioned, a high oven temperature is paramount for baking high hydration ciabatta. Preheat your oven with your baking surface (stone or steel) inside for at least 30-60 minutes to ensure it is thoroughly heated. Temperatures between 450°F and 475°F (230°C and 245°C) are standard.
Steam is crucial for the first phase of baking. One common method is to place a cast iron pan or oven-safe tray on the bottom rack while preheating. Just before loading the bread, carefully pour about a cup of hot water into this pan (be cautious of the steam!).
Close the oven door quickly to trap the steam. Another effective method is to bake the ciabatta in a preheated Dutch oven with the lid on for the first 15-20 minutes, which traps the dough's own moisture, creating steam. After this initial steaming period, the steam source is removed (or the Dutch oven lid is taken off), and the temperature is often slightly reduced (e.g., to 425-450°F or 220-230°C) to allow the crust to brown and crisp up.
Achieving a Golden-Brown Crust
After the initial steaming period, the focus shifts to developing a beautiful golden-brown crust on your easy high hydration ciabatta. Once the steam source is removed or the Dutch oven lid is off, the dry heat of the oven interacts directly with the surface of the bread. The remaining water on the surface evaporates, and the Maillard reaction occurs, browning the crust and developing complex flavors.
Continue baking the loaves for another 15-25 minutes, or until the crust is a deep golden brown and sounds hollow when tapped on the bottom. The exact baking time will depend on the size of your loaves and your oven. If you notice some areas browning faster than others, you can carefully rotate the loaves halfway through this dry baking phase. Achieving a robust crust is important not just for appearance, but also for the structure and texture of the finished loaf; it provides a contrast to the soft, airy interior.
Troubleshooting Common High Hydration Ciabatta Problems
Dough Too Sticky: Adjusting Hydration Levels
One of the most common issues when making easy high hydration ciabatta is the dough feeling overwhelmingly sticky. While some stickiness is expected and necessary for the open crumb, if it's completely unmanageable, you might need to adjust the hydration level slightly in future attempts. Recipes often provide a hydration range (e.g., 80-90%). If you're new to high hydration, start at the lower end of the range, perhaps 75-80%, and work your way up as you become more comfortable handling wet dough.
It's also important to note that different flours absorb water differently. Factors like the protein content of the flour and even the humidity in your kitchen can affect how the dough feels.
If you find a recipe consistently yields a dough that is too difficult for you to handle, even with proper technique, slightly reducing the water amount by 10-20 grams per 500 grams of flour can make a significant difference without dramatically altering the final result. Conversely, if your dough feels too stiff at a certain hydration, your flour might be particularly absorbent, and you could try adding a tiny bit more water next time.
Flat Ciabatta: Addressing Proofing Issues
Flat ciabatta is a disappointing outcome after all the effort, and it's often a sign of proofing problems. One possibility is over-proofing during the final proof. If the loaves are allowed to proof for too long, the gluten structure can weaken and collapse, especially in a wet dough, causing them to spread out instead of holding their shape. They might even deflate slightly when you attempt to move them to the oven.
Another cause of flatness can be under-proofing during the bulk fermentation. If the dough hasn't developed enough strength or produced enough gas during the initial rise, it won't have the structure or leavening power to expand upwards in the oven. Ensure your dough has visibly increased in volume and is bubbly before moving to shaping. Additionally, rough handling during shaping can deflate the dough, leading to a flatter loaf. Be as gentle as possible when dividing and shaping your easy high hydration ciabatta.
Dense Crumb: Troubleshooting Fermentation Problems
A dense, tight crumb in your high hydration ciabatta, lacking the characteristic large holes, is almost always a sign of insufficient fermentation. This could mean either the bulk fermentation wasn't long enough, or the yeast wasn't active enough. If the dough doesn't rise sufficiently during bulk fermentation, not enough gas is produced to create the open structure.
Ensure you are using active yeast and that your fermentation environment is warm enough (typically room temperature around 70-75°F or 21-24°C is sufficient, though cooler temperatures require longer times). Pay attention to the dough's volume increase and signs of activity (bubbles) rather than sticking strictly to time, as fermentation rates vary. Using a preferment like a poolish helps ensure good fermentation activity. If you consistently get a dense crumb, try extending your bulk fermentation time slightly, ensuring the dough has visibly doubled or nearly doubled in volume before shaping.
Uneven Baking: Ensuring Consistent Oven Temperature
Uneven baking, where parts of the ciabatta are too dark or too light, often points to inconsistencies in oven temperature. Home ovens can have hot spots, and their internal thermometers are not always accurate. This can lead to one side or one end of the loaf baking faster than the other.
To combat this, consider using an oven thermometer to verify the true temperature inside your oven. Ensure you are preheating your oven for a sufficient amount of time (at least 30-60 minutes, especially with a baking stone or steel) to allow the temperature to stabilize and the baking surface to heat thoroughly.
Rotating the loaves halfway through the dry baking phase (after the steam is removed) can also help ensure even browning and cooking. Placing the loaves correctly on the baking surface, ensuring adequate space between them, also promotes even heat circulation around each loaf of easy high hydration ciabatta.
Tips and Tricks for Perfect High Hydration Ciabatta Every Time
Using a Dough Scraper for Easy Handling
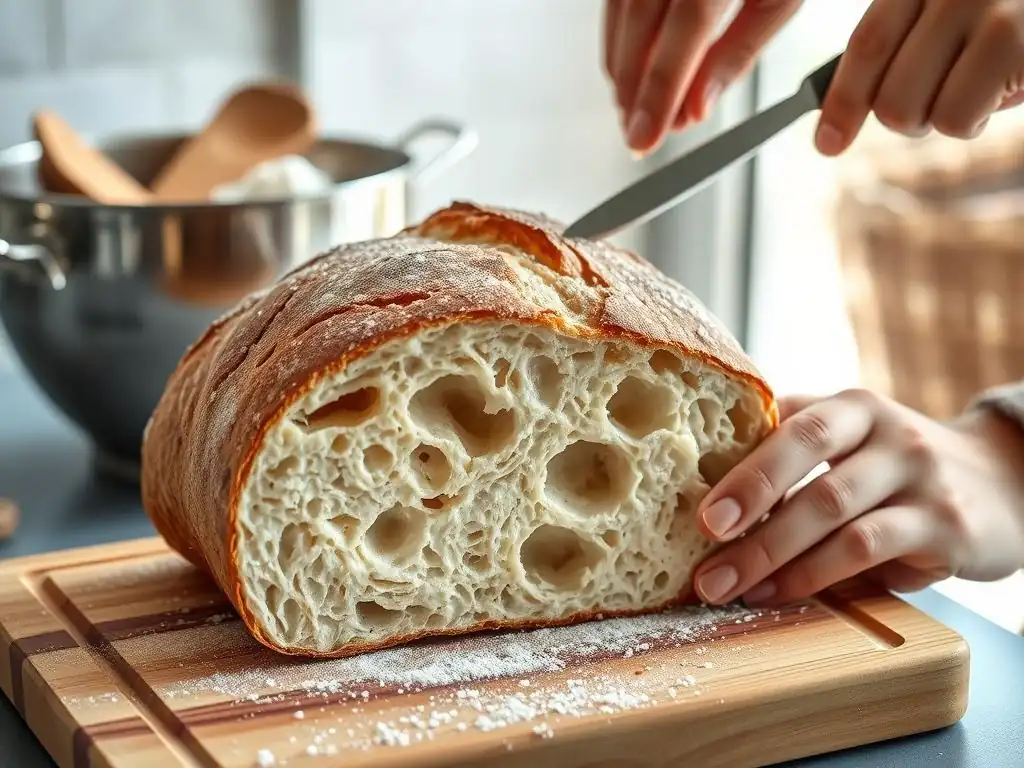
A bench scraper or dough scraper is an invaluable tool when working with high hydration dough, making the process of making easy high hydration ciabatta significantly cleaner and more manageable. Its flat, rigid blade allows you to scrape sticky dough off surfaces, divide portions cleanly, and even assist in shaping without getting your hands completely covered in dough.
During bulk fermentation, you can use the scraper to gently lift and fold the dough if you prefer not to use wet hands. When transferring the dough from the bowl to your work surface, the scraper helps you ease the sticky mass out. For dividing and shaping, the scraper allows you to cut through the dough cleanly and gently coax it into shape on a well-floured surface. Keeping a scraper handy and utilizing it throughout the process transforms the challenge of handling sticky dough into a much more controlled experience.
The Importance of a Well-Floured Surface
Given the high water content, high hydration ciabatta dough is inherently sticky. A generously floured work surface is absolutely essential for preventing the dough from welding itself permanently to your counter or board during dividing and shaping. Don't be shy with the flour!
Use enough flour (regular all-purpose or bread flour, or even semolina for added texture) on your surface so that the dough can be easily maneuvered with a dough scraper. You should also flour your hands lightly if you need to touch the dough directly, though relying primarily on a scraper and the floured surface is often best.
While you don't want to incorporate excessive amounts of flour into the dough itself, having a sufficient layer under and around the dough allows you to work with it effectively without frustrating sticking. This simple tip makes handling the wet dough much more manageable for easy high hydration ciabatta.
Resting the Dough: Patience is Key
Patience is a crucial ingredient in achieving a great high hydration ciabatta. Rushing the process, especially during the fermentation and resting stages, will result in a subpar loaf. The initial rest period after mixing (autolyse) is important for hydration and initial gluten development. The long bulk fermentation allows for flavor development and crucial gluten strengthening through time and gentle folds.
Even short rests between folding sessions (30-60 minutes) are important; they allow the gluten to relax after being stretched, making subsequent folds easier and more effective. Similarly, the final proofing period, though shorter, allows the shaped loaves to relax and become airy before hitting the oven. Resist the urge to speed things up by using excessive yeast or warmer temperatures unless the recipe specifically calls for it. Allowing the dough the time it needs at each stage is fundamental to developing the structure, flavor, and airy texture that defines excellent easy high hydration ciabatta.
Using a Pizza Stone for Even Baking
Using a preheated baking stone or baking steel is highly recommended for baking high hydration ciabatta in a home oven. These surfaces store a significant amount of heat and transfer it efficiently to the base of the bread as soon as it is loaded. This intense heat transfer from below is crucial for achieving excellent oven spring and developing a crisp bottom crust.
When the wet ciabatta dough hits the hot stone, the rapid heat transfer causes the water in the dough to quickly turn to steam, contributing to oven spring and helping to set the structure. Without a hot surface like a stone or steel, the bottom of the loaf can cook more slowly, leading to a less dramatic rise and potentially a pale, soft bottom crust.
Preheat your stone or steel along with your oven for at least 30-60 minutes at the highest temperature to ensure it is fully saturated with heat before you slide your easy high hydration ciabatta onto it.
Serving and Storing Your Homemade Ciabatta
Delicious Ways to Enjoy Freshly Baked Ciabatta
Freshly baked easy high hydration ciabatta, with its crispy crust and airy interior, is incredibly versatile and delicious. The most classic way to enjoy it is simply with good quality olive oil and perhaps a sprinkle of sea salt. Its open crumb is perfect for soaking up liquids.
It also makes fantastic sandwiches; the sturdy crust holds up well to fillings, while the soft interior provides a pleasant contrast. Consider slicing it horizontally for panini or cutting it into chunks for dipping into soups or stews. Toasted slices are wonderful topped with bruschetta, or used for garlic bread. The large holes also make it ideal for mopping up sauces on a plate. Don't hesitate to experiment – its simple, rustic flavor pairs well with a wide range of sweet and savory accompaniments.
Proper Storage to Maintain Freshness
High hydration ciabatta is best enjoyed fresh, ideally within a day or two of baking. However, if you need to store it, proper technique can help maintain its quality for a little longer. Once the loaf has cooled completely on a wire rack (this is crucial; storing warm bread traps moisture and makes the crust soggy), store it at room temperature.
The best way to store ciabatta is loosely wrapped in a paper bag. This allows the crust to breathe, helping to maintain its crispness. Avoid plastic bags or airtight containers, as these will trap moisture and quickly turn the crust soft and the interior gummy. Stored in a paper bag, the crust will soften somewhat over time, but the interior will remain relatively good for 2-3 days. For longer storage, freezing is the best option.
Reheating Ciabatta for Optimal Texture
If your easy high hydration ciabatta has gone a little soft after storage, or if you've frozen it, reheating can help revive its wonderful texture. To reheat a whole or partial loaf, preheat your oven to around 350-375°F (175-190°C). Place the ciabatta directly on the oven rack or on a baking sheet.
Bake for 5-10 minutes, or until the crust is crisp again and the interior is warmed through. If reheating from frozen, you can place the frozen loaf directly in the preheated oven and bake for 15-25 minutes, or until heated through and the crust is refreshed. This reheating method helps to crisp up the crust and restore some of the bread's original airy appeal, making day-old or frozen easy high hydration ciabatta almost as good as fresh.
Conclusion: Mastering the Art of Easy High Hydration Ciabatta.
Frequently Asked Questions
What does "high hydration" mean in the context of ciabatta bread?
High hydration refers to a dough with a high ratio of water to flour, typically 75% or more. This creates the signature airy texture of ciabatta.
Why is high hydration ciabatta dough often considered difficult to work with?
High hydration dough is very sticky and loose, making it challenging to shape and handle. This requires specific techniques to develop strength.
What are some tips for managing a high hydration ciabatta dough?
Use techniques like folding and stretching to develop gluten strength without excessive kneading. Keep your hands and work surface well-floured to prevent sticking.
What kind of flour is best for a high hydration ciabatta?
Strong bread flour with a high protein content is recommended. This helps to absorb the water and develop the necessary gluten structure.
How does the "BakeWithEase" recipe make high hydration ciabatta more manageable?
The recipe provides step-by-step instructions and emphasizes techniques like gentle handling. It also focuses on easy-to-find ingredients for a less daunting experience.
Final Reflection: The Humble Loaf, the Unexpected Journey
The pursuit of the perfect high-hydration ciabatta, once a seemingly daunting task for home bakers, is now more accessible than ever. Mastering this airy, open-crumbed bread isn't just about technique; it's about embracing a process, understanding the nuances of flour and water, and finding joy in the transformation of simple ingredients. This journey, as detailed in this article, proves that even the most challenging baking projects can be broken down into manageable steps.
The impact of accessible baking knowledge, particularly in the realm of artisan breads, is profound. It empowers individuals to connect with their food on a deeper level, fostering a sense of accomplishment and self-sufficiency. This resonates deeply with me, as I've witnessed firsthand the satisfaction that comes from crafting something beautiful and delicious from scratch. Bread is the staff of life,
they say, and I believe that the act of making it is equally nourishing for the soul. The journey of mastering this recipe, and sharing it, has been a testament to the power of shared knowledge and the enduring appeal of simple, wholesome food.
Now, it's your turn. Don't be intimidated by the seemingly complex world of high-hydration doughs. Take the techniques outlined in this article, experiment with different flours and hydration levels, and most importantly, embrace the process. The reward? A crusty, airy ciabatta loaf that will not only delight your palate but also fill you with a sense of pride and accomplishment. The journey to baking mastery is a personal one – begin yours today.
Unlock Your Ciabatta Dreams: Bake the Perfect Loaf Today!
Thanks for taking the time to explore the world of airy, high-hydration ciabatta with us! We hope you gained valuable insights into mastering this seemingly complex bread. Now it's time to put your newfound knowledge into action.
- Bake your own ciabatta masterpiece! Use the recipe and techniques discussed above to create a loaf you'll be proud of. Don't be afraid to experiment—that's where the real magic happens!
- Share your ciabatta journey! Post a picture of your creation on social media and tag us – we'd love to see your results!
- Explore more advanced techniques: Check out our other articles on sourdough starters and shaping techniques to further elevate your baking skills.
What unexpected ingredient or technique are you most excited to try in your next ciabatta attempt?