
Honey Wheat Rolls: A Touch of Sweetness & Health

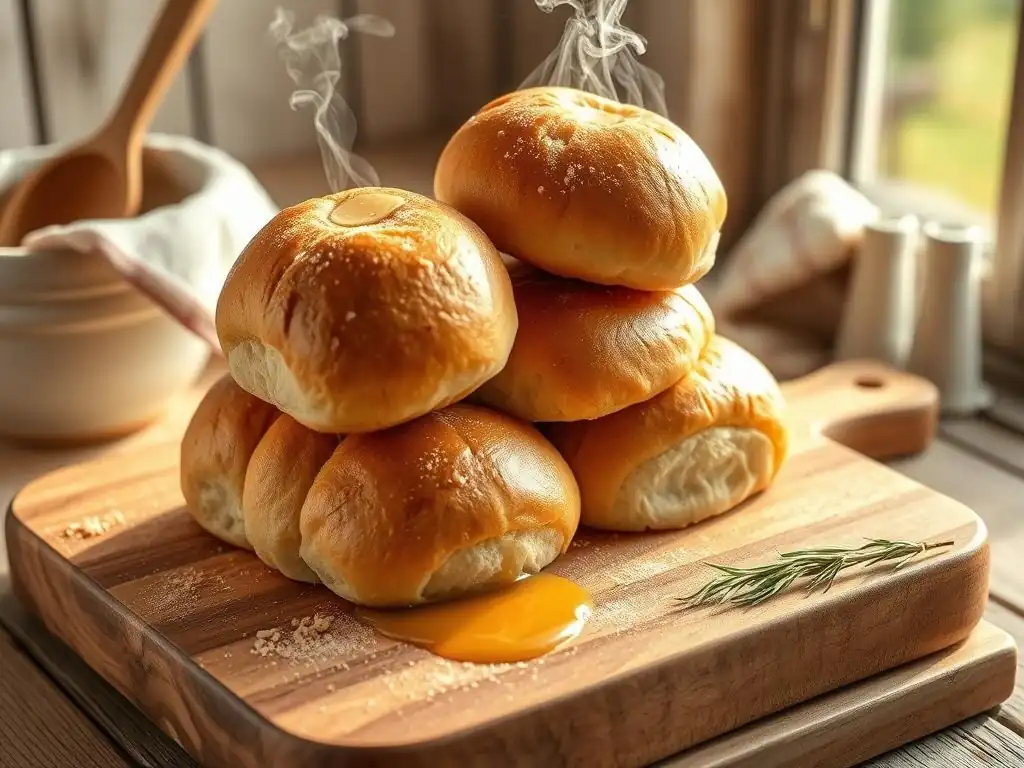
Welcome to BakeWithEase, your haven for unlocking baking brilliance!
Craving the aroma of freshly baked bread, but intimidated by complex recipes? You're in the right place. Today, we're diving into the delightful world of bread baking with a recipe that's both simple and satisfying. Prepare to be amazed by our Honey Wheat Rolls, a perfect blend of sweetness and wholesome goodness. But first, what makes our easy honey wheat bread recipe so special, and how can you adapt it to create these irresistible rolls? Let's find out...
- Honey Wheat Rolls: A Touch of Sweetness & Health - BakeWithEase.com
- Introduction to Honey Wheat Rolls: The Perfect BakeWithEase Treat
- Mastering the Easy Honey Wheat Bread Recipe: A Step-by-Step Guide
- Shaping and Baking Your Homemade Honey Wheat Rolls
- Tips and Tricks for the Best Honey Wheat Rolls: BakeWithEase Secrets
- Variations and Add-ins for Your Honey Wheat Rolls
- Storing and Serving Your Honey Wheat Rolls: Freshness Guaranteed
- Troubleshooting Common Honey Wheat Roll Baking Problems
- Enjoying Your Homemade Easy Honey Wheat Bread Recipe
-
Frequently Asked Questions
- What makes these Honey Wheat Rolls "easy"?
- Can I substitute any ingredients in the Honey Wheat Rolls recipe?
- How do I ensure my Honey Wheat Rolls are soft and fluffy?
- What is the best way to store leftover Honey Wheat Rolls?
- Can I use this recipe to make a loaf of Honey Wheat bread instead of rolls?
- Final Reflection: The Enduring Allure of Simple Baking
- Unleash Your Inner Baker: Craft These Delightful Rolls!
Honey Wheat Rolls: A Touch of Sweetness & Health - BakeWithEase.com
Introduction to Honey Wheat Rolls: The Perfect BakeWithEase Treat
Welcome to BakeWithEase, where we believe that mastering baking should be a joyful and accessible journey for everyone. Today, we're diving into the wonderful world of honey wheat rolls. These delightful rolls strike a perfect balance between wholesome goodness and a touch of natural sweetness, making them a fantastic addition to any meal or a satisfying snack on their own. Learning this easy honey wheat bread recipe is a rewarding experience that yields soft, flavorful results you'll be proud to share.
Our philosophy at BakeWithEase centers around empowering bakers of all skill levels. This easy honey wheat bread recipe exemplifies that approach. We break down each step, explaining not just what to do, but why certain techniques are important. Whether you're a complete novice or looking to expand your bread-making repertoire, you'll find the guidance here straightforward and encouraging, helping you create perfect homemade honey wheat rolls every time.
Why Choose Honey Wheat Rolls? A Healthier and Delicious Option
Choosing to bake honey wheat rolls offers several compelling advantages over traditional white rolls, blending nutritional benefits with undeniably delicious flavor. Whole wheat flour, a key ingredient in an easy honey wheat bread recipe, provides significantly more dietary fiber compared to refined white flour. For instance, a cup of whole wheat flour typically contains around 12-14 grams of fiber, while a cup of all-purpose white flour might only have 3-4 grams. This increased fiber content supports digestive health and can contribute to feeling fuller for longer.
Beyond fiber, honey wheat rolls also often contain more vitamins and minerals inherent in the wheat germ and bran that are removed during the refining process of white flour. Honey itself adds more than just sweetness; it's a natural humectant, meaning it helps retain moisture in the bread, resulting in a softer, more tender crumb that stays fresh longer.
While it's still a sugar, using honey allows for a unique depth of flavor and can sometimes mean using slightly less added sugar overall compared to recipes relying solely on granulated sugar. Baking these homemade honey wheat rolls is a step towards incorporating more wholesome ingredients into your diet without sacrificing taste or texture.
Understanding the BakeWithEase Philosophy: Simple Recipes, Great Results
At BakeWithEase, our core principle is demystifying baking. We believe that anyone can create delicious baked goods with the right guidance and a little practice. Our recipes, including this easy honey wheat bread recipe, are designed to be approachable, breaking down complex processes into simple, manageable steps. We focus on clear instructions, helpful tips, and explanations that build your understanding and confidence in the kitchen.
Our aim is to remove the intimidation often associated with bread making. We understand that working with yeast, kneading dough, and proofing can seem daunting at first. That's why we emphasize techniques that are beginner-friendly and forgiving. By following our straightforward methods, you'll not only successfully bake fantastic homemade honey wheat rolls but also gain fundamental skills that can be applied to a wide range of other baking projects. We're here to guide you from gathering ingredients to enjoying your freshly baked creations.
Mastering the Easy Honey Wheat Bread Recipe: A Step-by-Step Guide
Embarking on the journey to bake your own honey wheat rolls is an exciting step! This easy honey wheat bread recipe is designed to be simple and rewarding. We'll walk you through each stage, ensuring you understand the process and achieve fantastic results right from your first batch of homemade honey wheat rolls.
Gathering Your Ingredients for the Honey Wheat Dough
Success in baking starts with having the right ingredients on hand and understanding their role. For this easy honey wheat bread recipe, you'll need a few key components that work together to create soft, flavorful rolls. Ensure your ingredients are fresh, especially the yeast and flour, as this is crucial for a successful bake.
Having everything measured out before you begin, a practice known as mise en place, is highly recommended. This prevents you from scrambling mid-recipe and ensures accuracy. You'll need specific quantities of flour, yeast, warm liquid (usually milk or water), honey, butter (or oil), salt, and potentially an egg for richness or an egg wash. Quality ingredients make a noticeable difference in the final taste and texture of your homemade honey wheat rolls.
Honey Wheat Flour: The Base of Your Delicious Rolls
Honey wheat flour is the cornerstone of this easy honey wheat bread recipe, providing both the structure and characteristic flavor. It's essentially a blend of whole wheat flour and honey, often with some added white flour to balance the texture. The whole wheat portion contributes fiber, nutrients, and a slightly nutty taste, while the honey adds natural sweetness and aids in moisture retention.
When selecting your flour, look for one labeled specifically as "honey wheat" or ensure you have both whole wheat and all-purpose flour if the recipe calls for a blend. The ratio of whole wheat to white flour will impact the roll's density and texture; more whole wheat will result in a denser roll. Store your flour in a cool, dry place, ideally in an airtight container, to maintain freshness and prevent it from absorbing moisture or odors. Fresh flour is essential for proper gluten development and rising in your homemade honey wheat rolls.
Yeast Selection: Active Dry vs. Instant Yeast
Yeast is the magical leavening agent that makes your honey wheat rolls light and fluffy. For an easy honey wheat bread recipe, you'll typically use either active dry yeast or instant yeast. Understanding the difference is key to successful rising. Active dry yeast usually comes in small granules and needs to be dissolved in warm liquid (often called "proofing") before being added to the dry ingredients. This step ensures the yeast is alive and active, indicated by foaming.
Instant yeast, on the other hand, is more finely ground and can usually be mixed directly with the dry ingredients. It activates faster and often allows for a shorter rise time. While you can often substitute one for the other, you might need to adjust the quantity slightly (sometimes using about 25% less instant yeast than active dry) and be mindful of whether the recipe includes a proofing step for active dry yeast. Checking the expiration date on your yeast packet is crucial; expired yeast is the most common reason for dough failing to rise.
The Sweetness of Honey: Choosing the Right Type
Honey is not just a sweetener in this easy honey wheat bread recipe; it contributes moisture, flavor, and helps achieve that beautiful golden-brown crust. The type of honey you use can subtly influence the final taste of your homemade honey wheat rolls. Lighter, milder honeys like clover or acacia will provide sweetness without overpowering the wheat flavor, while darker, more robust honeys like buckwheat or wildflower will lend a more pronounced, complex note.
Liquid or creamed honey works well in baking. Avoid crystallized honey unless you gently warm it to liquefy it first. Be precise with your measurement, as honey is dense and sticky. Greasing your measuring cup or spoon slightly before measuring honey can help it slide out easily. The natural enzymes in honey also play a small role in breaking down starches, contributing to the bread's texture and aiding in browning during baking.
Preparing the Honey Wheat Bread Dough: A Beginner-Friendly Approach
Mixing and kneading the dough are fundamental steps in this easy honey wheat bread recipe. Don't be intimidated; it's a process that becomes intuitive with practice. This stage is where the ingredients come together, and the gluten structure necessary for a soft, airy roll begins to develop.
The goal is to create a smooth, elastic dough that is slightly tacky but not overly sticky. Pay attention to the feel of the dough as you mix and knead, as environmental factors like humidity can affect the amount of flour needed. Resist the urge to add too much flour, which can result in dry, dense rolls. Follow the recipe's quantities but be prepared to make minor adjustments based on your dough's consistency.
Activating the Yeast for Optimal Rising
If your easy honey wheat bread recipe calls for active dry yeast, the activation step is crucial. This involves dissolving the yeast in warm liquid, typically milk or water, heated to a specific temperature range. The ideal temperature is usually between 105°F and 115°F (40°C to 46°C). Water that is too cold won't activate the yeast, while water that is too hot can kill it.
After adding the yeast to the warm liquid (often with a pinch of sugar or honey to feed it), let it sit for 5-10 minutes. You should see a foamy layer develop on the surface. This foam indicates that the yeast is alive and active, ready to leaven your dough. If no foam appears after 10 minutes, your yeast may be expired or the water temperature was incorrect, and you'll need to start this step over with fresh yeast.
Combining Wet and Dry Ingredients: Achieving the Perfect Consistency
Once your yeast is activated (or if using instant yeast, mixed with dry ingredients), it's time to combine everything. In a large mixing bowl, whisk together your dry ingredients: the honey wheat flour blend, salt, and potentially dry yeast if using instant. In a separate bowl or directly with the dry ingredients (depending on your method), combine the activated yeast mixture (or warm liquid), melted butter or oil, honey, and any other wet components like eggs.
Gradually add the wet ingredients to the dry, mixing with a spoon, spatula, or stand mixer fitted with a dough hook. Mix until a shaggy dough forms and most of the flour is incorporated. At this point, the dough will likely be sticky. The goal is to achieve a consistency that pulls away from the sides of the bowl but might still stick slightly to the bottom. This hydration level is important for a tender crumb in your easy honey wheat bread recipe.
Kneading the Dough: Developing Gluten for a Soft Texture
Kneading is the process of developing the gluten structure in the dough, which is essential for creating light and airy rolls. Gluten is a protein network formed when flour and liquid are mixed and then worked. As you knead, these proteins align and create elastic strands that trap the carbon dioxide produced by the yeast, causing the dough to rise.
You can knead by hand on a lightly floured surface or using a stand mixer with a dough hook. Kneading by hand typically takes 8-12 minutes, while a stand mixer might take 6-10 minutes on medium speed. The dough is properly kneaded when it becomes smooth, elastic, and springs back slowly when gently poked.
A common test is the "windowpane test": carefully stretch a small piece of dough; if you can stretch it thin enough to see light through it without it tearing, the gluten is well-developed. Proper kneading is crucial for the texture of your homemade honey wheat rolls.
First Rise: Allowing the Dough to Expand
After kneading, the dough needs time to rest and rise. This process, called the first fermentation or bulk proofing, allows the yeast to produce carbon dioxide, expanding the dough and developing flavor. This is a vital step in any easy honey wheat bread recipe.
Place the kneaded dough in a lightly oiled bowl, turning the dough to coat all sides. This prevents it from sticking. Cover the bowl tightly with plastic wrap or a damp kitchen towel to prevent the surface from drying out and forming a crust, which would inhibit rising.
Creating the Ideal Environment for Dough Rising
The temperature of the environment significantly impacts how quickly your dough rises. An ideal temperature range for proofing is typically between 75°F and 80°F (24°C to 27°C). Warmer temperatures speed up yeast activity, while cooler temperatures slow it down. Avoid placing the dough in a drafty or cold spot.
Common places to proof dough include:
- On the kitchen counter in a warm room.
- In a slightly warmed oven (turn the oven on for just a minute or two, then turn it off before placing the dough inside).
- In a microwave (turned off) with a cup of hot water alongside the dough.
The first rise for an easy honey wheat bread recipe typically takes 1 to 1.5 hours, or until the dough has roughly doubled in size. Patience is key here; don't rush this step.
Determining When the Dough is Ready
Knowing when your dough has finished its first rise is important for achieving the best texture in your homemade honey wheat rolls. The primary indicator is that the dough should have approximately doubled in volume. However, simply looking at it isn't always enough.
A reliable method is the "poke test." Gently press two fingers about half an inch deep into the dough. If the indentations remain and do not spring back, the dough is ready for the next step. If the indentations spring back immediately, the dough needs more time to rise. If the dough deflates completely when poked, it has over-risen. While slightly over-risen dough can sometimes be salvaged, aiming for the "indentations remain" stage is best for optimal results.
Shaping and Baking Your Homemade Honey Wheat Rolls
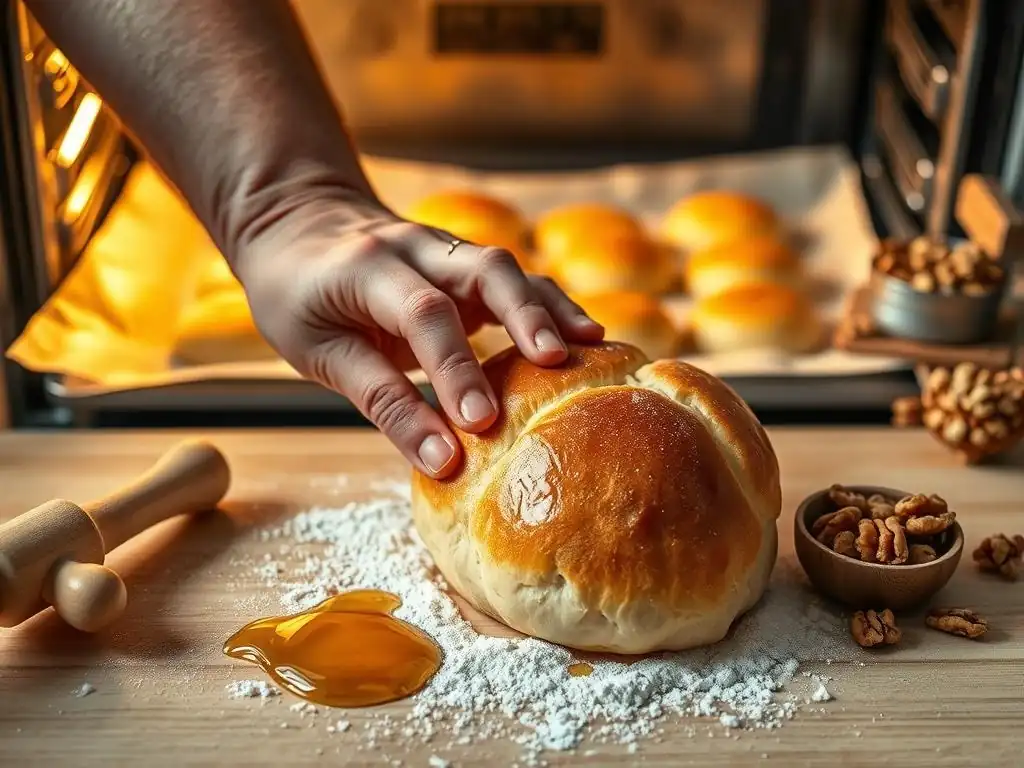
Once the first rise is complete, you're halfway to enjoying your delicious homemade honey wheat rolls! The next steps involve shaping the dough into individual rolls and then baking them to golden perfection. This stage is where the easy honey wheat bread recipe really comes together.
Dividing and Shaping the Dough: Creating Uniform Rolls
After the first rise, gently punch down the dough to release the excess gas. This also helps redistribute the yeast and equalizes the temperature throughout the dough. Turn the dough out onto a lightly floured surface. The next step is to divide the dough into equal portions to ensure your rolls bake evenly and have a consistent size.
Using a kitchen scale is the most accurate way to achieve uniform rolls. For medium-sized rolls, aim for portions weighing between 2.5 and 3 ounces (about 70-85 grams) each. If you don't have a scale, divide the dough roughly into the desired number of pieces. Evenly sized rolls are not just aesthetically pleasing but also crucial for consistent baking time.
Different Shaping Techniques for Honey Wheat Rolls
There are several simple ways to shape your dough portions into rolls for this easy honey wheat bread recipe. The most common method is creating round rolls. To do this, take a portion of dough and flatten it slightly.
Pull the edges of the dough into the center, pinching them together to form a seam on the bottom. Then, cup your hand around the dough ball on a clean, unfloured surface and gently roll it in a circular motion, applying light pressure, until a smooth, taut ball forms. The surface tension created helps the roll hold its shape during the second rise and baking.
Other techniques include shaping them into oblong rolls, knots, or even Parker House rolls (folded squares). For oblong rolls, shape the dough into a cylinder. For knots, roll the dough into a rope and tie it into a simple knot. Experiment with different shapes to find what you enjoy most; the basic dough from your easy honey wheat bread recipe is versatile.
Proofing the Shaped Rolls: The Second Rise
After shaping, the rolls need a second rise, also known as proofing. This allows the yeast to produce more gas, making the rolls light and airy before baking. Arrange the shaped rolls on a baking sheet lined with parchment paper, leaving enough space between them (about 1-2 inches) as they will expand.
Cover the rolls loosely with plastic wrap or a light kitchen towel. Allow them to rise in a warm, draft-free place for 30-45 minutes, or until they appear puffy and have increased significantly in size (they won't quite double like the first rise). The poke test can also be used here: gently poke a roll; if the indentation springs back slowly, leaving a slight mark, they are ready to bake. Over-proofing can lead to rolls that collapse in the oven.
Baking the Rolls to Golden Perfection
Baking is the final step in transforming your proofed dough into delicious homemade honey wheat rolls. Proper oven temperature and timing are key to achieving a beautiful golden-brown crust and a perfectly cooked interior.
Preheat your oven while the rolls are completing their second rise. Ensure the oven reaches the correct temperature before placing the rolls inside. This initial burst of heat helps the rolls rise quickly (oven spring) before the crust sets.
Oven Temperature and Baking Time: Achieving the Perfect Crust
For most easy honey wheat bread recipes baked as rolls, a common oven temperature range is between 375°F and 400°F (190°C to 200°C). Baking at this temperature helps create a nice crust while ensuring the interior cooks through evenly. The exact temperature might vary slightly depending on your oven and the specific recipe.
Baking time for standard-sized rolls is typically 15 to 20 minutes. However, this can vary based on the size of your rolls and your oven's calibration. Start checking for doneness around the 15-minute mark. The rolls should be golden brown on top and bottom.
Checking for Doneness: The Touch Test and Internal Temperature
To be certain your homemade honey wheat rolls are fully baked, rely on more than just visual cues. While a golden-brown color is a good indicator, the best way to check is by testing the internal temperature. Use an instant-read thermometer inserted into the center of a roll; it should register between 190°F and 200°F (88°C to 93°C).
Another simple test is the "thump test." Carefully remove a roll from the baking sheet (use oven mitts!) and tap the bottom. A properly baked roll will sound hollow when tapped. If it sounds dense or feels heavy, it likely needs a few more minutes in the oven. Don't underbake, as this results in a gummy texture, but also avoid overbaking, which can make the rolls dry.
Tips and Tricks for the Best Honey Wheat Rolls: BakeWithEase Secrets
Creating truly outstanding homemade honey wheat rolls from an easy honey wheat bread recipe involves more than just following the basic steps. Here are a few BakeWithEase secrets that can elevate your rolls from good to absolutely amazing, ensuring they are consistently soft, flavorful, and moist.
Experimenting with these techniques after you've mastered the basic recipe can significantly improve your results. These tips address common issues like dryness and lack of flavor, ensuring your next batch of honey wheat rolls is your best yet.
Ensuring a Soft and Tender Crumb: Using a Tangzhong Method
One highly effective technique for ensuring an incredibly soft and tender crumb in your honey wheat rolls is using the Tangzhong method. This is a Japanese technique where a small portion of the flour and liquid (usually milk or water) from the recipe is cooked into a thick paste or slurry before being added to the main dough ingredients. Typically, you'd heat about 5% of the flour and 25% of the liquid until it forms a paste similar to pudding.
Why does this work? Cooking the flour with liquid gelatinizes the starches, allowing the flour to absorb and retain significantly more liquid. This extra moisture remains in the dough throughout mixing, kneading, rising, and baking, resulting in rolls that are exceptionally soft, moist, and stay fresh for longer. Incorporating a Tangzhong into your easy honey wheat bread recipe is a simple step that yields impressive results in crumb texture.
Enhancing the Honey Flavor: Brushing with Honey Butter After Baking
To really highlight the delicious sweetness of honey in your homemade honey wheat rolls, consider brushing them with a simple honey butter glaze immediately after they come out of the oven. While the rolls are still hot, the glaze melts and is absorbed slightly into the crust, adding moisture, shine, and an extra layer of wonderful honey flavor.
To make honey butter, simply melt a couple of tablespoons of butter and whisk in a tablespoon or two of honey. You can also add a pinch of salt if you like a sweet and salty contrast. Brush this mixture generously over the tops and sides of the hot rolls using a pastry brush. The residual heat from the rolls will melt the butter and allow the honey mixture to soak in beautifully, boosting the flavor profile of your easy honey wheat bread recipe creation.
Preventing Dry Rolls: Covering with a Damp Cloth While Cooling
The cooling process is just as important as the baking process for achieving the perfect texture in your honey wheat rolls. As rolls cool, moisture can evaporate from the surface, potentially leading to a tougher crust or a slightly dry interior. A simple trick to combat this is to cover the rolls with a clean, damp (not soaking wet) kitchen towel as they cool on a wire rack.
Placing a damp cloth over the hot rolls helps to trap steam escaping from the interior, keeping the crust soft and pliable. It also allows the internal moisture to redistribute throughout the roll as it cools. This technique is particularly useful for rolls baked as individual pieces rather than a pull-apart loaf, as they have more surface area exposed. Allowing your homemade honey wheat rolls to cool properly under a damp cloth ensures they retain their delightful softness.
Variations and Add-ins for Your Honey Wheat Rolls
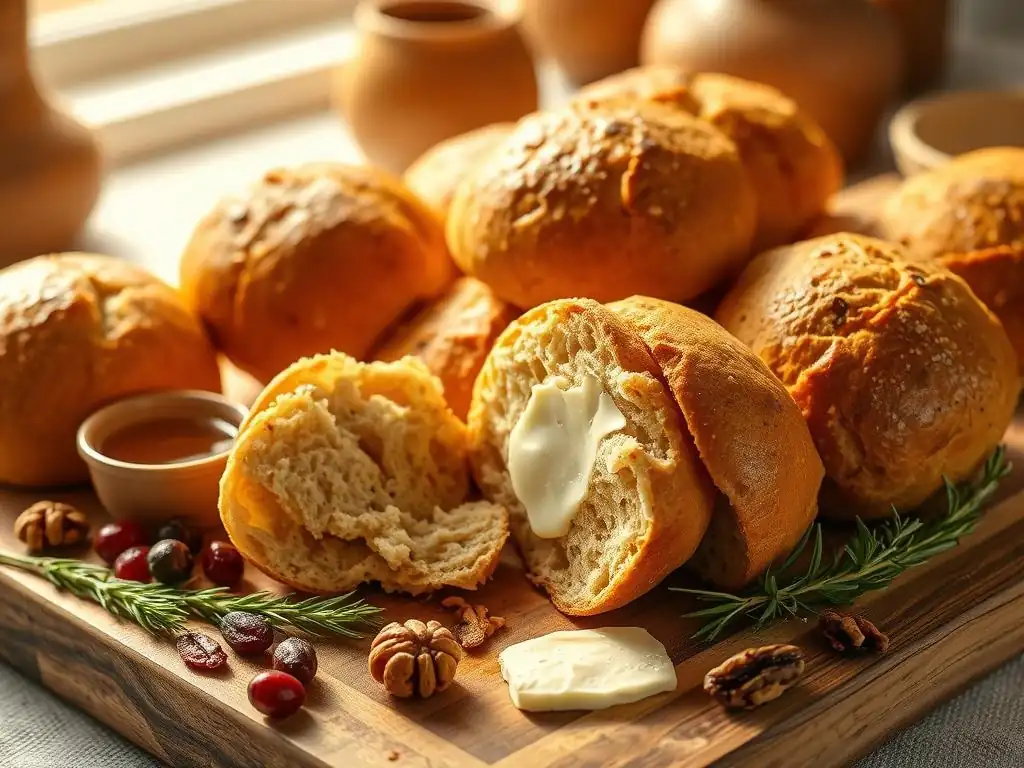
While the classic easy honey wheat bread recipe is fantastic on its own, one of the joys of baking is the ability to customize. The basic dough provides a wonderful canvas for incorporating various flavors and textures, allowing you to create unique batches of homemade honey wheat rolls tailored to different tastes and occasions.
Introducing add-ins or experimenting with flour blends can dramatically change the character of your rolls. Whether you prefer something sweet to serve with breakfast or a savory roll perfect for dinner, these variations can make your easy honey wheat bread recipe even more versatile and exciting.
Sweet Variations: Adding Cinnamon or Raisins
If you're looking to lean into the sweeter side of your honey wheat rolls, incorporating cinnamon or raisins is a delightful option. For cinnamon rolls, you can knead a teaspoon or two of ground cinnamon directly into the dough along with the dry ingredients. Alternatively, you can roll out the dough after the first rise, spread it with a mixture of melted butter, cinnamon, and brown sugar, roll it up like a log, slice it into rounds, and bake them as cinnamon-swirl honey wheat rolls.
Raisins add bursts of chewy sweetness. For best results, plump the raisins first by soaking them in warm water or juice for about 10-15 minutes, then drain them well. Gently knead the plumped raisins into the dough during the last minute or two of kneading. Use about 1/2 to 1 cup of raisins per batch of dough from your easy honey wheat bread recipe, depending on how many you like. These sweet variations are perfect for breakfast or a sweet snack.
Savory Variations: Incorporating Herbs or Cheese
Honey wheat rolls don't have to be exclusively sweet! They also pair beautifully with savory additions. Fresh or dried herbs can be kneaded into the dough. Consider adding a tablespoon or two of finely chopped fresh rosemary, thyme, or chives, or a teaspoon of dried Italian seasoning or garlic powder. These herbs infuse the rolls with aromatic flavor, making them an excellent accompaniment to soups, stews, or roasted meats.
Cheese is another fantastic savory add-in. Grated sharp cheddar, Parmesan, or a blend of Italian cheeses can be folded into the dough during the final stages of kneading. About 1/2 to 1 cup of grated cheese works well for a standard batch. Cheese adds richness and a tangy depth of flavor. You can also sprinkle cheese on top of the rolls before baking for a crispy crust. These savory twists transform your easy honey wheat bread recipe into a versatile side dish.
Exploring Different Flour Combinations: Spelt Flour
While an easy honey wheat bread recipe traditionally uses a blend including whole wheat, you can experiment with other whole grains to alter the flavor and texture. Spelt flour is an ancient grain that can be used in place of some or all of the whole wheat flour. Spelt has a slightly nutty, sweeter flavor than modern wheat and is often easier to digest for some people.
When substituting, keep in mind that spelt flour can sometimes behave differently than wheat flour; it may require slightly less liquid or less kneading as its gluten structure is more delicate. You can start by substituting 25-50% of the whole wheat flour with spelt flour in your easy honey wheat bread recipe. This will give your homemade honey wheat rolls a subtly different flavor profile and a wonderfully tender crumb. Experimenting with flour blends opens up a whole new world of bread baking possibilities.
Storing and Serving Your Honey Wheat Rolls: Freshness Guaranteed
You've successfully baked a beautiful batch of homemade honey wheat rolls from your easy honey wheat bread recipe! Now, how do you keep them fresh, and what are the best ways to enjoy them? Proper storage is key to maintaining that soft texture and delicious flavor for as long as possible.
Serving your rolls warm is always a treat, but knowing how to store them correctly means you can enjoy them over several days. Whether you plan to eat them all within a day or two or save some for later, these tips will help you preserve their quality.
Proper Storage Techniques to Maintain Freshness
To keep your honey wheat rolls fresh at room temperature, allow them to cool completely on a wire rack first. Storing warm rolls will create condensation, making them soggy. Once cooled, place the rolls in an airtight container or a resealable plastic bag. A bread box also works well if the rolls are kept sealed inside a bag. Stored this way, they will typically remain fresh for 2-3 days.
For longer storage, freezing is an excellent option. Once completely cooled, place the rolls in a single layer on a baking sheet and freeze for about an hour until firm. Then, transfer the firm rolls to a freezer-safe bag or container, pressing out as much air as possible. Frozen honey wheat rolls can last for up to 2-3 months. To thaw, simply take out the desired number of rolls and let them sit at room temperature for an hour or two, or gently warm them in a low oven.
Serving Suggestions: Pairing Your Rolls with Meals
Homemade honey wheat rolls from an easy honey wheat bread recipe are incredibly versatile and can be served in numerous ways. They are perfect alongside hearty meals like soups, stews, chili, or roasted chicken. Their slight sweetness complements both savory and sweet dishes.
Serve them warm with a pat of butter, or with honey butter for an extra treat (as mentioned in the tips section). They also make excellent small sandwiches or sliders. Consider slicing them horizontally and filling them with deli meats, cheese, or even pulled pork. For a sweeter take, slice and serve with jam, cream cheese, or use them as a base for mini bread puddings. The possibilities for enjoying your delicious homemade honey wheat rolls are nearly endless!
Troubleshooting Common Honey Wheat Roll Baking Problems
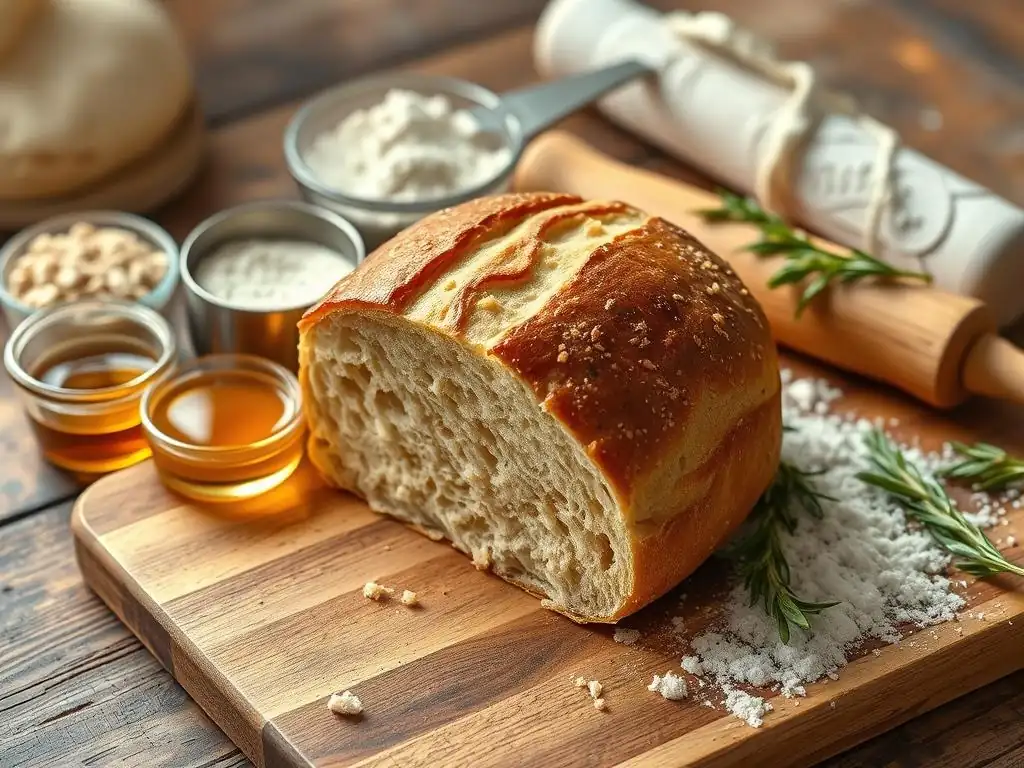
Even with an easy honey wheat bread recipe, sometimes things don't go exactly as planned. Don't get discouraged! Baking is a science, and understanding common issues can help you identify what went wrong and how to fix it for your next batch of homemade honey wheat rolls.
Encountering a problem is an opportunity to learn and improve your baking skills. Most issues with bread making are related to ingredient freshness, temperature, or technique. Let's look at some frequent challenges and their potential solutions.
Dough Not Rising: Identifying Potential Issues
One of the most frustrating problems in bread baking is when your dough fails to rise, or rises very little. This almost always points to an issue with the yeast.
Here are the primary culprits:
Expired Yeast: Yeast has a shelf life. Check the date on the packet or jar. If it's past its prime, it won't be active.Incorrect Water Temperature: If using active dry yeast, the water must be warm enough to activate it (105-115°F / 40-46°C) but not so hot that it kills it (above 130°F / 54°C). Use a thermometer to be precise.Insufficient Proofing Time or Cold Environment: Dough needs time and warmth to rise. Ensure your kitchen isn't too cold and that you're allowing sufficient time for the first and second rises according to your easy honey wheat bread recipe.Too Much Salt: Salt is essential for flavor and controlling yeast activity, but too much can inhibit or even kill the yeast. Measure your salt accurately.
If your dough didn't rise, unfortunately, you'll likely need to start over with fresh yeast and careful temperature control.
Rolls Too Dense: Correcting the Recipe or Technique
Dense rolls are usually the result of issues with rising or kneading. If your homemade honey wheat rolls turned out heavy and brick-like, consider the following:
Insufficient Kneading: If the gluten wasn't properly developed through kneading, the dough won't have the structure to trap gases produced by the yeast, resulting in a dense crumb. Ensure you kneaded long enough until the dough was smooth and elastic.Under-Proofing: If the dough or shaped rolls didn't rise sufficiently during the first or second rise, they won't be light and airy. Ensure the dough doubles (first rise) and becomes puffy (second rise) in a warm environment.Too Much Flour: Adding too much flour during mixing or kneading makes the dough stiff and heavy, inhibiting rising and resulting in a dry, dense roll. Stick to the recipe's measurements and only add minimal extra flour during kneading if necessary.Inactive Yeast: As mentioned above, yeast that isn't active won't produce enough gas to lighten the dough.
Reviewing your kneading technique and ensuring proper rising times and temperatures for your easy honey wheat bread recipe are key to achieving a light, tender crumb.
Burnt Rolls: Adjusting Baking Time and Temperature
Burnt or overly dark rolls are typically a matter of baking time, oven temperature, or placement.
Oven Temperature Too High: If your oven runs hot, the outside of the rolls will brown too quickly before the inside is cooked. Use an oven thermometer to verify your oven's temperature accuracy and adjust accordingly.Baking Time Too Long: Simply baking the rolls for too long will cause them to darken excessively and potentially dry out. Start checking for doneness at the minimum time specified in your easy honey wheat bread recipe and use the internal temperature test.Rolls Placed Too Close to Heating Element: If your baking sheet is on the rack closest to the bottom or top heating element, the rolls can burn. Ensure your oven rack is positioned in the middle of the oven.Sugary Glaze Applied Too Early: If you applied an egg wash or sugary glaze too early in the baking process, it can caramelize and burn before the rolls are done. Some glazes are best applied during the last few minutes of baking or immediately after.
Adjusting your oven temperature slightly lower and checking your rolls a few minutes earlier than the recipe suggests can help prevent burning in future batches of your homemade honey wheat rolls.
Enjoying Your Homemade Easy Honey Wheat Bread Recipe
Congratulations! You've successfully baked a batch of warm, delicious homemade honey wheat rolls using our easy honey wheat bread recipe. There's truly nothing quite like the smell of fresh bread filling your home and the satisfaction of creating something so wonderful from simple ingredients.
Take a moment to appreciate your accomplishment. Whether this was your first time baking bread or you're a seasoned pro, each batch is a unique creation. Enjoy the fruits of your labor and share them with those you care about.
Baking is often an act of love, and sharing your homemade honey wheat rolls is one of the most rewarding parts of the process. Serve them warm at your next family dinner, bring them to a gathering with friends, or simply enjoy them together over a casual meal.
Watch their faces light up as they taste the soft texture and subtle sweetness of your rolls. Be ready for compliments and maybe even requests for your easy honey wheat bread recipe! Sharing your baking not only spreads joy but also encourages others to perhaps try their hand at baking too, embodying the spirit of BakeWithEase.
Conclusion: The Joy of Baking Honey Wheat Rolls
Mastering this easy honey wheat bread recipe is a fulfilling achievement. From mixing the dough to watching it rise and finally pulling golden, fragrant rolls from the oven, each step offers its own satisfaction. You've learned about the role of ingredients, practiced essential techniques like kneading and proofing, and overcome potential challenges.
Baking homemade honey wheat rolls is more than just following instructions; it's about connecting with a timeless craft and creating something nourishing and delicious with your own hands. We hope this guide has made the process accessible and enjoyable for you. Keep baking, keep experimenting, and continue to find joy in the kitchen with BakeWithEase. Happy Baking!
Frequently Asked Questions
What makes these Honey Wheat Rolls "easy"?
The recipe focuses on simple steps and uses readily available ingredients. We've broken down the process to make it approachable for bakers of all skill levels.
Can I substitute any ingredients in the Honey Wheat Rolls recipe?
Yes, but with caution. You can often substitute different types of flour, but this will impact the texture. Also, the sweetness from honey is essential, so a substitute might alter the overall flavor profile.
How do I ensure my Honey Wheat Rolls are soft and fluffy?
Don't over-knead the dough. Also, using lukewarm liquids helps activate the yeast properly. Finally, ensuring the rolls have enough space to rise is crucial for a light and airy texture.
What is the best way to store leftover Honey Wheat Rolls?
Store them in an airtight container at room temperature for up to 2 days. For longer storage, you can freeze them in a freezer-safe bag for up to 3 months.
Can I use this recipe to make a loaf of Honey Wheat bread instead of rolls?
Yes, you can! Simply shape the dough into a loaf instead of rolls and adjust the baking time accordingly. Be sure to check for doneness with a toothpick inserted into the center before removing it from the oven.
Final Reflection: The Enduring Allure of Simple Baking
The humble honey wheat roll, a seemingly simple creation, speaks volumes about the enduring power of comfort food and the joy of homemade goodness in our increasingly fast-paced world. Its ease of preparation belies the satisfaction derived from creating something delicious and nourishing from scratch, a stark contrast to the convenience of pre-packaged alternatives. This recipe, designed for accessibility and ease, offers a pathway to reconnect with the fundamental pleasures of baking.
The influence of simple, wholesome recipes like this one extends far beyond the kitchen table. It's a reminder of slower rhythms, of family traditions passed down through generations, and of the importance of nurturing ourselves with wholesome ingredients. Baking is at once child's play and adult joy. And love, of course.
This quote perfectly encapsulates the magic of creating these rolls; it's a process that is both accessible and deeply fulfilling, offering a tangible connection to something larger than ourselves.
Now, I invite you to consider your own relationship with food and the simple pleasures in life. Will you embrace the opportunity to bake these honey wheat rolls, to experience the tactile satisfaction of kneading dough and the aromatic delight of freshly baked bread? Perhaps this recipe will inspire you to explore other simple, wholesome recipes, fostering a deeper connection to the food you consume and the traditions you cherish. The journey to a more mindful and fulfilling life often begins with the simplest of acts.
Unleash Your Inner Baker: Craft These Delightful Rolls!
Thanks for taking the time to explore the world of honey wheat rolls with us! We hope you've gained some valuable baking knowledge and inspiration. Ready to get your hands floury?
- Bake a batch of these honey wheat rolls today! Use the recipe as a starting point – experiment with different additions like nuts or dried fruit to personalize them.
- Share your baking journey with us and other enthusiastic bakers on our social media pages! We'd love to see your creations.
- Why not challenge yourself to try a new bread recipe next week? Let's build a community of passionate bakers!
What’s your favorite secret ingredient to elevate simple bread recipes?