
Mastering GlutenFree Flour Blends for Bread Baking Success

Welcome to BakeWithEase, your trusted guide to baking bliss!
Discover the secrets to achieving bakery-worthy loaves, even when going gluten-free. Are you ready to unlock the potential of gluten-free bread flour blends? We'll guide you through the nuances of creating perfect textures and flavors, empowering you to bake delicious, satisfying breads that everyone will love. Curious about the best blends and techniques? Let's embark on a bread-baking journey together!
- Understanding Gluten-Free Bread Flour Blends: A Baker's Guide
- Key Ingredients in Gluten-Free Bread Flour Blends
- Creating Your Own Gluten-Free Bread Flour Blends
- Troubleshooting Common Gluten-Free Bread Baking Problems
- Gluten-Free Bread Baking Techniques for Superior Results
- Storing Gluten-Free Bread for Optimal Freshness
- Delicious Gluten-Free Bread Recipes to Try
- Conclusion: Embrace the Art of Gluten-Free Bread Baking
-
Frequently Asked Questions
- What exactly is a gluten-free bread flour blend?
- Why can't I just use one type of gluten-free flour for bread?
- What are some common ingredients in gluten-free bread flour blends?
- How do I know which gluten-free bread flour blend is best for my recipe?
- Can I make my own gluten-free bread flour blend?
- Final Reflection: The Flour Power of Gluten-Free Baking
- Unlock Your Gluten-Free Baking Potential!
Understanding Gluten-Free Bread Flour Blends: A Baker's Guide
What is Gluten-Free Flour and Why Blend?
Gluten-free flour refers to any flour made from grains, seeds, nuts, or roots that do not contain gluten, the protein complex found in wheat, barley, and rye. For individuals with celiac disease, gluten sensitivity, or those simply choosing to avoid gluten, these flours are essential. However, baking with a single gluten-free flour, like rice flour or almond flour, often results in baked goods that lack the structure, elasticity, and texture we expect, especially in bread.
This is where gluten-free flour blends become crucial. A successful gluten-free bread flour blend is a carefully formulated mixture of several different flours and starches, often combined with binding agents. Each component contributes unique properties – some provide structure, others lightness, moisture retention, or chewiness. By combining these elements, bakers can create a blend that mimics the functional properties of wheat flour much more effectively, leading to significantly better results in gluten-free bread baking.
The Role of Gluten in Traditional Bread Baking
In traditional wheat-based bread baking, gluten plays a vital and complex role. When wheat flour is mixed with water and kneaded, two proteins, glutenin and gliadin, hydrate and link together to form a strong, elastic network called gluten. This network is responsible for the dough's ability to stretch and hold its shape.
As yeast ferments, it produces carbon dioxide gas. The elastic gluten network traps these gas bubbles, causing the dough to rise and develop its characteristic airy structure. During baking, the gluten network sets, giving the bread its final structure, texture, and chewiness. Without this gluten network, achieving a light, airy, and well-structured loaf is a significant challenge.
Challenges of Gluten-Free Bread Baking
The primary challenge in gluten-free bread baking stems directly from the absence of gluten. Dough made from single gluten-free flours or poorly formulated gluten-free bread flour blends lacks the elasticity needed to trap yeast-produced gases effectively. This often results in dense, heavy loaves that don't rise well.
Furthermore, gluten contributes to the overall texture and moisture retention in traditional bread. Gluten-free flours can sometimes lead to baked goods that are crumbly, dry, or have a gummy texture if not balanced correctly. Overcoming these issues requires a deep understanding of how different gluten-free ingredients interact and the specific techniques needed to build structure and manage moisture without the help of gluten.
The Benefits of Using Gluten-Free Flour Blends
Using a well-formulated gluten-free bread flour blend is perhaps the most significant step towards successful gluten-free bread baking. These blends are designed to compensate for the lack of gluten by combining flours and starches with complementary properties. For instance, a blend might combine the structure provided by brown rice flour with the lightness of tapioca starch and the moisture retention of potato starch.
Beyond structure and texture, gluten-free bread flour blends can also enhance flavor and nutritional profile. Blends often incorporate nutrient-rich flours like sorghum or teff, adding complexity and depth not found in single flours. Using a reliable blend simplifies the baking process, providing a consistent base that takes much of the guesswork out of achieving delicious, well-risen gluten-free bread.
Key Ingredients in Gluten-Free Bread Flour Blends
Gluten-Free Base Flours: Choosing the Right Foundation
Base flours provide the bulk of the blend and contribute structure, flavor, and nutritional value. They are often combined with starches to achieve the desired texture.
Rice Flour: White vs. Brown Rice Flour
Rice flour is a staple in many gluten-free bread flour blends due to its neutral flavor and relatively low cost. White rice flour is made from polished rice and is finer and lighter, contributing to a softer crumb. Brown rice flour, made from whole grain rice, is more nutritious, higher in fiber, and imparts a slightly nutty flavor and denser texture.
A blend might use a combination of both to balance structure and tenderness. For example, a common blend might use white rice flour as the primary base flour, perhaps making up 30-40% of the total flour weight in a gluten-free bread flour blend.
Brown rice flour is often used in blends aiming for a heartier, whole-grain loaf. Its higher fiber content can absorb more liquid, sometimes requiring slight adjustments to hydration. When formulating a gluten-free bread flour blend for rustic or whole-grain style breads, brown rice flour could make up a larger proportion, potentially 20-30% of the blend, alongside other whole-grain type gluten-free flours.
Tapioca Starch/Flour: Adding Structure and Chew
Tapioca starch, also known as tapioca flour, is derived from the cassava root. It is a very fine, white starch that is excellent for adding chewiness and elasticity to gluten-free baked goods. It helps create a desirable crust and contributes to a softer, less crumbly interior, which is particularly important in gluten-free bread flour blends.
Used in moderation, tapioca starch prevents the bread from becoming too dense or hard. It typically makes up a significant portion of the starch component in a gluten-free bread flour blend, often ranging from 15% to 25% of the total blend weight. Its slightly sweet flavor is also a pleasant addition.
Potato Starch: Enhancing Texture and Moisture
Potato starch is another common ingredient in gluten-free bread flour blends. It is a light, white starch that contributes to a tender crumb and helps retain moisture, preventing the bread from drying out quickly. It works well in combination with other starches and flours to create a balanced texture.
While similar in function to tapioca starch, potato starch can provide a slightly different mouthfeel and is often used alongside it. It might constitute 10% to 20% of a typical gluten-free bread flour blend. It's important not to confuse potato starch with potato flour, which is made from the whole potato and is much heavier and denser.
Sorghum Flour: A Nutritious and Versatile Option
Sorghum flour is a whole-grain flour with a mild, slightly sweet flavor and a fine texture. It's a good source of fiber and protein, adding nutritional value to gluten-free bread flour blends. It can contribute to a soft crumb and works well in various types of gluten-free bread.
This versatile flour can replace a portion of rice flour in a blend, adding complexity to the flavor profile. It is often used in blends for sandwich bread or sweeter loaves. Sorghum flour might make up 15% to 25% of the base flour component in a gluten-free bread flour blend, depending on the desired outcome and flavor.
Teff Flour: Adding a Unique Flavor and Texture
Teff flour is a tiny ancient grain native to Ethiopia, available in both ivory and brown varieties. It has a distinctive earthy, slightly molasses-like flavor and is highly nutritious, packed with iron and calcium. Teff flour adds a unique depth of flavor and a slightly rustic texture to gluten-free bread flour blends.
It is particularly well-suited for darker, heartier loaves or those with a sourdough profile. Due to its strong flavor and higher absorption rate, teff flour is often used in smaller quantities than rice or sorghum flour in a general-purpose blend, perhaps making up 10% to 20% of the base flour mix.
Gluten-Free Binding Agents: Mimicking Gluten's Elasticity
Since gluten-free bread flour blends lack gluten, binding agents are essential to provide structure, elasticity, and the ability to trap gases. They act as a sort of glue, holding the dough together and preventing it from becoming crumbly.
Xanthan Gum: The Most Popular Choice
Xanthan gum is a polysaccharide produced by the fermentation of sugar by the bacterium Xanthomonas campestris. It is the most widely used binding agent in gluten-free baking due to its effectiveness in mimicking gluten's elasticity and viscosity. It helps create a sticky, cohesive dough that can trap air bubbles, leading to a better rise and structure.
The amount of xanthan gum needed in a gluten-free bread flour blend varies depending on the recipe and the other ingredients, but it's typically used in small amounts relative to the total flour weight. For yeast breads, a common ratio is about 1 to 1.5 teaspoons of xanthan gum per cup of gluten-free bread flour blend (or roughly 1.5% to 2% of the total flour weight). Using too much can result in a gummy or unpleasant texture.
Guar Gum: An Alternative Binding Agent
Guar gum is a natural gum derived from guar beans. It functions similarly to xanthan gum as a thickener and stabilizer in gluten-free baking. While it can be used as a binder, some bakers find it less effective than xanthan gum in yeast breads, and it can sometimes produce a slightly different texture or flavor.
Guar gum is often used by individuals who have sensitivities to xanthan gum. If substituting guar gum for xanthan gum in a gluten-free bread flour blend recipe, it's generally recommended to use slightly more guar gum – perhaps 1.5 to 2 times the amount of xanthan gum called for, depending on the specific application. Experimentation is often needed to find the best ratio.
Psyllium Husk: Adding Fiber and Structure
Psyllium husk, derived from the seeds of the Plantago ovata plant, is primarily known as a fiber supplement, but it is also an excellent binder and structure builder in gluten-free bread. When mixed with liquid, psyllium husk forms a gel-like substance that provides elasticity and helps create a more pliable dough, similar to what gluten provides.
Psyllium husk is particularly effective in creating a soft, chewy crumb and a sturdy crust in gluten-free bread flour blends. It also adds significant dietary fiber. It is typically used at a ratio of about 1 to 2 tablespoons of whole psyllium husk (or slightly less powder) per cup of gluten-free bread flour blend, often mixed directly with the liquid ingredients before adding the dry blend. For example, a recipe might call for 10-15 grams of psyllium husk per 500 grams of gluten-free bread flour blend.
Flaxseed Meal: Another option to consider
Ground flaxseed, or flaxseed meal, is another ingredient that can act as a binder in gluten-free baking when mixed with water. Known as a "flax egg" when used in vegan baking, it forms a gel that helps hold ingredients together. While not as powerful a binder as xanthan gum or psyllium husk for providing the primary structure in yeast bread, it can contribute to binding and add moisture and nutritional value to gluten-free bread flour blends.
Flaxseed meal imparts a slightly nutty flavor and adds healthy omega-3 fatty acids and fiber. It can be used in combination with other binders to enhance texture and nutrition. A common ratio is mixing 1 tablespoon of flaxseed meal with 3 tablespoons of water and letting it sit for 5-10 minutes to form a gel before adding to the dough. When incorporated directly into a gluten-free bread flour blend, it might make up 5-10% of the mix.
Other Important Ingredients in Gluten-Free Bread Baking
Beyond flours, starches, and binders, several other ingredients play crucial roles in successful gluten-free bread baking using gluten-free bread flour blends. These components contribute to leavening, flavor, moisture, and overall texture.
Yeast: Selecting the Right Type
Yeast is the leavening agent that makes bread rise by producing carbon dioxide gas through fermentation. For gluten-free bread, instant yeast or rapid-rise yeast is often preferred because it can be mixed directly with the dry ingredients, including the gluten-free bread flour blend, without prior proofing. This simplifies the process.
Active dry yeast can also be used but typically requires proofing in warm liquid with a pinch of sugar before being added to the dry ingredients. Ensuring your yeast is fresh and active is paramount for achieving a good rise with any gluten-free bread flour blend. Check the expiration date and store yeast properly in a cool, dry place or the refrigerator/freezer.
Sugar: Feeding the Yeast and Adding Flavor
Sugar serves a dual purpose in gluten-free bread. Firstly, it provides food for the yeast, kickstarting the fermentation process and encouraging gas production, which is vital for lifting the dense gluten-free bread flour blend dough. A small amount of sugar is usually sufficient for this purpose.
Secondly, sugar contributes to the flavor and helps with browning of the crust during baking. While not strictly necessary for structure, a touch of sugar (like granulated sugar, honey, or maple syrup) improves the bread's overall taste and appearance. Typical recipes might use 1-3 tablespoons of sugar per loaf.
Salt: Controlling Yeast Activity and Enhancing Flavor
Salt is a critical ingredient in bread baking, both traditional and gluten-free. It controls the rate of yeast fermentation; without salt, the yeast can become too active and produce gas too quickly, leading to structural issues. Salt slows down the yeast, allowing for a more controlled rise.
Beyond its effect on yeast, salt is essential for enhancing the flavor of the bread. It brings out the subtle tastes of the gluten-free bread flour blends and other ingredients, preventing the bread from tasting bland. The typical salt ratio in bread is about 1.5% to 2% of the flour weight.
Eggs: Adding Structure and Richness
Eggs are frequently used in gluten-free bread recipes to provide additional structure, richness, and binding. The proteins in eggs help create a more stable crumb structure, which is particularly beneficial when working with gluten-free bread flour blends that lack the inherent structure of gluten.
Eggs also add moisture and fat, contributing to a softer, more tender crumb and a richer flavor. They can help improve the rise and prevent the bread from being too crumbly. Some recipes, particularly for sandwich loaves or enriched breads, might call for 1-2 large eggs per loaf, adding significantly to the final texture and quality.
Creating Your Own Gluten-Free Bread Flour Blends
Understanding Flour Ratios: Achieving the Right Balance
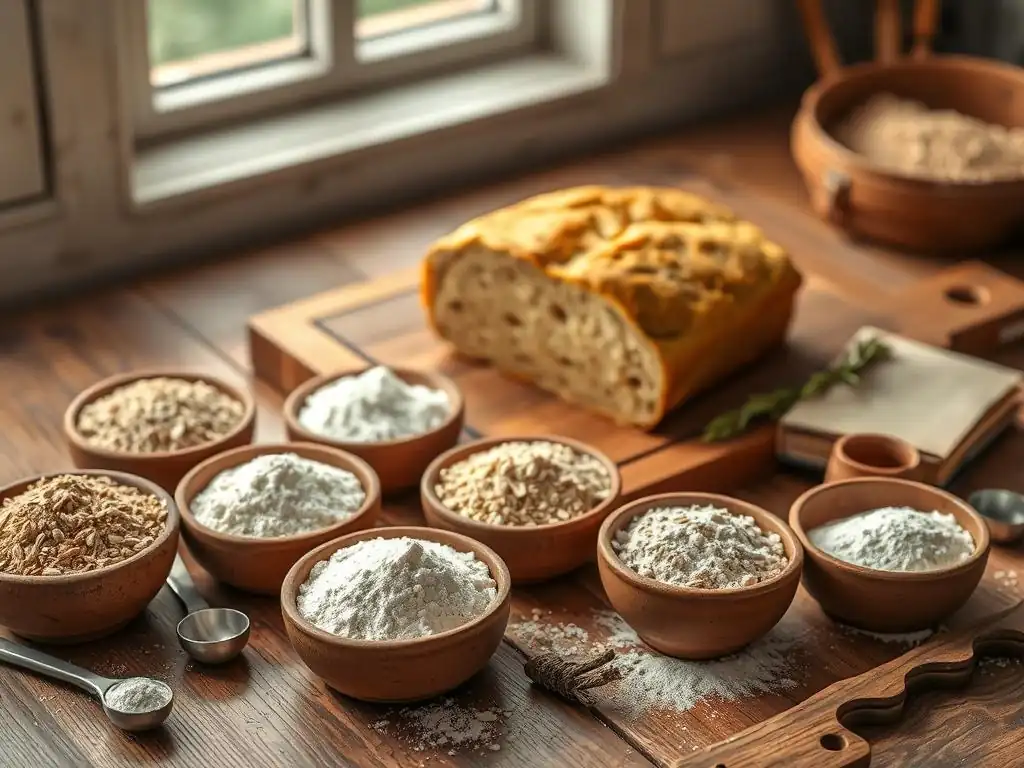
Creating your own gluten-free bread flour blend allows for customization based on specific dietary needs, flavor preferences, and the type of bread you want to bake. The key to success lies in understanding the role of each ingredient and finding the right ratios of base flours, starches, and binders.
A common principle is to balance "heavy" or absorbent flours (like brown rice, sorghum, teff) with "light" or less absorbent starches (like tapioca, potato, cornstarch). A typical starting point for a versatile gluten-free bread flour blend might involve roughly 60-70% base flours (a mix of rice, sorghum, etc.) and 30-40% starches. The binder (xanthan gum, psyllium husk, etc.) is then added based on the total weight of the flour and starch mixture.
Gluten-Free Flour Blend Recipes for Different Types of Bread
Tailoring your gluten-free bread flour blend to the specific bread type can dramatically improve results. A blend optimized for a light sandwich loaf will differ from one suited for a rustic, chewy boule.
All-Purpose Gluten-Free Bread Flour Blend Recipe
A good starting point for many bread recipes is a versatile gluten-free bread flour blend. A common ratio might be:
- 40% Brown Rice Flour
- 20% White Rice Flour
- 20% Tapioca Starch
- 20% Potato Starch
- Add 1.5 - 2 teaspoons xanthan gum per cup of blend when using in a recipe.
Combine these dry ingredients thoroughly and store in an airtight container. This blend provides a balance of structure, tenderness, and moisture, suitable for many basic gluten-free bread recipes.
Gluten-Free Blend Recipe for Rustic Breads
For rustic breads with a heartier flavor and chewier texture, a gluten-free bread flour blend might incorporate more whole-grain type flours and potentially psyllium husk for added structure and chew. Consider a blend like:
- 30% Brown Rice Flour
- 20% Sorghum Flour
- 10% Teff Flour
- 20% Tapioca Starch
- 20% Potato Starch
- Add 1.5 - 2 tablespoons whole psyllium husk per cup of blend when using in a recipe (or 10-15g psyllium per 500g blend).
This blend leverages the flavors and textures of different whole grains while still incorporating necessary starches and a robust binder like psyllium husk for that desired rustic chew.
Gluten-Free Blend Recipe for Sandwich Loaves
A gluten-free bread flour blend for soft sandwich loaves typically prioritizes a tender, light crumb. This often means a higher proportion of lighter starches and potentially white rice flour. A possible blend could be:
- 30% White Rice Flour
- 15% Sorghum Flour or Millet Flour
- 25% Tapioca Starch
- 20% Potato Starch
- 10% Cornstarch (for extra softness)
- Add 1.5 - 2 teaspoons xanthan gum per cup of blend when using in a recipe.
This blend focuses on achieving a soft, fine crumb that slices well, making it ideal for everyday sandwich bread using a gluten-free bread flour blend.
Gluten-Free Blend Recipe for Sourdough Breads
Gluten-free sourdough requires a blend that can support the longer fermentation and often higher hydration of sourdough starters. Psyllium husk is particularly popular here for its ability to create a strong gel structure. A gluten-free bread flour blend for sourdough might look like:
- 30% Brown Rice Flour
- 20% Sorghum Flour
- 20% White Rice Flour
- 30% Starch (Tapioca, Potato, or a mix)
- Add 1.5 - 2 tablespoons whole psyllium husk per cup of blend when using in a recipe (or 10-15g psyllium per 500g blend). Xanthan gum can also be used, but psyllium is often preferred for sourdough structure.
This blend provides a good base for the sourdough starter to work with, using a combination of flours and starches, heavily relying on psyllium husk to mimic the gluten network needed for a good sourdough rise and structure.
Tips for Mixing Gluten-Free Flour Blends
When creating your own gluten-free bread flour blend, thorough mixing is essential. The different flours, starches, and binders vary in density and particle size, and they must be evenly distributed throughout the blend to ensure consistent results in your baking.
Use a large bowl or container and whisk the ingredients together vigorously for several minutes. Alternatively, you can pulse the mixture in a food processor or blender to ensure everything is finely ground and evenly combined. Once mixed, store your gluten-free bread flour blend in an airtight container in a cool, dark place, or refrigerate/freeze for longer storage, as some gluten-free flours can go rancid more quickly than wheat flour. Proper storage helps maintain the quality and performance of your homemade blend.
Troubleshooting Common Gluten-Free Bread Baking Problems
Even with the best gluten-free bread flour blends, occasional issues can arise. Understanding common problems and their causes can help you adjust your technique and ingredients for better results.
Dense and Gummy Bread: Identifying the Causes
Dense and gummy textures are common pitfalls in gluten-free bread baking. This can often be attributed to insufficient leavening (yeast activity), too much binder (especially xanthan gum), or improper hydration. If your bread is dense, ensure your yeast is active and your proofing environment is warm enough (around 75-85°F or 24-29°C).
Gummy texture can result from too much starch or binder in your gluten-free bread flour blend, or insufficient baking time/temperature. Gluten-free bread needs to be baked thoroughly to set the starches. Try reducing the binder slightly in your next batch or increasing the baking time slightly, ensuring the internal temperature reaches around 205-210°F (96-99°C).
Dry and Crumbly Bread: Moisture Management
If your gluten-free bread is dry or falls apart easily, it usually indicates a lack of moisture or insufficient binding. Ensure your gluten-free bread flour blend contains enough ingredients that retain moisture, like potato starch or a small amount of flaxseed meal.
Check your recipe's hydration level. Gluten-free doughs often require more liquid than wheat doughs because gluten-free flours can be very absorbent. Increasing the liquid slightly (a tablespoon or two at a time) in your next bake can help. Also, ensure you are using an appropriate amount of binder (xanthan gum, psyllium husk) as it helps hold the crumb together.
Bread Doesn't Rise: Yeast Activation and Proofing
Poor rise is a sign that the yeast isn't working effectively, or the dough isn't proofing correctly. First, check your yeast's expiration date and ensure your liquid is the correct temperature for activation (usually around 105-115°F or 40-46°C for active dry yeast, or room temperature to 130°F/54°C for instant yeast when mixed with dry ingredients).
Ensure your dough is proofing in a warm, draft-free environment. Gluten-free doughs often benefit from a slightly warmer proofing temperature than wheat doughs. A proofer setting on an oven, a warm spot near a sunny window, or an oven with just the light on can work. Insufficient binder in the gluten-free bread flour blend can also hinder rise as the structure isn't strong enough to trap the gas.
Poor Crust Formation: Achieving a Golden Brown Crust
Achieving a desirable crust on gluten-free bread can be tricky. A pale, soft crust might mean the bread isn't baking at a high enough temperature or for long enough. Ensure your oven is accurately calibrated and preheated fully. Baking at a higher initial temperature (like 400-425°F or 200-220°C) for the first 15-20 minutes can help develop the crust.
Adding a small amount of sugar or a liquid sweetener like honey or maple syrup to your dough formula can also promote better browning. Using a baking stone or steel can provide more even heat transfer, contributing to a better crust when baking bread made with gluten-free bread flour blends.
Uneven Texture: Addressing Air Pockets and Crumb Structure
Uneven texture, such as large air pockets or a very inconsistent crumb, can occur in gluten-free bread. This might be due to inadequate mixing of the gluten-free bread flour blend, leading to uneven distribution of ingredients and binders. Ensure you mix your dough thoroughly to develop the structure provided by the binders.
Over-proofing can also lead to collapsing structure and large holes. Gluten-free dough doesn't always double in size like wheat dough; often, a 50-75% increase is sufficient before baking. Gently handling the dough during shaping and avoiding excessive degassing is also important to maintain the fragile structure built by the binders in your gluten-free bread flour blend.
Gluten-Free Bread Baking Techniques for Superior Results
Beyond selecting the right gluten-free bread flour blend, employing specific techniques can significantly improve the outcome of your gluten-free bread. These methods compensate for the lack of gluten's unique properties.
The Importance of Proper Hydration
Gluten-free flours absorb liquids differently than wheat flour, and gluten-free bread flour blends often require higher hydration levels to achieve a moist, workable dough and a soft crumb. While wheat dough becomes kneadable with less water, gluten-free doughs are typically quite wet and sticky – more like a thick batter or a very soft cookie dough than a firm, elastic wheat dough.
Aim for a dough consistency that is scoopable or spreadable rather than kneadable. This higher hydration helps prevent dryness and ensures the starches in the gluten-free bread flour blend gelatinize properly during baking, contributing to a better texture. Don't be afraid of sticky dough; it's often a sign of sufficient hydration.
Mixing and Kneading Gluten-Free Dough
Unlike wheat dough, which requires extensive kneading to develop the gluten network, gluten-free dough doesn't benefit from traditional kneading. The goal is simply to mix the ingredients thoroughly and activate the binders in the gluten-free bread flour blend.
Use a stand mixer with a paddle attachment or a sturdy spoon to mix the dough until all ingredients are fully incorporated and the dough is cohesive and slightly sticky. Mixing for 5-7 minutes on medium speed in a stand mixer is usually sufficient to activate binders like xanthan gum or psyllium husk and distribute them evenly throughout the gluten-free bread flour blend mixture.
Proofing Gluten-Free Dough: Patience is Key
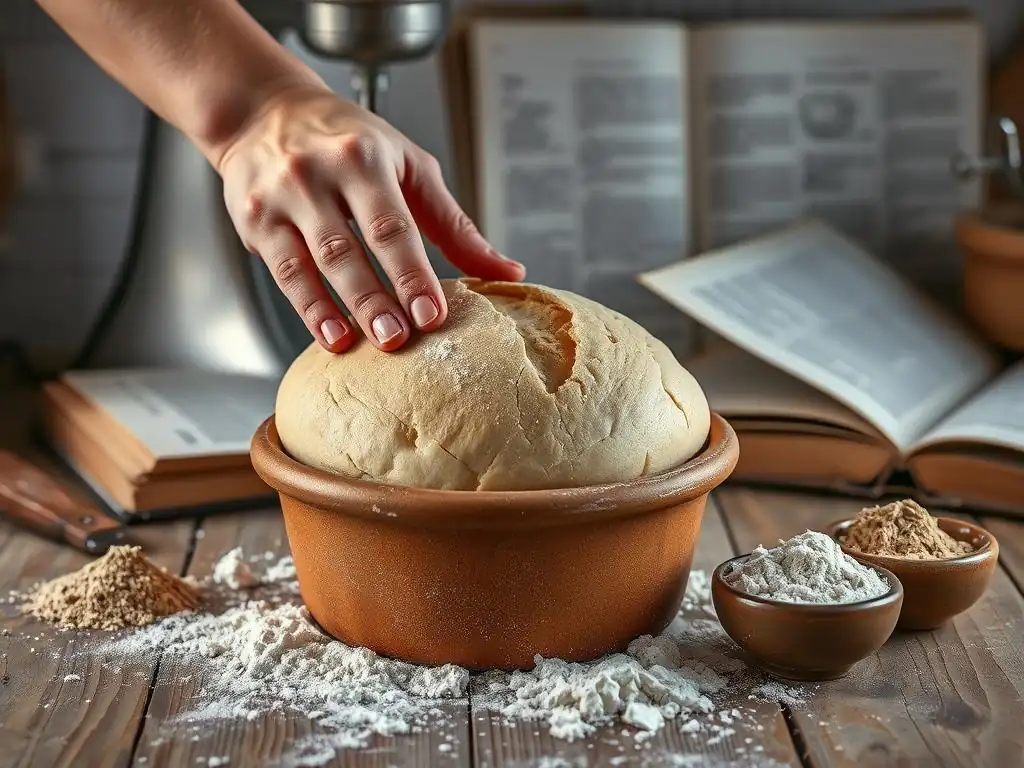
Proofing is the process where yeast ferments and causes the dough to rise. Gluten-free dough made with a gluten-free bread flour blend typically rises differently and often takes longer than wheat dough. It may not double in size, and over-proofing can lead to collapse.
Proof in a warm, draft-free place until the dough has increased by about 50-75% in volume. This can take anywhere from 45 minutes to 1.5 hours, depending on the warmth of the environment and the yeast activity. A good test is the "poke test": gently poke the dough with a wet finger; if the indentation springs back slowly and only partially, it's ready to bake.
Baking Temperatures and Times for Gluten-Free Bread
Proper baking temperature and time are crucial for ensuring gluten-free bread is cooked through, has a good structure, and develops a nice crust. Gluten-free bread often benefits from baking at a moderately high temperature, typically between 375°F and 425°F (190°C and 220°C).
Baking times vary greatly depending on the size and shape of the loaf, but a standard sandwich loaf might take 40-60 minutes. The best way to tell if gluten-free bread is done is to check its internal temperature with an instant-read thermometer. The bread is fully baked when the internal temperature reaches 205-210°F (96-99°C). The crust should also be golden brown.
The Tangzhong Method: Improving Moisture and Texture
The Tangzhong method, or water roux method, is a technique originating from Asian baking that involves cooking a small portion of the flour (from your gluten-free bread flour blend) with a liquid (water or milk) to form a thick paste before adding it to the main dough. This pre-gelatinizes the starches in the flour.
Using Tangzhong in gluten-free bread significantly improves moisture retention, resulting in a softer, more tender crumb and increased shelf life. It can also help with structure and give the bread a lighter texture. Typically, about 5-10% of the total flour weight from the gluten-free bread flour blend is used to make the Tangzhong, cooked with 5-10 times its weight in liquid.
Storing Gluten-Free Bread for Optimal Freshness
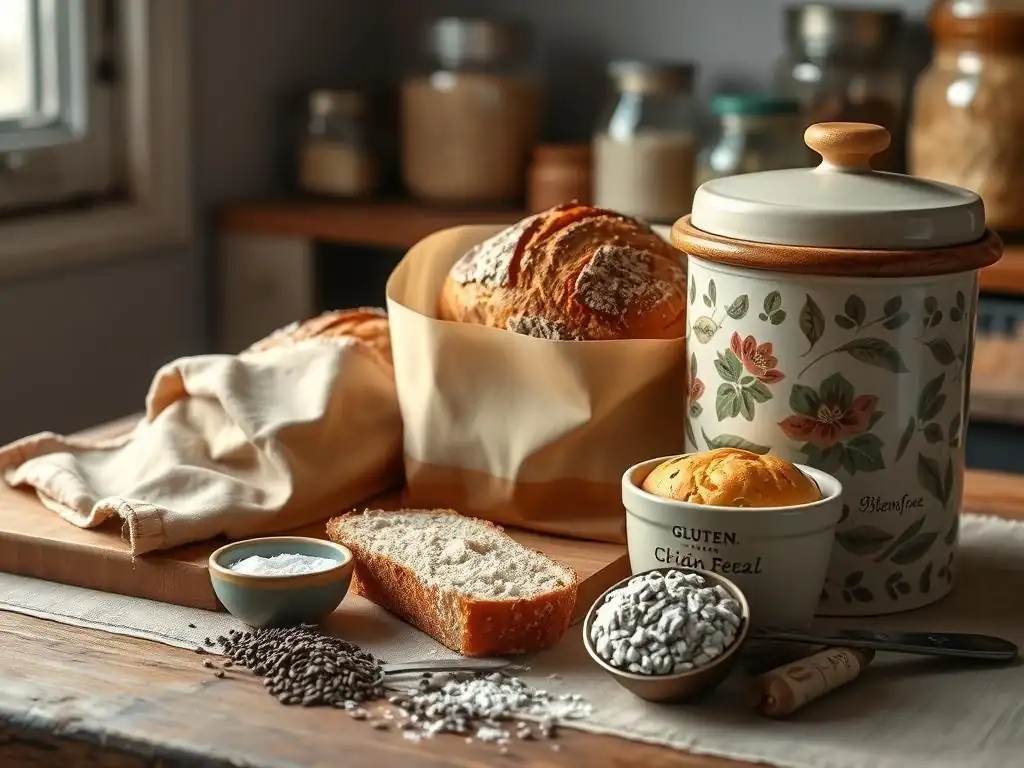
Proper storage is key to keeping your homemade gluten-free bread fresh and preventing it from becoming dry or stale quickly. Gluten-free bread tends to dry out faster than wheat bread because it lacks the gluten structure that helps retain moisture over time.
Cooling Gluten-Free Bread Properly
Allowing your gluten-free bread to cool completely before slicing or storing is perhaps the most critical step in preserving its texture. Hot bread continues to cook internally as it cools, and slicing it too early can result in a gummy texture as steam is released prematurely.
Once removed from the oven, transfer the loaf immediately to a wire cooling rack. This allows air to circulate around the entire loaf, preventing the bottom from becoming soggy. Let the bread cool for at least 2-3 hours, or until it is completely cool to the touch, before attempting to slice it.
Best Storage Methods for Gluten-Free Bread
For short-term storage (1-2 days), once completely cool, wrap the bread tightly in plastic wrap, beeswax wrap, or place it in a bread bag. Store it at room temperature on the counter. Avoid storing gluten-free bread in the refrigerator, as this can actually speed up the staling process.
If you won't consume the bread within a couple of days, freezing is the best option for maintaining freshness and texture. Proper wrapping is essential to prevent freezer burn and preserve the quality of your bread made with gluten-free bread flour blends.
Freezing Gluten-Free Bread for Later Use
Freezing is an excellent way to extend the life of your gluten-free bread. Once the loaf is completely cool, you can freeze it whole or slice it first. Slicing before freezing allows you to thaw only the amount you need, which is very convenient.
To freeze, wrap the cooled bread tightly in plastic wrap, ensuring no air pockets. Then, wrap it again in aluminum foil or place it in a freezer-safe bag or container. Properly wrapped gluten-free bread can be stored in the freezer for up to 2-3 months. To thaw, unwrap the bread (or slices) and let it come to room temperature on a wire rack, or toast individual slices directly from frozen.
Delicious Gluten-Free Bread Recipes to Try
Experimenting with different recipes is the best way to master gluten-free bread baking with your chosen gluten-free bread flour blends. Here are a few ideas to get you started.
Gluten-Free Sandwich Bread Recipe
A reliable gluten-free sandwich bread recipe is a must-have. Using a soft gluten-free bread flour blend like the one suggested earlier (with higher starch content) works well.
- Ingredients: Your chosen gluten-free bread flour blend, warm water or milk, yeast, a little sugar, salt, oil or melted butter, and optionally eggs or psyllium husk for extra structure.
- Method: Combine wet ingredients (including dissolved yeast if using active dry) with dry ingredients (including blend, binder, sugar, salt). Mix well into a thick batter. Transfer to a greased loaf pan. Proof in a warm place until risen by about 50-75%. Bake at around 375-400°F (190-200°C) until golden brown and internal temperature is 205-210°F (96-99°C).
Gluten-Free Rustic Bread Recipe
For a crusty exterior and chewy interior, a rustic gluten-free bread flour blend with more whole grains and psyllium husk is ideal.
- Ingredients: Your chosen rustic gluten-free bread flour blend, warm water, yeast, salt, and psyllium husk (if not already in the blend).
- Method: Combine dry ingredients (blend, salt, yeast). Whisk psyllium husk into warm water and let gel for a few minutes. Combine wet and dry ingredients, mixing until a shaggy dough forms. Let rest briefly. Shape the sticky dough onto parchment paper. Proof until risen by 50-75%. Bake in a preheated oven (ideally with steam) at 400-425°F (200-220°C) until deeply colored and internal temperature reaches 205-210°F (96-99°C).
Gluten-Free Baguette Recipe
Making gluten-free baguettes can be challenging but rewarding, requiring a blend that balances structure and crispness.
- Ingredients: A gluten-free bread flour blend suitable for structure (like the rustic blend without the whole grains), warm water, yeast, salt, and a good binder like psyllium husk.
- Method: Mix ingredients to form a wet, sticky dough. Allow a bulk fermentation period. Shape carefully into baguette forms on a baguette pan or parchment paper. Proof until visibly risen but not doubled. Bake at a high temperature (425-450°F / 220-230°C) with steam to encourage crust development, until golden brown and internal temperature is 205-210°F (96-99°C).
Conclusion: Embrace the Art of Gluten-Free Bread Baking
Mastering Gluten-Free Flour Blends: Key Takeaways
Successfully baking gluten-free bread hinges significantly on using well-formulated gluten-free bread flour blends. These blends combine the strengths of various flours and starches, along with essential binders, to mimic the structure and texture provided by gluten. Understanding the properties of ingredients like rice flour, tapioca starch, potato starch, sorghum, teff, xanthan gum, and psyllium husk is key to choosing or creating a blend that meets your needs.
While challenges exist, from achieving proper rise to preventing gummy or crumbly textures, these can be overcome with the right gluten-free bread flour blend, proper hydration, gentle mixing, patient proofing, and accurate baking techniques. Don't be discouraged by initial results; gluten-free baking is a skill that improves with practice and experimentation.
Further Resources for Gluten-Free Baking Enthusiasts
Embarking on the journey of mastering gluten-free bread flour blends is an exciting path. Many online resources, cookbooks dedicated to gluten-free baking, and communities of gluten-free bakers offer valuable tips, recipes, and support.
Exploring different gluten-free bread flour blends, experimenting with hydration levels, and trying out various techniques like the Tangzhong method will deepen your understanding and improve your results. With practice and the right resources, you can consistently bake delicious, well-structured gluten-free bread that you and your loved ones will enjoy.
Frequently Asked Questions
What exactly is a gluten-free bread flour blend?
A gluten-free bread flour blend is a specifically formulated mix of various gluten-free flours, starches, and sometimes gums, designed to mimic the properties of wheat flour for bread baking. It aims to provide structure and elasticity otherwise missing in individual gluten-free flours.
Why can't I just use one type of gluten-free flour for bread?
Single gluten-free flours often lack the binding and elasticity needed to create a stable bread structure. A blend combines different flours to address these deficiencies and achieve a better texture and rise.
What are some common ingredients in gluten-free bread flour blends?
Common ingredients include rice flour, tapioca starch, potato starch, sorghum flour, and a binding agent like xanthan gum or psyllium husk. Each ingredient plays a role in the final texture and structure of the bread.
How do I know which gluten-free bread flour blend is best for my recipe?
Read reviews, look for blends specifically formulated for bread, and consider the ingredients and their ratios. Experimentation is key, as different blends perform differently in various recipes.
Can I make my own gluten-free bread flour blend?
Yes, you can! Many bakers prefer to create their own blends to control the ingredients and ratios. Researching the properties of different gluten-free flours and starches will help you customize your blend.
Final Reflection: The Flour Power of Gluten-Free Baking
Mastering gluten-free flour blends isn't just a niche skill; it's a gateway to delicious, satisfying bread for millions. The rising demand for gluten-free options, driven by dietary needs and preferences, underscores the critical importance of understanding the nuances of these blends. This knowledge empowers individuals to create bread that transcends the limitations often associated with gluten-free baking.
The journey into the world of gluten-free flour blends has been a personal revelation, transforming my understanding of baking and the power of experimentation. The best bread is the bread you bake yourself,
a sentiment often heard, takes on a new meaning when considering the challenges and rewards of gluten-free baking. The subtle differences between rice flour, tapioca starch, and almond flour, and the art of combining them in the right proportions, have opened up a world of culinary possibilities. This isn't just about avoiding gluten; it's about embracing the unique characteristics of each ingredient to create something truly special.
Now, it's your turn to explore the exciting world of gluten-free bread baking. Don't be afraid to experiment, to adjust ratios, and to discover your own perfect blend. Each loaf you bake, each experiment you undertake, brings you closer to mastering this art and enjoying the delicious rewards of homemade gluten-free bread. Embrace the challenge, and you'll find yourself empowered to create bread that is not only gluten-free, but truly exceptional.
Unlock Your Gluten-Free Baking Potential!
Thanks for joining us on this journey into the world of gluten-free bread baking! We hope you've gained valuable insights and newfound confidence in tackling this delicious challenge. Now it's time to put your knowledge into practice.
- Bake your first gluten-free masterpiece! Use the flour blend recommendations from the article to create your favorite loaf (or try a new recipe!). This is your chance to experience the satisfaction of perfectly risen, flavourful bread, completely free of gluten.
- Share your baking triumphs (or questions!) on our social media channels. Let's inspire each other with delicious gluten-free creations! We'd love to see what you bake!
- Experiment with different gluten-free flour blends to discover your perfect combination for different bread types. Note your results and share your favorites with our community!
Ready to transform your baking and unleash your inner gluten-free bread wizard? What unique gluten-free bread will you create next?