
The Role of Temperature in Sourdough Rye Baking

Welcome to BakeWithEase, your partner in the delightful world of baking! Ever wondered if you're truly harnessing the power of temperature in your sourdough creations? We're diving deep into a crucial aspect of bread baking, specifically exploring the impact of sourdough rye baking temperature on your final loaf. Discover how achieving the perfect temperature can unlock unparalleled flavor and texture. Read on to unlock the secrets to a truly exceptional rye sourdough!
- Understanding Temperature's Impact on Sourdough Rye Bread
- Key Temperature Stages in Sourdough Rye Baking
- Temperature's Influence on Sourdough Rye Characteristics
- Tools for Precise Temperature Control in Sourdough Rye Baking
- Troubleshooting Temperature-Related Issues in Sourdough Rye
- Mastering Sourdough Rye Baking: Temperature as Your Ally
- Frequently Asked Questions
- Final Reflection: The Alchemy of Temperature in Sourdough Rye
- Unlock the Secrets of Perfect Rye: Master Temperature's Role
Understanding Temperature's Impact on Sourdough Rye Bread
Why Temperature Matters for Successful Sourdough Rye
Temperature is arguably the most critical, yet often overlooked, variable in crafting exceptional sourdough rye bread. Unlike commercial yeast, sourdough relies on a complex ecosystem of wild yeasts and lactic acid bacteria, and their activity is profoundly influenced by temperature. The rate of fermentation, the production of organic acids (which contribute to flavor and preservation), and the development of gluten structure all hinge on maintaining the correct temperature at each stage.
Ignoring temperature can lead to unpredictable results, ranging from flat, dense loaves to overly sour or bland flavors. Mastering the sourdough rye baking temperature is key to consistency and quality.
Proper temperature control ensures that the microbial community in your sourdough starter and dough thrives, producing the desired characteristics in your final loaf. For instance, higher temperatures generally favor lactic acid bacteria, leading to a tangier bread, while lower temperatures might slow everything down but allow for more complex flavor development over time.
Specific temperature ranges are needed for the enzymes in the flour to break down starches into sugars, providing food for the microbes and contributing to crust color and crumb texture. Without careful attention to the sourdough rye baking temperature throughout the process, achieving that perfect balance of rise, texture, and signature rye flavor becomes a matter of chance rather than skill.
Sourdough Rye Baking: More Than Just a Recipe
Sourdough rye baking is less about following a rigid recipe and more about understanding a dynamic biological process, where temperature acts as the primary control knob. A recipe provides the ingredients and proportions, but the environment – specifically temperature – dictates the speed and nature of the fermentation. The same dough formula baked on a warm summer day versus a cool winter day will behave drastically differently if temperature isn't accounted for. This is particularly true for rye, which has different enzymatic activity and gluten-forming properties compared to wheat.
Think of temperature as the conductor of your sourdough orchestra. It dictates when the yeast should play their rising notes and when the bacteria should contribute their complex flavor harmonies. A recipe might say "ferment for 4 hours," but that duration is only meaningful within a specific temperature range.
If your kitchen is cooler, that same process might take 6-8 hours or more. If it's warmer, it could be done in 2-3 hours. Learning to read the dough – its feel, its rise, its aroma – in conjunction with the ambient temperature is essential for consistent results in sourdough rye baking temperature management.
Key Temperature Stages in Sourdough Rye Baking
Starter Activity and Temperature: The Foundation of Flavor
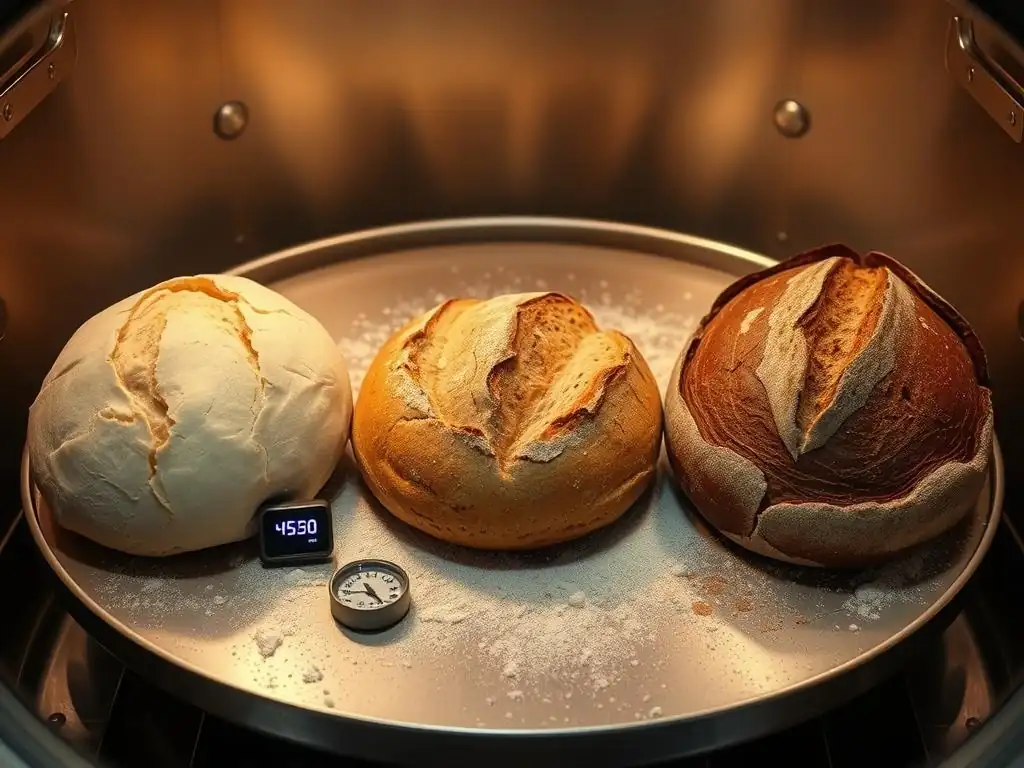
The health and activity of your sourdough starter are directly tied to its temperature. A robust starter, bubbly and active, is the cornerstone of successful sourdough rye baking. Wild yeasts and lactic acid bacteria within the starter are most active within specific temperature ranges. For a typical rye sourdough starter, temperatures between 75-80°F (24-27°C) are often considered ideal for promoting vigorous activity and a balanced microbial population. At these temperatures, you should see reliable doubling or tripling within 4-6 hours after feeding, indicating a strong starter ready to leaven your bread.
Maintaining a consistent temperature for your starter ensures predictable feeding schedules and activity levels. If your starter is kept cooler, say around 65-70°F (18-21°C), its activity will slow down significantly; it might take 8-12 hours or longer to peak. While slower fermentation can sometimes build more complex flavors, it requires patience and careful timing. Conversely, temperatures much above 80°F (27°C) can accelerate activity but may also favor certain bacteria that produce an overly acidic or even acetone-like smell, potentially weakening the starter over time. Precise sourdough rye baking temperature control starts with your starter.
Ideal Temperature for Rye Sourdough Starter Development
The optimal temperature range for developing and maintaining a healthy rye sourdough starter is generally between 75°F and 80°F (24°C and 27°C). Within this range, both the wild yeasts responsible for leavening and the lactic acid bacteria responsible for flavor and acidity thrive in balance. At 75°F, activity is robust, leading to reliable doubling within 4-6 hours after a standard 1:1:1 feeding ratio (starter:water:flour). This temperature range provides a good balance between speed and the development of pleasant, tangy flavors without becoming excessively sour or vinegary.
If you're aiming for a starter that you can feed less frequently, say once a day, maintaining it at a slightly cooler temperature, around 70-72°F (21-22°C), can be beneficial. This slows down the metabolism of the microbes, extending the time before it peaks and collapses. For long-term storage or reduced maintenance, starters can be kept in the refrigerator at around 40°F (4°C), where microbial activity is dramatically slowed, requiring feeding only once a week or even less frequently, though they will need several feedings at room temperature to regain full vigor for baking.
Troubleshooting Starter Issues Related to Temperature
Many common sourdough starter problems can be traced back to temperature. If your starter is sluggish or doesn't rise much after feeding, the temperature is likely too low. Below 70°F (21°C), activity slows considerably, and below 60°F (15°C), it can become almost dormant. To fix this, move your starter to a warmer spot, such as near a warm appliance (but not on it), inside a turned-off oven with the light on, or in a proofing box set to the ideal temperature range. Consistent warmth is crucial for waking it up.
Conversely, if your starter smells strongly of vinegar or acetone and is collapsing very quickly after feeding, it might be too warm. High temperatures accelerate fermentation to the point where the microbes consume their food source too fast, leading to the production of stronger acids and alcohols.
Try moving the starter to a slightly cooler location within the ideal range (75-80°F) or even a few degrees lower if needed. Ensure you are feeding it enough flour relative to the amount of starter you keep – a higher ratio (e.g., 1:2:2 or 1:3:3) can help dilute the microbial population and slow down fermentation in warmer conditions.
Dough Mixing Temperature: Achieving the Right Consistency
The temperature of your dough immediately after mixing, known as the Desired Dough Temperature (DDT), is a critical factor in controlling the rate of bulk fermentation. The temperature of the ingredients, particularly the water, significantly influences the final dough temperature. For sourdough rye baking, aiming for a DDT typically between 75°F and 78°F (24°C and 26°C) is a good starting point. This temperature range promotes a balanced fermentation rate, allowing for adequate development of both structure and flavor during the subsequent bulk fermentation stage.
Achieving the correct DDT helps ensure that your dough progresses through fermentation at a predictable pace. If the dough is too cold after mixing, the fermentation will be sluggish, potentially leading to a dense crumb and underdeveloped flavor. If it's too warm, fermentation can proceed too quickly, risking over-fermentation before sufficient structure has developed. Therefore, controlling the temperature of your ingredients, especially the water, is essential for hitting your target DDT for successful sourdough rye baking temperature management from the start.
Calculating Desired Dough Temperature (DDT) for Rye
A simple formula can help you calculate the ideal water temperature needed to achieve your Desired Dough Temperature (DDT). The formula accounts for the temperature of the flour, the starter, the room, and the friction factor from mixing. A common simplified version for home bakers assumes friction adds about 25°F (14°C) during mixing:
Target Water Temperature = (DDT x 3) - Room Temperature - Flour Temperature - Starter Temperature
For example, if your DDT target is 76°F (24.5°C), your room is 72°F (22°C), your flour is 70°F (21°C), and your starter is 78°F (25.5°C), you would calculate: Water Temp = (76 x 3) - 72 - 70 - 78 = 228 - 72 - 70 - 78 = 8°F. This unusually low result indicates the room, flour, and starter are already quite warm relative to the target, meaning you'd need very cold water, perhaps even ice water, to bring the temperature down, or you might need to adjust your DDT target slightly lower or find a cooler spot for bulk fermentation. A more practical example: DDT 76°F, Room 68°F, Flour 65°F, Starter 75°F. Water Temp = (76 x 3) - 68 - 65 - 75 = 228 - 68 - 65 - 75 = 20°F. Wait, this formula seems off. Let's use a more standard factor-based formula:
Target Water Temp = (DDT x Number of Factors) - (Flour Temp + Room Temp + Starter Temp + Friction Factor)
Where "Number of Factors" is typically 4 (Room, Flour, Starter, Water) and Friction Factor is estimated (e.g., 10-25°F or 5-14°C). Let's use 4 factors and a friction factor of 20°F (11°C). Example: DDT 76°F, Room 68°F, Flour 65°F, Starter 75°F, Friction 20°F. Target Water Temp = (76 * 4) - (65 + 68 + 75 + 20) = 304 - 228 = 76°F. In this case, you'd aim for water at 76°F.
Correction: A simpler factor approach is often used for home baking:
Target Water Temp = (DDT x 3) - Room Temp - Flour Temp - Starter Temp (This accounts for Room, Flour, Starter, and Water being the primary temperature influences, implicitly including friction or assuming it's negligible). Example: DDT 76°F, Room 68°F, Flour 65°F, Starter 75°F. Target Water Temp = (76 * 3) - 68 - 65 - 75 = 228 - 208 = 20°F. Still getting a very low number.
Let's try a more common, simplified home version that averages temperatures and adds a friction factor: DDT = (Flour Temp + Room Temp + Water Temp + Starter Temp + Friction Factor) / 5
To find Water Temp: Water Temp = (DDT * 5) - Flour Temp - Room Temp - Starter Temp - Friction Factor
Let's assume DDT 76°F, Room 68°F, Flour 65°F, Starter 75°F, Friction 15°F. Water Temp = (76 * 5) - 65 - 68 - 75 - 15 = 380 - 223 = 157°F. This is too high.
Let's use the "factor" method where each ingredient/environment is a "factor" influencing the final temp. Water is the variable we control. DDT = (Flour Temp + Room Temp + Starter Temp + Water Temp + Friction Factor) / Number of Factors
Number of Factors is typically 4 (Flour, Room, Starter, Water). Friction Factor is often added to the sum before dividing, or included as an extra factor. Let's use a common baker's method: Target Water Temp = (DDT * 3) - Room Temp - Flour Temp - Starter Temp (This assumes Friction is negligible or accounted for in DDT target). Example: DDT 76°F, Room 68°F, Flour 65°F, Starter 75°F. Target Water Temp = (76 * 3) - 68 - 65 - 75 = 228 - 208 = 20°F.
Let's step back. The issue might be the formula itself or how friction is handled. A simpler approach for home bakers is to use a target sum of temperatures.
Target Sum = DDT x 4 (assuming 4 main factors: Room, Flour, Water, Starter)
Target Water Temp = Target Sum - Room Temp - Flour Temp - Starter Temp - Friction Factor (e.g., 10-20°F or 5-11°C)
Example: DDT 76°F, Room 68°F, Flour 65°F, Starter 75°F, Friction 15°F. Target Sum = 76 * 4 = 304
Water Temp = 304 - 68 - 65 - 75 - 15 = 304 - 223 = 81°F. This seems much more reasonable. So, you would aim for water around 81°F (27°C). Measure your ingredient temperatures and the room temperature before mixing to use this formula effectively for your sourdough rye baking temperature.
The Effect of Water Temperature on Rye Dough
The temperature of the water you add to your rye flour and starter has the most immediate and significant impact on the final dough temperature. Using warmer water will increase the DDT, accelerating the fermentation process. Conversely, using colder water will lower the DDT, slowing fermentation down.
This is your primary tool for hitting your target DDT, especially when room or ingredient temperatures are not ideal. For instance, on a cold day, you might need water as warm as 90-100°F (32-38°C) to achieve a DDT of 76°F, while on a hot day, you might need water as cool as 60-65°F (15-18°C), or even ice water.
It's important not to use water that is excessively hot, as this can damage the delicate microbial life in your sourdough starter, effectively killing the yeast and bacteria before they even start working. Water temperatures above 110-120°F (43-49°C) should generally be avoided when mixing dough with sourdough. Use a thermometer to measure your water temperature precisely before adding it to your ingredients. Adjusting the water temperature is the most direct way to manage your initial sourdough rye baking temperature and set the stage for successful fermentation.
Bulk Fermentation Temperature: Developing Rye Flavor and Structure
Bulk fermentation, also known as the first rise, is a critical stage where temperature heavily influences both the development of the dough's structure and the complex flavors characteristic of sourdough rye. The temperature during this phase dictates the rate at which the yeast produces carbon dioxide (for rise) and the bacteria produce organic acids (for flavor and structure).
A common target temperature range for bulk fermentation of sourdough rye is 75-80°F (24-27°C). Within this range, you can expect a good balance of rise and flavor development over a period of 3-5 hours, depending on the starter's activity and the percentage of rye in the dough.
Maintaining a consistent temperature throughout bulk fermentation is key. Fluctuations can lead to uneven fermentation, resulting in a less predictable final loaf. Higher temperatures (above 80°F) will speed up fermentation, potentially leading to over-proofing or an overly sour flavor profile if not carefully monitored. Lower temperatures (below 70°F) will slow fermentation, requiring significantly longer times (6-12+ hours) but potentially developing more nuanced flavors. Controlling the sourdough rye baking temperature during this phase is paramount for achieving desired results.
Optimal Bulk Fermentation Temperature for Sourdough Rye
For many sourdough rye recipes, an optimal bulk fermentation temperature falls within the range of 75°F to 80°F (24°C to 27°C). This temperature range encourages active yeast production for a good rise while allowing the lactic acid bacteria to produce a balanced profile of flavors. At 75°F, fermentation proceeds steadily, giving you time for a few sets of folds (if required by the recipe) and careful observation. As the temperature approaches 80°F, the process accelerates, demanding closer attention to avoid over-fermentation.
Some bakers intentionally use cooler temperatures for bulk fermentation, such as 65-70°F (18-21°C), to slow down the process and develop more complex flavors over a longer period (e.g., 8-12 hours or even overnight). This "cold bulk" can be particularly beneficial for high-percentage rye doughs, which can ferment very quickly at warmer temperatures. Experimenting within these ranges allows you to control the pace and flavor profile of your sourdough rye bread, making sourdough rye baking temperature a tool for customization.
Monitoring Dough Temperature During Bulk Fermentation
Simply relying on the ambient room temperature during bulk fermentation isn't sufficient, as the dough itself can generate some heat through microbial activity. Regularly monitoring the internal temperature of your dough is the best way to ensure it's fermenting within your target range. Use an instant-read digital thermometer to check the dough temperature every hour or so, especially if you are aiming for a specific DDT.
If the dough temperature is dropping below your target, find a warmer spot for it. This could be a proofing box, a warm oven (turned off, maybe with the light on), or simply covering the dough and placing it in a warmer part of your house.
If the dough is getting too warm, move it to a cooler location, like a slightly cooler room or even briefly in the refrigerator (though be cautious not to shock it with extreme cold). Consistent temperature monitoring allows you to make necessary adjustments and maintain control over the sourdough rye baking temperature during this crucial rise.
Proofing Temperature: The Final Rise for Rye Bread
Proofing, the final rise before baking, is another stage where temperature plays a critical role in the outcome of your sourdough rye bread. The temperature during proofing influences how much the dough expands and the final structure of the crumb. Unlike bulk fermentation which focuses on flavor and initial structure development, proofing is primarily about achieving the optimal volume and airy texture before the dough hits the oven. Typical proofing temperatures range from cool (refrigeration, 40°F/4°C) to warm (75-80°F/24-27°C).
The duration of proofing is highly dependent on the temperature. A warm proof might take only 1-3 hours, while a cold proof in the refrigerator can take 8-16 hours or even longer. Cold proofing is particularly popular for sourdough rye as it slows down fermentation, allowing for deeper flavor development and making the dough easier to handle and score. Controlling the sourdough rye baking temperature during this final stage ensures your loaf has the best chance for a successful bake.
Controlled Proofing: Temperature's Role in Shaping Rye Bread
Controlled proofing temperature allows you to manipulate the final shape, rise, and even crust development of your sourdough rye bread. Warm proofing (75-80°F) results in a faster rise and is suitable if you need to bake relatively quickly after bulk fermentation. However, warmer temperatures can sometimes lead to a slightly less structured dough, especially with higher percentages of rye which has less gluten.
Cold proofing in the refrigerator (40°F/4°C) is often preferred for sourdough rye. The cold temperature dramatically slows yeast activity but allows the enzymes and bacteria to continue working slowly, enhancing flavor complexity. The cold also firms up the dough, making it much easier to transfer from a proofing basket and score cleanly. A cold proof can range from 8 to 16 hours, giving you flexibility in your baking schedule. This precise control over the sourdough rye baking temperature during proofing is a powerful technique.
Over-Proofing vs. Under-Proofing: Temperature Indicators
Temperature is a key indicator of whether your dough is over-proofed or under-proofed during the final rise. At warmer proofing temperatures, dough can go from perfectly proofed to over-proofed very quickly. Signs of over-proofing include the dough looking overly inflated, potentially starting to flatten out, and collapsing easily when gently poked (the poke test results in a dough that doesn't spring back at all). This happens because the yeast has run out of food and the gluten structure has started to degrade at the warmer temperature.
At cooler proofing temperatures (like in the fridge), the risk of over-proofing within a typical timeframe is much lower due to the slowed activity. Under-proofing, regardless of temperature, means the dough hasn't expanded enough. It will feel dense and not spring back much during the poke test. If proofing at a warm temperature, under-proofing means you simply haven't waited long enough. If cold-proofing, under-proofing usually means it needed more time in the cold or perhaps wasn't sufficiently fermented during the bulk stage before chilling. Monitoring temperature helps predict the proofing time needed for your sourdough rye baking temperature strategy.
Baking Temperature: Achieving a Perfect Crust and Crumb
The oven temperature during baking is the final critical temperature stage in sourdough rye baking. It's where all the hard work from the previous stages comes to fruition. The initial high heat provides oven spring, setting the structure of the loaf. The sustained temperature bakes the interior, develops the crumb, and caramelizes the crust. Typical baking temperatures for sourdough rye range from 400°F to 480°F (200°C to 250°C).
The specific temperature and baking method (e.g., in a Dutch oven, on a baking stone with steam) will influence the final crust and crumb. A high initial temperature is crucial for achieving a good rise and a crispy crust. Then, often, the temperature is slightly reduced to ensure the interior bakes through without burning the exterior. Precise control of the sourdough rye baking temperature in the oven is the final step to a successful loaf.
Recommended Baking Temperature for Different Rye Bread Styles
The ideal baking temperature for sourdough rye depends largely on the style of bread. For high-percentage rye breads (70%+ rye), which are dense and can burn easily, a slightly lower temperature might be preferred after the initial high heat burst. Starting at 450°F (232°C) for the first 15-20 minutes (often covered in a Dutch oven) and then reducing to 400-425°F (200-220°C) for the remainder of the bake (uncovered) works well to ensure the interior cooks through without the crust becoming too hard or burnt.
For mixed-flour rye breads with a significant percentage of wheat (e.g., 40-60% rye), which develop a more open crumb and robust structure, a higher sustained temperature can often be used. Starting at 475-480°F (245-250°C) for the covered portion and then reducing to 425-450°F (220-232°C) uncovered can promote maximum oven spring and a crackling crust. Always preheating your oven and baking vessel thoroughly to your target sourdough rye baking temperature is vital.
Oven Temperature Calibration for Consistent Results
Relying solely on your oven's built-in thermostat can be risky, as they are often inaccurate, sometimes by as much as 25-50°F (15-30°C). Inaccurate oven temperature is a common cause of baking issues, leading to burnt bottoms, pale crusts, or underbaked interiors. To ensure consistent results in your sourdough rye baking, use an independent oven thermometer to verify the actual temperature inside your oven. Place it in the center of the oven or near where you place your loaf.
Preheat your oven for at least 30-60 minutes, allowing not just the air but also your baking stone or Dutch oven to reach the target sourdough rye baking temperature. Check the thermometer to see if your oven is running hot or cold. If it's consistently off, you'll need to adjust your oven setting accordingly (e.g., if your oven thermometer reads 425°F when the dial is set to 450°F, you know to set the dial higher next time). Calibrating your oven is a simple step that can dramatically improve the predictability and quality of your sourdough rye bakes.
Temperature's Influence on Sourdough Rye Characteristics
Flavor Development: How Temperature Affects Taste
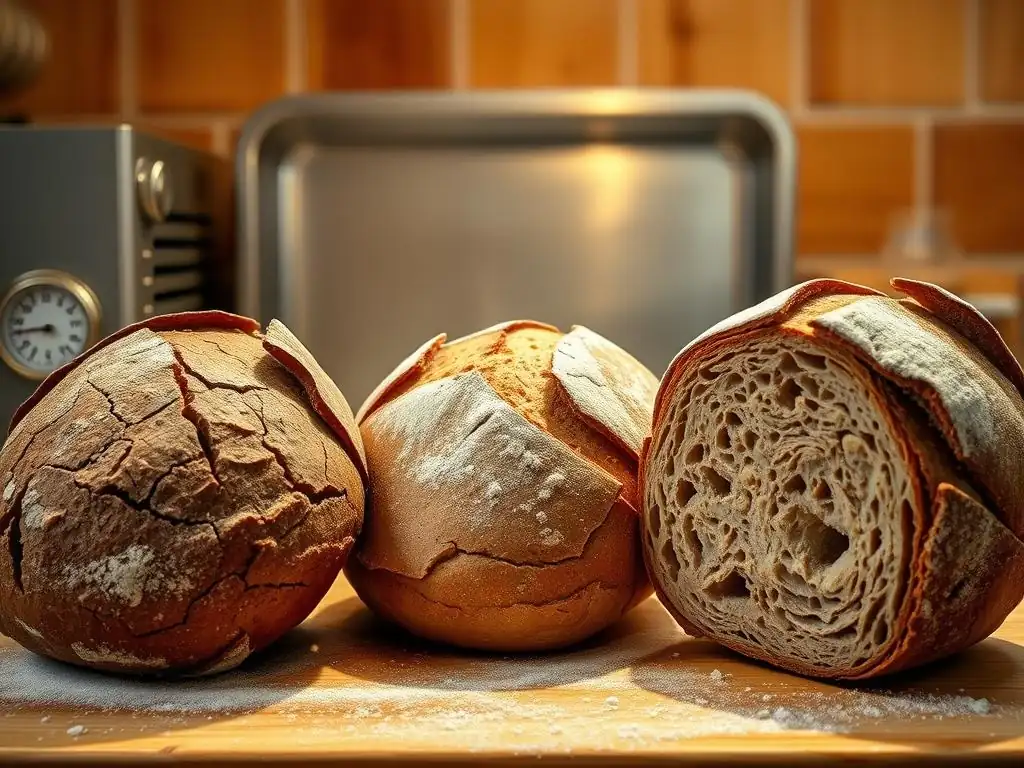
Temperature is a primary driver of flavor development in sourdough rye. The different microbial communities (yeast and bacteria) thrive at different temperatures, and their metabolic byproducts (acids, alcohols, esters) contribute distinct flavors. Lactic acid bacteria, which are crucial for the characteristic tang and complexity of sourdough, come in two main types: homofermentative (producing primarily lactic acid, milder tang) and heterofermentative (producing lactic acid, acetic acid, CO2, and ethanol, resulting in a sharper, more vinegary tang). Temperature influences the balance between these two types.
Generally, warmer fermentation temperatures (75-80°F) favor the heterofermentative bacteria, leading to higher levels of acetic acid and a more pronounced, sometimes sharper, sourness often associated with rye bread. Cooler fermentation temperatures (60-70°F) favor the homofermentative bacteria and yeast activity, resulting in a slower rise but a milder, more balanced acidity with less acetic bite and potentially more complex, subtle flavors from longer enzyme activity. Controlling the sourdough rye baking temperature during fermentation is a key lever for tailoring the flavor profile.
Higher Temperature Fermentation: Bold Rye Flavors
Fermenting your sourdough rye dough at higher temperatures, typically between 75°F and 80°F (24-27°C), encourages rapid activity from both yeast and heterofermentative lactic acid bacteria. This leads to a quicker rise and a more pronounced flavor profile characterized by a bolder tang, often with noticeable acetic acid notes (the 'vinegary' tang). This can be desirable in certain hearty, traditional rye loaves.
However, at these warmer temperatures, fermentation proceeds quickly, and the window for optimal proofing is shorter. You must monitor the dough closely to avoid over-fermentation, which can lead to a gummy texture or an overly aggressive sourness. The rapid activity also means less time for certain enzymes to break down starches, potentially affecting the depth of flavor compared to slower, cooler methods. Achieving the desired bold flavors requires careful timing when using higher sourdough rye baking temperature ranges for fermentation.
Lower Temperature Fermentation: Milder Rye Notes
Opting for lower fermentation temperatures, such as 60-70°F (15-21°C) during bulk fermentation or using cold proofing (40°F/4°C) for the final rise, significantly slows down microbial activity. While this requires more patience, it allows for longer fermentation times, which can lead to more complex and mellow flavor development. Cooler temperatures tend to favor homofermentative lactic acid bacteria, resulting in a higher proportion of lactic acid compared to acetic acid, yielding a smoother, less sharp tang.
Longer, cooler fermentation also allows enzymes in the flour more time to break down complex carbohydrates into simpler sugars. These sugars not only feed the yeast over an extended period but also contribute to better caramelization during baking, resulting in a richer crust color and deeper, more nuanced flavors within the crumb. Using lower sourdough rye baking temperature during fermentation and proofing is an excellent strategy for developing subtle, complex flavors in your rye bread.
Texture and Crumb: Temperature's Impact on Structure
Temperature profoundly affects the internal texture, or crumb, of your sourdough rye bread. The rate of yeast activity, controlled by temperature, determines how much carbon dioxide gas is produced, which in turn creates the bubbles that form the crumb structure. The balance between yeast activity and the development of the dough's structure (gluten and pentosans in rye) is key. Incorrect temperatures can lead to issues like a dense crumb or large, irregular holes.
For instance, if fermentation or proofing occurs too quickly at high temperatures without sufficient structural development (through mixing or folding), the gas bubbles might not be adequately trapped, leading to a denser loaf. Conversely, if fermentation is too slow at low temperatures, the dough might not develop enough gas to create an open structure by the time it's ready for baking. Mastering the sourdough rye baking temperature at each stage is crucial for achieving the desired crumb texture.
Achieving an Open Crumb in Rye Bread with Temperature Control
While high-percentage rye breads naturally have a denser crumb than wheat loaves due to lower gluten content, you can still influence the openness of the crumb through temperature management, especially in mixed-flour rye breads. Using a bulk fermentation temperature in the 75-80°F (24-27°C) range, coupled with adequate dough strength development (stretching and folding), promotes vigorous yeast activity that generates ample gas.
Following this with a controlled proofing temperature is vital. A warm proof (75-80°F) requires careful timing to catch the dough at peak fermentation, just before it starts to collapse. A cold proof (40°F) slows the yeast, allowing the dough to firm up and the structure to stabilize, which can help trap gases more effectively during the initial oven spring, contributing to a more open crumb in mixed-flour rye loaves. Optimal sourdough rye baking temperature during fermentation and proofing directly impacts crumb development.
Dense Crumb: Avoiding Common Temperature-Related Problems
A dense crumb in sourdough rye is often a result of temperature-related issues leading to inadequate fermentation or structural failure. One common cause is keeping the starter or dough too cold, which slows yeast activity to a crawl, resulting in insufficient gas production during fermentation and proofing. Ensure your starter is active and your dough is fermenting within the recommended temperature ranges (75-80°F for bulk, 40°F or 75-80°F for proofing, depending on method).
Another issue is over-proofing at too high a temperature. If the dough ferments too quickly and the structure cannot support the rapid gas production, the gluten network can break down, leading to collapse and a dense, often gummy, crumb. Monitor your dough closely if fermenting/proofing at warmer temperatures. Using a thermometer to verify your sourdough rye baking temperature at each stage is key to diagnosing and preventing density issues.
Crust Development: Temperature and Caramelization
The temperature of your oven is the primary factor influencing the crust development of your sourdough rye bread. High initial baking temperatures are essential for achieving a good "oven spring" (the final rapid rise in the oven) and for initiating the Maillard reaction and caramelization on the surface of the dough. The Maillard reaction, which occurs at temperatures above 300°F (150°C), is responsible for the browning and complex flavors of the crust. Caramelization, the browning of sugars, occurs at higher temperatures (above 320°F/160°C) and adds sweetness and color.
Using a high initial temperature, often 450-480°F (232-250°C), helps lock in moisture by quickly setting the outer crust, which contributes to a better rise and a thinner, crispier crust later. The duration at this high temperature, often with steam (like in a Dutch oven), allows for maximum expansion before the crust hardens completely. Then, reducing the temperature allows the interior to finish baking without the crust burning. Controlling the sourdough rye baking temperature in the oven is key to a beautiful and flavorful crust.
Achieving a Dark and Crispy Rye Crust
To get that desirable dark, crispy crust on your sourdough rye, you need high heat and sufficient baking time at the correct temperature. Preheating your oven and baking vessel (Dutch oven, baking stone) to a high temperature, such as 450-480°F (232-250°C), is the first step. Baking covered for the initial phase (e.g., 20 minutes in a Dutch oven) traps steam released by the dough, keeping the crust soft and allowing for maximum expansion.
Once uncovered, continue baking at a slightly reduced temperature (e.g., 425-450°F / 220-232°C) for another 20-30 minutes or until the crust reaches your desired depth of color. The longer you bake uncovered at a sufficiently high temperature, the darker and crispier the crust will become as sugars caramelize. Ensure the internal temperature of the bread reaches around 200-210°F (93-99°C) to ensure the interior is fully baked when the crust is ready. Precision in sourdough rye baking temperature in the oven yields the best crust.
Preventing Burnt Crusts: Temperature Management Tips
While high heat is necessary for a good crust, excessive temperature or baking for too long at high heat can result in a burnt crust while the interior is still underbaked. If your crust is consistently burning before the inside is done, consider reducing your initial baking temperature slightly (e.g., starting at 450°F instead of 480°F).
Using a baking vessel like a Dutch oven is excellent for the first part of the bake as it protects the crust from direct radiant heat. If baking on a stone, you might need to use a baking steel or place a sheet pan on a rack below your stone to shield the bottom from direct heat.
You can also cover the loaf loosely with foil during the last 10-15 minutes of baking if the crust is darkening too quickly. Monitoring the color of the crust and adjusting the sourdough rye baking temperature or shielding the loaf are crucial for preventing burns.
Tools for Precise Temperature Control in Sourdough Rye Baking
Digital Thermometers: Accurate Temperature Readings
Accurate temperature readings are fundamental to consistent sourdough rye baking. A good quality digital thermometer is an indispensable tool. You'll use it to:
- Measure the temperature of your starter before feeding or using it.
- Measure the temperature of your flour and water for calculating DDT.
- Measure the internal temperature of your dough during bulk fermentation and proofing.
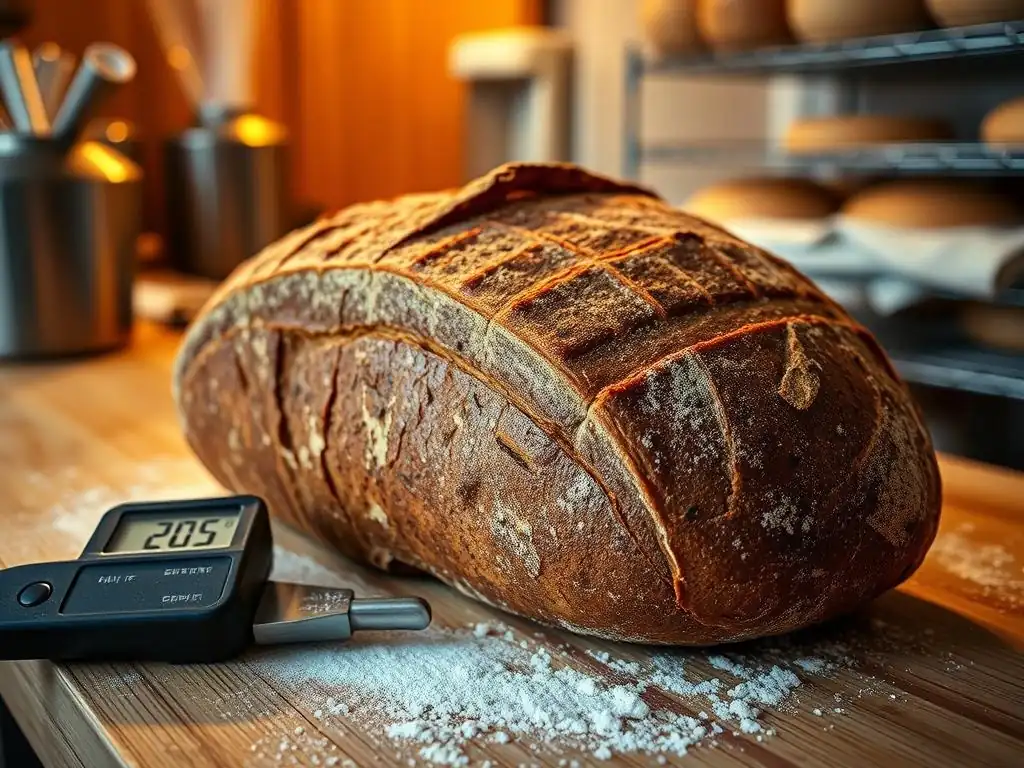
- Measure the internal temperature of your finished loaf to ensure it's fully baked (aim for 200-210°F or 93-99°C).
An instant-read thermometer is most convenient for quick checks. Ensure it is calibrated occasionally by checking the temperature of ice water (should be 32°F/0°C) and boiling water (should be 212°F/100°C at sea level). Relying on feel alone is unreliable; a thermometer provides the objective data needed to manage your sourdough rye baking temperature effectively.
Temperature-Controlled Proofing Boxes: Consistent Results
For serious sourdough rye bakers seeking maximum consistency, a temperature-controlled proofing box can be a game-changer. These devices provide a stable environment for both starter maintenance and dough fermentation/proofing, eliminating the variability caused by fluctuating room temperatures. They allow you to set a precise temperature, ensuring your starter peaks predictably and your dough ferments at the desired rate.
Whether you aim for a warm bulk fermentation at 78°F (25.5°C) or a warm proof at 75°F (24°C), a proofing box maintains that temperature consistently. This is particularly useful for rye doughs, which can be sensitive to temperature swings. While not strictly necessary, a proofing box takes much of the guesswork out of managing the sourdough rye baking temperature during the fermentation and proofing stages.
Oven Thermometers: Ensuring Accurate Baking Temperatures
As mentioned earlier, oven thermostats are often inaccurate. An inexpensive oven thermometer placed inside your oven is essential for verifying that your oven is actually reaching and holding the temperature you set. This is critical for successful baking and crust development in sourdough rye.
Place the thermometer near your baking surface (stone or Dutch oven) and check it after the oven has preheated for at least 30 minutes. If it reads significantly differently from your dial setting, you'll need to adjust your oven control accordingly. For example, if your oven thermometer consistently reads 25°F (14°C) low, set your oven dial 25°F higher than the recipe calls for. Using an oven thermometer ensures you are baking your sourdough rye at the intended temperature, preventing issues like underbaking or burnt crusts.
Dough Rising Too Quickly: Temperature Solutions
If your sourdough rye dough is rising much faster than expected during bulk fermentation or proofing, the most likely culprit is a temperature that is too high. Yeast activity is significantly accelerated by warmth.
- Check the dough temperature: Use a digital thermometer to confirm the internal temperature. If it's significantly above your target (e.g., above 80°F / 27°C), this is the reason.
- Move to a cooler location: Immediately transfer the dough to a cooler spot. This could be a cooler room, a basement, or even briefly in the refrigerator to slow it down (monitor closely if using the fridge).
- Adjust future water temperature: For subsequent bakes, calculate your DDT more carefully and use colder water during mixing to start fermentation at a lower temperature.
- Reduce bulk fermentation time: If you can't lower the temperature, be prepared to shorten the bulk fermentation time significantly and proceed to shaping sooner based on the dough's visual cues (e.g., 50-75% increase in volume, bubbly surface).
Dough Rising Too Slowly: Temperature Adjustments
A sluggish or slow-rising sourdough rye dough is usually a sign that the temperature is too low for sufficient microbial activity. This can happen during bulk fermentation or proofing.
- Check the dough temperature: Measure the internal temperature. If it's below the ideal range (e.g., below 70°F / 21°C), it's too cold.
- Find a warmer spot: Move the dough to a warmer environment. Options include a proofing box set to 75-80°F (24-27°C), a turned-off oven with the light on, a warm spot near a vent, or even placing it in a microwave (turned off) which can act as a slightly insulated box.
- Increase fermentation time: If you cannot increase the temperature significantly, be prepared for a much longer fermentation time. Dough at 65°F (18°C) might take twice as long as dough at 75°F (24°C).
- Adjust future water temperature: For your next bake, use warmer water when mixing to achieve a higher initial DDT, setting the stage for faster fermentation. Ensure your starter is active and at a good temperature before mixing.
Bitter or Sour Taste: Temperature's Potential Role
While many factors influence the taste of sourdough rye, temperature during fermentation plays a significant role in the balance of acids produced, which affects the perceived sourness or bitterness.
- Overly Sour/Vinegary Taste: This is often due to fermentation or proofing at temperatures that are too high (above 80°F / 27°C), which favors acetic acid production. To achieve a milder tang, try fermenting and proofing at slightly lower temperatures (70-75°F / 21-24°C) or using a longer, cooler bulk fermentation or cold proofing in the refrigerator.
- Bitter Taste: While less common and potentially linked to other factors like flour quality or over-fermentation leading to protein breakdown, extreme temperatures (too hot or too cold for extended periods) can stress the microbial community, potentially leading to off-flavors, including bitterness. Ensure consistent, moderate temperatures within the recommended ranges for your sourdough rye baking temperature strategy. A very young or unbalanced starter can also contribute to off-flavors; ensure your starter is mature and healthy, fed regularly at a consistent temperature.
Mastering Sourdough Rye Baking: Temperature as Your Ally
Temperature is not an obstacle in sourdough rye baking; it's a powerful tool. By understanding how temperature affects your starter, dough mixing, fermentation, proofing, and baking, you gain control over the entire process. You can predict fermentation times, influence flavor profiles, and achieve consistent results. From using a thermometer to calculate DDT to strategically using warm or cold temperatures for different stages, integrating temperature awareness into your baking routine will elevate your sourdough rye bread from good to truly exceptional.
Adapting Recipes Based on Ambient Temperature
A key skill in mastering sourdough rye baking temperature is learning to adapt recipes based on your ambient conditions. Most recipes assume a "standard" room temperature, often around 70-75°F (21-24°C). If your kitchen is significantly warmer or cooler than this, you must adjust.
- Warmer Environment: If your kitchen is warm (above 75°F), your dough will ferment faster. Use colder water when mixing to lower the DDT. Shorten bulk fermentation and proofing times, relying more on visual cues of the dough's readiness than strict timing. Consider using cold proofing in the refrigerator to slow things down and manage your schedule.
- Cooler Environment: If your kitchen is cool (below 70°F), fermentation will be slower. Use warmer water when mixing to increase the DDT. Be prepared for longer bulk fermentation and proofing times. Find warmer spots for your dough (proofing box, warm oven with light on) to help it along, or embrace the longer, cooler fermentation for potentially deeper flavors.
By paying attention to the actual temperature of your ingredients and dough and adjusting your methods accordingly, you make temperature your ally in the journey of sourdough rye baking.
Frequently Asked Questions
What is the ideal sourdough rye baking temperature?
The ideal temperature generally falls between 450-475°F (232-246°C). This high heat helps create a good crust and rise, especially important for dense rye breads. Adjust based on your oven and recipe.
Why is temperature so important for sourdough rye?
Temperature significantly impacts the enzyme activity, gluten development, and overall structure of the bread. Too low, and the bread will be dense and gummy; too high, and the crust will burn before the inside is cooked.
How does oven temperature affect the sourdough rye crust?
Higher temperatures promote a crisper, thicker crust due to rapid moisture evaporation and caramelization. Lower temperatures result in a softer, less defined crust. Monitor carefully to prevent burning.
Can I adjust the sourdough rye baking temperature during the bake?
Yes, it's common to lower the temperature after the initial burst of heat to ensure the inside is fully cooked without burning the crust. This usually happens after about 20-30 minutes.
What happens if my sourdough rye baking temperature is too low?
Baking at too low a temperature can result in a dense, gummy interior and a pale, soft crust. The bread may also not rise properly due to insufficient heat to activate the yeast and set the gluten.
Final Reflection: The Alchemy of Temperature in Sourdough Rye
Mastering sourdough rye baking is not merely about following a recipe; it's about understanding the intricate dance between temperature and fermentation. A seemingly small fluctuation can dramatically alter the final product, transforming a dense, flavorful loaf into a gummy, sour mess or a beautifully risen masterpiece. This understanding is crucial not just for baking success, but for appreciating the artistry and science behind this ancient craft.
The impact of temperature on sourdough rye extends far beyond the immediate outcome of a single bake. It represents a deeper connection to the historical and cultural significance of bread making, a practice passed down through generations, each baker subtly adjusting their techniques based on their environment and experience. The subtle nuances of temperature control reflect this rich history. Bread is the staff of life,
a simple phrase that belies the complex relationship between humanity and this fundamental food source. Understanding the role of temperature allows us to connect with this legacy in a tangible way.
Now, consider your own baking journey. What temperature adjustments have you made, and how did they impact your results? I encourage you to experiment, to meticulously record your observations, and to embrace the inevitable imperfections as valuable learning experiences. The pursuit of the perfect sourdough rye loaf is a journey of continuous learning, a testament to patience, precision, and a deep appreciation for the transformative power of heat. Embrace the alchemy of temperature, and discover the magic within your own oven.
Unlock the Secrets of Perfect Rye: Master Temperature's Role
Thanks for taking the time to explore the fascinating world of sourdough rye baking! You've now unlocked key insights into temperature's influence on your bread's final texture and flavor. Ready to put your newfound knowledge into practice?
- Bake a Rye Masterpiece: Experiment with different proofing temperatures to see how it affects your next loaf. Note your observations and tweak your process for an even better result next time!
- Share Your Rye Journey: Share your baking adventures—and any temperature-related discoveries!—with the BakeWithEase community in the comments below. We'd love to hear from you!
- Explore Deeper: Discover more sourdough secrets by browsing other articles on our site dedicated to advanced rye techniques.
Ready to elevate your sourdough rye baking game? What temperature experiment will you try first?