
The Science of Stretching Dough Thin Without Breakage

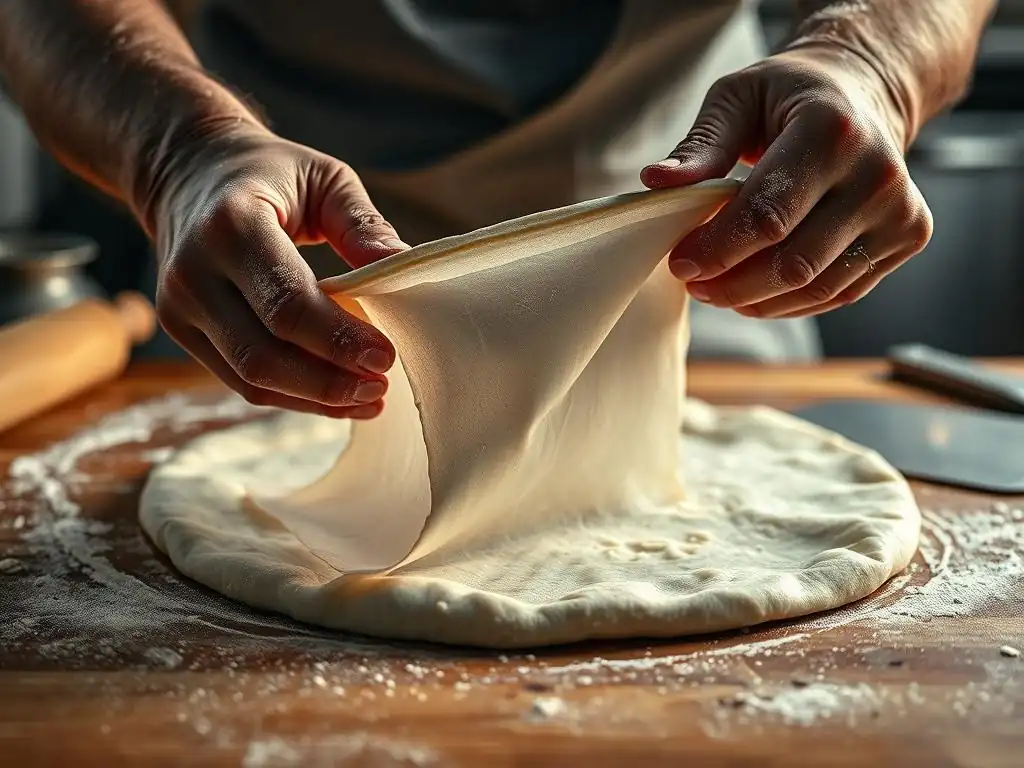
Welcome to BakeWithEase, where baking becomes a joy, not a chore! Ever dreamt of crafting perfectly thin, delicate dough for your next culinary masterpiece? This week, we're diving deep into the science of thin dough stretching techniques, revealing the secrets to achieving that elusive, paper-thin consistency without tearing or breakage. Get ready to unlock the secrets to superior bread baking and more – are you ready to stretch your baking skills?
- BakeWithEase: Mastering Thin Dough Stretching Techniques for Pizza Perfection
- Understanding the Science Behind Thin Dough
- Preparing Your Dough for Optimal Thin Stretching
- Thin Dough Stretching Techniques: A Step-by-Step Guide
- Troubleshooting Common Thin Dough Problems
- Advanced Thin Dough Stretching Tips and Tricks
- Baking Your Thin Crust Pizza to Perfection
- Conclusion: Achieving Thin Crust Pizza Mastery with BakeWithEase
-
Frequently Asked Questions
- How crucial is gluten development for successfully stretching dough thin?
- What role does resting the dough play in thin dough stretching?
- Are there specific flours better suited for thin dough stretching techniques?
- What are some common mistakes that cause dough to tear when stretching it thin?
- How can I improve the elasticity of my dough if it keeps breaking during stretching?
- Final Reflection: The Enduring Art of Thin Dough
- Unleash Your Inner Pizzaiolo: Master the Art of Thin Crust
BakeWithEase: Mastering Thin Dough Stretching Techniques for Pizza Perfection
Achieving that perfect, paper-thin pizza crust is a baker's delight. It requires not just skill, but a deep understanding of the dough itself. Mastering thin dough stretching techniques is key to avoiding tears and achieving a beautifully uniform base that crisps up perfectly in the oven.
This guide from BakeWithEase will take you through the science, preparation, and execution of stretching dough incredibly thin for pizza, ensuring your homemade pies rival those from your favorite pizzeria. We'll explore the intricacies of dough structure, the best practices for preparation, and step-by-step methods for handling delicate, thin dough.
Understanding the Science Behind Thin Dough
Before you even touch the dough, understanding its fundamental components is crucial for mastering thin dough stretching techniques. The way flour, water, and yeast interact dictates the dough's elasticity and strength, which are paramount for achieving a thin crust without breakage.
The internal structure of the dough is what allows it to be stretched without tearing. This structure is primarily built by gluten, a protein network formed when water interacts with proteins in flour and is developed through kneading and fermentation. The hydration level and yeast activity also play significant roles in the dough's ability to stretch thinly and hold its shape.
The Importance of Gluten Development in Thin Dough
Gluten is the backbone of your dough, providing the structure and elasticity needed for successful thin dough stretching techniques. When flour and water are mixed, two proteins, glutenin and gliadin, bond and form gluten strands. Kneading strengthens this network, aligning the strands and creating a strong, flexible matrix.
For a thin crust pizza, you need a well-developed, but not overly tight, gluten network. Insufficient gluten development results in a weak dough that tears easily when stretched. Conversely, over-kneading can make the dough too tough and resistant, also leading to breakage. A properly developed dough should be smooth, elastic, and capable of stretching thinly without snapping back excessively. Aim for a dough that passes the "windowpane test," where a small piece can be stretched thin enough to see light through without tearing.
Dough Hydration and its Role in Stretchability
Hydration, the ratio of water to flour in your dough, is critically important for mastering thin dough stretching techniques. Higher hydration levels generally lead to a more extensible and easier-to-stretch dough. This is because the extra water helps to fully hydrate the flour proteins, facilitating better gluten development and creating a softer, more pliable dough.
For thin crust pizza, hydration levels often range from 60% to upwards of 70% (based on the flour weight). A dough with 65% hydration, for instance, will be significantly easier to stretch thinly compared to a 55% hydration dough, assuming sufficient gluten development. However, very high hydration doughs (75%+) can be sticky and challenging to handle for beginners. Finding the right balance is key to achieving a dough that is both stretchable and manageable for your level of experience.
Yeast Activity and Dough Strength for Thin Crust Pizza
Yeast activity influences both the flavor and the structure of your dough, impacting its suitability for thin dough stretching techniques. During fermentation, yeast produces carbon dioxide gas, which is trapped by the gluten network, causing the dough to rise. This process also helps to relax the gluten structure, making the dough more extensible.
However, over-fermentation can weaken the gluten structure as enzymes break down the protein network. This results in a dough that is fragile and prone to tearing when stretched thinly. Under-fermented dough, on the other hand, will be tight and difficult to stretch. Optimal fermentation yields a dough that is relaxed, airy, and has sufficient strength to withstand the stretching process required for a thin crust. Typically, a bulk fermentation of 1-3 hours at room temperature followed by a cold fermentation of 12-72 hours is ideal for developing both flavor and strength for thin dough.
Preparing Your Dough for Optimal Thin Stretching
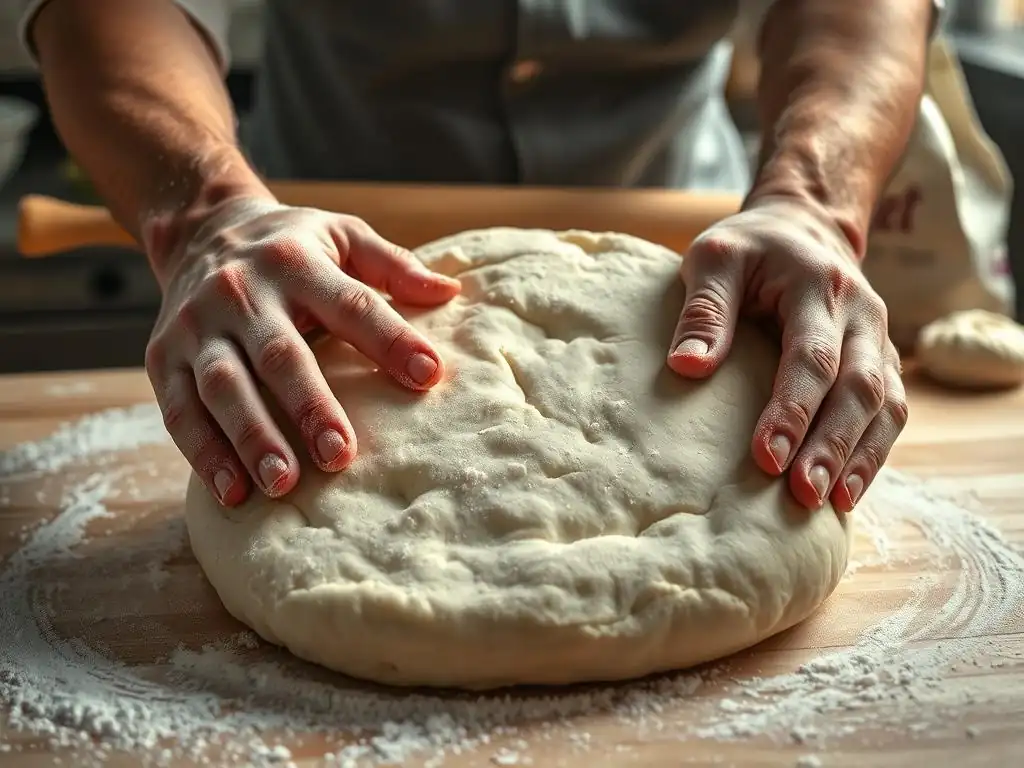
Proper dough preparation is the foundation for successful thin dough stretching techniques. The ingredients you choose, the way you mix and knead, and the fermentation process all contribute to a dough that is elastic, strong, and ready to be stretched to a paper-thin consistency without tearing.
Starting with the right flour and ensuring precise hydration levels are crucial first steps. Following up with effective kneading techniques and allowing for adequate bulk fermentation builds the internal structure necessary for a resilient dough. Each step in the preparation phase directly impacts how easily and successfully you can apply thin dough stretching techniques later on.
Choosing the Right Flour for Thin Pizza Dough: 00 Flour, Bread Flour
The type of flour you use significantly impacts the dough's gluten content and characteristics, which are vital for thin dough stretching techniques. "00" flour, commonly used in Italy for pizza and pasta, is finely milled and has a protein content typically ranging from 10% to 12.5%. Its gluten forms a very extensible network, making it ideal for stretching thin.
Bread flour, with a higher protein content usually between 12% and 14%, develops a stronger, more elastic gluten network. While it provides excellent structure, dough made solely with high-protein bread flour can sometimes be too elastic and snap back excessively when trying to stretch it very thinly. Many bakers find a blend of 00 flour and bread flour, or using a medium-protein bread flour (around 12%), provides the best balance of strength and extensibility for mastering thin dough stretching techniques.
Precise Hydration Levels for Maximum Dough Elasticity
Achieving precise hydration is paramount for developing a dough with maximum elasticity and extensibility, critical for thin dough stretching techniques. Hydration is calculated as (Weight of Water / Weight of Flour) * 100%. For thin crust pizza, a hydration level between 60% and 70% is often recommended.
A 65% hydration dough, for example, uses 650 grams of water for every 1000 grams of flour. This level of hydration ensures the flour is fully saturated, allowing for optimal gluten development and creating a dough that is pliable and less likely to tear when stretched thinly. Experimenting within this range based on your flour type and environment is key; a 68% hydration might work perfectly with one flour but feel too sticky with another. Accurate measurement, preferably by weight using a kitchen scale, is essential to hit the target hydration consistently.
The Perfect Kneading Technique for Strong Gluten Networks
Effective kneading is the process that develops the gluten network, transforming a shaggy mix into a smooth, elastic ball ready for thin dough stretching techniques. Whether you knead by hand or machine, the goal is to align the gluten proteins and build strength.
For machine kneading, using a stand mixer with a dough hook for 8-12 minutes on medium speed is typically sufficient for a standard pizza dough. You'll know it's ready when the dough clears the sides of the bowl and looks smooth. Hand kneading requires more effort, usually 10-15 minutes of folding, pushing, and stretching the dough. A well-kneaded dough should be smooth, supple, and pass the windowpane test. Properly developed gluten ensures the dough can be stretched very thin without breaking, which is the essence of successful thin dough stretching techniques.
Bulk Fermentation: Building Flavor and Stretch in Thin Dough
Bulk fermentation, the initial rise of the dough before dividing and shaping, is a critical phase for developing both flavor and the necessary structure for thin dough stretching techniques. During this time, yeast produces gas, expanding the dough, while enzymes begin to break down complex starches and proteins, contributing to flavor and relaxing the gluten.
Allowing the dough to ferment adequately at room temperature (typically 1-3 hours, until roughly doubled in size) makes it more extensible and easier to stretch thinly. Following this with a cold fermentation in the refrigerator (12-72 hours or even longer) further develops complex flavors and strengthens the gluten structure in a controlled manner. This slow, cold process is highly recommended for dough intended for thin crust pizza, as it results in a dough that is both flavorful and exceptionally easy to handle and stretch using various thin dough stretching techniques.
Thin Dough Stretching Techniques: A Step-by-Step Guide
Once your dough is perfectly prepared and rested, it's time to transform that ball into a thin, round pizza base. Mastering thin dough stretching techniques requires practice and a gentle touch. The goal is to stretch the dough evenly without creating thin spots or tears.
There are several popular methods for stretching dough thinly, each with its own advantages. Whether you prefer using your hands or a rolling pin, understanding the mechanics behind each technique will help you achieve a perfectly uniform thin crust. The key is to work slowly and patiently, allowing the dough's elasticity to assist you.
Hand Stretching Techniques for Thin Crust Pizza
Hand stretching is often considered the purist's method for achieving a thin crust and is a fundamental aspect of mastering thin dough stretching techniques. It allows you to feel the dough's resistance and thickness directly, enabling precise control.
The process typically starts with gently pressing the dough ball from the center outwards to create a small disk, leaving a slightly thicker rim for the crust. From there, various methods can be employed to expand the dough, focusing on letting gravity and gentle manipulation do the work. Hand stretching helps preserve the airy structure of the dough, contributing to a lighter, crispier crust.
The Knuckle Stretching Method: A Detailed Explanation
The knuckle stretching method is a classic hand technique for thin dough stretching techniques. Start with a relaxed dough ball on a lightly floured surface or draped over your knuckles. Gently press the center of the dough, leaving the outer edge slightly thicker.
Then, place the dough over your knuckles, holding the edge with your thumbs. Rotate the dough, allowing gravity to stretch it downwards between your knuckles. As you rotate, gently move your hands apart, allowing the dough to expand evenly. Avoid pinching or pulling aggressively, which can cause tears. This method is excellent for achieving a uniform thickness and maintaining a distinct crust edge.
The Toss and Catch Technique: Mastering the Art
The toss and catch technique is perhaps the most dramatic of the thin dough stretching techniques, often seen in pizzerias. While it looks impressive, its primary function is to use centrifugal force to stretch the dough quickly and evenly.
Start with a partially stretched dough disk. Hold the edge of the dough with both hands and gently toss it upwards, spinning it horizontally. Catch the dough on the backs of your hands or knuckles. The spinning motion helps the dough expand outwards evenly. This technique requires practice and a dough with well-developed gluten. It's less about brute force and more about a controlled spin and gentle catching.
The Gentle Drape: Achieving Uniform Thinness
The gentle drape method is a simple yet effective thin dough stretching technique, particularly good for beginners or very hydrated doughs. Start with a dough ball on a lightly floured surface. Gently press the center to form a small disk.
Pick up the disk and hold it by the edge, letting the rest of the dough hang down. Gently rotate the dough, allowing gravity to stretch it downwards. You can also gently move your hands along the edge, letting the dough pull itself thin. This method is very forgiving and minimizes the risk of tearing, helping you achieve a relatively uniform thinness across the base.
Using a Rolling Pin for Thin and Even Dough
While hand stretching is preferred by some for its effect on crust texture, using a rolling pin is a perfectly valid and often easier way to achieve a consistently thin and even dough, especially when mastering thin dough stretching techniques. It provides more control over thickness and shape.
Using a rolling pin helps flatten the dough uniformly across the entire surface. The key is to apply even pressure and work from the center outwards. While it can sometimes push out some of the gas bubbles created during fermentation, skilled use can still result in a delicious thin crust pizza.
Selecting the Right Rolling Pin for Thin Dough
The type of rolling pin you use can impact how effectively you can perform thin dough stretching techniques with it. A straight, cylindrical rolling pin (like a French rolling pin without handles) is often favored for pizza dough. Its simple design allows for direct contact and feel for the dough's thickness.
A tapered rolling pin also works well, allowing you to pivot and control the pressure more precisely. Avoid heavy, bulky rolling pins that might crush the dough too much. A medium-weight pin gives you enough leverage to flatten the dough without forcing out all the air. The material (wood, marble, or stainless steel) is less critical than the shape and weight for thin dough stretching techniques.
Rolling Techniques to Avoid Tearing
When using a rolling pin for thin dough stretching techniques, gentle, even pressure is key to avoiding tears. Start with your dough ball on a lightly floured surface. Press the dough gently with your hands to form a small disk.
Place the rolling pin in the center of the disk and roll outwards, applying even pressure. Rotate the dough frequently (about a quarter turn) to ensure you are rolling a circle. Roll from the center towards the edge in multiple directions, rather than back and forth over the same spot repeatedly. If the dough starts to resist or shrink back, cover it and let it rest for 5-10 minutes before continuing; this allows the gluten to relax and makes further thin dough stretching techniques easier.
Achieving a Consistent Thickness
Achieving a consistent thickness across the entire dough is crucial for even cooking and a uniform crust when using thin dough stretching techniques. Whether hand stretching or using a rolling pin, constantly assess the dough's thickness by holding it up to the light or gently feeling it with your fingertips.
When using a rolling pin, focus on rolling from the center outwards and rotating the dough regularly. If you notice thicker spots, concentrate your rolling efforts there, using slightly more pressure. With hand stretching, pay attention to areas that feel thicker and use your knuckles or fingers to gently coax them thinner. Practice is the best way to develop the feel for achieving uniform thinness across the entire pizza base.
Troubleshooting Common Thin Dough Problems
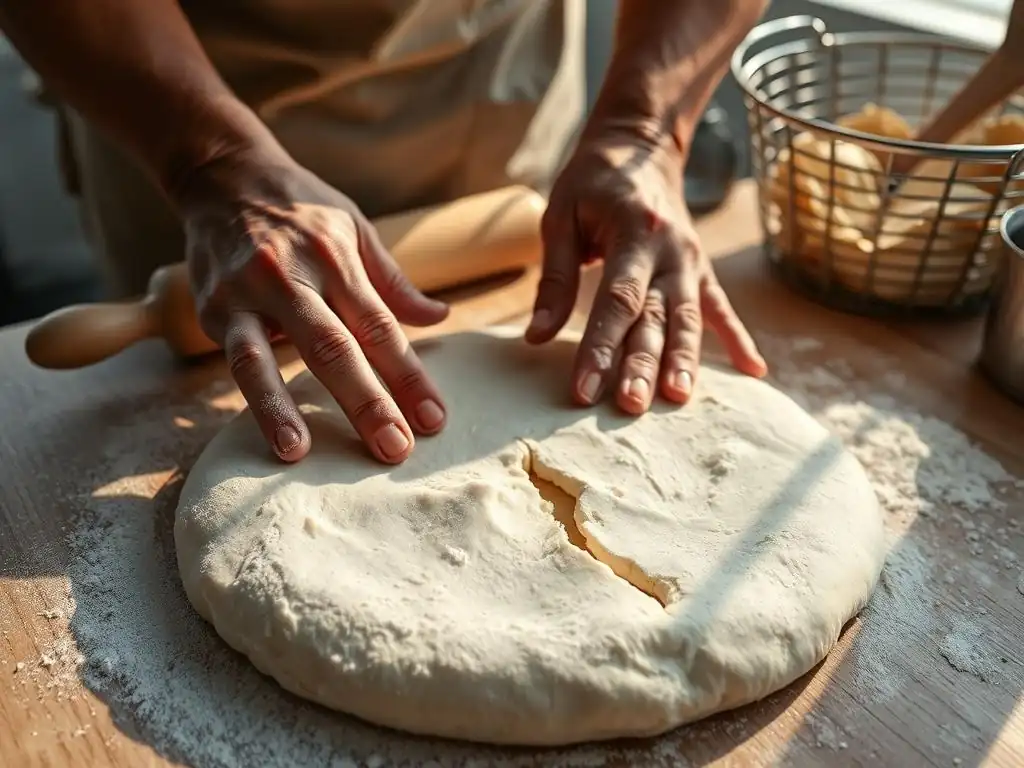
Even with the best preparation and techniques, you might encounter issues when applying thin dough stretching techniques. Tears, holes, and uneven shapes are common frustrations, but they are usually fixable or preventable with a little understanding of why they occur.
Identifying the root cause of a problem is the first step to solving it. Is the dough tearing because it's too weak, too stiff, or are you using too much force? Understanding these issues will significantly improve your success rate with thin dough stretching techniques.
Why Your Dough Tears During Stretching
Dough tearing is one of the most common frustrations when attempting thin dough stretching techniques. It typically indicates an issue with the dough's structure or your handling method. Identifying the cause is key to preventing it in the future.
Common culprits include insufficient gluten development, which makes the dough weak and unable to withstand stretching forces. Conversely, dough that is too cold or hasn't rested enough can be too tight and resistant, leading to tears when stretched. Using excessive force or stretching too quickly before the dough is ready are also frequent reasons for breakage.
Over-Fermentation and Weak Gluten
Over-fermentation is a major cause of dough tearing when using thin dough stretching techniques. When dough ferments for too long, particularly at warmer temperatures, enzymatic activity can start to break down the gluten network.
This weakened structure cannot hold the gas produced by the yeast or withstand the stretching required for a thin crust. The dough becomes sticky, gassy, and very fragile, tearing easily with minimal manipulation. A dough that is significantly over-proofed might even collapse on itself. Proper fermentation timing and potentially using cold fermentation can help prevent this issue.
Insufficient Hydration and Dough Stiffness
Insufficient hydration results in a stiff, dry dough that is difficult to stretch thinly without tearing. When there isn't enough water, the flour proteins cannot fully hydrate, leading to poor gluten development and a dough that lacks extensibility.
A low-hydration dough (e.g., 55% hydration) will feel dense and resistant compared to a dough with 65%+ hydration. Attempting to stretch a stiff dough often leads to it snapping back forcefully or tearing because it lacks the pliability needed for thin dough stretching techniques. Ensuring you measure your water accurately and potentially increasing hydration slightly in future batches can help.
Incorrect Stretching Technique
Even a perfectly prepared dough can tear if incorrect thin dough stretching techniques are applied. Applying too much pressure in one spot, pinching the dough tightly, or stretching too quickly can cause the gluten network to break.
Forcefully pulling the dough instead of gently coaxing it to expand is a common mistake. Rapidly tossing dough that isn't sufficiently relaxed or developed can also lead to tears. Practice with gentle, even pressure and letting the dough's natural elasticity guide you is essential for successful thin dough stretching techniques.
Preventing Holes and Thin Spots in Your Dough
Holes and thin spots are undesirable outcomes when aiming for a uniform thin crust using thin dough stretching techniques. They often occur in areas where the dough was stretched too aggressively or wasn't uniform in thickness to begin with.
Preventing them starts during the initial stretching phase by ensuring even pressure and rotation. If you do encounter a small hole, it's often possible to patch it before adding toppings and baking, saving your pizza base.
Patching Techniques for Minor Tears
If you encounter a small tear or hole while performing thin dough stretching techniques, don't panic! Minor issues can often be patched. Gently pinch the edges of the tear together, overlapping them slightly.
You can also take a tiny piece of dough from the rim (where it's slightly thicker) or another part of the dough and gently press it over the hole, feathering the edges into the surrounding dough. Be gentle to avoid making the hole bigger. Ensure the patch is well-sealed before adding toppings.
Restoring Dough Elasticity After Tearing
Sometimes, a dough that tears might feel overly tight or resistant, indicating the gluten needs to relax. If you encounter significant tearing or resistance during thin dough stretching techniques, stop stretching immediately.
Gently gather the dough back into a loose ball, cover it with a bowl or plastic wrap, and let it rest for 10-20 minutes at room temperature. This allows the gluten strands to relax, making the dough more pliable and less likely to tear when you resume stretching. This resting period is often called a "bench rest."
Achieving a Perfectly Round Thin Crust Pizza
Achieving a perfectly round shape is the aesthetic goal for many when applying thin dough stretching techniques. While the shape doesn't affect the taste, a round pizza is easier to top evenly and manage on a peel and in the oven.
The key to a round shape lies in consistently working the dough from the center outwards and rotating it frequently during the stretching process. Whether hand stretching or rolling, mindful manipulation is essential.
Rotation Techniques for Even Stretching
Consistent rotation is fundamental to achieving a round shape when using thin dough stretching techniques. With hand stretching, rotate the dough about a quarter turn after each significant stretch or knuckle pass.
When using a rolling pin, roll outwards from the center in one direction, then lift the dough, rotate it a quarter turn, and roll outwards again. This continuous rotation ensures that you are applying stretching force evenly around the circumference of the dough, guiding it into a circular shape rather than an oval or irregular one.
Using a Pizza Peel for Transferring Dough
Once your dough is stretched thin, transferring it to your baking surface (like a pizza stone or steel) without deforming its shape is crucial. This is where a pizza peel comes in.
Lightly flour the pizza peel (using semolina flour is excellent here as it acts like tiny ball bearings, allowing the dough to slide easily). Gently lay your stretched dough onto the prepared peel. Add your toppings quickly but carefully. Before transferring to the oven, give the peel a little shake to ensure the dough isn't sticking. If it is, gently lift the edges and add a little more semolina underneath. Slide the pizza from the peel onto the hot stone or steel with a swift, forward motion.
Advanced Thin Dough Stretching Tips and Tricks
For those looking to refine their thin dough stretching techniques and elevate their thin crust pizza game, a few advanced strategies can make a significant difference in dough quality, flavor, and handling.
Techniques like cold fermentation and autolyse improve the dough's structure and extensibility. Using alternative flours like semolina can aid in handling sticky doughs. These tips build upon the foundational science and techniques to help you achieve truly paper-thin results.
Cold Fermentation for Enhanced Dough Strength
Cold fermentation, allowing the dough to rise slowly in the refrigerator for 12-72 hours (or even longer), is a cornerstone technique for advanced thin dough stretching techniques. The low temperature significantly slows down yeast activity but allows enzymes to work longer, breaking down complex carbohydrates into sugars, resulting in deeper flavor development.
Crucially for stretching, the long, slow fermentation also strengthens the gluten network in a relaxed state. This results in a dough that is both more extensible (stretchy) and more elastic (snaps back gently), a perfect combination for achieving a thin crust that doesn't tear easily. Dough fermented cold is typically easier to handle and stretch thin compared to dough proofed solely at room temperature.
Autolyse: Improving Dough Hydration and Extensibility
Autolyse is a simple technique that can significantly improve dough hydration and extensibility, making thin dough stretching techniques easier. It involves mixing just the flour and water from your recipe and letting the mixture rest for 20-60 minutes before adding the salt and yeast and beginning to knead.
During this resting period, the flour fully hydrates, and enzymatic activity begins to break down some of the gluten, making the dough more extensible. When you eventually add the salt and yeast and knead, the gluten develops more quickly and efficiently. This results in a dough that is smoother, easier to handle, and stretches beautifully thin without resistance, enhancing your thin dough stretching techniques.
Using Semolina Flour for Easier Stretching
Using semolina flour (specifically durum wheat semolina) on your work surface and pizza peel is an excellent tip for making thin dough stretching techniques easier, especially with higher hydration doughs.
Semolina flour has a slightly coarser texture than wheat flour. When used for dusting, the tiny granules act like ball bearings, allowing the stretched dough to slide easily across the surface without sticking. This significantly reduces the risk of tearing the delicate, thin dough when adjusting its position or transferring it to the peel. A light dusting is usually sufficient.
Achieving a Paper-Thin Crust
Achieving a truly paper-thin crust requires combining proper dough preparation with meticulous thin dough stretching techniques. Start with a dough that is well-hydrated (65%+), properly fermented (including cold fermentation), and well-rested before stretching.
Use a gentle hand stretching technique like the knuckle method or gentle drape, focusing on even expansion from the center outwards. If using a rolling pin, apply minimal, even pressure and roll in multiple directions, rotating frequently. Constantly check the thickness by holding the dough up to the light. Don't be afraid to let the dough rest briefly if it resists stretching. With practice, you'll develop the feel needed to stretch the dough incredibly thin while maintaining its integrity.
Baking Your Thin Crust Pizza to Perfection
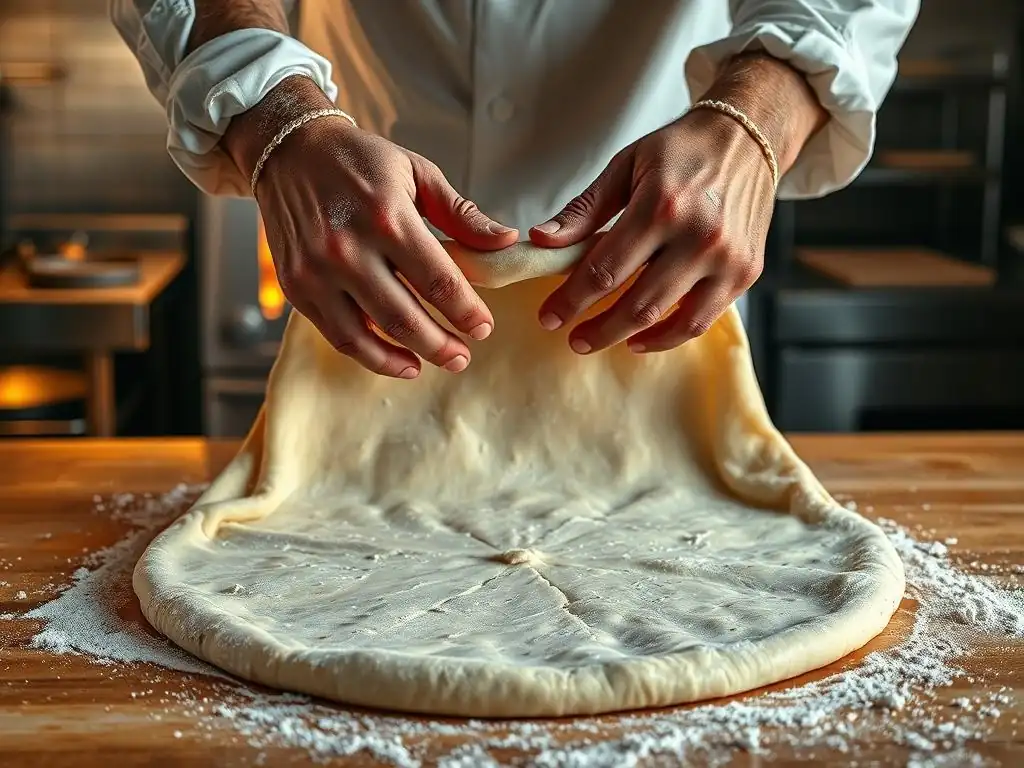
Stretching the dough thin is only half the battle; baking it correctly is essential to achieve that crispy, delicious thin crust pizza. The high temperature and short cooking time are key to preventing the crust from becoming tough or soggy.
Understanding how to use your oven, whether with a pizza stone or steel, and considering the impact of your toppings will ensure your perfectly stretched thin crust bakes up exactly as intended.
Oven Temperature and Cooking Time for Thin Crust Pizza
High heat is essential for baking thin crust pizza quickly and achieving a crispy base. A home oven set to its maximum temperature, typically 500°F (260°C) or 550°F (290°C), is ideal. The high temperature causes the dough to set rapidly and encourages oven spring before the crust dries out.
Cooking time for a thin crust pizza at these high temperatures is usually very short, often between 5 and 10 minutes, depending on the oven and the thickness of your crust. You'll know it's done when the crust is golden brown and the cheese is melted and bubbly, with some charring on the edges.
Using a Pizza Stone or Steel for Optimal Results
A pizza stone or steel is highly recommended for achieving optimal results when baking thin crust pizza. These surfaces absorb and retain heat exceptionally well. When the pizza is placed on the preheated stone or steel, the intense heat is transferred directly to the base of the dough.
This rapid heat transfer causes the crust to cook and crisp up much faster than it would on a standard baking sheet, preventing a soggy bottom and contributing significantly to the desired crispy texture of a thin crust. Preheat your stone or steel in the oven for at least 30-60 minutes at the maximum temperature before baking.
Toppings and Their Impact on Thin Crust Integrity
While the focus is on the crust, the choice and quantity of toppings can impact the integrity of your thin crust pizza. Excessive moisture from sauces, vegetables, or cheese can make a thin crust soggy.
For a thin crust, it's best to use toppings sparingly. Drain excess liquid from vegetables like mushrooms or spinach before adding them. Use a thinner layer of sauce and avoid overloading the pizza. Cooking moisture-rich toppings slightly beforehand can also help. Lighter toppings allow the thin crust to crisp up properly and maintain its structure during baking.
Conclusion: Achieving Thin Crust Pizza Mastery with BakeWithEase
Mastering thin dough stretching techniques is a rewarding journey for any home baker aiming for pizza perfection. By understanding the science of gluten, hydration, and fermentation, preparing your dough meticulously, and practicing gentle, effective stretching methods, you can consistently achieve a beautifully thin, tear-free crust.
Remember to troubleshoot common issues patiently and consider advanced techniques like cold fermentation to elevate your results. With the right approach and a little practice, you'll be creating delicious, crispy thin crust pizzas that impress every time, thanks to your command of thin dough stretching techniques learned right here at BakeWithEase.
Frequently Asked Questions
How crucial is gluten development for successfully stretching dough thin?
Gluten development is absolutely crucial. A well-developed gluten network provides the necessary elasticity and strength to stretch the dough without tearing. This allows for a thin, even layer.
What role does resting the dough play in thin dough stretching?
Resting, also known as autolyse, allows the gluten to relax. This makes the dough more extensible and less likely to snap when stretched. It's a key step for thin dough.
Are there specific flours better suited for thin dough stretching techniques?
Yes, strong bread flour with a high protein content is generally preferred. This type of flour develops a stronger gluten network, essential for stretching dough thin.
What are some common mistakes that cause dough to tear when stretching it thin?
Common mistakes include insufficient gluten development, not allowing the dough to rest properly, and overworking the dough. Also, too much pressure during stretching can cause tears.
How can I improve the elasticity of my dough if it keeps breaking during stretching?
Try kneading the dough for a longer duration to develop more gluten. Make sure to incorporate a resting period before stretching. Also, consider using bread flour for a stronger dough.
Final Reflection: The Enduring Art of Thin Dough
The delicate dance of stretching dough to paper-thin perfection remains a crucial skill, not just for culinary artistry, but for understanding the fundamental principles of material science. This seemingly simple act, explored throughout this article, reveals a complex interplay of gluten development, hydration levels, and the application of controlled force. Mastering these techniques isn't merely about creating beautiful pastries; it's about understanding the very nature of elasticity and tensile strength.
The impact of understanding thin dough stretching extends far beyond the kitchen. It's a microcosm of problem-solving and precision, mirroring the meticulous processes found in various fields, from engineering to textile manufacturing. The patience and attention to detail required resonate deeply with the principles of craftsmanship and the pursuit of excellence. The details are not the details. They make the design.
– Charles Eames. This quote perfectly encapsulates the importance of understanding the seemingly minor aspects of dough stretching, as they ultimately determine the success of the final product.
Now, consider your own approach to challenges. Do you approach them with the same careful consideration, the same understanding of the underlying principles, as a master baker approaches their dough? I invite you to reflect on this. Take the lessons learned here – the importance of gradual stretching, the significance of proper hydration, and the power of mindful technique – and apply them to your own endeavors. The ability to stretch thin without breaking, whether it's dough or a challenging situation, is a skill worth cultivating. Embrace the process, appreciate the subtleties, and discover the rewarding results.
Unleash Your Inner Pizzaiolo: Master the Art of Thin Crust
Thanks for diving into the science of perfectly thin dough! You've now unlocked the secrets to consistently amazing crusts. Ready to put your newfound knowledge into practice?
- Challenge yourself: Try making a pizza tonight using the techniques we explored. Experiment with different flours or hydration levels – you might surprise yourself!
- Share your success (or your struggles!): Post a picture of your creation on social media using #BakeWithEaseThinCrust and let's learn from each other.
- Dive Deeper: Explore our other resources on yeast, flour types, and advanced baking techniques to elevate your baking game.
What unique flavor combination will you create with your flawlessly thin crust? Let us know in the comments below!