
Troubleshooting Enriched Dough Rise Issues

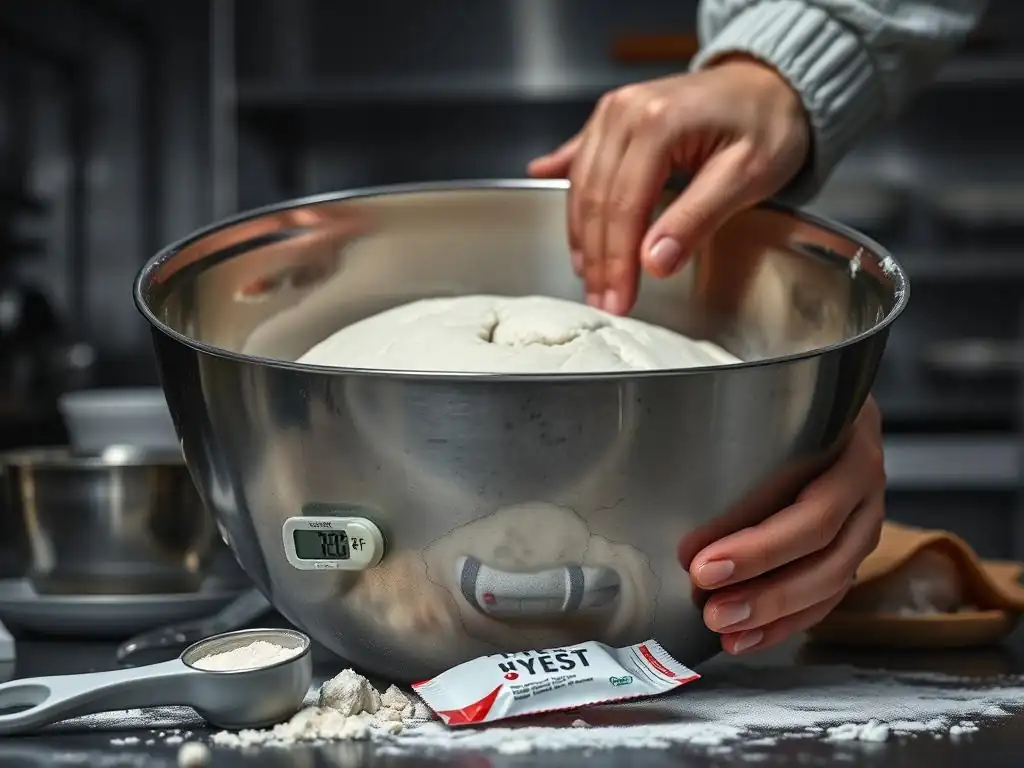
Welcome to BakeWithEase, your trusted guide in the delicious world of baking! Ever wondered why your dough isn't rising? You're in the right place. We'll unravel the mysteries behind enriched dough rise issues, offering practical solutions and expert insights to ensure your next bake is a resounding success. Ready to transform your baking woes into baking wins? Let's get started!
- Troubleshooting Sourdough Starter Issues: Why Isn't My Starter Active?
- Introduction: Understanding Sourdough Starters and Activity
-
Common Reasons Why Your Sourdough Starter Isn't Active
- Hydration Problems: Balancing Water and Flour
- Temperature Issues: Finding the Sweet Spot for Fermentation
- Feeding Schedule Problems: Consistency is Key
- Flour Type Issues: Choosing the Right Food for Your Starter
- Contamination: Identifying and Preventing Unwanted Microbes
- Acidity Imbalance: Maintaining a Healthy pH Level
- Troubleshooting Steps for Inactive Sourdough Starters
- Specific Starter Scenarios and Their Activation Challenges
- Preventing Future Starter Inactivity: Best Practices
- Conclusion: Mastering Sourdough Starter Activation
- Frequently Asked Questions
- Final Reflection: The Humble Rise—Unlocking the Secrets of Enriched Dough
- Unleash Your Baking Potential: Get That Perfect Rise!
Troubleshooting Sourdough Starter Issues: Why Isn't My Starter Active?
Introduction: Understanding Sourdough Starters and Activity
What is a Sourdough Starter? A Baker's Definition
A sourdough starter is essentially a living culture, a symbiotic community of wild yeast and beneficial bacteria (primarily Lactic Acid Bacteria) that thrive in a mixture of flour and water. Think of it as a pet dough – it needs regular feeding and care to stay healthy and active. This microbial ecosystem is responsible for leavening your bread, giving it that characteristic rise and complex flavor profile. Unlike commercial yeast, which is a single strain, a starter is a diverse population working together.
This dynamic community ferments the sugars in the flour, producing carbon dioxide gas (which makes your dough rise) and organic acids (which contribute to flavor, texture, and preservation). A healthy, active starter is crucial for successful sourdough baking. When your starter is sluggish or inactive, it directly impacts the dough's ability to rise, leading to dense or flat loaves. Understanding what makes a starter tick is the first step in troubleshooting why your dough isn't rising.
Why Starter Activity Matters in Sourdough Baking
The vigor and activity of your sourdough starter are paramount because they are the primary source of leavening in your bread. An active starter, when fed, will predictably double or even triple in volume within a few hours (depending on temperature and feeding ratio), showing visible signs of fermentation like bubbles on the surface and throughout the culture. This bubbly expansion is a direct result of the yeast producing carbon dioxide.
If your starter is not active – meaning it doesn't show significant growth or bubbling after feeding – it won't be able to produce enough gas to lift your bread dough. This is a primary reason why dough not rising is a common issue for sourdough bakers. A strong, active starter also contributes desirable acids that improve the dough's structure, elasticity, and overall flavor. A weak or inactive starter results in a slow or non-existent rise, potentially gummy texture, and a lack of that signature sourdough tang.
Common Reasons Why Your Sourdough Starter Isn't Active
Hydration Problems: Balancing Water and Flour
Too Much Water: Diluting the Culture
Adding too much water relative to flour creates a very thin, runny starter. While it might seem counterintuitive, excessive hydration can actually make it harder for the microbes to thrive and show visible activity. The food (flour) is too spread out, making it difficult for the yeast and bacteria to efficiently consume the sugars. This diluted environment can also favor certain less desirable bacteria.
A typical healthy starter is often maintained at a 1:1 ratio of flour to water by weight (100% hydration), resulting in a thick, paste-like consistency. If your starter is significantly thinner than this, the yeast and bacteria might not be able to form the strong network needed to trap gas bubbles effectively, making it appear less active even if fermentation is occurring slowly. For instance, feeding 50g starter with 50g flour and 75g water (150% hydration) will result in a thinner starter that might peak faster but show less dramatic volume increase compared to a 100% hydration starter.
Too Little Water: Inhibiting Microbial Activity
Conversely, a starter that is too dry is equally problematic. If you use too little water relative to the flour, the mixture becomes very stiff and dense. In this environment, the yeast and bacteria have limited mobility and reduced access to the food source and oxygen necessary for vigorous fermentation. It's like trying to swim in mud compared to water.
A stiff starter (like 50% or 60% hydration) is possible and used by some bakers for specific purposes, but it typically ferments much slower than a 100% hydration starter at the same temperature. If your starter is meant to be more liquid but is consistently too thick, the lack of sufficient moisture can literally slow down the metabolic processes of the microbes, resulting in sluggish activity and a failure to rise adequately when used in dough. Ensuring the correct hydration is a fundamental step when troubleshooting why your dough not rising starts with the starter itself.
Temperature Issues: Finding the Sweet Spot for Fermentation
Too Cold: Slowing Down or Dormant Activity
Temperature plays a critical role in the metabolic rate of the yeast and bacteria in your starter. If the environment is too cold, their activity slows down dramatically. Below 65°F (18°C), fermentation becomes very sluggish. In refrigerator temperatures (around 40°F or 4°C), the microbes become largely dormant, which is why refrigeration is used for long-term storage to slow feedings.
If your kitchen is consistently cool, say below 68°F (20°C), your starter will take much longer to become active after feeding, perhaps taking 12-24 hours to show significant signs of life instead of the typical 4-8 hours at warmer temperatures. This slow activity directly impacts why your dough not rising might be an issue, as the starter isn't potent enough when you mix it into your bread. Finding a warmer spot, like near a warm appliance or in a proofing box, can often revive a sluggish starter.
Too Hot: Killing Off Beneficial Microbes
While warmth encourages activity, excessive heat can be detrimental. Temperatures consistently above 85°F (30°C) can stress the starter, potentially favoring certain bacteria over the wild yeast, leading to an imbalance. More critically, temperatures above 95°F (35°C) can begin to kill off the beneficial yeast and bacteria necessary for leavening and flavor development.
Leaving your starter in a location that gets too hot, like in a sunny window on a warm day or directly on a heat vent, can quickly weaken or even destroy the microbial culture. Signs of overheating might include a very rapid, almost frantic initial rise followed by a sudden collapse and a foul odor. Maintaining a consistent temperature between 70°F and 80°F (21-27°C) is generally ideal for a healthy, active starter.
Feeding Schedule Problems: Consistency is Key
Infrequent Feeding: Starving the Culture
Sourdough starters need to be fed regularly to maintain their vitality. When a starter is left unfed for too long at room temperature, the yeast and bacteria consume all the available sugars in the flour. Once the food runs out, their activity significantly decreases, and the starter becomes overly acidic from the buildup of metabolic byproducts. This overly acidic environment is less hospitable to the yeast.
An unfed or infrequently fed starter will appear sluggish, might have a strong, pungent, vinegary or acetone-like smell, and will not reliably rise or show significant bubbles. Trying to bake with a starved starter is a common reason why dough not rising occurs. A starter left for days or weeks without feeding will require multiple consistent feedings to regain its strength and balanced microbial population.
Irregular Feeding: Disrupting the Balance
Consistency in feeding time is also beneficial for maintaining a robust and predictable starter. Feeding at erratic intervals – sometimes every 12 hours, sometimes every 36 hours – can disrupt the natural cycle of the microbial community. The yeast and bacteria have peak periods of activity and reproduction based on the availability of fresh food.
Irregular feeding can lead to inconsistent performance. One day the starter might be active, the next it's sluggish, making it difficult to predict when it's ready to be used in a recipe. While starters are resilient, establishing a routine, such as feeding every morning or every evening, helps the microbial population stabilize and ensures you have an active starter when you need it for your bake, reducing the likelihood of dough not rising issues.
Flour Type Issues: Choosing the Right Food for Your Starter
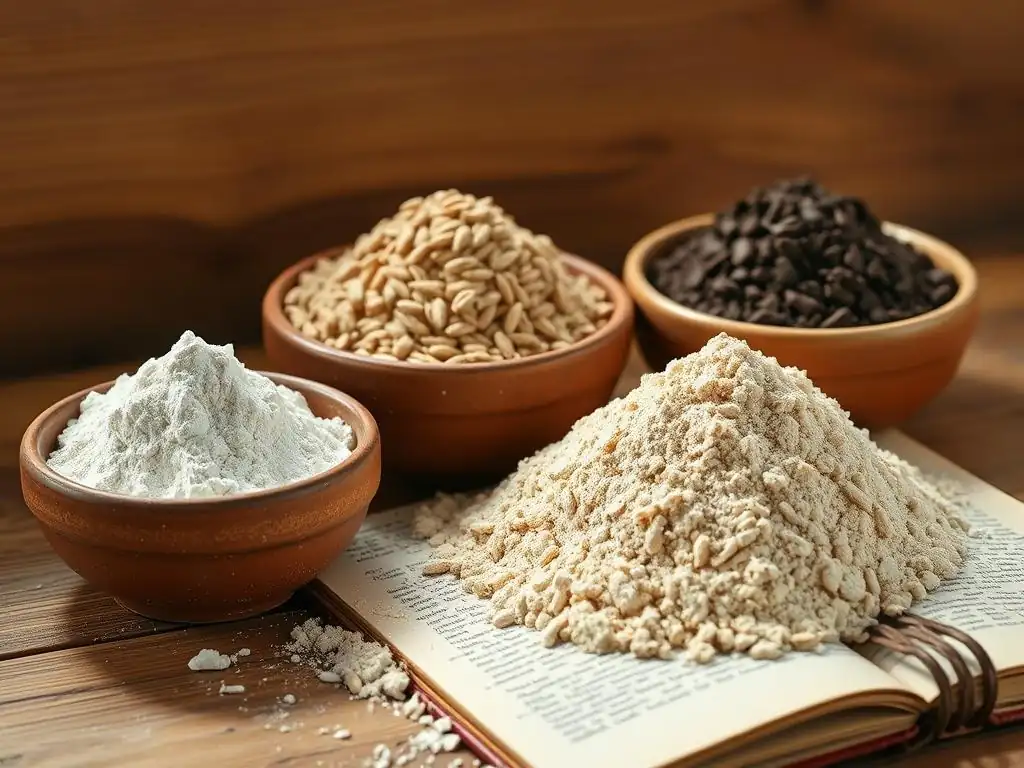
Bleached Flour: Inhibiting Starter Growth
The type of flour you feed your starter makes a difference. Bleached flours are processed using chemicals that can sometimes have a negative impact on the delicate microbial ecosystem in a starter. The bleaching process can reduce the nutrient content and potentially introduce compounds that are less favorable to the wild yeast and bacteria.
While some starters can be maintained on bleached all-purpose flour, many bakers find that their starters are more vigorous and easier to maintain when fed with unbleached flour. If you've been using bleached flour and your starter is consistently weak, switching to unbleached flour might provide the boost needed to improve its activity and address why your dough not rising might be linked to the starter's diet.
Insufficient Nutrients: Selecting Whole Grain Options
Wild yeast and bacteria thrive on the diverse nutrients found in flour. While white bread flour works well for many starters, flours that contain more of the wheat germ and bran, such as whole wheat or rye flour, provide a richer food source. These parts of the grain contain more vitamins, minerals, and complex carbohydrates that the microbes love.
Many bakers use a mix of white and whole wheat/rye or even feed exclusively with rye flour, especially when trying to establish a new starter or revive a sluggish one. Rye flour, in particular, is known for its high enzymatic activity and nutrient density, which can significantly boost starter activity. If your starter is weak, trying a few feedings with a small amount of rye or whole wheat flour mixed into your regular flour can often invigorate it. For example, using 20% rye and 80% bread flour can make a noticeable difference in activity.
Contamination: Identifying and Preventing Unwanted Microbes
Mold: Recognizing and Avoiding Contamination
Mold is a common form of contamination in sourdough starters and is usually easy to spot. It appears as fuzzy patches on the surface, which can be white, green, black, or even pink. Mold spores are everywhere in the environment, but a healthy, active starter is usually acidic enough to prevent them from taking hold. Mold growth is often a sign that the starter is weak, not acidic enough, or has been exposed to airborne spores.
If you see mold in your starter, it is generally recommended to discard the entire culture and start fresh. Mold can have unseen roots extending throughout the starter, and some molds produce harmful toxins. To prevent mold, keep your starter in a clean jar, use clean utensils, avoid trapping excessive condensation on the lid, and ensure your starter is regularly fed and active, maintaining a healthy acidity level (pH below 4.5 at peak activity).
Kahm Yeast: Understanding and Managing its Presence
Kahm yeast is another type of surface growth that can appear on starters. It's a film-forming, aerobic yeast that looks like a white, wrinkled skin or patchy film on the surface. It's not harmful to consume, but it indicates that the starter's surface is exposed to too much air and that the starter's acidity might be slightly off, allowing Kahm to outcompete the desirable yeast.
While Kahm yeast isn't dangerous, it can impart an off-flavor or smell (sometimes fruity, sometimes like nail polish remover) and can suppress the activity of the leavening yeast. If you spot Kahm yeast, you can usually scrape it off the surface, discard that portion, and then feed your starter as usual. Ensuring your starter is fed regularly, kept at a proper temperature, and stored in a jar that minimizes surface area exposure to air can help prevent Kahm yeast from forming.
Acidity Imbalance: Maintaining a Healthy pH Level
Excessive Acidity: Inhibiting Yeast Activity
As a sourdough starter ferments, the bacteria produce lactic and acetic acids, which contribute to flavor and help protect the starter from spoilage. However, if a starter is left unfed for too long, the acidity levels can become excessively high. Wild yeast is somewhat acid-tolerant, but too much acid will significantly inhibit its activity.
An overly acidic starter will smell very strongly of vinegar or acetone (nail polish remover) and will likely be sluggish and fail to rise much after feeding. This high acidity is a major factor why dough not rising can occur even if you use a starter that looks bubbly but is past its peak or hasn't been fed recently. Regular, timely feeding helps dilute the accumulated acids and provides fresh food, bringing the pH back into a range where the yeast thrives.
Insufficient Acidity: Encouraging Undesirable Bacteria
While excessive acidity is common in neglected starters, insufficient acidity can also be a problem, particularly in young or weak starters. A healthy starter's acidity (pH typically dropping to 4.0-4.5 at peak) helps suppress the growth of pathogenic bacteria and other unwanted microbes. If the starter isn't producing enough acid, it becomes more susceptible to contamination or the proliferation of bacteria that produce off-flavors or don't contribute to leavening.
This can happen if the starter is fed too frequently with very large amounts of fresh flour/water relative to the starter amount, essentially diluting the microbial population and acidity too much before it has a chance to develop. A starter that smells sweet or overly yeasty without any tang might lack sufficient acidity. Maintaining a consistent feeding ratio (like 1:1:1 or 1:2:2 starter:flour:water by weight) and allowing the starter to mature can help establish a healthy pH balance.
Troubleshooting Steps for Inactive Sourdough Starters
Step 1: Adjust Hydration
Reducing Water: Thickening the Consistency
If your starter seems too thin and isn't showing much structure or rise, try reducing the amount of water slightly at the next feeding. For example, if you usually feed 50g starter with 50g flour and 50g water (1:1:1 ratio), try feeding with 50g starter, 50g flour, and 45g water. This will make the mixture slightly stiffer (around 90% hydration).
Observe how the starter behaves over the next few feedings. A slightly thicker consistency can sometimes help the gas bubbles become more visible and create a stronger structure, making the rise more apparent. Ensure you are measuring ingredients by weight, as volume measurements (cups) are notoriously inaccurate for sourdough ingredients.
Adding Water: Thinning the Consistency
Conversely, if your starter is very stiff and dense, making it hard to mix and showing little activity, you likely need to increase the hydration. If you're using a 1:1:1 ratio and it's too stiff (perhaps due to flour type), try increasing the water slightly. For example, use 50g starter, 50g flour, and 55g water (110% hydration).
A more liquid consistency allows the microbes to move more freely and access nutrients more easily. Experiment within a reasonable range (typically 90% to 110% hydration for a standard starter) until you find a consistency that results in good activity with your specific flour and temperature conditions.
Step 2: Optimize Temperature
Warmer Environment: Finding a Suitable Location
If your kitchen is cool (below 70°F or 21°C) and your starter is sluggish, finding a warmer spot is crucial. Microbes are more active at higher temperatures. Look for locations that are consistently between 75°F and 80°F (24-27°C).
Ideas for warmer spots include:
- Inside an oven with just the light on (check temperature first, can be 80-90°F).
- On top of a refrigerator or near a warm appliance like a water heater.
- In a proofing box or dedicated bread proofer set to a warm temperature.
- Inside a microwave or unheated oven with a bowl of hot water placed next to the starter (refresh water as needed).
Cooler Environment: Avoiding Over-Fermentation
If your starter is peaking and falling very quickly (within 2-3 hours) and perhaps smelling overly acidic, it might be too warm. High temperatures accelerate fermentation, quickly consuming the food and leading to high acidity. While rapid activity might seem good, it means the starter is peaking well before you might be ready to use it, and it can weaken the culture over time.
Try moving your starter to a slightly cooler location, perhaps between 70°F and 75°F (21-24°C). This will slow down fermentation, allowing the starter to develop strength and acidity more gradually and peak over a longer, more manageable timeframe (e.g., 4-8 hours). This also helps maintain a healthier balance of yeast and bacteria.
Step 3: Establish a Consistent Feeding Schedule
Twice-Daily Feeding: A Common Routine
For a starter kept at warm room temperature (75-80°F / 24-27°C) or when trying to revive a sluggish starter, feeding twice a day (roughly every 12 hours) is often recommended. This ensures the starter receives a fresh supply of food before it completely consumes the previous meal and becomes overly acidic.
Feeding twice a day with a ratio like 1:1:1 (starter:flour:water) helps build microbial population and activity quickly. For example, discard all but 50g of starter, then feed with 50g flour and 50g water in the morning and again in the evening. This consistent influx of nutrients keeps the yeast and bacteria happy and active, leading to a reliable rise.
Once-Daily Feeding: For Mature Starters
Once your starter is consistently doubling or tripling within 4-8 hours at your typical room temperature and smells pleasantly tangy, you can often switch to a once-daily feeding schedule (roughly every 24 hours). This is usually appropriate if your kitchen temperature is cooler (70-74°F / 21-23°C) or if you use a slightly larger feeding ratio.
Using a ratio like 1:2:2 or 1:3:3 (starter:flour:water) when feeding once a day helps provide enough food to last the full 24 hours without the starter becoming overly acidic or starved. For example, feed 25g starter with 50g flour and 50g water (1:2:2). This strategy is more economical on flour and sustainable for daily maintenance once your starter is robust.
Step 4: Change Flour Type

Switching to Whole Wheat: Encouraging Activity
If your starter is weak or slow, especially if you've only been feeding it white flour, try incorporating some whole wheat flour into its diet. Whole wheat flour is rich in nutrients that can stimulate microbial growth.
For a few feedings, try replacing a portion of your regular flour with whole wheat. For instance, if you feed 50g starter with 50g white bread flour and 50g water, switch to feeding with 50g starter, 40g white bread flour, 10g whole wheat flour, and 50g water. Observe the difference in activity over the next few days. Many bakers find that even a small percentage of whole grain flour significantly boosts starter vigor.
Using Rye Flour: Boosting Fermentation
Rye flour is particularly effective at boosting sourdough starter activity due to its high enzyme content and nutrient profile. It's often used to create new starters or revive sluggish ones quickly.
Consider feeding your starter exclusively with rye flour for a few cycles, or mix a significant portion into your regular flour. For example, feed 50g starter with 25g rye flour, 25g white bread flour, and 50g water. Rye starters tend to be very active and smell quite tangy. Once your starter shows renewed vigor, you can gradually transition back to your preferred flour mix, maintaining a small percentage of whole grain if desired.
Step 5: Observe for Contamination
Discarding Contaminated Starter: Starting Fresh
If you see any signs of mold – fuzzy, colored patches (green, black, white, pink) – it is safest to discard the entire starter. Do not try to scoop out the moldy parts, as the mold structure often permeates the culture invisibly.
Clean your jar and utensils thoroughly with hot, soapy water. If possible, sterilize the jar by boiling or running it through a hot dishwasher cycle. Then, begin a new starter from scratch using fresh flour and water, following a reliable recipe. This is the most prudent approach to ensure your sourdough isn't compromised by harmful mold.
Remedying Minor Issues: Removing Kahm Yeast
If you observe a white, film-like layer on the surface of your starter, it's likely Kahm yeast. While not ideal, it doesn't necessarily mean you need to discard the entire starter unless it's accompanied by truly foul odors (beyond typical sourdough tang).
Carefully scrape off the layer of Kahm yeast from the surface and discard it. Try to remove as much of the film as possible without digging too deep into the healthy starter below. Then, feed your starter as usual. To help prevent it from returning, ensure you are feeding regularly, maintaining a good temperature, and using a jar that minimizes the surface area exposed to air (e.g., a taller, narrower jar instead of a wide, shallow one).
Step 6: Monitor Acidity and Adjust Feeding
Adjusting Feeding Ratio: Influencing Acidity Levels
If your starter smells overwhelmingly of vinegar or acetone, it's likely too acidic, usually from being left unfed for too long. To reduce acidity, you need to dilute the acids and provide fresh food. The best way to do this is by adjusting your feeding ratio to use a smaller amount of starter relative to the fresh flour and water.
Instead of a 1:1:1 ratio, try feeding with a 1:5:5 or even 1:10:10 ratio for a few cycles. For example, take just 10g of your overly acidic starter and feed it with 50g flour and 50g water (1:5:5). This provides a large "meal" for the relatively small amount of starter, buffering the acidity and allowing the yeast to become more active in a less hostile environment.
Using pH Strips: Measuring Acidity for Guidance
While not strictly necessary for home bakers, using pH strips can provide specific data about your starter's acidity levels. A healthy, active starter typically drops to a pH between 4.0 and 4.5 at its peak, just before it starts to collapse.
If your starter consistently stays above pH 4.5 after several hours at peak temperature, it might lack sufficient acidity, making it prone to undesirable microbial growth. If it consistently drops well below 4.0 while still showing some activity, it's likely overly acidic and could benefit from larger feeding ratios. pH strips can offer objective insight when troubleshooting why your dough not rising might stem from an unbalanced starter, though experienced bakers often rely on smell and behavior.
Specific Starter Scenarios and Their Activation Challenges
Reviving a Neglected Starter: The Comeback Strategy
A starter left unfed in the refrigerator for weeks or months might look dormant, have a dark liquid layer (hooch) on top, and smell strongly of alcohol or acetone. Don't despair – they are often revivable!
- Step 1: Assess: Pour off the hooch (or stir it in if you prefer a stronger tang, though pouring is better for revival). Scrape off any dry crust. The viable starter is usually underneath.
- Step 2: Small Feeding: Take a small amount of the starter (e.g., 20g) from the healthy-looking part underneath the hooch/crust. Feed it with a generous amount of fresh flour and water, perhaps a 1:3:3 or 1:4:4 ratio (e.g., 20g starter, 80g flour, 80g water). Use some whole grain flour if possible.
- Step 3: Consistent Feeding: Feed this smaller batch every 12-24 hours, depending on the temperature. Discard most of the starter each time, keeping only a small amount (e.g., 20-30g) to feed.
- Step 4: Observe: It might take several days (3-7 or even more) of consistent feeding at a warm temperature (75-80°F / 24-27°C) before you see reliable doubling or tripling. Be patient. You'll notice the smell becoming more pleasant and the texture more bubbly.
Activating a Dried Starter: Rehydration Techniques
Dried sourdough starter is a convenient way to store or share a starter long-term. Rehydrating it requires time and consistent care to bring the microbes back to life.
- Step 1: Rehydrate: Combine the dried starter flakes with an equal weight of warm water (around 80-90°F / 27-32°C). Let it sit for a few hours (e.g., 4-8 hours) until the flakes have softened and dissolved into a paste.
- Step 2: Initial Feeding: Feed the rehydrated starter with an equal weight of flour (preferably some whole grain or rye) and water. For example, if you started with 20g dried starter and 20g water, add 40g flour and 40g water. Mix well.
- Step 3: Consistent Feeding: Treat this like a new starter. Feed it every 12-24 hours, discarding a portion each time (e.g., keep 30-50g and feed with fresh flour/water). Maintain a warm temperature (75-80°F / 24-27°C).
- Step 4: Patience: It can take anywhere from 3 days to over a week for a dried starter to become reliably active, doubling or tripling after feeding. Keep feeding consistently until you see robust activity before attempting to bake with it.
Adapting a Starter to Different Flours: Gradual Transition
If you want to switch your starter from one type of flour (e.g., rye) to another (e.g., white bread flour), or introduce a new flour type, it's best to do it gradually. Sudden, drastic changes in diet can shock the microbial community and lead to a temporary dip in activity.
- Step 1: Partial Substitution: Begin by substituting only a small percentage of the original flour with the new flour type during feedings. For example, if feeding with 100% rye, try feeding with 80% rye and 20% white bread flour.
- Step 2: Gradual Increase: Over several feedings (e.g., 3-7 days), gradually increase the percentage of the new flour while decreasing the original flour. So, you might go from 80/20 to 60/40, then 40/60, and so on, until you reach your desired mix or 100% of the new flour.
- Step 3: Observe Activity: Pay attention to how the starter's activity changes during the transition. It might become slightly more or less active initially. Maintain your regular feeding schedule and temperature.
- Step 4: Full Transition: Once you are feeding with your desired flour mix and the starter is consistently showing strong activity (doubling/tripling within a predictable timeframe), the transition is complete.
Preventing Future Starter Inactivity: Best Practices

Consistent Routine: Sticking to a Schedule
One of the most important factors in maintaining a healthy, active sourdough starter is consistency. Establish a regular feeding schedule that fits your lifestyle, whether that's every morning, every evening, or twice a day.
- Task List:
- [ ] Choose a feeding time (e.g., 7 AM, 9 PM).
- [ ] Stick to the chosen time as closely as possible daily.
- [ ] Use a consistent feeding ratio and amount of starter.
- [ ] Feed in a location with a relatively stable temperature.
This predictability helps the microbial population establish a rhythm, ensuring the starter is consistently strong and ready for baking, thus preventing issues like why dough not rising due to a weak starter.
Careful Observation: Monitoring Visual Cues
Become familiar with what your healthy, active starter looks, smells, and behaves like at different stages after feeding. This allows you to spot potential issues early.
- Task List:
- [ ] Note the starter's consistency immediately after feeding.
- [ ] Observe bubble formation over time (small bubbles initially, larger bubbles as it peaks).
- [ ] Watch for volume increase (doubling/tripling is a good sign). Mark the level on the jar.
- [ ] Smell the starter at different stages (mildly tangy when young, more acidic at peak/past peak).
- [ ] Check the texture (airy and web-like at peak).
- [ ] Look for signs of collapse after peaking (a concave surface).
By paying attention to these cues, you can tell if your starter is peaking too fast (too warm, needs larger feeding ratio), too slow (too cold, needs smaller feeding ratio, or needs more feeds), or showing signs of distress.
Proper Storage: Maintaining Starter Health
How you store your starter between feedings or when taking a break from baking impacts its health.
- Task List:
- [ ] Use a clean, appropriately sized jar (tall and narrow often helps with observing rise and reducing Kahm yeast).
- [ ] Use a lid that allows gases to escape but prevents drying (loose-fitting lid, jar lid screwed on loosely, or plastic wrap secured with a rubber band but slightly vented).
- [ ] Store at room temperature (70-80°F / 21-27°C) if feeding daily or twice daily.
- [ ] Store in the refrigerator (around 40°F / 4°C) for longer breaks (feed weekly or bi-weekly when refrigerated).
- [ ] When taking a starter out of the fridge, give it 1-3 consistent feedings at room temperature to revive its activity before using it for baking.
Proper storage ensures the starter environment is stable and reduces risks of contamination or extreme temperature fluctuations that can negatively impact microbial activity and lead to issues like why dough not rising.
Conclusion: Mastering Sourdough Starter Activation
Key Takeaways for a Thriving Starter
Maintaining a vibrant sourdough starter is a journey, but understanding the key factors influencing its activity makes troubleshooting much easier. Remember that your starter is a living ecosystem, and its health directly dictates the success of your sourdough bread, particularly its rise.
The most common culprits behind an inactive starter are temperature (too cold or too hot), feeding issues (infrequent or irregular feeding, incorrect ratios), hydration imbalances (too wet or too dry), and the type of flour used. Less common, but important to recognize, are contamination (mold, Kahm yeast) and significant acidity imbalances. When your dough not rising, the first place to look is often the starter itself.
Resources for Further Learning on Sourdough Management
While this guide covers the primary reasons why your starter might not be active, the world of sourdough is vast and fascinating. Continued learning can deepen your understanding and improve your baking results.
Explore reliable baking websites and books dedicated to sourdough. Look for detailed guides on starter maintenance, different feeding strategies, and how to adapt your starter to various flours and temperatures. Many online communities and forums offer support and shared experiences from other sourdough enthusiasts tackling similar challenges. Consistent practice and observation, combined with reliable information, will empower you to cultivate a consistently robust starter, ensuring your sourdough dough rises beautifully every time.
Frequently Asked Questions
Why is my enriched dough not rising?
The most common reason is inactive yeast. Make sure your yeast is alive by proofing it. Other causes can include too cold a temperature or expired ingredients.
What is "proofing" yeast and how do I do it?
Proofing yeast means testing its viability. Mix yeast with warm water and sugar. If it foams within 5-10 minutes, it's active.
What temperature is ideal for dough rising?
The ideal temperature for dough rising is generally between 75-85°F (24-29°C). Too cold slows down yeast activity; too hot can kill it.
Could using old flour affect my dough rise?
Yes, absolutely! While flour doesn't "expire" in the same way as milk, it can become stale. Older flour affects gluten development, leading to a poor rise.
Besides temperature and yeast, what else can affect enriched dough rising?
The amount of fat and sugar in enriched dough can inhibit the rise. Ensure you're using the correct proportions as specified in the recipe.
Final Reflection: The Humble Rise—Unlocking the Secrets of Enriched Dough
The seemingly simple act of dough rising is, in reality, a complex dance of yeast, flour, and time, a process easily disrupted and often misunderstood. A perfectly risen loaf represents not just culinary success, but a mastery of fundamental baking principles. Understanding the nuances of enriched dough rise, as explored in this article, is crucial for any baker aiming for consistent, delicious results.
The challenges of achieving a proper rise have plagued bakers for centuries, shaping techniques and inspiring countless variations in recipes. The frustration of a stubbornly flat loaf is a familiar experience, a testament to the delicate balance required. This journey into the science and art of enriched dough rising has underscored the importance of precision and patience. The best bread is made with love and care, and that includes understanding the process.
This simple truth, often overlooked, is the key to unlocking the secrets of a perfect rise.
Now, consider your own baking experiences. Have you encountered the frustrations detailed here? Perhaps you've wrestled with a dough that refused to cooperate, leaving you with a dense, disappointing result. I encourage you to revisit your baking practices, armed with the knowledge gained in this article. Experiment with different techniques, pay close attention to detail, and most importantly, embrace the learning process. The journey to mastering enriched dough is a rewarding one, filled with the delicious aroma of freshly baked bread and the satisfaction of a perfectly risen loaf.
Unleash Your Baking Potential: Get That Perfect Rise!
Thanks for taking the time to explore the world of enriched doughs with us! We hope you gained valuable insights into troubleshooting those pesky rise issues. Now it's time to put that knowledge into action.
- Master the Art of the Rise: Experiment with the temperature and humidity in your kitchen today. Make notes on your observations—this is key to consistent results!
- Share Your Success (or Challenges!): We'd love to hear about your baking journey. Share your experiences and tips in the comments below – let's build a supportive baking community together!
- Dive Deeper into Dough: Explore our other articles on BakeWithEase.com for more baking tips and tricks to elevate your skills.
What small adjustment will you make to your next enriched dough recipe to ensure a perfect rise?