
Understanding Gluten Development in Ciabatta and Rustic Doughs

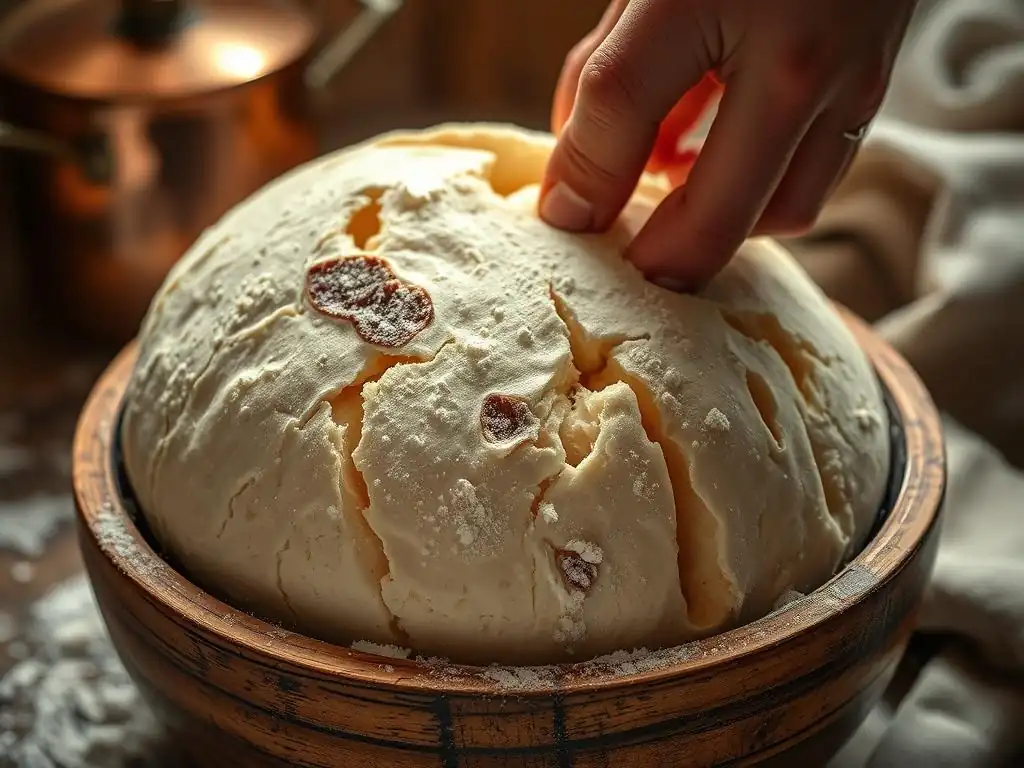
Welcome to BakeWithEase, your guide to baking brilliance! Ever wondered how to achieve that perfect, airy crumb in your ciabatta? This article dives deep into the fascinating science of gluten development ciabatta dough, revealing the secrets to creating those signature large holes and irresistible chew. Get ready to unlock the potential of your rustic loaves and discover the techniques that will elevate your bread baking to a whole new level. Intrigued? Let's get started!
- Introduction to Gluten in Ciabatta and Rustic Breads
- Key Factors Affecting Gluten Development in Ciabatta & Rustic Doughs
- Achieving Optimal Gluten Development in Ciabatta Dough
- Mastering Gluten Development in Rustic Breads
- Gluten Development and the Open Crumb Structure
- Common Mistakes to Avoid in Gluten Development
- Conclusion: Elevate Your Baking with Gluten Knowledge
-
Frequently Asked Questions
- What is gluten development and why is it important in ciabatta dough?
- How does the hydration level of ciabatta dough affect gluten development?
- What are some techniques to encourage gluten development in ciabatta dough?
- Can you over-develop gluten in ciabatta dough?
- What type of flour is best for achieving optimal gluten development in ciabatta dough?
- Final Reflection: The Art and Science of Gluten in Ciabatta
- Unlock Your Ciabatta Mastery: Take the Next Step!
Introduction to Gluten in Ciabatta and Rustic Breads
The Importance of Gluten Development for Ciabatta's Texture
Gluten development is absolutely fundamental to achieving the signature open, airy crumb and chewy texture that defines authentic ciabatta bread. Without sufficient gluten structure, the dough lacks the elasticity and extensibility needed to trap the gases produced during fermentation. This results in a dense, heavy loaf rather than the light, hole-filled interior characteristic of great ciabatta. The stretching and folding techniques commonly used in high-hydration doughs like ciabatta are specifically designed to encourage this gluten network to form and strengthen, allowing the dough to rise dramatically during baking and create those large, irregular holes.
The unique structure of ciabatta, often translated as "slipper" due to its shape, relies heavily on a well-developed gluten network that can support a very wet dough. A high hydration level (often 80% or more water relative to flour weight) is typical for ciabatta, and it's the strong, elastic gluten that prevents this wet mass from simply collapsing.
The gluten strands form a web that provides the necessary scaffolding, enabling the dough to hold its shape and volume as carbon dioxide expands within it during the rise and bake. Mastering gluten development ciabatta dough is the key to moving from flat, sad loaves to beautifully airy ones.
What is Gluten and How Does it Form in Dough?
Gluten is not an ingredient you add; it's a protein structure that develops when two proteins found in wheat flour, glutenin and gliadin, come into contact with water. When these proteins are hydrated and agitated (through mixing or kneading), they link together to form an elastic network. Glutenin provides elasticity, allowing the dough to spring back when stretched, while gliadin provides extensibility, allowing the dough to be stretched without tearing. Together, they form the cohesive, stretchy matrix we know as gluten.
The formation of this gluten network is a gradual process. Initially, the hydrated proteins are tangled and weak. As mixing or kneading continues, these protein chains align and bond, creating longer, stronger, and more organized structures. This development allows the dough to become smooth, elastic, and capable of holding its shape and trapping gas. The degree of gluten development required varies depending on the type of bread; a soft cake requires minimal gluten, while a chewy ciabatta or rustic bread demands significant gluten development to achieve its desired texture and structure.
Key Factors Affecting Gluten Development in Ciabatta & Rustic Doughs
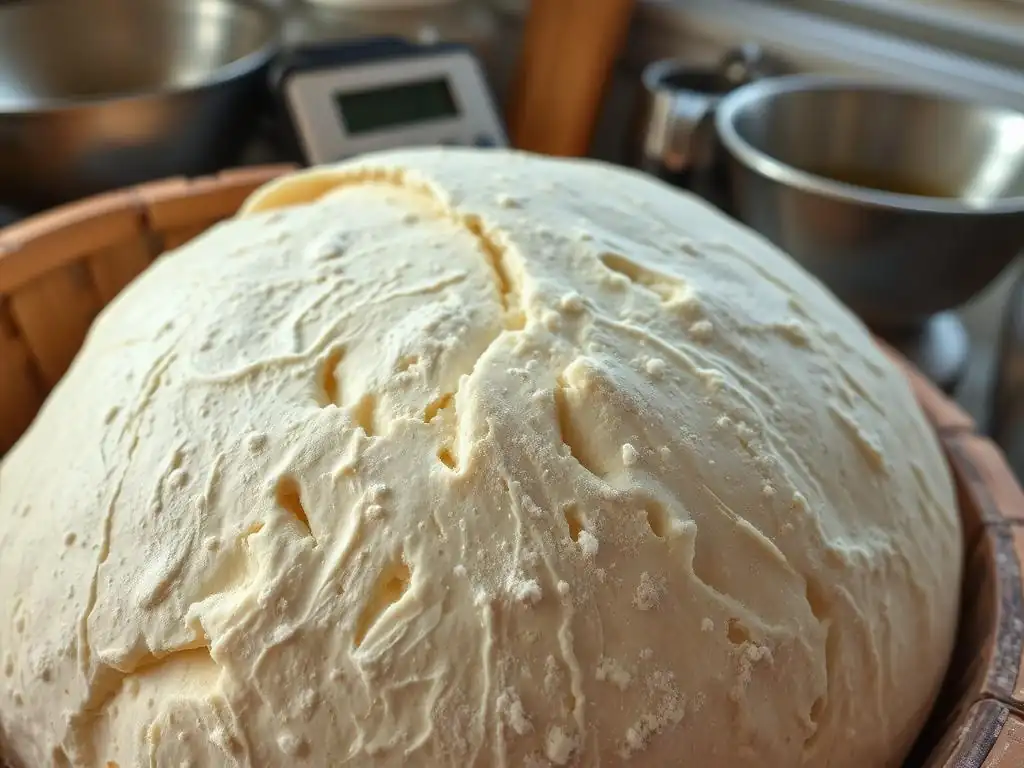
The Role of Flour: Protein Content and Gluten Strength
The type of flour used is perhaps the most critical factor influencing gluten development. Wheat flour contains the gluten-forming proteins, and the amount and quality of these proteins vary significantly between different flour types. Higher protein flours generally yield stronger gluten networks, which is essential for breads that require a lot of structure, like ciabatta and many rustic loaves. The protein content is often listed on flour packaging, typically ranging from around 8% for cake flour to 14% or more for strong bread flour.
Beyond just the quantity of protein, the quality of the gluten-forming proteins also matters. Some flours have proteins that form more extensible gluten, while others form more elastic gluten. Millers carefully select wheat varieties and milling processes to produce flours optimized for specific baking applications. For breads requiring significant structure and an open crumb, like ciabatta, a flour with both high protein content and proteins that yield a balanced extensibility and elasticity is preferred to support the high hydration levels and extensive fermentation.
Choosing the Right Flour for Ciabatta
Selecting the appropriate flour is paramount for successful gluten development ciabatta dough. Ciabatta typically requires a strong bread flour with a protein content of 12% to 14%. This high protein level ensures that a robust gluten network can form, capable of supporting the high hydration levels (often 80-90% or even higher) and producing the characteristic open crumb. Using a lower protein flour, like all-purpose flour (typically 10-12% protein), will result in a weaker gluten structure that struggles to handle the wetness, leading to a flatter loaf with a tighter crumb.
Some bakers also incorporate a small percentage of high-gluten flour (14-16% protein) or vital wheat gluten (concentrated gluten protein) into their bread flour to further boost the protein content and strengthen the dough, especially when working with extremely high hydration or challenging wheat varieties. However, for most standard ciabatta recipes, a quality bread flour with around 12.5-13.5% protein is sufficient to achieve excellent gluten development and structure.
Best Flour Types for Rustic Bread
Rustic breads encompass a wide range of styles, but many also benefit from good gluten development, though perhaps not always to the extreme level of ciabatta. Depending on the desired crumb and crust, a strong bread flour (12-14% protein) is often a good choice for rustic loaves, providing structure and chewiness. However, some rustic recipes call for a blend of flours, including whole wheat flour, rye flour, or even lower-protein flours like Type 00 or specialty bread flours.
When using whole wheat or rye flour in rustic breads, it's important to note that while they contain gluten-forming proteins, other components (like bran particles in whole wheat or pentosans in rye) can interfere with gluten development. This often necessitates longer mixing or resting times, or combining them with a higher percentage of white bread flour, to achieve adequate gluten strength. For a standard rustic loaf aiming for a sturdy crust and moderately open crumb, a high-quality bread flour remains the most reliable base for strong gluten development.
Water and Hydration: Its Impact on Gluten Formation
Water is the catalyst for gluten development; without it, the glutenin and gliadin proteins remain dormant. Water hydrates the proteins, allowing them to bond and form the gluten network. Furthermore, the amount of water, or hydration level, significantly impacts how gluten develops and the final texture of the bread. Higher hydration doughs, like ciabatta (often 80%+ hydration), require more mixing or time to fully develop their gluten structure compared to lower hydration doughs (e.g., a baguette at 65-70% hydration).
In high hydration doughs, the abundance of water allows the protein molecules to move more freely and bond more extensively, given enough time and gentle handling. While initially very wet and slack, proper mixing and resting periods allow the gluten network to become incredibly strong and elastic, despite the high water content. This is why techniques like autolyse and stretching and folding are so effective for wet doughs – they encourage organized gluten formation without overworking the dough into a sticky mess.
High Hydration Dough and Gluten Development
Ciabatta is the quintessential example of a high hydration dough, where the water content often exceeds 80% relative to the flour weight. This high level of hydration is crucial for achieving the bread's characteristic moist interior and large, irregular holes (alveoli). However, working with such wet dough presents challenges for gluten development. The proteins are dispersed in a large amount of water, requiring more effort or time for them to find each other and bond effectively into a strong network.
For gluten development ciabatta dough at high hydration, techniques that promote gluten formation without intense mechanical kneading are often favored. Methods like autolyse (a rest period after mixing flour and water) allow hydration to occur fully before salt is added, and stretching and folding during bulk fermentation gently align and strengthen the developing gluten strands over time. This approach builds a strong, extensible gluten network that can trap gas efficiently, leading to the desired open crumb structure despite the dough's initial slackness.
The Impact of Water Temperature
Water temperature also plays a role in the rate of gluten development and overall dough activity. Warmer water (within a reasonable range, typically 70-85°F or 21-29°C) can speed up the hydration process and slightly accelerate enzymatic activity that aids gluten development. It also warms the dough, which is beneficial for fermentation, another process intertwined with gluten development. However, excessively hot water can damage the yeast and potentially denature the gluten proteins, hindering development.
Conversely, very cold water (e.g., 40°F or 4°C) will slow down hydration and gluten development significantly. This can be useful in certain situations, like when using a high-speed mixer that generates a lot of heat, or when planning a very long, slow fermentation. For standard home baking of ciabatta or rustic breads, using water at a moderate temperature (lukewarm to slightly warm) is generally recommended to facilitate both gluten development and yeast activity without issues.
Mixing Techniques: Developing Gluten Effectively
Mixing is the primary mechanical action that initiates and develops the gluten network. As the dough is mixed, the hydrated glutenin and gliadin proteins are brought together and tangled, forming bonds. The type and duration of mixing significantly impact the resulting gluten structure. Gentle, long mixing (like in a stand mixer on low speed) tends to develop a strong, elastic gluten network, while very aggressive or short mixing might not fully develop the gluten, or in some cases, can even overwork it.
For ciabatta and many rustic breads, which benefit from a well-developed but not necessarily intensely kneaded gluten structure, techniques that combine initial gentle mixing with subsequent rest periods or stretching and folding are common. This approach allows the gluten to develop more organically over time, resulting in a more extensible and less tight network, which is conducive to forming large, irregular holes in the crumb.
Autolyse: The First Step to Gluten Development
Autolyse is a simple yet powerful technique that significantly aids gluten development, particularly in high hydration doughs like ciabatta. It involves mixing just the flour and water from the recipe and letting the mixture rest for a period, typically 20 to 60 minutes, before adding the salt and yeast (or starter). During this rest, the flour fully hydrates, and enzymatic activity begins to break down starches and proteins.
The primary benefit of autolyse for gluten development ciabatta dough is that it allows the gluten network to start forming without the interference of salt (which tightens gluten) or the mechanical stress of intense kneading. This initial hydration and resting period makes the dough more extensible, easier to handle, and reduces the total kneading time required to achieve optimal gluten development. It helps create a smoother, more elastic dough right from the start.
Different Mixing Methods for Ciabatta Dough
Given ciabatta's high hydration, traditional vigorous kneading can be challenging. Several mixing methods are effective for developing gluten in this wet dough:
- Stand Mixer: Using a stand mixer with a dough hook is a common method. The dough is typically mixed on low speed initially to combine ingredients, then increased to medium speed. It may take 10-20 minutes of mixing, pausing occasionally to scrape down the sides, until the dough pulls away from the sides of the bowl and shows significant elasticity.
- Hand Mixing/Slap and Fold: For those without a mixer, the "slap and fold" technique is excellent for high hydration doughs. It involves repeatedly lifting, slapping the dough onto the counter, and folding it over itself. This aerates the dough and builds gluten effectively, though it can be messy initially.
- No-Knead/Minimal Mix: Many modern ciabatta recipes use minimal initial mixing (just enough to combine ingredients) followed by a series of "stretching and folding" during the bulk fermentation. This relies on time and gentle handling to develop the gluten network.
Regardless of the method, the goal is to develop a strong, elastic gluten network capable of supporting the high hydration and trapping gas for an open crumb. The "windowpane test" (gently stretching a small piece of dough to see if it forms a thin, translucent membrane) is a good indicator of sufficient gluten development.
Kneading Techniques for Rustic Bread Dough
Rustic bread doughs can vary in hydration, from moderately wet to quite dry. The kneading technique should be adapted accordingly:
- Moderate Hydration (65-75%): Traditional kneading on a floured surface works well. This involves folding the dough over, pressing down, and rotating. Aim for 10-15 minutes of kneading until the dough is smooth, elastic, and passes the windowpane test. A stand mixer is also effective here.
- Higher Hydration (75%+): Similar to ciabatta, slap and fold or stand mixer kneading is more manageable than traditional hand kneading. Alternatively, minimal initial mixing followed by stretching and folding during bulk fermentation is highly effective and often preferred for developing a more extensible gluten structure suitable for rustic loaves with open crumbs.
Using a bench scraper can be helpful when working with wetter rustic doughs to manage the sticky mass during hand kneading or stretching and folding. The key is to continue working the dough until it develops sufficient strength and elasticity, which is often indicated by a smooth surface and the ability to hold its shape somewhat.
Time and Fermentation: Gluten's Evolution
Time is a crucial element in gluten development, especially in doughs that undergo long fermentation periods, common for both ciabatta and many rustic breads. Even with minimal initial mixing, a long, slow fermentation allows enzymes naturally present in flour to break down proteins and starches, which in turn helps the gluten network relax and become more extensible. Simultaneously, yeast activity produces carbon dioxide, and the stretching and folding techniques employed during bulk fermentation align the gluten strands, strengthening the network over several hours.
This enzymatic action and physical manipulation over time build a robust yet extensible gluten structure that is capable of trapping large bubbles of gas, contributing significantly to the open crumb structure desired in these breads. A dough that has undergone sufficient fermentation and gluten development will feel alive, elastic, and slightly bubbly. Rushing the process will result in underdeveloped gluten, leading to a dense, tight crumb.
Bulk Fermentation and Gluten Strength
Bulk fermentation, the first rise after mixing, is a critical period for gluten development, particularly when minimal initial kneading is used. During this phase, the dough is typically left to rise at room temperature or in a cooler environment (like the refrigerator for longer ferments) for several hours. For ciabatta, bulk fermentation can range from 2-4 hours at room temperature, often involving periodic stretching and folding every 30-60 minutes.
Each stretch and fold during bulk fermentation helps to realign the developing gluten strands, making the network stronger and more organized. This process builds tension and structure in the dough, increasing its ability to hold the gas produced by the yeast. By the end of a successful bulk fermentation, the dough should have increased significantly in volume, feel airy, and exhibit a smooth, elastic surface, indicating a well-developed gluten network ready for shaping.
The Importance of Proofing
Proofing, also known as the final rise, occurs after the dough has been shaped and before baking. While the primary focus of proofing is for the shaped loaf to increase in volume due to continued yeast activity, it also allows the gluten network to relax slightly after the tension introduced during shaping. This relaxation is important, as it allows the loaf to expand freely in the oven during the initial phase of baking (oven spring).
However, it's crucial not to over-proof dough with well-developed gluten. If proofed too long, the gluten network can become over-stretched and weak, unable to support the structure during baking. This can lead to a loaf that collapses or has a dense area just under the crust. Recognizing the signs of a properly proofed loaf – typically feeling light and airy, and indenting slowly when gently poked – is key to ensuring the developed gluten performs optimally in the oven.
Achieving Optimal Gluten Development in Ciabatta Dough
Tips for Perfect Gluten Formation in Ciabatta
Achieving optimal gluten development ciabatta dough requires attention to detail at several stages. Here are some key tips:
- Use High Protein Flour: Start with a bread flour containing 12-14% protein. This provides the necessary building blocks for a strong network.
- Hydrate Fully: Ensure all the flour is completely hydrated. Using an autolyse period (mixing flour and water first) helps significantly with this, making the dough easier to work with later.
- Be Patient with Mixing: High hydration doughs take longer to develop gluten mechanically. Use a stand mixer or slap and fold method and mix until the dough is smooth, elastic, and pulls away from the bowl, or passes the windowpane test. This might take 15-20 minutes in a mixer.
- Incorporate Stretching and Folding: Perform several rounds of stretching and folding during the bulk fermentation (e.g., every 30-45 minutes for the first 2 hours). This builds strength and structure gently without overworking the dough.
- Allow Sufficient Bulk Fermentation Time: Don't rush the first rise. A long, slow fermentation (2-4 hours at room temperature or longer in the fridge) allows gluten to develop and relax, resulting in a more extensible and gassy dough.
- Handle Gently: Once gluten is developed, handle the dough gently during shaping to preserve the airy structure and avoid deflating the gas bubbles trapped by the gluten network.
Following these steps helps ensure that the gluten network in your ciabatta dough is strong enough to support its wetness and trap the significant amount of gas needed for its characteristic open crumb.
Troubleshooting Common Gluten Issues in Ciabatta
Bakers sometimes encounter issues with gluten development in ciabatta dough. Here are some common problems and how to address them:
- Dough is too sticky/won't develop: This could be due to insufficient mixing time, low protein flour, or incorrect hydration calculation. Ensure you're using bread flour, mix for long enough until the dough shows signs of elasticity (even if still wet), and double-check your water measurement. Sometimes, a longer autolyse can help initial stickiness.
- Dough tears easily when stretching/folding: This indicates underdeveloped gluten. It needs more time or more stretching and folding cycles. Give it more rest between folds, or increase the total bulk fermentation time.
- Dough is tight/resists stretching: This might indicate over-mixing or insufficient rest. If over-mixed, there's little you can do in the current batch. If it's just tight from handling, give it a 20-30 minute rest (a "bench rest") before attempting to shape or stretch again.
- Loaf is flat/dense: This is often a sign of underdeveloped gluten (cannot support the rise) or over-proofing (gluten structure collapsed). Ensure adequate mixing and bulk fermentation with stretching/folding. Pay attention to proofing times and cues.
- Crumb is tight/uniform, not open: Primarily a result of insufficient gluten development or gentle handling. You need a strong yet extensible network to create large, irregular holes. Focus on proper flour, hydration, thorough mixing, and stretching/folding during bulk fermentation.
Troubleshooting often involves assessing the dough's feel and elasticity at different stages and adjusting mixing time, rest periods, or folding frequency in subsequent bakes.
Mastering Gluten Development in Rustic Breads
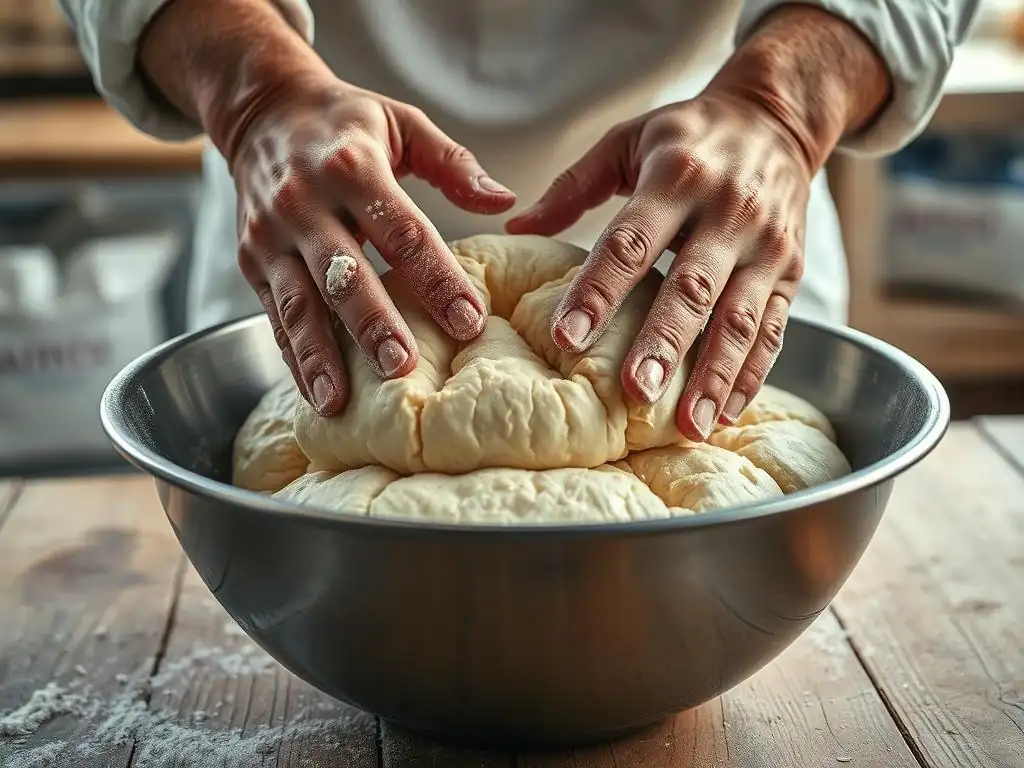
Techniques for Building Gluten in Rustic Bread Dough
Mastering gluten development in rustic breads, which often involve various flours and hydration levels, requires adaptable techniques.
- Adjust Kneading to Hydration: For lower to moderate hydration rustic doughs (65-75%), traditional hand kneading or stand mixer kneading for 10-15 minutes is effective. For higher hydration doughs (75%+), like those used for some rustic loaves aiming for a very open crumb, use the slap and fold method or stand mixer, aiming for a smooth, elastic dough.
- Utilize Autolyse: Even in moderately hydrated rustic doughs, a 20-30 minute autolyse can make kneading easier and improve gluten extensibility. It's particularly beneficial when using whole wheat or specialty flours.
- Implement Stretching and Folding: This technique is invaluable for developing gluten in rustic doughs, especially those with mix-ins like nuts, seeds, or whole grains that can interfere with mechanical kneading. Performing 3-4 sets of stretches and folds during a 2-3 hour bulk fermentation builds significant strength and structure gently.
- Consider Preferments: Many rustic bread recipes use preferments like a poolish or a stiff levain (sourdough starter). The long fermentation of the preferment partially develops gluten and adds strength and flavor to the final dough, often reducing the need for intensive kneading.
The key is to build a gluten structure appropriate for the specific rustic bread style – strong enough for structure and oven spring, but potentially less focused on the extreme extensibility needed for ciabatta's massive holes, depending on the desired crumb.
Recognizing the Signs of Well-Developed Gluten in Rustic Breads
Knowing when the gluten is adequately developed is crucial for success with rustic breads. Look for these signs:
- Smooth Surface: The dough surface should transition from shaggy and rough to smooth and satiny after mixing or sufficient stretching and folding.
- Elasticity: When you press a finger gently into the dough, the indentation should slowly spring back. If it stays indented, the gluten is likely underdeveloped.
- Extensibility: The dough should be able to stretch without tearing easily. The "windowpane test" is the classic method: pinch a small piece of dough, and gently stretch it between your fingers. If you can stretch it thin enough to see light through it without it tearing, the gluten is well-developed.
- Structure/Tension: After a few rounds of stretching and folding during bulk fermentation, the dough should feel like it has tension and holds its shape better on the counter compared to its initial slack state.
Observing these characteristics helps confirm that the gluten network has formed sufficiently to support the dough through fermentation, shaping, and baking, leading to a well-structured rustic loaf.
Gluten Development and the Open Crumb Structure
How Gluten Impacts the Crumb of Ciabatta
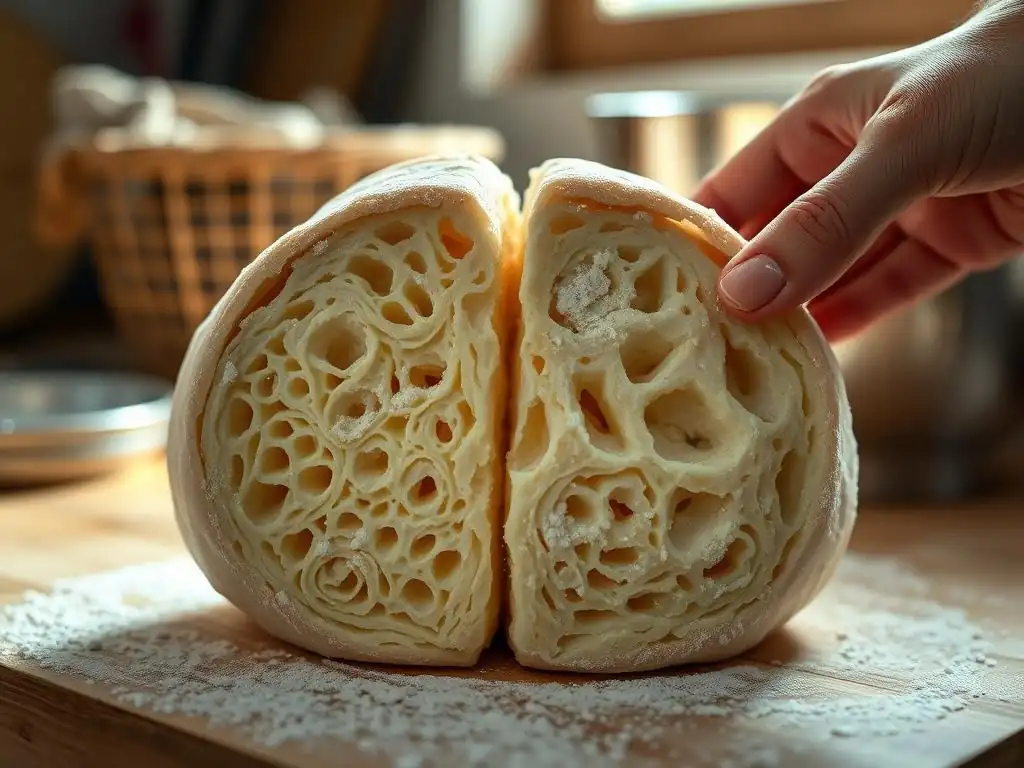
The open, irregular crumb with large holes is the hallmark of ciabatta, and it is directly dependent on successful gluten development ciabatta dough. The strong, elastic gluten network acts as a flexible balloon, capable of expanding significantly as the carbon dioxide produced by yeast fills the dough during fermentation and oven spring.
A well-developed gluten network allows the dough to trap these large gas bubbles and maintain their shape without collapsing. When the loaf bakes, the heat sets this expanded structure, preserving the large alveoli. If the gluten is underdeveloped, it won't be strong or extensible enough to hold large bubbles; instead, the gas will escape or form many small, uniform holes, resulting in a dense, tight crumb. Conversely, if the gluten is too tight or over-developed without sufficient extensibility (often from over-mixing without adequate rest), it can restrict the expansion, also leading to a less open crumb.
Achieving a Desired Crumb in Rustic Breads
The desired crumb in rustic breads varies widely, from moderately open to dense and hearty, depending on the flour mix (e.g., high percentage of whole wheat or rye often results in a tighter crumb) and style. However, achieving any intended crumb structure relies on controlling gluten development.
For a moderately open crumb in a rustic white loaf, proper gluten development through kneading and/or stretching and folding is essential to trap sufficient gas. When using flours that inhibit gluten (like whole wheat), strategies to bolster the white flour gluten (e.g., longer autolyse, more stretching/folding) are key. The balance between gluten strength (for structure) and extensibility (for expansion) is managed through hydration levels, mixing techniques, and fermentation time. A dough with balanced gluten will expand predictably, allowing bakers to influence crumb structure through shaping techniques and baking methods (like using a Dutch oven to maximize oven spring).
Common Mistakes to Avoid in Gluten Development
Over-Mixing vs. Under-Mixing Dough
Both over-mixing and under-mixing can negatively impact gluten development and the final bread texture.
- Under-mixing: This is a common issue, especially with high hydration doughs like ciabatta or wetter rustic doughs. Under-mixed dough feels shaggy, tears easily, lacks elasticity, and won't pass the windowpane test. The gluten network hasn't fully formed, leading to a flat loaf with a dense, tight crumb that lacks structure and chewiness. The solution is simply to mix or knead for longer, or incorporate stretching and folding during bulk fermentation if using a minimal-mix method.
- Over-mixing: Less common with hand kneading but possible with powerful stand mixers running at high speeds for too long. Over-mixed dough becomes very tight, loses its elasticity, and can become sticky or even liquify slightly as the gluten strands break down. While initially appearing strong, this damaged network cannot properly hold gas or expand in the oven, often resulting in a dense, heavy loaf with poor volume. The best prevention is to monitor the dough's texture and stop mixing as soon as it reaches the desired development stage (smooth, elastic, passes windowpane test).
Finding the sweet spot between under and over-mixing is crucial for optimal gluten development.
Incorrect Hydration Levels and Gluten Formation
Incorrect hydration levels are a significant factor affecting gluten development and dough handling.
- Too Low Hydration: If the dough is too dry (low hydration), the gluten-forming proteins won't fully hydrate. This makes gluten development difficult, resulting in a stiff, hard-to-work dough that produces a dense, dry bread with a tight crumb. While some breads are intentionally low hydration, for styles like ciabatta or open-crumb rustic loaves, insufficient water prevents the gluten from forming a flexible, extensible network.
- Too High Hydration: While high hydration is key for ciabatta, if the water content is excessive for the flour's protein level or the baker's technique, it can make the dough incredibly sticky and difficult to handle. It requires significant skill and often longer mixing/resting times to coax the gluten into forming a strong network in such a wet environment. If the gluten doesn't fully develop, the dough will lack structure and spread out instead of holding its shape and rising, leading to a flat, dense loaf.
Accurately measuring ingredients, especially water, and understanding how the flour's protein content affects appropriate hydration levels are essential for controlling gluten development and achieving the desired dough consistency. Adjusting hydration slightly based on the specific flour and environmental conditions is part of mastering bread baking.
Conclusion: Elevate Your Baking with Gluten Knowledge
Understanding gluten development in ciabatta and rustic doughs is perhaps the most important concept for achieving those coveted textures and open crumbs. From selecting the right high-protein flour to managing hydration, employing effective mixing techniques, and allowing sufficient time for fermentation, each step plays a vital role in building the strong yet extensible gluten network.
Whether you're aiming for the airy interior of ciabatta or the sturdy structure of a rustic loaf, paying close attention to how the gluten forms and behaves will dramatically improve your results. By recognizing the signs of well-developed gluten and troubleshooting common issues like under- or over-mixing, you gain greater control over your dough. Embrace the process of gluten development ciabatta dough and in your rustic loaves, and watch your bread transform from simply baked goods into masterpieces of texture and structure.
Frequently Asked Questions
What is gluten development and why is it important in ciabatta dough?
Gluten development is the process of forming elastic gluten strands in dough. This is crucial for ciabatta because it provides the structure and airy texture characteristic of the bread. Without adequate gluten development, the ciabatta will be flat and dense.
How does the hydration level of ciabatta dough affect gluten development?
Ciabatta dough is known for its high hydration. Higher hydration actually aids in gluten development by allowing the gluten proteins to more easily stretch and align. However, it also makes the dough stickier and harder to handle.
What are some techniques to encourage gluten development in ciabatta dough?
Techniques include autolysing (allowing the flour and water to rest before kneading), using a stand mixer with a dough hook, and employing stretch and fold techniques during the bulk fermentation. These actions all help align and strengthen the gluten network.
Can you over-develop gluten in ciabatta dough?
Yes, although it's less common with ciabatta than some other breads. Over-developed gluten results in a tough and rubbery texture. Monitor the dough's elasticity and stop kneading when it's smooth and strong, but not overly tight.
What type of flour is best for achieving optimal gluten development in ciabatta dough?
A strong bread flour with a high protein content (typically 12-14%) is ideal. This type of flour provides the necessary gluten-forming proteins to create the characteristic open crumb and chewy texture of ciabatta.
Final Reflection: The Art and Science of Gluten in Ciabatta
Understanding gluten development in ciabatta dough is not merely a technical pursuit; it's the key to unlocking the bread's unique character and achieving truly exceptional results. The intricacies of gluten formation, its impact on texture, and the subtle nuances of hydration and fermentation all contribute to the airy crumb and chewy crust that define this beloved Italian bread. This knowledge, once considered the domain of experienced bakers, is now accessible to a wider audience, empowering home bakers to elevate their craft.
The journey of understanding gluten development has profoundly impacted my own baking, transforming it from a sometimes frustrating process into a deeply rewarding creative endeavor. The more I learn about the science behind the dough, the more I appreciate the artistry involved. It's a delicate balance, a dance between hydration, time, and technique, and the results are truly breathtaking. The bread is the mirror of the baker's soul,
a wise baker once said, and I believe this to be profoundly true. The more mindful and precise I become in my approach to gluten development, the more my bread reflects my intention and care.
Now, it's your turn. Take what you've learned about gluten development in ciabatta dough and experiment! Don't be afraid to adjust hydration levels, play with fermentation times, and observe the changes in your dough. Each loaf you bake will be a lesson, a step closer to mastering the art of creating that perfect, airy ciabatta with a delightfully chewy crust. Embrace the process, enjoy the journey, and savor the delicious rewards of your efforts. The world of artisan bread awaits!
Unlock Your Ciabatta Mastery: Take the Next Step!
Thanks for taking the time to explore the fascinating world of gluten development in ciabatta and rustic doughs! You've now gained valuable insights into creating that perfect chewy texture. Ready to put your newfound knowledge into practice?
- Bake Your Best Ciabatta Yet: Try your hand at our recommended recipe (found on our Recipe page) – pay close attention to the kneading and fermentation stages, and see the difference it makes! This is your chance to experience the true magic of gluten development firsthand.
- Share Your Successes (and Challenges!): Join our BakeWithEase community forum and share your experiences—photos of your beautiful loaves are especially welcome!
- Explore Advanced Techniques: Dive deeper into gluten structure by browsing the other articles on our website, focusing specifically on hydration and proofing. You might be surprised by what you discover!
What unique ingredient or technique will you experiment with in your next ciabatta bake?