
Classic French Brioche Recipe: BakeWithEase StepbyStep

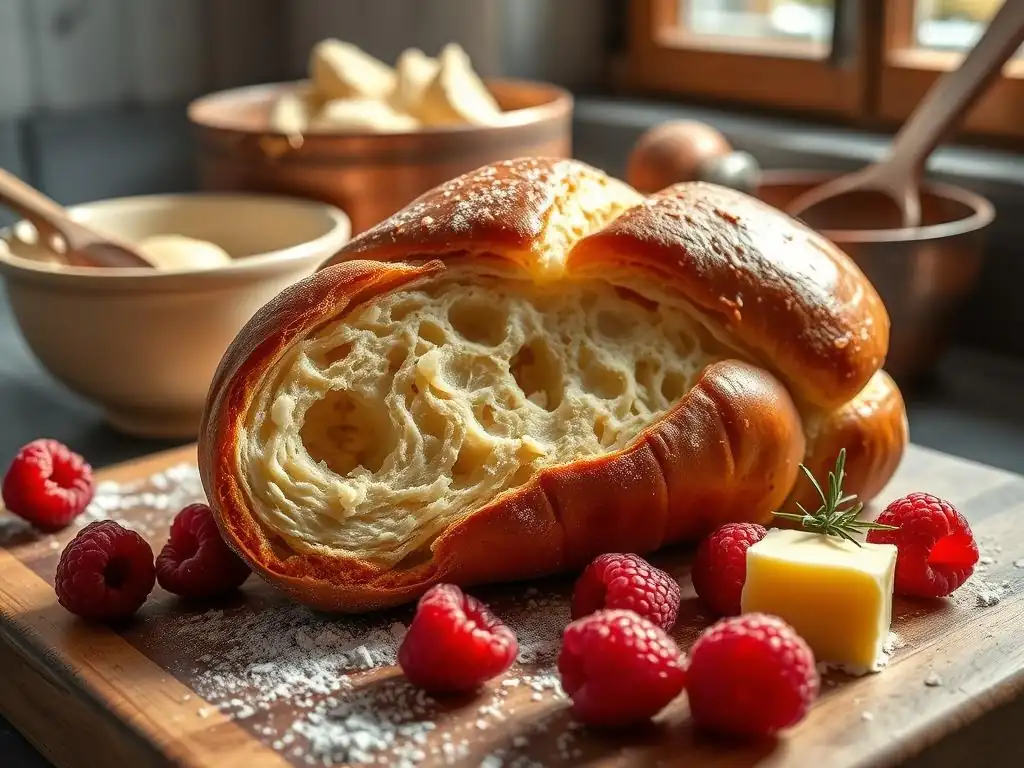
Welcome to BakeWithEase, your haven for unlocking the delicious world of baking! Ever dreamt of crafting that perfect, golden-brown, melt-in-your-mouth brioche? We're here to make that dream a reality. Dive in and discover our easy classic French brioche recipe, meticulously designed to guide you through each step. But the baking adventure doesn't stop there... what other secrets will you uncover to elevate your baking skills?
- Introduction to Easy Classic French Brioche Baking
-
Mastering the Classic Brioche Dough: A Step-by-Step Guide
- Ingredient List for Authentic French Brioche
- Step 1: Preparing the Brioche Starter (Poolish/Levain Option)
- Step 2: Combining the Dough: First Mix
- Step 3: Incorporating the Butter: The Key to Richness
- Step 4: First Rise: Bulk Fermentation for Flavor
- Step 5: Shaping the Brioche: Classic Loaf or Individual Buns
- Step 6: Second Rise: Proofing to Perfection
- Step 7: Baking the Brioche: Achieving Golden Perfection
- Step 8: Cooling and Enjoying Your Homemade Brioche
- Troubleshooting Your Brioche: Common Issues and Solutions
- Storing Your Brioche: Keeping it Fresh
- Elevate Your Brioche: Variations and Add-Ins
- Conclusion: BakeWithEase's Commitment to Easy Brioche Baking
-
Frequently Asked Questions
- How difficult is the Classic French Brioche Recipe from BakeWithEase for a beginner baker?
- What makes the BakeWithEase brioche recipe different from other brioche recipes?
- Can I substitute any ingredients in the Classic French Brioche Recipe?
- How long does it take to make the Classic French Brioche Recipe from start to finish?
- What are some common mistakes to avoid when making brioche, according to BakeWithEase?
- Final Reflection: The Enduring Allure of a Simple Brioche
- Unleash Your Inner Baker: Master the Art of Brioche!
Introduction to Easy Classic French Brioche Baking
What Makes This Brioche Recipe Special? (BakeWithEase's Approach)
At BakeWithEase, we believe that mastering classic techniques shouldn't be intimidating. Our easy classic French brioche recipe is designed to demystify this rich, buttery bread, making it accessible for home bakers of all levels. We focus on clear, step-by-step instructions, emphasizing visual cues and common troubleshooting tips, so you can achieve bakery-quality results right in your own kitchen without needing years of experience. It's about building confidence with a truly rewarding dough.
This specific approach breaks down the brioche-making process into manageable stages, from activating the yeast to the final golden bake. We guide you through each step, explaining why certain techniques are important, like incorporating the butter gradually or understanding the signs of proper fermentation. This ensures that you're not just following a recipe, but truly learning the fundamentals behind creating a truly delicious, easy classic French brioche.
Why Brioche is a Baker's Delight: Texture and Flavor
Brioche stands out in the world of enriched doughs due to its luxurious texture and deeply satisfying flavor. Unlike lean breads made primarily with flour, water, and yeast, brioche incorporates significant amounts of butter and eggs. This high fat and protein content results in a crumb that is incredibly soft, tender, and almost cake-like, yet still retains a delightful chewiness characteristic of bread.
The flavor profile is equally exquisite – rich, slightly sweet from the butter and sometimes a touch of sugar, with a subtle eggy note. It's a versatile bread that can be enjoyed on its own, used as a base for sweet or savory dishes, or transformed into the most decadent French toast. The process of creating this dough, though requiring patience, is immensely rewarding, culminating in a loaf or rolls with a beautiful golden crust and an irresistible aroma.
Mastering the Classic Brioche Dough: A Step-by-Step Guide
Ingredient List for Authentic French Brioche
Essential Ingredients for Rich Brioche Dough
Creating a truly authentic and easy classic French brioche recipe requires a few key ingredients that contribute significantly to its characteristic richness and texture. You'll need high-quality all-purpose or bread flour, fresh eggs (usually whole eggs plus sometimes extra yolks for added richness), granulated sugar, active dry or instant yeast, fine sea salt, and, most importantly, a substantial amount of unsalted butter. Typically, a standard loaf recipe might call for around 4-5 large eggs and anywhere from 150g to 250g of butter for about 500g of flour – this high ratio is what gives brioche its signature decadence.
Beyond the core components, milk or water is often used to hydrate the dough, and sometimes a touch of vanilla extract or orange blossom water is added for a subtle aromatic lift. The quality of your ingredients truly matters here; using fresh eggs and good butter will make a noticeable difference in the final flavor and texture of your easy brioche. Ensure your butter is softened but not melted for proper incorporation.
Notes on Flour, Yeast, and Butter Selection
The type of flour you choose can impact the outcome of your easy classic French brioche recipe. While all-purpose flour works well and is readily available, bread flour with its higher protein content (around 12-14%) can help develop a stronger gluten structure, which is beneficial for the rich dough to rise properly and support the heavy load of butter and eggs. Using a good quality, unbleached flour is always recommended for better flavor.
For yeast, both active dry and instant yeast work for this easy brioche recipe. If using active dry, you'll need to activate it in a warm liquid first (typically around 105-115°F or 40-46°C). Instant yeast can often be mixed directly with the dry ingredients, saving a step. When it comes to butter, always use unsalted butter.
This allows you to control the salt level in your dough precisely. Ensure the butter is genuinely softened to room temperature (around 65-70°F or 18-21°C) – it should yield easily to pressure but not be greasy or melted. This is crucial for it to emulsify correctly into the dough.
Step 1: Preparing the Brioche Starter (Poolish/Levain Option)
Activating the Yeast for a Light and Airy Brioche
For many enriched doughs, including this easy classic French brioche recipe, ensuring your yeast is active and happy is the first critical step towards a light and airy result. If using active dry yeast, you'll typically dissolve it in a small amount of warm milk or water (around 105-115°F or 40-46°C) with a pinch of sugar. Let this mixture sit for 5-10 minutes.
You should see a foamy layer develop on the surface, indicating the yeast is alive and ready to work. If it doesn't foam, your yeast might be expired or the liquid temperature was incorrect, and you should start over with fresh yeast.
If you're using instant yeast, you might skip this proofing step as it can often be mixed directly with the dry ingredients. However, even with instant yeast, some recipes call for blooming it first, especially if you're unsure of its freshness. Whichever yeast you use, proper activation is key to the dough's ability to rise and develop its characteristic open crumb structure. This initial step sets the stage for a successful easy brioche bake.
Letting the Starter Proof: Visual Cues
While a full poolish or levain (sourdough starter) can be used for brioche, many easy classic French brioche recipes use a simpler method, either activating the yeast directly or creating a small initial dough mixture (sometimes called a sponge or pre-ferment) that proofs briefly before adding the rest of the ingredients. If your recipe involves this initial proofing step, typically involving some flour, liquid, and yeast, you'll let it sit at room temperature for a period, often 30 minutes to an hour, or until it becomes bubbly and has increased noticeably in volume, perhaps doubling in size.
The visual cues are paramount here: look for a bubbly, active surface and a significant expansion. This pre-fermentation step helps to give the yeast a head start and can contribute to better flavor development and dough structure in your easy brioche. It's a simple way to boost the leavening power and ensure a more reliable rise in the later stages.
Step 2: Combining the Dough: First Mix
Mixing the Initial Dough Components
Once your yeast is active (or mixed with dry ingredients), the next step in creating your easy classic French brioche recipe is combining the initial dough components. This typically involves mixing the flour, sugar, salt, activated yeast mixture (or instant yeast), and eggs. This can be done by hand in a large bowl or, more commonly and efficiently, in a stand mixer fitted with a dough hook. The goal at this stage is to bring everything together into a cohesive, shaggy dough mass.
Mix on a low speed initially to avoid flour flying everywhere, gradually increasing the speed as the ingredients come together. This initial mixing phase usually takes just a few minutes, enough time for the liquids to hydrate the flour and for the dough to start pulling away from the sides of the bowl, though it will still be quite sticky and rough at this point. Don't overmix in this stage; the main kneading work comes later.
Achieving the Right Dough Consistency
After the initial ingredients are combined, you'll have a dough that is likely very soft and sticky, which is perfectly normal for an easy classic French brioche recipe dough before the butter is added. The consistency should be manageable enough to form a rough ball, but it won't be smooth or elastic yet. It might stick significantly to your hands or the sides of the mixer bowl.
This stickiness is due to the high hydration from the eggs and any liquid added. Resist the urge to add excessive amounts of extra flour at this stage. A small amount of flour might be needed if the dough is excessively wet, but the goal is to keep the dough as soft as possible to allow the butter to incorporate properly later. The dough will become smoother and more manageable as you knead it and add the butter.
Step 3: Incorporating the Butter: The Key to Richness
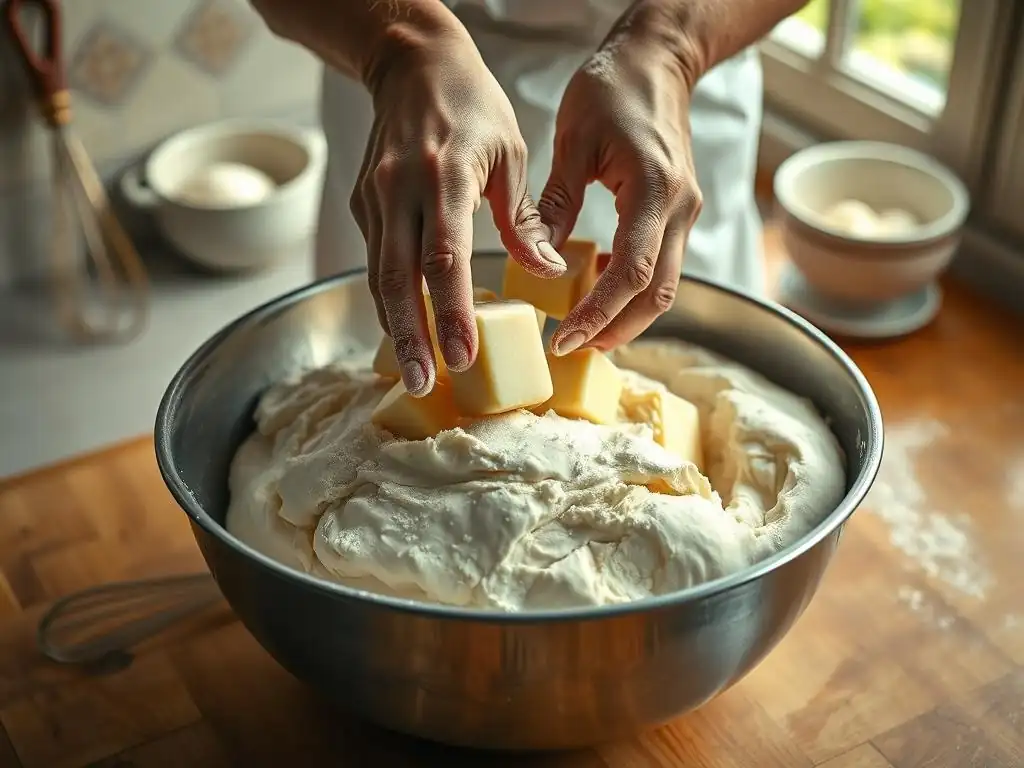
Adding Butter Gradually for a Silky Dough
Incorporating the softened butter is arguably the most critical step in developing the rich texture of an easy classic French brioche recipe. The butter needs to be added gradually to the kneaded dough. If using a stand mixer, continue kneading the dough on medium speed. Begin adding the softened butter one chunk at a time, waiting until each piece is almost fully incorporated before adding the next. This process can take 15-20 minutes or even longer, depending on the mixer and dough quantity.
As you add the butter, the dough will initially become very wet and sticky, almost like a batter. Keep kneading. The dough hook will slap against the sides of the bowl. Gradually, as the butter is absorbed, the dough will transform. It will become smooth, elastic, and shiny, pulling away from the sides of the bowl cleanly. This patient incorporation is essential for creating the signature silky texture of easy brioche.
Dealing with Sticky Dough: Tips and Tricks
Working with brioche dough, especially during the butter incorporation phase, means dealing with stickiness. It's a high-hydration dough with a lot of fat, so stickiness is inherent. If you're kneading by hand, use a bench scraper to manage the dough and scrape it off your work surface. Avoid adding too much extra flour, as this can make the final brioche dense and dry. A light dusting on your hands or scraper is usually sufficient.
If using a stand mixer and the dough seems stubbornly sticky even after extensive kneading and butter incorporation (slapping against the bowl but not cleaning the sides), check your butter temperature – it might have been too cold or too warm. Sometimes, a brief rest (5-10 minutes) can help the gluten relax, making the dough easier to handle. Ultimately, a properly kneaded brioche dough, while still soft, will become much less sticky than it was initially and should pass the "windowpane test," where a small piece can be stretched thin enough to see light through it without tearing.
Step 4: First Rise: Bulk Fermentation for Flavor
Bulk Fermentation Explained: Developing Flavor
Bulk fermentation, or the first rise, is a crucial period for your easy classic French brioche recipe dough. During this time, the yeast is actively producing carbon dioxide gas, causing the dough to rise, while also developing complex flavors through metabolic processes. This stage typically takes place at room temperature for 1-2 hours, followed by a longer, slower fermentation in the refrigerator, often 8-12 hours or even overnight. The cold fermentation is particularly beneficial for flavor development, allowing enzymes to break down starches into sugars, resulting in a sweeter, more nuanced taste in the final brioche.
During the room temperature portion, the dough will expand significantly, often doubling in size. The cold fermentation, while slower in terms of rise, is vital for texture and handling. Chilling the dough makes it much firmer and easier to shape due to the solidification of the butter. This slow fermentation also contributes significantly to the distinct, rich flavor profile of a classic French brioche.
Recognizing When the Dough is Ready
Knowing when your easy classic French brioche recipe dough has completed its bulk fermentation requires observing several cues. For the initial room temperature rise, the dough should have visibly increased in volume, ideally doubling or nearly doubling. You can perform the "poke test": gently press a floured finger into the dough about half an inch deep. If the indentation springs back slowly or only partially, the dough is likely ready. If it springs back immediately, it needs more time. If it collapses, it's likely over-proofed.
After the cold fermentation in the refrigerator, the dough might not look dramatically larger, but it will be firm, significantly easier to handle, and have a slightly bubbly surface. It will also have developed a lovely aroma. This chilled state is the perfect time to proceed with shaping your easy brioche, as the butter is solid, making the dough less sticky and more pliable.
Step 5: Shaping the Brioche: Classic Loaf or Individual Buns
Shaping Techniques for Brioche Loaves
Shaping your easy classic French brioche recipe dough into a loaf is a straightforward process once the dough is properly chilled and rested. The goal is to create tension on the surface of the dough, which helps it hold its shape and rise evenly in the oven. A common method is to gently deflate the cold dough, divide it into equal portions (often three or four for a braided loaf, or simply shaped into one or two loaves), and then shape each portion into a smooth ball or log.
For a simple loaf, gently pat the dough into a rectangle, then roll it up tightly into a cylinder, pinching the seam closed. Place this seam-side down in a greased loaf pan. For a braided loaf, roll each portion into a long strand, then braid them together, pinching the ends to seal. Place the braid in the pan. Ensure the pan is adequately greased or lined with parchment paper to prevent sticking. This careful shaping contributes to a beautiful final presentation and an even bake for your easy brioche loaf.
Creating Individual Brioche Buns: A Visual Guide
Creating individual brioche buns or rolls from your easy classic French brioche recipe dough is a popular alternative to a loaf, perfect for sandwiches or serving alongside meals. Again, start with well-chilled dough. Gently deflate the dough and divide it into equal portions, typically ranging from 50g to 100g per bun, depending on desired size. Aim for consistent sizes for even baking.
To shape a simple round bun, take a portion of dough and form it into a rough ball. Then, using your hand cupped over the dough on a lightly floured or unfloured surface, gently roll the dough in a circular motion, applying light pressure, until a smooth, tight ball is formed. This technique, called "rounding," creates surface tension.
Place the shaped buns on a baking sheet lined with parchment paper, leaving space between them for rising. For classic pain de mie style brioche buns, you can also shape them into small logs and place them side-by-side in a rectangular pan.
Step 6: Second Rise: Proofing to Perfection
Proofing the Shaped Brioche: Achieving the Perfect Rise
After shaping your easy classic French brioche recipe dough into loaves or buns, it's time for the second rise, also known as proofing. This usually takes place at room temperature, allowing the dough to expand and become light and airy before baking. The time required can vary significantly depending on the ambient temperature, typically ranging from 1.5 to 3 hours. The shaped dough should increase in size by about 50-75% – it won't necessarily double like in the first rise, as it's constrained by its shape and pan.
Look for visual cues: the dough should look puffy and feel light when gently touched. If you perform the poke test again, an indentation should remain and spring back very slowly. Proper proofing is essential for achieving a light texture; under-proofed brioche will be dense, while over-proofed brioche can collapse in the oven.
Preventing Over-Proofing: A Baker's Guide
Over-proofing is a common pitfall when making an easy classic French brioche recipe, and it can lead to a collapsed structure or a dense, gummy texture. To prevent this, pay close attention to the visual cues of the dough. Don't rely solely on the clock, as temperature fluctuations can speed up or slow down proofing considerably. If your kitchen is warm, the dough will proof faster.
If you think your dough is proofing too quickly, you can slow it down by placing it in a cooler spot in your kitchen or even briefly in the refrigerator. If you need to step away, refrigerating the dough is a good way to pause the proofing process. Remember the poke test: if the indentation stays completely or the dough looks extremely puffy and fragile, it might be over-proofed. It's better to slightly under-proof than significantly over-proof your easy brioche.
Step 7: Baking the Brioche: Achieving Golden Perfection
Oven Temperature and Baking Time
Baking your easy classic French brioche recipe requires careful attention to temperature and time to ensure it's cooked through with a beautiful crust. Brioche is typically baked in a moderately hot oven, often preheated to around 350-375°F (175-190°C). The specific temperature can vary slightly depending on the size and shape of your brioche. Loaves will bake longer than individual buns.
A standard brioche loaf might bake for 30-40 minutes, while smaller buns could be ready in 15-25 minutes. The internal temperature of a fully baked brioche should reach around 190-200°F (88-93°C). Use an instant-read thermometer inserted into the center of the loaf or bun (avoiding any butter pockets) to check for doneness. The crust should be a deep golden brown.
Achieving a Golden-Brown Crust: Egg Wash Application
A signature characteristic of an easy classic French brioche recipe is its glossy, deep golden-brown crust. This is achieved through the application of an egg wash before baking. A typical egg wash consists of one or two egg yolks or a whole egg whisked with a tablespoon or two of milk or cream. This mixture is then gently brushed over the surface of the proofed brioche dough using a pastry brush.
Apply the egg wash carefully to avoid deflating the delicate, proofed dough. For an extra-glossy finish, some bakers apply two thin coats, allowing the first to dry slightly before applying the second. This egg wash not only provides a beautiful color but also contributes to a slightly crisp exterior while the interior remains soft. For variations, you can sprinkle pearl sugar or sesame seeds on top after the egg wash.
Step 8: Cooling and Enjoying Your Homemade Brioche
Cooling Techniques for Optimal Texture
Once your easy classic French brioche recipe is baked to golden perfection, proper cooling is essential for developing the final texture. As soon as the brioche comes out of the oven, carefully remove it from the pan and place it on a wire rack. This allows air to circulate around the entire loaf or buns, preventing the bottom from becoming soggy from trapped steam.
Allow the brioche to cool completely before slicing, ideally for at least 1-2 hours for a loaf. While it's tempting to slice into warm bread, cutting into brioche too early can result in a gummy texture inside because the internal structure is still setting as it cools. Patient cooling ensures the crumb finishes cooking through residual heat and moisture equilibrates, giving you that perfect, tender interior.
Serving Suggestions for Freshly Baked Brioche
Freshly baked easy classic French brioche is incredibly versatile and delicious served in many ways. Simply slicing a warm loaf and serving it with good butter and jam is a classic and delightful option for breakfast or brunch. Individual brioche buns are perfect for gourmet sliders or sandwiches, offering a richer alternative to standard bread.
Beyond the basics, brioche is the absolute best bread for making French toast due to its rich, absorbent crumb. Day-old brioche is particularly good for this purpose. You can also use slices for bread pudding or croutons. Its slightly sweet and buttery flavor pairs well with both sweet and savory accompaniments, making your homemade easy brioche a truly adaptable treat.
Troubleshooting Your Brioche: Common Issues and Solutions
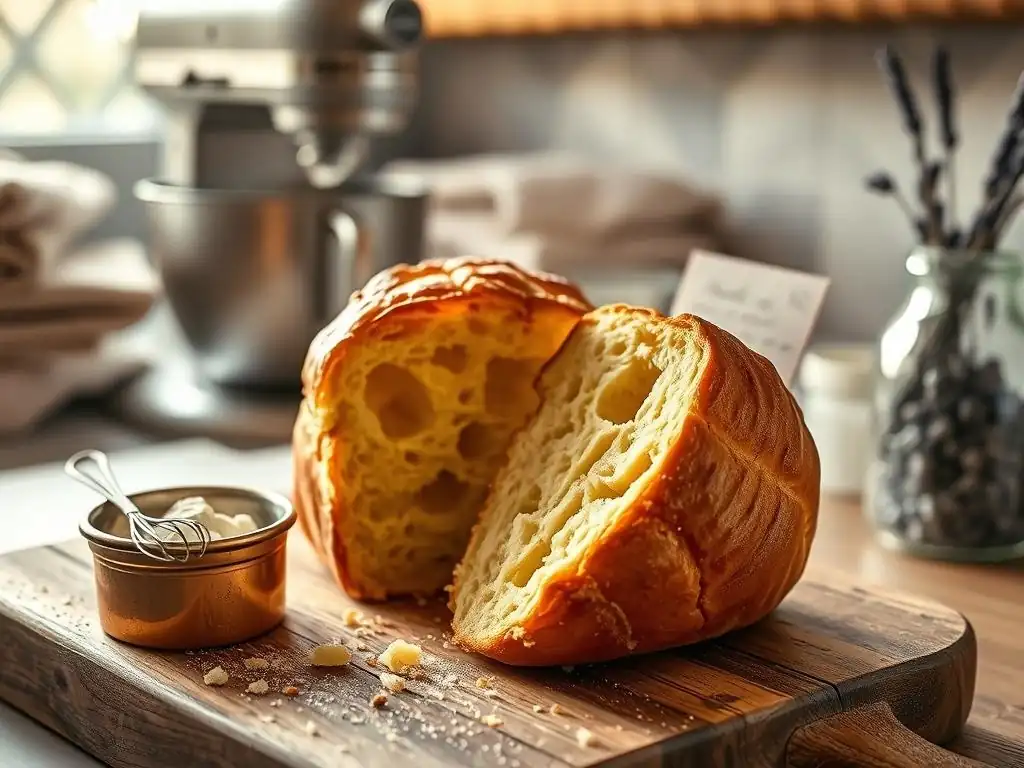
Why is My Brioche Dough Too Sticky?
It's common for easy classic French brioche recipe dough to be quite sticky, especially before the butter is fully incorporated and after mixing the initial ingredients. This stickiness is primarily due to the high hydration level from the eggs and any added liquid, combined with the fat from the butter. A certain level of stickiness is normal and indicates a potentially moist and tender final product.
However, if the dough remains excessively sticky even after thorough kneading (passing the windowpane test) and chilling, a few factors could be at play. The flour might have a lower protein content than ideal, or you might have accidentally added too much liquid. Ensure your butter was properly softened, not melted, as melted butter can make the dough greasy and hard to handle.
If necessary, during kneading, you can add a very small amount of flour (a tablespoon at a time) until the dough is manageable, but avoid adding too much, which will result in a dry brioche. Relying on a stand mixer helps immensely with sticky enriched doughs like easy brioche.
My Brioche Didn't Rise: Troubleshooting Tips
A lack of sufficient rise in your easy classic French brioche recipe can be disheartening, but it's usually due to a few common issues related to the yeast or fermentation conditions. The most frequent culprit is inactive yeast. Ensure your yeast is fresh and, if using active dry, that you proofed it properly in warm liquid (around 105-115°F or 40-46°C) until it foamed. Using liquid that is too hot will kill the yeast, while liquid that is too cold won't activate it.
Other factors include the temperature of your kitchen being too cold, which slows down yeast activity significantly. Try placing the dough in a warmer spot, perhaps near a sunny window (but not hot) or in a turned-off oven with the light on. Ensure you gave the dough adequate time for both the first and second rises according to the recipe guidelines, keeping in mind that times are estimates and temperature plays a big role. Insufficient kneading can also impact rise; the dough needs enough gluten development to trap the gases produced by the yeast.
Achieving a Perfect Golden Crust: Baking Adjustments
Achieving that signature deep golden-brown crust on your easy classic French brioche recipe involves both preparation and careful baking. The most important step is applying an egg wash (typically egg whisked with milk or cream) to the shaped dough just before baking. This provides the sugars and proteins needed for browning. Ensure the egg wash is applied evenly over the entire surface.
During baking, if you notice the crust is browning too quickly before the interior is cooked, you can loosely tent the brioche with aluminum foil. This protects the top from direct heat while the inside continues to bake. Conversely, if your crust isn't browning enough, you might need to increase the oven temperature slightly (by 10-15°F) for the last 5-10 minutes of baking, or even use the broiler very briefly (watch it constantly!) if the top is pale but the inside is done. Ensure your oven thermostat is accurate; an oven thermometer can be a helpful tool.
Storing Your Brioche: Keeping it Fresh
Best Practices for Storing Brioche Bread
Proper storage is key to keeping your easy classic French brioche recipe fresh and delicious for as long as possible after it has cooled completely. Brioche is best enjoyed the day it is baked, but it can be stored at room temperature for 2-3 days. The most effective way to store it is in an airtight container or a sealed plastic bag. Avoid refrigerating freshly baked brioche, as this can actually speed up the staling process.
If you've sliced the brioche, place the cut side down when storing to help retain moisture. For individual buns, simply place them in a single layer in an airtight container. Keeping air away from the bread is the primary goal to prevent it from drying out. While it won't retain its soft, fresh-from-the-oven texture indefinitely, proper storage will keep it enjoyable for a few days.
Freezing Brioche for Later Enjoyment
If you won't be consuming your entire easy classic French brioche recipe within a few days, freezing is an excellent option to preserve its quality. Brioche freezes exceptionally well due to its high fat content. Ensure the brioche is completely cooled before freezing. You can freeze a whole loaf, half a loaf, or individual buns.
Wrap the brioche tightly in plastic wrap, then place it inside a freezer-safe bag or wrap it again in aluminum foil. This double layer of protection helps prevent freezer burn. Frozen brioche can be stored for up to 2-3 months. To thaw, remove from the freezer and let it sit at room temperature in its wrapping until fully thawed (several hours for a loaf, less for buns). You can refresh thawed brioche by warming it gently in a low oven (around 300°F/150°C) for 10-15 minutes.
Elevate Your Brioche: Variations and Add-Ins
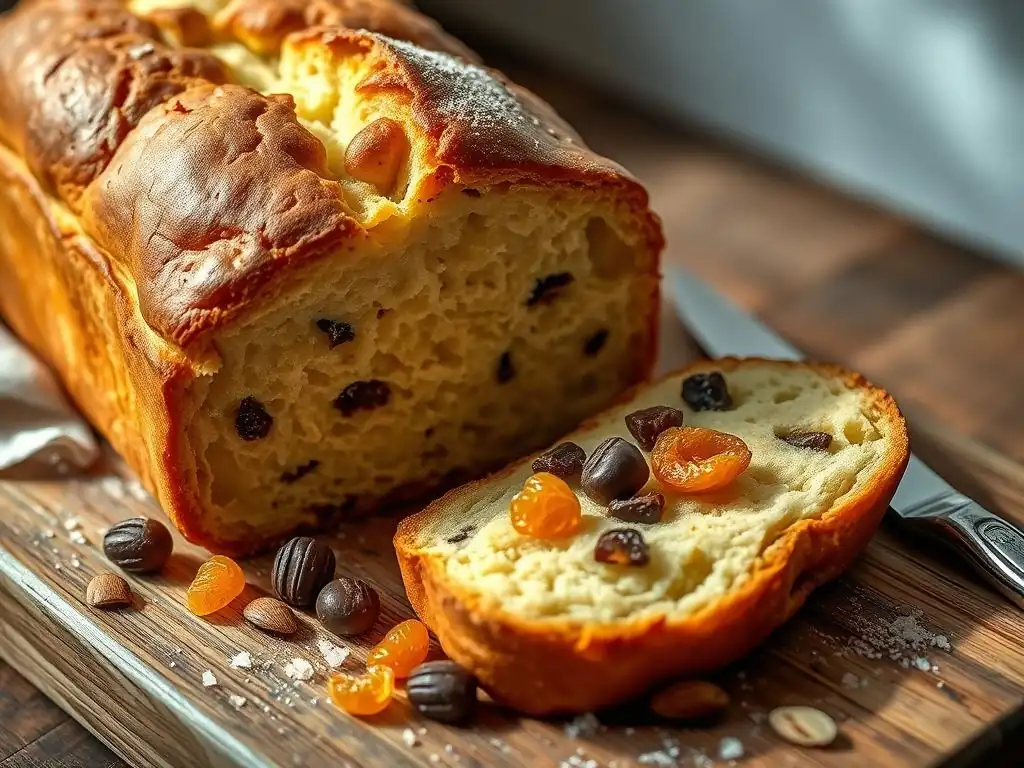
Chocolate Chip Brioche: A Decadent Twist
One of the easiest and most popular ways to elevate your easy classic French brioche recipe is by adding chocolate chips. This creates a decadent treat perfect for breakfast or dessert. Simply fold about 1 cup (around 150-200g) of good quality chocolate chips into the dough during the final stages of kneading, after the butter has been fully incorporated. You can use semi-sweet, dark, or even milk chocolate chips, depending on your preference.
Ensure the chips are evenly distributed throughout the dough without overworking it. Proceed with the rest of the recipe as usual – bulk fermentation, shaping, proofing, and baking. The chocolate chips will melt slightly during baking, creating pockets of rich, gooey chocolate within the tender brioche crumb. This variation is always a crowd-pleaser.
Savory Brioche: Adding Herbs and Cheese
While often enjoyed sweet, your easy classic French brioche recipe can easily be transformed into a savory bread perfect for sandwiches or alongside soups. Incorporate finely chopped fresh herbs like rosemary, thyme, or chives, and grated cheese such as Gruyère, Parmesan, or sharp cheddar into the dough. A good starting point is about 1/2 cup of herbs and 1 cup (around 100-150g) of cheese per standard loaf recipe.
Add the herbs and cheese during the last few minutes of kneading, after the butter is fully mixed in. This ensures they are distributed without interfering with gluten development too early. Shape and bake as usual. The savory additions create a wonderfully aromatic and flavorful bread that pairs beautifully with savory fillings or simply toasted with butter.
Brioche French Toast: The Ultimate Brunch Treat
Using your homemade easy classic French brioche recipe to make French toast is perhaps the most luxurious application. The rich, slightly sweet, and tender crumb is ideal for soaking up the custard mixture without falling apart. Day-old brioche is often preferred as it's slightly firmer and less likely to become soggy. Slice the brioche about 1 inch thick.
Dip each slice into a custard made from eggs, milk or cream, a touch of sugar, vanilla extract, and perhaps a pinch of cinnamon or nutmeg. Allow the bread to soak for a minute or two on each side. Cook on a buttered griddle or frying pan over medium heat until golden brown and cooked through, typically 3-5 minutes per side. Serve with your favorite toppings like maple syrup, fresh berries, whipped cream, or powdered sugar for an unforgettable brunch experience.
Conclusion: BakeWithEase's Commitment to Easy Brioche Baking
At BakeWithEase, we are passionate about making delicious baking accessible to everyone, and our easy classic French brioche recipe is a perfect example of this. We hope this detailed guide has empowered you to tackle this rewarding bake with confidence. There's immense satisfaction in pulling a golden, fragrant brioche from your oven, knowing you created it yourself.
We love seeing your baking triumphs! Please share photos and stories of your successful easy brioche bakes with us. Tag us on social media or send us an email. Your successes inspire other bakers in our community and help us continue providing helpful, easy-to-follow recipes and tips. Happy baking!
Further Exploration: Other Enriched Dough Recipes on BakeWithEase
Mastering this easy classic French brioche recipe is a fantastic step into the world of enriched doughs. If you enjoyed the process and the delicious result, there are many other wonderful enriched doughs waiting for you to explore right here on BakeWithEase. From Challah and Babka to sticky buns and doughnuts, the techniques you've learned for brioche provide a solid foundation for tackling these other delightful breads and pastries.
Each enriched dough has its unique characteristics and methods, but they all share the common thread of incorporating fats, eggs, and/or sugar for a richer, softer texture than lean breads. Dive into our collection of Brioche and Enriched Dough recipes to continue your baking journey. You'll find step-by-step guides and helpful tips to make each new challenge an easy and rewarding experience.
Frequently Asked Questions
How difficult is the Classic French Brioche Recipe from BakeWithEase for a beginner baker?
The recipe is designed with beginner bakers in mind. It offers step-by-step instructions and uses easy-to-find ingredients, making it manageable even if you're new to baking.
What makes the BakeWithEase brioche recipe different from other brioche recipes?
BakeWithEase focuses on simplicity and clarity, providing detailed explanations and visual aids. We aim to demystify the brioche-making process and ensure success even for novice bakers.
Can I substitute any ingredients in the Classic French Brioche Recipe?
While we recommend using the listed ingredients for the best results, you can try dairy-free alternatives like plant-based butter. However, substitutions can affect the final texture and flavor of the brioche.
How long does it take to make the Classic French Brioche Recipe from start to finish?
The entire process, including preparation, proofing, and baking, takes approximately 3-4 hours. Most of this time is dedicated to proofing the dough, which is crucial for a light and airy brioche.
What are some common mistakes to avoid when making brioche, according to BakeWithEase?
Avoid overmixing the dough, which can result in a tough brioche. Also, ensure your yeast is fresh and active for proper rising. Temperature control is also important to not kill the yeast.
Final Reflection: The Enduring Allure of a Simple Brioche
The seemingly simple act of baking a classic French brioche transcends mere culinary creation; it's a journey into tradition, a testament to the power of patience, and a celebration of the everyday. In a world obsessed with instant gratification, the slow rise, the gentle kneading, and the rewarding aroma of a perfectly baked brioche offer a powerful antidote to the frenetic pace of modern life. This recipe, designed for ease of access and execution, aims to democratize this timeless pleasure, making it accessible to all.
The influence of baking, and specifically the comforting ritual of bread making, on our cultural landscape is undeniable. It's a connection to our ancestors, a shared experience across generations, and a potent symbol of home and hearth. Bread is the staff of life,
a simple phrase, yet it encapsulates the profound significance of this humble food. The brioche, with its rich butteriness and delicate texture, elevates this concept, transforming a basic necessity into a celebratory treat, a symbol of abundance and joy. This recipe, I hope, has helped to strengthen that connection, allowing you to experience the magic firsthand.
Now, I invite you to consider the lessons learned beyond the recipe itself. Take the time to savor the process, to appreciate the slow unfolding of the dough, and to relish the satisfaction of creating something beautiful and delicious with your own hands. The next time you feel overwhelmed, remember the calming rhythm of kneading, the warmth of the oven, and the simple pleasure of sharing a slice of homemade brioche with loved ones. This is more than just a recipe; it's an invitation to slow down, connect, and find joy in the everyday rituals that enrich our lives.
Unleash Your Inner Baker: Master the Art of Brioche!
Thanks for joining us on this delicious journey into the world of classic French brioche! We hope you gained valuable insights and feel inspired to create something truly special. Ready to take your baking skills to the next level?
- Bake your own masterpiece: Use our step-by-step guide to create a perfectly golden, fluffy brioche. Don't be intimidated – it's easier than you think!
- Share your success: Snap a picture of your beautiful brioche and share it on social media using #BakeWithEaseBrioche – let's inspire each other!
- Explore more enriched dough recipes: Dive deeper into our recipe archives to find other delightful treats made with rich, buttery doughs.
What unique twist will you add to your homemade brioche to make it your own?