
Creating Intricate Buttercream Borders on Cakes

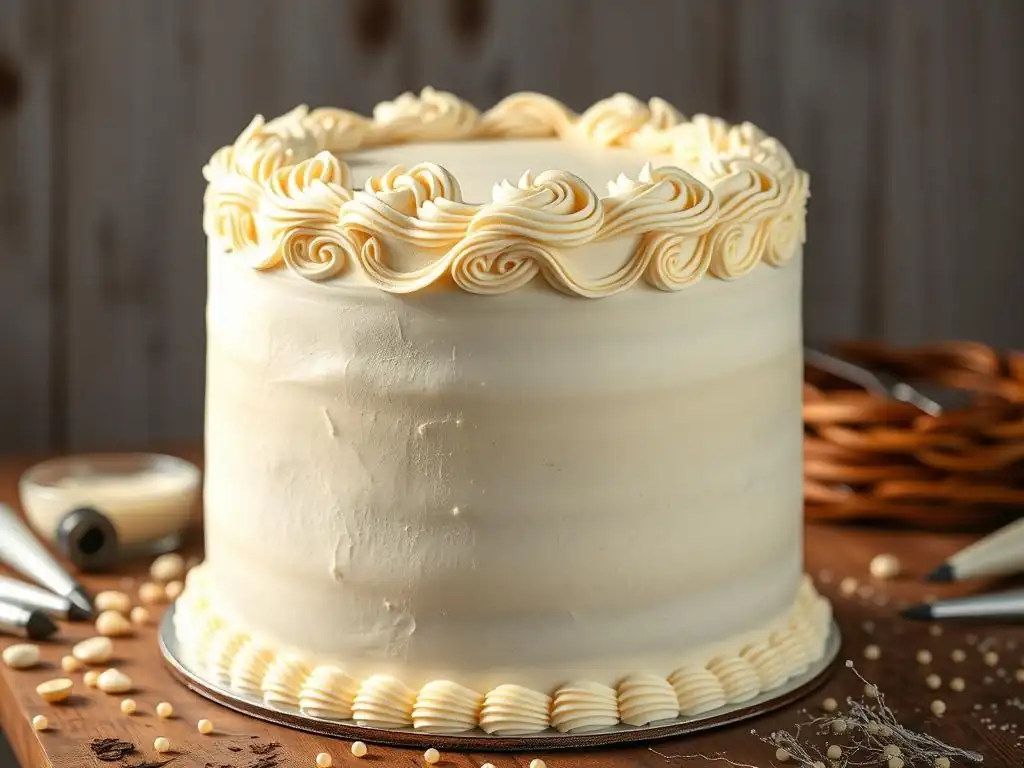
Welcome to BakeWithEase, your guide to unlocking the sweet secrets of the baking world! Ever dreamed of creating a cake that's not just delicious, but a true work of art? Get ready to elevate your baking skills because this article dives deep into intricate buttercream border techniques for cakes. Discover how to transform simple frosting into stunning visual masterpieces – are you ready to master the art of buttercream borders?
- Creating Intricate Buttercream Borders on Cakes: A BakeWithEase Guide
- Mastering Intricate Buttercream Border Techniques for Cakes
- Essential Tools and Buttercream Recipe for Intricate Borders
- Step-by-Step Guide to Piping Various Intricate Buttercream Borders
- Tips for Achieving Professional-Looking Buttercream Borders
- Advanced Buttercream Border Techniques
- Troubleshooting Common Buttercream Border Problems
- Conclusion: Elevate Your Cake Decorating with Intricate Buttercream Borders
-
Frequently Asked Questions
- What are some basic tools I need to create intricate buttercream borders?
- What type of buttercream is best for intricate borders?
- How do I prevent air bubbles in my buttercream while piping?
- What are some simple buttercream border designs a beginner can try?
- How can I fix mistakes while piping buttercream borders?
- Final Reflection: Mastering the Art of the Intricate Buttercream Border
- Unleash Your Inner Cake Artist: Master the Art of Buttercream Borders!
Creating Intricate Buttercream Borders on Cakes: A BakeWithEase Guide
Mastering Intricate Buttercream Border Techniques for Cakes
This guide from BakeWithEase will walk you through creating stunning and intricate buttercream borders to elevate your cake decorating skills. Perfect for intermediate bakers looking to add a professional touch. Mastering intricate buttercream border techniques cake decorating is a rewarding journey, transforming simple cakes into impressive centerpieces. We'll cover everything from essential tools to advanced piping methods, ensuring you have the knowledge to tackle even the most complex designs.
Adding an intricate buttercream border to a cake provides a polished finish and can hide imperfections at the cake's base or top edge. These techniques are not just decorative; they showcase skill and attention to detail. Whether you're preparing a cake for a special occasion or simply want to practice new skills, understanding these intricate cake border techniques will significantly enhance your baking repertoire. Let's dive into the world of piping and discover how to create beautiful borders that will impress everyone.
Essential Tools and Buttercream Recipe for Intricate Borders
Must-Have Cake Decorating Tools for Buttercream Borders
To successfully execute intricate buttercream border techniques cake decorating requires specific tools. Piping bags are fundamental; they come in various sizes and materials like disposable plastic, reusable canvas, or silicone. For intricate work, smaller, disposable bags (like 10-inch or 12-inch) offer precision and easy cleanup, while larger bags (16-inch or 18-inch) are better for covering large areas or piping substantial borders like a wide shell. Having a variety on hand is always a good idea.
Piping tips are the stars of border creation. A basic set should include round tips (for dots and lines), star tips (open and closed for shells, rosettes, and stars), and perhaps a petal tip (for ruffles or specific scroll accents). For example, a Wilton 1M or Ateco 826 (open star) is perfect for rosettes and large shells, while a Wilton 21 or Ateco 18 (closed star) creates smaller, more defined shells. Investing in a set with tips ranging from fine detail (#1-$3) to larger borders (#18-$32) will give you versatility for various intricate buttercream border techniques cake designs.
- Piping Bags: Choosing the right size and material.
- Piping Tips: A guide to different tips for various border designs (e.g., star tips, petal tips, round tips).
- Couplers: For easy tip switching.
- Turntable: For smooth and even application.
- Offset Spatula: For smoothing buttercream and creating textures.
The Perfect Buttercream Consistency for Intricate Piping
Achieving the ideal buttercream texture is paramount for successful intricate piping. The buttercream should be smooth, pliable, and hold its shape without being too stiff to pipe easily or too soft that it collapses. Think of a consistency similar to smooth peanut butter or toothpaste – firm enough to define sharp edges but soft enough to flow continuously from the piping bag. Temperature plays a huge role; slightly cool buttercream pipes better than warm, greasy buttercream.
For intricate buttercream border techniques cake piping, both American buttercream and meringue-based buttercreams (Swiss or Italian) can work, but they behave differently. American buttercream, made from butter and powdered sugar, is generally firmer and holds sharp details well, making it excellent for defined stars, shells, and scrolls. However, it can be very sweet and prone to crusting.
Swiss or Italian meringue buttercreams, while less sweet and smoother, are softer and might not hold ultra-sharp edges as well but are fantastic for smooth ropes and elegant scrolls where a softer look is desired. A good starting point for American buttercream is roughly a 1:2 ratio of butter to powdered sugar by weight, adjusted with milk or cream for desired consistency.
- Achieving the Ideal Buttercream Texture: Not too stiff, not too soft.
- Buttercream Recipe Recommendations: American Buttercream, Swiss Meringue Buttercream, Italian Meringue Buttercream – which is best for intricate work?
- Adjusting Buttercream Consistency: Troubleshooting tips for overly stiff or soft buttercream.
Step-by-Step Guide to Piping Various Intricate Buttercream Borders
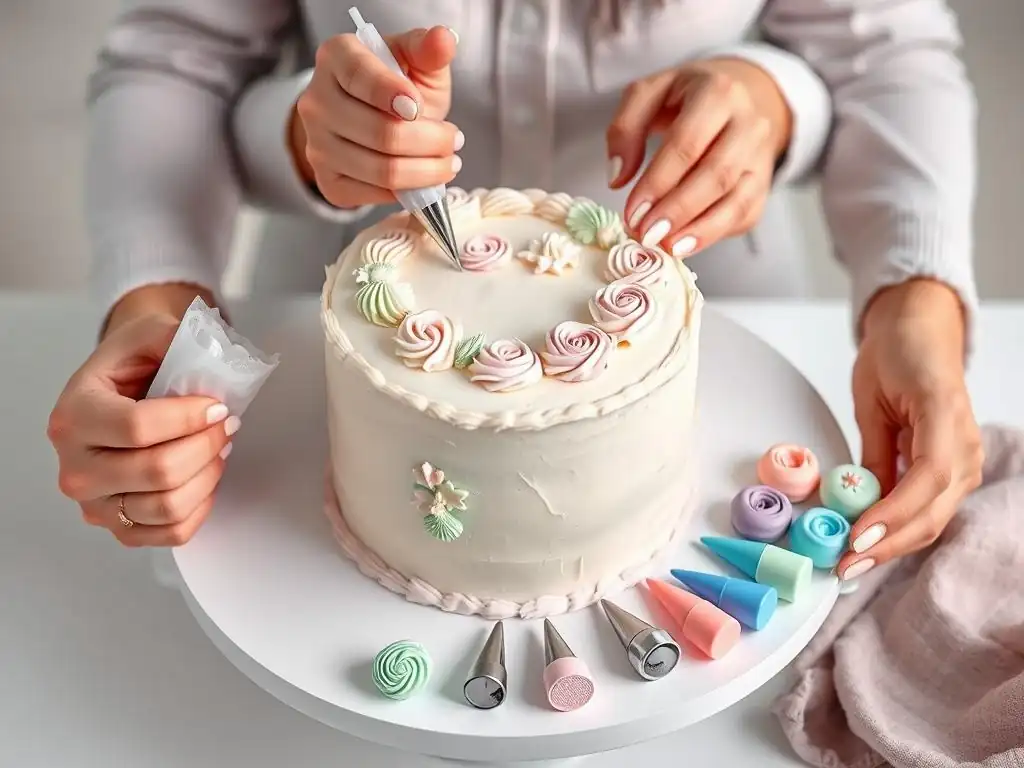
The Classic Shell Border: A Foundation Technique
The shell border is a fundamental technique and a great starting point for learning intricate buttercream border techniques cake applications. It creates a beautiful, scalloped edge that adds a touch of elegance to any cake. Begin by selecting a star tip (open or closed, like a Wilton 21 or 1M). Fill your piping bag about two-thirds full with prepared buttercream, twist the top closed, and position the bag at a 45-degree angle to the cake surface.
To pipe a shell, apply consistent pressure to the bag, allowing the buttercream to build up a mound at the starting point. As the mound forms, gradually decrease pressure while simultaneously pulling the bag downwards and slightly towards you, creating a tail that tapers off. Release pressure completely as you pull away. For the next shell, start with the tip slightly overlapping the tail of the previous shell. This overlapping creates a continuous, flowing border. Practice this motion on parchment paper first to get a feel for the pressure and pull required for consistent shells.
The Elegant Rope Border: Adding Texture and Dimension
The rope border adds a sophisticated, intertwined look that provides wonderful texture and dimension. This is one of the more fluid intricate buttercream border techniques cake decorators use. You'll typically use a large round tip (like a Wilton 12) or a large star tip (like a Wilton 1M or 21) depending on whether you want a smooth or textured rope. Hold the piping bag at a 45-degree angle, similar to the shell border, but the motion is different.
To create the rope effect, pipe a short, curved line resembling a 'C' or a comma. For the next segment, start piping just below the end of the first segment, overlapping it slightly, and pipe another curved line that mirrors the first but is angled the other way, forming the start of the intertwined look. Continue this motion, overlapping each new segment onto the previous one, alternating the curve's direction as you move around the cake.
The consistent overlap and pressure are key to achieving a smooth, continuous rope. Practice maintaining the angle and pressure to avoid breaks or uneven thickness in the rope.
The Delicate Rosette Border: Creating Floral Accents
Rosettes offer a charming, floral accent and are among the most popular intricate buttercream border techniques cake designs. They are relatively simple to pipe but require consistent pressure and speed for uniform results. A star tip is essential here, with tips like the Wilton 1M or 4B being excellent choices for creating beautiful swirls. The size of the tip will determine the size of your rosettes.
To pipe a rosette, hold the piping bag perpendicular to the cake surface (or slightly angled for a different look). Start in the center of where you want the rosette and apply steady pressure. Pipe in a circular or swirling motion, moving outwards from the center. Release pressure as you complete the circle and pull the tip away.
The key is to maintain consistent pressure throughout the swirl for an even thickness. You can pipe rosettes close together to form a continuous border or space them out for a more delicate look. Experiment with starting in the center and swirling outwards versus starting at the edge and swirling inwards to see which effect you prefer.
The Intricate Scroll Border: Adding a Touch of Sophistication
The scroll border is a classic, elegant design that adds a touch of sophistication and historical flair. It's one of the more advanced intricate buttercream border techniques cake decorators employ, requiring practice to achieve fluid, continuous lines. You'll typically use a small to medium round tip (like a Wilton 5 or 10) or a petal tip (like a Wilton 104) for a more elaborate look. The basic scroll is an 'S' shape piped on its side.
To create a continuous scroll border, start by piping the first half of an 'S' (a curved line). Then, without lifting the tip from the cake, transition into the second half of the 'S', connecting it smoothly. For the next scroll, start the first half of its 'S' where the previous scroll ended, overlapping slightly, and continue the motion around the cake.
The goal is to create a flowing series of interconnected 'S' shapes. Using a petal tip involves angling the tip so the wider end is against the cake and the narrow end is pointing away, creating a ruffled or ribbed scroll. Practice piping the 'S' shape smoothly and consistently on parchment paper before attempting it on the cake.
The Basketweave Border: A Challenging but Rewarding Technique
The basketweave border is a visually striking technique that mimics woven material, adding incredible texture and depth. It's considered one of the more challenging intricate buttercream border techniques cake decorators can master, requiring precision and patience. A basketweave tip (like a Wilton 46 or 47) is specifically designed for this, having one smooth edge and one serrated edge.
Begin by piping a long vertical strip using the smooth side of the tip held flat against the cake. Then, pipe several shorter horizontal strips over the vertical strip, spacing them evenly. Next, pipe another long vertical strip next to the first one, but this time, pipe it over the horizontal strips.
Continue alternating: pipe horizontal strips over the last vertical strip, then a vertical strip over those horizontal strips. Using the serrated edge of the tip for the horizontal strips can add more definition to the weave. Marking light guidelines on the cake beforehand can help ensure even spacing and straight lines, crucial for a convincing basketweave.
Tips for Achieving Professional-Looking Buttercream Borders
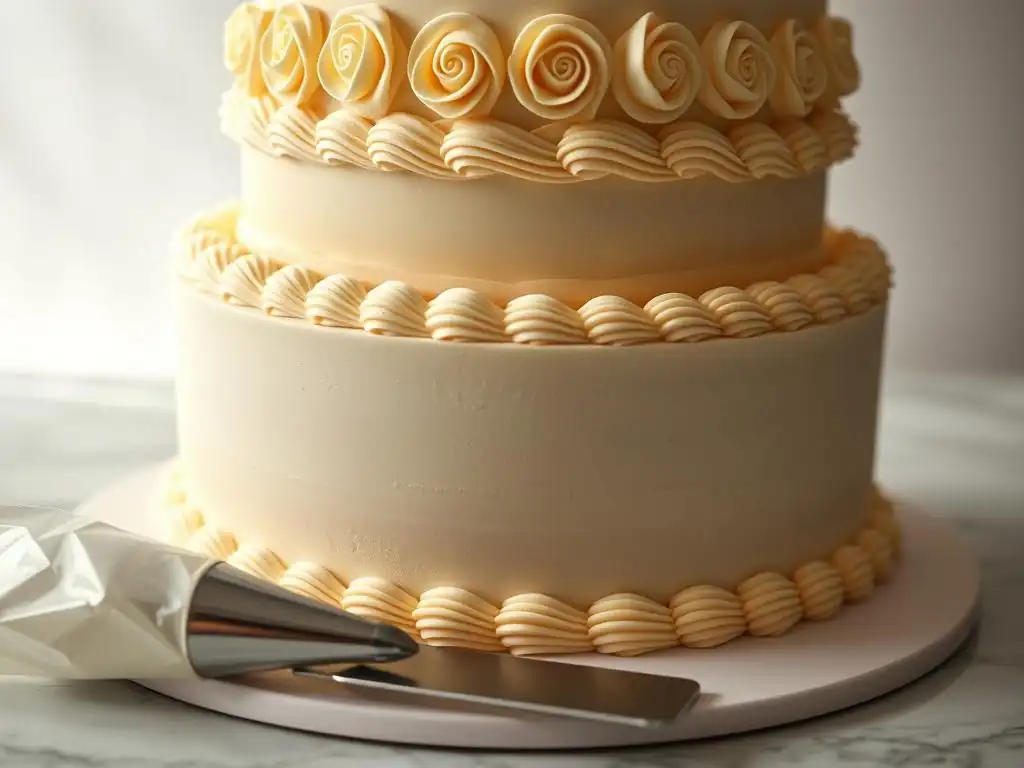
Practice Makes Perfect: The Importance of Practice Piping
Mastering intricate buttercream border techniques cake decorating is fundamentally about practice. You wouldn't expect to play a complex piece on a musical instrument without practicing the scales, and piping is no different. Dedicating time to practicing helps build muscle memory, improve control, and achieve consistency in pressure and motion.
Practice boards, which are essentially laminated sheets or plastic surfaces with various patterns and lines, are invaluable tools. You can pipe directly onto them, scrape the buttercream off, and reuse it. Spending just 15-20 minutes a day practicing basic motions like straight lines, curves, and the fundamental shapes of your desired borders (shells, 'C's, 'S's) can lead to significant improvement within a week or two. This low-stakes practice allows you to experiment with different tips, buttercreams, and techniques without the pressure of decorating a finished cake.
Maintaining Consistent Pressure: Key to Even Borders
Consistency is the hallmark of professional-looking intricate buttercream border techniques cake designs. The most critical factor in achieving this consistency is maintaining steady, even pressure on the piping bag. Fluctuating pressure leads to uneven thickness in your lines and borders, resulting in a messy or amateur appearance.
Hold the piping bag correctly – with the twisted top tucked into the palm of your dominant hand and supported by your other hand near the tip. Use the hand gripping the top of the bag to apply steady pressure, squeezing from the top down as the bag empties. The supporting hand guides the tip but should not be used to squeeze. Practice applying constant pressure while moving your hand at a steady pace. This will ensure that your shells are uniform in size, your ropes are of even thickness, and your scrolls flow smoothly.
Achieving Smooth and Sharp Edges: Finishing Touches
Even with careful piping, small imperfections can occur. Achieving smooth and sharp edges is part of the finishing touches that make intricate buttercream border techniques cake designs truly stand out. An offset spatula is your best friend here for tidying up.
For borders piped on the top edge of the cake, a small offset spatula can be used very gently to nudge any uneven spots or smooth the very top edge of the border where it meets the cake surface. For borders around the base, ensure the border meets the cake board cleanly or slightly overlaps it.
Chilling the cake briefly after piping can also firm up the buttercream, making it less likely to smudge if you need to make slight adjustments or move the cake. A chilled, firm border is also less prone to damage during transport or final decorating steps.
Advanced Buttercream Border Techniques
Incorporating Color: Creating Ombre and Two-Toned Borders
Adding color introduces another layer of complexity and visual appeal to intricate buttercream border techniques cake decorating. Creating ombre effects or two-toned borders can transform a simple design into something truly spectacular. To color buttercream, use gel food coloring, as it's highly concentrated and won't significantly alter the buttercream's consistency like liquid colors can. Start with a small amount and gradually add more until you achieve the desired shade.
For an ombre border, you'll need buttercream in several shades of the same color, ranging from light to dark. Fill separate piping bags with each shade. Start piping the lightest shade for a section of the border, then switch to the next darkest shade, slightly overlapping the end of the previous section to create a subtle blend. Continue around the cake, progressing through the shades until you reach the darkest color.
For a two-toned border using a single tip (like a star or petal tip), you can load the piping bag with two colors side-by-side. This is often achieved by spreading one color on one side of a piece of plastic wrap and the other color next to it, then rolling it up and inserting it into the piping bag. As you pipe, the two colors will emerge simultaneously, creating a striped effect within the border element.
Adding Textural Elements: Pearls, Sprinkles, and More
Once your intricate buttercream border techniques cake design is piped, adding textural elements like edible pearls, sprinkles, or sanding sugar can provide extra sparkle and detail. These additions can highlight certain parts of the border or add a contrasting texture.
Selecting the right embellishments involves considering the overall design and color scheme. Small silver or gold edible pearls can be placed individually along the curves of a scroll border or at the tips of shells for an elegant touch. Fine sanding sugar can be sprinkled over a piped border while the buttercream is still soft to create a shimmering effect. For a bolder look, larger sprinkles or jimmies can be pressed gently into the piped buttercream. Apply these elements carefully and sparingly; too many can overwhelm the intricate details of the border.
Troubleshooting Common Buttercream Border Problems
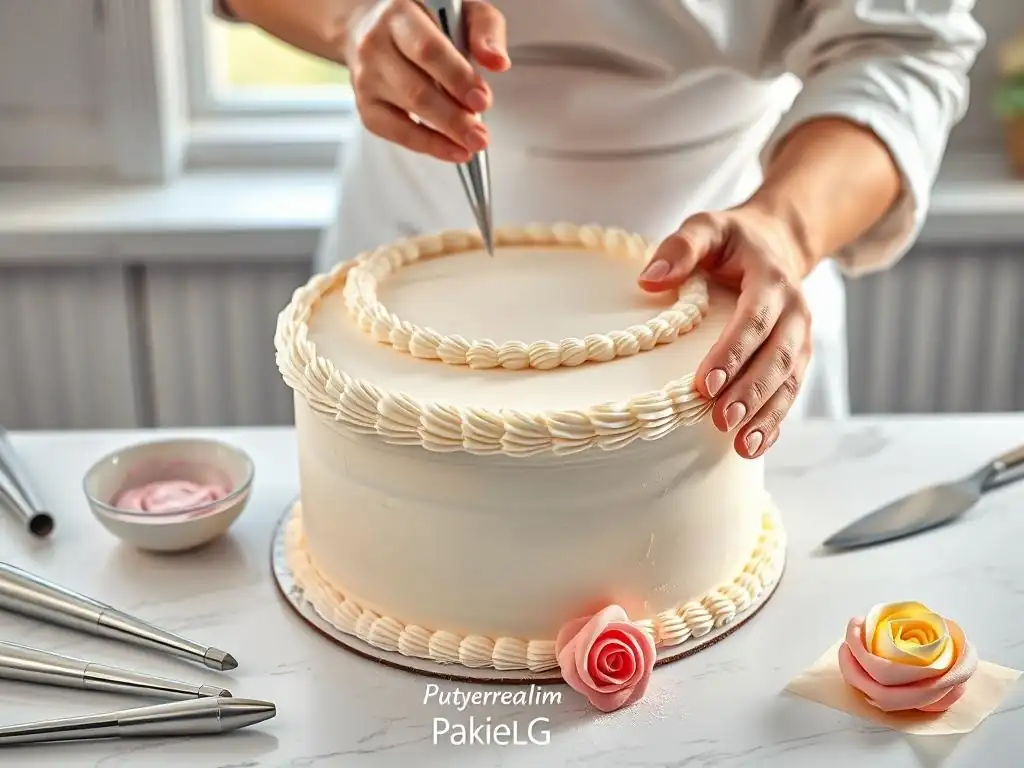
Buttercream Too Soft or Too Stiff
One of the most common issues encountered when using intricate buttercream border techniques cake decorators face is incorrect buttercream consistency. If your buttercream is too soft, it won't hold its shape when piped; shells will slump, and lines will be indistinct. If it's too stiff, it will be difficult to pipe smoothly, causing jagged edges and potentially tearing the piping bag.
To adjust buttercream consistency, if it's too soft, you likely need to add more powdered sugar (for American buttercream) or chill it slightly in the refrigerator for 10-15 minutes. If it's too stiff, you need to add a small amount of liquid – a teaspoon or two of milk, cream, or even water – mixing it in thoroughly until the desired texture is reached.
For meringue-based buttercreams, adding a bit more softened butter can help if it's too stiff, while chilling is the primary fix for softness. Always add adjustments gradually, mixing well after each addition, until the consistency is just right for intricate piping.
Uneven Borders
Achieving uniform borders is a key aspect of successful intricate buttercream border techniques cake application, but unevenness is a common problem, especially for beginners. This can manifest as some shells being larger than others, rope segments being inconsistent, or scroll lines varying in thickness.
Uneven borders are most often caused by inconsistent pressure on the piping bag or inconsistent speed of movement. Practice exercises focusing solely on maintaining steady pressure while piping straight lines on a practice board can help significantly. Using a turntable is also crucial; it allows you to rotate the cake smoothly as you pipe, enabling you to maintain a consistent angle and distance from the cake surface throughout the entire border. Take breaks if your hand fatigues, as this can lead to a loss of control and uneven results.
Air Bubbles in Buttercream
Air bubbles trapped in buttercream can disrupt the smooth flow of icing while piping, causing gaps or bursts in your intricate buttercream border techniques cake designs. These bubbles often occur during the mixing process, especially if the buttercream is whipped at high speed for too long.
To prevent air bubbles, mix your buttercream on a lower speed for the final few minutes after adding all ingredients; this helps push out trapped air. Before filling your piping bag, you can also press the buttercream against the side of your mixing bowl with a spatula to force out air pockets. Once the buttercream is in the piping bag, gently tap the bag against the counter a few times, then squeeze a bit of buttercream out onto a practice surface until it flows smoothly, which helps release any remaining trapped air near the tip.
Conclusion: Elevate Your Cake Decorating with Intricate Buttercream Borders
By mastering these intricate buttercream border techniques, you can transform your cakes into stunning works of art. From the foundational shell border to the challenging basketweave, each technique offers a unique way to add beauty and sophistication. Remember that patience and practice are your greatest allies in developing these intricate cake border techniques.
Experiment with different tips, colors, and embellishments to develop your own unique style. Don't be discouraged by initial imperfections; every attempt is a step towards mastery. BakeWithEase is here to help you on your baking journey, providing the guides and inspiration you need to confidently create beautiful and delicious cakes. Keep piping, keep practicing, and enjoy the process of bringing your cake visions to life with these intricate buttercream border techniques cake skills.
Frequently Asked Questions
What are some basic tools I need to create intricate buttercream borders?
You'll need a piping bag, various piping tips (like star, petal, and round tips), and an offset spatula. Quality tools will make a big difference. Also, practice on parchment paper first!
What type of buttercream is best for intricate borders?
A stiff buttercream, like American buttercream or Swiss meringue buttercream, is ideal. These hold their shape well and won't melt easily during piping.
How do I prevent air bubbles in my buttercream while piping?
Burp your piping bag frequently to release trapped air. Also, ensure your buttercream is smooth and consistently mixed before filling the bag.
What are some simple buttercream border designs a beginner can try?
Start with basic shell borders, rosettes, or simple swirls. Practice consistency in pressure and movement to achieve even and neat results.
How can I fix mistakes while piping buttercream borders?
Use an offset spatula or a small paintbrush dipped in hot water to gently smooth out imperfections. Work quickly before the buttercream sets too much.
Final Reflection: Mastering the Art of the Intricate Buttercream Border
The pursuit of the perfect buttercream border is more than just a decorative flourish; it's a testament to patience, precision, and the enduring power of artistic expression in the culinary world. Today, in a world saturated with visually stunning food imagery, the ability to create truly intricate buttercream borders elevates a cake from simple dessert to a breathtaking masterpiece, capturing attention and inspiring awe. This skill, once the domain of professional pastry chefs, is now accessible to anyone with dedication and the right techniques.
The journey of mastering intricate buttercream borders is a deeply rewarding one. It's about more than just the final product; it's about the process itself – the feeling of the cool buttercream in your hands, the satisfying precision of each perfectly piped swirl, the quiet concentration required to create something truly beautiful. The details are not the details. They make the design.
- Charles Eames. This quote perfectly encapsulates the importance of meticulous attention to detail in achieving truly stunning buttercream borders. The subtle variations in pressure, the consistent speed of the piping bag, the careful placement of each element – these are the elements that transform a simple border into a work of art.
Now, it's your turn. Don't be intimidated by the seemingly complex techniques. Start small, practice consistently, and allow yourself to experiment. Each imperfectly piped rose, each slightly wobbly leaf, is a step closer to mastering your craft. Embrace the learning process, celebrate your successes, and remember the joy that comes from creating something beautiful with your own two hands. The world awaits your exquisitely decorated cakes!
Unleash Your Inner Cake Artist: Master the Art of Buttercream Borders!
Thanks for taking the time to explore the world of intricate buttercream borders! We hope you’ve gained the confidence to create stunning cake designs. Ready to put your new skills to the test?
- Dive into your next cake project: Use what you've learned to create a breathtaking border design for your next celebratory cake. Challenge yourself to try a new technique or pattern!
- Share your creations: Show off your beautiful buttercream work on social media! Tag us – we'd love to see your masterpieces.
- Explore our advanced buttercream techniques guide (coming soon!): Stay tuned for our next guide delving into even more intricate designs and piping methods.
What stunning border will you create for your next baking adventure?