
Why Your Croissants Aren't Flaky (And How to Fix It Now)

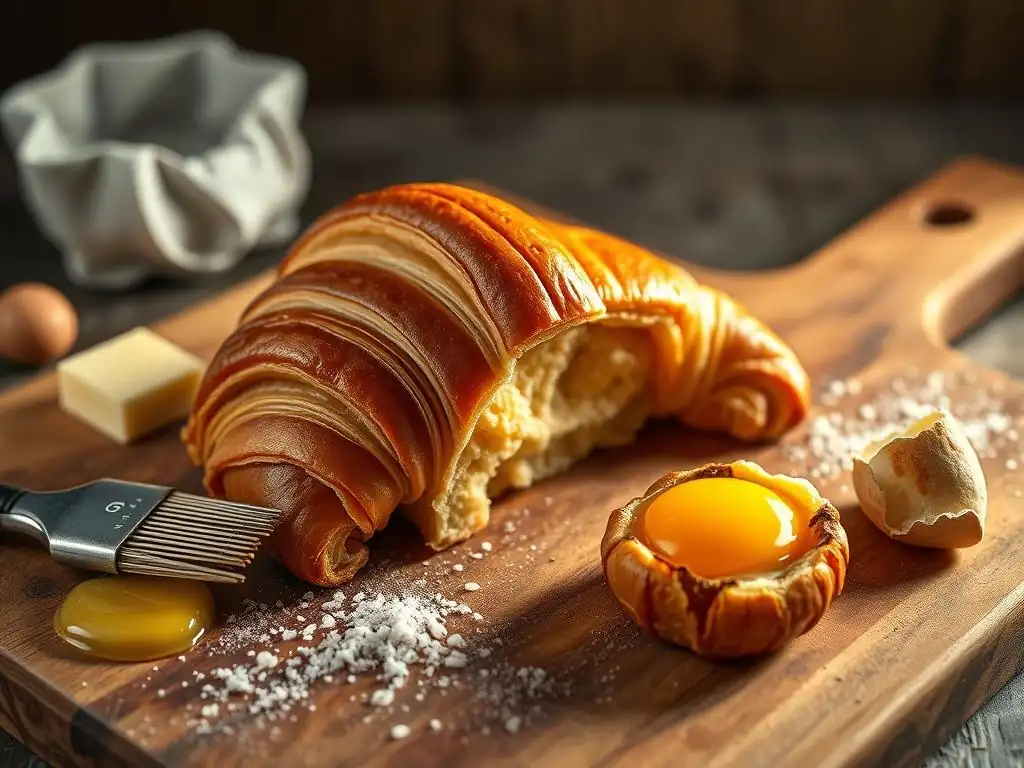
Welcome to BakeWithEase, your trusted guide to baking brilliance! Ever wondered why your croissants aren't achieving that coveted, melt-in-your-mouth flakiness? You're not alone! Dive into our article, " Why Your Croissants Aren't Flaky (And How to Fix It Now)," where we unravel the secrets to perfect lamination and troubleshoot common croissant-making mishaps. Ready to transform your baking game? Let's get started and uncover the keys to achieving those irresistibly flaky croissants you've always dreamed of!
- Understanding Croissant Flakiness: The Key to Baking Success
- Troubleshooting Common Croissant Baking Issues: Flaky Croissants Troubleshooting Tips
- Advanced Tips for Achieving Perfectly Flaky Croissants at Home
- Step-by-Step Guide to Fixing Common Croissant Flakiness Problems
- Beyond the Basics: Maintaining Flakiness After Baking
- Conclusion: Enjoying Your Perfectly Flaky Homemade Croissants
- Frequently Asked Questions
- Final Reflection: The Pursuit of the Perfect Flaky Croissant
- Unleash Your Inner Pastry Chef: Master Flaky Croissants!
Understanding Croissant Flakiness: The Key to Baking Success
What Makes a Croissant Flaky? The Science Behind the Layers
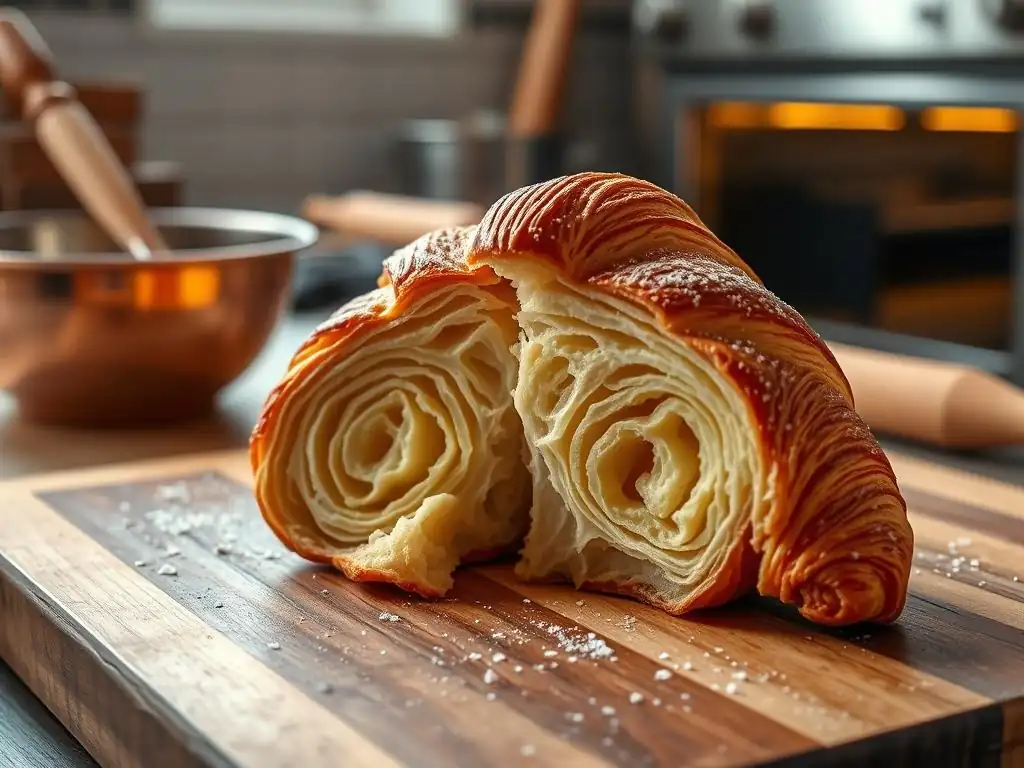
The magic of a perfectly flaky croissant lies in its intricate layers, a result of a delicate process called lamination. This involves encasing a block of cold butter within a dough and repeatedly folding and rolling it out. As the croissant bakes, the water in the butter turns to steam, forcing the dough layers apart. This steam expansion creates thousands of thin, crisp layers, giving the croissant its characteristic airy and flaky texture.
Furthermore, the quality of the gluten development in the dough plays a crucial role. A well-developed gluten network is strong enough to hold the structure as the steam expands, but not so tough that it prevents the layers from separating. The interaction between the melting butter, the expanding steam, and the structured dough is a precise science, where temperature and technique are paramount to achieving those coveted, shatteringly crisp layers that define a truly great croissant.
Common Mistakes Leading to Non-Flaky Croissants
One of the most frequent culprits behind dense, non-flaky croissants is improper temperature control. If the butter is too warm during lamination, it can meld into the dough instead of remaining in distinct layers. This results in a bread-like texture rather than the desired flakiness. Conversely, if the dough or butter is too cold and stiff, it can tear during rolling, breaking the butter layers and compromising the final structure.
Another significant issue relates to the proofing process. Over-proofing allows the butter to start melting out of the dough before baking, collapsing the layer structure. Under-proofing, on the other hand, means the dough hasn't developed enough to support the steam expansion, leading to a dense crumb. Incorrect baking temperature is also critical; too low a temperature won't generate enough steam quickly to lift the layers, while too high can burn the exterior before the interior is cooked and the layers fully formed.
Troubleshooting Common Croissant Baking Issues: Flaky Croissants Troubleshooting Tips
Problem 1: Dough Temperature Control Issues and Their Impact on Flakiness
Maintaining the correct dough and butter temperature is arguably the most critical factor in achieving flaky croissants. If your dough feels warm or sticky when you're trying to roll it out, it's likely too warm, causing the butter to soften excessively. This leads to the butter integrating into the dough rather than staying in thin, separate sheets between the dough layers, which is essential for steam lift during baking.
If the dough or butter is too cold, it becomes rigid and brittle. Attempting to roll cold, stiff dough can cause the butter block to crack and break into small pieces, disrupting the continuous layers. It can also tear the dough itself. Both scenarios prevent the uniform layering needed for maximum flakiness, resulting in a denser, less layered crumb structure after baking. Effective flaky croissants troubleshooting tips often start with temperature checks.
Solution: Mastering Dough Temperature for Perfect Croissant Layers
The ideal temperature for your dough and butter block during lamination should be cool but pliable, typically between 40°F and 55°F (4°C and 13°C). Before each fold and roll, touch your dough; it should feel cool to the touch but not hard. If it feels warm or the butter seems to be oozing, stop and refrigerate the dough for 20-30 minutes until it's properly chilled.
Using a thermometer can be helpful, but learning to gauge the texture by touch is key. The butter should be firm enough to maintain its shape but soft enough to roll without cracking. If your kitchen is warm, consider working in shorter bursts and refrigerating the dough more frequently between folds. This proactive approach to temperature control is a fundamental step in any effective flaky croissants troubleshooting tips guide.
Problem 2: Butter Lamination Problems: Achieving Even Distribution
Uneven butter distribution within the dough is a major obstacle to achieving uniform flakiness. If the butter block isn't spread evenly during the initial encasement or if rolling isn't consistent, you can end up with areas of dough that have too much butter (leading to greasy spots) or too little (leading to dense, bread-like sections). This lack of uniformity means steam won't lift all parts of the croissant equally.
Common lamination errors include not squaring off the dough and butter properly before folding, applying uneven pressure while rolling (pressing harder in some spots than others), or rushing the process, which can cause the butter to tear or squeeze out. These issues directly compromise the integrity of the layers being built, making the final croissant less flaky and potentially unevenly baked.
Solution: Techniques for Laminating Butter Correctly
Start by ensuring your butter block is the correct size and pliability to match your dough rectangle. The butter should cover about two-thirds of the dough surface before the first fold. Roll the dough evenly, applying consistent pressure from the center outwards. Use light flouring on your surface and rolling pin, but avoid excessive flour, which can dry out the dough.
Perform your folds (usually three or four "turns") with precision, ensuring straight edges and sharp corners. After each fold, gently press down on the dough to seal the edges and create a relatively even thickness before chilling. Allowing sufficient rest time in the refrigerator (at least 30-60 minutes) between turns is crucial; this relaxes the gluten and firms up the butter, making the dough easier to roll evenly without tearing the layers.
Problem 3: Proofing Problems: Over-Proofing vs. Under-Proofing Croissants
Proofing is the final rise before baking, where the shaped croissants expand and the yeast produces gas, creating air pockets. Over-proofing occurs when croissants are left to rise for too long or in too warm an environment. The butter, which should be cold, starts to melt and seep out of the layers, pooling on the baking sheet. The dough structure also weakens, and when baked, the layers collapse, resulting in a flat, greasy, and dense croissant.
Conversely, under-proofing means the dough hasn't risen sufficiently. The yeast hasn't produced enough gas to create the necessary air pockets, and the gluten hasn't relaxed enough. When these under-proofed croissants hit the hot oven, the sudden rush of steam and yeast activity causes them to expand rapidly and unevenly, often bursting seams and resulting in a heavy, bready texture with poor layer separation. Recognizing the signs of correct proofing is key for flaky croissants troubleshooting.
Solution: Identifying and Achieving the Ideal Proofing Stage
The ideal proofing environment is warm and humid, typically around 75°F to 80°F (24°C to 27°C) with 70-80% humidity. This allows the dough to rise without the butter melting. Proofing time varies significantly based on temperature and humidity, usually taking from 1.5 to 3 hours. A properly proofed croissant will look significantly puffed up, about 1.5 to 2 times its original size.
The best test for proofing is the "jiggle test" or "poke test." Gently jiggle the tray; the croissants should look airy and jiggle slightly like jelly. For the poke test, gently press the side of a croissant with a fingertip. If the indentation springs back very slowly and only partially, it's likely perfectly proofed. If it springs back immediately, it needs more time (under-proofed). If the indentation remains completely or the croissant deflates, it's over-proofed.
Problem 4: Baking Temperature and Time: Crucial for Flaky Results
The oven temperature and baking duration are critical for achieving that golden-brown exterior and light, flaky interior. If the oven is too cool, the butter melts slowly, potentially leaking out before it can create significant steam lift. The dough bakes slowly, resulting in a denser crumb and less defined layers. The exterior might brown unevenly or not at all, lacking that desirable crispness.
Conversely, if the oven is too hot, the exterior can brown and set too quickly before the interior is fully cooked or the layers have had ample time to separate and expand from the steam. This leads to croissants that are dark or burnt on the outside but doughy or raw inside, with collapsed or underdeveloped layers. Precise temperature control is a vital part of effective flaky croissants troubleshooting tips.
Solution: Optimizing Baking Parameters for a Golden, Flaky Crust
Preheat your oven thoroughly, ideally for 20-30 minutes, to ensure it reaches and maintains the target temperature. Many bakers start croissants at a higher temperature (like 400°F/200°C) for the first 10-15 minutes to encourage a rapid burst of steam and oven spring, which maximizes layer separation. Then, they reduce the temperature (to around 350°F/175°C) for the remaining 15-20 minutes to allow the interior to cook through and the exterior to brown evenly without burning.
Keep a close eye on your croissants as they bake, especially in the latter half. Baking time is always an estimate; rely more on visual cues. They should be deeply golden brown all over, not just on top. If they are browning too quickly, you can loosely tent them with foil. Using an oven thermometer is highly recommended, as oven temperatures can vary significantly from the dial setting.
Advanced Tips for Achieving Perfectly Flaky Croissants at Home
Using High-Quality Ingredients for Superior Flakiness
The quality of your ingredients significantly impacts the final texture and flavor of your croissants. High-fat butter (often referred to as European-style butter), typically containing 82% or more butterfat, is crucial. This higher fat content means less water, leading to more efficient steam production during baking and thus better layer separation and flakiness. Butter with lower fat content contains more water and milk solids, which can make the dough greasy and hinder layer formation.
Beyond butter, using a good quality bread flour with a moderate protein content (around 11-12%) provides the necessary gluten structure to hold the delicate layers without making the dough too tough. Fresh, active yeast is essential for proper proofing and oven spring. Even the quality of your salt and sugar matters, affecting flavor and yeast activity. Investing in quality ingredients is a fundamental flaky croissants troubleshooting tip from the start.
The Importance of Resting the Dough: Time is Your Friend
Resting the dough isn't just about chilling the butter; it's equally important for relaxing the gluten. After each fold and roll-out ("turn"), the gluten in the dough becomes tightened and elastic. Trying to roll dough that hasn't rested adequately will cause it to resist rolling, spring back, and potentially tear, disrupting the delicate layers.
Allowing the dough to rest in the refrigerator for at least 30-60 minutes between each turn, and for a longer period (several hours, or even overnight) after the final turn and before shaping, allows the gluten network to relax. This makes the dough pliable and easy to work with, ensuring you can roll it thinly and evenly without stress, which is vital for creating numerous thin, distinct layers necessary for maximum flakiness.
Mastering the Art of the Turns: Ensuring Even Butter Distribution
The "turns" are the core of lamination, where you create the multiple layers of dough and butter. Most croissant recipes call for three or four single turns, resulting in hundreds of layers. Precision during these turns is paramount. Each time you fold the dough, ensure the edges are aligned squarely and the fold is neat. Roll the dough evenly to a consistent thickness across the entire surface before folding again.
Avoid letting the dough warm up too much during this process. If the butter softens, the layers can smear together. If it's too cold, it can crack. The goal is to maintain distinct, even layers of butter and dough throughout the entire sheet. Consistent thickness and sharp folds across all turns are non-negotiable steps for achieving truly flaky croissants.
Cutting and Shaping Techniques for Maximum Flakiness
How you cut and shape your croissants can also affect their final flakiness. Use a sharp knife or a pizza cutter to cut the dough triangles cleanly. A dull blade can compress and seal the edges of the layers, preventing them from separating properly during baking. Aim for long, narrow triangles with a small notch at the base.
When shaping, gently stretch the base of the triangle slightly before rolling tightly from the base towards the tip. Rolling too loosely will result in fewer layers and a less airy interior. Rolling too tightly can tear the dough or prevent expansion. The goal is to create tension as you roll, building structure that will support the layers as they expand in the oven. Avoid pressing down hard on the shaped croissants.
Step-by-Step Guide to Fixing Common Croissant Flakiness Problems

Step 1: Assessing Your Dough Temperature and Adjusting Accordingly
Before you even start rolling for lamination, check the temperature of your dough and butter. They should be cold from refrigeration but pliable, not hard. If the dough feels stiff and resistant, let it sit at cool room temperature for 5-10 minutes to soften slightly, but watch it closely. If it feels warm or soft, or the butter seems oily, immediately return it to the refrigerator for 20-30 minutes.
During the lamination process, if you notice the dough becoming difficult to roll, shrinking back excessively, or if you see butter starting to ooze out, stop rolling immediately. This is a clear sign the dough is too warm or the gluten is too tight. Wrap the dough well and place it back in the refrigerator for at least 30-45 minutes before attempting to continue. Patience with chilling is a top flaky croissants troubleshooting tip.
Step 2: Perfecting the Lamination Process: A Visual Guide
Imagine the butter and dough as alternating sheets of paper. Your goal is to keep them separate and uniform. When rolling, use gentle, even pressure. Roll from the center outwards in all directions, lifting and rotating the dough frequently to prevent sticking and ensure even thickness. Aim for a rectangle with sharp corners.
When folding, ensure the edges meet squarely. For a single fold (like a letter), bring one edge two-thirds of the way across, then fold the remaining third over it. Tap the edges gently to seal. After folding, turn the dough so the folded edge is to your side before rolling again. If you see any tears in the dough during rolling, gently patch them by pinching the dough together; a small tear can lead to butter leakage.
Step 3: Monitoring and Adjusting Proofing Time Based on Environment
Proofing is highly variable. Don't rely solely on the time specified in a recipe. Instead, observe your croissants. Place them in a warm, humid spot. If your kitchen is cold, you can create a makeshift proofing box by placing them in a turned-off oven with a pan of hot water on the rack below.
Check the croissants periodically. They should double in size and look airy. Perform the gentle poke test: if the indentation slowly springs back, they are ready. If they spring back quickly, they need more time. If the indentation stays or they deflate, they are over-proofed – unfortunately, there's little you can do to fix over-proofed croissants for flakiness, though you can still bake them. Adjust proofing time based on your environment and the dough's appearance and feel.
Step 4: Achieving the Ideal Oven Temperature for Optimal Flakiness
Using an oven thermometer is essential for accurate baking. Preheat your oven to the temperature specified in the recipe, typically starting high (e.g., 400°F/200°C) and potentially reducing it later (e.g., to 350°F/175°C). Give the oven plenty of time to heat up fully and stabilize.
Place the proofed croissants in the hot oven quickly to minimize heat loss. If using the high-to-low temperature method, set a timer for the initial high-heat phase (e.g., 10-15 minutes) before reducing the temperature. Watch the croissants for even browning. If one side of your oven bakes hotter, rotate the baking sheet halfway through. Bake until they are a deep golden brown all over the top, sides, and bottom, which ensures they are cooked through and the layers are crisp.
Beyond the Basics: Maintaining Flakiness After Baking
Proper Storage Techniques to Preserve Croissant Texture
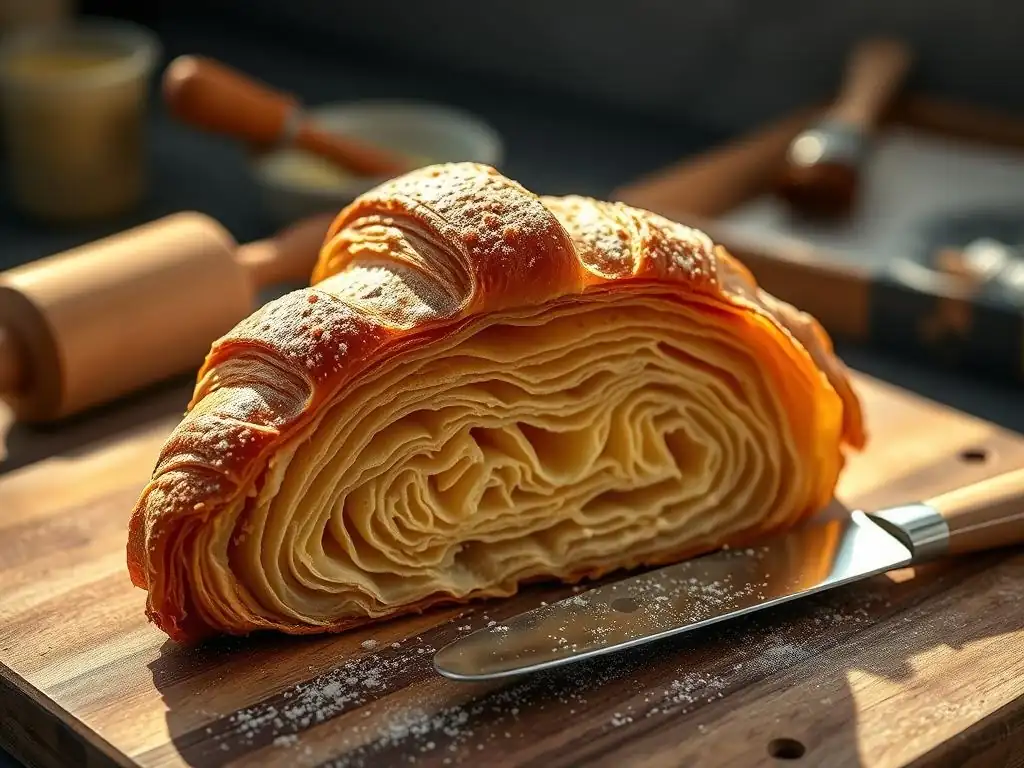
Freshly baked croissants are at their peak flakiness immediately after cooling slightly. However, they can lose their crispness quickly when exposed to air, as moisture from the atmosphere and the interior of the croissant migrates. To preserve flakiness for a short period (a few hours), store them uncovered at room temperature.
For longer storage, once completely cooled, place croissants in an airtight container or a sealed plastic bag. This will prevent them from becoming stale, but they will inevitably lose some of their crisp exterior and become softer. They can be stored this way at room temperature for 1-2 days. Freezing is the best option for longer storage; wrap cooled croissants individually in plastic wrap, then place them in a freezer-safe bag or container for up to 1-2 months.
Reheating Croissants to Restore Flakiness
Reheating is the best way to bring back some of that fresh-baked flakiness to croissants that have gone soft. Avoid the microwave, which will only make them chewy. The best method is to reheat them in a conventional or toaster oven.
Preheat your oven to a moderate temperature, around 325°F to 350°F (160°C to 175°C). Place the croissants directly on the oven rack or on a baking sheet. Heat for about 5-10 minutes for room-temperature croissants, or 10-15 minutes for frozen ones (no need to thaw first). Heat until they are warm throughout and the exterior is crisp again. This process helps re-crisp the outer layers, making them much more enjoyable than eating them soft.
Conclusion: Enjoying Your Perfectly Flaky Homemade Croissants
Frequently Asked Questions
Why are my croissants not flaky?
The most common reason for lack of flakiness is insufficient lamination, where the butter layers melt into the dough. Other culprits include dough that's too warm or using the wrong type of butter.
What type of butter is best for making flaky croissants?
You need butter with a high fat content and low water content, such as European-style butter. The higher fat content allows for a better separation of layers during baking, leading to optimal flakiness.
How can I tell if my dough is too warm during the lamination process?
If the butter starts to soften and ooze out of the dough while you're rolling, it's too warm. Return the dough to the refrigerator for 15-30 minutes to chill before continuing.
What are some common mistakes that beginners make when laminating dough?
Beginners often overwork the dough, developing too much gluten, or they don't chill the dough adequately between folds. Patience and proper chilling are key to successful lamination.
Besides lamination, what else impacts the flakiness of croissants?
Baking temperature and proofing time are also crucial. Baking at the right temperature creates steam that separates the layers. Over-proofing can lead to a dense, less flaky croissant.
Final Reflection: The Pursuit of the Perfect Flaky Croissant
The quest for the flawlessly flaky croissant is more than just a culinary pursuit; it's a testament to the power of precision and understanding in baking. A seemingly simple pastry, the croissant reveals its complexities only when we strive for that ethereal, melt-in-your-mouth texture. This article has explored the common pitfalls – from improper hydration and folding techniques to oven temperature inconsistencies – that often stand between the baker and croissant perfection. But more importantly, it highlights the rewarding journey of mastering a technique that demands patience and attention to detail.
The pursuit of the perfect croissant mirrors life's own challenges; the seemingly small details often hold the key to achieving our larger goals. The meticulous layering, the precise folding, the careful timing – these are all microcosms of the dedication and perseverance required to achieve any significant undertaking. As the renowned pastry chef, Michel Roux, once said: Baking is a science, but it's also an art. You need precision, but you also need passion.
This sentiment perfectly encapsulates the spirit of croissant-making, and indeed, many aspects of life.
Now, consider your own "croissant challenge." What seemingly insurmountable task are you facing? What small adjustments, what mindful attention to detail, might be the key to unlocking your own success? Don't be discouraged by initial setbacks; embrace the learning process, experiment with different techniques, and remember the satisfaction that awaits when you finally achieve that perfectly flaky, golden-brown masterpiece. The journey itself is as rewarding as the destination.
Unleash Your Inner Pastry Chef: Master Flaky Croissants!
Thanks for taking the time to explore the secrets of perfectly flaky croissants! We hope you gained valuable insights into achieving that coveted, melt-in-your-mouth texture. Now it's time to put your newfound knowledge into action.
- Bake Your Best Croissants Yet: Try the techniques outlined in the article – focus on one specific tip (like proper lamination) and see the difference it makes in your next batch.
- Share Your Success (or Challenges!): Post a picture of your croissants on social media using #BakeWithEaseFlaky and tag us! We'd love to see your results.
- Explore Our Croissant Recipe Collection: Dive deeper into the world of croissants with our extensive library of recipes—from classic buttery versions to creative flavor combinations.
Ready to transform your baking game and create croissants that'll leave everyone speechless? What's the first technique you’re going to try perfecting today?