
Feeding Your Starter: The Simple Daily Routine for Success


Welcome to BakeWithEase, your trusted guide to the delightful world of baking! Ever wondered how a simple daily routine can unlock the secrets to perfectly risen sourdough? Unlock the full potential of your dough by following our comprehensive guide to the daily sourdough starter feeding routine. Discover the techniques and timings that will transform your starter, and ultimately, your bread. Get ready to elevate your baking game - let's get started!
- Understanding the Importance of a Daily Sourdough Starter Feeding Routine
- Your Step-by-Step Daily Sourdough Starter Feeding Guide
- Troubleshooting Common Sourdough Starter Feeding Issues
- Tips for Maintaining a Healthy Daily Sourdough Starter Feeding Routine
- Long-Term Sourdough Starter Care: Beyond the Daily Routine
- Frequently Asked Questions
- Final Reflection: Cultivating Consistency, Reaping Delicious Rewards
- Unleash Your Inner Baker: Nurture Your Starter's Potential!
Understanding the Importance of a Daily Sourdough Starter Feeding Routine
Maintaining a vibrant and active sourdough starter is the bedrock of successful sourdough baking. It's not just a pet project; it's a living culture of wild yeast and beneficial bacteria that leavens your bread and imparts that signature tangy flavor. A consistent daily sourdough starter feeding routine is absolutely crucial for keeping this delicate ecosystem in balance and ensuring it has the energy needed to perform reliably when you're ready to bake. Skipping feedings or feeding erratically can lead to a weak, unpredictable starter that struggles to rise or develop flavor properly.
Think of your starter's daily sourdough starter feeding routine as providing fuel for its tiny inhabitants. The yeast consume sugars in the flour and produce carbon dioxide (which makes bread rise) and alcohol. The bacteria produce lactic and acetic acids, contributing to the sourdough flavor profile.
These microorganisms have peak activity cycles, often reaching their zenith about 6-8 hours after a feeding at typical room temperature (around 75°F). A regular feeding schedule ensures you're always working with a starter that's near its peak activity level, leading to better oven spring and a more desirable crumb structure in your finished loaves. Without this daily routine, the starter can become overly acidic, sluggish, and less effective as a leavening agent.
Why a Consistent Feeding Schedule Matters for Your Sourdough
A consistent daily sourdough starter feeding routine is paramount because it regulates the balance of yeast and bacteria and prevents the buildup of excessive acidity. When a starter isn't fed regularly, the microorganisms consume all available food (flour), and the acidic waste products begin to accumulate. This high acidity can eventually harm the yeast and bacteria, making the starter less vigorous and potentially leading to off-flavors. For example, a starter left unfed for too long might develop a strong, sharp vinegar-like smell due to excessive acetic acid production.
Furthermore, a consistent schedule helps you predict your starter's behavior. If you feed your starter at roughly the same time every day, you'll learn how quickly it rises, when it peaks, and when it starts to fall.
This predictability is invaluable when planning your baking schedule, as you'll know exactly when your starter is ripe and ready to be used in a recipe – typically when it has doubled or tripled in size and is full of bubbles. Bakers often find that feeding their starter around the same time each morning or evening establishes a reliable rhythm, making the daily sourdough starter feeding routine a simple, integrated part of their day.
The Link Between Feeding and Sourdough Bread Quality
The health and vigor of your sourdough starter, directly influenced by your daily sourdough starter feeding routine, have a profound impact on the quality of your final bread. A well-fed, active starter provides the robust leavening power needed for a good rise, resulting in a light, airy crumb structure with those desirable open holes. If your starter is weak from inconsistent feeding, your dough may not rise adequately, leading to a dense, heavy loaf. The difference can be as stark as a beautifully voluminous boule versus a flat, brick-like result.
Beyond just rise, the feeding routine also affects the flavor of your sourdough. The balance of lactic acid (milder, yogurt-like) and acetic acid (sharper, vinegar-like) produced by the bacteria is influenced by feeding frequency, temperature, and hydration. A starter fed regularly tends to have a more balanced, pleasant tang. For instance, feeding twice a day or keeping the starter warmer can encourage more lactic acid production, leading to a milder flavor. A consistent daily sourdough starter feeding routine helps you cultivate the specific flavor profile you prefer in your bread, ensuring each loaf reflects a healthy, happy starter.
Your Step-by-Step Daily Sourdough Starter Feeding Guide

Establishing a simple daily sourdough starter feeding routine is key to success. Here's a breakdown of the process.
Step 1: Assessing Your Sourdough Starter's Activity Level
Before you feed your starter, take a moment to observe it. Its appearance and behavior tell you a lot about its health and readiness for feeding. This initial assessment is a critical part of your daily sourdough starter feeding routine.
Visual Cues: Bubbles, Rise, and Texture
Look closely at your starter. A healthy, active starter will have numerous bubbles throughout, not just on the surface. These bubbles are evidence of the yeast producing carbon dioxide. Observe how much it has risen since its last feeding; a vigorous starter should have at least doubled, if not tripled, in volume, often leaving streaks or 'legs' on the side of the jar showing its peak height before starting to fall.
The texture should be light and airy, not dense or pasty. If you see a layer of liquid on top (called "hooch"), it's a sign that your starter is hungry and needs feeding. A small amount of hooch is normal if you've gone slightly past its peak, but a large amount indicates a significant delay in feeding.
The Float Test: Is Your Starter Ready to Bake?
While not strictly part of the daily feeding routine assessment (it's more for determining if the starter is ready for baking), the float test is a classic indicator of peak activity. To perform it, gently take a very small spoonful of your starter at its peak (when it's most bubbly and has doubled/tripled) and drop it into a glass of water. If the starter floats, it's ready to be used in your dough.
This indicates that it's full of carbon dioxide gas, a sign of strong yeast activity. If it sinks, it might not be at its peak yet, or it could be past its peak and starting to deflate. While you don't need to do this test every day before feeding, understanding how your starter behaves at its peak helps you assess its overall health during your daily sourdough starter feeding routine.
Step 2: Discarding (and What to Do With It!)
Discarding a portion of your starter before feeding is a standard practice in the daily sourdough starter feeding routine. While it might seem wasteful at first, it's essential for maintaining a healthy, manageable culture.
Why Discarding is Essential for Sourdough Starter Maintenance
Discarding prevents your starter from growing into an unmanageable volume. If you simply added new flour and water each day without removing any, you would quickly end up with gallons of starter! More importantly, discarding removes a portion of the acidic waste products that accumulate as the microorganisms ferment.
By removing a portion of the old, acidic starter and feeding the remaining, more active culture with fresh flour and water, you dilute the acidity and provide a fresh food source. This encourages the yeast and bacteria to continue reproducing and fermenting vigorously, keeping the starter healthy and preventing it from becoming too sour or sluggish. It's a crucial step in the daily sourdough starter feeding routine to maintain a balanced microbial environment.
Creative Ways to Use Sourdough Discard Recipes
The good news is that "discard" doesn't have to mean waste! There are countless delicious ways to use your sourdough discard, especially when following a daily sourdough starter feeding routine. Discard is essentially a fermented flour and water mixture that can add a slight tang and unique texture to various baked goods. It works wonderfully in recipes where you don't need the leavening power of an active starter. Consider using it in:
- Pancakes or Waffles: Sourdough discard adds a lovely tang.
- Crackers: Easy to make and highly customizable.
- Flatbreads or Naan: Creates a soft, chewy texture.
- Muffins or Scones: Adds moisture and a subtle sour note.
- Quick Breads (like banana bread): Enhances flavor.
Using your discard in these ways makes the daily sourdough starter feeding routine feel less like a chore and more like an opportunity for extra treats! Many discard recipes don't require the discard to be recently fed; older discard from the fridge works just as well for many applications.
Step 3: Feeding Your Sourdough Starter: Ratios and Ingredients
The core of the daily sourdough starter feeding routine is adding fresh flour and water to your starter. The ratio of starter, water, and flour is key to managing hydration and feeding strength.
The Classic 1:1:1 Feeding Ratio Explained
A widely recommended and easy-to-remember ratio for the daily sourdough starter feeding routine is 1:1:1. This means feeding your starter equal parts starter, water, and flour by weight. For example, if you keep 50 grams of starter after discarding, you would feed it with 50 grams of fresh water and 50 grams of fresh flour.
This ratio results in a starter with 100% hydration (meaning the weight of water is equal to the weight of flour), which is a common consistency for many sourdough recipes and easy to work with. Using weight is much more accurate than volume (cups) because flours and water vary in density. Maintaining this consistent ratio in your daily sourdough starter feeding routine helps ensure stable activity levels.
Experimenting with Different Flour Types for Feeding
While many bakers feed their starter with the same flour they primarily bake with (often bread flour or all-purpose flour), you can experiment with different types. The type of flour used in your daily sourdough starter feeding routine can influence its activity and flavor. Rye flour, for instance, is rich in nutrients and enzymes that yeast love, often leading to a very vigorous and active starter. Many bakers feed their starter a mix, perhaps 50% bread flour and 50% rye, to boost activity.
Whole wheat flour also provides more nutrients than white flour. If you primarily bake with white bread flour, feeding your starter with a small percentage of rye or whole wheat (e.g., 10-20% of the flour weight) can help keep it robust. Just be aware that changing flour types can alter the starter's consistency and feeding rhythm slightly.
Step 4: Mixing and Observing Your Fed Starter
Once you've discarded and added fresh flour and water according to your chosen ratio, it's time to mix and then observe the magic happen as part of your daily sourdough starter feeding routine.
Achieving the Right Consistency: A Smooth, Pancake-Batter Texture
After adding the water and flour to the remaining starter, mix everything thoroughly. A spoon or spatula works well. Scrape down the sides of the jar to ensure all the dry bits of flour are incorporated. When using a 1:1:1 ratio, the resulting consistency should be similar to a thick pancake batter or a very wet, sticky dough – smooth and uniform, with no dry pockets of flour.
This consistency is generally easy to mix and provides good hydration for the microorganisms. If your starter feels too thick or too thin, double-check your measurements, especially if you're not weighing ingredients. The right consistency is a visual cue that you've executed this step of the daily sourdough starter feeding routine correctly.
Monitoring Starter Activity After Feeding
After mixing, cover your starter loosely (allowing gases to escape but preventing it from drying out) and place it in a warm spot, ideally between 75-80°F (around 24-27°C). Now, the observation begins! This is where you learn your starter's rhythm. Note the time you fed it.
Use a rubber band or marker on the jar to mark the level of the starter immediately after feeding. Over the next few hours, you should start seeing bubbles forming and the starter slowly rising. A healthy, well-fed starter following a consistent daily sourdough starter feeding routine will typically double or triple in volume within 4 to 8 hours at optimal temperature. Observing this rise helps you understand your starter's health and predicts when it will be ready for baking.
Troubleshooting Common Sourdough Starter Feeding Issues

Even with a diligent daily sourdough starter feeding routine, you might encounter issues. Don't worry; most problems are fixable.
Inactive Starter: Identifying the Cause and Solutions
A sluggish or inactive starter is a common issue. It might not be rising much, or it might have a large layer of hooch. Identifying the root cause is the first step in getting it back on track within your daily sourdough starter feeding routine.
Temperature's Impact on Sourdough Starter Activity
Temperature is perhaps the most significant factor affecting starter activity. Like most microorganisms, sourdough yeast and bacteria thrive within a specific temperature range. Too cold, and their activity slows dramatically; too hot, and they can die off. The ideal temperature range for vigorous activity is often cited as 75-80°F (24-27°C).
If your kitchen is cooler than this, especially in winter, your starter will be less active. Solutions include finding a warmer spot (like on top of the refrigerator, inside a microwave with the light on, or in a proofing box), or simply being patient as it will take longer to rise. Ensuring your starter is in a consistently warm environment is a key part of optimizing your daily sourdough starter feeding routine.
Adjusting Feeding Ratios for a Sluggish Starter
If temperature isn't the issue, or even if it is, adjusting your feeding ratio can help revive a sluggish starter. Sometimes, a starter needs a little boost. Try feeding it with a higher ratio of flour and water relative to the starter, perhaps 1:2:2 (starter:water:flour by weight). For example, keep 25g of starter and feed it with 50g water and 50g flour.
This gives the microorganisms more food relative to their current population, encouraging faster reproduction and activity. Incorporating a small amount of rye flour (as discussed earlier) can also provide a nutrient boost. Consistency in your daily sourdough starter feeding routine, even when troubleshooting, is important; make small adjustments and observe the results over a few feedings.
Overfed Starter: Recognizing the Signs and Recovery Tips
While less common than an inactive starter, it is possible to "overfeed" your starter, especially if you're using very large ratios of flour/water to a small amount of starter, or feeding it too frequently without discarding enough.
Preventing Overfeeding: Maintaining the Right Balance
Overfeeding, in the sense of using too much flour and water relative to the amount of starter kept, can dilute the microbial population to a point where they take a very long time to become active. A starter that takes 12+ hours to show significant activity at room temperature might be overfed. The consistency might also seem thinner than usual. The key to preventing this is maintaining a balanced daily sourdough starter feeding routine using standard ratios like 1:1:1 or 1:2:2.
Ensure you are discarding a sufficient amount of the old starter before feeding the remainder. If you suspect you've overfed, simply continue your regular daily sourdough starter feeding routine (e.g., 1:1:1) for a few days, discarding the excess each time. The population will catch up to the food supply, and activity should increase.
Mold and Off-Smells: When to Discard and Start Over
Sometimes, despite your best efforts with the daily sourdough starter feeding routine, things go wrong, and your starter becomes contaminated.
Mold is unmistakable – fuzzy, colored patches (green, black, orange, or pink) on the surface or sides. If you see mold, there is unfortunately no salvaging the starter. The mold spores are likely throughout the culture, even if not visible elsewhere. You must discard the entire starter and jar contents and start fresh. Do not attempt to scrape off the mold; it's unsafe.
Off-smells can range from a strong alcohol/nail polish remover smell (excess hooch, indicating hunger but usually fixable with regular feeding) to truly foul or rotten odors, which could indicate undesirable bacteria have taken hold. If your starter smells truly putrid or like vomit, it's best to discard it and start a new one. While a healthy starter can have a strong, tangy, or even slightly cheesy smell, it should never smell rotten or chemically noxious beyond the initial acetone smell from hooch.
Trust your nose; if it smells wrong, it's likely wrong. Starting over is sometimes necessary to ensure a healthy daily sourdough starter feeding routine moving forward.
Tips for Maintaining a Healthy Daily Sourdough Starter Feeding Routine
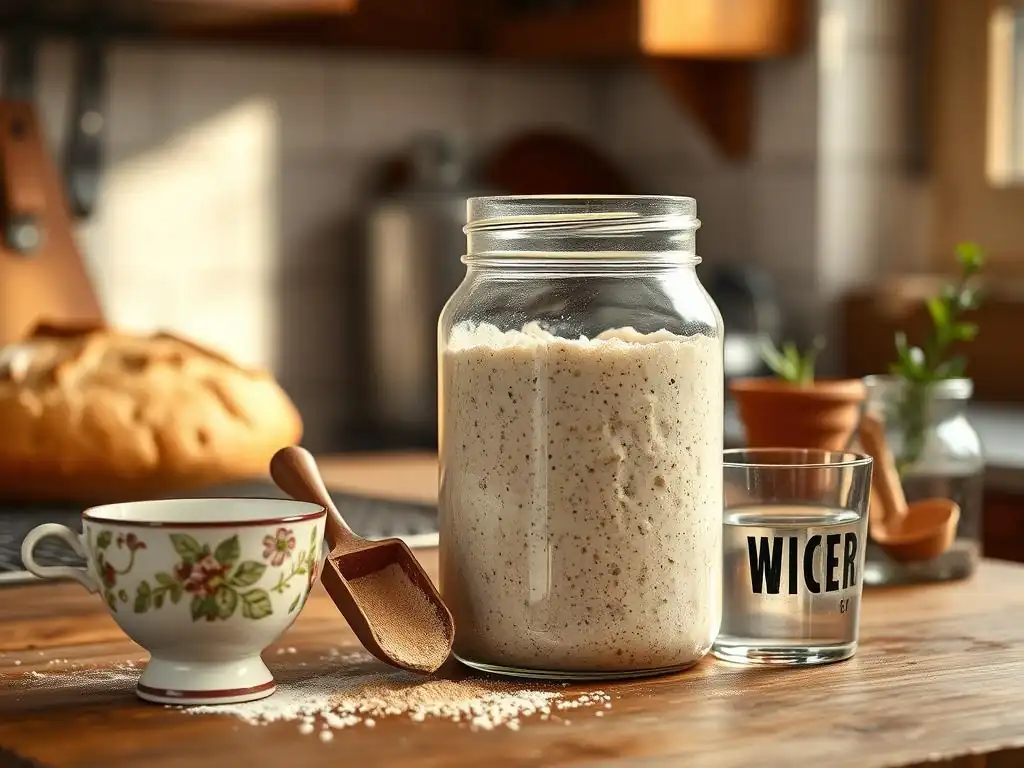
Making the daily sourdough starter feeding routine sustainable involves incorporating it smoothly into your life.
Establishing a Consistent Feeding Time
Consistency is key. Choose a time of day that works for you – perhaps first thing in the morning or last thing at night – and stick to it as much as possible. Feeding your starter at roughly the same time each day helps establish a predictable cycle of rising and falling.
This makes it easier to assess its health and know when it will be ready for baking. For example, if you feed every morning at 8 AM, you'll learn that it typically peaks around 4 PM. This predictability is a major benefit of a disciplined daily sourdough starter feeding routine.
Creating a Dedicated Sourdough Starter Feeding Space
Find a dedicated spot for your starter that is relatively warm and out of direct sunlight. A consistent temperature is crucial for maintaining stable activity. Avoid placing it near drafty windows or heating vents that cycle on and off. Many bakers find a spot on top of the refrigerator, inside a cupboard above the fridge, or even inside a turned-off oven (with a note on the door!) works well. Having a specific place for your starter makes the daily sourdough starter feeding routine a more integrated habit.
Documenting Your Sourdough Starter's Progress
Keeping a simple log or using visual cues can be incredibly helpful, especially when you're new to the daily sourdough starter feeding routine. Use a rubber band around your jar to mark the starter's level immediately after feeding. Note the time and temperature. Over time, you'll see how quickly it rises and how high it peaks. If you're troubleshooting, a log helps you track changes you make (like adjusting ratios or temperature) and their effects. This documentation provides valuable insights into your starter's health and activity, making your daily sourdough starter feeding routine more informed.
Long-Term Sourdough Starter Care: Beyond the Daily Routine
While a daily sourdough starter feeding routine is ideal for frequent baking, sometimes life requires putting your starter on hold.
Storing Your Sourdough Starter for Inactive Periods
If you don't plan to bake for more than a few days, you don't need to maintain a strict daily sourdough starter feeding routine. You can store your starter in the refrigerator. Feed your starter as usual, let it sit at room temperature for just 1-2 hours (to start fermentation), and then place it in the fridge.
The cold temperature significantly slows down microbial activity. You can store it like this for 1-2 weeks, feeding it just once a week or every two weeks. To feed a refrigerated starter, take it out, let it warm up for a few hours, discard most of it, feed it its usual ratio, let it sit at room temp until it shows signs of activity (bubbles), and then either use it or return it to the fridge.
Reviving a Dormant Sourdough Starter
When you're ready to bake again after refrigerating your starter, you'll need to revive it from its dormant state. This requires more than just one feeding after its long nap from the daily sourdough starter feeding routine. Take your starter out of the fridge, discard most of it, and feed it its regular ratio (e.g., 1:1:1). Let it sit at room temperature.
It might be slow to show activity the first day. Discard and feed again after 12-24 hours, or once it shows some bubbles. Repeat this feeding every 12 hours or so until your starter is consistently doubling or tripling within 4-8 hours after feeding at room temperature. This might take 2-3 days of regular feeding to get it back to full strength.
Expanding Your Sourdough Starter for Larger Batches
Sometimes, a recipe calls for more starter than you typically maintain with your daily sourdough starter feeding routine (e.g., needing 200g when you usually keep 50g). Expanding your starter is simple: just scale up your regular feeding ratio. For instance, if you usually keep 50g and feed it 50g water and 50g flour (total 150g), but need 200g for a recipe, you can take your 50g starter and feed it perhaps 75g water and 75g flour (total 200g).
Or, if you have more starter on hand (say 100g after discarding), you can feed it 100g water and 100g flour to yield 300g. Just ensure the starter you're expanding is healthy and active from its regular daily sourdough starter feeding routine. Feed the larger quantity and let it rise until it's at its peak before using it in your recipe.
Frequently Asked Questions
What is the importance of a daily sourdough starter feeding routine?
A daily feeding routine is crucial for maintaining a healthy and active sourdough starter. Regular feeding provides the yeast and bacteria with the necessary nutrients to thrive and produce consistent results.
How often should I feed my sourdough starter?
For a mature and active starter kept at room temperature, a daily feeding is typically recommended. If stored in the refrigerator, feeding can be reduced to once a week or less frequently.
What is the ideal ratio of starter, flour, and water for feeding?
A common and effective ratio is 1:1:1, meaning equal parts starter, flour, and water by weight. Experiment to find what works best for your starter and environment.
What type of flour is best for feeding my sourdough starter?
Unbleached all-purpose flour or bread flour are excellent choices. Whole wheat flour can also be used occasionally to add nutrients and flavor, but it's best to avoid bleached flour.
What happens if I miss a feeding of my sourdough starter?
Missing a feeding occasionally is usually not a disaster. Your starter may become weaker and more acidic, but it can often be revived with consistent feedings over a few days.
Final Reflection: Cultivating Consistency, Reaping Delicious Rewards
The seemingly simple act of feeding a sourdough starter mirrors the larger human pursuit of consistent effort leading to remarkable results. It's not just about bread; it's about nurturing a living thing, a process that demands patience, attention, and a commitment to the daily ritual. This dedication, however small it may seem, yields extraordinary rewards, both in the tangible form of delicious, handcrafted bread and in the intangible benefits of mindful practice.
The impact of this seemingly small routine extends far beyond the kitchen. It's a powerful metaphor for achieving any long-term goal. The consistent, daily effort required to maintain a healthy starter echoes the dedication needed to pursue personal growth, professional success, or any other ambitious undertaking. The difference between ordinary and extraordinary is that little extra.
This quote perfectly encapsulates the essence of the daily sourdough starter feeding routine and its broader implications. The seemingly insignificant daily actions, when compounded over time, create something truly extraordinary.
Now, consider your own "starter." What project, skill, or relationship requires consistent nurturing? What daily practice, however small, could you implement to cultivate growth and achieve your own remarkable results? Embrace the simplicity, find joy in the routine, and watch as your dedication blossoms into something truly beautiful and rewarding. The journey may be long, but the bread – both literal and metaphorical – will be well worth the effort.
Unleash Your Inner Baker: Nurture Your Starter's Potential!
Thanks for taking the time to learn about the daily joys (and simple routine!) of feeding your sourdough starter. You've now got the knowledge to bake incredible bread! Ready to put your new skills to the test?
- Bake your first sourdough loaf! Use your now-thriving starter to create a magnificent loaf — the aroma alone will be worth it!
- Share your sourdough journey! Tell us (and others!) about your experience – what worked, what surprised you? We’d love to hear from you.
- Experiment with different flours to discover new flavor profiles. What exciting textures and tastes will you uncover?
What unique ingredient will you add to your next sourdough creation to elevate its flavor?