
Freezing Pain au Chocolat: Dough vs. Baked Pastries

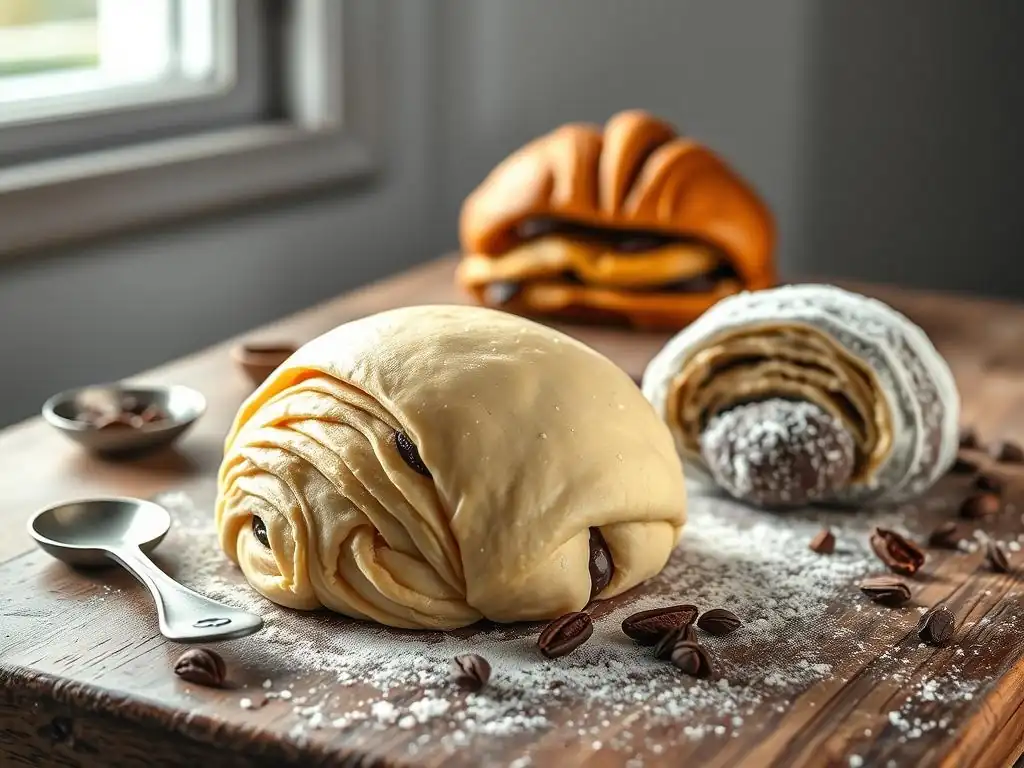
Welcome to BakeWithEase, your trusted guide to the delightful world of baking! Ever wondered if you can really get ahead by freezing your pain au chocolat dough? We're diving deep into the secrets of preservation, comparing the best methods for freezing dough versus already baked pastries. Unlock the key to perfectly flaky layers and save time without sacrificing quality. Curious to know which method reigns supreme? Keep reading to find out!
- Freezing Pain au Chocolat: Dough vs. Baked Pastries - BakeWithEase.com
- Introduction: Preserving Your Pain au Chocolat Creations
- Freezing Pain au Chocolat Dough: A Baker's Guide
- Freezing Baked Pain au Chocolat: Maintaining Quality and Flavor
- Dough vs. Baked: A Comparison of Freezing Methods for Pain au Chocolat
- Conclusion: Choosing the Right Freezing Method for Your Needs
- Frequently Asked Questions
- Final Reflection: The Enduring Delight (and Defrosting Dilemma) of Pain au Chocolat
- Unlock Your Chocolate Pastry Potential!
Freezing Pain au Chocolat: Dough vs. Baked Pastries - BakeWithEase.com
Introduction: Preserving Your Pain au Chocolat Creations
Why Freeze Pain au Chocolat? Convenience and Freshness
Baking pain au chocolat from scratch is a rewarding experience, but it often yields more pastries than you can enjoy in a single sitting. Freezing offers a fantastic solution to preserve your hard work and enjoy fresh, flaky pain au chocolat whenever a craving strikes, without the need to start the entire process from the beginning. This method allows you to bake a large batch and store the excess, significantly reducing prep time on busy mornings or for unexpected guests.
Beyond convenience, freezing helps lock in the freshness and quality of your pain au chocolat. When stored properly, the delicate layers and rich chocolate filling are protected from staling. This means you can enjoy a pastry that tastes nearly as good as freshly baked weeks or even a couple of months later, offering a level of flexibility that perishable baked goods typically don't allow. It's an essential skill for any home baker looking to manage their baking schedule and minimize waste.
Understanding the Options: Freezing Dough vs. Freezing Baked Pain au Chocolat
When it comes to preserving pain au chocolat, you essentially have two primary methods: freezing the dough before baking or freezing the pastries after they've been fully baked. Each approach has its own set of advantages and considerations regarding flavor, texture, convenience, and the final outcome. Choosing the right method depends on your priorities – whether you value the absolute freshest possible result straight from the oven or the quickest path to enjoyment.
Freezing pain au chocolat dough allows you to bake the pastries fresh on demand, potentially offering a superior flaky texture and aroma. This method requires careful handling and thawing, as the delicate layers of dough need to be preserved. Freezing baked pain au chocolat, on the other hand, is quicker for immediate access but requires proper reheating to restore texture. Understanding the nuances of each technique is key to successfully preserving your delicious creations.
Freezing Pain au Chocolat Dough: A Baker's Guide
The Best Time to Freeze Pain au Chocolat Dough
The optimal moment to freeze pain au chocolat dough is after it has been shaped but before the final proofing. At this stage, the dough is ready to bake but hasn't undergone the significant rise that occurs during proofing. Freezing at this point preserves the delicate structure and yeast activity, allowing you to control the final rise when you're ready to bake.
If you freeze the dough after proofing, the expanded structure is much more fragile and prone to collapsing or being damaged by ice crystals during freezing. This can result in a less airy, dense final product. Therefore, shaping the pain au chocolat, arranging the chocolate batons inside, and then immediately preparing them for the freezer is the standard and most recommended practice for successful freezing pain au chocolat dough.
Step-by-Step: How to Freeze Unbaked Pain au Chocolat
Preparing the Dough for Freezing: Proofing Considerations
As mentioned, the pain au chocolat dough should be shaped but not proofed before freezing. Once you've rolled out your dough, cut it into rectangles, placed the chocolate batons, and rolled them up into the classic shape, they are ready for the next step towards the freezer. Avoid letting them sit at room temperature for more than 15-20 minutes at this stage to prevent any premature proofing from beginning.
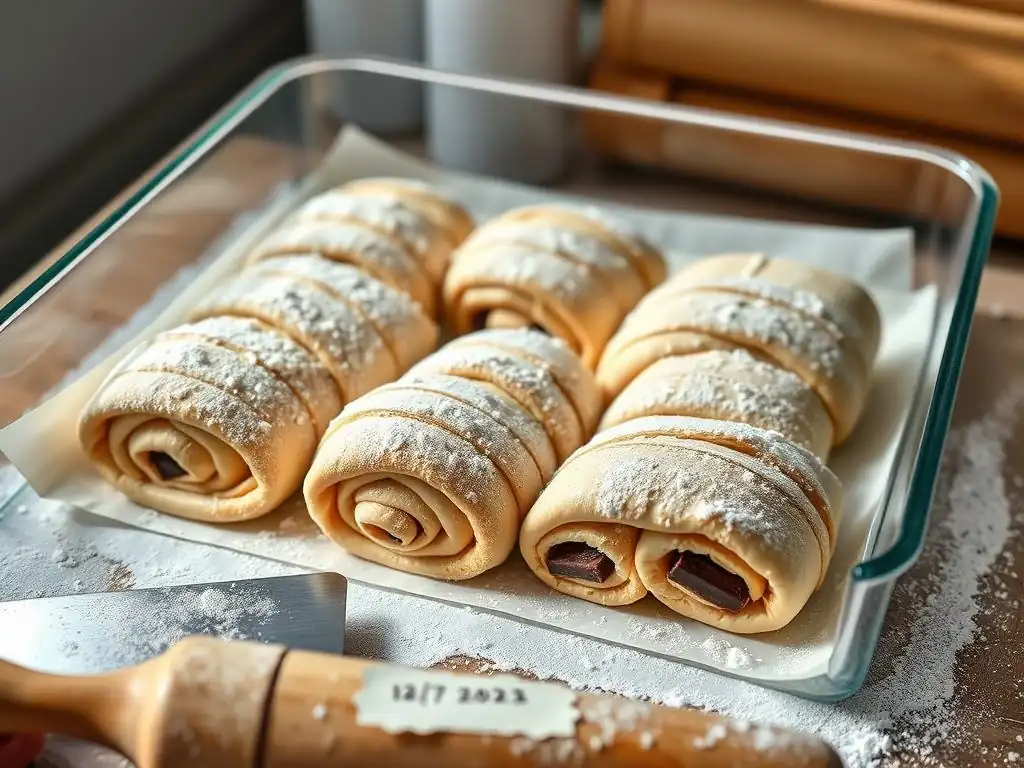
To prepare them for freezing, place the shaped, unproofed pain au chocolat onto a baking sheet lined with parchment paper. Ensure there is some space between each pastry to prevent them from freezing together. This initial flash freeze step is crucial for maintaining their shape and making them easy to wrap individually later. Pop the tray into the freezer for about 1-2 hours, or until the pastries are solid to the touch.
Wrapping and Protecting the Dough for Optimal Freezing
Once the pain au chocolat are flash-frozen, it's time to wrap them properly to protect them from freezer burn, which can dry out the dough and develop off-flavors. Remove the solid pastries from the freezer. Wrap each pain au chocolat individually and tightly. A common method is to use plastic wrap first, ensuring no dough is exposed to the air.
After wrapping in plastic wrap, add another layer of protection. This could be aluminum foil, which provides an excellent barrier against moisture and odors, or place the plastic-wrapped pastries into a heavy-duty freezer bag or airtight container. Double-wrapping is key when freezing pain au chocolat dough to ensure the delicate layers remain hydrated and the quality is preserved for future baking.
Labeling and Dating Your Frozen Pain au Chocolat Dough
Proper labeling is essential for managing your frozen goods and ensuring you use them within a reasonable timeframe for the best quality. Use a permanent marker to clearly label each wrapped pastry or the freezer bag/container.
The label should include:
- The item name (e.g., "Pain au Chocolat Dough")
- The date you froze them
Frozen pain au chocolat dough is best used within 1-2 months for optimal quality. While it might remain safe to consume for longer if stored consistently at 0°F (-18°C) or below, the quality, especially the ability to rise and the final texture, can degrade over time. Knowing the freezing date helps you prioritize using older batches first, ensuring you always bake with dough that yields the best results.
Thawing and Baking Frozen Pain au Chocolat Dough: A Detailed Process
Slow Thawing for Best Results
Thawing frozen pain au chocolat dough requires patience and a slow, controlled environment. The recommended method is to thaw them overnight in the refrigerator. Remove the wrapped pastries from the freezer and place them on a baking sheet lined with parchment paper. Loosely cover the baking sheet with plastic wrap or a clean kitchen towel to prevent the surface of the dough from drying out while thawing.
Allow the pain au chocolat to thaw completely in the refrigerator for about 8-12 hours. This slow thawing process minimizes condensation and allows the moisture within the dough to redistribute evenly, which is crucial for a proper rise during the subsequent proofing stage. Avoid thawing at room temperature, as this can cause the outside of the pastry to warm up and start proofing before the inside has fully thawed, leading to uneven results.
Proofing the Thawed Dough: Achieving the Perfect Rise
Once the pain au chocolat dough is fully thawed in the refrigerator, it needs to proof at room temperature before baking. Remove the baking sheet from the fridge and place it in a warm, draft-free spot. The ideal proofing temperature is around 75-80°F (24-27°C). Loosely cover the tray again to maintain a humid environment around the pastries.
Proofing time for frozen and thawed pain au chocolat dough will be longer than for fresh dough, typically taking 2-4 hours, depending on the room temperature and the dough's condition. The pastries should double in size and look significantly puffier and somewhat wobbly when gently shaken. You should be able to see the distinct layers of the dough. An under-proofed pastry will be dense, while an over-proofed one may collapse in the oven.
Baking from Frozen: Adjusting Baking Time and Temperature
You don't bake pain au chocolat directly from frozen; you must thaw and proof them first as described above. The baking instructions for thawed and proofed pain au chocolat dough are generally the same as for fresh dough, but it's always a good idea to keep a close eye on them. Preheat your oven to the specified temperature, typically around 375-400°F (190-200°C).
Bake the proofed pain au chocolat for approximately 15-20 minutes, or until they are a deep golden brown and the layers are clearly defined and flaky. Baking time might be slightly longer than for fresh pastries due to the dough starting from a colder temperature after proofing compared to dough that proofed from a warmer state. Look for visual cues of doneness: rich color and a crisp exterior.
Troubleshooting Common Issues When Freezing Pain au Chocolat Dough
Preventing Freezer Burn: Proper Storage Techniques
Freezer burn is a common enemy when freezing pain au chocolat dough, resulting in dry, tough spots on the pastry. It occurs when the dough is exposed to cold, dry air, causing moisture to evaporate. The key to prevention lies in creating an airtight barrier around the dough.
This involves the two-step wrapping process: first, a tight layer of plastic wrap directly against the pastry, followed by a second, more robust layer like aluminum foil or storage in a heavy-duty freezer bag or container. Ensuring all air is squeezed out of bags and containers before sealing also helps significantly. Storing the pastries in the coldest part of your freezer, where temperature fluctuations are minimal, further protects them from freezer burn.
Addressing Dough That Doesn't Rise After Thawing
If your frozen pain au chocolat dough fails to rise adequately after thawing and proofing, several factors could be at play. One common reason is damaged yeast. This can happen if the dough was frozen too slowly, stored at inconsistent temperatures (temperature swings in the freezer), or frozen for too long (significantly beyond 1-2 months).
Another reason could be insufficient thawing or proofing time. Ensure the dough is fully thawed in the refrigerator before attempting to proof it. Make sure the proofing environment is warm enough (75-80°F is ideal) and allow ample time (2-4 hours). If the dough still seems sluggish, try placing it in a slightly warmer spot or creating a humid environment (like a proofing box or oven with the light on and a tray of hot water) to encourage the yeast. Sometimes, if the yeast is compromised, the rise may simply be less dramatic than with fresh dough.
Freezing Baked Pain au Chocolat: Maintaining Quality and Flavor
When Freezing Baked Pain au Chocolat is a Good Idea
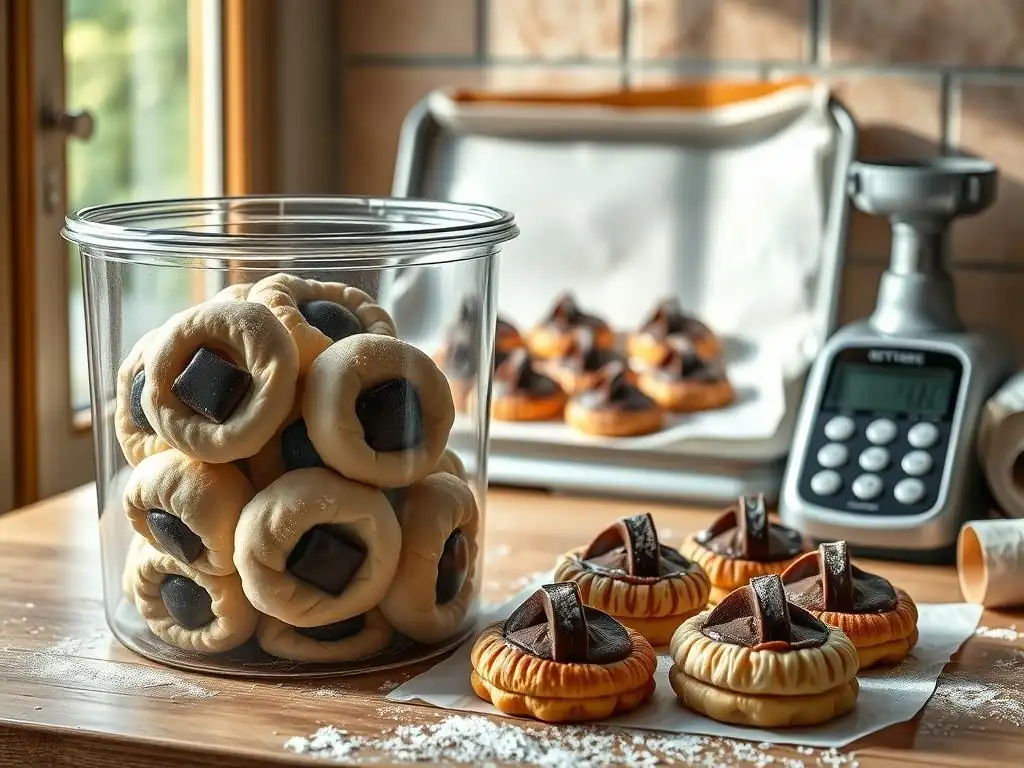
Freezing pain au chocolat after baking is an excellent option when you have leftover pastries or if you want a ready-to-eat treat with minimal preparation time. This method is significantly quicker than freezing dough, as it bypasses the thawing and proofing stages entirely. It's perfect for those moments when you want a delicious pastry right away, perhaps just needing a quick reheat.
This approach is particularly convenient for individuals or smaller households who might only want one or two pastries at a time. Instead of baking a whole batch from frozen dough, you can simply grab a single baked pain au chocolat from the freezer. While the texture might not be exactly identical to a pastry baked fresh from dough, the convenience factor is undeniable, and with proper technique, the results are still very satisfying.
Cooling and Preparing Baked Pain au Chocolat for Freezing
Ensuring Complete Cooling Before Freezing
Just like with most baked goods, it is absolutely critical that your pain au chocolat are completely cooled to room temperature before you attempt to freeze them. Placing warm or even slightly warm pastries into the freezer can cause several problems.
Firstly, the residual heat will create condensation inside the packaging, leading to ice crystals forming on the surface of the pastry. These ice crystals can damage the delicate structure, resulting in a soggy texture upon thawing. Secondly, placing warm items in the freezer can slightly raise the temperature of surrounding items, potentially affecting their quality. Allow your freshly baked pain au chocolat to cool fully on a wire rack, ensuring air circulates around them, until they are no longer emitting any heat. This may take 1-2 hours depending on the size and ambient temperature.
Wrapping and Sealing Baked Pain au Chocolat for Freezer Storage
Proper wrapping is just as important for baked pain au chocolat as it is for dough to prevent freezer burn and maintain quality. Once the pastries are completely cool, wrap each one individually. Start with a layer of plastic wrap, ensuring it clings tightly to the pastry and there are no gaps where air can enter.
Follow the plastic wrap with a second protective layer. This could be aluminum foil wrapped snugly around the plastic-wrapped pastry, or you can place the individually wrapped pastries into a heavy-duty freezer bag or an airtight container. Using a rigid container offers the added benefit of protecting the delicate layers from being crushed by other items in the freezer. The goal is to minimize exposure to cold air and moisture loss.
Thawing and Reheating Frozen Baked Pain au Chocolat
Thawing Methods: Room Temperature vs. Oven
You have a couple of options for thawing frozen baked pain au chocolat. The simplest method is to leave the wrapped pastry at room temperature for about 30-60 minutes until thawed through. This is suitable if you plan to eat it at room temperature or give it a very quick reheat.
For the best texture, especially restoring some crispness, it's often preferable to thaw slightly and then reheat, or even go directly to reheating from mostly frozen (though this takes longer). Avoid thawing in the microwave, as this can make the pastry rubbery and tough. Slow thawing followed by a quick reheat in the oven is generally the superior method for quality.
Reheating for Optimal Texture and Taste: Crispness Restoration
Reheating is key to bringing frozen baked pain au chocolat back to life, particularly restoring their flaky texture. Preheat your oven or toaster oven to a moderate temperature, around 300-350°F (150-175°C).
Place the thawed (or partially thawed) pain au chocolat directly on the oven rack or on a baking sheet. Reheat for about 5-10 minutes for thawed pastries, or 10-15 minutes for partially frozen ones, until they are warmed through and the exterior feels crisp again. The chocolate inside should be melted and gooey. Keep a close eye on them to prevent burning, especially the tips. Enjoy immediately for the best experience!
Tips for Maintaining Quality When Freezing Baked Pain au Chocolat
Preventing Soggy Pain au Chocolat After Thawing
The main challenge with freezing baked pain au chocolat is preventing them from becoming soggy upon thawing or reheating. This sogginess is primarily caused by condensation and moisture migration. Ensuring the pastries are completely cool before freezing is the first critical step, as mentioned earlier.
Proper, airtight wrapping is the second defense, preventing ice crystals from forming directly on the surface. When thawing, avoid humid environments. Reheating is the most effective way to combat sogginess, as the heat helps to evaporate surface moisture and re-crisp the layers. Using a conventional oven or toaster oven for reheating is far better than a microwave for achieving a desirable texture.
Enhancing Flavor After Reheating: Simple Tricks
While reheating restores texture, you can also enhance the flavor of frozen and reheated pain au chocolat. The warmth itself helps to release the aromas of butter and chocolate, making them more appealing.
For an extra touch, consider a very light dusting of powdered sugar or a quick brush with melted butter after reheating. If the chocolate filling seems less gooey than desired, the reheating process in the oven should ideally take care of this, ensuring the chocolate is melted and warm. The goal is to replicate the fresh-baked experience as closely as possible, and serving them warm right after reheating is the best way to achieve this.
Dough vs. Baked: A Comparison of Freezing Methods for Pain au Chocolat
Flavor and Texture: Which Method Preserves Better?
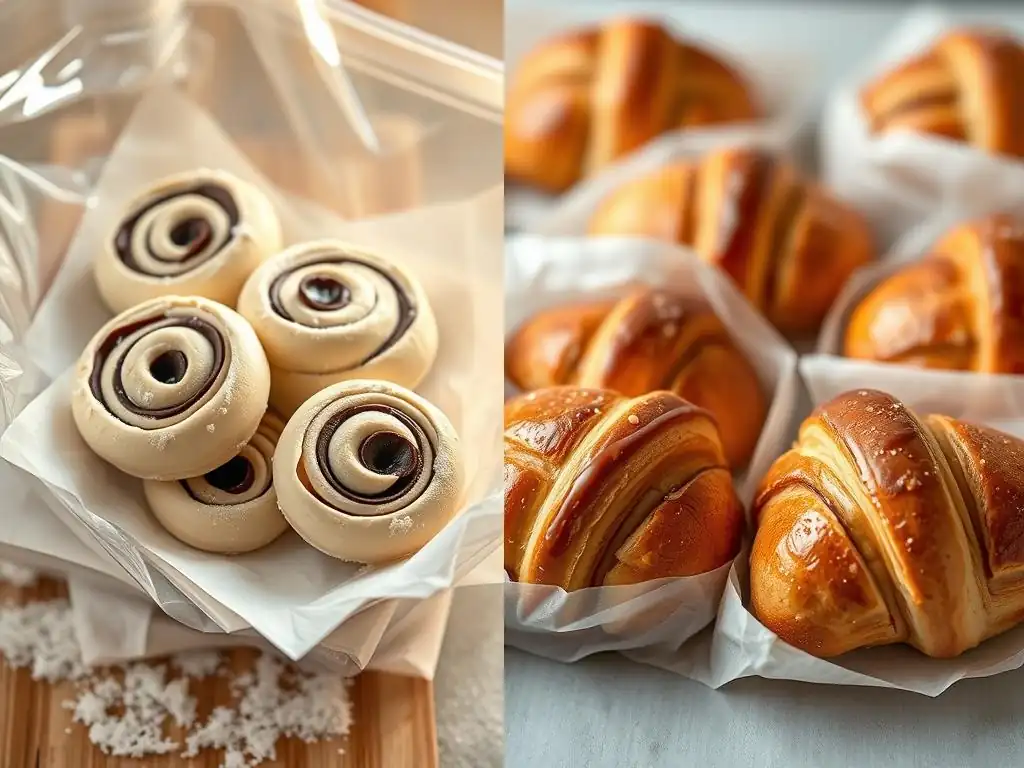
When comparing the final eating experience, freezing pain au chocolat dough generally yields a pastry with superior flavor and texture compared to freezing a baked one. Baking the dough fresh from a thawed and proofed state allows the yeast to perform its final magic, resulting in a lighter, airier, and more distinctly layered interior. The crust tends to be flakier and crisper, and the aroma of freshly baked butter and pastry is more pronounced.
Freezing baked pain au chocolat, while convenient, can sometimes result in a slightly less delicate texture after thawing and reheating. The layers may not be quite as distinct, and there's a higher risk of the pastry being slightly dense or rubbery if not reheated perfectly. However, the difference can be minimal with careful freezing and reheating techniques, and many find the convenience outweighs the slight difference in texture.
Convenience and Time: Which Method is More Efficient?
From a time and effort perspective at the moment of consumption, freezing baked pain au chocolat is significantly more convenient. You simply need to thaw (quick process) and reheat (5-15 minutes). This is ideal for immediate gratification or spontaneous cravings.
Freezing pain au chocolat dough requires more foresight and time before you can eat the pastry. After taking the dough from the freezer, you must first thaw it overnight in the refrigerator (8-12 hours), and then proof it at room temperature (2-4 hours) before you can even begin baking (15-20 minutes). This multi-step process means you need to plan several hours or even a day ahead. However, the initial work of shaping and preparing the dough is done in advance for both methods.
Storage Space: Which Method Requires Less Room?
The space required in your freezer can also be a factor. Unbaked pain au chocolat dough, especially after being shaped, tends to be slightly smaller and more compact than a fully baked and puffed-up pastry.
Therefore, freezing pain au chocolat dough might require slightly less freezer space per pastry compared to freezing baked ones. Additionally, unbaked pastries are generally firmer before thawing, making them potentially easier to stack carefully (after flash freezing) without crushing, though using containers is always recommended for protection in either case.
Conclusion: Choosing the Right Freezing Method for Your Needs
Recap: Freezing Dough for Future Baking
Freezing pain au chocolat dough is the method of choice for bakers prioritizing the highest possible quality in terms of flavor, texture, and aroma. By freezing the shaped, unproofed dough, you preserve the potential for a truly flaky, airy pastry that bakes up beautifully fresh from your oven after thawing and proofing.
This method involves shaping, flash freezing, double-wrapping securely, and labeling. The thawing and baking process requires patience – an overnight thaw in the fridge followed by a significant proofing period at room temperature before baking. It's the ideal technique if you have a bit more time before you want to enjoy your pain au chocolat and crave that fresh-from-the-bakery experience.
Recap: Freezing Baked Pastries for Quick Enjoyment
For those who value speed and convenience, freezing baked pain au chocolat is the way to go. This method allows you to have delicious pastries ready to eat with minimal fuss – just a quick thaw and reheat. It's perfect for having a stash of single-serving treats available whenever you need a sweet fix or a last-minute breakfast pastry.
The key steps involve ensuring the pastries are completely cool before wrapping them individually and securely to prevent freezer burn. Reheating in the oven is recommended to restore the crisp texture. While the final texture might be slightly different from baking fresh dough, the ease of access makes this a very popular and practical option for preserving pain au chocolat.
BakeWithEase Tips for Success: Mastering Pain au Chocolat Freezing
Regardless of whether you choose to freeze pain au chocolat dough or baked pastries, here are some general tips for success from BakeWithEase.com:
- Always use high-quality ingredients: The better the butter and chocolate you start with, the better the frozen and thawed/baked result will be.
- Wrap Tightly: Air is your enemy in the freezer. Double-wrapping (plastic wrap + foil or freezer bag/container) is the gold standard for both dough and baked goods.
- Label Clearly: Dates and contents prevent mystery items in the back of the freezer.
- Freeze Quickly, Thaw Slowly: Get items into the freezer as fast as possible to minimize ice crystal formation. Thaw delicate items like dough slowly in the refrigerator.
- Know Your Freezer: A consistent temperature of 0°F (-18°C) or lower is crucial for long-term storage quality. Avoid frequent opening and closing of the freezer door.
[ ] Ensure all ### headers have at least two detailed paragraphs.
[ ] Check for real/approximated data or examples.
[ ] Verify keyword integration (Freezing pain au chocolat dough and variations).
[ ] Confirm Markdown usage and visual appeal elements.
[ ] Check for fluency, accuracy, and tone.
[ ] Ensure no prohibited elements (links, images, etc.).
[ ] Confirm output contains only the article content.
Frequently Asked Questions
Can I freeze pain au chocolat dough before baking?
Yes, you can freeze pain au chocolat dough. It's best to freeze it after the first proofing, but before shaping and the final proof. This allows for a longer shelf life and easier handling later.
What's the best way to freeze unbaked pain au chocolat dough?
Wrap the dough tightly in plastic wrap then place it in a freezer-safe bag. Ensure all air is removed to prevent freezer burn. This helps maintain the dough's texture and flavor.
How long can I store pain au chocolat dough in the freezer?
Pain au chocolat dough can be stored in the freezer for up to 2-3 months for optimal quality. After that, the dough may become dry or lose some of its rise.
How do I thaw frozen pain au chocolat dough?
Thaw the dough in the refrigerator overnight. This allows for a slow and even thaw, which is crucial for maintaining the dough's structure and texture. Avoid thawing at room temperature.
Can I freeze pain au chocolat after it's been baked?
Yes, you can freeze baked pain au chocolat. Allow them to cool completely, then wrap them individually in plastic wrap and place them in a freezer-safe bag. Reheating in the oven will help restore crispness.
Final Reflection: The Enduring Delight (and Defrosting Dilemma) of Pain au Chocolat
The art of freezing pain au chocolat dough, while seemingly simple, reveals a surprising depth of culinary technique and preservation. Mastering this process isn't just about convenience; it's about unlocking the potential for consistently delicious pastries, anytime. The ability to enjoy freshly baked, flaky goodness without the commitment of immediate baking is a game-changer for both home bakers and professionals alike.
The impact of readily available frozen dough extends beyond individual kitchens. It has democratized access to high-quality pastries, allowing more people to enjoy this culinary delight. This ease of access, however, also highlights the importance of understanding the nuances of freezing and thawing to maintain optimal texture and flavor. The best things in life are worth waiting for,
but sometimes, even the best things need a little help along the way. This is where the careful consideration of freezing techniques truly shines, ensuring that the wait is worth it.
Now, consider your own baking journey. Perhaps you've experienced the frustration of a less-than-perfect thaw, or the joy of a perfectly flaky, golden-brown pain au chocolat straight from the oven, born from a carefully frozen dough. I invite you to experiment, to refine your own freezing and thawing techniques, and to share your discoveries. Embrace the challenge, for within the seemingly simple act of freezing pain au chocolat dough lies a world of culinary exploration and delicious possibilities. Let the journey begin!
Unlock Your Chocolate Pastry Potential!
Thanks for joining us on this delicious journey into the world of chocolate pastries! We hope you’ve gained a deeper understanding of the differences between using dough versus baked components in your pain au chocolat. Now it's time to put your newfound knowledge to the test!
- Master the Perfect Pain au Chocolat: Dive into your kitchen and experiment with both dough and baked pastry methods. See which one best suits your skills and taste preferences! Note down your findings – you might be surprised by what you discover!
- Share Your Chocolate Creations: Show off your baking prowess by sharing photos of your pain au chocolat on social media. Use #BakeWithEasePainAuChocolat to connect with fellow bakers and inspire others!
- Explore More Chocolate Recipes: Discover even more delectable chocolate recipes on BakeWithEase.com. Find the perfect recipe to compliment your newfound skills!
Ready to unleash your inner pastry chef? What unique twist will you add to your next pain au chocolat?