
Mold Alert: How to Prevent and Identify Mold on Your Starter

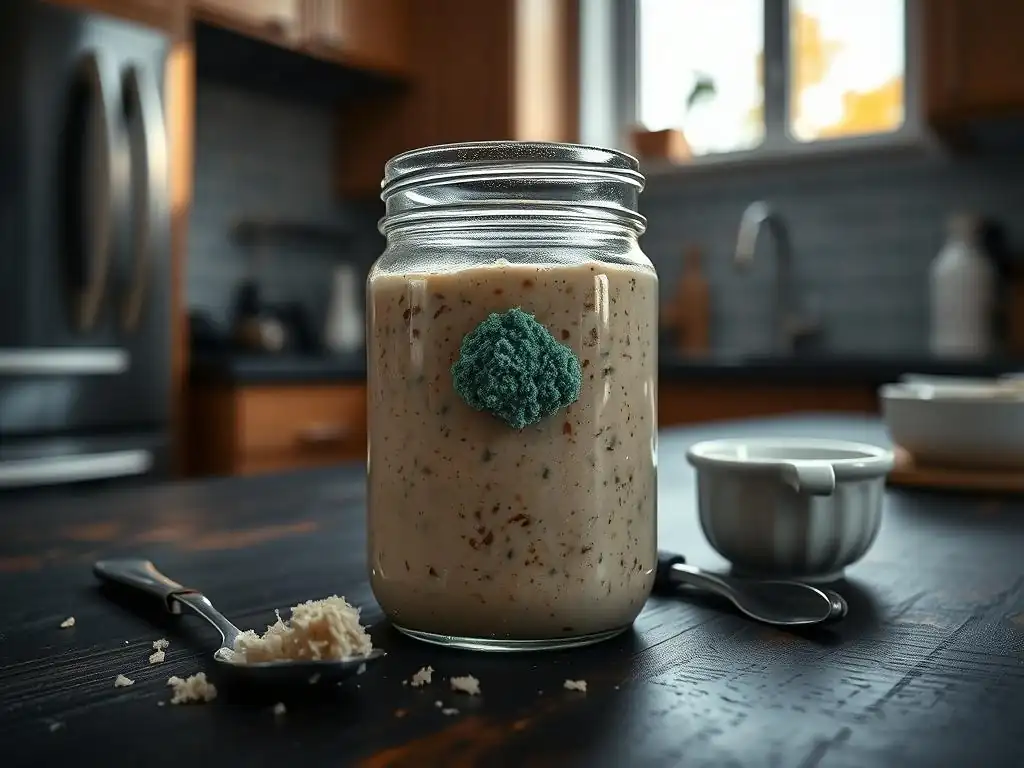
Welcome to BakeWithEase, your trusted guide to baking success! Ever stared into your sourdough starter with a mix of pride and… is that mold? Don't panic! This guide delves into the crucial topic of sourdough starter mold prevention, offering expert tips and tricks to keep your culture healthy and your bread delicious. Discover how to identify, avoid, and even rescue your starter from unwanted fungal guests. Ready to unlock the secrets to a mold-free, thriving starter? Let's get baking!
- Sourdough Starter Mold: Prevention, Identification, and Remediation
- Understanding Mold Growth in Sourdough Starters
- Preventing Sourdough Starter Mold: Essential Practices
- Identifying Mold on Your Sourdough Starter: A Comprehensive Guide
- Responding to Mold Contamination in Your Sourdough Starter
- Sourdough Starter Troubleshooting: Addressing Common Non-Mold Issues
- Long-Term Sourdough Starter Health and Maintenance
-
Frequently Asked Questions
- What is the most common cause of mold growth in a sourdough starter?
- How can I tell if my sourdough starter has mold and not just hooch?
- What are the best practices for storing my sourdough starter to prevent mold?
- If I find mold on my sourdough starter, is it safe to just remove the moldy part and continue using the rest?
- Can using a specific type of flour help prevent mold growth in my sourdough starter?
- Final Reflection: Cultivating a Flourishing, Mold-Free Starter
- Unleash Your Baking Potential: Mold-Free Starters & Delicious Breads!
Sourdough Starter Mold: Prevention, Identification, and Remediation
Understanding Mold Growth in Sourdough Starters
Causes of Mold Contamination in Sourdough Starters
Mold contamination in sourdough starters primarily occurs when unwanted microorganisms, specifically mold spores, find a favorable environment to grow. These spores are ubiquitous, floating in the air, present on surfaces, and even on ingredients like flour. A sourdough starter, being a living culture of wild yeasts and bacteria in a moist, nutrient-rich environment, is particularly susceptible if conditions aren't managed properly.
Factors like insufficient acidity in a young or neglected starter, exposure to airborne spores from uncovered containers, or the introduction of contaminants from unclean utensils or hands can all provide the entry points and conditions necessary for mold to take hold. For example, leaving a starter uncovered near fruit that is beginning to spoil significantly increases the risk of airborne mold spores landing on the starter's surface.
Furthermore, temperature and humidity play significant roles. Mold thrives in warm, humid conditions, often between 70°F and 90°F (21°C to 32°C), especially when combined with stagnant air. While these temperatures are sometimes within the ideal range for active starter fermentation, they also create a welcoming environment for mold if hygiene is not paramount.
A starter that is underfed or stored improperly, leading to a less active state or a reduced acidic environment, becomes less competitive against invading molds. The natural acidity produced by the lactic acid bacteria in a healthy, active starter (often reaching a pH of around 3.5 to 4.0) is a significant deterrent to many common molds, but this defense is weakened when the starter is stressed or neglected.
Differentiating Mold from Benign Starter Byproducts
It's common for new sourdough bakers to confuse normal starter behaviors or benign surface growths with dangerous mold. The most frequent source of confusion is Kahm yeast, which often appears as a white, powdery, or film-like layer on the surface of a starter. Unlike mold, Kahm yeast is typically flat, sometimes appearing wrinkled or dry, and doesn't have the fuzzy, three-dimensional structure characteristic of mold.
It usually smells benign, sometimes slightly alcoholic or even like cheese, but not musty or rotten like mold. While Kahm yeast isn't harmful to consume, it can impact the flavor of your starter and is generally scraped off.
Another common observation is liquid separation, often called "hooch," which is a layer of alcohol produced by the yeast as they consume sugars. Hooch can range from clear to dark gray or black depending on the flour used and how long the starter has been unfed. It's perfectly normal and can be stirred back in or poured off.
Sometimes, dry crusts form on the edges or surface of the starter, especially if the container isn't airtight; this is simply dried starter and not mold. True mold, in contrast, is almost always fuzzy, can be various colors (green, black, orange, pink, blue), and often smells distinctly unpleasant or musty. Recognizing these differences is key to effective sourdough starter mold prevention and management.
Identifying Common Types of Mold Found in Sourdough
While many types of mold exist, those commonly found in food items like sourdough starters often belong to genera such as Penicillium, Aspergillus, Mucor, or Rhizopus. Penicillium molds are frequently green or blue, often seen on bread or cheese, and can appear as fuzzy spots. Aspergillus molds can also be green, black, or yellow and are known for their powdery appearance in some stages. Mucor and Rhizopus are often referred to as "pin molds" due to their sporangia resembling pinheads, and they can appear quickly as fuzzy white or gray patches that turn black as they mature.
Visually identifying the specific genus of mold without a microscope is difficult and often unnecessary for practical purposes. What's important is recognizing that any fuzzy growth that is not the starter itself is likely mold. Colors like vibrant green, black, orange, or pink are strong indicators of mold and should be treated with extreme caution. While some molds might appear white initially, they typically develop color as they mature and sporulate. If you see any fuzzy, colored growth, assume it is mold and take appropriate action, prioritizing safety over saving the starter.
Preventing Sourdough Starter Mold: Essential Practices
Maintaining a Sanitary Baking Environment
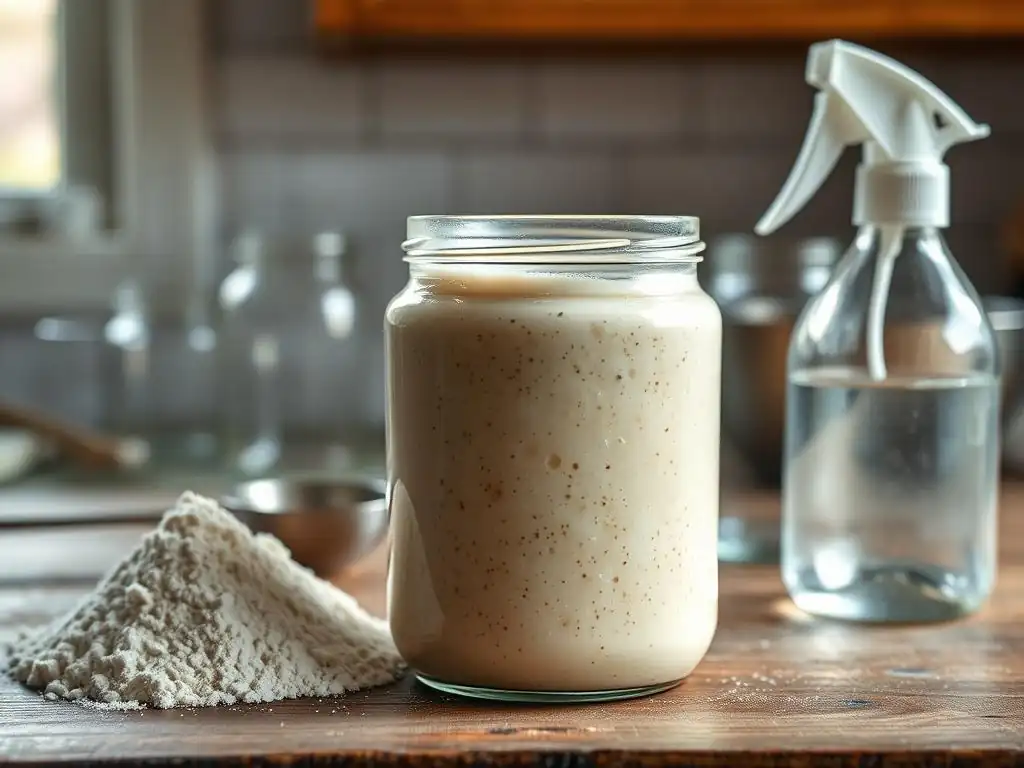
A clean environment is perhaps the most critical factor in sourdough starter mold prevention. Mold spores are airborne and can settle on surfaces, equipment, and even directly into your starter if exposed. Before feeding or handling your starter, ensure your workspace is clean. Wipe down counters with a mild disinfectant or soap and water. Wash your hands thoroughly with soap for at least 20 seconds before touching any equipment or the starter itself. This minimizes the transfer of mold spores and other unwanted microorganisms from your hands to the starter.
Beyond the immediate workspace, consider the overall cleanliness of your kitchen. Storing your starter away from potential sources of mold, such as ripening fruit, compost bins, or areas with high humidity and poor ventilation (like near a sink or dishwasher during operation), can significantly reduce exposure risks. Regularly cleaning your kitchen surfaces, including shelves and cabinets where flour and baking supplies are stored, helps maintain a low-spore environment, bolstering your sourdough starter mold prevention efforts.
Optimizing Feeding and Storage for Mold Inhibition
Proper feeding is fundamental to a healthy, resilient starter that can naturally resist mold. A regularly fed starter maintains a healthy population of lactic acid bacteria, which produce acids that lower the pH, creating an environment less hospitable to mold growth. Feeding ratios matter; a 1:1:1 ratio of starter, water, and flour by weight is common for daily feeding at room temperature (around 70-75°F or 21-24°C), promoting vigorous activity and acidity. Skipping feedings or using ratios that dilute the starter too much can weaken its defenses.
Storage conditions also play a crucial role in sourdough starter mold prevention. Storing your starter in the refrigerator significantly slows down microbial activity, including potential mold growth. While refrigeration doesn't stop mold entirely, the colder temperatures (typically 35-40°F or 2-4°C) drastically inhibit its proliferation. If storing in the fridge, feeding it at least once a week is recommended to keep it healthy. For starters kept at room temperature, daily feeding is usually necessary to maintain peak activity and acidity, thus preventing mold from establishing itself. An active, acidic starter is your best defense.
Utilizing Clean Equipment and Containers
The containers and utensils you use for your sourdough starter must be scrupulously clean. Residual food particles or soap scum can harbor mold spores or other bacteria that compete with or harm your starter culture. Wash your jars, lids, and stirring utensils thoroughly with hot, soapy water after each use. Rinsing well is also important to remove any soap residue, which can inhibit starter activity. Some bakers prefer to rinse with very hot water or even briefly sanitize jars by pouring boiling water into them, though this is often beyond what's strictly necessary if washing is thorough.
Choosing the right container also aids in sourdough starter mold prevention. Smooth, non-porous materials like glass are ideal because they are easy to clean and don't harbor bacteria or mold in scratches like plastic might over time. Ensure the container is large enough to accommodate the starter's growth after feeding (it can double or triple in size).
While lids shouldn't be screwed on tightly (to allow fermentation gases to escape), they should cover the opening to prevent airborne contaminants, including mold spores, from easily entering. A loose-fitting lid, cheesecloth secured with a band, or even just resting the lid on top are common methods that allow gas exchange while offering some protection.
Regulating Temperature and Humidity for Starter Health
Temperature and humidity levels in your kitchen directly impact both your starter's health and the potential for mold growth. As mentioned, mold thrives in warmth and humidity. While your starter might be happiest fermenting at typical room temperatures (70-80°F), excessively high humidity combined with poor air circulation can create favorable conditions for mold on the surface or lid of the container. Maintaining a consistent, moderate temperature within the ideal range for your starter's activity (which varies slightly based on the flour used and desired fermentation speed) is important.
Avoiding drastic temperature fluctuations is also beneficial for maintaining a stable, healthy starter culture that can resist invaders. If your kitchen temperature regularly swings from cool to very warm, this can stress the starter. Similarly, storing your starter in a consistently humid location, like a damp basement or a perpetually steamy kitchen corner, increases the risk of mold. Using a hygrometer to monitor humidity and potentially a small fan for air circulation in enclosed spaces can help manage these environmental factors, contributing to better sourdough starter mold prevention.
Identifying Mold on Your Sourdough Starter: A Comprehensive Guide
Recognizing Visual Characteristics of Mold: Color and Texture
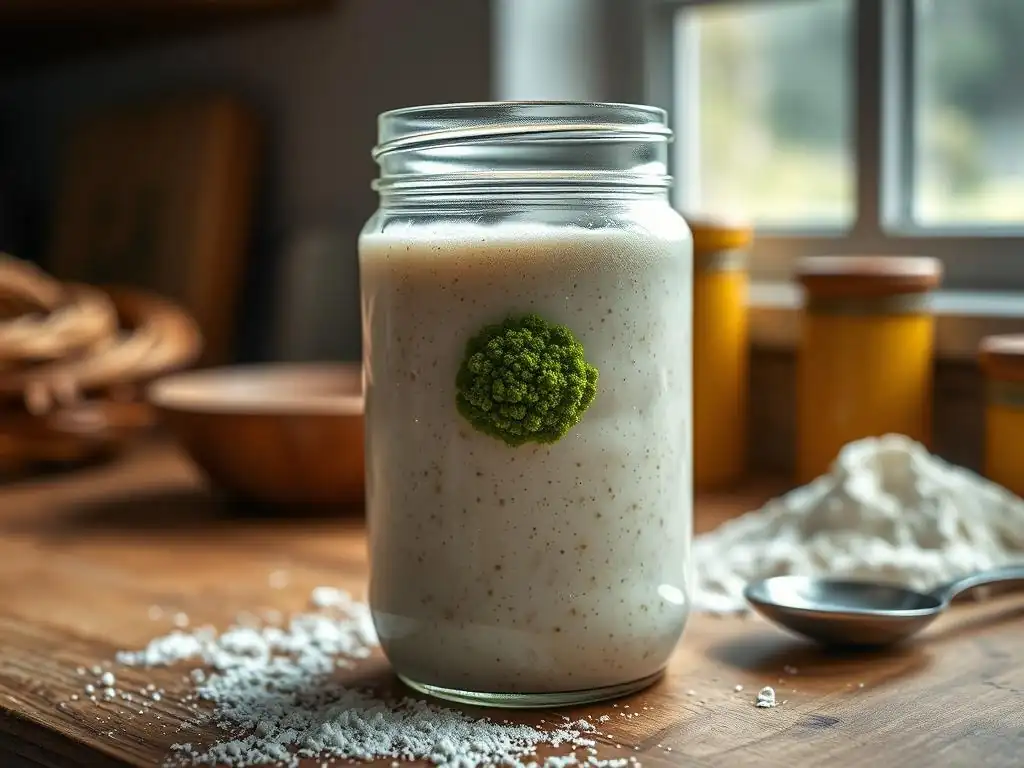
The most definitive way to identify mold on your sourdough starter is through visual inspection. Mold typically appears as fuzzy or powdery spots on the surface of the starter or sometimes on the walls of the container just above the starter line. Unlike the smooth or bubbly surface of a healthy starter, mold has a distinct texture – it looks like miniature hairs or filaments growing. The texture can range from wispy and cottony to dense and matted depending on the type of mold and its stage of growth.
Color is another crucial visual indicator. While some molds might start as white fuzz (which can sometimes be confused with Kahm yeast, but remember mold is fuzzy), they often develop distinctive colors as they mature and produce spores. Common mold colors found on food include green, black, blue, orange, and even pink or red. Any spot of color that is fuzzy or textured and doesn't resemble a normal starter bubble, hooch, or dried flour is highly likely to be mold. If you see any signs of colored, fuzzy growth, err on the side of caution.
Detecting Mold Through Odor: Identifying Contamination
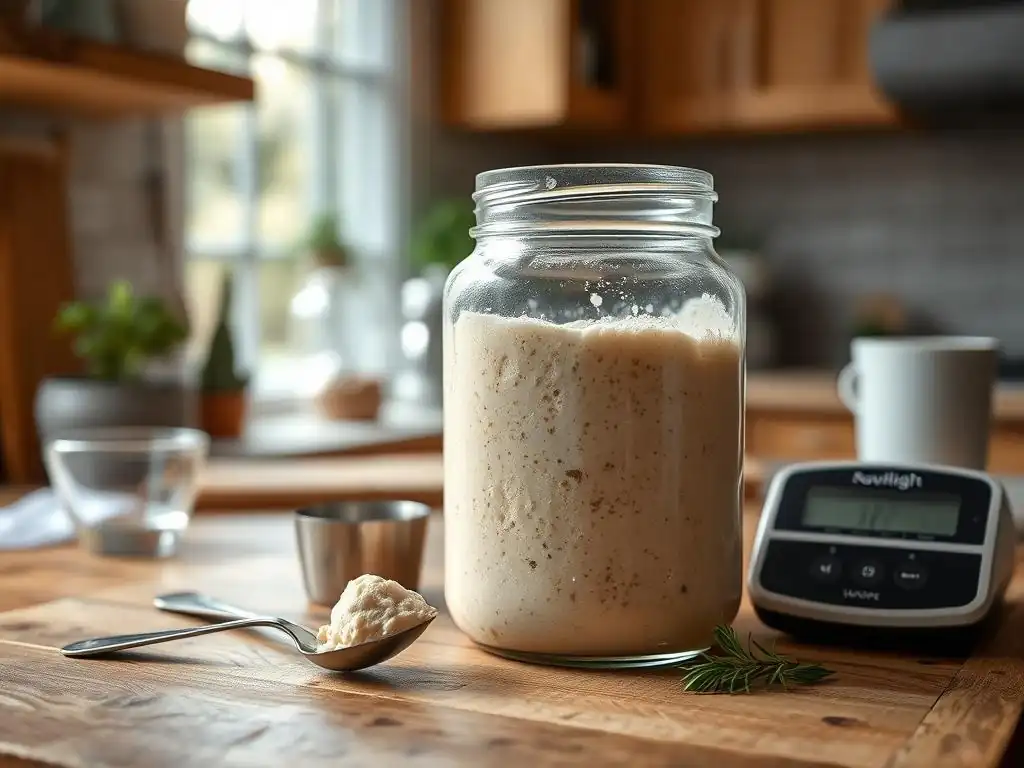
While visual cues are the primary method for detecting mold, odor can also be a strong indicator, although it's not always present in the early stages of mold growth. A healthy, active sourdough starter should smell pleasant – tangy, yeasty, slightly alcoholic, or like fermented fruit. The specific aroma can vary based on the flour used and the starter's age and activity level.
Mold, on the other hand, often produces a distinctively unpleasant odor. This smell is typically musty, stale, rotten, or even earthy, akin to the smell of damp soil or decaying leaves.
If you open your starter container and are met with an odor that is off, particularly one that smells like mildew or rot, it's a strong signal that something is wrong, and it could be mold, even if you don't immediately see visible signs. However, rely more on visual identification, as some molds might not produce a strong odor initially, and other issues (like rancid hooch) can also cause unpleasant smells.
Examining the Starter Surface for Mold Indicators
A thorough examination of the starter surface is essential for early mold detection, which is critical for sourdough starter mold prevention efforts. Mold almost always starts growing on the surface, where it has access to oxygen and often the least acidic part of the starter. Look closely at the entire surface area. Are there any spots of unusual color? Is there any fuzzy or powdery texture that isn't typical starter bubbles or dried flour? Pay special attention to the edges where the starter meets the container wall, as mold can sometimes start there.
It's also wise to check just above the starter line on the sides of the container. Sometimes, condensation or small splashes of starter can create a microenvironment where mold can begin to grow before spreading to the main body of the starter. Use a clean spoon or spatula to gently push aside a small section of the surface if you suspect something is underneath.
However, if you see clear signs of mold on the surface, disturbing it can release spores into the air, potentially contaminating your environment and future starters. A careful visual inspection without agitation is usually sufficient for identification.
Responding to Mold Contamination in Your Sourdough Starter
Assessing the Extent of Mold Growth
Once mold is suspected or identified, the first step is to assess how much of the starter is affected. Is it a single, small patch, or has the mold spread across a significant portion of the surface? Does it appear to have grown deeply into the starter, or is it only on the very top layer? While it might be tempting to investigate closely, avoid disturbing the moldy area more than necessary to prevent releasing spores. A visual assessment from a safe distance is usually sufficient.
Consider the color and type of mold if possible (though specific identification isn't strictly necessary). Some molds, particularly black molds, can be more problematic than others, potentially producing mycotoxins. While the risk of serious toxin production in a starter is debated and likely low with common food molds, it's a factor in the decision to discard. A small, isolated patch might seem manageable, but it's important to remember that the visible mold is often just the "fruiting" body, and hyphae (the mold's root-like structure) can penetrate deeper into the food.
Determining Salvageability of a Moldy Starter
The general consensus among experienced bakers and food safety guidelines is that if you see any mold on your sourdough starter, it is safest to discard the entire starter. While some resources might suggest scraping off a small patch of mold, the hyphae often extend well below the surface, and you cannot be certain you've removed all of it. More importantly, some molds produce invisible toxins (mycotoxins) that can permeate the food, even in areas where no visible mold is present. These toxins are not destroyed by baking temperatures.
Given the small cost and effort required to start a new starter from scratch (typically just flour and water over 7-14 days), the risk associated with trying to salvage a potentially contaminated starter is simply not worth it. Food safety authorities like the USDA recommend discarding moldy soft foods, and a sourdough starter falls into this category due to its high moisture content and porous structure, which allows mold roots (hyphae) to penetrate easily.
Therefore, the safest and most recommended course of action for sourdough starter mold prevention and management is almost always to discard the entire contents if mold is found.
Remediation Techniques for Minor Mold Exposure
While the safest approach is to discard a moldy starter, some sources discuss potential remediation for very minor cases, though this is not widely recommended for food safety reasons. This typically involves carefully scraping off the visible mold plus a significant margin (at least an inch or more) of the starter surrounding and beneath the moldy area. The removed portion must be discarded immediately and carefully, ideally sealed in a bag before going into the trash.
Following removal, the remaining starter would need to be transferred to a clean container and fed frequently to encourage vigorous activity and acidity, hopefully outcompeting any remaining unseen mold spores. However, this method carries inherent risks. You cannot guarantee that all mold hyphae or potential toxins have been removed. For reliable sourdough starter mold prevention and safety, it is strongly advised to discard the entire starter and begin anew, ensuring all equipment is thoroughly cleaned before starting the new culture.
Sourdough Starter Troubleshooting: Addressing Common Non-Mold Issues
Distinguishing Kahm Yeast from Mold Growth
As discussed earlier, Kahm yeast is the most common visual anomaly mistaken for mold. Distinguishing between the two is crucial for effective sourdough starter mold prevention because Kahm yeast, while sometimes undesirable for flavor, doesn't necessitate discarding the starter. Kahm yeast appears as a flat, white or off-white film or powdery layer on the surface. It often develops wrinkles or looks dry and skin-like. It is not fuzzy or three-dimensional like mold. Its smell is usually benign, sometimes described as cheesy, alcoholic, or even like nail polish remover (acetone), but not the musty, rotten smell associated with mold.
If you encounter this white, non-fuzzy film, it is almost certainly Kahm yeast. It typically forms on starters that are underfed, kept in containers that are too large (exposing a large surface area to air), or stored in warmer temperatures. To address Kahm yeast, simply scrape it off the surface with a clean spoon.
You can then feed your starter as usual. To prevent its recurrence, try feeding more frequently, ensuring your container size is appropriate for the amount of starter, and potentially storing it in a slightly cooler spot if at room temperature. Unlike mold, scraping Kahm yeast off is generally considered safe.
Understanding Starter Discoloration and Texture Variations
Beyond mold and Kahm yeast, sourdough starters can exhibit other visual changes that are usually normal and not indicative of spoilage requiring discard. The liquid layer known as "hooch" can vary in color from clear to dark gray or black, especially in unfed starters or those made with whole grain flours. Dark hooch is simply concentrated waste products from fermentation; it's normal. Stirring it back in adds nutrients and mellows the starter's flavor, while pouring it off results in a more acidic starter.
The texture of a starter also changes with feeding and fermentation. After feeding, it's a thick batter. As it ferments, it becomes bubbly, airy, and eventually loosens before collapsing. A neglected starter might become very liquid with a thick layer of hooch.
These texture changes are normal. Discoloration within the starter itself (not on the surface) that isn't hooch, such as streaks of pink or orange within the starter body, can sometimes indicate contamination by specific bacteria (like Serratia marcescens causing pink rot), which can be harmful. While less common than mold, any unusual, non-hooch discoloration within the starter warrants caution and often suggests discarding.
Addressing Potential Issues Before They Escalate
Proactive management is key to preventing issues like mold and Kahm yeast. Regularly observing your starter allows you to catch potential problems early. Check its smell, texture, and appearance daily if kept at room temperature, or with each feeding if refrigerated. Is it bubbling as expected?
Does it smell right? Are there any unusual growths or colors? Early detection of Kahm yeast means you can simply scrape it off before it becomes a thick layer. Early detection of a struggling starter (lack of activity, thin consistency) means you can adjust feeding frequency or ratio before it becomes vulnerable to mold or other contaminants.
Maintaining a consistent feeding schedule appropriate for your storage method (daily at room temp, weekly in fridge) is the best way to ensure your starter is healthy and acidic enough to resist invaders, serving as excellent sourdough starter mold prevention. Using a transparent container makes observation easier. If you notice your starter seems sluggish or its smell is off (but not moldy), giving it a few extra, smaller feedings over a day or two (e.g., feeding every 12 hours instead of 24) can often help revive its activity and acidity, strengthening its natural defenses.
Long-Term Sourdough Starter Health and Maintenance
Implementing Consistent Feeding Schedules
Consistency in feeding is paramount for a healthy, active sourdough starter and is the cornerstone of sourdough starter mold prevention. Whether you keep your starter at room temperature or in the refrigerator, adhering to a regular feeding schedule ensures the yeast and bacteria population remains balanced and vigorous. For starters kept at room temperature (around 70-75°F), daily feeding is typically necessary. This involves discarding a portion of the starter and feeding the remainder with fresh flour and water, commonly in a 1:1:1 ratio by weight. This regular refreshment maintains peak activity and acidity, making it resistant to mold.
If you store your starter in the refrigerator (typically 35-40°F), feeding once a week is usually sufficient. The cold temperature significantly slows down fermentation, so it consumes its food much slower. When you take it out to feed, allow it to warm up slightly, feed it, let it become active for a few hours at room temperature (some let it double), and then return it to the fridge.
This weekly routine keeps the culture alive and healthy without the need for daily attention. Consistent feeding prevents the starter from becoming overly acidic or depleted of nutrients, conditions that can stress the culture and potentially invite mold.
Employing Optimal Storage Solutions
Choosing and maintaining the right storage container is a simple yet vital aspect of sourdough starter mold prevention. Glass jars are highly recommended due to being non-porous, easy to clean, and allowing for easy visual inspection. The container should be large enough to allow the starter to at least double in volume after feeding without overflowing. For instance, a starter fed 1:1:1 (yielding triple the initial volume) would need a container at least three times the volume of the portion you keep.
The lid should cover the container opening to protect against airborne contaminants like mold spores and fruit flies, but it should not be airtight. Fermentation produces gases (primarily carbon dioxide), and if these cannot escape, pressure will build up, potentially breaking the jar. Using a lid that rests loosely on top, a lid with a gasket but not screwed down tightly, or covering the jar with cheesecloth or a paper towel secured with a rubber band are all effective methods. Ensure the cover is clean and dry, as moisture on the lid can also encourage mold growth.
Recognizing Early Signs of Starter Imbalance
Learning to read your starter is a skill developed over time, and recognizing early signs of imbalance allows you to intervene before serious issues like mold arise. A healthy starter should consistently double (or more) within a predictable timeframe after feeding, depending on the temperature and ratio. It should have a pleasant, tangy aroma and a bubbly, airy texture when active. If your starter consistently fails to rise significantly, smells unusually weak or off (but not moldy-rotten), or develops a thick layer of hooch very quickly after feeding, these are signs of imbalance.
These imbalances often indicate the starter is underfed, too cold, or the ratio of flour and water isn't quite right for its environment. Addressing these issues promptly – perhaps by increasing feeding frequency, moving it to a warmer spot, or slightly adjusting the feeding ratio (e.g., using a bit more flour) – can revitalize the culture. A strong, active starter is naturally more resistant to unwanted invaders like mold and Kahm yeast. Paying attention to these early warning signs is a proactive measure in sourdough starter mold prevention.
Frequently Asked Questions
What is the most common cause of mold growth in a sourdough starter?
The most common cause is contamination from the environment. This can happen if the starter is left uncovered or is exposed to unclean utensils. Proper hygiene and sanitation are key.
How can I tell if my sourdough starter has mold and not just hooch?
Mold will typically appear as fuzzy, discolored patches (e.g., pink, orange, blue, or black), whereas hooch is a dark, liquid byproduct of fermentation. Hooch is usually harmless, while mold is not.
What are the best practices for storing my sourdough starter to prevent mold?
Store your sourdough starter in a clean, airtight container in the refrigerator. Regularly feed it every 1-2 weeks to maintain its activity and prevent mold growth.
If I find mold on my sourdough starter, is it safe to just remove the moldy part and continue using the rest?
No. It is not safe to simply remove the moldy part. Mold can spread throughout the starter, even if it's not visible. It's best to discard the entire starter and begin again.
Can using a specific type of flour help prevent mold growth in my sourdough starter?
While flour type isn't the primary factor, using high-quality, unbleached flour can help. Bleached flour can sometimes lack the beneficial bacteria needed for a healthy, mold-resistant starter.
Final Reflection: Cultivating a Flourishing, Mold-Free Starter
The fight against sourdough starter mold isn't just about preserving a bubbly friend; it's about safeguarding the heart of your baking journey. A healthy starter is the foundation of delicious, artisanal bread, and understanding how to prevent mold is crucial for consistent baking success. Ignoring the signs can lead to wasted effort and frustration, highlighting the importance of proactive care.
The delicate balance between nurturing a thriving starter and preventing unwanted mold growth mirrors the delicate balance we often strive for in our own lives. We nurture our passions, our relationships, and our health, all while navigating challenges and setbacks. This constant vigilance, this careful attention to detail, is essential for growth and flourishing. The greatest glory in living lies not in never falling, but in rising every time we fall.
– Nelson Mandela. This quote resonates deeply with the process of sourdough baking; even if mold takes hold, learning from the experience allows for a stronger, more resilient starter – and a more resilient baker.
So, as you continue your baking journey, remember the lessons learned here. Don't be afraid to discard a moldy starter; it's a necessary step towards a healthier, more productive one. Observe your starter closely, learn to recognize the subtle signs of trouble, and embrace the process of learning and refining your techniques. Your patience and dedication will be rewarded with the fragrant aroma of freshly baked bread, a testament to your perseverance and the magic of sourdough.
Unleash Your Baking Potential: Mold-Free Starters & Delicious Breads!
Thanks for taking the time to learn about preventing and identifying mold in your sourdough starter! You've now got the knowledge to keep your starter healthy and thriving. Ready to put your new skills to the test?
- Prioritize your starter's health: Check your starter daily for signs of mold and promptly address any issues. This is the most crucial step to ensuring baking success!
- Share your starter success (or challenges!): Let our community know about your experience in the comments below. We love hearing from you!
- Experiment with a new bread recipe: Now that you're a sourdough mold-prevention expert, it's time to try that ambitious bread recipe you've been putting off!
So, what amazing bread will you bake next, now that you're a sourdough starter mold-prevention pro?