
Slow & Steady: Nurturing a Starter in Cooler Temperatures


Welcome to BakeWithEase, where simplifying baking is our specialty! Ever wondered how cooler temperatures can actually unlock a whole new dimension of flavor in your sourdough? This article dives deep into nurturing your sourdough starter when the mercury drops, revealing the secrets to a slow and steady rise. Discover the techniques that will transform your baking, even when the kitchen feels more like a fridge. Ready to master the art of sourdough in any season? Let's get started!
- Winter Sourdough: Cultivating a Thriving Starter in Cold Climates
- Understanding Sourdough Starter Behavior in Cold Climates
- Adapting Your Sourdough Starter Feeding Schedule for Cold Temperatures
- Maintaining a Consistent Temperature for Your Sourdough Starter
- Troubleshooting Common Sourdough Starter Issues in Cold Weather
- Recipes Optimized for Sourdough Starter Cultured in Cold Temperatures
- Tips for Long-Term Sourdough Starter Maintenance in Cold Climates
-
Frequently Asked Questions
- How does cooler weather affect my sourdough starter?
- What is the ideal temperature range for sourdough starter activity?
- How can I encourage my sourdough starter to rise in colder weather?
- Do I need to adjust my feeding schedule when it's cold?
- Will a cooler temperature starter affect the flavor of my bread?
- Final Reflection: The Enduring Power of Patience in Sourdough Baking
- Unlock Your Baking Potential: Mastering Cooler-Weather Baking
Winter Sourdough: Cultivating a Thriving Starter in Cold Climates
Understanding Sourdough Starter Behavior in Cold Climates
How Temperature Impacts Sourdough Starter Activity
Temperature is perhaps the single most critical factor influencing the activity of your sourdough starter. It directly affects the metabolic rate of the wild yeasts and lactic acid bacteria that make up your culture. In warmer conditions, typically between 75°F and 80°F (24°C to 27°C), these microorganisms are highly active, consuming food (flour and water) rapidly and producing carbon dioxide (causing bubbles and rise) and organic acids (flavor). This leads to a starter that doubles or triples in size within just a few hours after feeding, often peaking around 4-6 hours.
Conversely, when your sourdough starter is kept in cooler temperatures, such as 60°F to 70°F (15°C to 21°C), the microbial activity slows down significantly. The yeasts and bacteria become less energetic, consuming food at a much slower pace. This means the rise will be more gradual, perhaps taking 8-12 hours or even longer to peak. While this slower pace might seem less vigorous, it's not necessarily a sign of an unhealthy starter; it's simply responding to its environment. Understanding how cooler temperatures sourdough starter activity changes is key to successful baking in winter months.
The Science Behind Slow Fermentation
Slow fermentation, often a natural outcome of maintaining a sourdough starter in cooler temperatures, offers distinct advantages, particularly for flavor development and dough structure. The slower metabolic rate of the bacteria, specifically the Lactobacillus species, allows them more time to produce a wider range of organic acids, such as lactic and acetic acids. Lactic acid contributes a milder, yogurt-like tang, while acetic acid provides a sharper, vinegar-like bite. The ratio of these acids shifts with temperature – cooler temperatures often favor acetic acid production, leading to a more pronounced sourness, which many bakers appreciate.
Furthermore, the extended fermentation period facilitated by cooler temperatures sourdough starter management allows enzymes in the flour more time to break down complex starches and proteins. This enzymatic activity contributes to better gluten development and extensibility in the final dough, often resulting in a loaf with a more open crumb structure and improved digestibility. A starter nurtured in cooler temperatures, while slower to rise, can yield a more complex, nuanced flavor profile and a superior bread texture compared to one rushed in a warm environment.
Adapting Your Sourdough Starter Feeding Schedule for Cold Temperatures
Adjusting Feeding Ratios for Optimal Starter Growth
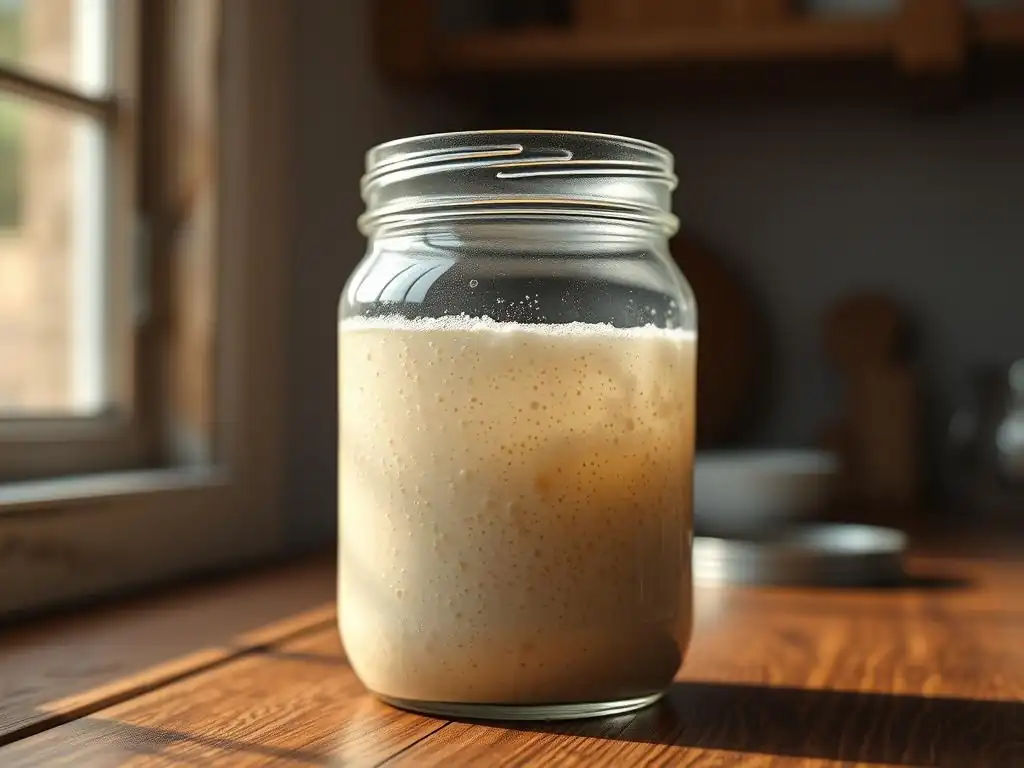
When dealing with a sourdough starter in cooler temperatures, the standard 1:1:1 feeding ratio (starter:flour:water by weight) might lead to your starter becoming overfed and sluggish between feedings, as it takes much longer to consume the available food. To compensate for the reduced activity, you'll need to adjust your feeding ratio to provide relatively more food for the slower-working microbes. Common adjustments include feeding ratios like 1:2:2 or even 1:3:3. For example, instead of feeding 50g starter with 50g flour and 50g water (1:1:1), you might feed 25g starter with 50g flour and 50g water (1:2:2).
Using a 1:2:2 or 1:3:3 ratio gives the smaller amount of starter a larger buffet of food to work through, extending the time it takes to reach its peak and preventing it from becoming overly acidic and depleting its food source too quickly in cooler temperatures. This adjustment helps maintain a healthy, active culture over a longer period between feedings, which is especially useful if you aren't baking daily. Experimenting with ratios is key; a starter kept consistently at 65°F might thrive on a 1:2:2 ratio, while one at 55°F might prefer 1:3:3 or even less frequent feeding.
Recognizing Signs of Under- or Over-Feeding
Recognizing the signs of an underfed or overfed sourdough starter is crucial, particularly when its activity is naturally slower in cooler temperatures. An underfed starter, or one that hasn't been fed enough relative to its population size and environmental temperature, will typically peak very quickly after feeding and then collapse. It might smell strongly acidic, like vinegar or nail polish remover (acetic acid), and have a watery consistency. Its rise will be minimal, and it won't hold its structure well. This happens because the small amount of food is quickly consumed by the large number of microbes.
Conversely, an overfed starter (receiving too much food relative to its population or activity level) will show very little activity between feedings. You might see minimal bubbling or rise, and it could take an excessively long time (24+ hours) to show any signs of fermentation. The smell might be bland or just faintly yeasty, lacking the characteristic tang.
While a slow rise is normal for a sourdough starter in cooler temperatures, an overfed starter is slow because the microbes are diluted in too much food and haven't had time to multiply sufficiently to consume it. Adjusting your feeding ratio based on these signs is vital for maintaining a balanced culture.
Maintaining a Consistent Temperature for Your Sourdough Starter
Utilizing Temperature Control Methods
Maintaining a consistent temperature is arguably the most effective way to manage your sourdough starter's activity, especially when dealing with cooler temperatures. Relying solely on ambient room temperature can be challenging, as it fluctuates throughout the day and night. Several methods can help create a more stable, warmer environment. Proofing boxes, either purpose-built appliances or DIY versions using an insulated container and a heat source, offer precise temperature control. Some ovens have a "proof" setting, typically around 80-85°F (27-29°C), which is ideal for rapid starter activation, although this might be too warm for long-term storage or slow fermentation.
Another common technique is using your kitchen oven with just the light on. The incandescent bulb generates enough warmth to raise the internal temperature significantly, often reaching 75-80°F (24-27°C), depending on the oven and bulb wattage. Always test the temperature first with an oven thermometer, as some ovens can get too hot.
Other methods include placing the starter near a warm appliance (like a refrigerator's exhaust or a warm water heater), using a seed starting mat under the starter jar, or placing the jar in a cooler or insulated box with a warm water bottle changed periodically. These controlled environments help buffer against external temperature swings, providing the consistent warmth your sourdough starter needs to thrive, especially in cooler temperatures.
Creating a Warm Environment: DIY Solutions
You don't need fancy equipment to provide a warm, stable home for your sourdough starter in cooler temperatures. A simple DIY solution involves using your kitchen oven. Place the starter jar inside the oven (turned off), and turn on the oven light. This can raise the internal temperature by 10-20°F (5-10°C) above room temperature, often reaching the ideal range of 75-80°F (24-27°C) for active fermentation. Remember to place a note on the oven door so no one accidentally preheats the oven with your starter inside!
Another effective DIY method is creating an insulated box. You can use a small cooler, a cardboard box lined with towels or blankets, or even a microwave oven (turned off). Place your starter jar inside, and if needed, add a jar or bottle of warm (not hot) water next to it.
Close the lid or door to trap the warmth. For longer periods, you might need to replace the warm water every few hours. These simple setups provide a much more consistent temperature than leaving the starter exposed to fluctuating room temperatures, helping you manage your sourdough starter in cooler temperatures effectively.
Best Temperature Ranges for Sourdough Starter Activity
Understanding the optimal temperature ranges for your sourdough starter's activity is key to managing it, especially in cooler temperatures. For rapid, vigorous growth and peak readiness for baking (often referred to as the "sweet spot" for baking), a temperature range of 75°F to 80°F (24°C to 27°C) is generally considered ideal. In this range, the starter will typically double or triple in size within 4-6 hours after feeding, showing abundant bubbles and a pleasant, tangy aroma.
However, maintaining a sourdough starter in cooler temperatures, specifically between 65°F and 70°F (18°C to 21°C), slows down the fermentation considerably. While the rise will be less dramatic and much slower (taking 8-12+ hours to peak), this temperature range is excellent for developing complex flavors. It also allows for less frequent feeding, making it suitable for bakers who don't bake daily.
Temperatures below 60°F (15°C) will slow activity significantly, potentially requiring feeding only every 24-48 hours, while refrigeration (around 40°F / 4°C) puts the starter into a state of near-dormancy, requiring feeding only once a week or less. The best temperature depends on your baking schedule and desired starter activity level.
Troubleshooting Common Sourdough Starter Issues in Cold Weather
Addressing Slow Rising and Weak Activity
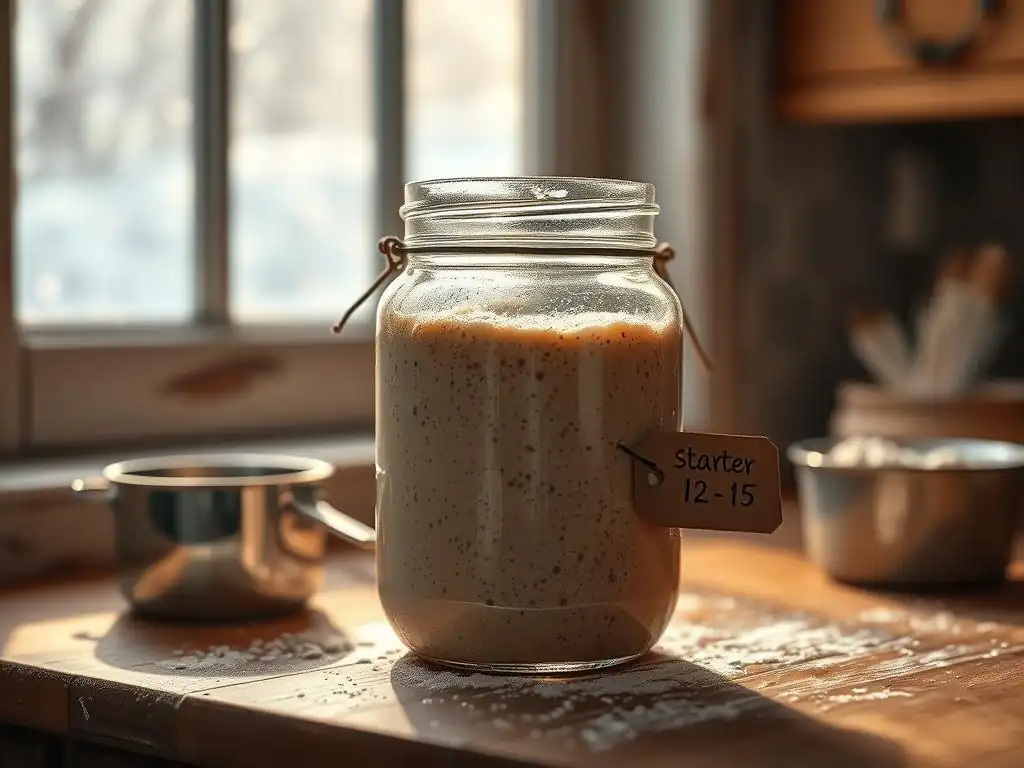
One of the most common issues encountered when managing a sourdough starter in cooler temperatures is slow rising and seemingly weak activity. If your starter isn't doubling or tripling within a reasonable timeframe for its temperature (e.g., not peaking within 12-18 hours at 65°F), it might need a boost.
First, ensure you are feeding it correctly – using a 1:2:2 or 1:3:3 ratio in cooler temperatures provides more food for the microbes. Using slightly warmer water for feeding (around 80-85°F / 27-29°C) can also give the starter a gentle jump start, though avoid hot water which can kill the microbes.
Consider moving your starter to a warmer location using one of the temperature control methods discussed earlier. Even raising the temperature by a few degrees, say from 60°F to 68°F, can significantly increase activity. Sometimes, a starter just needs a few consistent feedings at a slightly warmer temperature to regain its vigor. Be patient; recovery in cooler temperatures naturally takes longer. If the starter smells overly acidic or like alcohol, it might be slightly underfed for the temperature; try increasing the feeding ratio further or feeding slightly more frequently until activity improves.
Preventing Mold Growth and Unwanted Bacteria
While cooler temperatures generally slow down microbial activity, making your starter less susceptible to rapid spoilage than in warm, humid conditions, preventing mold and unwanted bacteria is still important. Mold typically appears as fuzzy spots (green, black, white, or orange) on the surface. Unwanted bacteria can sometimes manifest as pink or orange streaks or a foul, putrid smell (distinct from the normal tangy or alcoholic smell). The best defense is maintaining a healthy, active starter and practicing good hygiene.
Always use clean jars and utensils when feeding your sourdough starter. Wash jars thoroughly with hot, soapy water and rinse well. Ensure your flour and water sources are clean.
A healthy, active starter with a balanced population of yeast and bacteria creates an acidic environment that naturally inhibits the growth of most pathogens and molds. Feeding your starter regularly according to its activity level in cooler temperatures prevents it from becoming too weak or hungry, which can make it more vulnerable to invaders. If you see mold, it's safest to discard the entire starter and begin anew, as mold spores can penetrate throughout the culture.
Reviving a Dormant Sourdough Starter After Cold Exposure
If your sourdough starter has been stored in the refrigerator (dormancy) or has become very sluggish due to extended exposure to very cooler temperatures, it will need a careful revival process. This process typically involves a few consistent feedings at a warmer temperature to wake up the dormant microbes. Take your starter out of the cold environment and let it come to room temperature for an hour or two.
Then, give it a small feeding using a higher ratio, such as 1:1:1 or 1:2:2, with water around 75-80°F (24-27°C). Place it in a warm spot (75-80°F) if possible. Discard a portion as usual before feeding. For the first few feedings, you might not see much activity.
Continue feeding it every 12-24 hours (depending on how quickly it shows signs of life) at a consistent warm temperature. It might take 2-3 days or even longer for the starter to return to its full vigorous activity, doubling or tripling predictably after feeding. Patience and consistent warm feedings are key to successfully reviving a sourdough starter from cold exposure.
Recipes Optimized for Sourdough Starter Cultured in Cold Temperatures

Overnight Cold-Proofed Sourdough Bread
A sourdough starter maintained in cooler temperatures is perfectly suited for recipes that utilize long, cold fermentation periods, such as overnight cold-proofed bread. Because the starter's activity is slower, it can handle being mixed into a dough that will undergo a primary bulk fermentation at room temperature for several hours (often 6-12 hours, depending on the ambient temperature and starter strength) before being shaped and placed in the refrigerator for a long, slow final proof (12-48 hours).
The slower activity of the starter in cooler temperatures means the dough won't over-ferment too quickly during the initial bulk rise. The subsequent cold proof in the refrigerator further slows fermentation to a crawl, allowing complex flavors to develop and the gluten structure to mature beautifully. Using a starter that is slightly less vigorous due to cooler temperature cultivation can be an advantage here, providing a longer window before the dough becomes over-proofed, making scheduling easier.
Sourdough Discard Waffles
Managing a sourdough starter in cooler temperatures often means feeding it less frequently or with higher ratios, but you'll still generate discard. Instead of letting it go to waste, sourdough discard waffles are a delicious way to use it up. This recipe doesn't rely on the leavening power of an active starter; instead, the discard primarily contributes flavor and tenderness.
A simple discard waffle recipe might involve mixing sourdough discard (typically 100-150g) with eggs (2), melted butter (50-75g), milk (100-150ml), flour (100-150g), sugar (1-2 tbsp), baking powder (1-2 tsp), baking soda (1/2 tsp), and salt (1/2 tsp). The chemical leaveners (baking powder and soda) provide the lift, while the discard adds a subtle tang and helps tenderize the crumb. This is a quick and satisfying way to use up the discard generated from maintaining your sourdough starter in cooler temperatures.
Tips for Long-Term Sourdough Starter Maintenance in Cold Climates
Storing Your Sourdough Starter for Optimal Longevity
For periods when you won't be baking frequently, storing your sourdough starter in the refrigerator is the best way to maintain it with minimal effort, especially in cooler temperatures where room temperature activity is already slow. Refrigeration significantly slows down microbial activity, essentially putting the starter into a state of semi-dormancy.
To prepare your starter for cold storage, ensure it's healthy and active. Feed it as usual, let it rise for 2-3 hours at room temperature after feeding (to ensure it has fresh food), and then place it in a clean jar with a loose-fitting lid in the back of your refrigerator where the temperature is most stable.
When stored in the fridge, a healthy sourdough starter in cooler temperatures needs to be fed much less often – typically once every week or two is sufficient. When it's time to feed, take it out, discard most of it (leaving 20-30g), feed it with fresh flour and water (e.g., 1:2:2 or 1:3:3 ratio), let it sit at room temperature for a few hours until you see some activity, and then return it to the fridge. This infrequent feeding schedule makes long-term storage easy, perfect for managing your sourdough starter in cooler temperatures without daily commitment.
Refreshing Your Sourdough Starter After Extended Cold Storage
After extended storage in the refrigerator (more than a week or two), your sourdough starter will be sluggish and need refreshing to regain its full baking vigor. This process is similar to reviving a dormant starter. Take the starter out of the fridge and let it warm up for an hour. Discard all but 20-30 grams of the starter.
Feed the remaining starter with fresh flour and water, using a ratio like 1:1:1 initially, or 1:2:2 if it seems very thick or inactive. Use water that is around 75-80°F (24-27°C). Place the starter in a warm spot (75-80°F) if possible. You will likely need to feed it every 12-24 hours for 2-4 consecutive feedings, discarding most of the starter before each feed, until it consistently doubles or triples within 4-8 hours and smells pleasantly tangy. This process brings your sourdough starter back to peak activity after its time in cooler temperatures or refrigeration.
Winter-Proofing Your Sourdough Starter Routine
Successfully managing a sourdough starter in cooler temperatures requires adapting your routine. The key strategies involve understanding that slower is normal, adjusting feeding ratios to account for decreased activity, and utilizing simple methods to provide consistent warmth when needed. Don't expect the same rapid rise you might see in summer; embrace the slower pace, which often leads to better flavor.
- Adjust Feeding: Transition from 1:1:1 to 1:2:2 or 1:3:3 ratios.
- Feed Less Often: Daily feeding might be too frequent; every 12-24 hours might suffice depending on the temperature.
- Control Temperature: Use an oven light, insulated box, or proofing setting to provide a consistent warm environment (75-80°F) when you need activity, or accept slower fermentation at room temperature (65-70°F).
- Be Patient: Allow more time for rises and proofs.
- Watch for Signs: Pay attention to how your starter looks and smells to gauge its health and adjust feeding accordingly.
By implementing these tips, you can maintain a healthy, productive sourdough starter throughout the colder months, ensuring you can continue baking delicious bread regardless of the ambient temperature. Managing your sourdough starter in cooler temperatures is achievable with patience and adaptation.
Frequently Asked Questions
How does cooler weather affect my sourdough starter?
Cooler temperatures slow down the fermentation process. This means your starter may take longer to rise and be ready for baking.
What is the ideal temperature range for sourdough starter activity?
While starters can survive in a wider range, the ideal temperature is generally between 70-75°F (21-24°C). Cooler temperatures will require adjustments.
How can I encourage my sourdough starter to rise in colder weather?
You can try placing your starter in a warmer location, such as near a warm oven (not on top!), or using a proofing box. Another option is to use slightly warmer water during feeding.
Do I need to adjust my feeding schedule when it's cold?
Yes, you likely need to feed less frequently or use a smaller amount of starter in your dough. Monitor your starter closely for signs of activity.
Will a cooler temperature starter affect the flavor of my bread?
Yes, cooler fermentation often leads to a more complex and tangy flavor in your sourdough bread. It's a different, but often desirable, outcome.
Final Reflection: The Enduring Power of Patience in Sourdough Baking
The art of nurturing a sourdough starter in cooler temperatures is more than just a baking technique; it's a testament to the power of slow, deliberate growth. In a world obsessed with instant gratification, the patient cultivation of a starter mirrors the rewards of mindful living, offering a tangible connection to the natural rhythms of fermentation. This process, often perceived as challenging, ultimately yields a depth of flavor and resilience unmatched by its faster-growing counterparts.
The journey of a sourdough starter, especially in cooler environments, reflects the larger human experience of navigating challenges and finding beauty in the unexpected. The subtle shifts in activity, the occasional setbacks, and the eventual triumph of a bubbly, active starter all resonate with our own personal journeys. As the poet Mary Oliver so eloquently stated, Tell me, what is it you plan to do with your one wild and precious life?
This question, applied to sourdough baking, reminds us to appreciate the process, the patience, and the unique character of each starter we nurture, regardless of the ambient temperature.
Now, consider your own life. What aspects require the same patience and nurturing that your sourdough starter demands? What seemingly slow processes, when approached with dedication and understanding, might yield unexpected rewards? Embrace the slow, embrace the steady, and discover the profound satisfaction that comes from cultivating something beautiful, one small step at a time. Your sourdough starter, thriving in cooler temperatures, stands as a potent symbol of this enduring truth.
Unlock Your Baking Potential: Mastering Cooler-Weather Baking
Thanks for taking the time to explore the secrets of cooler-weather baking! You've now gained valuable insights into nurturing your starter and achieving perfect results, even when temperatures drop. Ready to put your new knowledge into practice?
- Bake your dream loaf: Try the recipe variations suggested in the article and share your results with us! We'd love to see your creations.
- Experiment with different flours: Discover how different flours respond to cooler temperatures and expand your baking horizons. Document your findings for future reference!
- Join our baking community: Connect with fellow bakers in the comments below. Share your tips, tricks, and any challenges you encounter – we’re here to help you succeed!
What unique flour blend will you experiment with next to elevate your cooler-weather baking?