
Your Starter's First Feed: Getting Started Right

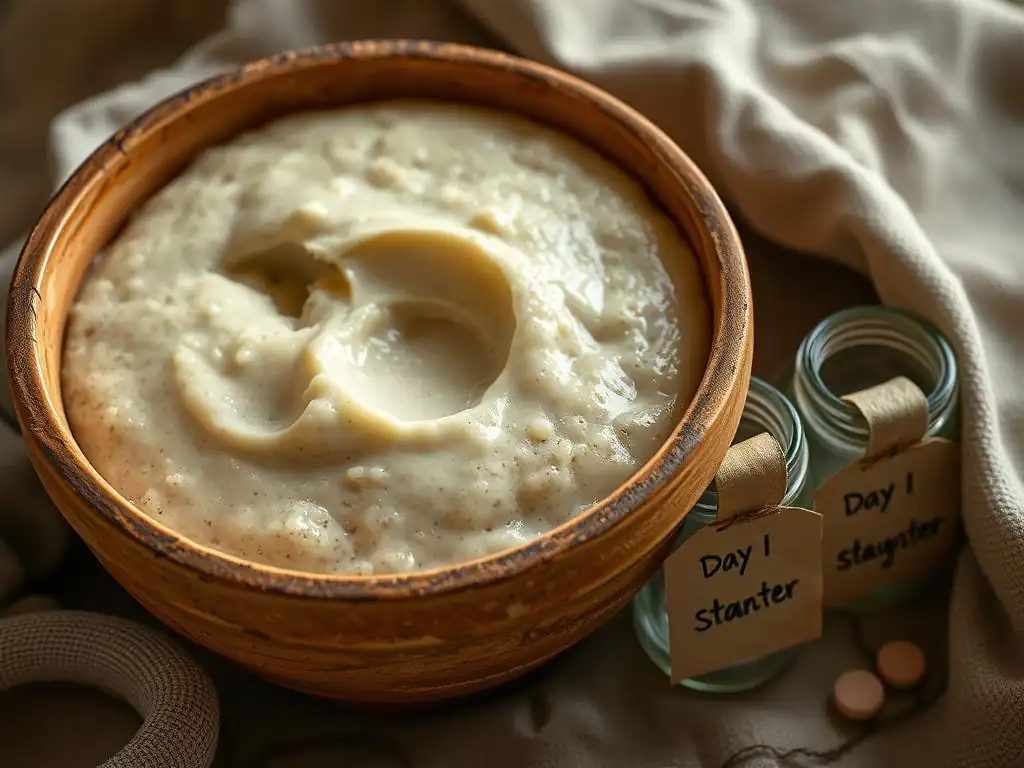
Welcome to BakeWithEase, your companion in the delightful world of baking! Ever wondered how to nurture a bubbly, thriving sourdough starter? Then you're in the right place. Today, we're diving deep into the crucial first step: understanding the perfect sourdough starter feeding schedule. Unlock the secrets to a vibrant starter and prepare to embark on a journey of delicious, naturally leavened creations. Ready to learn more and avoid common pitfalls? Let's get baking!
- Your Starter's First Feed: Getting Started Right (BakeWithEase.com)
- Introduction to Sourdough Starter Feeding for Beginners
- Understanding Your Sourdough Starter's Needs
- The First Feeding: A Step-by-Step Guide
- Choosing the Right Flour and Water
- Establishing a Regular Sourdough Starter Feeding Schedule
- Troubleshooting Common Issues After the First Feed
- Tips for Maintaining a Healthy and Active Sourdough Starter
- The Long-Term Benefits of a Well-Fed Sourdough Starter
- Sourdough Starter Feeding Schedule: Advanced Considerations
- Conclusion: Nurturing Your Sourdough Journey with Consistent Feeding
-
Frequently Asked Questions
- What is the most crucial aspect of a sourdough starter feeding schedule?
- Why is a sourdough starter feeding schedule important for baking success?
- How does the environment affect my sourdough starter feeding schedule?
- What happens if I miss a feeding in my sourdough starter feeding schedule?
- Can I adjust my sourdough starter feeding schedule based on the recipe I'm using?
- Final Reflection: The Enduring Power of a Simple Start
- Unleash Your Inner Baker!
Your Starter's First Feed: Getting Started Right (BakeWithEase.com)
Introduction to Sourdough Starter Feeding for Beginners
Welcome to the World of Sourdough!
Embarking on your sourdough journey is an exciting step into the ancient art of fermentation. Your sourdough starter is more than just a mixture of flour and water; it's a living ecosystem teeming with wild yeasts and beneficial bacteria. These microorganisms work together to leaven your bread and pastries, giving them that signature tangy flavor and airy texture. Think of your starter as a pet that needs regular care and nourishment – its health directly impacts the success of your baking.
Nurturing a starter might seem daunting at first, but it's a rewarding process. As you spend time feeding and observing your starter, you'll begin to understand its rhythm and signs of activity. This connection to your starter is part of the magic of sourdough baking. Getting the first feed right after your starter shows its initial signs of life is crucial for building a strong, resilient culture that will serve your baking adventures for years to come.
Why a Consistent Sourdough Starter Feeding Schedule is Crucial
A consistent sourdough starter feeding schedule is the bedrock of a healthy, active starter. Just like any living organism, your starter needs regular nourishment to thrive. Feeding provides the yeasts and bacteria with the carbohydrates in flour they need to consume and ferment. Without a regular schedule, these microorganisms will exhaust their food supply, become sluggish, and eventually die off, leaving you with an inactive starter.
Maintaining a predictable sourdough starter feeding schedule ensures that your starter consistently reaches its peak activity level around the same time after each feed. This predictability is vital for successful baking because most recipes call for the starter when it is at its most vigorous state, typically when it has doubled or tripled in size. A reliable feeding schedule takes the guesswork out of knowing when your starter is ready to bake with, leading to more consistent and successful loaves.
Understanding Your Sourdough Starter's Needs
Identifying a Hungry Starter: Signs to Look For
Recognizing when your sourdough starter is hungry is key to maintaining its health and vitality. A well-fed starter, hours after being fed, will typically be bubbly, show significant volume increase (often doubling or tripling), and have a pleasant, slightly tangy aroma. As the starter consumes its food, these signs begin to diminish. A hungry starter will start to deflate, returning to its original volume or even shrinking slightly.
One common sign of a hungry starter is the formation of a liquid layer on top, often called "hooch." This hooch is alcohol produced by the yeast as a byproduct of consuming the flour; it can range from clear to dark gray or black depending on the type of flour used and how long it's been left unfed.
While hooch isn't necessarily harmful (you can pour it off or stir it in), its presence is a clear signal that your starter has run out of easily accessible food and is ready for its next meal. The smell might also become more strongly alcoholic or acidic.
Factors Influencing Your Starter's Activity
Several environmental and ingredient factors significantly influence your sourdough starter's activity level and, consequently, how often it needs feeding. Temperature is perhaps the most impactful factor. Warmer temperatures (ideally between 75-80°F or 24-27°C) accelerate fermentation, causing the starter to consume its food faster and peak sooner, potentially requiring feeding every 12 hours. Cooler temperatures (below 70°F or 21°C) slow down microbial activity, meaning the starter will take longer to peak and may only need feeding every 24 hours or even less frequently if stored in the refrigerator.
The type of flour you use also plays a role. Whole grain flours like rye or whole wheat contain more nutrients and microbial activity initially, which can sometimes lead to faster fermentation compared to refined white flour. Water quality is important too; chlorinated water can inhibit microbial growth, so filtered or dechlorinated tap water is often recommended. Understanding these variables helps you anticipate your starter's needs and adjust your sourdough starter feeding schedule accordingly.
The First Feeding: A Step-by-Step Guide
Step 1: Preparing for the Initial Feed
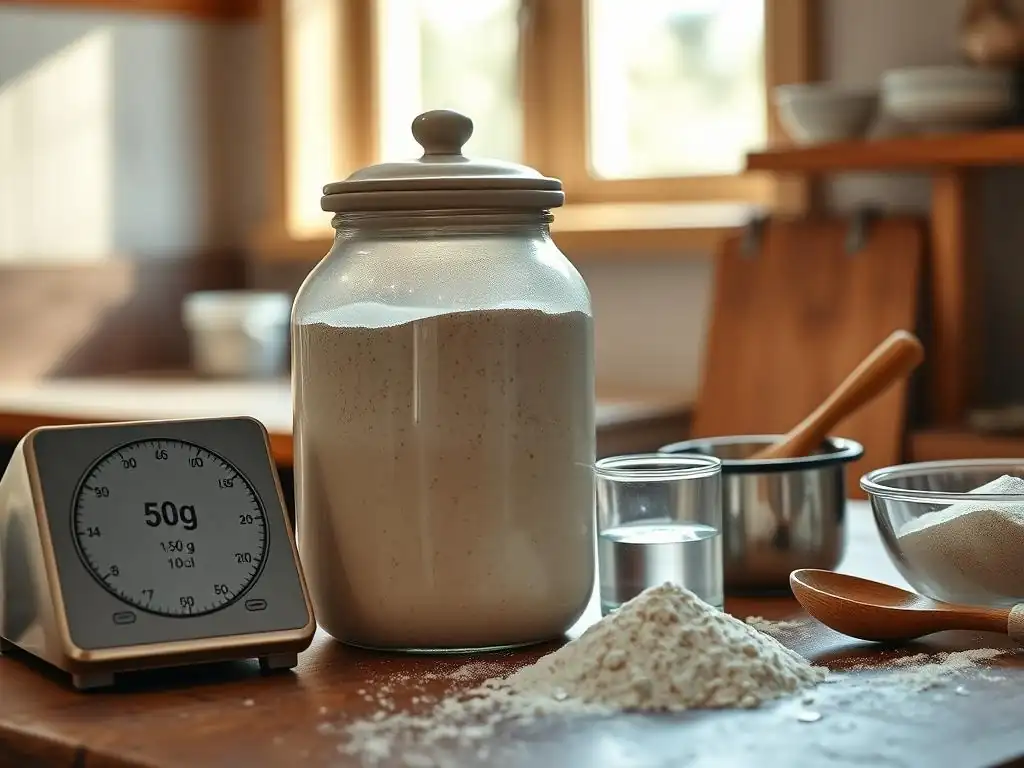
Before you perform your starter's first feed, gather your essential tools and ingredients. You will need your sourdough starter in its jar, fresh flour, clean water, a kitchen scale for accurate measurements, and a spatula or spoon for mixing. Ensure your jar is clean and large enough to accommodate the starter as it grows – something that can hold at least double or triple the volume of your starter is ideal. Having everything ready makes the process smooth and efficient.
Accuracy is key when feeding your starter, especially in the early stages. Using a kitchen scale to measure flour and water by weight is highly recommended over using volume measurements (like cups). This ensures you maintain the correct hydration level and feeding ratio consistently, which is fundamental for a healthy starter. For example, 50 grams of water is always 50 grams, but 50 grams of flour can vary significantly in volume depending on how packed it is.
Step 2: Discarding Part of the Starter
Discarding a portion of your sourdough starter before feeding is a necessary step for several reasons. Firstly, it helps manage the ever-increasing volume of your starter. Without discarding, you would quickly end up with an unmanageably large amount. More importantly, discarding ensures that the yeast and bacteria have enough food relative to their population size. Keeping only a small portion of the old starter concentrates the active microbes and provides them with a fresh, ample supply of nutrients in the new flour and water.
A common feeding ratio, especially for routine maintenance, is 1:1:1 by weight (starter:water:flour). This means you would keep one part of your existing starter and feed it with one part water and one part flour. For example, if you aim to maintain 50 grams of starter, you would discard all but 50 grams of your current starter, then feed those 50 grams with 50 grams of water and 50 grams of flour. The discarded portion isn't waste; it can be used in many recipes like pancakes, crackers, or muffins, or simply composted.
Step 3: Adding Flour and Water (The Feeding Process)
Once you have the desired amount of old starter remaining in your jar after discarding, it's time to add the fresh "food." Following your chosen feeding ratio (e.g., 1:1:1), add the measured amount of water to the starter in the jar. For our 50g starter example, this would be 50 grams of water. Stir the water into the starter until it is mostly dissolved and appears milky. This helps distribute the starter evenly before adding the flour.
Next, add the measured amount of flour to the mixture. Using the 1:1:1 example, you would add 50 grams of flour. The type of flour can vary (more on that later), but unbleached all-purpose or bread flour is a common choice for beginners. Adding the flour last helps prevent dry pockets and ensures the starter is fully hydrated.
Step 4: Mixing and Observing
After adding the flour and water to the reserved starter, mix everything together thoroughly. Use your spatula or spoon to scrape down the sides of the jar and ensure there are no dry clumps of flour remaining. Mix until you achieve a smooth, thick batter consistency with no visible dry flour. The mixture should be homogenous.
Once mixed, gently consolidate the surface of the starter. You can use a rubber spatula to smooth the top. Immediately after mixing, note the level of the starter in the jar. Placing a rubber band or marking the jar with a piece of tape at this initial level is incredibly helpful.
This allows you to easily track how much your starter has risen after feeding, which is a primary indicator of its activity and health. Cover the jar loosely with a lid or plastic wrap to allow gases to escape but prevent the surface from drying out. Place it in a warm spot and observe its progress over the next several hours, looking for bubbles and rise.
Choosing the Right Flour and Water
Best Flour Types for Feeding Your Sourdough Starter
The type of flour you choose for feeding your sourdough starter significantly impacts its activity and flavor profile. While many flours can work, unbleached all-purpose flour and bread flour are excellent choices for beginners. They provide a good balance of starches for energy and protein for structure, and they are readily available. Many experienced bakers also favor using organic, stone-ground whole wheat or rye flour, especially in the initial stages of building a starter, as these flours contain more nutrients and naturally occurring microbes which can help kickstart fermentation.
Using a consistent type of flour for your sourdough starter feeding schedule helps create a stable environment for the microbial ecosystem. However, it's perfectly acceptable to experiment or even feed with a mix of flours (e.g., 80% white and 20% rye) once your starter is established. Rye flour, in particular, is known for creating very active starters due to its high enzyme content, though it often results in a more liquid consistency. The key is to use unbleached flour, as the bleaching process can damage the starches and inhibit microbial activity.
The Importance of Water Quality
Water is the other critical ingredient in your sourdough starter, and its quality matters. Tap water often contains chlorine or chloramine, chemicals added to make it safe for drinking. These chemicals can inhibit or even kill the beneficial wild yeasts and bacteria in your starter, slowing down activity. While some starters are resilient enough to handle tap water, especially after they are well-established, using filtered water or bottled water is a safer bet, particularly in the early days.
If you use tap water, you can easily remove chlorine by simply letting it sit out in an open container for 24 hours before using it. The chlorine will dissipate into the air. Note that chloramine is more stable and may require filtration (like a Brita filter) to remove effectively. The temperature of the water is also important; using lukewarm water (around 75-80°F or 24-27°C) can help stimulate activity, while cold water will slow things down. Avoid using hot water, which can kill the microbes.
Establishing a Regular Sourdough Starter Feeding Schedule
Developing a Consistent Routine
Consistency is the cornerstone of a healthy and predictable sourdough starter feeding schedule. Your starter thrives on routine. Feeding it at roughly the same time each day (if kept at room temperature) helps regulate its activity cycle, making it easier to predict when it will be at its peak and ready for baking. For example, choosing to feed it every morning around 9 AM or every evening around 7 PM and sticking to that schedule will build a strong, reliable culture.
Think of it like feeding a pet; they do best when fed on a regular schedule. This consistency allows you to observe its behavior over time – how long it takes to peak, how much it rises, and what it smells like at different stages. These observations are invaluable for understanding your starter's needs and making informed decisions about your sourdough starter feeding schedule, whether you need to adjust the frequency, the feeding ratio, or the temperature it's stored at.
Feeding Frequency: How Often to Feed Your Starter
The optimal feeding frequency for your sourdough starter depends primarily on where you store it and the ambient temperature. If you keep your starter at room temperature (typically between 68-78°F or 20-26°C), it will likely need to be fed once every 24 hours using a standard 1:1:1 ratio. In warmer environments, you might even need to feed it every 12 hours if it's peaking and falling rapidly. This daily feeding rhythm is a common sourdough starter feeding schedule for starters used regularly for baking.
For bakers who don't bake daily or weekly, storing the starter in the refrigerator is a great option. Colder temperatures dramatically slow down fermentation. A refrigerated starter typically only needs to be fed once a week. To use a refrigerated starter for baking, you'll need to take it out and perform one or two feedings at room temperature to revive its activity before incorporating it into your dough. This reduced sourdough starter feeding schedule makes maintenance much easier for less frequent bakers.
Troubleshooting Common Issues After the First Feed

Dealing with Slow Activity
It's not uncommon for a sourdough starter, especially in its early days or after the first feed, to seem sluggish or show slow activity. If you're not seeing much rise or bubbling after 12-24 hours at room temperature, don't panic. Several factors could be contributing. Firstly, check the temperature of its environment; if it's cooler than ideal (below 70°F or 21°C), the microbes will work much slower. Try moving it to a warmer spot, like on top of the refrigerator or in an oven with the light on (ensure the oven itself is off! ).
Another possibility is the flour or water quality. Ensure you are using unbleached flour and filtered or dechlorinated water. Sometimes, simply giving it more time is the answer; some starters take longer to become vigorous. You could also try feeding it slightly more frequently (e.g., every 18-20 hours instead of 24) or using a small amount of rye or whole wheat flour in the mix (e.g., 10-20% of the flour weight) for a few feedings to give it a boost.
Addressing Mold and Unwanted Growth
While a healthy sourdough starter develops a robust microbial population that typically wards off unwanted invaders, sometimes mold or other strange growths can appear, particularly in new or neglected starters. Mold usually appears as fuzzy spots of various colors (green, black, orange, pink) on the surface. If you see any fuzzy mold, unfortunately, the safest course of action is to discard the entire starter and begin again. The mold you see is just the fruiting body, and the hyphae (roots) have likely spread throughout the culture.
A liquid layer (hooch) or a dry crust on top is generally not mold and is usually a sign of hunger or dehydration. You can pour off the hooch or stir it in before feeding. A dry crust can be removed before feeding. However, any fuzzy, colored growth indicates contamination. Maintaining a consistent sourdough starter feeding schedule, using clean jars and utensils, and ensuring the starter isn't too dry (which can encourage mold) are the best preventative measures.
Adjusting Your Feeding Schedule Based on Results
Your sourdough starter feeding schedule isn't a rigid rule written in stone; it's a guideline that should be adapted based on how your starter behaves. Observe how long it takes for your starter to double or triple in size after feeding at room temperature.
If it's peaking and starting to fall within 6-8 hours, your starter is very active and might be hungry sooner than 24 hours, especially in warm conditions. You could either increase the feeding frequency to every 12 hours or increase the feeding ratio (e.g., feed 1 part starter with 2 or 3 parts flour and water, like 1:2:2 or 1:3:3) to give it more food relative to the microbial population, which will extend the time until it peaks.
Conversely, if your starter is taking longer than 24 hours to show significant activity at a comfortable room temperature (70-75°F), it might be sluggish. You could try increasing the feeding frequency slightly (e.g., feeding every 20-22 hours) or ensuring it's in a warmer spot. Paying close attention to your starter's peak time allows you to fine-tune your sourdough starter feeding schedule for optimal health and predictable baking readiness.
Tips for Maintaining a Healthy and Active Sourdough Starter
Creating the Ideal Environment
Providing your sourdough starter with the right environment is crucial for its long-term health and activity. Wild yeasts and bacteria are most active within a specific temperature range, typically between 75-80°F (24-27°C). Keeping your starter in a warm, draft-free location helps ensure consistent fermentation. Avoid placing it in direct sunlight, which can overheat it, or near cold windows or drafty areas, which can slow it down dramatically.
If your kitchen is consistently cooler than the ideal range, consider finding a warmer spot. This could be on top of your refrigerator (which often emits warmth), inside a microwave (turned off, of course), or inside your oven with just the light on (again, oven off!). Some bakers even use proofing boxes or build DIY warm spots to maintain a steady temperature. A stable, warm environment contributes significantly to a predictable sourdough starter feeding schedule and a happy starter.
Using the Float Test to Gauge Readiness
The float test is a simple yet effective method to gauge whether your sourdough starter is active enough and ready to be used for baking. When your starter has peaked (typically doubled or tripled in size and is full of bubbles), gently take a small spoonful (about a teaspoon). Fill a glass with room-temperature water and carefully drop the spoonful of starter onto the surface.
If the starter floats, it means it is sufficiently airy and active, full of carbon dioxide bubbles produced by the yeast. It's ready to be used in your baking recipe. If it sinks to the bottom, it indicates that the starter has either not yet peaked or has passed its peak and is collapsing, meaning it may not provide enough lift for your dough. While not foolproof for every starter, the float test is a widely used indicator of peak activity and can help you time your baking within your sourdough starter feeding schedule.
Storing Your Sourdough Starter Properly
How you store your sourdough starter depends on how often you plan to bake. If you bake frequently (every few days), keeping your starter at room temperature with daily feedings (a regular sourdough starter feeding schedule) is the most convenient option. Use a jar with a loose-fitting lid or cover with plastic wrap or a damp cloth secured with a rubber band to allow gases to escape.
If you bake less often (weekly or less), storing your starter in the refrigerator is ideal. Place the well-fed starter in a jar and seal it tightly with a lid. The cold temperature slows down microbial activity significantly, allowing you to reduce the feeding frequency to once a week or even every two weeks.
To use a refrigerated starter, take it out, let it warm up for a few hours, discard most of it, and feed it once or twice at room temperature until it becomes active and passes the float test. This adjusted sourdough starter feeding schedule saves time and flour.
The Long-Term Benefits of a Well-Fed Sourdough Starter
Improved Baking Results
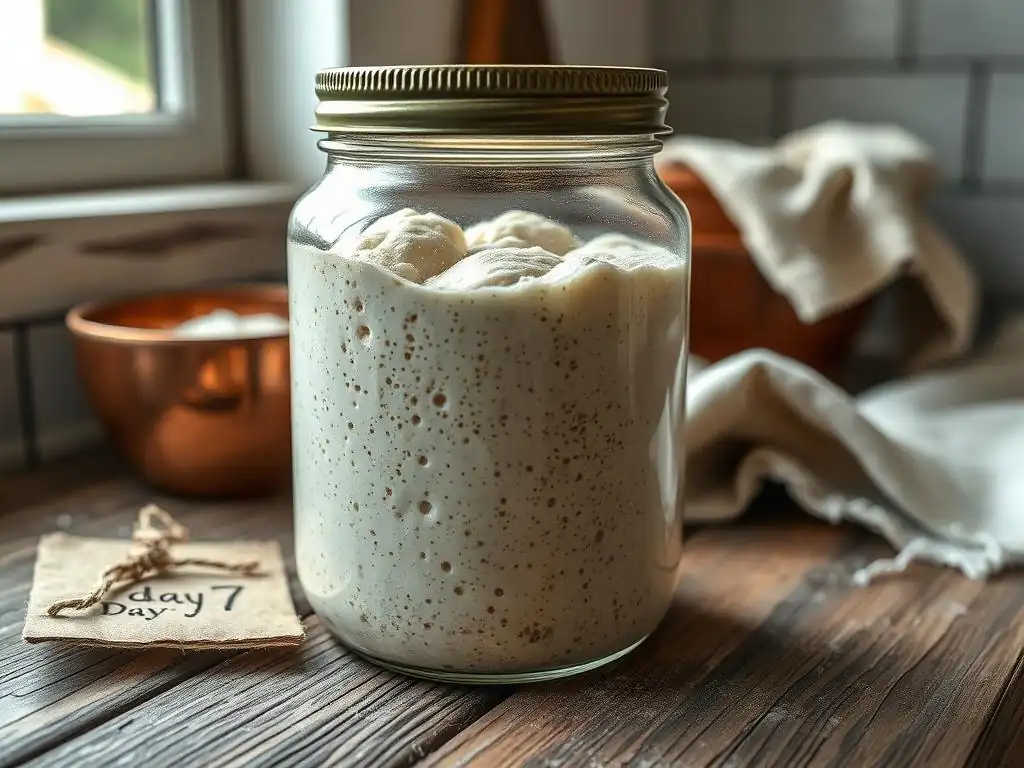
The most tangible benefit of maintaining a consistent sourdough starter feeding schedule is the dramatic improvement in your baking results. A healthy, active starter provides reliable and vigorous leavening. This translates directly into bread with a better rise, leading to a more open and desirable crumb structure. You'll notice your loaves are lighter and airier compared to using a weak or inconsistent starter.
Furthermore, a strong starter contributes to better oven spring – the final burst of expansion in the oven. This is because the starter has built up a significant amount of carbon dioxide production potential. Whether you're baking a rustic loaf of country bread, fluffy dinner rolls, or even sourdough pizza crust, using a well-fed starter ensures your baked goods achieve their full potential in terms of volume and texture.
Enhanced Flavor Development
Beyond leavening, a consistently fed sourdough starter is essential for developing the complex and nuanced flavors characteristic of sourdough baking. The bacteria in the starter, primarily lactic acid bacteria, produce organic acids (lactic and acetic acid) as they consume sugars. These acids contribute the signature tang to sourdough. A healthy, active culture maintains a balanced population of yeasts and bacteria, ensuring proper acid development.
Regular feeding keeps this microbial balance in check and provides the necessary substrate for acid production. Over time, with consistent care and feeding, your starter will develop its unique flavor profile, influenced by the flour you use and your local environment. This depth of flavor is something that cannot be replicated with commercial yeast and is a hallmark of well-crafted sourdough.
Building a Strong and Resilient Starter
Regularly adhering to a sourdough starter feeding schedule builds a strong and resilient microbial community within your jar. Consistent feeding encourages the proliferation of the most vigorous yeasts and bacteria, creating a culture that is better equipped to handle minor fluctuations in temperature or feeding times. A robust starter is less susceptible to developing mold or other unwanted issues because the beneficial microbes are dominant and outcompete potential contaminants.
A strong starter also performs more reliably. It will consistently peak within a predictable timeframe after feeding, making your baking schedule easier to manage. Think of it as building muscle; consistent "workouts" (feedings) make the starter stronger and more capable. This resilience means your starter can bounce back more easily if you occasionally miss a feeding or subject it to slightly less-than-ideal conditions.
Sourdough Starter Feeding Schedule: Advanced Considerations
Adapting to Different Temperatures
Once you've mastered the basics, you'll find that adapting your sourdough starter feeding schedule to temperature changes is a key skill. As mentioned earlier, temperature is a major driver of fermentation speed. In warm summer months, with ambient temperatures potentially reaching 80°F (27°C) or higher, your starter might peak rapidly, perhaps within 6-8 hours. In such conditions, you might need to switch to a 12-hour feeding cycle to ensure you're feeding it at its peak or just as it starts to fall.
Conversely, during cooler winter months when your kitchen temperature might drop to 65°F (18°C) or below, your starter will be much less active. It might take 18-24 hours or even longer to peak. In these cases, sticking to a strict 24-hour sourdough starter feeding schedule might mean you are feeding it too early, before it has fully developed. You can either feed it less frequently (e.g., every 36 hours if needed) or find a warmer spot to maintain a more consistent activity level. Learning to read your starter's peak based on temperature is crucial for an effective feeding schedule.
Adjusting for Different Flour Types
Switching or mixing flour types requires understanding how different flours impact fermentation and adjusting your sourdough starter feeding schedule accordingly. Whole grain flours, like rye and whole wheat, contain more enzymes and nutrients than refined white flour. This often leads to faster fermentation and a shorter time to peak. If you switch from feeding with all-purpose flour to feeding with 100% rye, you might find your starter is ready to feed again much sooner, potentially requiring a more frequent schedule or a higher feeding ratio (less starter, more new flour/water).
When incorporating different flours, observe your starter's behavior closely. Does it peak faster? Does it produce more hooch? Does the consistency change? These observations will guide you in adjusting your sourdough starter feeding schedule or ratio. For example, if adding rye makes it peak too fast, you might feed it with a 1:2:2 or 1:3:3 ratio (starter:water:flour) instead of 1:1:1 to slow things down by providing more food. Consistency in flour type helps stabilize your schedule, but flexibility is possible with observation.
Feeding Ratios for Specific Baking Projects
While a 1:1:1 feeding ratio is standard for maintaining a starter, experienced bakers often adjust the ratio based on their specific baking needs. This is an advanced aspect of the sourdough starter feeding schedule. A "levain" or "leaven" is essentially a specific build of your starter using a different ratio, often higher in flour and water relative to the amount of starter used (e.g., 1:2:2, 1:3:3, or even 1:5:5).
Using a higher ratio provides the microbes with a larger food source. This means it will take longer for the starter to consume all the available food and reach its peak. This is particularly useful for recipes that require a starter that peaks overnight, allowing you to mix the levain in the evening and use it the next morning. Understanding how different ratios affect the timing of your starter's peak allows you to manipulate your sourdough starter feeding schedule to align perfectly with your baking plans.
Conclusion: Nurturing Your Sourdough Journey with Consistent Feeding
Mastering the art of sourdough begins with understanding and nurturing your starter. The first feed is a critical step, setting the stage for a vibrant and active culture. By paying attention to the signs of a hungry starter, understanding the factors that influence its activity, and following a consistent sourdough starter feeding schedule, you build the foundation for successful baking.
Remember that your starter is a living ecosystem that responds to its environment and the care you provide. While there are general guidelines, observing your unique starter and adjusting your sourdough starter feeding schedule based on its behavior is key. With patience, practice, and regular feeding, your starter will become a reliable partner in your kitchen, bringing delicious, tangy loaves and pastries to life. Embrace the process, learn from your observations, and enjoy the incredible rewards of baking with your own thriving sourdough starter.
Frequently Asked Questions
What is the most crucial aspect of a sourdough starter feeding schedule?
The most crucial aspect is consistency. Following a regular schedule, such as every 12 or 24 hours, helps maintain a healthy and active starter.
Why is a sourdough starter feeding schedule important for baking success?
A consistent feeding schedule ensures your starter is at its peak activity and strength. This leads to better rise and flavor in your sourdough bread.
How does the environment affect my sourdough starter feeding schedule?
Temperature plays a significant role. Warmer environments require more frequent feedings, while cooler environments may allow for less frequent feedings.
What happens if I miss a feeding in my sourdough starter feeding schedule?
Missing a feeding can weaken the starter. If it's just a single missed feeding, simply resume your regular schedule. Prolonged neglect might require resuscitation.
Can I adjust my sourdough starter feeding schedule based on the recipe I'm using?
Yes, you can adjust it to build a stronger starter right before baking. This often involves feeding more frequently or using a higher ratio of flour and water.
Final Reflection: The Enduring Power of a Simple Start
The meticulous care given to a sourdough starter's first feed mirrors the crucial initial steps in any significant endeavor. A seemingly small act—the precise mixing of flour and water—holds the key to unlocking a world of flavor and possibility. This seemingly simple act, repeated consistently, is the foundation for something extraordinary.
The journey of nurturing a sourdough starter is a potent metaphor for life itself. The patience, consistency, and attention to detail required resonate deeply with the challenges and rewards of pursuing any long-term goal. The greatest things are simple, and many that are simple can be great.
This quote, though not directly about sourdough, perfectly captures the essence of this process and its broader implications. The seemingly insignificant daily act of feeding the starter becomes a powerful symbol of commitment and the slow, steady growth that leads to remarkable results.
Now, consider your own aspirations. What "starter" are you nurturing in your life? What project, relationship, or skill requires the same dedication and consistent effort? Remember the lessons learned from your starter's first feed: precision, patience, and unwavering commitment are the cornerstones of success. Embrace the process, celebrate the small victories, and watch as your own "starter" flourishes into something truly remarkable.
Unleash Your Inner Baker!
Thanks for taking the time to explore the world of baking with us! We hope you gained valuable insights into crafting the perfect starter feed. Ready to put your knowledge into practice?
- Craft your starter today! Follow the steps outlined in the article and watch your starter come alive. This is the key first step to amazing homemade bread.
- Share your starter journey! Post a picture of your bubbly starter on social media using #BakeWithEaseStarter – let's inspire each other!
- Explore our recipe section for delicious starter-based breads – we've got something for every taste.
Ready to experience the joy of freshly baked bread made with your own starter? What’s your favorite bread to make?