
Making Viennoiserie Dough: Hand Mixing vs Stand Mixer Guide

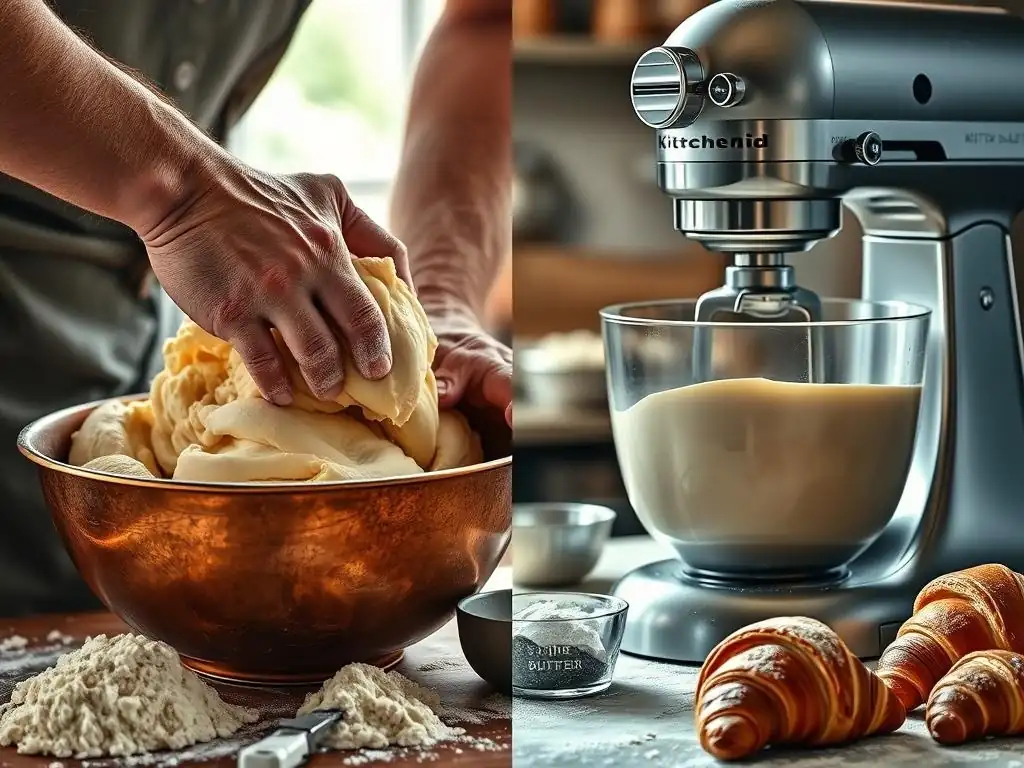
Welcome to BakeWithEase, your haven for all things baking! Ever wondered if you really need a stand mixer to achieve that perfect, flaky viennoiserie? This article dives deep into the art of hand mixing viennoiserie dough, uncovering secrets and techniques that will empower you to create delectable pastries without relying on expensive equipment. Prepare to unlock a new level of baking mastery – let's get started!
- Introduction to Viennoiserie Dough Techniques
-
Hand Mixing Viennoiserie Dough: A Step-by-Step Guide
- Ingredients for Hand-Mixed Viennoiserie Dough
- Equipment Needed for Hand Mixing Viennoiserie
- Step 1: Preparing the Dough for Hand Kneading
- Step 2: Hand Kneading the Viennoiserie Dough: The Technique
- Step 3: First Proofing of Hand-Mixed Dough
- Step 4: Incorporating the Butter Block by Hand
- Step 5: Creating the Lamination Layers by Hand
- Step 6: Final Proofing and Baking Hand-Mixed Viennoiserie
-
Stand Mixer Viennoiserie Dough: A Streamlined Approach
- Ingredients for Stand Mixer Viennoiserie Dough
- Equipment Needed for Stand Mixer Method
- Step 1: Mixing the Dough in the Stand Mixer
- Step 2: First Proofing of Stand Mixer Dough
- Step 3: Incorporating the Butter Block with the Stand Mixer Dough
- Step 4: Creating the Lamination Layers with Stand Mixer Dough
- Step 5: Final Proofing and Baking Stand Mixer Viennoiserie
- Hand Mixing vs. Stand Mixer: A Detailed Comparison for Viennoiserie Dough
- Troubleshooting Common Viennoiserie Dough Problems
- Tips for Perfect Viennoiserie, Regardless of Mixing Method
- Mastering Viennoiserie: Choosing the Right Method for You
- Conclusion: Baking Viennoiserie with Confidence
-
Frequently Asked Questions
- What are the main benefits of hand mixing viennoiserie dough compared to using a stand mixer?
- Is it possible to achieve the same quality viennoiserie dough by hand mixing as with a stand mixer?
- What are the essential techniques for successfully hand mixing viennoiserie dough?
- What are the biggest challenges when hand mixing viennoiserie dough, and how can I overcome them?
- What types of viennoiserie benefit most from being hand mixed?
- Final Reflection: The Art and Science of Viennoiserie, By Hand
- Unleash Your Inner Baker: Master Viennoiserie Dough!
Introduction to Viennoiserie Dough Techniques
Understanding Viennoiserie: A Baker's Delight
Viennoiserie refers to baked goods, often enriched with eggs, butter, milk, and sugar, distinguishing them from standard bread. Think croissants, pain au chocolat, brioche, and Danish pastries. These delightful treats are characterized by their rich flavor, tender crumb, and often, a beautifully laminated structure achieved through incorporating a butter block and performing multiple folds. Mastering viennoiserie dough is a rewarding challenge that elevates your baking skills, whether you're aiming for flaky layers or a soft, enriched loaf.
The foundation of successful viennoiserie lies in the dough's development and lamination. The dough needs sufficient gluten structure to support the layers and the significant amount of butter it will envelop. Proper mixing, whether through hand mixing viennoiserie dough or using a stand mixer, is the critical first step in developing this structure before the intricate process of lamination begins. Achieving the right balance of elasticity and extensibility is key to preventing the dough from tearing during rolling and folding.
Hand Mixing Viennoiserie Dough: A Traditional Approach
Mixing viennoiserie dough by hand is a time-honored method that connects the baker directly to the ingredients. It requires patience, physical effort, and a keen sense of touch to feel the dough's consistency as it develops. This traditional approach allows for meticulous control over gluten development, as you can instantly feel when the dough transitions from a shaggy mass to a smooth, elastic ball. Many bakers find the process of hand mixing viennoiserie dough meditative and deeply satisfying.
Historically, bakers relied solely on their hands to develop dough, including rich viennoiserie. This method builds strength and elasticity gradually, often taking longer than machine mixing but offering a unique intimacy with the dough. The warmth from your hands can slightly influence dough temperature, which is a factor to manage, but the ability to feel the dough's resistance and stickiness allows for precise adjustments, like adding a tiny bit more flour or water as needed, ensuring the dough reaches the perfect state for the subsequent steps of lamination and shaping.
Stand Mixer Method for Viennoiserie: Modern Convenience
Utilizing a stand mixer for viennoiserie dough offers a powerful and efficient alternative to manual labor. The machine's motor handles the intensive kneading, significantly reducing the physical effort and time required to develop the gluten structure. This method is particularly advantageous when working with larger batches or recipes that call for a high level of gluten development, as the mixer can maintain a consistent speed and action for extended periods without fatigue.
A stand mixer provides consistency in the mixing process, helping to ensure uniform gluten development throughout the dough. While you lose the direct tactile feedback of hand mixing viennoiserie dough, you gain speed and ease. It's crucial, however, to monitor the dough carefully in the mixer to avoid over-kneading, which can result in a tough final product. Using the appropriate attachment, typically the dough hook, and starting at a low speed before increasing, allows the mixer to efficiently bring the dough together and build strength.
Hand Mixing Viennoiserie Dough: A Step-by-Step Guide
Ingredients for Hand-Mixed Viennoiserie Dough
Crafting viennoiserie dough by hand starts with high-quality ingredients. A typical recipe might include strong bread flour (around 500g), which provides the necessary protein for gluten development, alongside milk (approximately 150-200ml), fresh yeast (about 15-20g) or active dry yeast (7-10g), sugar (around 50-80g) for sweetness and fermentation, a pinch of salt (about 8-10g) to enhance flavor and control yeast activity, and several eggs (2-3 large). These enrichments contribute to the dough's softness and richness.
Crucially, the dough will also require a significant amount of cold butter – often around 25-30% of the flour weight, so for 500g flour, you'd need 125-150g butter – to be incorporated into the dough during the initial mix, and a separate, larger block of cold butter (often 40-50% of the flour weight, so 200-250g for 500g flour) for lamination. Ensuring all ingredients, except the butter for lamination, are at cool room temperature or slightly chilled helps control dough temperature during the potentially longer hand mixing viennoiserie dough process.
Equipment Needed for Hand Mixing Viennoiserie
Mixing viennoiserie dough by hand requires minimal specialized equipment, making it accessible to home bakers. You'll need a large, sturdy mixing bowl, preferably non-reactive like stainless steel or glass. A scale is essential for accurately measuring ingredients by weight, which is crucial in baking, especially for the flour and butter ratios in viennoiserie. Measuring cups and spoons are also useful for smaller quantities like salt or yeast.
Beyond the basics, a clean, flat work surface is necessary for kneading. This could be a wooden board, a granite countertop, or even a large silicone mat. A bench scraper is invaluable for handling sticky dough, scraping the surface clean, and dividing the dough. You'll also need plastic wrap or a clean kitchen towel for covering the dough during proofing and chilling, and a rolling pin for shaping and lamination. No complex machinery is needed for hand mixing viennoiserie dough.
Step 1: Preparing the Dough for Hand Kneading
Begin by combining the dry ingredients in your large mixing bowl: flour, sugar, and salt. If using active dry yeast, you might dissolve it in lukewarm milk with a pinch of sugar first (around 105-115°F or 40-46°C) and let it bloom for 5-10 minutes until frothy. If using fresh or instant yeast, you can often add it directly to the dry ingredients, although some prefer dissolving fresh yeast in the liquid. Create a well in the center of the dry ingredients.
Pour the liquids – milk and beaten eggs – into the well. If you're incorporating butter into the dough mix itself (separate from the lamination butter block), add small, cold cubes of that butter now. Using a spatula or your hand, start mixing from the center, gradually incorporating the dry ingredients from the sides. Continue mixing until a shaggy, cohesive mass forms and there's no dry flour left in the bowl. This is the point where you'll turn the dough out onto your work surface for hand mixing viennoiserie dough.
Step 2: Hand Kneading the Viennoiserie Dough: The Technique
Once the shaggy dough is on your lightly floured surface, the kneading begins. The goal is to develop gluten, transforming the sticky mass into a smooth, elastic dough. A common technique involves pushing the dough away from you with the heel of your hand, stretching it, then folding it back onto itself, rotating the dough slightly with each fold. Repeat this push-fold-rotate motion continuously. Initially, the dough will be sticky and difficult to handle, but resist the urge to add excessive flour, which can make the dough tough.
Knead for approximately 10 to 15 minutes. As you knead, you'll feel the dough change texture; it will become less sticky, more elastic, and smoother. You can test for sufficient gluten development by performing the "windowpane test": gently stretch a small piece of dough between your fingers. If you can stretch it thin enough to see light through it without it tearing, the gluten is well-developed. If it tears easily, continue kneading. This hands-on process is key to achieving the desired structure when hand mixing viennoiserie dough.
Step 3: First Proofing of Hand-Mixed Dough
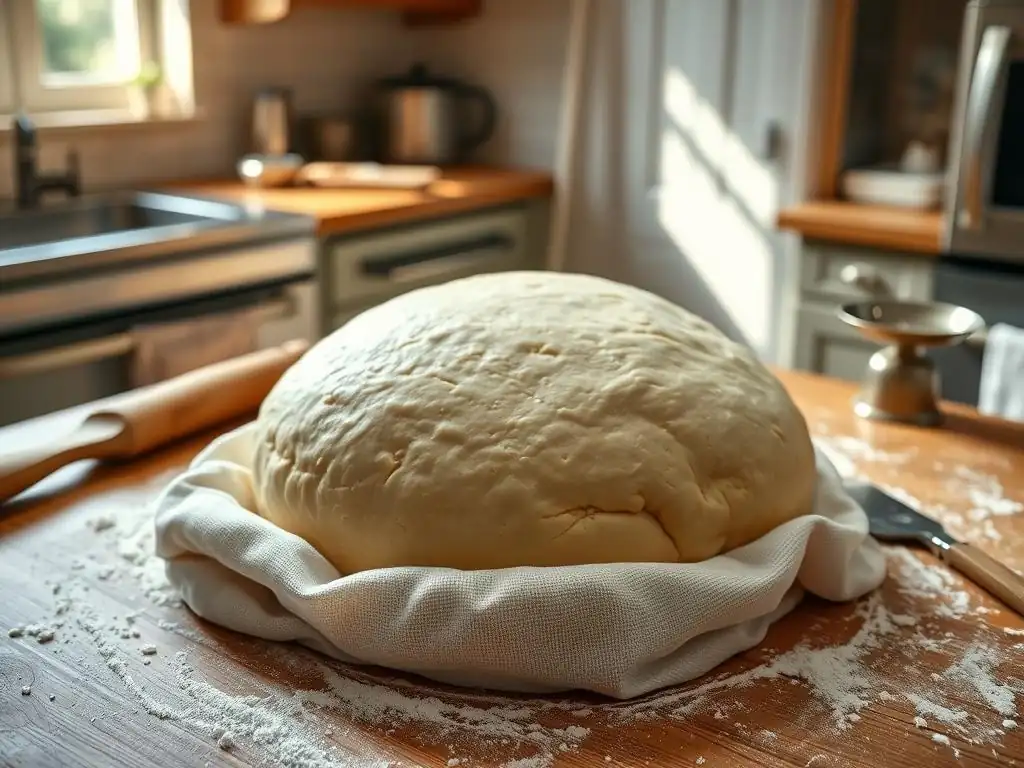
After kneading, shape the dough into a ball and place it in a lightly oiled bowl, turning to coat all sides. Cover the bowl tightly with plastic wrap or a damp towel. The first proof, often called bulk fermentation, allows the yeast to produce carbon dioxide, which makes the dough rise and develop flavor. For viennoiserie dough, which is rich and often needs to be kept cool for lamination, this proofing stage is typically done in a cool place, like the refrigerator, for several hours or even overnight.
Refrigeration slows down fermentation significantly, which is beneficial for several reasons. Firstly, it makes the dough firmer and easier to handle for the subsequent lamination process. Secondly, the slow, cold fermentation develops more complex flavors in the dough. Expect the dough to increase in size, perhaps doubling or nearly doubling, depending on the time and temperature. A cold, slow first proof is fundamental whether hand mixing viennoiserie dough or using a machine.
Step 4: Incorporating the Butter Block by Hand
The heart of viennoiserie is the lamination, which starts with incorporating a cold, pliable butter block into the dough. Prepare your butter block by shaping the cold butter (e.g., 200-250g) into a rectangle, typically about 6x8 inches or roughly one-third the size of your rolled-out dough rectangle. You can do this by placing the butter between two sheets of parchment paper and rolling or pounding it with a rolling pin until it reaches the desired dimensions and pliability – it should bend slightly without breaking.
Take your chilled dough from the first proof and roll it out on a lightly floured surface into a rectangle roughly three times the width of your butter block and slightly longer. Place the butter block on one half of the dough rectangle, leaving a small border around the edges. Fold the other half of the dough over the butter block, sealing the edges as if you were folding a book. Ensure the butter is completely enclosed within the dough. This initial step sets the stage for the delicate layers achieved after hand mixing viennoiserie dough.
Step 5: Creating the Lamination Layers by Hand
Lamination involves repeatedly rolling and folding the dough and butter package to create alternating layers of dough and butter. A common sequence is the "single fold," where you roll the dough into a rectangle, fold one end into the center, and then fold the other end over the first fold, like folding a letter into thirds. After each fold, rotate the dough 90 degrees, wrap it tightly, and chill it for 30-60 minutes to allow the gluten to relax and the butter to firm up.
You typically perform 3 to 4 folds in total, chilling between each fold. For example, you might do two single folds, chill, then two more single folds, chilling again between them. Alternatively, some recipes use "double folds," which involve folding both ends towards the center line and then folding the dough in half, like closing a book. The number and type of folds determine the final number of layers; three single folds create 27 layers (3^3), while four single folds create 81 layers (3^4). Precise rolling and chilling are crucial when hand mixing viennoiserie dough and laminating.
Step 6: Final Proofing and Baking Hand-Mixed Viennoiserie
After completing the lamination steps and chilling the dough one last time, it's ready to be shaped into croissants, pain au chocolat, or other pastries. Roll the dough to the specified thickness (often around 3-4mm), cut into shapes, and form your pastries. Place the shaped viennoiserie on baking sheets lined with parchment paper. The final proof, or proofing viennoiserie dough, is essential for the pastries to achieve their characteristic light and airy texture.
The final proof is typically done at a moderate room temperature (around 75-80°F or 24-27°C) with high humidity to prevent a skin from forming. This can take anywhere from 1 to 2.5 hours, depending on the temperature and yeast activity.
The pastries should look visibly puffy and jiggly, but not fully doubled in size, as they will expand further in the oven. Bake in a preheated oven, often starting at a higher temperature (around 400°F or 200°C) for the first 10-15 minutes to encourage a rapid rise, then reducing the temperature (to 375°F or 190°C) to ensure even baking and a golden-brown crust.
Stand Mixer Viennoiserie Dough: A Streamlined Approach
Ingredients for Stand Mixer Viennoiserie Dough
The ingredients for stand mixer viennoiserie dough are largely the same as for the hand-mixed version, focusing on quality flour, dairy, eggs, sugar, salt, and yeast. Using approximately 500g of strong bread flour, 150-200ml of milk, 7-10g of active dry yeast, 50-80g of sugar, 8-10g of salt, and 2-3 eggs provides a solid foundation. The key is accurate measurement by weight for consistent results.
As with the hand method, a portion of cold butter (125-150g) might be incorporated into the initial dough mix, and a larger block of cold butter (200-250g) is reserved for lamination. While the stand mixer handles the kneading, the quality and temperature of ingredients remain paramount. Using cold liquids and eggs can help keep the dough temperature down during machine mixing, which generates friction and heat, potentially accelerating fermentation too quickly before lamination begins.
Equipment Needed for Stand Mixer Method
The primary piece of equipment for this method is, of course, a stand mixer equipped with a dough hook attachment. A mixer with at least 300-watt power is generally recommended for handling dough effectively, though more powerful mixers (500+ watts) make the process easier. You'll also need a large mixing bowl for the mixer, a scale for accurate measurements, and measuring cups/spoons.
Similar to the hand method, a clean work surface, a bench scraper, plastic wrap, and a rolling pin are necessary for the later stages of dough handling, shaping, and lamination. While the mixer takes care of the initial kneading, the manual steps of incorporating the butter block and performing the folds still require these basic tools. The stand mixer simply replaces the strenuous hand mixing viennoiserie dough step.
Step 1: Mixing the Dough in the Stand Mixer
Combine the dry ingredients (flour, sugar, salt, and yeast if adding directly) in the stand mixer bowl. If blooming yeast, add the frothy mixture to the bowl. Add the cold milk and eggs. If incorporating butter into the dough, add small, cold cubes at this stage. Attach the dough hook.
Start mixing on the lowest speed to bring the ingredients together, scraping down the sides of the bowl as needed. Once a shaggy dough forms and no dry flour remains, increase the speed to low-medium (typically speed 2 or 3 on most mixers). Knead for 5 to 8 minutes. Watch the dough closely; it should pull away from the sides of the bowl but still stick to the bottom.
The dough should look smooth and elastic. Perform the windowpane test; if it passes, mixing is complete. Be careful not to over-knead, which is easier to do with a machine than when hand mixing viennoiserie dough.
Step 2: First Proofing of Stand Mixer Dough
After mixing in the stand mixer, the dough needs its first proof, just like hand-mixed dough. Shape the dough into a ball, place it in a lightly oiled bowl, cover tightly, and refrigerate. A cold proof for 8 to 12 hours, or even up to 24 hours, is ideal for developing flavor and making the dough firm and easy to handle for lamination.
The cold temperature significantly slows yeast activity, allowing enzymes to break down starches into sugars, contributing to better flavor and browning during baking. The chilling also firms up the butter incorporated into the dough (if any) and the dough itself, making it less sticky and more manageable for the precise rolling and folding steps required for lamination. This cold rest is a universal requirement for successful viennoiserie, regardless of whether you used a stand mixer or hand mixing viennoiserie dough.
Step 3: Incorporating the Butter Block with the Stand Mixer Dough
Once the dough has completed its cold first proof, it's time to incorporate the pre-prepared, cold yet pliable butter block. Roll out the chilled dough on a lightly floured surface into a rectangle, typically about 1/4 inch thick (around 6-7mm). The dimensions should be roughly three times the width of your butter block rectangle.
Place the butter block onto one half of the rolled-out dough, leaving a border of about an inch around the edges. Fold the other half of the dough over the butter, enclosing it completely. Press down the edges to seal the butter inside the dough package. This initial step is identical to the hand-mixing method and is crucial for creating the distinct layers that define viennoiserie.
Step 4: Creating the Lamination Layers with Stand Mixer Dough
The lamination process using stand mixer dough is the same as with hand-mixed dough. Roll the dough package into a rectangle and perform the required folds (single or double). For example, roll into a rectangle, fold into thirds (single fold), rotate 90 degrees, wrap, and chill for 30-60 minutes.
Repeat this process 2-3 more times, chilling the dough between each fold. The chilling allows the gluten to relax after the stress of rolling and prevents the butter from melting or becoming too soft, which would cause it to integrate into the dough rather than remain in distinct layers. The number of layers achieved depends on the number and type of folds (e.g., 3 single folds result in 81 layers). Precision in rolling and sufficient chilling are paramount for achieving flaky layers, regardless of how you mixed the dough initially, whether through hand mixing viennoiserie dough or machine.
Step 5: Final Proofing and Baking Stand Mixer Viennoiserie
After the final lamination fold and subsequent chilling, the dough is ready for shaping. Roll the dough to the desired thickness (usually 3-4mm), cut out shapes (like triangles for croissants or rectangles for pain au chocolat), and form your pastries. Place the shaped pastries on a baking sheet lined with parchment paper, leaving adequate space between them as they will expand.
The final proof allows the shaped pastries to rise, becoming light and airy. This should be done in a warm, humid environment (around 75-80°F or 24-27°C) for 1 to 2.5 hours. They should appear puffy and expanded, but not fully doubled. Baking follows, typically in a hot oven (starting around 400°F or 200°C for 10-15 minutes, then reducing to 375°F or 190°C) until golden brown and well-risen. Proper proofing and baking are key to the final texture, regardless of whether you opted for hand mixing viennoiserie dough or a stand mixer.
Hand Mixing vs. Stand Mixer: A Detailed Comparison for Viennoiserie Dough
Dough Consistency: Hand Mixing vs. Stand Mixer
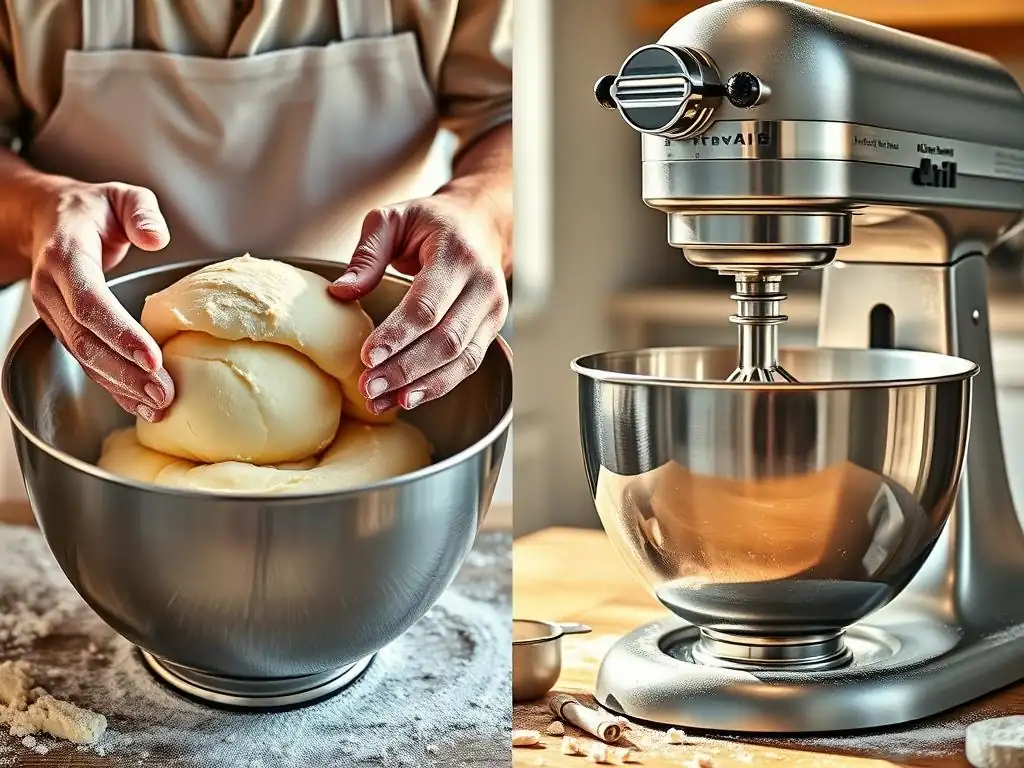
When hand mixing viennoiserie dough, you have direct tactile feedback throughout the process. Your hands can feel the dough's resistance, stickiness, and elasticity as the gluten develops. This allows for subtle adjustments in kneading pressure and speed, and a baker can immediately sense if the dough is too wet or dry and make minor corrections. The resulting dough often feels smooth and pliable, with development driven by patient effort.
A stand mixer develops gluten more rapidly and uniformly due to the consistent action of the dough hook. This can lead to a very smooth and elastic dough in a shorter time frame. However, it's easier to over-knead in a mixer, which can result in a tough dough with overly tightened gluten. Monitoring the dough visually and performing the windowpane test frequently is essential when using a machine to achieve the desired consistency, which might feel slightly more uniform compared to dough mixed by hand.
Time Commitment: Hand Kneading vs. Machine Mixing
The most significant difference between hand mixing viennoiserie dough and using a stand mixer is the time and physical effort required for the initial mixing and kneading phase. Hand kneading typically takes 10 to 15 minutes of continuous work to achieve sufficient gluten development for this type of rich dough. This requires physical exertion and can be tiring, especially for larger batches.
In contrast, a stand mixer can develop viennoiserie dough in approximately 5 to 8 minutes, depending on the mixer's power and speed setting. This drastically cuts down on the active mixing time and eliminates the physical strain. While the mixer speeds up this initial step, the subsequent stages of bulk fermentation (first proof), chilling, lamination (rolling and folding), and final proofing take the same amount of time regardless of the mixing method. So, the stand mixer primarily saves time in the initial dough formation.
Ease of Use: Hand Mixing vs. Stand Mixer for Viennoiserie
Hand mixing viennoiserie dough is arguably more physically demanding than using a stand mixer. It requires sustained effort and technique to knead the dough effectively, especially when it's initially sticky and heavy due to the rich ingredients. However, it is very accessible, requiring only basic kitchen tools and a surface. The "ease" comes from its simplicity in terms of equipment.
A stand mixer makes the kneading process effortless from a physical standpoint. You simply add ingredients, turn on the machine, and monitor. This is particularly easy for individuals who may lack the physical strength for prolonged kneading or are making large quantities. The "ease" here relates to reduced physical labor and speed. However, it requires a significant investment in the appliance itself and knowledge of how to use it correctly to avoid issues like over-kneading or overheating the dough.
Temperature Control: Impact on Hand-Mixed and Stand Mixer Dough
Temperature control is crucial in viennoiserie to prevent the butter layers from melting during lamination. Both hand mixing viennoiserie dough and using a stand mixer can influence dough temperature. Hand kneading transfers body heat to the dough, which can slightly raise its temperature over the 10-15 minutes of work, potentially accelerating fermentation prematurely if not managed.
A stand mixer generates friction heat from the mechanical action, which can warm the dough even more quickly than hand mixing, especially if mixed at higher speeds or for too long. To counteract this, bakers often use colder ingredients (like chilled milk or eggs) when using a mixer. Regardless of the method, chilling the dough thoroughly after mixing and between lamination steps is non-negotiable for maintaining the cold temperature necessary for distinct butter layers.
Best Practices for Viennoiserie Dough Mixing
Whether you choose to mix by hand or with a stand mixer, several best practices apply. Always weigh your ingredients accurately; consistency is key in baking, especially with complex doughs like viennoiserie. Ensure your ingredients are cold, particularly the liquids and any butter added during the initial mix, to help control dough temperature during kneading.
Develop the gluten sufficiently but avoid over-kneading. For hand mixing viennoiserie dough, this means kneading until the dough passes the windowpane test and feels smooth and elastic, typically 10-15 minutes. For a stand mixer, it's usually 5-8 minutes on low-medium speed. Monitor the dough constantly. Finally, always perform a proper cold bulk fermentation after mixing to rest the dough, develop flavor, and make it firm for lamination.
Troubleshooting Common Viennoiserie Dough Problems
Dough Too Sticky: Solutions for Both Methods
A common issue when hand mixing viennoiserie dough or using a stand mixer is overly sticky dough. This is often caused by too much hydration (too much liquid relative to flour) or insufficient gluten development. If the dough is just slightly sticky after initial mixing/kneading, resist adding large amounts of flour immediately. A very light dusting on your work surface during hand kneading can help, or continuing to mix in the stand mixer for another minute or two might help the gluten absorb the moisture.
If the dough is excessively sticky and won't come together or develop structure, it indicates a significant hydration imbalance. You may need to carefully knead in a small amount of additional flour, tablespoon by tablespoon, until the desired consistency is reached. For hand mixing viennoiserie dough, sprinkle flour onto your work surface and knead it in.
In a stand mixer, add a tablespoon of flour at a time and mix on low until incorporated before checking the consistency again. Remember that viennoiserie dough is enriched and won't be as stiff as lean bread dough, but it shouldn't be unmanageably sticky.
Dough that is too dry lacks sufficient moisture and will feel stiff, crumbly, and difficult to knead or develop gluten. This usually results from using too much flour or not enough liquid in the recipe. Dry dough will not stretch properly during kneading or lamination and will result in dense, tough pastries.
If you notice the dough is too dry early in the mixing process (either hand mixing viennoiserie dough or in the stand mixer), you can carefully add a tiny amount of extra liquid (milk or water), a teaspoon at a time. Knead or mix it in completely before adding more. Continue adding liquid sparingly until the dough reaches the correct consistency – pliable and slightly tacky, but not sticky. Adding too much liquid at once can make the dough too wet, so add slowly and check the dough's feel frequently.
Butter Leaking During Lamination: Prevention and Fixes
Butter leaking out of the dough during lamination is a common problem and usually indicates that the butter block was too soft or the dough was too warm during rolling. The ideal temperature for the butter block is cold but pliable, similar to cold modeling clay. If the butter is too hard, it can break into pieces; if too soft, it melts into the dough. The dough itself must also be cold and firm.
Prevention is key: Ensure both the dough and butter block are adequately chilled (ideally 35-40°F or 2-4°C) and pliable before you start rolling. Work quickly and use a lightly floured surface. If you notice butter starting to squeeze out, especially during rolling, stop immediately. Wrap the dough well and return it to the refrigerator for at least 30-60 minutes to firm up completely before attempting to roll again. Rolling on a cold surface, like marble or granite, can also help keep the dough and butter cool, whether you started by hand mixing viennoiserie dough or using a mixer.
Uneven Layers: Achieving Uniform Lamination
Uneven layers in your final viennoiserie can result from inconsistent rolling and folding during lamination. If the dough is not rolled to an even thickness before folding, or if the folds are not precise (e.g., edges not aligned), the layers of dough and butter will not be uniform throughout the pastry. This can lead to some areas being overly buttery or doughy, and the pastry may not rise evenly.
To achieve uniform layers, always roll the dough package to an even thickness across the entire rectangle. Use a ruler if necessary. When folding, be precise; align the edges neatly before completing the fold. Ensure the corners are square. Also, make sure the dough is well-rested and chilled between folds; this allows the gluten to relax, making the dough easier to roll evenly without tearing, which is vital whether you used hand mixing viennoiserie dough or a machine initially. Gentle, even pressure when rolling is also important.
Tips for Perfect Viennoiserie, Regardless of Mixing Method
Importance of Cold Ingredients
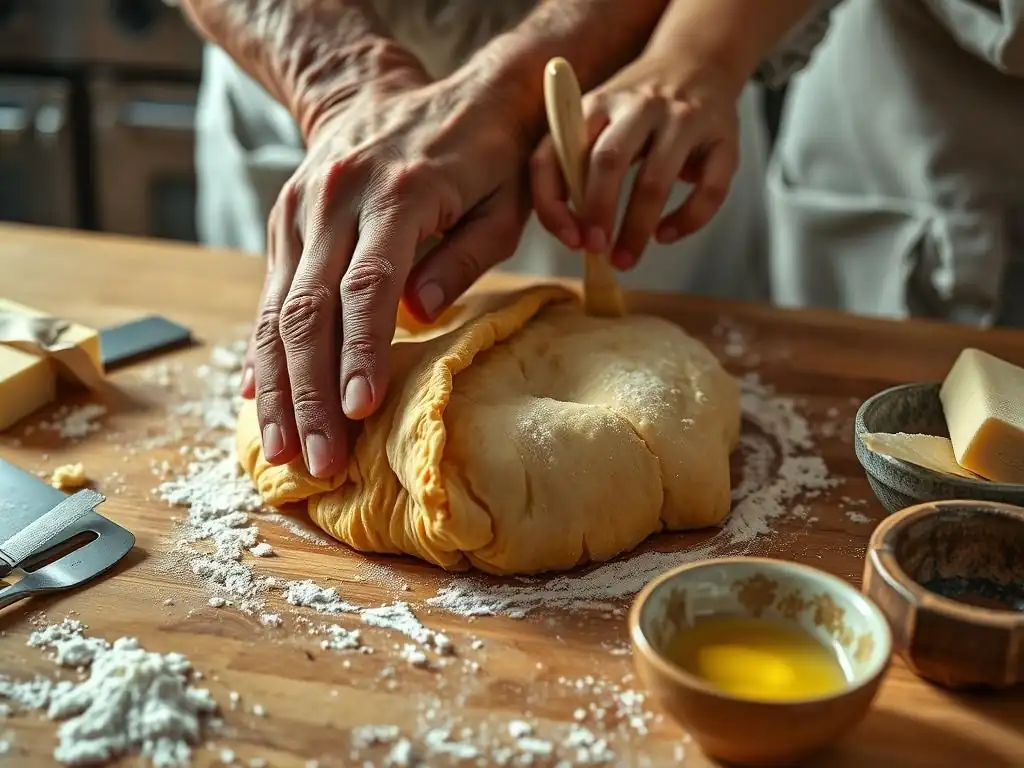
Maintaining cold temperatures is perhaps the single most critical factor for successful viennoiserie, whether you are hand mixing viennoiserie dough or using a stand mixer. Using cold milk, eggs, and even flour (by chilling it briefly) helps to keep the dough temperature down during the initial mixing, which generates heat through friction (machine) or physical effort (hand).
Crucially, the butter block for lamination must be cold but pliable. If the dough or butter is too warm during lamination, the butter will melt into the dough instead of staying in distinct layers. This results in a greasy dough and a dense, bread-like texture rather than the desired flaky layers. Chilling the dough thoroughly after mixing and between each fold is absolutely essential for keeping the butter solid and creating those beautiful, separate layers.
Proper Proofing Techniques
Proofing, both the initial bulk fermentation and the final proof of the shaped pastries, is vital for texture and flavor development. The first proof for viennoiserie dough is typically a long, cold fermentation in the refrigerator (8-24 hours). This slow rise develops complex flavors and makes the dough firm for lamination.
The final proof of shaped viennoiserie (croissants, pain au chocolat, etc.) should be done in a warm, humid environment (around 75-80°F / 24-27°C) until the pastries are visibly puffy and jiggly, but not doubled in size (usually 1-2.5 hours). Over-proofing can cause the butter to leak during baking and result in a poor rise. Under-proofing leads to a dense, heavy texture. A humid environment prevents the surface from drying out and forming a skin, which would restrict expansion during baking. This applies equally whether you began by hand mixing viennoiserie dough or using a stand mixer.
Baking for Optimal Rise and Color
Baking is the final step where the magic of lamination is revealed. Viennoiserie is typically baked in a hot oven to encourage a rapid rise and create steam from the melting butter, which helps separate the layers. A common method is to start baking at a higher temperature, such as 400°F (200°C), for the first 10-15 minutes. This initial heat causes the water in the butter to flash into steam, forcing the dough layers apart.
After this initial high-heat burst, the temperature is often reduced to around 375°F (190°C) to allow the pastries to bake through evenly and achieve a rich, golden-brown color without burning the exterior. Baking time varies depending on the size and type of pastry, but croissants often take 20-25 minutes, while pain au chocolat might take slightly longer. A properly baked viennoiserie will be golden, flaky, and sound hollow when tapped on the bottom, regardless of whether you started by hand mixing viennoiserie dough or with a machine.
Mastering Viennoiserie: Choosing the Right Method for You
When to Choose Hand Mixing
Choosing to mix viennoiserie dough by hand is a great option if you enjoy a more traditional, hands-on approach to baking. It allows for a direct connection with the dough, letting you feel its development and make intuitive adjustments. This method is also ideal if you don't have access to a stand mixer or prefer not to use one.
Hand mixing viennoiserie dough is also suitable for smaller batch sizes where the physical effort is less demanding. It teaches patience and develops a deeper understanding of dough texture and gluten development through tactile experience. Many bakers find the process therapeutic and rewarding, valuing the physical connection to their craft over mechanical speed.
When to Choose a Stand Mixer
A stand mixer is the preferred tool if you bake viennoiserie frequently, make larger batches, or want to minimize the physical effort involved in kneading rich dough. The machine handles the strenuous work efficiently, saving time and ensuring consistent gluten development without fatigue.
Using a stand mixer allows you to focus on other aspects of the preparation while the dough is mixing, making the overall process feel more streamlined. It's particularly helpful when working with very stiff or sticky doughs that would be challenging to knead by hand. For many home bakers, the stand mixer offers a level of convenience that makes tackling complex recipes like viennoiserie more approachable, especially compared to the labor-intensive process of hand mixing viennoiserie dough.
Shaping and Assembly: Croissants and Pain au Chocolat
After the final lamination and chilling, the dough is ready to be transformed into iconic viennoiseries. For croissants, the dough is typically rolled into a large rectangle (around 16x12 inches for a standard batch), then cut into long triangles with a base of about 3-4 inches. Each triangle is gently stretched at the base and rolled up from the wide end to the tip, creating the classic crescent shape.
For pain au chocolat, the dough is rolled into a rectangle and cut into smaller rectangles (around 3x4 inches). One or two pieces of high-quality baking chocolate are placed near one end, and the dough is rolled up to enclose the chocolate. Precise cutting and gentle handling are key during shaping to maintain the delicate layers created during lamination, irrespective of whether you used hand mixing viennoiserie dough or a stand mixer for the initial step.
Conclusion: Baking Viennoiserie with Confidence
Mastering viennoiserie dough is a journey that rewards precision, patience, and practice. Whether you choose the traditional path of hand mixing viennoiserie dough or the modern convenience of a stand mixer, the fundamental principles remain the same: using quality ingredients, developing gluten properly, maintaining cold temperatures during lamination, and proofing and baking with care. Each method offers a unique experience and set of advantages.
Ultimately, the choice between hand mixing and a stand mixer depends on your personal preference, available equipment, and batch size. Both methods can yield spectacular results – flaky croissants, rich pain au chocolat, and tender brioche. By understanding the process, paying attention to detail at each step, and troubleshooting common issues, you can bake viennoiserie with confidence and enjoy the delicious fruits of your labor. Happy baking!
Frequently Asked Questions
What are the main benefits of hand mixing viennoiserie dough compared to using a stand mixer?
Hand mixing allows for greater control over the dough's development and temperature. It also helps you avoid overmixing, which can result in tough viennoiserie.
Is it possible to achieve the same quality viennoiserie dough by hand mixing as with a stand mixer?
Yes, absolutely! While it requires more effort, hand mixing can produce exceptional results. The key is to be patient and mindful of the dough's feel.
What are the essential techniques for successfully hand mixing viennoiserie dough?
Gentle folding and pressing are crucial. Focus on incorporating the butter evenly without warming it too much. Also, remember to rest the dough at appropriate intervals.
What are the biggest challenges when hand mixing viennoiserie dough, and how can I overcome them?
Maintaining the dough's cold temperature is a significant challenge. Use cold ingredients, work in a cool environment, and rest the dough frequently in the refrigerator.
What types of viennoiserie benefit most from being hand mixed?
While all viennoiserie can be hand mixed, those with higher butter content, like croissants, often benefit. The gentle process helps ensure the butter layers remain distinct.
Final Reflection: The Art and Science of Viennoiserie, By Hand
The seemingly simple act of mixing viennoiserie dough reveals a profound connection between technique, patience, and the final product. Whether you choose the power of a stand mixer or the intimacy of hand mixing, the journey itself is a testament to the enduring appeal of handcrafted baking. The subtle nuances in texture and flavor, often imperceptible to the untrained palate, become profoundly apparent when you've invested the time and effort into the process.
The exploration of hand mixing versus stand mixing for viennoiserie dough has highlighted more than just a difference in methods; it's revealed a deeper understanding of the dough's behavior and the baker's role in its transformation. The most beautiful thing we can experience is the mysterious. It is the source of all true art and science.
- Albert Einstein. This quote resonates deeply, as the seemingly simple act of mixing dough becomes a journey of discovery, a dance between human touch and the unfolding chemistry of flour, water, and yeast. The subtle shifts in the dough's consistency, the feel of the gluten developing under your fingertips – these are the sensory experiences that elevate baking from a task to an art.
Now, consider your own approach to baking. Will you embrace the efficiency of a stand mixer, or will you find solace and connection in the meditative rhythm of hand mixing? Regardless of your choice, remember that the true reward lies not just in the golden-brown, flaky layers of the finished product, but in the journey itself. Embrace the process, savor the details, and let the experience enrich your understanding of this beautiful craft. The next time you approach your mixing bowl, remember the power you hold in your hands – the power to create something truly special.
Unleash Your Inner Baker: Master Viennoiserie Dough!
Thanks for taking the time to explore the world of viennoiserie dough with us! We hope you now feel confident in choosing the right mixing method for your baking journey. Ready to put your newfound knowledge to the test?
- Bake your dream croissants: Select your preferred method (hand mixing or stand mixer) and get started on that perfect, flaky pastry. Don't forget to share your creations with us!
- Experiment with different flours: Try substituting different types of flour and observe the effects on the dough's texture and flavor. Document your results – you might discover your new favorite flour blend!
- Join our baking community: Share your baking triumphs (and even your flops!) on our social media channels. We love to see what you create and answer any lingering questions you have.
What unique twist will you add to your next viennoiserie creation? Let's hear your baking ideas in the comments below!