
Unlock the Secrets of Flaky Viennoiserie Texture

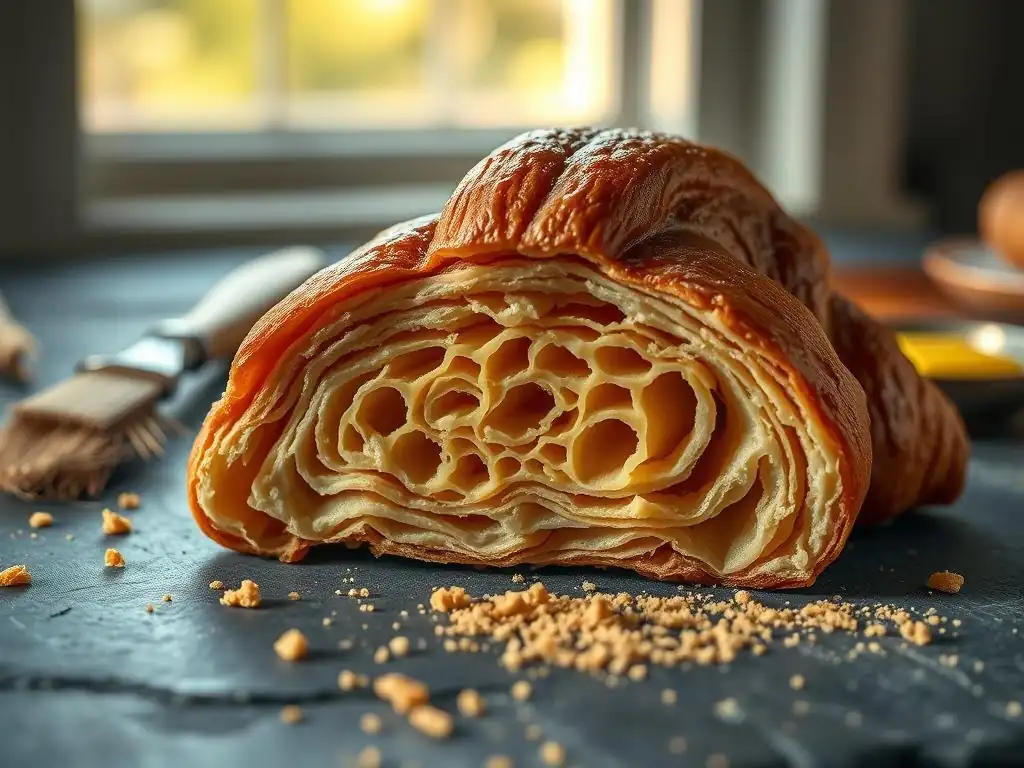
Welcome to BakeWithEase, your trusted guide to baking brilliance! Ever wondered how professional bakers achieve that impossibly flaky viennoiserie texture? You're in the right place. We're about to unlock those secrets, revealing the techniques and insights that will elevate your pastries from good to unforgettable. Get ready to master the art of layering and discover the science behind perfect flakiness. Let's get baking!
- Introduction to Flaky Viennoiserie: Achieving Bakery-Quality Layers at Home
- Essential Ingredients for Perfect Flaky Viennoiserie
- Mastering the Dough: The Foundation of Flaky Viennoiserie
- The Art of Lamination: Creating Flaky Layers
- Proofing Viennoiserie: Preparing for the Oven
- Baking for Maximum Flakiness: Temperature and Techniques
- Troubleshooting Common Viennoiserie Problems
- Storing and Enjoying Your Homemade Viennoiserie
- Advanced Viennoiserie Techniques for the Ambitious Baker
- Conclusion: Mastering the Art of Flaky Viennoiserie
-
Frequently Asked Questions
- How can I achieve a truly flaky texture in my viennoiserie?
- What is the importance of butter temperature when making viennoiserie?
- What are some common mistakes that prevent viennoiserie from being flaky?
- How does the type of flour used affect the final texture of viennoiserie?
- How many folds are typically needed for optimal flakiness in viennoiserie dough?
- Final Reflection: The Enduring Allure of Flaky Perfection
- Unleash Your Inner Pâtissier: Master Flaky Perfection!
Introduction to Flaky Viennoiserie: Achieving Bakery-Quality Layers at Home
What is Viennoiserie and Why is Flakiness Important?
Viennoiserie refers to baked goods made from an enriched yeast dough, often laminated with butter. Think of classic pastries like croissants, pain au chocolat, and Danish pastries. These are distinct from simple breads due to the addition of ingredients like eggs, sugar, and milk, which enrich the dough, and crucially, the process of lamination.
The defining characteristic of a truly exceptional viennoiserie is its flakiness. This delicate, crisp texture, with visible layers that shatter slightly when bitten into, is the hallmark of mastery. Achieving this specific flaky viennoiserie texture is what elevates these pastries from merely sweet bread to a sublime culinary experience. It's the difference between a dense roll and a light, airy pastry that seems to melt in your mouth.
The Science Behind Flaky Layers: Butter, Dough, and Steam
The secret to that coveted flaky viennoiserie texture lies in the careful layering of dough and butter, a technique known as lamination. As the pastry bakes in a hot oven, the butter layers melt. The water content in the butter (typically around 16-18% even in high-fat butter) turns to steam.
This trapped steam is what physically pushes the thin layers of dough apart. The dough layers, having developed enough gluten structure, expand and crisp up around these steam pockets. Simultaneously, the heat causes the Maillard reaction and caramelization on the exterior, creating that beautiful golden-brown crust and contributing to the complex flavor. It's a delicate balance: the butter must remain in distinct layers until baking, and the dough must be strong enough to puff but tender enough to separate, all contributing to the flaky viennoiserie texture secrets.
Essential Ingredients for Perfect Flaky Viennoiserie
Choosing the Right Flour for Viennoiserie
The type of flour you use plays a significant role in developing the structure needed to support the flaky layers. A flour with a moderate protein content, typically between 10% and 12%, is often ideal. All-purpose flour can work well, provided its protein level falls within this range. Too little protein and the dough won't be strong enough to hold its structure during lamination and baking; too much protein (like in some high-gluten bread flours) can make the dough too elastic and difficult to roll thinly without tearing, potentially hindering the development of a light, flaky viennoiserie texture.
For example, using a flour like King Arthur Baking Company's All-Purpose Flour, which has a protein content of around 11.7%, provides a good balance. It allows for sufficient gluten development to create a resilient dough that can withstand multiple folds and rolling, yet remains pliable enough to stretch without excessive resistance. This ensures the dough layers are thin and uniform, setting the stage for successful lamination and ultimately, the desired flaky viennoiserie texture.
The Importance of High-Quality Butter in Viennoiserie
Butter is not just an ingredient; it is the architect of flakiness in viennoiserie. Using a high-quality butter with a high-fat content (ideally 82% or higher) is crucial. European-style butters typically fit this description. The higher fat percentage means less water compared to standard butter (around 80% fat), which is vital because excess water in the butter can cause it to integrate too much with the dough during lamination or proofing, preventing the formation of distinct layers.
Moreover, the consistency of the butter is paramount. It needs to be cold enough to remain solid during lamination, but pliable enough to roll out evenly with the dough without breaking into pieces. Many bakers find that briefly beating cold butter helps achieve the right malleability. Brands like Plugrá or Kerrygold are popular choices due to their high-fat content and relative availability, providing a good starting point for unlocking flaky viennoiserie texture secrets through quality ingredients.
Other Key Ingredients: Yeast, Sugar, and Salt
Beyond flour and butter, yeast, sugar, and salt are fundamental to viennoiserie. Yeast (either active dry or instant) is responsible for leavening the dough, creating the airy pockets within the pastry's structure during proofing and the initial stages of baking. The amount used typically ranges from 1% to 2% of the flour weight for instant yeast, affecting the proofing time and flavor development.
Sugar serves multiple purposes: it feeds the yeast, aids in browning the crust through caramelization, and contributes to the tenderness and flavor of the final product. Recipes often call for sugar in amounts around 10% to 15% of the flour weight. Salt is equally important; it controls yeast activity, strengthens the gluten network, and significantly enhances the overall flavor, balancing the richness of the butter and sweetness from the sugar.
A typical salt percentage is around 1.8% to 2% of the flour weight. These ingredients, in precise balance, support the dough structure and fermentation necessary for achieving that perfect flaky viennoiserie texture.
Mastering the Dough: The Foundation of Flaky Viennoiserie
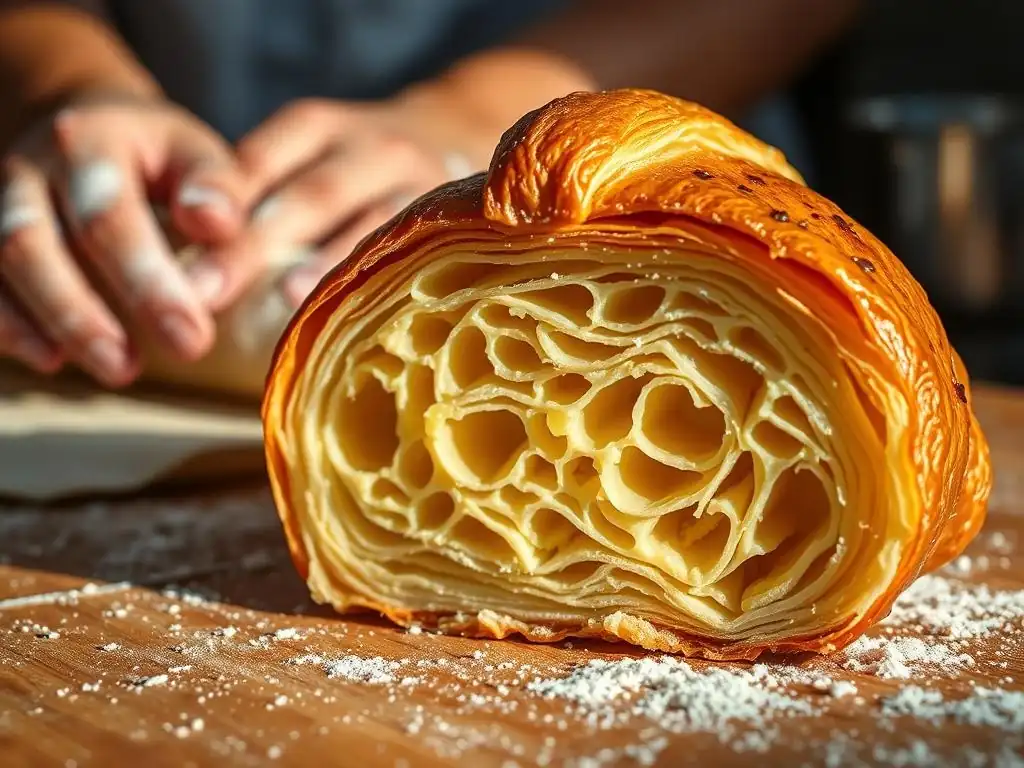
Preparing the Viennoiserie Dough: A Step-by-Step Guide
Creating the initial dough for viennoiserie is a process focused on bringing ingredients together while keeping them cool. The typical method involves combining the dry ingredients (flour, sugar, salt, yeast) and then adding cold liquids (often milk and sometimes eggs) and incorporating them just until a shaggy dough forms. Unlike standard bread dough, initial kneading is often minimal – just enough to bring it together.
The dough is then typically subjected to a short period of mixing or light kneading, followed immediately by chilling. A common approach is to mix the dough for only 5-7 minutes on low speed in a stand mixer. This limited initial kneading prevents excessive gluten development too early.
The dough is then shaped into a rectangle, wrapped, and placed in the refrigerator to chill thoroughly, often for several hours or overnight, reaching a temperature of about 4-8°C (40-46°F). This chilling is paramount for controlling yeast activity and preparing the dough for the lamination process required to achieve a flaky viennoiserie texture.
The Importance of Dough Temperature Control
Maintaining a consistently cold dough temperature is arguably one of the most critical factors in successful viennoiserie production and a key secret to flaky viennoiserie texture. From mixing through lamination, the dough must be kept cold, ideally between 4°C and 8°C (40°F and 46°F). This low temperature prevents the yeast from becoming too active prematurely and, more importantly, keeps the butter block solid and distinct within the dough layers during rolling and folding.
If the dough becomes too warm, the butter will start to soften, melt, and potentially bleed into the dough layers. This mixing of butter and dough obliterates the distinct layers necessary for flaking. Working in a cool environment and giving the dough ample chilling time between folds (typically 30-60 minutes per chill) are non-negotiable steps. Ignoring temperature control is a common pitfall that prevents bakers from achieving that desired light, flaky viennoiserie texture.
Developing Gluten: Achieving the Right Dough Structure
While initial kneading is light, the dough still requires sufficient gluten development to provide the necessary structure. Gluten, the protein network formed when flour is mixed with water and worked, gives the dough its elasticity and strength. This strength is needed to allow the dough to be rolled out thinly without tearing and to provide the framework that will expand and crisp up around the melting butter during baking.
Much of the gluten development in viennoiserie dough occurs not during initial kneading, but during the extended cold fermentation periods between lamination steps. The long rest allows the proteins to hydrate and align naturally. By the time the dough is ready for shaping, it should be elastic and extensible. You can test for sufficient gluten by gently stretching a small piece of dough; it should stretch thin enough to see light through it without tearing easily – the "windowpane" effect. This balanced gluten structure is foundational to achieving a delicate yet structured flaky viennoiserie texture.
The Art of Lamination: Creating Flaky Layers
Understanding Lamination: The Key to Viennoiserie Texture
Lamination is the signature technique that transforms a simple enriched dough into a layered marvel, unlocking the secrets of flaky viennoiserie texture. It involves enclosing a block of cold butter within the dough and then repeatedly rolling and folding the combined dough and butter. Each fold creates multiple alternating layers of dough and butter.
The goal is to create dozens, or even hundreds, of incredibly thin, parallel layers. When these layers are subjected to the high heat of the oven, the butter melts and releases steam, which forces the dough layers apart, creating the characteristic airy, flaky structure. Without proper lamination, you simply cannot achieve the distinct, crisp layers that define authentic viennoiserie.
The Beurrage (Butter Block): Preparation and Incorporation
The "beurrage" is the carefully prepared block of butter that is laminated into the dough. It's crucial that the butter is cold but pliable, having a similar consistency to the dough. Typically, cold butter is shaped into a flat rectangle, often by placing it between parchment paper and gently beating it with a rolling pin, then rolling it smoothly. A common size might be a square or rectangle roughly half the size of the rolled-out dough envelope.
Incorporating the beurrage involves rolling the chilled dough into a larger rectangle, often twice the size of the butter block. The butter block is placed on one half of the dough, and the other half is folded over to completely enclose the butter, sealing the edges. This forms the starting point for lamination, ensuring the butter is fully encased before the rolling and folding process begins. The success of this initial step is vital for preventing butter leaks during subsequent folds and maintaining the integrity of the layers needed for a truly flaky viennoiserie texture.
Folding Techniques: Single, Double, and Book Folds Explained
There are two primary folding techniques used in lamination: the single fold and the double (or book) fold. In a single fold, the rolled-out dough/butter rectangle is folded into thirds, like folding a letter. One end is folded to the center, and then the other end is folded over the first. This effectively triples the number of dough and butter layers each time it is performed.
The double fold, also known as a book fold because it resembles a closed book, involves folding both ends of the rolled-out rectangle towards the center seam, and then folding the dough in half along that seam. This technique quadruples the number of layers with each fold. Recipes will specify which folds to use and how many, as the combination determines the final layer count and ultimately influences the flaky viennoiserie texture. After each fold, the dough must be rotated 90 degrees before rolling again to ensure even layering.
Number of Folds: Finding the Sweet Spot for Optimal Flakiness
The number of folds performed during lamination is a critical factor influencing the final flaky viennoiserie texture. While more folds create more layers, there is a point of diminishing returns. A typical recipe for croissants or pain au chocolat calls for 3 to 4 total folds, which might be a sequence of single folds or a combination of single and double folds.
For example, three single folds result in a theoretical 17 layers of dough and 16 layers of butter before the final shaping and rolling. Four single folds would yield 33 layers of dough and 32 layers of butter. A common combination is one single fold followed by two double folds, resulting in a similar high number of layers (theoretically 33 dough, 32 butter).
Too few folds (e.g., only one or two) will result in thick, bready layers rather than delicate flakes. Too many folds (e.g., five or more) can cause the butter layers to break down and integrate too much with the dough, leading to a less distinct and potentially tougher crumb rather than the desired flaky viennoiserie texture.
Proofing Viennoiserie: Preparing for the Oven
Understanding the Proofing Process for Viennoiserie
Proofing is the final rise that shaped viennoiserie undergoes before baking. During this time, the yeast continues to ferment, producing carbon dioxide gas that causes the pastries to expand and become light and airy. This stage is just as crucial as lamination for achieving the desired flaky viennoiserie texture and volume.
Proper proofing develops the open, tender crumb structure inside the pastry. However, proofing viennoiserie is delicate because the distinct butter layers must be preserved. The goal is sufficient expansion without the butter melting and pooling, which would prevent the layers from separating in the oven. It's a careful balance of time, temperature, and humidity.
Optimal Proofing Temperature and Humidity
Proofing temperature is critical for viennoiserie because the butter layers must remain intact. Unlike standard bread dough which might proof at warmer temperatures, viennoiserie is best proofed at a relatively cool temperature, typically between 24°C and 26°C (75°F and 79°F). Proofing at temperatures much higher than this risks melting the butter before the dough has fully risen.
Humidity is also essential during proofing to prevent the surface of the pastries from drying out and forming a skin. A dry skin restricts the dough's ability to expand evenly and can result in a less voluminous pastry with a compromised flaky viennoiserie texture.
A proofing box with controlled temperature and humidity is ideal, but home bakers can create a humid environment by placing the pastries in a slightly warm, turned-off oven with a pan of hot water on the rack below. Proofing time can vary, but often takes 1.5 to 3 hours depending on the environment and yeast activity.
Signs of a Properly Proofed Viennoiserie
Knowing when your viennoiserie is perfectly proofed requires careful observation. The pastries should have increased significantly in size, typically becoming about 50% to 75% larger than their shaped size. They should look visibly puffy and feel light when gently lifted.
A common test is the "poke test": gently press the side of a pastry with your fingertip. If the indentation slowly springs back about halfway, the pastry is usually ready to bake. If the indentation springs back completely and immediately, it needs more proofing time. If the indentation remains fully depressed and doesn't spring back at all, it is likely over-proofed, and the butter may have begun to melt, which will negatively impact the flaky viennoiserie texture. It's better to slightly under-proof than significantly over-proof.
Baking for Maximum Flakiness: Temperature and Techniques
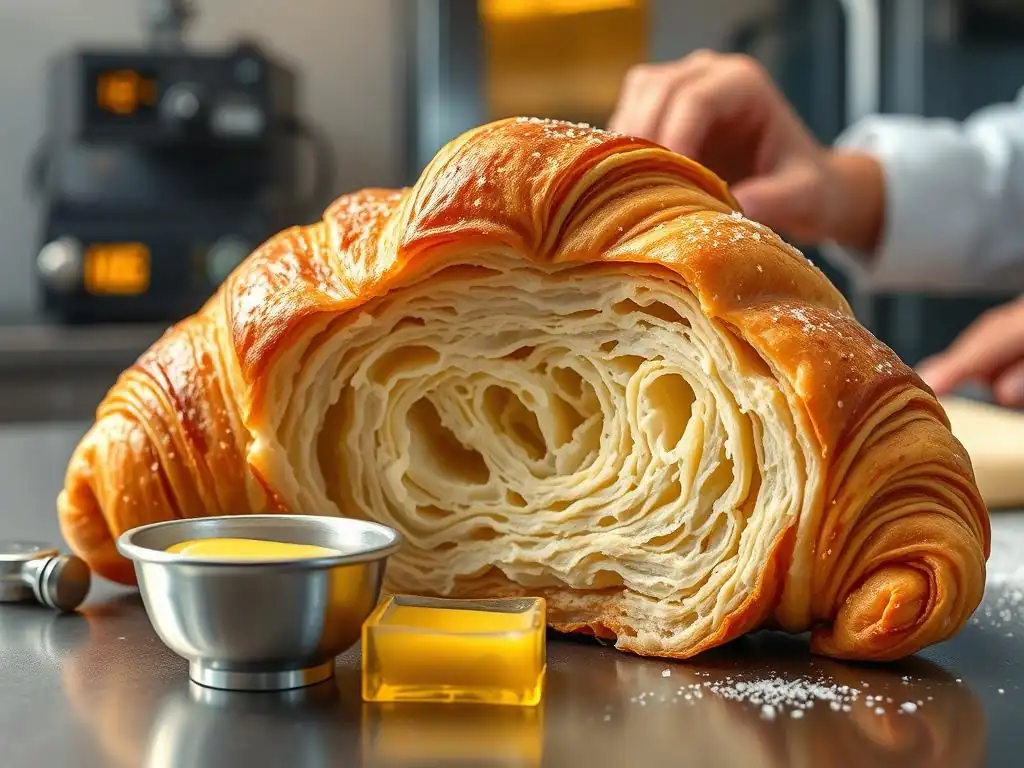
Achieving Oven Spring: The Secret to Lifted Layers
Oven spring is the initial rapid expansion of the dough when it's first placed in a hot oven. This burst of growth is fueled by residual yeast activity and the rapid conversion of water into steam within the dough and especially from the melting butter layers. Maximizing oven spring is a key secret to achieving height and promoting the separation of the flaky layers.
To achieve significant oven spring, the oven must be properly preheated to a high temperature before the pastries go in. A hot oven ensures that the surface of the dough doesn't set too quickly, allowing the internal gases and steam to push the layers apart effectively. This explosive expansion in the first few minutes of baking is what gives viennoiserie its characteristic lift and contributes significantly to the final flaky viennoiserie texture.
Ideal Baking Temperature for Viennoiserie
Baking viennoiserie often involves starting at a high temperature to maximize oven spring, then reducing the temperature to ensure the interior cooks thoroughly without burning the exterior. A common approach is to preheat the oven to a high temperature, such as 200-220°C (400-430°F). The pastries are placed in the hot oven, and this temperature is maintained for the first 10-15 minutes.
After this initial high-heat phase, the temperature is typically reduced to a moderate range, around 180-190°C (350-375°F), for the remaining baking time. The total baking time varies depending on the size and type of pastry, but often ranges from 15 to 25 minutes. This two-stage temperature approach ensures both maximum layer separation from initial steam production and even cooking through to the center, resulting in a beautifully golden and flaky viennoiserie texture.
Using Steam to Enhance Flakiness and Crust Development
Adding steam to the oven at the beginning of the baking process is another technique that significantly enhances flaky viennoiserie texture and crust quality. Steam keeps the surface of the dough moist and pliable for the first few minutes of baking. This prevents a crust from forming too early, allowing the pastry to expand fully and achieve maximum oven spring.
As the steam dissipates, the moist surface promotes better caramelization and Maillard reactions, resulting in a richer, deeper golden-brown color and a thinner, crispier crust. Home bakers can generate steam by placing a heat-safe pan on the bottom rack of the oven while preheating and carefully pouring hot water into it just as the pastries are placed in the oven. Be cautious when adding water to avoid burns. This simple step contributes greatly to achieving that desired delicate and crisp flaky viennoiserie texture.
Monitoring Doneness: Visual Cues and Internal Temperature
Knowing exactly when your viennoiserie is done baking is crucial for both flavor and texture. Visually, properly baked pastries should be a deep, rich golden brown all over, including between the layers. They should look light and expanded, with clearly defined, separated layers visible on the sides.
For ultimate accuracy, especially with larger pastries like croissants, an instant-read thermometer is recommended. The internal temperature should reach at least 90-93°C (195-200°F) in the center. Baking for the correct amount of time ensures the dough is fully cooked through, preventing a raw or doughy interior, which would ruin the flaky viennoiserie texture you worked so hard to achieve. Under-baked pastries will collapse slightly upon cooling and lack the crispness of properly baked ones.
Troubleshooting Common Viennoiserie Problems
Why Isn't My Viennoiserie Flaky?
One of the most frustrating issues is when your viennoiserie turns out dense or bready instead of light and flaky. The most common culprit is temperature control during lamination and proofing. If the butter gets too warm and melts into the dough before baking, the distinct layers are lost, and there's no butter left to create steam and separate the dough. Insufficient chilling between folds or proofing in too warm an environment are primary causes.
Other reasons include not performing enough folds during lamination (resulting in too few layers), the dough being too tough (over-kneaded initially or not rested enough), or insufficient oven spring (oven not hot enough, or under-proofed dough). Ensuring your ingredients are cold, working quickly, chilling frequently, proofing at the correct temperature, and baking in a properly preheated, hot oven are key steps to troubleshoot and unlock flaky viennoiserie texture secrets.
Dough Too Tough or Too Soft: Adjusting Hydration
The consistency of your initial dough affects how well it handles during lamination. If the dough is too tough or tight, it will resist rolling, making it difficult to create thin, even layers and potentially tearing. This can be caused by using flour with too high a protein content, over-kneading the dough initially, or not allowing sufficient rest time for gluten to relax.
Conversely, if the dough is too soft or sticky, it will be difficult to handle and roll without sticking, and it may not have enough structure to support the layers during proofing and baking. This often results from using too much liquid (high hydration) or not enough flour.
A typical hydration for croissant dough is around 50-55% of the flour weight. If your dough consistently seems too tough or too soft, consider slightly adjusting the amount of liquid in your next batch (e.g., add a tablespoon less water if too soft, a tablespoon more if too tough) while ensuring accurate measurement of dry ingredients.
Butter Leaking During Baking: Prevention and Solutions
Butter leaking out of your pastries during baking is a clear sign that something went wrong with the layering or proofing process, and it will unfortunately result in a less flaky viennoiserie texture. The most common cause is the butter melting before it gets into the hot oven, either during an over-long or too-warm proofing period, or because the shaped pastries weren't sufficiently chilled before baking. If the butter is already liquid or too soft when it hits the heat, it simply melts away instead of creating steam between the layers.
To prevent this, ensure your proofing environment is at the correct cool temperature (24-26°C) and not too warm. Always bake viennoiserie directly from a chilled state; place the shaped, proofed pastries in the refrigerator for 15-30 minutes before baking if your proofing environment was warm or if you suspect they might leak. If butter does leak significantly during baking, there's little you can do at that point to save the flakiness, but understanding the cause helps prevent it next time you attempt to bake flaky viennoiserie texture.
Uneven Baking: Tips for Consistent Results
Achieving uniform browning and flakiness across all your pastries can be challenging due to oven hot spots and variations in pastry size or placement. Uneven baking means some pastries might be perfectly golden and flaky while others are pale or overdone.
To combat uneven baking, ensure your oven is accurately calibrated – oven temperatures can vary significantly from the dial setting. Using an oven thermometer is recommended. Always preheat your oven thoroughly, allowing it ample time to reach and stabilize at the target temperature. Arrange pastries on the baking sheet with sufficient space between them (they expand!)
to allow for even heat circulation; overcrowding is a common mistake. Rotating the baking sheet halfway through the baking time (e.g., turning it 180 degrees) can also help ensure more consistent browning and development of flaky viennoiserie texture across the batch. Using a baking stone or steel can also help regulate oven temperature and provide even heat from below.
Storing and Enjoying Your Homemade Viennoiserie
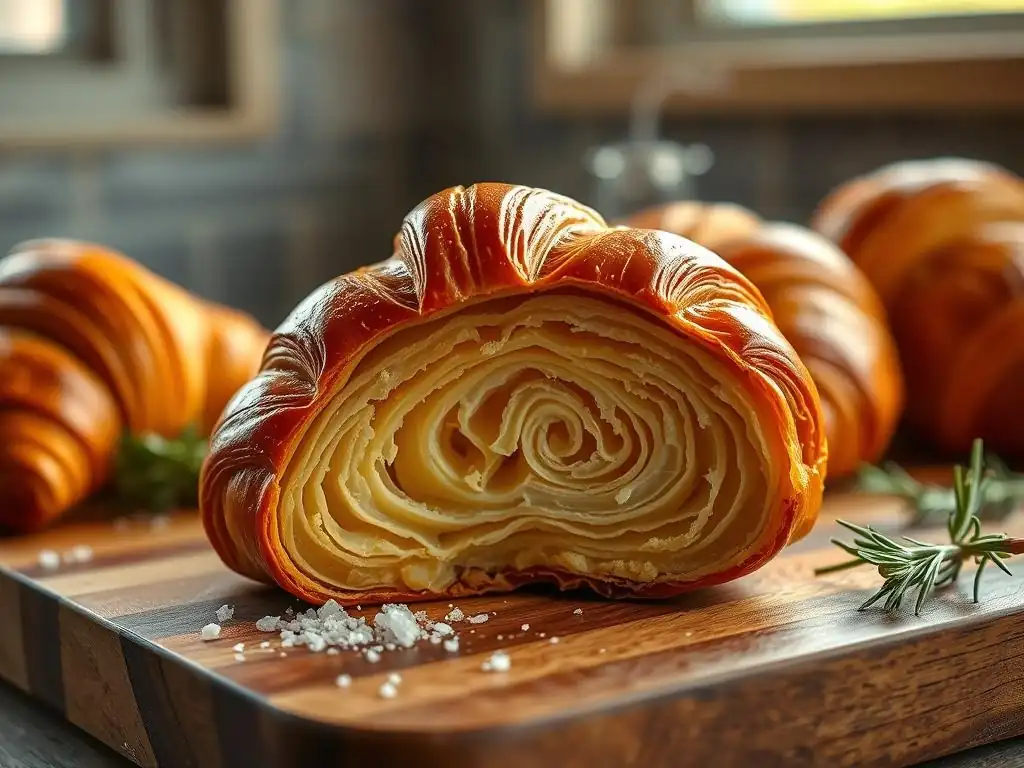
Best Practices for Storing Baked Viennoiserie
Freshly baked viennoiserie is best enjoyed within a few hours of coming out of the oven, when the flaky viennoiserie texture is at its peak crispness. However, leftovers can be stored. To maintain some semblance of crispness for up to a day, store baked pastries loosely wrapped in paper bags at room temperature. Avoid plastic bags or airtight containers at room temperature, as these trap moisture and will quickly make the crust soft and chewy, ruining the flaky texture.
For longer storage, allow the pastries to cool completely, then wrap them tightly in plastic wrap and aluminum foil or place them in a freezer-safe bag. Frozen viennoiserie can be stored for 1-2 months. Freezing is preferable to refrigeration, as refrigeration tends to dry out baked goods and degrades texture.
Reheating Viennoiserie for a Fresh-Baked Taste
To revive the crisp, flaky viennoiserie texture of stored pastries, reheating is recommended. Avoid the microwave at all costs, as it will turn them soft and rubbery. The best method is to reheat them in an oven or toaster oven.
Preheat your oven to a moderate temperature, around 175°C (350°F). Place the pastries directly on the oven rack or on a baking sheet. Reheat for 5-10 minutes for room temperature pastries, or 10-15 minutes for frozen ones (no need to thaw first). The goal is to warm them through until the butter within the layers re-melts slightly and the exterior crisps up again. This brings them remarkably close to their fresh-baked state, allowing you to enjoy that wonderful flaky viennoiserie texture once more.
Creative Ways to Enjoy Your Flaky Viennoiserie Creations
While classic croissants and pain au chocolat are delightful on their own, your homemade flaky viennoiserie creations can be enjoyed in many ways. Of course, pairing them with a good cup of coffee or tea is a timeless pleasure, allowing the delicate flaky viennoiserie texture and rich buttery flavor to shine.
Beyond enjoying them plain, consider slicing croissants horizontally and using them as a base for sweet or savory sandwiches. They make an excellent vehicle for ham and cheese, smoked salmon, or even a simple spread of jam and butter. Day-old viennoiserie that has lost some of its crispness can be transformed into a luxurious bread pudding. You can also get creative with toppings – brush warm pastries with a simple sugar glaze, dip them in chocolate, or fill them with pastry cream or fruit compotes for an extra treat.
Advanced Viennoiserie Techniques for the Ambitious Baker
Exploring Different Lamination Techniques
Once you've mastered the basic single and double folds, there are more advanced lamination techniques and dough types to explore that can impact the final flaky viennoiserie texture. Some bakers experiment with different numbers or sequences of folds (e.g., three double folds instead of a mix).
You can also try laminating richer doughs, such as a brioche dough. This creates pastries like Kouign Amann, which have a different, more caramelized texture due to the higher sugar and butter content in the base dough itself, in addition to the laminated butter. An even more advanced technique is reverse lamination, where the dough is actually enclosed within the butter block. This method can be trickier but is sometimes used to ensure the butter stays cold and distinct, potentially yielding an even more exaggerated flaky viennoiserie texture.
Incorporating Flavors into Your Viennoiserie Dough
Elevate your viennoiserie by incorporating flavors directly into the dough itself. Beyond classic fillings like chocolate or almond cream, you can add citrus zest (orange or lemon), ground spices like cardamom or cinnamon, or even extracts like vanilla or almond to the initial dough mixture.
For a chocolate viennoiserie dough base (beyond just pain au chocolat filling), you can substitute a small percentage of the flour with high-quality cocoa powder (ensure it's unsweetened cocoa powder). When adding dry ingredients like spices or cocoa, ensure they are well-whisked into the flour before adding liquids to ensure even distribution. When adding extracts or zest, incorporate them with the liquid ingredients. Be mindful that adding significant amounts of dry ingredients might slightly affect the hydration, potentially requiring minor adjustments to achieve the right dough consistency for successful lamination and a desirable flaky viennoiserie texture.
Creating Unique Viennoiserie Shapes and Designs
Moving beyond the standard croissant and pain au chocolat shapes allows for creative expression and can subtly influence the final texture. Common shapes include escargots (snail shapes, often filled with pastry cream and raisins), palmiers (rolled and sliced, creating crisp layers), and various forms of Danish pastries with centers designed to hold fillings.
The way a pastry is shaped affects how the layers expand in the oven. For example, tightly rolling a croissant helps create the characteristic crescent shape and contributes to its rise. Cutting dough into specific patterns for Danish pastries allows for different layer arrangements. Experimenting with shaping not only makes your pastries visually appealing but is also part of mastering how the laminated dough behaves in the oven to achieve different expressions of flaky viennoiserie texture. Each shape presents its own challenges and rewards in terms of proofing and baking.
Conclusion: Mastering the Art of Flaky Viennoiserie
Recap of Key Techniques for Achieving Flaky Viennoiserie Texture
Achieving that elusive, perfect flaky viennoiserie texture is a rewarding baking challenge that hinges on a few critical techniques. It starts with selecting the right ingredients, particularly a balanced flour and high-fat butter. Mastering the dough involves careful mixing, minimal initial kneading, and crucial temperature control throughout the process.
The heart of viennoiserie lies in lamination – the precise layering of dough and butter through repeated rolling and folding, followed by adequate chilling. Proper proofing at a cool temperature and high humidity allows the dough to expand without melting the butter. Finally, baking in a hot oven, often with steam, provides the necessary oven spring and even heat to create those hundreds of delicate, separated layers. Patience, precision, and temperature management are the ultimate secrets to unlocking flaky viennoiserie texture secrets at home.
Embrace the Baking Journey: Experiment and Perfect Your Skills
Mastering viennoiserie is a journey that takes practice and patience. Don't be discouraged if your first attempts aren't perfectly flaky. Each batch is an opportunity to learn about how your ingredients behave, how your kitchen environment affects the dough and butter, and how your oven bakes.
Start with classic recipes and focus on perfecting each step: ingredient temperatures, the consistency of your butter block, the tension and evenness of your rolling, the precision of your folds, the signs of proper proofing, and the visual cues of a perfectly baked pastry. As you gain confidence, you can experiment with different recipes, shapes, and flavors. The process of creating flaky viennoiserie is intricate, but the reward of biting into a warm, crisp, and airy pastry you made yourself is truly unparalleled. Keep baking, keep learning, and you will unlock the secrets of flaky viennoiserie texture.
Frequently Asked Questions
How can I achieve a truly flaky texture in my viennoiserie?
Achieving flakiness comes down to laminating the dough correctly. This involves creating alternating layers of dough and butter, ensuring the butter remains cold throughout the process to prevent it from melting and absorbing into the dough.
What is the importance of butter temperature when making viennoiserie?
Butter temperature is crucial. The butter needs to be cold and firm but pliable enough to be worked with. If it's too soft, it will melt into the dough, resulting in a dense, less flaky final product.
What are some common mistakes that prevent viennoiserie from being flaky?
Common mistakes include overworking the dough, using butter that is too warm, and not allowing sufficient resting time between folds. These errors can compromise the distinct layers needed for flakiness.
How does the type of flour used affect the final texture of viennoiserie?
Using a strong bread flour with a higher protein content is recommended. This creates a dough with enough gluten development to hold the layers of butter and dough together while baking, contributing to the flakiness.
How many folds are typically needed for optimal flakiness in viennoiserie dough?
Generally, three to four single or double folds are sufficient to create a good lamination. Over-folding can lead to a tough dough, so it's important to find the right balance for achieving the desired flaky viennoiserie texture.
Final Reflection: The Enduring Allure of Flaky Perfection
The pursuit of the perfect flaky viennoiserie texture is not merely a culinary quest; it's a testament to the enduring power of meticulous technique and a deep understanding of fundamental principles. The secrets revealed within this article—from the precise hydration of the dough to the crucial role of lamination—are not just recipes for success, but pathways to unlocking a deeper appreciation for the artistry of baking. This understanding translates directly to improved results in your own kitchen, regardless of your skill level.
The impact of mastering viennoiserie techniques extends far beyond the simple act of creating delicious pastries. It's a journey of discovery, a process of learning patience and precision, and a celebration of the transformative power of ingredients working in harmony. The best things in life are worth waiting for,
and this certainly holds true for the rewarding experience of achieving that perfect, shatteringly flaky croissant or pain au chocolat. The subtle nuances of texture – the delicate layers, the airy lightness, the satisfying crunch – are a testament to the dedication and skill involved.
Now, consider your own baking journey. What challenges have you faced in achieving that elusive flakiness? What new techniques will you incorporate into your next baking project? I invite you to embrace the spirit of experimentation, to refine your skills, and to savor the profound satisfaction of creating viennoiserie that not only tastes exquisite but also embodies the perfect balance of art and science. The secrets are out there; now it's your turn to unlock them and share the magic of flaky perfection with the world.
Unleash Your Inner Pâtissier: Master Flaky Perfection!
Thanks for taking the time to delve into the world of flaky viennoiserie! We hope you now feel confident in tackling those buttery layers. Ready to put your newfound knowledge into practice?
- Bake your dream croissants: Use our techniques to create perfectly layered, golden-brown croissants this weekend. Don't forget to share a picture with us!
- Experiment with different fillings: Explore the endless possibilities beyond classic butter—think chocolate, almond cream, or even savory options. What unique combination will you create?
- Join our baking community: Share your experiences and ask questions in the comments below. Let's inspire each other to reach new baking heights!
What innovative viennoiserie creation will you bake next?