
Common Buttercream Mistakes and How to Avoid Them

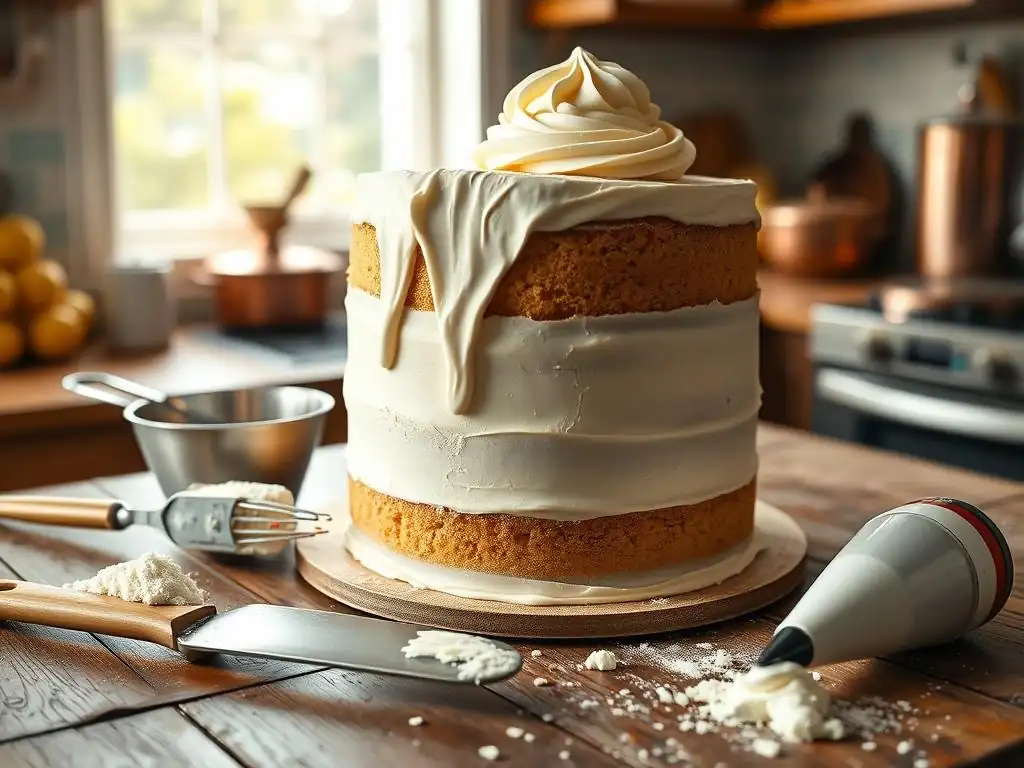
Welcome to BakeWithEase, your trusted companion on your baking journey! Ever wondered why your buttercream frosting isn't quite as smooth and dreamy as you envision? Dive in as we unravel some common buttercream mistakes and provide practical troubleshooting tips to achieve that perfect, velvety finish. Prepare to elevate your cakes and cupcakes with our expert advice!
- Common Buttercream Mistakes and How to Avoid Them: Buttercream Frosting Troubleshooting Tips for Perfect Results
- Introduction to Buttercream Frosting Troubleshooting
- Mistake #1: Grainy Buttercream and How to Fix It
- Mistake #2: Buttercream That's Too Soft or Melts Easily
- Mistake #3: Buttercream That's Too Stiff or Crusted Over
- Mistake #4: Buttercream with an Unpleasant Buttery Taste
- Mistake #5: Buttercream Separation or Curdling
- Mistake #6: Buttercream Lacking Flavor or Depth
- Mistake #7: Buttercream with Air Bubbles
- General Buttercream Troubleshooting Tips and Best Practices
- Conclusion: Mastering Buttercream with BakeWithEase
-
Frequently Asked Questions
- What are the most common mistakes people make when making buttercream frosting?
- How do I fix buttercream that is too runny?
- My buttercream looks curdled and separated. What went wrong?
- What's the best way to achieve a smooth, lump-free buttercream?
- Can I use different types of butter for buttercream frosting?
- Final Reflection: Mastering the Art of Flawless Buttercream
- Unlock Your Perfect Buttercream: Master the Art of Flawless Frosting!
Common Buttercream Mistakes and How to Avoid Them: Buttercream Frosting Troubleshooting Tips for Perfect Results
Introduction to Buttercream Frosting Troubleshooting
Creating beautiful, smooth buttercream frosting is a rewarding part of baking, but it can sometimes feel like navigating a minefield. From grainy textures to soupy messes, encountering issues is common for bakers of all levels. Understanding why these problems occur is the first step to mastering this versatile topping. This article provides essential buttercream frosting troubleshooting tips to help you identify, fix, and prevent the most frequent mishaps, ensuring your cakes and cupcakes look and taste fantastic.
Buttercream frosting serves as both a delicious filling and a decorative canvas, making its consistency and flavor crucial. Whether you're aiming for a classic vanilla American buttercream or a delicate Swiss meringue, running into trouble can be frustrating. These common challenges, however, are almost always fixable with the right knowledge and techniques. Let's dive into the specifics of what can go wrong and how to apply effective buttercream frosting troubleshooting tips to achieve consistently perfect results.
Why Buttercream Goes Wrong: Understanding Common Issues
Buttercream is an emulsion, a delicate balance of fat (butter) and liquid (milk, cream, or meringue base), often stabilized and sweetened with sugar. Problems typically arise when this balance is disrupted or when ingredients aren't properly prepared or combined. Temperature plays a massive role; butter that is too cold won't cream properly, while butter that is too warm can lead to a greasy, separated mess. Sugar, especially granulated sugar in American buttercream, must be fully dissolved to avoid a gritty texture.
Beyond ingredient preparation, the mixing process itself is critical. Over-whipping can incorporate too much air, leading to bubbles, while insufficient mixing might leave ingredients uncombined or sugar undissolved. Even the environment can affect your buttercream; high humidity can make frosting too soft, and cold temperatures can make it too stiff. Recognizing these potential pitfalls is key to effective buttercream frosting troubleshooting and preventing issues before they even start.
BakeWithEase's Guide to Perfect Buttercream: Avoiding Beginner Mistakes
Mastering buttercream starts with understanding the fundamentals and being mindful of common errors. Many beginner mistakes stem from impatience or not paying close attention to ingredient temperatures and mixing times. For instance, adding powdered sugar too quickly to creamed butter can instantly seize the mixture, or using butter straight from the fridge will result in a lumpy texture that's hard to fix.
Our guide at BakeWithEase focuses on providing actionable buttercream frosting troubleshooting tips that address these fundamental errors. We emphasize the importance of using room temperature ingredients, mixing for the correct duration at the right speed, and understanding the nuances of different buttercream types. By following simple best practices, you can dramatically reduce the likelihood of encountering common problems and build confidence in your buttercream-making skills.
Mistake #1: Grainy Buttercream and How to Fix It
A grainy texture is perhaps one of the most disappointing issues you can encounter when making buttercream. Instead of a smooth, luxurious feel, you're left with tiny sugar crystals that are unpleasant on the palate. This problem is almost exclusively associated with buttercreams that use powdered or granulated sugar directly mixed with butter, such as American buttercream.
The good news is that grainy buttercream is often fixable, though prevention is always easier. Understanding the cause is the first step in applying the right buttercream frosting troubleshooting tips for this specific issue. Don't despair if your batch isn't perfectly smooth on the first try; with a few adjustments, you can usually salvage it.
The Culprit: Undissolved Sugar in Buttercream
The primary reason behind grainy buttercream is sugar that hasn't fully dissolved into the fat and liquid components. In American buttercream, powdered sugar is typically added to creamed butter. While powdered sugar is very fine, it can still contain small crystalline particles or clumps. If it's not mixed thoroughly enough or if there isn't sufficient moisture to help dissolve it, these particles remain, creating that undesirable gritty texture.
Using granulated sugar in recipes not designed for it (like directly creaming it with butter without cooking it into a syrup first, as in Swiss or Italian meringue buttercreams) will almost guarantee a grainy result because granulated sugar crystals are much larger and require heat and liquid to dissolve properly. Even with powdered sugar, using a brand with larger crystal sizes or not sifting it can contribute to the problem. Proper buttercream frosting troubleshooting tips for graininess always circle back to ensuring that sugar is completely incorporated and dissolved.
Solution: Ensuring Smoothness Through Proper Mixing Techniques
The most effective way to fix grainy buttercream is to continue mixing it. Often, the mixture just needs more time for the sugar particles to dissolve into the butter and any added liquid (like milk or cream). Use a stand mixer with the paddle attachment on medium-low speed. Allow it to mix for several minutes, sometimes 5-10 minutes or even longer, scraping down the sides of the bowl periodically. The friction from the mixing can also help generate a little warmth, aiding dissolution.
If extended mixing alone doesn't work, adding a tiny amount of liquid (like a tablespoon of milk, cream, or even a neutral oil) can provide the necessary moisture to help the sugar dissolve. Add it slowly while mixing on low speed. Another buttercream frosting troubleshooting tip involves gently warming the bowl.
You can do this by placing the mixing bowl over a very gently simmering pot of water (ensure the bottom of the bowl doesn't touch the water) for just a minute or two, stirring constantly, then returning it to the mixer to whip again until smooth. Be careful not to melt the butter entirely.
Tips for Dissolving Sugar Effectively
Preventing grainy buttercream starts with preparation. Always sift your powdered sugar before adding it to the butter. This breaks up clumps and aerates the sugar. When adding the sifted sugar to the creamed butter, add it gradually, perhaps a cup at a time, mixing well after each addition on a low speed to avoid a cloud of sugar dust. Once all the sugar is incorporated, increase the speed to medium and beat for several minutes (e.g., 3-5 minutes) to give the sugar time to dissolve.
- Sift powdered sugar before use.
- Add sugar gradually to creamed butter.
- Mix on medium speed for several minutes after all sugar is incorporated.
- Ensure butter is at the correct room temperature (soft but not greasy, around 68-70°F or 20-21°C) for optimal creaming.
- If using a recipe with liquid, ensure it's added at the right stage to help dissolve sugar.
If your buttercream still feels slightly grainy, a powerful buttercream frosting troubleshooting tip is to switch to the whisk attachment and whip on medium-high speed for a minute or two after the initial mixing. This can sometimes help polish the texture, though be mindful of introducing too many air bubbles (which we'll address later).
Mistake #2: Buttercream That's Too Soft or Melts Easily
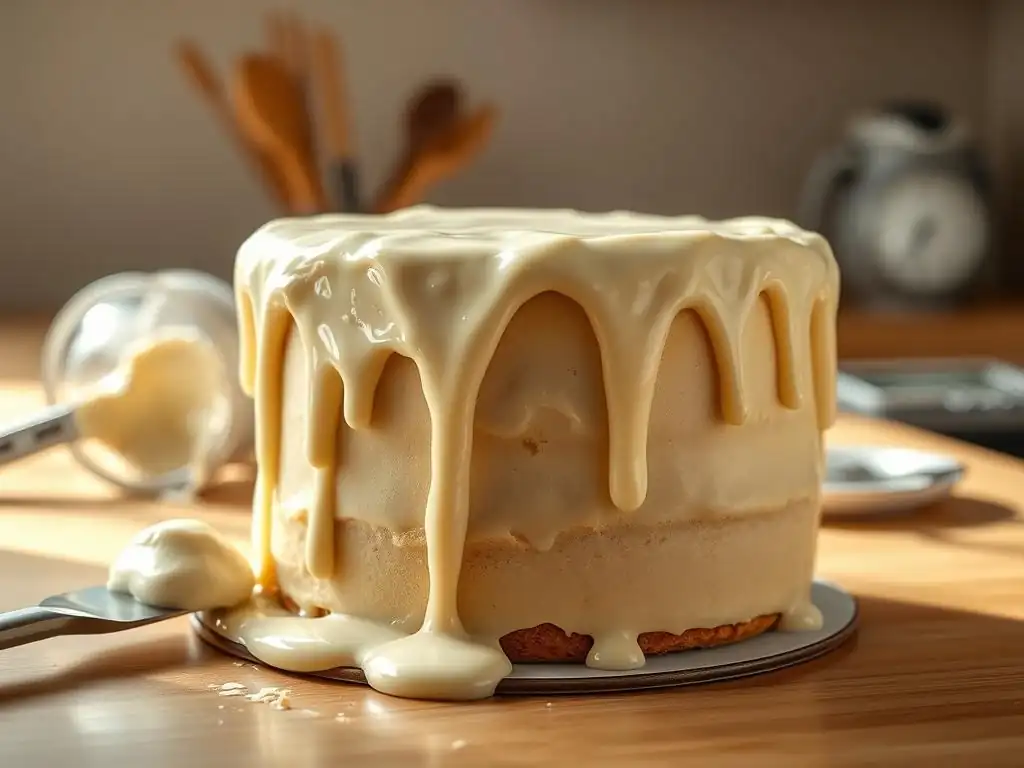
Nothing is quite as frustrating as piping beautiful swirls onto cupcakes only to watch them sag and melt before your eyes. Buttercream that is too soft or lacks stability is a common issue, especially in warm environments or when applied to warm cakes. This problem often results in decorations losing their shape and the frosting sliding off the baked goods.
Identifying the root cause of overly soft buttercream is crucial for applying the correct buttercream frosting troubleshooting tips. It's usually related to temperature or the fat-to-sugar ratio, but humidity can also play a significant role. Understanding how these factors interact will help you achieve a stable, pipeable consistency every time.
The Cause: Temperature Problems in Buttercream
The most frequent culprit behind overly soft buttercream is temperature, specifically the temperature of your butter and the ambient temperature of your kitchen. If your butter is too warm or melted when you start, the resulting frosting will be greasy and loose because the fat molecules aren't able to form a stable structure when whipped. Similarly, if you're working in a warm kitchen (above 75°F or 24°C), the heat will quickly soften the butter component of the frosting, leading to a melty consistency.
Another factor can be adding liquids (like milk, cream, or flavor extracts) that are too warm or adding too much liquid relative to the amount of fat and sugar. This throws off the emulsion and can make the buttercream slack. Effective buttercream frosting troubleshooting tips for soft frosting always involve managing temperature and adjusting the ingredient balance if necessary.
Solution: Controlling Buttercream Temperature for Stability
The primary solution for overly soft buttercream is chilling. Place the mixing bowl of soft buttercream in the refrigerator for 15-25 minutes. Check it periodically; you want the edges to start firming up, but the center should still be relatively soft. Once chilled, return the bowl to your mixer and beat it again, starting on low speed and gradually increasing to medium. This re-creams the butter and helps it emulsify properly as it cools down, restoring a stable consistency.
If the buttercream is extremely soft or separated, you might need a more intensive buttercream frosting troubleshooting tip. Take about 1/4 to 1/2 cup of the soft buttercream and gently melt it in the microwave or a small saucepan until it's liquid (don't let it get hot, just melted). With the mixer running on low speed, slowly drizzle this melted buttercream back into the main batch. This provides a warm fat component that can help re-emulsify the mixture and bring it back together into a stable consistency.
Achieving the Right Consistency: Refrigeration and Whipping Techniques
To achieve and maintain the right consistency, start with butter that is truly at room temperature – soft enough to dent easily with your finger but not shiny or greasy. If your kitchen is warm, you might need to slightly chill your butter before starting. After making your buttercream, especially American buttercream, if it feels too soft, refrigerate it for a short period (10-20 minutes) and then re-whip it. This is a common buttercream frosting troubleshooting tip used by professionals.
For meringue-based buttercreams (Swiss or Italian), which are more stable due to the cooked sugar syrup and egg whites, temperature is still key. Ensure the meringue is cooled to near room temperature before adding the butter. If the finished meringue buttercream is too soft, chilling and re-whipping is the standard fix. If it's very soft or curdled, chilling it thoroughly until quite firm (even an hour or more) and then beating it vigorously with the paddle attachment can often bring it back together.
- Chill soft buttercream in the refrigerator for 15-25 minutes.
- Re-whip chilled buttercream on medium speed.
- For severely soft/separated buttercream, try melting a small portion and re-incorporating it while mixing.
- Ensure your initial butter is at the correct room temperature (68-70°F).
- Work in a cool environment if possible.
Remember that American buttercream will always be less stable than meringue-based buttercreams in warm conditions. For hot days or tiered cakes, consider using a meringue buttercream or adding a stabilizer like a small amount of meringue powder or cornstarch (for American buttercream, added with the powdered sugar).
Mistake #3: Buttercream That's Too Stiff or Crusted Over
On the opposite end of the spectrum from soft, melty buttercream is frosting that is too stiff, difficult to spread or pipe, and sometimes develops a dry crust on the surface. This can make decorating a challenge, leading to torn cakes and uneven finishes. Stiff buttercream often results from temperature or moisture issues.
Understanding why your buttercream has become stiff is key to loosening it up without compromising its texture or flavor. Fortunately, stiff buttercream is usually easier to fix than soft buttercream, requiring the addition of a little moisture or warmth. Applying the right buttercream frosting troubleshooting tips will make your frosting pliable and easy to work with.
The Culprit: Overmixing and Dehydration of Buttercream
Stiff buttercream is frequently caused by overmixing, particularly in American buttercream. Whipping buttercream for too long can incorporate excessive air and also lead to some moisture evaporation, making the frosting denser and stiffer. Similarly, if a recipe calls for a specific amount of liquid (like milk or cream) and too little is added, the buttercream will naturally be stiffer.
Another common reason is temperature. Buttercream stored in the refrigerator or a very cold room will become quite firm due as the butter solidifies. While this is expected for storage, it needs to be addressed before use. Lastly, exposure to air can cause the surface of buttercream to dry out and form a crust, especially in drier environments. Proper storage is a simple buttercream frosting troubleshooting tip to prevent this.
Solution: Adding Moisture and Softening Stiff Buttercream
The most straightforward solution for stiff buttercream is to add a small amount of liquid. Start with a tablespoon of milk, cream, or even water (if flavor isn't a concern). Add the liquid while mixing the buttercream on low speed. Increase the speed slightly to incorporate, and assess the consistency. Add more liquid, a teaspoon at a time, until the desired consistency is reached. Be cautious not to add too much at once, as you can quickly go from too stiff to too soft.
If the stiffness is primarily due to refrigeration, simply letting the buttercream sit at room temperature for 30-60 minutes will allow the butter to soften. Then, give it a good whip in your mixer (with the paddle attachment) for a few minutes to restore its creamy texture. This re-creaming process is essential after chilling.
How to Revive Dry or Crusted Buttercream
If your buttercream has developed a crust from sitting out, the best approach is to scrape off the crusted layer if it's significant. Then, transfer the remaining buttercream to your mixer. Add a small amount of liquid (1-2 teaspoons of milk or cream) and beat on low speed. As it mixes, the liquid will help rehydrate the slightly dried portions and soften the overall batch.
- Add liquid (milk, cream, or water) gradually while mixing to soften stiff buttercream. Start with 1 tablespoon.
- Allow refrigerated buttercream to come to room temperature (30-60 minutes) before re-whipping.
- Re-whip stiff or rehydrated buttercream on medium speed until smooth and pliable.
- Scrape off significant crusting before attempting to revive the batch.
For very small batches that are stiff, you can sometimes work in a teaspoon of liquid by hand with a spatula, but for consistency, a mixer is recommended. Always cover leftover buttercream tightly with plastic wrap pressed directly onto the surface to prevent drying and crusting during storage. This simple step is a valuable buttercream frosting troubleshooting tip for future use.
Mistake #4: Buttercream with an Unpleasant Buttery Taste
While buttercream is made of butter, you don't want it to taste overwhelmingly like plain butter with sugar. A good buttercream should taste balanced, allowing other flavors (like vanilla or chocolate) to shine, or simply having a pleasant, creamy sweetness. If your buttercream has a strong, sometimes greasy, buttery aftertaste, it can detract significantly from your baked goods.
Addressing an unpleasant buttery taste involves understanding the quality and type of butter used, as well as how flavorings are incorporated. This issue is more common with American buttercream, which contains a higher ratio of butter to sugar compared to meringue-based versions. Applying the right buttercream frosting troubleshooting tips can help balance the flavor profile.
The Cause: Using the Wrong Type of Butter in Buttercream
The quality and type of butter you use have a direct impact on the final flavor of your buttercream. Standard supermarket butter can sometimes have a less clean or slightly metallic taste compared to higher-quality or European-style butters, which often have a higher fat content (typically 82% compared to 80% in standard butter) and a richer, sometimes tangier flavor due to fermentation. Using unsalted butter is generally recommended for baking, including buttercream, as it gives you control over the salt level. Salted butter can introduce an off-flavor or make the frosting taste... well, salty.
Furthermore, if your butter is not fresh, it can impart an unpleasant, sometimes rancid, flavor to the buttercream. Always check the expiration date and ensure your butter has been stored properly. A key buttercream frosting troubleshooting tip for flavor starts with selecting good quality, fresh, unsalted butter.
Solution: Choosing the Right Butter for Optimal Flavor
To achieve the best-tasting buttercream, opt for high-quality unsalted butter. European-style butters are often preferred by bakers for their higher fat content, which contributes to a smoother texture and richer flavor. Brands like Kerrygold, Plugrá, or even some store-brand premium options can make a noticeable difference. Ensure the butter is fresh and has been stored correctly in the refrigerator.
- Use high-quality unsalted butter (preferably European-style with 82% fat).
- Ensure butter is fresh and properly stored.
- Avoid using salted butter unless the recipe specifically calls for it and you are confident in the flavor outcome.
While premium butter costs a bit more, the improved taste and texture of your buttercream will be worth it, especially for frostings where the butter flavor is prominent, like a simple vanilla buttercream. This is a foundational buttercream frosting troubleshooting tip for achieving great flavor.
Neutralizing Buttery Flavors: Adding Extracts and Flavorings
If you've already made your buttercream and it has too much of a plain buttery taste, you can often mask or balance it by adding more or different flavorings. Vanilla extract is standard, but consider using a high-quality pure vanilla extract or even vanilla bean paste for a more intense flavor that can stand up to the butter. Start by adding an extra teaspoon or two of vanilla extract to your batch and mixing thoroughly.
Other flavorings can also help. A pinch of salt (yes, even in unsalted buttercream) can actually enhance the sweetness and balance the richness. Citrus zest (lemon, orange) adds brightness that cuts through the fat. Almond extract, coffee extract, or even a small amount of liqueur can introduce complex flavors that overshadow the plain butter taste.
- Add high-quality vanilla extract or vanilla bean paste.
- Consider adding a pinch of salt to balance sweetness and richness.
- Introduce other flavorings like citrus zest, almond extract, coffee extract, or liqueur.
- Taste and adjust flavorings gradually until the desired balance is achieved.
These buttercream frosting troubleshooting tips for flavor allow you to customize your frosting and ensure it complements your baked goods rather than just tasting like sweetened butter. Don't be afraid to experiment with different flavor combinations!
Mistake #5: Buttercream Separation or Curdling
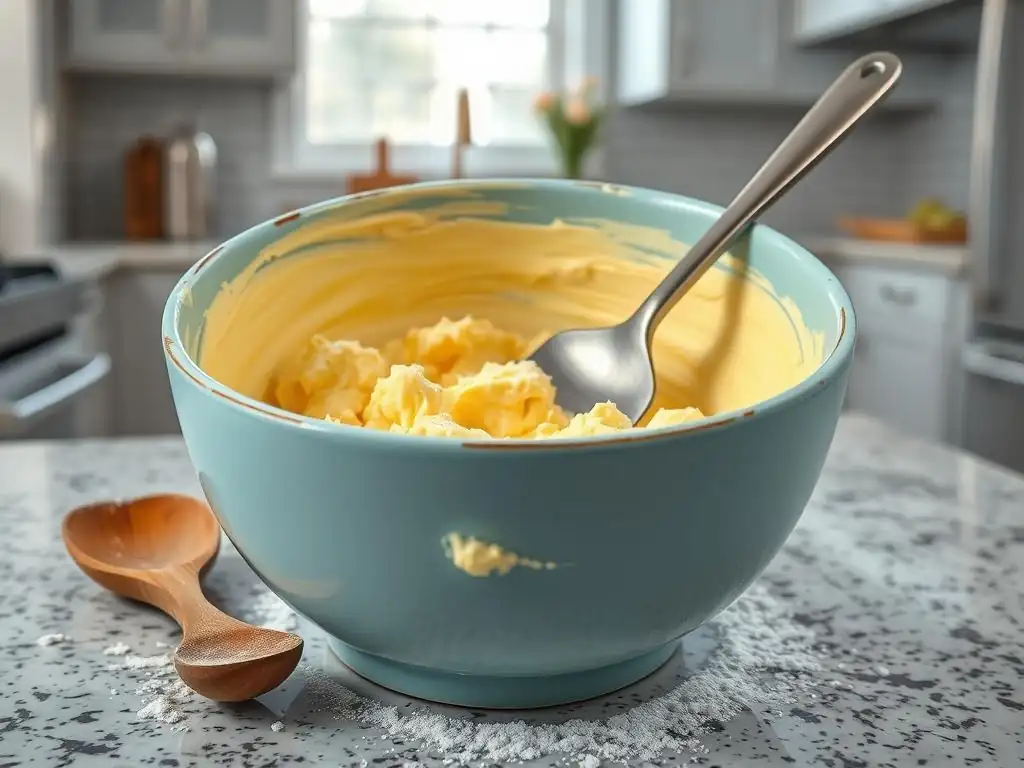
Seeing your smooth, creamy buttercream suddenly break, looking curdled, lumpy, or greasy with liquid pooling at the bottom, is disheartening. This separation, also known as breaking or curdling, happens when the emulsion of fat and liquid falls apart. It's a common issue, particularly with meringue-based buttercreams, but can also occur with American buttercream under certain conditions.
Understanding that buttercream is an emulsion helps explain why separation happens and guides you toward the correct buttercream frosting troubleshooting tips. The good news is that separated buttercream can almost always be salvaged and brought back to a smooth, usable consistency.
The Culprit: Temperature Shock in Buttercream Emulsion
Buttercream is an emulsion, meaning tiny droplets of fat are dispersed throughout a liquid base (or vice versa), held together by emulsifiers (like egg proteins in meringue buttercreams). This emulsion is stable within a specific temperature range. Temperature shock is the most common cause of separation. If ingredients are added at vastly different temperatures (e.g., adding cold butter to a warm meringue, or adding warm liquid to cold butter and sugar), the fat and liquid won't combine properly, and the mixture will curdle.
In meringue buttercreams, adding butter that is too cold to a meringue that hasn't cooled enough is a classic cause of curdling. The cold butter solidifies instead of emulsifying with the meringue. In American buttercream, adding liquid that is too warm or working in a very hot environment can cause the butter to melt and separate from the sugar. These temperature-related issues are the primary focus of buttercream frosting troubleshooting tips for separation.
Solution: Stabilizing Buttercream and Preventing Separation
Preventing separation starts with ensuring your ingredients are at the correct temperature. For American buttercream, make sure your butter is room temperature (68-70°F or 20-21°C) and any liquid added is also at room temperature. For meringue-based buttercreams, this is even more critical: the meringue base must be cooled to near room temperature (around 80-85°F or 27-29°C) before you begin adding the room temperature butter. The butter should be soft but not melted.
- Ensure all ingredients, especially butter and any liquid/meringue base, are at the correct temperature before combining.
- Add butter gradually to the meringue base (for meringue buttercreams), allowing each addition to incorporate.
- Mix on a consistent speed (usually medium) to help the emulsion form.
Following the recipe instructions precisely regarding temperatures and mixing speeds is your best defense against separation.
Fixing Separated Buttercream: The Emulsification Process
Salvaging separated buttercream involves re-emulsifying the mixture, often by adjusting the temperature and continuing to mix. This is a crucial buttercream frosting troubleshooting tip.
For meringue buttercreams (Swiss/Italian) that look curdled: This often happens if the butter was too cold. The fix is counter-intuitive: continue beating! Use the paddle attachment on medium-high speed. As the mixer runs, the friction will gently warm the mixture, helping the butter soften and emulsify with the meringue. It might look worse before it gets better, but keep mixing for 5-10 minutes. If it's still curdled, take a small amount (about 1/4 cup) of the buttercream, gently warm it until melted (not hot! ), and slowly drizzle it back into the mixing batch while beating.
For meringue buttercreams that are soupy/separated (often due to being too warm): Place the bowl in the refrigerator for 15-25 minutes until the edges start to firm up. Then, return it to the mixer and beat on medium-high speed. As the butter cools and firms, it should re-emulsify with the meringue.
For American buttercream that looks greasy/separated: This usually means it's too warm. Place the bowl in the refrigerator for 15-20 minutes to chill the butter slightly. Then, return it to the mixer and beat on medium speed. If liquid has separated out, try draining a little off before re-whipping, or add a tablespoon of powdered sugar while mixing.
- For curdled meringue buttercream (too cold): Continue beating on medium-high speed. If needed, melt a small portion and add back while mixing.
- For soupy meringue buttercream (too warm): Chill for 15-25 mins, then re-whip on medium-high speed.
- For greasy American buttercream: Chill for 15-20 mins, then re-whip on medium speed.
- Be patient! Re-emulsification can take several minutes of mixing.
These buttercream frosting troubleshooting tips are highly effective for rescuing separated batches, proving that a broken buttercream is rarely a lost cause.
Mistake #6: Buttercream Lacking Flavor or Depth
Sometimes buttercream looks perfect – smooth, stable, and easy to work with – but tastes... bland. It might be sweet, but it lacks that something extra that makes it truly delicious. This is a common issue when bakers rely solely on basic flavorings or don't use enough to stand up to the richness of the butter and sugar.
Ensuring your buttercream tastes as good as it looks requires deliberate flavoring techniques. Simply adding a teaspoon of vanilla extract might not be sufficient for a large batch of frosting. Understanding how to layer and intensify flavors is a key buttercream frosting troubleshooting tip for creating memorable desserts.
The Cause: Insufficient Flavoring in Buttercream
The most obvious reason for bland buttercream is simply not adding enough flavoring. Butter and sugar are the dominant components, and they require a significant amount of flavor extract, zest, or other additions to shine through. A standard recipe might call for 1-2 teaspoons of vanilla extract, but depending on the batch size and the quality of the extract, this might not be enough to impart a noticeable vanilla flavor.
Another cause can be using low-quality or imitation flavorings. Imitation vanilla extract, for example, can have a chemical or weak flavor compared to pure vanilla extract. Similarly, using artificial fruit flavorings instead of natural zest, juice reduction, or purees can result in a less vibrant taste. Addressing this requires focusing on both the quantity and quality of your flavoring agents.
Solution: Enhancing Buttercream Flavor with Extracts, Zest, and More
The solution to bland buttercream is to be more generous and creative with your flavorings. Don't be afraid to add more extract than the recipe initially suggests, especially if you're using a large quantity of buttercream. For vanilla, start with 1.5 to 2 times the amount called for and taste as you go. High-quality pure extracts offer a much better flavor profile.
Beyond standard extracts, incorporate other flavor boosters. A pinch of salt enhances sweetness and complexity. Citrus zest contains potent oils that add bright, fresh flavor without adding excess liquid. Coffee powder or espresso powder can deepen chocolate or vanilla flavors. Consider using fruit purees (reduced to concentrate flavor and minimize liquid), melted and cooled chocolate, cocoa powder, or even spices like cinnamon or cardamom.
- Use high-quality flavor extracts.
- Don't be afraid to add more extract than initially suggested, tasting as you go.
- Incorporate a pinch of salt to enhance sweetness.
- Add citrus zest for brightness.
- Use coffee/espresso powder to deepen flavors.
- Consider fruit purees, melted chocolate, or spices.
These buttercream frosting troubleshooting tips for flavor encourage you to think beyond the basic vanilla and explore ways to make your frosting truly delicious.
Creative Buttercream Flavor Combinations to Try
Once you've mastered the basics of flavoring, you can get creative! Here are a few ideas to elevate your buttercream:
- Lemon Raspberry: Add fresh lemon zest and a reduced raspberry puree (cooked down to a thick syrup and cooled) to a basic vanilla buttercream.
- Chocolate Espresso: Whip in melted, cooled dark chocolate and a teaspoon or two of espresso powder.
- Brown Butter Pecan: Brown your butter before creaming it (cool it completely until solid, then bring to room temp), then fold in toasted chopped pecans.
- Maple Spice: Add maple extract, cinnamon, nutmeg, and a pinch of ground cloves.
- Earl Grey: Steep Earl Grey tea bags in warm milk or cream, cool, and use this flavored liquid in your buttercream recipe.
Block Quote Example: Flavor is just as important as texture and appearance. A visually stunning cake with bland frosting is a missed opportunity!
- A wise baker
Experimenting with these buttercream frosting troubleshooting tips for flavor will open up a world of possibilities for your baked creations. Always taste and adjust until you achieve the perfect balance.
Mistake #7: Buttercream with Air Bubbles
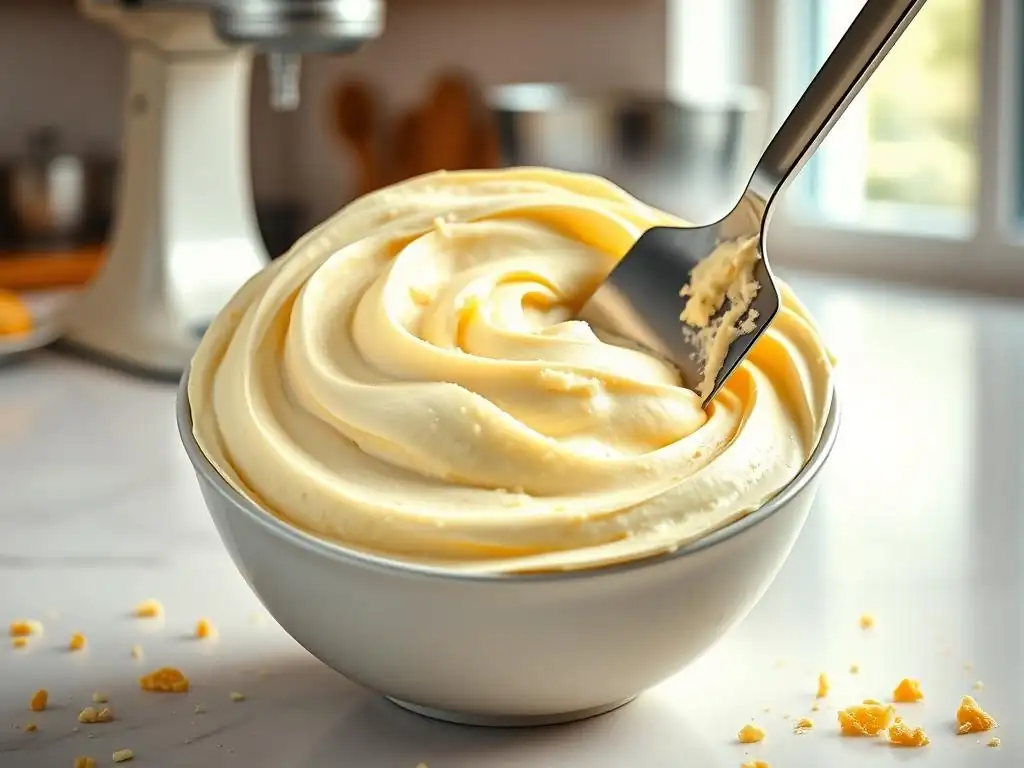
Sometimes, after whipping your buttercream, you're left with a frosting that's full of tiny air pockets. While some air is necessary for lightness, too many bubbles can make the frosting difficult to spread smoothly and result in a less polished finish, especially when aiming for sharp edges or smooth surfaces.
Addressing air bubbles is about adjusting your mixing technique after the buttercream has come together. It's a common issue in both American and meringue-based buttercreams. Applying the right buttercream frosting troubleshooting tips for air bubbles will help you achieve that coveted silky-smooth texture.
The Culprit: Over Whipping
The main cause of excessive air bubbles in buttercream is over-whipping or whipping at too high a speed for too long after the frosting has reached its desired consistency and temperature. While whipping is necessary to aerate the butter and make the frosting light and fluffy, continuing to whip on high speed once it's formed a stable emulsion will incorporate more and more air, creating those small pockets.
In American buttercream, this can happen after all the sugar is added and you continue to beat on high. In meringue buttercreams, it can occur if you whip for too long after the butter has been fully incorporated and the mixture has become smooth and stable.
Solution: How to remove air bubbles from buttercream
The key to removing air bubbles is to switch to a low and slow mixing method once the buttercream is fully formed. After you've finished the initial whipping and the buttercream is smooth and the correct consistency, switch from the whisk attachment (if you used it) to the paddle attachment on your stand mixer.
Now, mix the buttercream on the absolute lowest speed your mixer offers. Let it run for 5-10 minutes, periodically stopping to scrape down the sides and bottom of the bowl. This slow mixing action helps to push out the trapped air bubbles against the sides of the bowl, resulting in a denser, smoother, and more pliable frosting. This is a highly effective buttercream frosting troubleshooting tip for achieving a professional finish.
Techniques for smooth buttercream
Beyond the low-speed mixing trick, there are other techniques to ensure smooth buttercream.
- Use the Paddle Attachment: For the final smoothing stage, the paddle attachment is crucial. The whisk incorporates air; the paddle helps remove it.
- Slow Speed is Key: Resist the urge to rush this step. The slower the speed, the more effectively the air bubbles are worked out.
- Scrape Frequently: Air bubbles can cling to the sides of the bowl. Scraping down helps incorporate them back into the main batch where they can be smoothed out.
- Hand Smoothing (for small batches): For small amounts, you can manually smooth the buttercream by pressing it against the side of the bowl with a sturdy spatula, working out the air.
- Slight Warming (Optional): Sometimes, a very slight warming (like the gentle warmth from the mixer motor during the long, slow mix) can help the butter soften just enough to release air bubbles more easily.
Task List Example:
- [x] Ensure buttercream is fully mixed and emulsified.
- [x] Switch to the paddle attachment.
- [x] Mix on the lowest possible speed for 5-10 minutes.
- [x] Scrape down the bowl sides and bottom regularly.
- [ ] Practice patience during the smoothing phase.
Implementing these buttercream frosting troubleshooting tips will dramatically improve the texture of your frosting, making it easier to spread and decorate with.
General Buttercream Troubleshooting Tips and Best Practices
Mastering buttercream involves understanding the science behind it and being prepared to troubleshoot when things don't go perfectly. While specific issues require specific fixes, some general practices apply across the board and can prevent many common problems before they start. These overarching buttercream frosting troubleshooting tips are valuable for any baker.
Consistency, patience, and attention to detail are your best allies. Don't be discouraged by a less-than-perfect batch; view it as a learning opportunity. With practice, you'll develop an intuition for temperatures and textures, making troubleshooting second nature.
Key Takeaways for Avoiding Buttercream Disasters
Here are some essential buttercream frosting troubleshooting tips to keep in mind for consistent success:
- Temperature Control is Paramount: Ensure butter is at the correct room temperature (soft but not melted, around 68-70°F or 20-21°C). For meringue buttercreams, the meringue base must also be cooled sufficiently.
- Use Quality Ingredients: Fresh, high-quality butter and extracts make a significant difference in both texture and flavor.
- Measure Accurately: Baking is a science. Using the correct ratios of ingredients is crucial for proper structure and consistency.
- Mix Properly: Don't rush the mixing process. Cream butter and sugar thoroughly, add powdered sugar gradually, and take time to smooth out air bubbles at the end.
- Be Patient with Troubleshooting: Many issues, like separation or graininess, can be fixed with continued mixing or temperature adjustments. Don't give up too quickly!
- Store Buttercream Correctly: Always cover buttercream tightly with plastic wrap pressed directly onto the surface to prevent crusting and absorption of odors. Store at room temperature for a day or two, or in the fridge/freezer for longer periods. Always re-whip chilled buttercream before use.
Following these best practices significantly reduces the need for intensive buttercream frosting troubleshooting.
Buttercream Recipes and Techniques on BakeWithEase
At BakeWithEase, we offer a variety of tested buttercream recipes, from classic American buttercream to stable Swiss and Italian meringue versions, as well as French and German buttercreams. Each recipe includes detailed instructions and tips specifically designed to help you avoid common pitfalls.
We also provide guides on essential techniques, such as how to cream butter properly, the nuances of making meringue, and how to achieve different consistencies for piping or spreading. Exploring these resources on BakeWithEase can complement the buttercream frosting troubleshooting tips provided here and further enhance your skills.
Conclusion: Mastering Buttercream with BakeWithEase
Creating perfect buttercream is a skill that develops with practice. By understanding the common mistakes and knowing how to apply effective buttercream frosting troubleshooting tips, you can tackle challenges with confidence. Whether you're dealing with a grainy texture, a soupy mess, or a stiff, uncooperative frosting, remember that most issues are fixable.
Don't let past buttercream failures discourage you. Each attempt is an opportunity to learn and improve. Use the knowledge gained from these buttercream frosting troubleshooting tips to refine your technique and achieve the smooth, delicious results you desire.
Achieve Buttercream Perfection: Your Baking Journey Starts Here
With the right approach and a willingness to troubleshoot, you can master the art of making beautiful and tasty buttercream. Refer back to this guide whenever you encounter a problem, and remember the key buttercream frosting troubleshooting tips: control temperature, use quality ingredients, mix correctly, and be patient.
Explore the wealth of resources available on BakeWithEase to find recipes, tutorials, and inspiration for all your baking projects. From simple vanilla to complex flavor combinations, perfect buttercream is within your reach. Happy baking!
Frequently Asked Questions
What are the most common mistakes people make when making buttercream frosting?
The most common mistakes include using too much liquid, not creaming the butter and sugar properly, and incorrect temperature of ingredients. These often result in a runny or curdled frosting.
How do I fix buttercream that is too runny?
If your buttercream is too runny, try adding more powdered sugar gradually. Chilling the frosting briefly in the refrigerator can also help it firm up.
My buttercream looks curdled and separated. What went wrong?
Curdling often happens when the butter is too cold or the ingredients are at different temperatures. Gentle warming and continued mixing can sometimes bring it back together.
What's the best way to achieve a smooth, lump-free buttercream?
Ensure your butter is at room temperature and cream it thoroughly with the sugar until light and fluffy. Sifting the powdered sugar can also prevent lumps.
Can I use different types of butter for buttercream frosting?
Yes, but unsalted butter is generally recommended for better control over the sweetness. Using European-style butter with a higher fat content can also improve the texture.
Final Reflection: Mastering the Art of Flawless Buttercream
The pursuit of the perfect buttercream frosting is a journey shared by countless bakers, and the challenges encountered along the way are surprisingly common. A seemingly simple recipe can yield frustrating results if even minor steps are missed, leading to a final product far from the desired smooth, creamy texture. This article highlighted several key pitfalls, offering practical solutions to ensure your next buttercream creation is a masterpiece.
The impact of mastering buttercream extends far beyond the simple act of frosting a cake. It's about embracing the process, learning from mistakes, and ultimately finding joy in the creation of something beautiful. It's a testament to patience and precision, qualities that translate to many aspects of life. As the renowned pastry chef, Jacques Torres, once said, Baking is a science, but it's also an art. You have to understand the science, but you also have to feel the art.
This sentiment perfectly encapsulates the journey of perfecting buttercream—a blend of technical skill and creative passion.
Now, it's your turn. Take the knowledge gained from this article and apply it to your next baking adventure. Don't be discouraged by imperfections; instead, view them as opportunities for growth and learning. Embrace the process, experiment with different techniques, and most importantly, enjoy the journey of creating something delicious and visually stunning. The perfect buttercream is within your reach; all it takes is a little practice and a whole lot of heart.
Unlock Your Perfect Buttercream: Master the Art of Flawless Frosting!
Thanks for taking the time to learn about common buttercream blunders! You've now got the knowledge to create unbelievably smooth and delicious frosting. Ready to put your new skills to the test?
- Whip up a batch of your favorite buttercream recipe today! Use what you've learned to avoid those pesky mistakes and watch your confidence (and your cakes!) soar.
- Share your buttercream creations with us! We'd love to see your flawless frosting in action – tag us on social media!
- Challenge yourself: try a new flavor combination or decorative technique. What exciting buttercream adventures await?
Ready to conquer your next cake decorating project?