
Perfect Parker House Rolls: Achieve Ultimate Softness with This Recipe

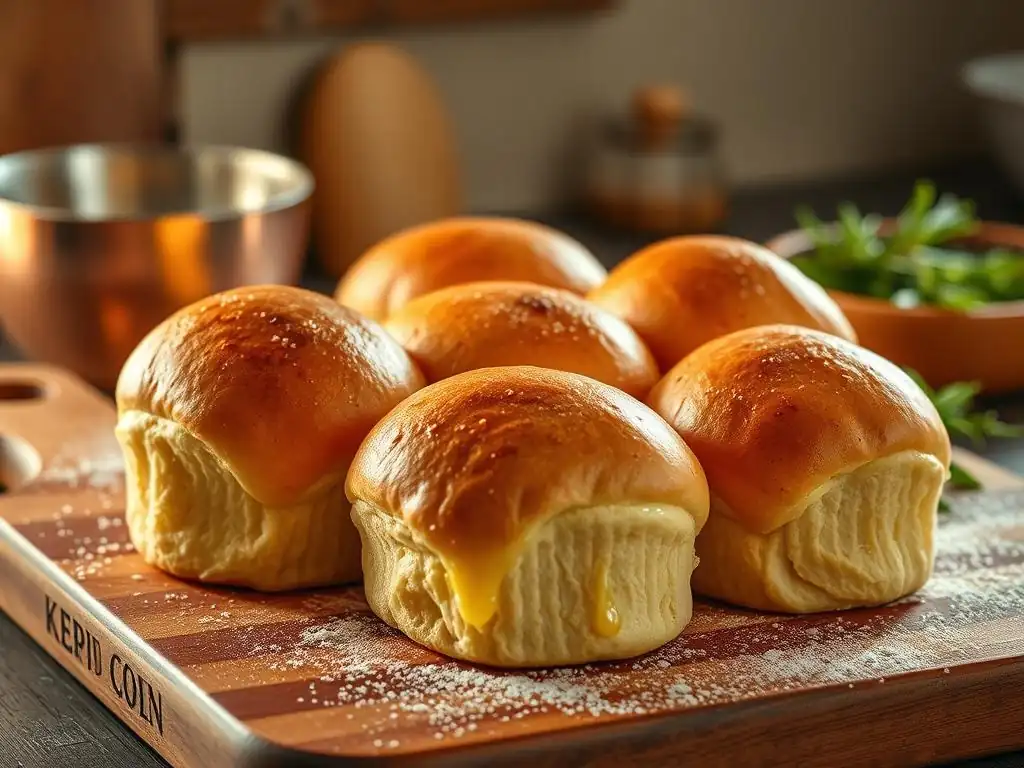
Welcome to BakeWithEase, your trusted guide to baking bliss! Ever dreamt of creating bakery-worthy bread from the comfort of your own kitchen? Then you're in the right place. This week, we're diving into a classic, and we know you'll love it: our Soft Parker House Rolls recipe. But what's the secret to achieving that melt-in-your-mouth texture? Let's uncover the techniques and tips that will elevate your baking game, transforming you into a Parker House pro. Prepare to embark on a culinary journey to create these irresistible, buttery delights!
- Introduction to Soft Parker House Rolls
- Understanding Parker House Rolls: A Baking Classic
- The Ultimate Soft Parker House Rolls Recipe: Step-by-Step
- Step 1: Preparing the Dough for Parker House Rolls
- Step 2: The First Rise: Developing Flavor and Texture
- Step 3: Shaping the Parker House Rolls
- Step 4: The Second Rise: Ensuring Maximum Softness
- Step 5: Baking the Parker House Rolls to Golden Perfection
- Step 6: The Secret to Ultimate Softness: Buttering and Cooling
- Tips and Tricks for Perfect Parker House Rolls
- Serving Suggestions: Enjoying Your Soft Parker House Rolls
- Mastering the Art of Soft Roll Baking: Beyond Parker House Rolls
-
Frequently Asked Questions
- How can I ensure my Parker House rolls are incredibly soft?
- What is the key ingredient that makes Parker House rolls different from other rolls?
- Can I make Parker House rolls ahead of time?
- What type of flour is recommended for this Soft Parker House Rolls recipe?
- Is there a substitute for butter in this recipe?
- Final Reflection: The Enduring Allure of the Perfect Roll
- Unlock the Secret to Perfectly Soft Parker House Rolls!
Introduction to Soft Parker House Rolls
Discover the Secret to Tender, Buttery Parker House Rolls
Baking soft, fluffy rolls is a skill many home bakers aspire to master, and Parker House rolls are often considered the gold standard. Their signature fold, tender crumb, and rich, buttery flavor make them a beloved classic, perfect for any meal. Achieving that characteristic melt-in-your-mouth softness isn't just about following a list of ingredients; it involves understanding the nuances of dough hydration, yeast activity, and careful handling. This guide will walk you through the precise steps and techniques needed to consistently produce rolls that are incredibly tender and moist.
The secret lies in a combination of factors: using the right proportion of wet to dry ingredients, ensuring proper gluten development during kneading, allowing sufficient proofing time for the dough to become light and airy, and, crucially, the post-baking butter bath. We'll delve into each of these elements, explaining the science behind them in a friendly, accessible way. By paying close attention to these details, you'll transform simple flour, water, yeast, and butter into rolls so soft, they practically float off the plate.
Why This Soft Parker House Rolls Recipe is a Must-Try
This specific soft Parker House rolls recipe has been refined to emphasize maximum tenderness and flavor. Unlike some recipes that can yield dry or dense results, this approach focuses on techniques that promote a light, open crumb structure and a rich, buttery finish. We prioritize ingredients like whole milk and butter, which contribute significantly to both softness and flavor, and guide you through crucial steps like gentle kneading and proper proofing that are often overlooked but are vital for achieving that desired cloud-like texture.
Furthermore, this recipe is designed for clarity and success, even if you're relatively new to enriched doughs. We provide clear indicators for when the dough is properly kneaded and proofed, removing much of the guesswork. The steps are broken down logically, making the process manageable and enjoyable. By the end, you'll not only have a batch of incredibly soft rolls but also a deeper understanding of the principles behind successful enriched bread baking, empowering you to tackle other similar recipes with confidence.
Understanding Parker House Rolls: A Baking Classic
What Makes Parker House Rolls Unique?
Parker House rolls stand out in the world of bread rolls primarily due to their distinctive shape and incredibly soft, rich texture. The shape is created by folding a round or square piece of dough over on itself, often with a generous brush of melted butter inside the fold before baking.
This not only gives them their characteristic appearance but also creates a delightful pocket of buttery goodness within the roll. The texture is consistently described as exceptionally soft, tender, and light, a result of a high proportion of fat (butter) and sometimes milk or eggs in the dough, which inhibits gluten development slightly and keeps the crumb tender.
Beyond their shape and texture, the flavor profile of Parker House rolls is deeply buttery and slightly sweet, making them incredibly versatile. They are substantial enough to be enjoyed on their own but also delicate enough not to overpower the dishes they accompany. Their popularity stems from this perfect balance of form, texture, and flavor, making them a staple on many dinner tables, especially during holidays or special occasions. Mastering a soft Parker House rolls recipe is a rewarding endeavor that brings a touch of classic elegance to any meal.
The History Behind These Classic American Rolls
The history of Parker House rolls is tied to the historic Parker House Hotel in Boston, Massachusetts. Legend has it that they were created there in the 1870s. One popular, albeit perhaps apocryphal, story suggests a baker, in a fit of pique, threw unfinished rolls into the oven, resulting in their signature folded shape. Regardless of the exact origin story, the rolls gained immense popularity at the hotel and their recipe eventually spread, becoming a beloved American classic.
The Parker House Hotel, which opened in 1855, was known for its culinary innovations, and these rolls quickly became one of its most famous contributions. They represent a specific era of American baking where enriched doughs were becoming more common, moving beyond simple lean breads. The use of butter was key to their appeal, setting them apart from simpler rolls. Over time, the soft Parker House rolls recipe has been adapted and perfected in countless kitchens, but the core elements – the rich dough, distinctive shape, and focus on tenderness – remain the same, preserving their historical legacy.
The Ultimate Soft Parker House Rolls Recipe: Step-by-Step
Ingredients for Perfectly Soft Rolls
Achieving truly soft Parker House rolls starts with selecting the right ingredients and having them ready. Using high-quality components makes a noticeable difference in the final texture and flavor. You'll need standard baking staples, plus a few key additions that contribute to the dough's richness and tenderness. Ensure your yeast is fresh, as active yeast is crucial for a good rise and light texture.
- All-purpose flour: About 3 to 3 ½ cups (measured correctly by spooning into cup and leveling)
- Granulated sugar: 1/4 cup
- Active dry yeast: 2 ¼ teaspoons (one standard packet)
- Salt: 1 teaspoon
- Whole milk: 1 cup, warmed to about 105-115°F (40-46°C)
- Unsalted butter: 1/2 cup (1 stick), melted and slightly cooled, plus more for brushing
- Large egg: 1, at room temperature
Equipment Needed for Baking Parker House Rolls
Having the right tools on hand simplifies the baking process and helps ensure consistent results for your soft Parker House rolls recipe. While some steps can be done by hand, certain pieces of equipment make the process significantly easier and more efficient, particularly when it comes to kneading and shaping.
- Large mixing bowl: For activating yeast and mixing dough.
- Stand mixer with dough hook attachment (optional but recommended): For efficient kneading. If kneading by hand, a sturdy surface is needed.
- Measuring cups and spoons: For accurate ingredient measurements.
- Liquid measuring cup: For milk.
- Small bowl: For melting butter.
- Pastry brush: For buttering the dough and baked rolls.
- Rolling pin: For rolling out the dough.
- Bench scraper or knife: For cutting dough squares or circles.
- Baking pan(s): A 9x13 inch baking pan or two 8x8 inch pans work well.
- Parchment paper (optional): For lining the baking pan for easy cleanup.
- Clean kitchen towel or plastic wrap: For covering the dough during proofing.
Step 1: Preparing the Dough for Parker House Rolls
Activating the Yeast for a Light and Airy Dough
The first crucial step in any soft roll recipe is activating the yeast. Yeast is a living organism that produces carbon dioxide gas, which is what makes bread dough rise and become light and airy. To wake up active dry yeast, it needs a warm liquid and a source of sugar.
Warm the milk to a temperature between 105°F and 115°F (40-46°C). This temperature range is critical; too cold, and the yeast won't activate efficiently; too hot, and you risk killing the yeast entirely. A kitchen thermometer is helpful here, but if you don't have one, the milk should feel pleasantly warm to the touch, like a warm bath, not hot.
Pour the warmed milk into your large mixing bowl (or stand mixer bowl). Sprinkle the 2 ¼ teaspoons of active dry yeast and a pinch of the granulated sugar over the milk. Stir gently to combine. Let this mixture sit for 5 to 10 minutes.
During this time, the yeast should begin to bloom – it will become foamy and bubbly on the surface. This foam is a clear indication that the yeast is alive and active, ready to make your Parker House rolls wonderfully soft. If you don't see any significant foaming after 10 minutes, your yeast may be dead, or the milk temperature was off. In this case, it's best to discard the mixture and start again with fresh yeast and correctly tempered milk.
Combining the Wet and Dry Ingredients
Once your yeast is active and foamy, it's time to bring the rest of the ingredients together to form the dough for your soft Parker House rolls recipe. To the bowl with the activated yeast mixture, add the remaining granulated sugar, the melted and slightly cooled butter, and the room temperature egg. Whisk these wet ingredients together until they are well combined. Using room temperature ingredients, especially the egg, helps them integrate more smoothly into the dough and can contribute to a more even texture.
Next, gradually add the dry ingredients: the salt and about 3 cups of the all-purpose flour. It's best to add the flour a cup at a time, mixing after each addition. If using a stand mixer, use the dough hook on a low speed. If mixing by hand, use a sturdy spoon or spatula.
Continue adding flour until the dough starts to come together in a shaggy mass. It might still be quite sticky at this point, which is normal for an enriched, soft dough. Reserve the remaining flour for kneading; you may not need all of it, as the exact amount can vary based on humidity and flour type.
Kneading the Dough to Achieve a Smooth Texture
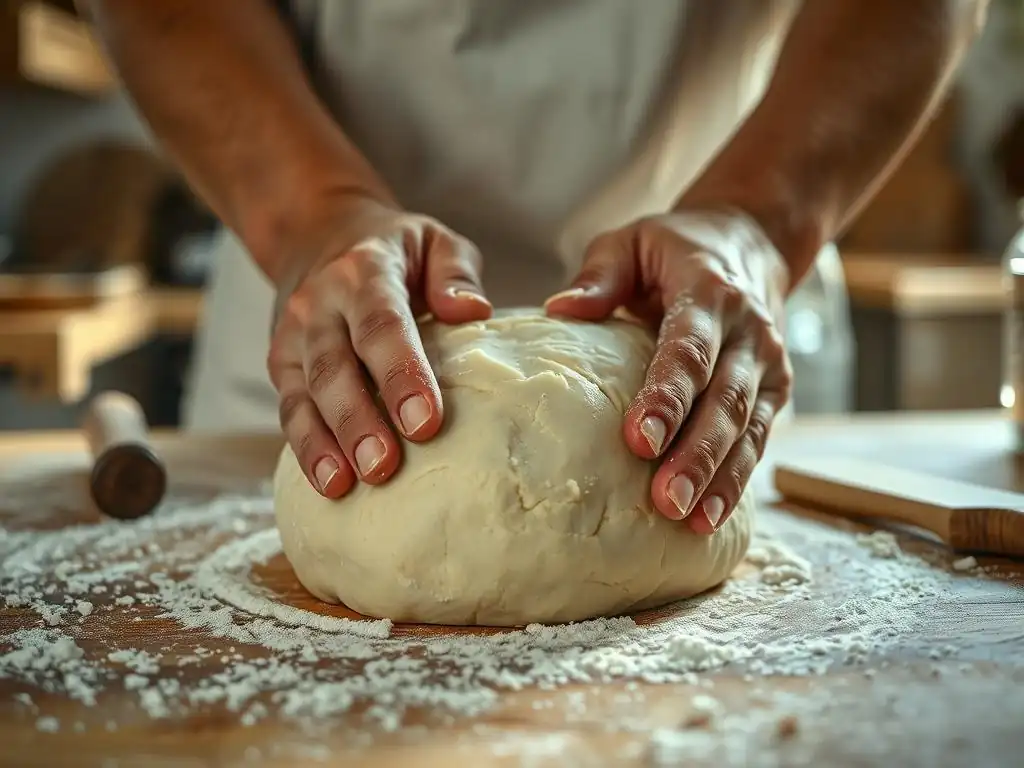
Kneading is a vital step for developing gluten, the protein network in flour that gives dough structure and elasticity. For soft rolls, you need enough gluten development to create a framework that can trap the gases produced by the yeast, allowing the rolls to rise beautifully, but not so much that the dough becomes tough. If using a stand mixer, attach the dough hook and knead on medium-low speed for about 6-8 minutes. The dough will initially stick to the sides of the bowl but should eventually pull away cleanly, becoming smooth and elastic.
If kneading by hand, turn the shaggy dough out onto a lightly floured surface. Knead by folding the dough over on itself, pressing down and pushing away with the heel of your hand, then rotating the dough. Continue this process for about 8-10 minutes. The dough will be sticky at first; resist the urge to add too much extra flour, as this can make the rolls dry.
Add just a tablespoon or two at a time if necessary to prevent excessive sticking. You'll know the dough is properly kneaded when it becomes smooth, elastic, and springs back slowly when gently poked. A good test is the "windowpane test": pull a small piece of dough and stretch it thinly; if you can stretch it enough to see light through it without it tearing, the gluten is well-developed.
Step 2: The First Rise: Developing Flavor and Texture
Creating the Ideal Environment for Dough Proofing
After kneading, the dough needs time to rise, or proof. This first rise is crucial for both developing flavor and improving the dough's texture. During this period, the yeast continues to ferment, producing carbon dioxide gas and alcohol, both of which contribute to the bread's aroma and flavor profile. For optimal rising, the dough needs a warm, draft-free environment. An ideal temperature range is typically between 75°F and 85°F (24-29°C).
To prepare the dough for its first rise, lightly grease your large mixing bowl with a little butter or oil. Place the kneaded dough in the bowl, turning it once to coat the surface with grease. This prevents a dry skin from forming on the dough.
Cover the bowl tightly with plastic wrap or a clean, damp kitchen towel. You can create a warm proofing environment by placing the covered bowl in a slightly warm oven (turned off) or near a sunny window. Avoid placing it in a spot that's too hot, as this can cause the yeast to overwork and produce off-flavors, or too cold, which will significantly slow down or stop the rise.
Judging When the Dough is Ready
The first rise typically takes between 1 to 1.5 hours, but the exact time can vary significantly depending on the room temperature, the activity of your yeast, and the temperature of the dough itself. Instead of relying strictly on the clock, it's essential to judge the dough's readiness by its appearance and feel. The dough should approximately double in size. It will look noticeably larger, puffier, and feel light and airy when gently touched.
A reliable way to test if the dough has risen enough is the "poke test." Lightly flour one of your fingers and gently press it about half an inch deep into the dough. If the indentation remains and does not spring back quickly, the dough is ready. If the indentation springs back immediately, the dough needs more time to rise. If it springs back only slightly and very slowly, it might be slightly over-proofed, but you can usually still proceed. This proper first rise is fundamental to achieving the desired soft texture in your soft Parker House rolls recipe.
Step 3: Shaping the Parker House Rolls
Rolling Out the Dough: Achieving Uniform Thickness
Once the dough has completed its first rise and is light and airy, gently punch it down to release the accumulated gas. This step also helps to redistribute the yeast and even out the dough's temperature. Turn the dough out onto a lightly floured surface. For classic Parker House rolls, the dough is typically rolled into a relatively thin sheet before cutting. Aim for a uniform thickness of about 1/4 to 1/3 inch (roughly 6-8 mm).
Use a rolling pin to roll the dough into a large rectangle or square. Try to keep the edges as even as possible to minimize scraps. A rectangle approximately 12x18 inches is a common size, depending on how many rolls you want and the size of your pan. Rolling to a consistent thickness is important because it ensures that all the rolls are roughly the same size and will bake evenly. If some parts are thicker than others, you'll end up with rolls that are underbaked in the center or dry on the edges.
Cutting the Dough into Squares or Circles
Traditionally, Parker House rolls are made from squares or circles cut from the rolled-out dough. For a classic look, you can use a round biscuit cutter, usually about 2.5 to 3 inches in diameter. Dip the cutter in flour occasionally to prevent sticking. Place the cut circles onto your prepared baking pan. If using a 9x13-inch pan, you can usually fit 12-15 rolls comfortably, allowing them space to expand.
Alternatively, and often easier, is to use a knife or bench scraper to cut the dough into squares or rectangles of a similar size, roughly 2.5 to 3 inches on each side. While not the strictly traditional shape, squares are much faster to cut and result in less dough scrap. The resulting rolls will still have the signature fold and achieve the same wonderful softness. Arrange the cut squares or circles in your baking pan, leaving a little space between them initially, as they will expand during the second rise and baking.
The Signature Fold: Creating the Parker House Roll Shape
This is the step that gives Parker House rolls their unique appearance. For each cut piece of dough (whether circle or square), you'll create a fold. Lightly brush one half of the dough circle or square with melted butter. This butter is key to the tenderness and flavor pocket within the finished roll. Avoid soaking the dough, just a light brush is sufficient.
Carefully fold the unbuttered half of the dough over onto the buttered half, creating a semi-circle or a folded square/rectangle. Press down gently along the folded edge to seal it slightly, but don't press too hard, as you want the layers to separate slightly during baking. Place the folded rolls into your prepared baking pan, arranging them relatively close together. As they rise and bake, they will touch, which helps keep the sides soft. This distinctive fold, combined with the rich dough, is what makes a soft Parker House rolls recipe truly special.
Step 4: The Second Rise: Ensuring Maximum Softness
Proofing the Shaped Rolls for a Second Time
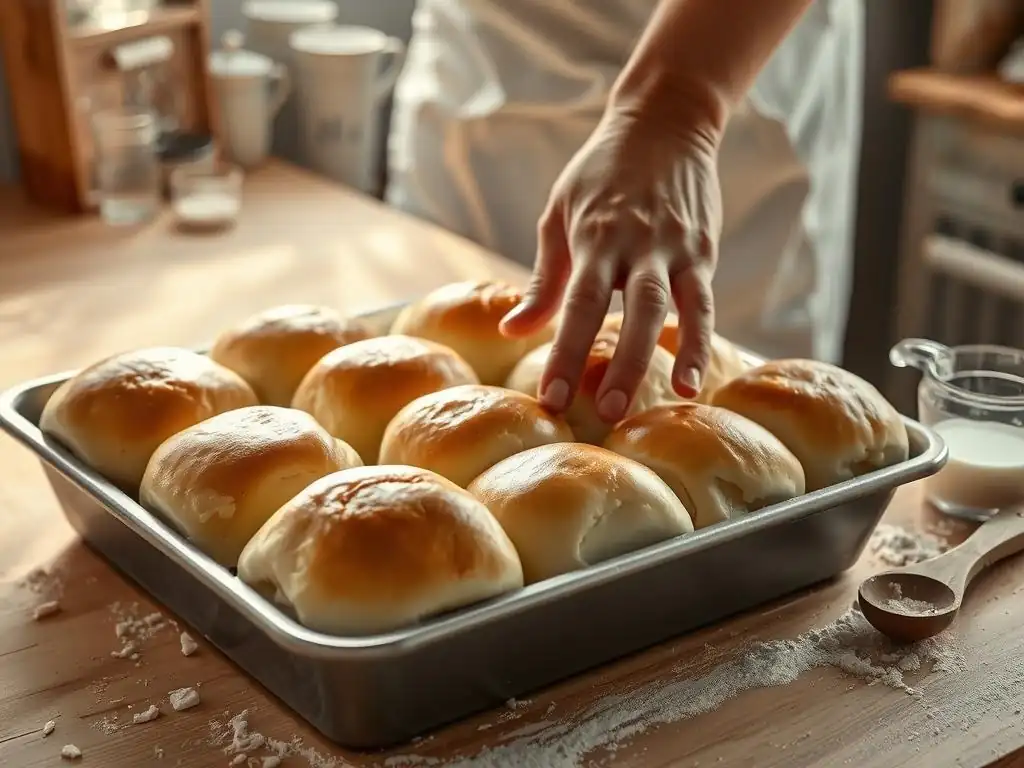
After shaping, the Parker House rolls need a second rise, also known as proofing. This second proof is vital for achieving the ultimate light and airy texture. During this time, the yeast continues to produce gas, causing the shaped rolls to expand and become significantly puffier. Place the baking pan containing the shaped rolls back into a warm, draft-free environment, similar to the first rise.
Cover the pan loosely with plastic wrap or a clean kitchen towel. Ensure the covering doesn't stick to the rolls as they rise; you can lightly spray the underside of the plastic wrap with non-stick spray if needed. Let the rolls proof for about 30-45 minutes. Again, the exact time will depend on the ambient temperature. The rolls should look visibly puffed up and have expanded to touch each other in the pan. They should look light and airy, not dense or heavy.
The Importance of Proper Proofing for Tender Rolls
Proper proofing is one of the most critical factors in achieving a soft Parker House rolls recipe. Under-proofing results in dense, heavy rolls because the yeast hasn't produced enough gas to create an open crumb structure. The rolls won't expand fully in the oven (oven spring), and the texture will be tight. Conversely, over-proofing can lead to rolls that collapse during baking or have a coarse texture and sometimes an overly yeasty or alcoholic smell and taste.
To check if your shaped rolls are properly proofed, gently poke one roll with a lightly floured finger. The indentation should spring back very slowly, leaving a slight mark. If it springs back immediately, they need more time. If it collapses completely, they are likely over-proofed. Aim for that sweet spot where they are significantly puffed but still have enough structure to hold their shape. This careful attention during the second rise pays off immensely in the final tender texture of your homemade rolls.
Step 5: Baking the Parker House Rolls to Golden Perfection
Oven Temperature and Baking Time
Baking at the correct temperature for the appropriate amount of time is essential to achieve a golden-brown crust while keeping the interior of the rolls incredibly soft. Preheat your oven to 375°F (190°C). This moderate temperature allows the rolls to finish rising in the oven (oven spring) and develop a beautiful color without drying out too quickly. Make sure the oven is fully preheated before placing the rolls inside.
Place the pan of proofed rolls in the center rack of the preheated oven. Bake for approximately 15 to 20 minutes. The baking time can vary slightly depending on your oven and the size of your rolls. Start checking around the 15-minute mark. The rolls are done when they are puffed, golden brown on top, and sound hollow when tapped on the bottom (carefully remove one from the pan to test). An internal temperature of around 190-200°F (88-93°C) is also a good indicator of doneness for enriched rolls.
Achieving a Golden-Brown Crust Without Drying Out the Rolls
Getting that perfect golden-brown color is part of the appeal of soft Parker House rolls, but you don't want to overbake them and lose their tenderness. The sugar and butter in the dough contribute to browning. If you notice the tops browning too quickly before the rolls are fully cooked, you can loosely tent the pan with aluminum foil for the remainder of the baking time. This will reflect some of the heat and prevent the tops from getting too dark.
Avoid opening the oven door too frequently during baking, especially in the first 10-12 minutes, as this can cause the oven temperature to drop and potentially affect the rise. Once the rolls are golden and cooked through, remove them from the oven. They should look invitingly soft and puffy. The next step immediately after baking is crucial for locking in moisture and enhancing that signature buttery finish.
Step 6: The Secret to Ultimate Softness: Buttering and Cooling
Brushing with Melted Butter Immediately After Baking
This step is often cited as the secret to achieving truly ultimate softness and that signature rich flavor in a soft Parker House rolls recipe. As soon as the rolls come out of the hot oven, while they are still in the pan, generously brush the tops with melted butter. The heat of the rolls will quickly absorb the butter, infusing them with moisture and a wonderful aroma.
Use about 2-4 tablespoons of melted unsalted butter for this step. A pastry brush works perfectly for distributing the butter evenly over the tops of all the rolls. Don't be shy with the butter; it contributes significantly to the final softness and richness. This hot butter bath not only adds flavor but also helps to create a very tender crust, preventing it from becoming hard or dry as the rolls cool.
Cooling the Rolls Properly to Maintain Softness
While the buttering step is key, proper cooling is equally important for maintaining the softness of your Parker House rolls. After brushing with butter, let the rolls sit in the pan for just a few minutes, maybe 5-10 minutes, to allow the butter to soak in and the rolls to set slightly. Then, carefully transfer the rolls from the baking pan to a wire cooling rack.
Cooling rolls on a wire rack allows air to circulate around them, preventing moisture from condensing on the bottom and making them soggy. It also allows steam to escape gradually. While it's tempting to break into a warm roll right away (and you absolutely should enjoy at least one!
), letting them cool mostly or entirely on the rack helps the internal structure set and locks in that tender crumb. Avoid covering them tightly while they are still very warm, as this can trap steam and make the crust soggy. Letting them cool properly ensures that the softness achieved through the baking process is maintained until they are ready to be served.
Tips and Tricks for Perfect Parker House Rolls
Troubleshooting Common Baking Issues
Even with a great soft Parker House rolls recipe, occasional issues can arise. Here are some common problems and how to address them. If your dough isn't rising, check your yeast expiration date and the temperature of your milk; ensure it was within the 105-115°F range. Kneading is another culprit; ensure you knead long enough to develop gluten, but not so much that the dough becomes tough. Sticky dough is often okay for soft rolls, but if it's unmanageable, add flour very gradually, a tablespoon at a time.
If your rolls are dense after baking, it's likely due to under-proofing. Make sure you allow sufficient time for both the first and second rises, judging by volume increase and the poke test, not just the clock. Dry rolls can result from adding too much flour during kneading, overbaking, or not brushing generously with butter immediately after coming out of the oven. By paying attention to these key steps – yeast activation, kneading, proofing, and post-bake buttering – you can troubleshoot most issues and ensure consistently soft results.
Variations: Adding Herbs or Garlic to Your Parker House Rolls
While the classic soft Parker House rolls recipe is a buttery delight on its own, you can easily customize them with simple additions to complement different meals. For a savory twist, try incorporating finely chopped fresh herbs like rosemary, thyme, or chives into the dough during the kneading process. About 1-2 tablespoons of fresh herbs or 1-2 teaspoons of dried herbs per batch is a good starting point.
Garlic lovers can add minced garlic or garlic powder to the dough. Alternatively, you can make a garlic butter to brush on the rolls after baking instead of plain melted butter. Simply melt the butter with a clove or two of minced garlic or a teaspoon of garlic powder. Let it steep for a few minutes before brushing onto the hot rolls. These variations add an extra layer of flavor, making your already soft and tender rolls even more irresistible.
Storing Your Homemade Parker House Rolls for Freshness
Proper storage is key to keeping your homemade soft Parker House rolls fresh and tender for as long as possible. Once the rolls have cooled completely, store them in an airtight container or a resealable plastic bag at room temperature. Kept this way, they will typically stay soft and delicious for 2-3 days. Avoid refrigerating them, as this can actually dry out bread products and make them stale faster.
If you won't be eating all the rolls within a few days, they freeze beautifully. Place the cooled rolls in a single layer on a baking sheet and freeze until solid, about 1-2 hours. Then transfer the frozen rolls to a freezer-safe bag or container, removing as much air as possible.
Frozen rolls can be kept for up to 2-3 months. To reheat, thaw frozen rolls at room temperature or gently warm them in a low oven (around 300°F or 150°C) for 5-10 minutes until heated through. Brushing with a little extra melted butter before warming can refresh their softness.
Serving Suggestions: Enjoying Your Soft Parker House Rolls
Pairing Your Rolls with Meals and Dips
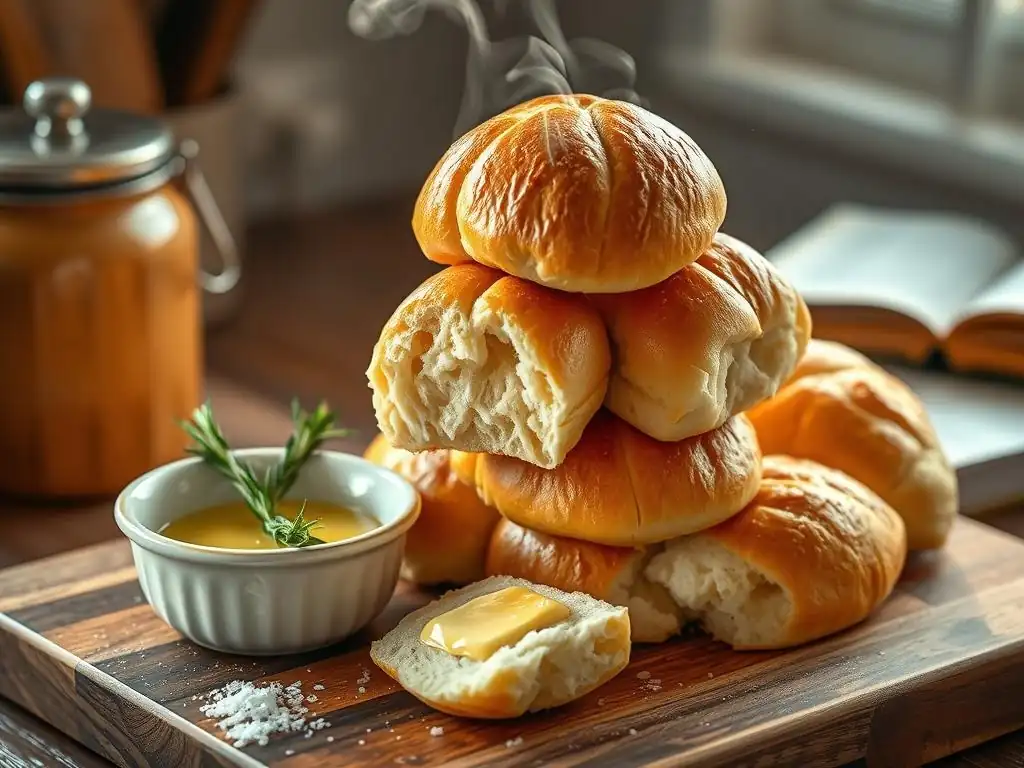
The beauty of a well-made soft Parker House rolls recipe is their versatility. They are the perfect accompaniment to a wide variety of meals. Serve them warm alongside roasted chicken, beef, or pork. They are a classic pairing for holiday dinners like Thanksgiving or Christmas. Their slightly sweet, buttery flavor also makes them a wonderful addition to soups and stews, perfect for soaking up broth.
Beyond main courses, they can be served simply with butter or used as a base for small sandwiches or sliders. Consider serving them with various dips like honey butter, herb butter, or even a garlic-parmesan spread. For a brunch setting, they can be enjoyed with jams or preserves. The possibilities are nearly endless, and their soft texture makes them universally appealing.
Elevating Your Dinner Table with Homemade Rolls
There's something undeniably special about serving homemade bread, and presenting a basket of warm, soft Parker House rolls is an easy way to elevate any dinner table, whether it's a casual weeknight meal or a special gathering. The aroma alone is inviting, and the sight of perfectly baked, tender rolls shows a level of care and effort that guests truly appreciate.
Having this reliable soft Parker House rolls recipe in your repertoire means you can easily add a touch of warmth and homemade goodness to any occasion. They make a simple meal feel more substantial and turn a special meal into a truly memorable one. The effort involved is minimal compared to the impressive result, making them a rewarding bake for any home cook.
Mastering the Art of Soft Roll Baking: Beyond Parker House Rolls
Exploring Other Soft Roll Recipes
Once you've mastered the soft Parker House rolls recipe, you've built a solid foundation for baking other types of soft, enriched rolls. Many sweet rolls, like cinnamon rolls or sticky buns before the filling and topping are added, start with a very similar dough base. Savory rolls, like potato rolls or even brioche-style buns, also share techniques learned from making Parker House rolls, such as working with a rich dough and understanding proofing times.
Look for recipes for other soft rolls that use milk, butter, and eggs, as these ingredients are key contributors to tenderness. Try your hand at Japanese milk bread rolls (Tangzhong method), which use a cooked flour paste for incredible softness, or simple dinner rolls. Each recipe will offer slight variations in technique or ingredient ratios, further expanding your understanding of how different components affect texture and flavor in soft baked goods.
Building Your Baking Skills with BakeWithEase
Baking is a journey of continuous learning, and mastering a soft Parker House rolls recipe is a significant step. BakeWithEase.com is dedicated to helping you build your skills one recipe at a time. We offer a wide range of guides and recipes, from beginner-friendly quick breads to more challenging yeasted doughs and pastries.
By practicing recipes like these soft rolls, you gain confidence in handling dough, understanding the role of ingredients, and recognizing the visual cues of successful baking (like proper proofing and golden-brown crusts). Don't be afraid to experiment and try new techniques. Every bake, successful or not, offers a valuable lesson. Continue exploring our resources, trying new recipes, and soon you'll be confidently baking a variety of delicious, soft rolls and other baked goods for yourself, friends, and family.
Frequently Asked Questions
How can I ensure my Parker House rolls are incredibly soft?
The secret to ultimate softness lies in using high-quality ingredients, like bread flour and butter, and ensuring proper proofing. Also, brushing with melted butter after baking contributes to a tender crust.
What is the key ingredient that makes Parker House rolls different from other rolls?
While the ingredients are similar to other rolls, the key difference is the folding technique during shaping. This creates distinct layers and contributes to the characteristic shape and texture.
Can I make Parker House rolls ahead of time?
Yes, you can prepare the dough ahead of time. After the first proof, you can refrigerate the dough overnight. Allow it to come to room temperature before shaping and baking for best results.
What type of flour is recommended for this Soft Parker House Rolls recipe?
Bread flour is highly recommended for this recipe. It has a higher protein content, which helps develop more gluten, resulting in a softer and chewier final product.
Is there a substitute for butter in this recipe?
While butter is crucial for the rich flavor and tender texture, you could use a vegan butter substitute. However, it may slightly alter the final taste and texture of the rolls.
Final Reflection: The Enduring Allure of the Perfect Roll
The pursuit of the perfect Parker House roll is more than just a culinary quest; it's a testament to the enduring power of simple pleasures. In a world obsessed with complex flavors and elaborate techniques, the humble Parker House roll reminds us of the profound satisfaction found in mastering a classic. Its soft, pillowy texture and delicate buttery flavor offer a comforting experience that transcends mere sustenance.
The influence of this seemingly simple recipe extends far beyond the kitchen table. It speaks to our collective desire for comfort and connection, echoing the warmth of shared meals and cherished traditions. Food is symbolic of love when words are inadequate.
– Alan D. Wolfelt. The act of baking these rolls, the aroma filling the home, and the joy of sharing them with loved ones creates a powerful sense of belonging and connection, a feeling increasingly valued in our fast-paced modern lives. This recipe becomes a vessel for creating memories and fostering relationships.
Now, I invite you to consider the impact of this simple recipe in your own life. Will you try your hand at creating these perfect Parker House rolls? Will you share them with someone you care about, fostering a moment of connection and warmth? The act of baking, the sharing, and the simple pleasure of enjoying these rolls is a powerful reminder to slow down, appreciate the small things, and savor the moments that truly matter. Let the soft texture and delicate flavor be a symbol of the comfort and connection we all crave.
Unlock the Secret to Perfectly Soft Parker House Rolls!
Thanks for joining us on this baking adventure! We hope you've gained the confidence to tackle these delightful rolls and impress your loved ones with their fluffy goodness. Ready to take your baking skills to the next level?
- Bake a batch today! Use the recipe you just learned and experience the joy of freshly baked Parker House rolls. Don't forget to adjust the recipe to your liking – experimentation is half the fun!
- Share your success (or even your struggles!) with us in the comments below. We love hearing from our baking community!
- Challenge yourself: Try substituting different flours or adding unique flavors to your next batch. What creative twist will you add?
What unique ingredient will you experiment with to elevate your Parker House Rolls?