
The Secret to Light Eastern European Yeast Doughs: Explained

Welcome to BakeWithEase, your kitchen companion for all things baking! Ever wondered how those impossibly light and airy Eastern European yeast doughs are achieved? Unlocking the secrets is easier than you think. Dive into our article below for light yeast dough recipe tips that will transform your baking, and discover the simple techniques that bring authentic flavors to your table. Get ready to create pastries that are both delicious and surprisingly simple!
- The Secret to Light Eastern European Yeast Doughs: Explained (BakeWithEase.com)
- Unveiling the Secrets of Light and Airy Eastern European Yeast Doughs
- Key Ingredients for Achieving Lightness in Eastern European Baking
-
Essential Techniques for Light Yeast Dough Recipes
- Proofing Perfection: Mastering the Art of Yeast Activation
- The Kneading Conundrum: Achieving Gluten Development without Overworking the Dough
- The First Rise: Creating the Foundation for Lightness
- Punching Down: Releasing Gases and Redistributing Yeast
- Shaping Strategies: Gentle Handling for Optimal Texture
- The Second Rise: Allowing the Dough to Fully Expand
- Light Yeast Dough Recipe Tips: Eastern European Baking Edition
- Common Mistakes to Avoid When Making Light Eastern European Yeast Doughs
- Adapting Traditional Eastern European Recipes for Lighter Results
- Storing and Enjoying Your Light Eastern European Yeast Bakes
- Troubleshooting Common Yeast Dough Problems
- Conclusion: Mastering the Art of Light Eastern European Yeast Doughs
- Frequently Asked Questions
- Final Reflection: The Enduring Lightness of Dough
- Unlock Your Inner Baker: Master Light & Fluffy Eastern European Doughs!
The Secret to Light Eastern European Yeast Doughs: Explained (BakeWithEase.com)
Unveiling the Secrets of Light and Airy Eastern European Yeast Doughs
Eastern European baking traditions are rich and diverse, famous for their incredibly flavorful and often visually stunning yeast-leavened pastries and breads. Think of iconic treats like Polish Babka, Czech Vánočka, Hungarian Kalács, or Russian Kulich. These baked goods are cherished for their tender crumb, rich flavors, and often elaborate shapes. However, achieving the signature lightness and airiness that characterizes the best of these bakes can sometimes feel like chasing a culinary unicorn. Many home bakers find their attempts resulting in dense, heavy doughs rather than the cloud-like texture they envisioned.
The journey to mastering these doughs involves more than just following a recipe. It requires understanding the science behind yeast activation, gluten development, and the role of each ingredient. Unlike some Western European counterparts that might rely heavily on butter or eggs for richness, traditional Eastern European light yeast dough recipe tips often emphasize proper technique and ingredient handling to achieve lift and tenderness without excessive fat. This article will guide you through the essential elements and techniques to unlock the secret to truly light and airy Eastern European yeast doughs, transforming your baking results.
Why Eastern European Yeast Doughs Can Be Tricky
Eastern European yeast doughs often incorporate a significant amount of enrichments like sugar, eggs, and sometimes milk or butter, which can initially inhibit yeast activity compared to lean doughs (just flour, water, salt, and yeast). Sugar, while providing food for the yeast, can also draw moisture away from the yeast cells if in high concentration, slowing down fermentation.
Similarly, fats and eggs can coat gluten strands, making it harder for the dough to develop the strong, elastic network needed to trap the gases produced by the yeast. This delicate balance makes these doughs particularly sensitive to variations in temperature, ingredient measurements, and handling.
Furthermore, many traditional recipes were developed in kitchens with different ambient temperatures and using different types of flour than might be commonly available today. A recipe passed down through generations might assume a warmer kitchen for proofing or a specific grind of flour that behaves differently. Adapting these time-honored methods to modern ingredients and environments requires a careful understanding of how each factor influences the final dough structure. Mastering the nuances of enrichment and fermentation is key to achieving that coveted light texture in your light yeast dough recipe tips.
The Quest for the Perfect Light Yeast Dough Texture
The ideal texture for a light Eastern European yeast dough is one that is soft, tender, and airy, with a fine, even crumb. When you slice into a perfectly baked Babka, for example, you should see a beautiful swirl pattern and a crumb that is moist but not heavy, yielding easily to the touch. This texture is achieved through a combination of robust yeast activity, proper gluten development, and controlled fermentation. The dough needs to be strong enough to hold its shape and trap gas, but not so strong that it becomes tough or rubbery.
Achieving this texture is the ultimate goal for any baker tackling these recipes. It's not just about getting the dough to rise; it's about ensuring that rise translates into a delightful eating experience. The journey involves careful measurement, patient proofing, and gentle handling. Every step, from activating the yeast to the final bake, plays a critical role in developing that signature lightness. By focusing on these key elements, you can consistently produce light yeast dough recipe tips that rival those from traditional bakeries.
Key Ingredients for Achieving Lightness in Eastern European Baking
The Importance of High-Gluten Flour for Yeast Dough
The foundation of any good yeast dough is flour, and for achieving lightness in enriched doughs, the protein content, specifically gluten-forming proteins, is crucial. High-gluten flour, typically bread flour with a protein content ranging from 12% to 14%, provides the necessary structure to support the significant rise expected in these enriched doughs. When kneaded, the proteins in the flour (glutenin and gliadin) combine with water to form gluten, a strong, elastic network. This network is what traps the carbon dioxide gas produced by the yeast, allowing the dough to expand and create an open, airy crumb structure.
Using a lower-protein flour, such as all-purpose flour (typically 10-12% protein), can work for some lighter doughs, but it may result in a less robust structure, leading to a slightly denser final product, especially in recipes with high amounts of sugar or fat. The stronger gluten network developed with bread flour is better equipped to handle the weight of these enrichments and sustain a larger volume increase during proofing and baking. Aim for a flour specifically milled for bread baking when seeking the best results for your light yeast dough recipe tips.
Understanding the Role of Yeast: Fresh vs. Instant Dry Yeast
Yeast is the magical leavening agent that transforms a simple mixture of ingredients into a light and airy baked good. It's a living organism that feeds on sugars and starches in the dough, producing carbon dioxide gas and alcohol as byproducts. The gas gets trapped within the gluten network, causing the dough to rise.
The type of yeast used significantly impacts the process and outcome. Fresh yeast (also known as cake yeast) is highly active and provides a slightly different flavor profile, often preferred by traditional bakers. It typically contains about 70% moisture and needs to be dissolved in a warm liquid (around 85-105°F or 30-40°C) before being added to the dry ingredients.
Instant dry yeast, on the other hand, is a more modern and convenient option. It is dried into granules and contains about 5% moisture. Instant yeast is designed to be added directly to the dry ingredients without prior hydration, making it faster and easier to use. It is also more shelf-stable than fresh yeast.
Active dry yeast is another common type, requiring hydration in warm liquid (around 105-115°F or 40-46°C) before use. While all types can produce a light dough, understanding their activation temperatures and how to properly proof them (especially for active dry or fresh yeast) is crucial for ensuring your yeast is alive and active, a fundamental light yeast dough recipe tip. Using expired or inactive yeast is a primary cause of dense dough.
Liquid Gold: The Impact of Milk or Water on Dough Lightness
The liquid component in a yeast dough plays several critical roles: it hydrates the flour, allowing gluten to form; it dissolves the sugar and salt; and it provides the medium for yeast activity. In many Eastern European enriched doughs, milk is often preferred over water. Milk contains fats, proteins, and lactose (a sugar), all of which contribute to the dough's characteristics. The fat in milk can tenderize the crumb, while the proteins contribute to browning and structure. Lactose is not readily consumed by yeast but contributes to sweetness and browning.
Using milk typically results in a softer, more tender crumb and a richer flavor compared to using water alone. The temperature of the liquid is also paramount; it needs to be warm enough to activate the yeast but not so hot that it kills it. For active dry yeast, temperatures around 105-115°F (40-46°C) are ideal for proofing.
For instant yeast, which is often added directly to flour, the liquid temperature can be slightly cooler, around 85-105°F (30-40°C), as the yeast will activate once mixed with the dry ingredients and warmed by the mixing process. Using the correct liquid type and temperature is a vital light yeast dough recipe tip.
The Sweet Spot: Sugar and its Effect on Yeast Activity and Dough Structure
Sugar is a multifaceted ingredient in enriched yeast doughs. Primarily, it serves as food for the yeast, fueling the fermentation process that produces carbon dioxide and causes the dough to rise. A small amount of sugar can actually speed up yeast activity. However, in rich Eastern European doughs, which often contain significant amounts of sugar, it also plays crucial roles in flavor, tenderness, and crust color. Sugar is hygroscopic, meaning it attracts and retains moisture, which helps keep the baked goods soft and moist for longer. It also interferes with gluten development, contributing to tenderness.
While sugar feeds the yeast, high concentrations (typically above 10-15% of the flour weight) can actually slow down fermentation. This is because sugar draws water out of the yeast cells via osmosis, making it harder for them to function efficiently. Recipes with high sugar content often require more yeast or longer proofing times to achieve the desired rise. Sugar also contributes significantly to the Maillard reaction during baking, resulting in a beautifully browned crust. Finding the right balance of sugar is key to both flavor and achieving a light, airy texture in your light yeast dough recipe tips.
Fat Content: Butter and Its Influence on Tenderness
Fats, typically in the form of butter or oil, are common enrichments in Eastern European yeast doughs. They contribute significantly to the tenderness and richness of the final baked good. Fat works by coating the flour particles and gluten strands, shortening them and preventing them from forming a continuous, strong network. This interference with gluten development results in a softer, more tender crumb that is less likely to become tough. Butter, in particular, adds a rich flavor and contributes to a flaky or layered texture in some applications when properly incorporated.
However, like sugar, high amounts of fat can also inhibit gluten development and slow down yeast activity. It's important to add fat at the appropriate stage of mixing (often after the initial gluten development has begun) and incorporate it thoroughly but gently. Too much fat, or fat added too early, can hinder the dough's ability to develop structure and rise properly, potentially leading to a denser result. Balancing the amount of fat with proper kneading and proofing techniques is essential for achieving both richness and lightness in your light yeast dough recipe tips.
Essential Techniques for Light Yeast Dough Recipes
Proofing Perfection: Mastering the Art of Yeast Activation
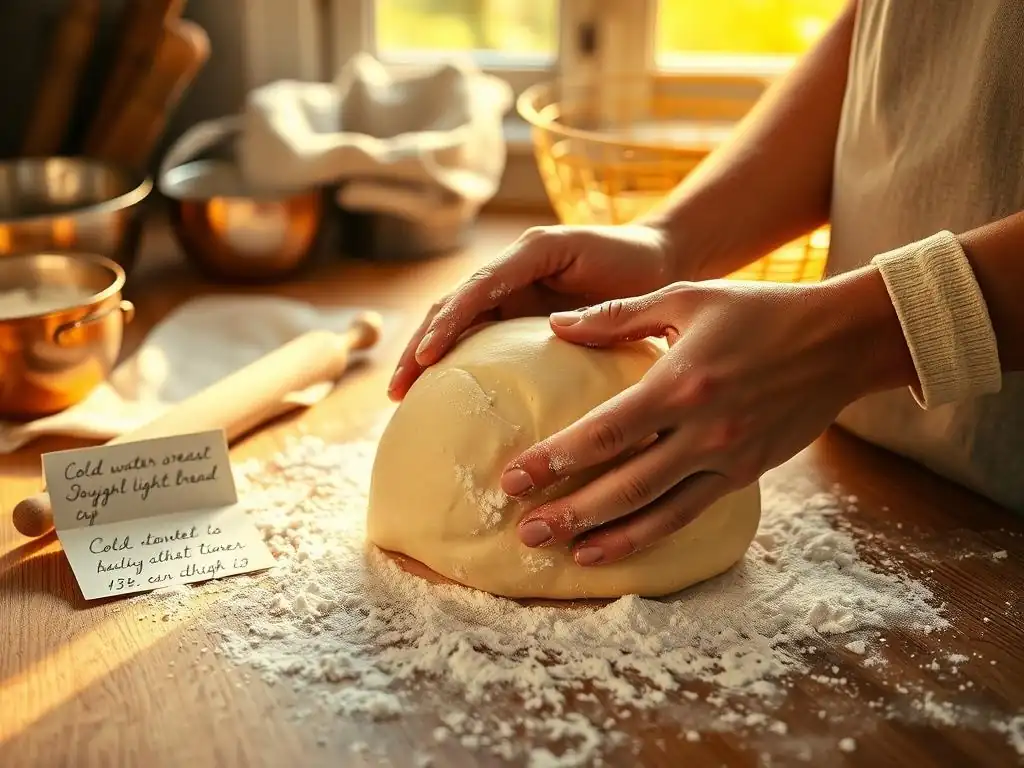
Proofing, also known as fermentation, is the process where yeast consumes sugars and produces carbon dioxide gas, causing the dough to rise. Mastering proofing is perhaps the most critical technique for achieving a light and airy dough. It's not just about letting the dough sit; it's about providing the optimal conditions for the yeast to thrive. This involves controlling temperature and humidity. Yeast is most active in a warm environment, typically between 75-85°F (24-30°C). Too cold, and the yeast works too slowly; too hot, and it can overwork or even die, producing off-flavors.
Proper proofing results in a dough that is significantly increased in volume (often doubled or tripled), feels light and airy, and passes the "poke test" – when gently poked with a finger, the indentation should remain or spring back very slowly. Under-proofing will result in a dense, heavy dough with poor volume, while over-proofing can cause the dough to collapse during baking or result in a coarse crumb and yeasty flavor. Learning to read the dough's cues and understanding the ideal proofing time and temperature for your specific light yeast dough recipe tips is a skill developed through practice.
The Kneading Conundrum: Achieving Gluten Development without Overworking the Dough
Kneading is the process of developing the gluten network in the dough. As you knead, whether by hand or machine, the gluten proteins align and strengthen, creating an elastic structure capable of trapping the gases produced by the yeast. Proper kneading is essential for a light and airy crumb. Under-kneaded dough will be slack and weak, unable to hold its shape or trap gas effectively, leading to a dense result. You can often tell if a dough is sufficiently kneaded by performing the windowpane test (more on this later).
However, there is such a thing as over-kneading, particularly when using a stand mixer on too high a speed or for too long. Overworked dough becomes tight, tough, and difficult to shape. While it might initially seem elastic, the gluten strands can actually break down, resulting in a dough that tears easily and produces a dense, heavy, and rubbery texture after baking. Finding the sweet spot – kneading until the dough is smooth, elastic, and passes the windowpane test without becoming sticky or tearing – is a crucial light yeast dough recipe tip.
The First Rise: Creating the Foundation for Lightness
The first rise, often called the bulk fermentation, is arguably the most important proofing stage for developing flavor and structure. During this initial rise, the yeast is actively fermenting throughout the entire mass of dough, producing gases and organic acids that contribute to the dough's flavor and aroma. This stage allows the gluten network to relax and expand gradually, building elasticity and strength. The duration of the first rise can vary significantly depending on the recipe, temperature, and amount of yeast used, typically ranging from 1 to 3 hours at room temperature, or longer if retarded in the refrigerator.
The goal of the first rise is usually to double the dough in volume. It's important not to rush this process. Allowing the dough sufficient time to ferment properly lays the foundation for a light and airy final product. A slow, cool bulk fermentation (like in the refrigerator for 8-12 hours) can further enhance flavor development, although it will require more time. Observing the dough's volume increase and performing the poke test are reliable indicators that the first rise is complete, a key part of many light yeast dough recipe tips.
Punching Down: Releasing Gases and Redistributing Yeast
After the first rise, the dough is typically punched down or gently degassed. This step serves several purposes. It releases the large pockets of carbon dioxide gas that have accumulated, making the dough easier to handle and shape evenly. It also redistributes the yeast cells, sugars, and enzymes throughout the dough, ensuring more even fermentation during the second rise. Additionally, it helps to equalize the temperature within the dough and strengthens the gluten structure by bringing the strands closer together.
Punching down should be done gently, not aggressively. Simply deflate the dough by pressing it down with your fist or folding it over on itself a couple of times. Avoid tearing or stretching the dough excessively. While some recipes might omit this step, particularly for very delicate doughs, it is a standard practice in many Eastern European light yeast dough recipe tips to ensure a finer, more even crumb structure in the final bake.
Shaping Strategies: Gentle Handling for Optimal Texture
Once the dough has completed its first rise and been punched down, it's time to divide and shape it according to the recipe. The way you handle the dough during shaping significantly impacts the final texture. It is crucial to handle the dough gently to preserve the airy structure developed during the first rise. Avoid pressing out all the gas or stretching the dough too tightly, as this can result in a dense crumb. Techniques vary depending on the specific bake – rolling for scrolls like Babka, braiding for challah-like loaves, or forming individual rolls.
When shaping, try to work efficiently and with minimal flour, as excess flour can make the dough tough. Use light, confident movements to form the desired shape, ensuring seams are sealed properly to prevent blowouts during baking. Allowing the dough to rest briefly between shaping steps (like after dividing and before final shaping) can help relax the gluten and make it easier to work with. Gentle handling during shaping is a subtle but important light yeast dough recipe tip for maintaining the lightness.
The Second Rise: Allowing the Dough to Fully Expand
The second rise, also known as the final proof or pan proof, occurs after the dough has been shaped and placed in its baking vessel (pan, baking sheet, etc.). This is the final opportunity for the dough to increase in volume before baking. During the second rise, the yeast continues to produce gas, causing the shaped dough to expand and become light and puffy.
This rise is crucial for achieving good volume and a tender crumb in the finished product. The duration of the second rise is typically shorter than the first, often ranging from 30 minutes to 1.5 hours, depending on the temperature and recipe.
The dough is ready for baking when it has significantly increased in size (often 80-100% of its original volume) and passes the poke test – the indentation should spring back very slowly or remain slightly. Over-proofing during the second rise is a common mistake; the dough can collapse during baking or result in a pale crust and a coarse crumb. Under-proofing will lead to a dense loaf with poor volume. Learning to judge the readiness of the dough by sight and touch is a key light yeast dough recipe tip for successful Eastern European bakes.
Light Yeast Dough Recipe Tips: Eastern European Baking Edition
Temperature Control: Maintaining Ideal Conditions for Yeast Activity
Controlling temperature is paramount throughout the entire yeast dough process, from activating the yeast to proofing. Yeast is most active and productive within a specific temperature range. For most common yeasts used in home baking, this range is roughly 75-85°F (24-30°C). Maintaining a consistent temperature during proofing ensures the yeast ferments at a steady pace, leading to even gas production and a predictable rise. Fluctuating temperatures can lead to uneven fermentation and can make it difficult to judge when the dough is ready.
Ideal environments for proofing include a slightly warm oven (turned off, with the light on), a proofing box, or simply covering the dough and placing it in a warm spot in your kitchen, away from drafts. If your kitchen is cool, longer proofing times will be needed, or you might consider using a warmer spot. Conversely, if your kitchen is very warm, the dough will rise faster, and you'll need to monitor it closely to prevent over-proofing. Paying attention to ambient temperature and adjusting proofing times accordingly is a critical light yeast dough recipe tip.
The Windowpane Test: Ensuring Proper Gluten Development
The windowpane test is a classic technique used to determine if the dough has been kneaded sufficiently to develop a strong gluten network. To perform the test, take a small piece of dough (about the size of a golf ball) and gently stretch it between your fingers. Carefully pull and stretch the dough outwards in all directions, trying to create a thin membrane. If the dough is properly kneaded, you should be able to stretch it thin enough to see light through it, like a translucent windowpane, without it tearing.
If the dough tears easily before becoming thin, it indicates that the gluten is not yet sufficiently developed, and the dough needs more kneading. If the dough is very sticky or difficult to stretch, it might be over-kneaded or have too much moisture. Performing the windowpane test is a reliable indicator of proper gluten development and a valuable light yeast dough recipe tip for ensuring your dough has the structure needed for a light crumb.
Egg Wash Application: Achieving a Beautiful Golden Crust without Weighing Down the Dough
Many Eastern European yeast bakes feature a beautiful, shiny, golden-brown crust. This is typically achieved by applying an egg wash just before baking. An egg wash is usually made by whisking an egg with a small amount of liquid, such as water, milk, or cream. The egg wash contributes to color and shine through the Maillard reaction and caramelization of sugars on the surface. The proteins in the egg also help create a slightly firmer crust.
When applying the egg wash, it's important to use a soft pastry brush and apply it gently and evenly. Avoid letting pools of egg wash collect in crevices or at the base of the dough, as this can create dense, heavy spots. Applying too thick a layer or using too much liquid can also weigh down the delicate surface of the proofed dough, potentially inhibiting the final oven spring. A thin, even coat is all that's needed for a gorgeous finish, making careful application a useful light yeast dough recipe tip.
Baking Time and Temperature: Achieving Even Baking and Preventing a Dense Interior
The final step in achieving a light yeast dough is baking it correctly. The oven temperature and baking time are crucial for ensuring the dough bakes through evenly, achieves good oven spring (the final burst of rising in the oven), and develops a desirable crust and crumb structure. Most enriched yeast doughs bake best in a moderately hot oven, typically between 350-375°F (175-190°C). This temperature allows the crust to set and brown while the interior cooks thoroughly and the yeast activity ceases.
Under-baking is a common cause of dense or gummy interiors. The internal temperature of a fully baked enriched yeast bread or pastry should reach around 190-200°F (88-93°C). Using an instant-read thermometer is the most accurate way to check for doneness. Over-baking, conversely, can result in a dry, tough texture. Pay attention to the visual cues – the crust should be deeply golden brown, and the loaf should sound hollow when tapped on the bottom. Adjusting baking time based on your specific oven and the size/shape of your bake is a key light yeast dough recipe tip.
Common Mistakes to Avoid When Making Light Eastern European Yeast Doughs
Over-Kneading: The Enemy of Tender Dough
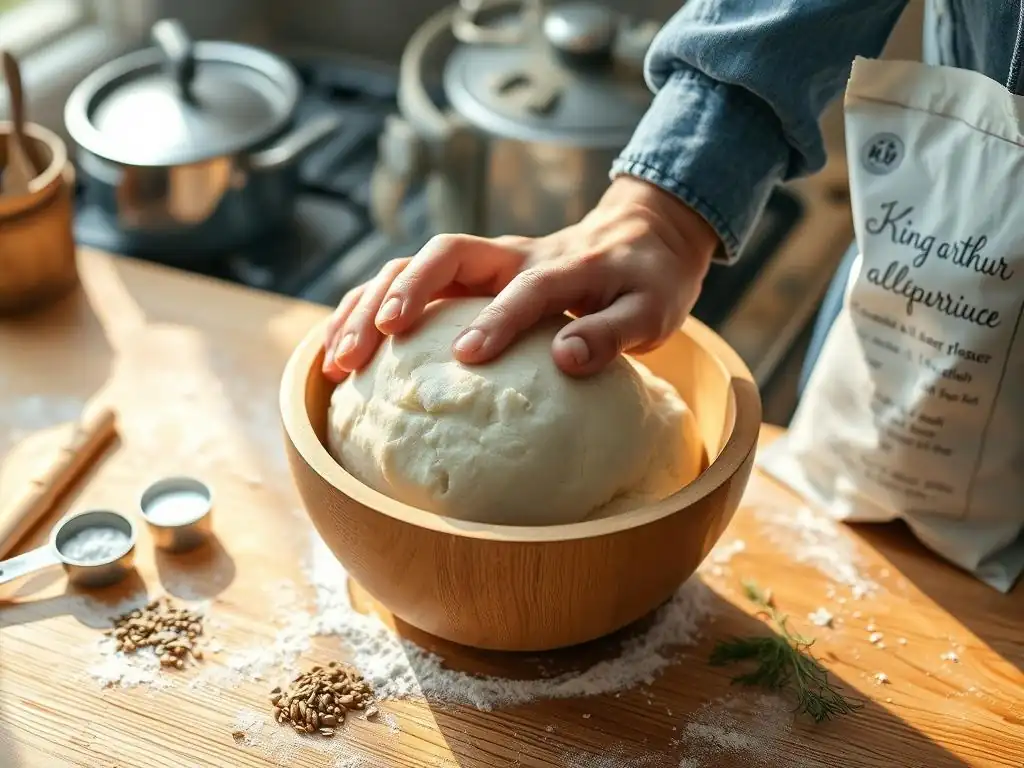
As discussed earlier, sufficient kneading is essential for gluten development. However, over-kneading, especially with the power of a stand mixer, can destroy the delicate gluten structure you've worked to build. When dough is over-kneaded, the gluten strands become too tight and can even break down, resulting in a dough that feels stiff, tears easily, and lacks elasticity. This leads to a baked product that is tough, dense, and rubbery rather than light and tender.
To avoid over-kneading, pay attention to the dough's texture. It should be smooth, elastic, and slightly tacky, but not sticky. Perform the windowpane test. If using a stand mixer, start on a low speed and increase gradually as needed, stopping as soon as the dough clears the sides of the bowl and passes the windowpane test. Typically, 8-12 minutes in a stand mixer on medium speed is sufficient for many enriched doughs. Trust your dough's feel more than a timer alone; this is a crucial light yeast dough recipe tip.
Using Expired Yeast: A Recipe for Disaster
Yeast is a living organism, and like all living things, it has a shelf life. Using expired or inactive yeast is one of the quickest ways to end up with a dense, flat dough. If your yeast is old, stored improperly (it should be stored in an airtight container in the refrigerator or freezer), or past its expiration date, it may not be viable enough to produce the necessary gas for leavening. Even if it shows some initial signs of activity, it might not have the strength to lift a heavy, enriched dough.
To ensure your yeast is active, especially if you're unsure about its age, proof it first. Dissolve the yeast in a small amount of warm liquid (as specified for the type of yeast) with a pinch of sugar. Within 5-10 minutes, it should become foamy and bubbly. If it doesn't, your yeast is likely dead, and you'll need a fresh batch. Always check the expiration date on the package and store yeast properly for optimal performance. Ensuring yeast viability is a non-negotiable light yeast dough recipe tip.
Incorrect Liquid Temperature: Scalding or Stalling the Yeast
The temperature of the liquid used to activate the yeast is critical. Water or milk that is too hot will kill the yeast, rendering it inactive. Temperatures above 130°F (54°C) are generally lethal to yeast. If you add liquid that is too hot to your dough, your yeast won't be able to ferment, and your dough will not rise, resulting in a heavy, unleavened brick.
Conversely, liquid that is too cold will slow down yeast activity significantly, potentially leading to extremely long proofing times or insufficient rise. While cold fermentation (like in the refrigerator) is used intentionally for flavor development, the initial activation liquid should be within the recommended temperature range for the specific type of yeast you are using (typically 85-115°F or 30-46°C). Always use a thermometer to check the liquid temperature; it's a simple step that prevents a common and frustrating issue, and a key light yeast dough recipe tip.
Rushing the Proofing Process: Patience is Key
Yeast dough requires time to ferment properly and develop its structure and flavor. Rushing the proofing process by using excessive heat or cutting the rising times short is a common mistake that leads to dense dough. If the dough doesn't have enough time to rise sufficiently during the first and second proofs, it won't achieve its full volume potential, resulting in a heavy, tight crumb. The yeast needs time to consume sugars and produce enough gas to inflate the gluten network.
While providing a warm environment helps, avoid putting dough in a hot oven or directly on a heating element, as this can kill the yeast or cause it to rise too quickly and then collapse. Trust the dough's visual cues and the poke test more than strict timing, as proofing times can vary based on ambient temperature, yeast activity, and recipe variations. Patience is a virtue in yeast baking, and allowing adequate proofing time is a fundamental light yeast dough recipe tip.
Over-Baking: Drying Out the Dough
Baking time and temperature are the final factors influencing the dough's texture. Over-baking occurs when the dough is left in the oven for too long or baked at too high a temperature for its size. This causes excessive moisture loss from the dough, resulting in a dry, crumbly, and tough texture. While a well-browned crust is desirable, a dark, hard crust can indicate over-baking.
To avoid over-baking, follow the recipe's guidelines but use them as a starting point. Check for doneness using visual cues (golden-brown crust), tactile cues (sounds hollow when tapped on the bottom), and ideally, an internal thermometer. For enriched doughs, an internal temperature of 190-200°F (88-93°C) typically indicates it is fully baked. If the crust is browning too quickly, you can loosely tent the bake with foil. Preventing moisture loss during baking is the final light yeast dough recipe tip for a tender crumb.
Adapting Traditional Eastern European Recipes for Lighter Results
Modifying Classic Recipes for Modern Tastes
Traditional Eastern European recipes are often rich, dense, and sometimes quite sweet, reflecting historical availability of ingredients and culinary preferences. While delicious, modern tastes often lean towards lighter textures and sometimes less intense sweetness. Adapting classic recipes involves making careful adjustments to achieve these lighter results without sacrificing the characteristic flavors. This might include slightly reducing the amount of sugar or fat, using a higher protein flour, or increasing the hydration slightly (adding a little more liquid).
For example, a very traditional Babka recipe might call for a high ratio of butter and sugar. A modern adaptation aiming for a lighter crumb might slightly decrease the butter while ensuring proper gluten development through thorough kneading and extended, slow fermentation (like an overnight cold proof). Experimenting with these ratios while maintaining the core techniques of proper proofing and gentle handling is key. Documenting your changes and results is helpful as you adapt these light yeast dough recipe tips.
Substituting Ingredients for a Healthier, Lighter Dough
For those looking to make Eastern European bakes even lighter or healthier, ingredient substitutions can be explored. Replacing some of the butter with a neutral oil can change the texture slightly but reduce saturated fat. Using a portion of whole wheat flour (start with replacing 10-20% of the white flour) can add fiber and nutrients, though it will require more liquid and potentially impact the dough's elasticity, requiring longer kneading or resting times.
Reducing sugar is also possible, though it will affect yeast activity, moisture retention, and browning. If significantly reducing sugar, you might need to increase the yeast slightly or allow for longer proofing times. Using alternative sweeteners can also be explored, but their effect on yeast activity and dough structure varies. Any substitution should be done gradually and with an understanding of how the ingredient functions in the dough, keeping in mind these light yeast dough recipe tips.
Adapting Babka for a Lighter Crumb
Babka, with its rich filling and swirled structure, is a prime candidate for adaptation towards a lighter crumb. Traditional recipes often result in a dense, cake-like texture. To achieve a lighter result, focus on several light yeast dough recipe tips:
- Flour Choice: Ensure you are using high-protein bread flour for a strong gluten network.
- Hydration: Slightly increasing the liquid (milk or water) can result in a softer dough.
- Kneading: Knead thoroughly until a strong windowpane is achieved. The dough needs strength to support the heavy filling.
- Fermentation: Implement a long, slow cold fermentation in the refrigerator (8-12 hours or longer). This develops flavor and strengthens the gluten, making the dough more extensible and easier to roll thinly without tearing, which is crucial for the layers.
- Filling: While the filling is key to flavor, avoid overfilling, as excessive weight can inhibit the rise. Ensure the filling is not too wet.
- Shaping: Roll the dough thinly and evenly. Roll the log relatively tightly but without compressing it excessively.
- Proofing: Allow sufficient time for the shaped babka to proof until visibly puffy and almost doubled in volume.
By focusing on these techniques, particularly strong gluten development and slow fermentation, you can transform a potentially heavy Babka dough into a much lighter, airier treat with a beautiful, open crumb structure and distinct swirls.
Storing and Enjoying Your Light Eastern European Yeast Bakes
Proper Cooling Techniques to Maintain Lightness
Once your beautiful, light Eastern European yeast bake comes out of the oven, proper cooling is essential for maintaining its texture. Hot bread or pastry continues to cook internally as it cools, and moisture is still redistributing. If you slice into a hot loaf too soon, the steam escapes rapidly, and the interior can become gummy or dense.
Always transfer baked goods immediately from the hot pan (unless the recipe specifies otherwise) to a wire cooling rack. A wire rack allows air to circulate around the entire surface, preventing the bottom from becoming soggy from trapped steam. Let the bake cool completely, or at least until it is just warm, before slicing or storing. For larger loaves or pastries, this can take 1-3 hours. Patience during the cooling process is a final, important light yeast dough recipe tip.
Storage Tips to Prevent Staling
Proper storage is key to keeping your light yeast bakes fresh and preventing them from becoming dry or stale too quickly. Once completely cooled, store bread and plain pastries at room temperature in an airtight container or bread box. Avoid refrigerating yeast bread, as this temperature range actually accelerates staling.
For enriched pastries with fillings (like Babka) or those containing dairy or eggs that might spoil quickly, refrigeration is necessary if they won't be consumed within a day or two. Wrap them tightly in plastic wrap or foil before placing them in an airtight container in the refrigerator. For longer storage, most yeast baked goods freeze exceptionally well. Wrap cooled bread or pastries tightly in plastic wrap, then in aluminum foil or a freezer-safe bag.
Frozen bakes can last for 2-3 months. Thaw at room temperature or gently reheat. Following these storage tips helps preserve the delightful lightness you worked hard to achieve using light yeast dough recipe tips.
Serving Suggestions and Complementary Flavors
Light Eastern European yeast bakes are wonderfully versatile and can be enjoyed in numerous ways. Plain loaves or rolls are perfect served with butter, jam, or honey, accompanying meals or coffee. Braided loaves like Vánočka or Kalács are delicious sliced and served for breakfast or brunch.
Enriched pastries like Babka or Kolaches are often enjoyed on their own as a treat with tea or coffee. Their rich, often sweet fillings (chocolate, nuts, poppy seed, fruit) pair beautifully with warm beverages. Consider serving with a dusting of powdered sugar, a light glaze, or alongside fresh fruit or whipped cream for an extra touch of indulgence. The light, tender crumb makes them a delightful base for various toppings and accompaniments, highlighting the success of your light yeast dough recipe tips.
Troubleshooting Common Yeast Dough Problems
Dough That Doesn't Rise: Identifying the Cause
One of the most frustrating issues in yeast baking is dough that simply refuses to rise. The primary cause is inactive or dead yeast. This could be due to using expired yeast, killing the yeast with liquid that is too hot (above 130°F or 54°C), or adding yeast directly to very cold ingredients without allowing it to warm up or activate. Another potential cause is insufficient moisture; yeast needs water to become active.
Other factors include adding salt directly on top of the yeast (salt can inhibit yeast activity in high concentrations), or using ingredients that are too cold, which significantly slows down fermentation. Ensure your yeast is fresh, your liquid is within the correct temperature range, and that all ingredients are roughly at room temperature (especially eggs and milk). If your kitchen is cold, find a warmer spot for proofing. Double-checking these basics is the first step when your light yeast dough recipe tips aren't yielding a rise.
Dense and Heavy Dough: Correcting the Issue
A dense and heavy final product is often the result of insufficient rising or inadequate gluten development. Under-proofing (not allowing the dough enough time for the first or second rise) means the yeast hasn't produced enough gas to inflate the dough sufficiently. Under-kneading results in a weak gluten structure that cannot trap the gas effectively, leading to a tight, heavy crumb.
Other contributors include using flour with too low a protein content for an enriched dough, using too much flour during kneading or shaping (making the dough stiff), or over-working the dough during shaping, which presses out too much gas. Ensure you are using bread flour, kneading until the windowpane test is passed, allowing ample proofing time until the dough is significantly increased in volume and passes the poke test, and handling the dough gently after the first rise. These are key light yeast dough recipe tips for achieving lightness.
Sticky Dough: Handling and Adjusting
Sticky dough can be frustrating to work with, but it doesn't necessarily mean it's bad dough. Dough that is too sticky to handle might have too much hydration (liquid). While higher hydration can lead to a lighter crumb, it also makes the dough stickier. It could also be under-kneaded, as gluten development helps the dough become less sticky and more manageable.
If the dough is slightly sticky but still manageable, try wetting your hands or using a bench scraper to handle it rather than adding excessive flour, which can make the final product tough. If the dough is excessively sticky and slack, you might need to knead in a little more flour, a tablespoon at a time, until it reaches the desired consistency – it should be elastic and tacky, but not sticking stubbornly to your hands or the surface. Adjusting hydration slightly in future batches based on your flour and environment is a useful light yeast dough recipe tip.
Dry Dough: Adding Moisture
Conversely, dough that is too dry will be stiff, crumbly, and difficult to knead into a smooth ball. It lacks the necessary moisture for proper gluten development and yeast activity, resulting in a dense, heavy bake. This is usually caused by using too much flour, not enough liquid, or flour that is very dry and absorbent.
If your dough feels dry during mixing or kneading, you can add more liquid, a teaspoon or tablespoon at a time, until it becomes pliable and tacky. Knead the dough thoroughly after adding the liquid to incorporate it fully. Ensure you are measuring ingredients accurately, particularly the flour, using a kitchen scale for best results. Environmental factors, like very dry air, can also affect dough hydration. Adjusting the liquid slightly based on feel is an important light yeast dough recipe tip for combating dryness.
Conclusion: Mastering the Art of Light Eastern European Yeast Doughs
Embrace the Journey and Enjoy the Baking Process.
Mastering light Eastern European yeast doughs is a rewarding culinary journey that connects you to rich traditions and results in incredibly delicious baked goods. While the process requires attention to detail and patience, understanding the role of each ingredient and technique demystifies the process. From selecting the right flour and yeast to controlling temperature, kneading effectively, and proofing patiently, each step contributes to that coveted light and airy texture.
Don't be discouraged by initial attempts that might not turn out perfectly. Every bake is a learning experience. Pay attention to how the dough feels, how it rises, and how it behaves during shaping and baking. By applying these light yeast dough recipe tips, troubleshooting common issues, and perhaps adapting traditional recipes to your environment and preferences, you will steadily improve your skills. Embrace the process, enjoy the wonderful aromas filling your kitchen, and savor the delightful results of your labor. Happy baking!
Frequently Asked Questions
What makes Eastern European yeast doughs so light and airy?
Eastern European yeast doughs achieve their lightness through specific techniques like multiple proofs and the use of high-quality ingredients. Proper kneading is also crucial for developing gluten structure.
What kind of flour is best for a light yeast dough recipe?
For the lightest texture, use bread flour or strong all-purpose flour. These flours have a higher protein content, which creates more gluten.
What are some common mistakes to avoid when making yeast dough?
Avoid using expired yeast or overworking the dough. Also, ensure your liquids are at the correct temperature (lukewarm, not hot) to activate the yeast properly.
How can I tell if my yeast dough has proofed enough?
The dough should double in size and feel light and airy to the touch. Pressing gently on the dough should leave a slight indentation that slowly fills back in.
What are some tips for storing leftover light yeast dough?
Wrap the dough tightly in plastic wrap and store it in the refrigerator for up to 24 hours. Alternatively, you can freeze the dough for longer storage, but be sure to thaw it properly before baking.
Final Reflection: The Enduring Lightness of Dough
The pursuit of a perfectly light yeast dough transcends mere culinary skill; it's a testament to our enduring desire for airy textures and delightful flavors. This article explored the often-overlooked secrets behind achieving that elusive lightness, from the careful selection of ingredients to the nuanced techniques of kneading and proofing. These techniques, while seemingly simple, hold the key to unlocking a world of baking possibilities, impacting everything from the humble dinner roll to the most elaborate celebratory cake.
The quest for the perfect light dough resonates deeply with our cultural history, reflecting a desire for both sustenance and artistry. Bread, after all, is a staple across cultures, and the lightness of the dough often symbolizes hope, abundance, and even celebration. Bread is the staff of life,
a proverb often repeated, speaks to its fundamental importance, and the lightness we achieve elevates it beyond mere sustenance. The techniques discussed here are not just recipes; they are a connection to a rich culinary heritage, passed down through generations and adapted to our modern kitchens.
Now, consider your own baking journey. What have you learned today that might transform your approach to yeast doughs? Perhaps it's the importance of proper hydration, the subtle nuances of fermentation, or the simple act of gently handling the dough. I encourage you to experiment, to embrace the process, and to discover the joy of creating light, airy doughs that will delight your senses and those of your loved ones. The lightness you achieve is not just in the texture of the bread, but also in the satisfaction of mastering a timeless craft.
Unlock Your Inner Baker: Master Light & Fluffy Eastern European Doughs!
Thanks for diving into the world of light and airy Eastern European doughs! We hope you've discovered new techniques and are ready to elevate your baking game. Now it's time to put your knowledge into practice.
Here's how to take the next step:
- Bake your dream loaf: Try out one of the recipes mentioned in the article – starting with the simplest one might be best! We're confident you'll be amazed by the results.
- Share your baking journey: Snap a picture of your creation and tag us on social media – we love seeing your baking triumphs (and learning from your experiments! ).
- Explore other Eastern European baking delights: Expand your baking horizons by searching our website for other exciting recipes and tips!
Ready to create your own masterpiece? What traditional Eastern European bread will you tackle first?