
Scandinavia's BestKept Baking Secrets: Dense and Delicious Breads

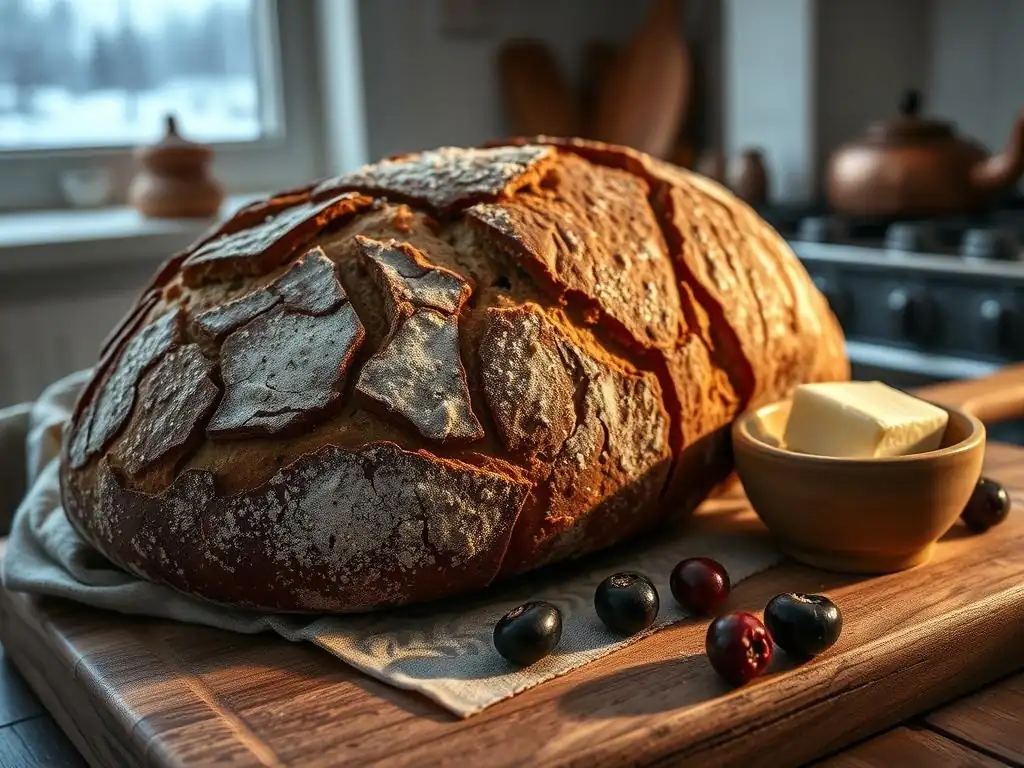
Welcome to BakeWithEase, your kitchen companion on a journey to baking brilliance! Ever wondered about the secrets behind those impossibly dense and flavorful breads from Scandinavia? Uncover the magic in our latest article, where we dive deep into the world of Dense Scandinavian Sourdough Bread. Get ready to explore a recipe that’s both surprisingly simple and utterly satisfying, and discover how to bring a taste of the North into your very own home. Let's bake!
- Discover the Secrets of Dense Scandinavian Sourdough Bread
-
The Ultimate Dense Scandinavian Sourdough Bread Recipe: A Step-by-Step Guide
- Key Ingredients for Authentic Scandinavian Sourdough
- Preparing Your Sourdough Starter for Scandinavian Bread
- Mixing and Kneading the Dough: Achieving the Perfect Texture
- First Fermentation (Bulk Fermentation): Developing Flavor
- Shaping Your Dense Scandinavian Loaf
- Second Fermentation (Proofing): Achieving the Final Rise
- Baking Your Dense Scandinavian Sourdough Bread
- Cooling and Slicing: Enjoying Your Homemade Bread
- Tips and Tricks for Perfecting Your Dense Scandinavian Sourdough
- Serving Suggestions: Pairing Your Dense Scandinavian Bread
- Storing Your Dense Scandinavian Sourdough Bread
-
Frequently Asked Questions
- What makes Scandinavian sourdough bread particularly dense?
- Are the ingredients for a dense Scandinavian sourdough bread recipe easy to find?
- How long does it typically take to make a Scandinavian sourdough bread from start to finish?
- What are some common mistakes to avoid when baking dense Scandinavian sourdough bread?
- Can I adapt a regular sourdough recipe to make it a dense Scandinavian-style sourdough?
- Final Reflection: The Enduring Power of Simple Ingredients
- Unlock Scandinavia's Baking Magic!
Scandinavia, a region known for its stunning landscapes and rich cultural heritage, also boasts a deep and fascinating baking tradition. At the heart of this tradition lies a love for hearty, dense breads, often made with rye and enriched with seeds and spices. These aren't your light, airy loaves; they are substantial, full of flavor, and designed to sustain through long, cold winters. Understanding the history and characteristics of these breads is the first step towards mastering your own dense Scandinavian sourdough bread recipe.
The appeal of Scandinavian bread goes beyond its sustenance. It's about the complex flavors developed through long fermentation, the earthy notes of rye, and the comforting texture that pairs perfectly with simple toppings like butter, cheese, or smoked fish. Learning to bake this style of bread connects you to a centuries-old practice, bringing a piece of Nordic culinary history into your own kitchen. It's a rewarding challenge that yields incredibly satisfying results.
The baking heritage of Scandinavia is deeply intertwined with its geography and climate. Historically, wheat was less common in many parts of the region than rye and barley, which were more resilient crops in the harsher conditions. This led to the development of breads based primarily on these grains. Rye, in particular, is lower in gluten than wheat, resulting in doughs that are stickier and produce denser loaves. Sourdough fermentation was also a natural fit, as it not only leavened the bread but also helped preserve it and made the nutrients in rye more accessible.
Traditional Scandinavian baking often involved baking large batches of bread, sometimes only a few times a year, especially in rural areas. These loaves were designed to last, often stored in cool cellars or dried to preserve them over the winter months. This necessity shaped the characteristics we see today: dense crumb structures that hold up well over time and robust flavors that deepen with age. Examples range from the dark, molasses-sweetened rugbrød of Denmark to the crisp, thin knäckebröd (crispbread) found across the region, showcasing a diverse yet unified approach to hearty grains.
The defining feature of many Scandinavian breads, especially rye-based ones, is their remarkable density. This isn't an accident; it's a consequence of the flour used and the baking techniques employed. Rye flour contains pentosans, which are complex carbohydrates that absorb a lot of water and contribute to a moist, tight crumb structure rather than the open, airy structure typical of wheat-based sourdoughs. The high hydration levels often used in these doughs, sometimes exceeding 80% water relative to flour weight, further contribute to this characteristic density and moistness.
Beyond texture, the flavor profile of a dense Scandinavian sourdough bread is complex and deeply satisfying. The long, slow fermentation process breaks down starches and proteins, developing rich, tangy notes. The rye flour itself imparts earthy, slightly sour, and sometimes subtly sweet undertones. Often, ingredients like malt, molasses, or dark syrup are added for color and a touch of sweetness, balancing the tanginess of the sourdough. Seeds such as sunflower, pumpkin, flax, or caraway are frequently incorporated, adding layers of texture, nutty flavors, and nutritional value, making each slice a flavorful experience.
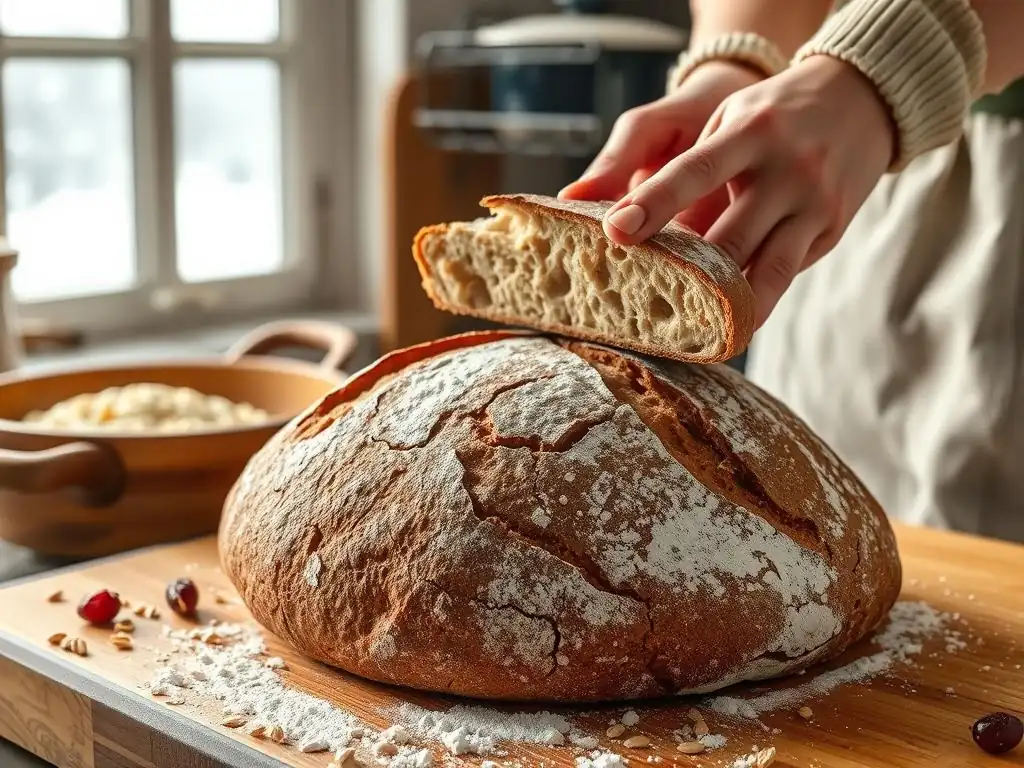
Ready to bake your own dense Scandinavian sourdough bread? This guide will walk you through each step, from preparing your starter to enjoying your finished loaf. Achieving that perfect balance of density, moisture, and flavor requires patience and attention to detail, but the result is incredibly rewarding. Follow this dense Scandinavian sourdough bread recipe closely, and you'll be enjoying a taste of the North in no time.
Crafting an authentic dense Scandinavian sourdough bread starts with selecting the right ingredients. While the process is similar to other sourdough baking, the choice of flour is paramount. You'll primarily need a mix of rye flour and strong wheat flour, alongside water, salt, and your active sourdough starter. Optional but traditional additions include dark syrups, seeds, and sometimes spices like fennel or caraway.
Using high-quality ingredients is crucial for the best results. Opt for organic flours if possible. The water you use should be non-chlorinated, as chlorine can inhibit the activity of your starter. The salt should be non-iodized sea salt or kosher salt. These simple ingredients, when combined and fermented correctly following a good dense Scandinavian sourdough bread recipe, transform into something truly special.
The Importance of Rye Flour in Scandinavian Baking
Rye flour is the cornerstone of many traditional Scandinavian breads, and it's essential for achieving the characteristic density and flavor of a dense Scandinavian sourdough bread. Unlike wheat flour, rye flour contains less gluten-forming proteins. This lower gluten content means the dough doesn't develop the same elastic structure as wheat dough, resulting in a tighter, heavier crumb. Furthermore, rye flour is rich in flavor compounds that contribute to the bread's distinctive taste profile, often described as earthy, slightly tangy, and robust.
There are different types of rye flour, from light to dark, and whole grain. For a truly authentic dense Scandinavian sourdough bread, a significant proportion of whole grain rye flour is often used. This not only adds nutritional value and fiber but also intensifies the flavor and color of the final loaf. Experimenting with different ratios of rye to wheat flour will allow you to control the density and strength of the crumb, finding the balance that suits your preference within your dense Scandinavian sourdough bread recipe.
Choosing the Right Type of Sourdough Starter
The success of your dense Scandinavian sourdough bread recipe heavily relies on a healthy, active sourdough starter. While any established starter can technically be used, a starter that has been fed with a significant portion of rye flour is often preferred for Scandinavian-style breads. A rye-based starter tends to be more vigorous and contributes its own robust flavor notes that complement the rye flour in the main dough.
If you don't have a rye starter, you can convert a portion of your existing wheat starter by feeding it exclusively with rye flour for several cycles (typically 3-5 days, feeding daily) before using it in your dense Scandinavian sourdough bread recipe. Look for a starter that reliably doubles or triples in size within 4-8 hours after feeding, depending on the temperature. It should have a pleasant, tangy aroma and be bubbly throughout. A strong starter provides the necessary leavening power to lift the heavy rye dough.
Before you begin mixing the dough for your dense Scandinavian sourdough bread, ensure your starter is at its peak activity. Using a starter that is not sufficiently active is a common reason for dense, flat loaves. Plan ahead, as getting your starter ready might take 1-2 feeding cycles.
Typically, you'll want to use your starter when it's at its peak or just slightly past it, often referred to as "ripe." This is when it has reached its maximum height after feeding and is just starting to show signs of deflating. Using it at this stage ensures it has maximum leavening power. For a dense Scandinavian sourdough bread recipe, some bakers prefer a slightly younger starter to control the tanginess, but activity is key.
Feeding Your Starter for Optimal Rise
To ensure your starter is active enough for a dense Scandinavian sourdough bread recipe, you'll need to feed it correctly. The standard feeding ratio is 1:1:1 by weight (starter:water:flour). For a rye starter, or a starter you plan to use for rye bread, feeding it with a mix of rye and water is ideal. For example, if you need 100g of active starter for your recipe, you might take 20g of your existing starter, feed it with 40g of water and 40g of rye flour.
Allow the starter to ferment at room temperature until it shows peak activity. The time this takes depends heavily on the ambient temperature. At warmer temperatures (around 24-26°C or 75-79°F), this might take 4-6 hours. At cooler temperatures (around 20-22°C or 68-72°F), it could take 8-12 hours. Observe your starter; it should be bubbly, domed, and smell pleasantly sour. This active state is crucial for successfully leavening the dense dough in your dense Scandinavian sourdough bread recipe.
Testing Your Starter's Activity
A simple and reliable way to test if your starter is ready to be used in your dense Scandinavian sourdough bread recipe is the float test. Gently scoop a small amount (about a teaspoon) of your active starter from the top and drop it into a glass of room temperature water. If the starter floats, it means it has enough trapped gas from fermentation and is active enough to leaven your dough.
If the starter sinks, it likely needs more time to ferment or perhaps another feeding to build strength. Don't be discouraged if it sinks; just feed it again or give it more time. Using a starter that passes the float test significantly increases your chances of a successful rise with your dense Scandinavian sourdough bread recipe, which is particularly important given the challenging nature of working with high-rye doughs.
Mixing and Kneading the Dough: Achieving the Perfect Texture
Mixing the dough for a dense Scandinavian sourdough bread recipe differs from mixing a high-wheat dough. Rye dough is inherently sticky and less elastic. You won't develop the same strong gluten network as you would with a baguette or ciabatta. The goal is to hydrate the flours evenly and integrate the ingredients without overworking the dough, which can make it even stickier and harder to handle.
Many recipes for dense Scandinavian sourdough bread use a high hydration level, meaning a lot of water relative to the flour weight. This is necessary because rye flour absorbs a significant amount of water. The initial mix might look more like a thick batter than a traditional dough. Patience is key during this stage, allowing the flour time to fully hydrate.
The Autolyse Technique for Enhanced Hydration
While less critical than with high-wheat doughs, an autolyse can still be beneficial in a dense Scandinavian sourdough bread recipe, particularly if using a blend of rye and wheat. An autolyse involves mixing just the flour and water from the recipe and letting it rest for 20-60 minutes before adding the starter and salt.
This resting period allows the flour to fully hydrate and the gluten (from the wheat portion) to start developing on its own. For a high-rye dough, the benefit is primarily improved hydration and slightly easier handling later on. When working with a dense Scandinavian sourdough bread recipe, even a short autolyse can make the subsequent mixing and folding steps a bit smoother.
Mastering the Art of Hand Kneading
Hand kneading a high-rye dough for a dense Scandinavian sourdough bread recipe is different from kneading wheat dough. You won't achieve the same smooth, elastic texture. Instead, the dough will remain relatively sticky and dense. The "kneading" process is more about mixing thoroughly and performing stretch-and-folds during the bulk fermentation.
If you choose to hand knead initially, focus on bringing the ingredients together into a cohesive mass. Techniques like the "slap and fold" can work, but be prepared for the stickiness. Alternatively, simply mixing with a sturdy spoon or dough whisk until no dry flour remains, followed by periodic folds, is often sufficient for developing the structure needed for a dense Scandinavian sourdough bread recipe.
Using a Stand Mixer for Dense Sourdough
A stand mixer can make the initial mixing of a dense Scandinavian sourdough bread recipe much easier, especially given the high hydration and stickiness of the dough. Use the dough hook attachment on a low speed. Mix the ingredients until they are just combined and no dry flour remains. This usually takes only a few minutes.
Avoid over-mixing, as this can damage the starch molecules in the rye and lead to a gummy texture. The stand mixer helps distribute the ingredients evenly and starts the minimal gluten development required from the wheat portion. After the initial mix in the stand mixer, you will still rely on subsequent folds during bulk fermentation to build structure for your dense Scandinavian sourdough bread.
First Fermentation (Bulk Fermentation): Developing Flavor
Bulk fermentation is a crucial stage in any sourdough process, and it's particularly important for developing the deep, complex flavors characteristic of a dense Scandinavian sourdough bread recipe. This is the period after mixing where the dough rests as a single mass, allowing the wild yeast and bacteria in the starter to begin their work, producing gas and organic acids.
The duration and environment of the bulk fermentation significantly impact the final texture and flavor of your bread. For a dense Scandinavian sourdough bread, a longer, cooler bulk fermentation is often preferred to enhance the tangy flavors and break down the rye effectively.
Understanding Bulk Fermentation Time and Temperature
The time required for bulk fermentation in a dense Scandinavian sourdough bread recipe is highly variable and depends primarily on the temperature of your kitchen and the activity of your starter. A typical bulk fermentation for this type of dough might range from 4 to 12 hours. At warmer room temperatures (around 24°C or 75°F), it might take 4-6 hours. At cooler temperatures (around 20°C or 68°F), it could take 8-12 hours or even longer.
You are looking for signs that the dough has increased in volume (though rye dough won't double like wheat dough, a 30-50% increase is common), has bubbles visible on the surface and sides, and feels lighter and airier. The dough should also smell pleasantly fermented. Don't rely solely on time; learn to read the dough itself to know when it's ready for the next step in your dense Scandinavian sourdough bread recipe.
The Importance of Folds During Bulk Fermentation
Even though rye dough doesn't develop gluten like wheat dough, performing folds during bulk fermentation is still beneficial for a dense Scandinavian sourdough bread recipe. Folds help to build some structure, distribute the yeast and bacteria evenly throughout the dough, and degas the dough slightly, which can improve the final crumb texture.
Typically, you might perform 2-4 sets of folds during the first 1-2 hours of bulk fermentation. For a sticky rye dough, wet hands or a wet dough scraper are your best tools. Gently stretch one side of the dough up and fold it over the center, repeating with the other three sides. Allow the dough to rest for 30-60 minutes between sets of folds. After the initial folds, leave the dough undisturbed to finish its bulk fermentation.
Shaping a dense Scandinavian sourdough bread can be a bit trickier than shaping a wheat loaf due to the dough's stickiness and lower elasticity. The goal is to create surface tension that will help the loaf hold its shape during proofing and baking. Don't expect the dough to be smooth and taut like a wheat boule; it will remain somewhat rustic.
Work on a lightly floured or wet surface. Use a dough scraper to help handle the sticky dough. The key is to be confident and efficient in your movements to avoid the dough sticking excessively to your hands or the work surface. Mastering shaping is a step closer to perfecting your dense Scandinavian sourdough bread recipe.
Techniques for Shaping a Tight and Even Loaf
For a dense Scandinavian sourdough bread recipe, simple shaping techniques work best. A common method is to gently pat the dough into a rough rectangle or circle, depending on whether you're aiming for a batard (oval) or boule (round). Then, fold the edges into the center to create tension.
For a boule, fold the sides towards the center, then gather the edges underneath to create a round shape with tension on top. For a batard, fold the top down about two-thirds of the way, then fold the bottom up over the top fold, and finally, gently roll the dough to create a log, sealing the seam underneath. The goal is to create a relatively uniform shape that will proof and bake evenly.
Using a Banneton Basket for Proofing
A banneton basket is an excellent tool for proofing a dense Scandinavian sourdough bread. It helps the dough hold its shape as it undergoes its final rise and also imparts a lovely pattern on the crust. Generously flour the banneton basket with rice flour (which is less likely to stick than wheat flour) or a mix of rice and rye flour.
Carefully place your shaped loaf seam-side up (if baking seam-side down) or seam-side down (if baking seam-side up for scoring) into the floured banneton. The basket supports the heavy, dense dough, preventing it from spreading out too much during proofing. This is particularly helpful for high-rye doughs which lack the strong structure of wheat doughs.
Second Fermentation (Proofing): Achieving the Final Rise
The second fermentation, or proofing, is the final rise the dough undergoes before baking. This stage allows the yeast to produce more gas, causing the loaf to expand further and developing more complex flavors. For a dense Scandinavian sourdough bread recipe, proofing can be done at room temperature or in the refrigerator (cold proofing).
Cold proofing in the refrigerator (usually 4°C or 40°F) is often preferred for dense Scandinavian sourdough. It significantly slows down fermentation, allowing flavors to deepen over a longer period (8-24 hours or even longer). Cold dough is also easier to score and handle before baking. Room temperature proofing is faster (1-3 hours) but requires closer monitoring.
Monitoring the Dough During Proofing
Whether proofing at room temperature or in the refrigerator, it's important to monitor your dense Scandinavian sourdough bread dough. The dough should increase in size, but it won't double like a wheat loaf. Look for a noticeable increase in volume and a dough that feels slightly puffy and lighter when gently poked.
Over-proofing a dense Scandinavian sourdough bread can lead to a lack of oven spring and a gummy texture. Under-proofing will result in a very dense, tight crumb and potentially a blow-out during baking. Learning to judge the readiness of the dough comes with practice and paying close attention to its appearance and feel as described in the next section.
The Poke Test: Knowing When Your Dough is Ready
The poke test is a common method to determine if your dense Scandinavian sourdough bread dough is sufficiently proofed. Gently press your floured finger about half an inch into the side of the dough.
If the indentation springs back immediately, the dough is under-proofed. If it stays indented completely, the dough is likely over-proofed. If the indentation slowly springs back halfway, the dough is perfectly proofed and ready to bake. This test is a reliable indicator for many types of bread, including your dense Scandinavian sourdough bread recipe.
Baking is where the magic happens, transforming your proofed dough into a beautiful, flavorful loaf of dense Scandinavian sourdough bread. Achieving a good crust and ensuring the dense interior is cooked through requires high heat and steam, especially during the initial phase of baking.
Many bakers prefer using a Dutch oven or baking stone with added steam for baking sourdough, and this holds true for a dense Scandinavian sourdough bread recipe. These methods help create a high-heat, steamy environment that promotes maximum oven spring and a beautiful, crispy crust.
Oven Temperature and Baking Time
Preheating your oven to a high temperature is essential for baking a dense Scandinavian sourdough bread. A common starting temperature is 230-250°C (450-480°F). This initial high heat provides the necessary "oven spring," causing the dough to expand rapidly before the crust sets.
The total baking time for a dense Scandinavian sourdough bread recipe can vary depending on the size and shape of the loaf, but typically ranges from 35 to 60 minutes. After the initial period at high heat (often under a lid or with steam), the temperature is usually reduced (to around 200-220°C or 400-430°F) for the remainder of the baking time to ensure the interior cooks thoroughly without burning the crust.
Using a Dutch Oven for a Crispy Crust
A Dutch oven is an excellent tool for baking a dense Scandinavian sourdough bread, helping to trap steam released by the dough during the first part of baking. This trapped steam keeps the surface of the dough moist, allowing it to expand fully before the crust hardens. Preheat your Dutch oven in the oven while it comes up to temperature.
Carefully transfer your proofed loaf into the hot Dutch oven. Bake with the lid on for the first 20-30 minutes. This creates the steamy environment crucial for oven spring and crust development. After this time, remove the lid to allow the crust to brown and crisp up. Continue baking until the loaf is deep golden brown and cooked through.
Scoring the Dough for Optimal Oven Spring
Scoring, or making cuts on the surface of the dough just before baking, serves both functional and aesthetic purposes for your dense Scandinavian sourdough bread. Functionally, scores act as vents, allowing the dough to expand predictably during oven spring. Without scoring, the loaf might burst unpredictably at its weakest point.
Aesthetically, scoring allows you to create patterns on your loaf. For a dense Scandinavian sourdough bread, simple scores like a single slash down the length of a batard or a cross on a boule are traditional. Use a sharp razor blade (lame) or a very sharp knife and make quick, confident cuts about half an inch deep. Scoring cold dough from the refrigerator is significantly easier than scoring warm dough.
Cooling and Slicing: Enjoying Your Homemade Bread
After the anticipation of mixing, fermenting, and baking, it might be tempting to slice into your dense Scandinavian sourdough bread right away. However, this is a critical step that requires patience to ensure the best texture and flavor.
Allowing the bread to cool properly is essential for several reasons. It allows the internal moisture to redistribute evenly throughout the loaf and the starches to set. Slicing too early can result in a gummy or doughy texture inside, even if the crust looks perfect.
Allowing the Bread to Cool Completely
Once your dense Scandinavian sourdough bread is out of the oven, transfer it immediately to a wire rack to cool. This allows air to circulate around the entire loaf, preventing the bottom crust from becoming soggy from residual steam.
Cooling time for a dense loaf like this can be significant, often 2-4 hours, or even longer for very large loaves. The internal temperature needs to drop considerably. While challenging, resist the urge to cut into it until it is completely cool. This patience will be rewarded with the perfect texture you worked so hard to achieve with your dense Scandinavian sourdough bread recipe.
The Best Way to Slice Dense Sourdough
Once your dense Scandinavian sourdough bread has cooled completely, it's time to slice and enjoy! Because of its dense texture and often chewy crust, using the right tool is important for clean slices.
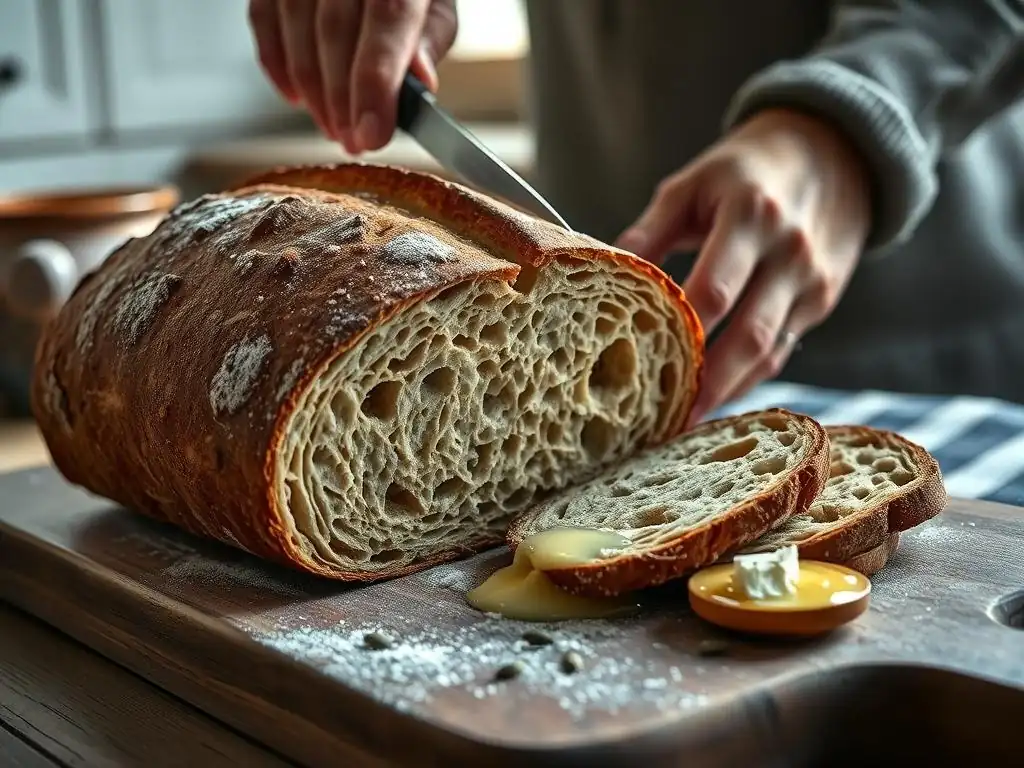
A serrated bread knife is the best tool for slicing dense sourdough. Use a gentle sawing motion rather than pressing down, which can flatten the loaf. Thick or thin slices? That's entirely up to you and how you plan to enjoy it. Thick slices are great for open-faced sandwiches, while thinner slices are perfect for toasting or pairing with cheese.
Baking a dense Scandinavian sourdough bread is a craft that improves with practice. Even with a solid dense Scandinavian sourdough bread recipe, there can be challenges. Here are some tips and tricks to help you troubleshoot common issues and elevate your baking.
Troubleshooting Common Baking Issues
- Issue: Dough is too sticky.
- Tip: High rye dough is naturally sticky. Use wet hands or a wet dough scraper when handling. Avoid adding excessive flour during shaping, as this can dry out the dough. Ensure your starter is active, as a weak starter can lead to a sticky, underdeveloped dough.
- Issue: Loaf is too flat.
- Tip: This is often due to an inactive starter, under-proofing, or insufficient surface tension during shaping. Ensure your starter passes the float test. Check proofing using the poke test. Practice shaping techniques to create a tighter loaf structure.
- Issue: Crust is too pale.
- Tip: Ensure your oven is fully preheated, especially the Dutch oven or baking stone. Bake at a sufficiently high temperature. Extending the baking time after removing the lid can help deepen the crust color. Adding a small amount of malt or sugar to the dough can also promote browning.
Avoiding a Gummy Texture
A gummy texture is a common issue when baking dense, high-rye breads like a dense Scandinavian sourdough bread. It often indicates that the bread was sliced before it was fully cooled, trapping moisture inside. As mentioned earlier, patience is key – allow the bread to cool completely on a wire rack for several hours.
Another cause can be over-mixing the dough, which can damage the starch structure in the rye flour. Ensure you are mixing just until the ingredients are combined. Also, ensure the bread is baked through. Use an instant-read thermometer to check the internal temperature; it should be around 96-100°C (205-212°F) when done. If it's lower, continue baking.
Achieving a Dark and Crispy Crust
A beautiful, dark, and crispy crust is a hallmark of well-baked dense Scandinavian sourdough bread. The high initial baking temperature and the use of steam (from a Dutch oven or by adding water to the oven) are crucial for achieving this. The steam keeps the crust soft initially, allowing for maximum expansion, before it dries out and crisps up.
Baking directly on a preheated stone or steel, with a steam pan added to the oven, is another effective method if you don't have a Dutch oven. Ensure the oven is fully preheated for at least 30-60 minutes. Baking until the crust is a deep mahogany color indicates that the Maillard reaction has occurred, developing rich flavors and a desirable texture.
Variations on the Traditional Recipe
The basic dense Scandinavian sourdough bread recipe is a fantastic starting point, but the tradition includes many delicious variations. Don't be afraid to experiment once you've mastered the base recipe.
Adding Seeds and Grains for Extra Texture and Flavor
Adding seeds and grains is a very popular variation in Scandinavian baking, enhancing both the texture and nutritional value of a dense Scandinavian sourdough bread. Common additions include sunflower seeds, pumpkin seeds, flax seeds, sesame seeds, and sometimes whole or cracked rye berries.
Seeds can be added directly to the dough during the mixing stage. Some recipes also call for soaking or boiling whole grains or seeds (like rye berries or flax seeds) before adding them to the dough. This pre-soaking helps them soften and prevents them from absorbing too much moisture from the dough during bulk fermentation and proofing. A typical amount might be 10-20% of the total flour weight in seeds/grains.
Exploring Different Types of Scandinavian Flour
While rye flour is central to a dense Scandinavian sourdough bread recipe, variations in the type and ratio of flour can significantly change the outcome. Using different grades of rye flour (light, medium, dark, or whole grain) will affect the color, flavor intensity, and density.
You can also experiment with the ratio of rye to wheat flour. A higher percentage of rye will result in a denser loaf, while increasing the wheat percentage will yield a slightly lighter crumb. Some recipes might also incorporate small amounts of other flours like barley or oats for different flavors and textures, staying within the spirit of a hearty, grain-focused dense Scandinavian sourdough bread.
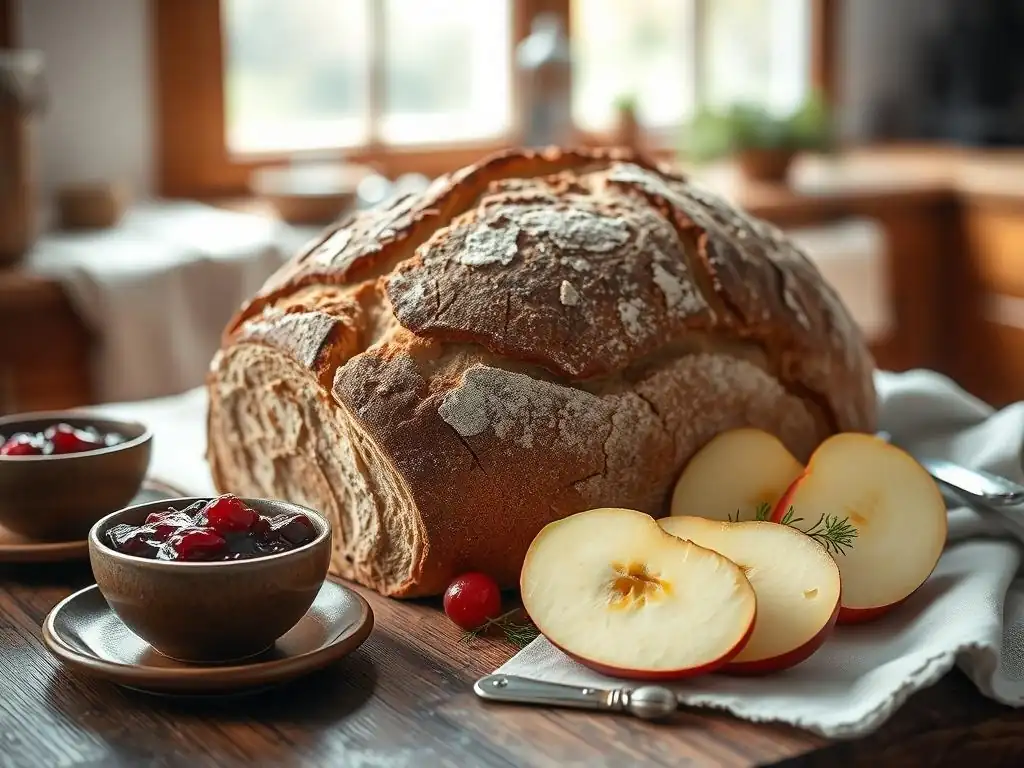
Your homemade dense Scandinavian sourdough bread is incredibly versatile and pairs wonderfully with a variety of foods. Its robust flavor and firm texture make it a perfect base for both simple and elaborate toppings.
In Scandinavia, dense rye bread is often served as the base for smørrebrød (open-faced sandwiches). Classic toppings include butter, various types of pickled herring, smoked salmon, shrimp, hard-boiled eggs, roast beef with remoulade and fried onions, or liver pâté. These pairings highlight the bread's ability to stand up to strong flavors.
Another traditional pairing is simply butter and cheese. The tangy bread cuts through the richness of butter and complements the flavors of aged or strong cheeses. It's also commonly served alongside soups and stews, its density making it perfect for soaking up hearty broths.
Creative Ways to Enjoy Your Homemade Sourdough
Beyond the traditional, your dense Scandinavian sourdough bread can be enjoyed in many creative ways. Toasting slices brings out its nutty flavors and creates a wonderfully crispy texture, perfect for avocado toast or bruschetta with a Nordic twist (think smoked fish or root vegetables).
Use it as the base for sophisticated appetizers, topped with cream cheese and dill, gravlax, or even sweet toppings like apple butter or lingonberry jam. Its sturdy structure also makes it great for croutons in salads or grinding into breadcrumbs for savory dishes.
Given the effort that goes into baking a dense Scandinavian sourdough bread, proper storage is key to keeping it fresh and enjoyable for as long as possible. Due to its density and often high rye content, this type of bread tends to stay fresh longer than lighter wheat loaves.
Keeping Your Bread Fresh for Longer
Once completely cooled, store your dense Scandinavian sourdough bread at room temperature. Avoid refrigerating it, as this can actually make the starch molecules recrystallize faster, leading to staling.
Wrap the loaf tightly in a linen bread bag, a paper bag, or plastic wrap. A linen bag allows the crust to remain crispier for longer, while plastic wrap keeps the crumb softer but can soften the crust. For optimal freshness, consume the bread within 3-5 days.
Freezing and Reheating Tips
If you won't finish your dense Scandinavian sourdough bread within a few days, freezing is an excellent option to preserve its quality. Slice the cooled loaf first, or freeze it whole.
To freeze, wrap the bread (whole or sliced) tightly in plastic wrap, then place it in a freezer-safe bag or aluminum foil. It can be stored in the freezer for up to 2-3 months. To reheat sliced bread, simply toast it directly from frozen. To reheat a whole loaf, thaw it at room temperature, then refresh it in a preheated oven (around 180°C or 350°F) for 10-15 minutes until the crust is crispy and the interior is warmed through.
Frequently Asked Questions
Scandinavian sourdough breads are dense due to the use of whole grain flours like rye, a relatively low hydration dough, and a longer fermentation process that develops a tighter crumb structure.
Yes, most ingredients are readily available. You'll typically need rye flour, wheat flour, water, salt, and a sourdough starter. Some recipes may call for optional ingredients like seeds or molasses.
The entire process, including starter feeding, mixing, fermentation, shaping, proofing, and baking, can take approximately 24-36 hours. Much of this time is passive fermentation.
Avoid over-proofing the dough, which can lead to a flat loaf. Also, ensure your starter is active and bubbly before mixing the dough for optimal rise and flavor.
Yes, you can. Start by substituting a portion of the wheat flour with rye flour, reduce the hydration slightly, and consider adding a small amount of molasses for a richer flavor and color typical of these breads.
Final Reflection: The Enduring Power of Simple Ingredients
The enduring appeal of dense Scandinavian sourdough bread lies not just in its rich flavor and satisfying texture, but in its reflection of a deep-rooted cultural connection to simple, high-quality ingredients. This connection, explored throughout this article, remains incredibly relevant today as we increasingly seek authenticity and sustainability in our food choices. The resurgence of sourdough baking itself speaks volumes about our desire to reconnect with traditional methods and appreciate the slow, deliberate process of crafting something truly nourishing.
The impact of Scandinavian baking traditions extends far beyond the kitchen table. It represents a mindful approach to food production, a respect for seasonal ingredients, and a celebration of community. Bread is the staff of life,
a saying often heard, perfectly encapsulates the central role bread plays in Scandinavian culture, and indeed, many cultures across the globe. This simple statement holds a profound truth: bread is more than just sustenance; it's a symbol of sharing, comfort, and connection. The recipes shared here are not just instructions, but pathways to understanding this deeper cultural significance.
Now, I invite you to consider your own relationship with food. What ingredients do you cherish? What traditions do you hold dear? Perhaps this exploration of Scandinavian baking secrets has sparked a desire to experiment with sourdough, to slow down your baking process, or simply to appreciate the simple beauty of well-made bread. Take the time to savor the process, to connect with the ingredients, and to share the results with those you love. The journey of baking, like the journey of life, is often best enjoyed in the company of others.
Thanks for joining us on this delicious journey through Scandinavia's best-kept baking secrets! You've now got the knowledge to craft unbelievably dense and flavorful breads. Ready to put your newfound skills to the test?
- Bake your first Scandinavian loaf: Gather your ingredients and try one of the recipes mentioned – the results are well worth the effort! Don't be afraid to experiment.
- Share your baking journey: Post a picture of your creation on social media using #BakeWithEaseScandinavia and tag us! Let's see those stunning loaves.
- Explore more Scandinavian baking traditions: Dive deeper into the history and culture behind these incredible breads. What other regional specialties catch your eye?
What unique twist will you add to your next Scandinavian bread masterpiece? Let us know in the comments below!