
Getting a Good Oven Spring: Troubleshooting Tips

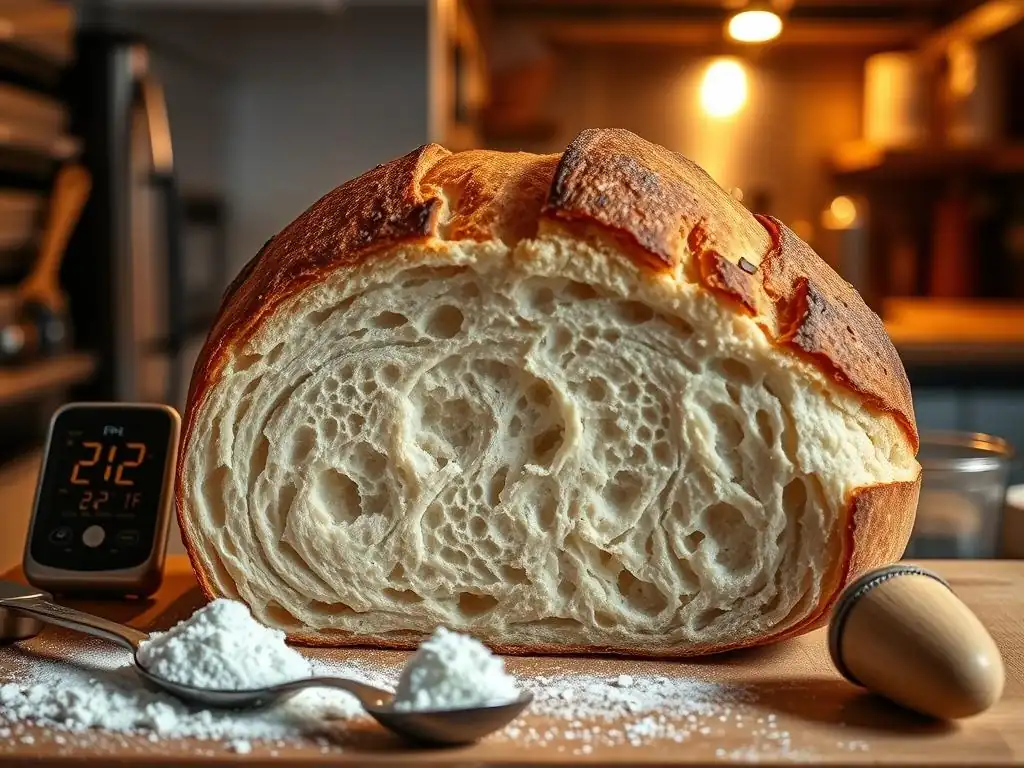
Welcome to BakeWithEase, your trusted companion in the delightful world of baking! Are you striving for that perfect rise in your bread but constantly battling a lackluster loaf? Dive into our latest article and unlock the secrets to achieving impressive oven spring. We'll guide you through common pitfalls and proven solutions, empowering you to bake breads that are as beautiful as they are delicious. Ready to transform your baking game? Let's get started!
- Getting a Good Oven Spring: Troubleshooting Tips for Breads
- BakeWithEase's Guide to Achieving Optimal Oven Spring
- Understanding Oven Spring: The Key to Perfect Bread Baking
- Common Oven Spring Problems and Their Solutions
- Oven Spring Troubleshooting Tips: Mastering the Baking Process
- Advanced Troubleshooting for Oven Spring Issues
- Preventing Oven Spring Problems: Best Practices for Bread Baking
- Achieving the Perfect Oven Spring: A Summary of Key Troubleshooting Steps
- Frequently Asked Questions
- Final Reflection: The Joy (and Science) of a Perfect Oven Spring
- Unlock Your Baking Potential: Master the Oven Spring!
Getting a Good Oven Spring: Troubleshooting Tips for Breads
BakeWithEase's Guide to Achieving Optimal Oven Spring
Welcome, fellow bakers, to BakeWithEase! We know how rewarding it is to pull a perfectly risen loaf from the oven, its crust crackling and golden. That impressive final push your dough gets in the heat is what we call "oven spring." It's a magical moment that dramatically impacts your bread's texture, crumb structure, and overall appearance. When oven spring doesn't happen as expected, it can be disheartening.
This guide is designed to walk you through the common culprits behind poor oven spring and provide actionable oven spring troubleshooting tips. Whether you're dealing with a flat loaf, a dense crumb, or just less lift than you hoped for, we'll help you diagnose the problem and get your bread soaring in the oven. Let's dive into mastering this crucial element of bread baking!
Understanding Oven Spring: The Key to Perfect Bread Baking
What is Oven Spring and Why is it Important?
Oven spring refers to the rapid expansion of bread dough when it's first placed in a hot oven. It's essentially the final burst of rising power your dough has before the yeast activity slows down and the crust begins to set. During this initial phase, usually the first 10-15 minutes of baking, trapped gases within the dough (carbon dioxide produced by yeast) expand rapidly due to the intense heat. Water in the dough also turns to steam, contributing to the expansion.
Why is this initial rise so important? A good oven spring creates a lighter, airier crumb structure. It helps develop a better crust, giving the loaf height and a pleasing shape. Without adequate oven spring, bread can turn out dense, flat, and heavy, lacking that desirable open texture. Mastering the conditions for optimal oven spring is fundamental to achieving high-quality homemade bread.
Factors Influencing Oven Spring in Bread
Several key factors converge to determine the success of your oven spring. These include the vitality of your yeast or starter, the strength and elasticity of your gluten network, the dough's hydration level, the degree of proofing, and the temperature and humidity of your oven. Each plays a critical role. For instance, healthy, active yeast produces ample gas during fermentation and proofing, providing the fuel for expansion. A well-developed gluten structure acts like a balloon, trapping these gases and allowing the dough to stretch without collapsing during the rapid expansion in the oven.
Consider a typical lean dough recipe: it might have a hydration level between 60% and 75%. Dough on the higher end of this range (more water) tends to have the potential for greater expansion and thus more oven spring, provided the gluten is strong enough to support it.
The proofing stage is also crucial; under-proofed dough still has a lot of energy left to expand, while over-proofed dough may have exhausted its rising power and gluten structure, leading to collapse rather than spring. Finally, the oven environment, particularly the initial high heat and steam, is essential for maximizing the dough's potential for rapid expansion before the crust sets.
Common Oven Spring Problems and Their Solutions
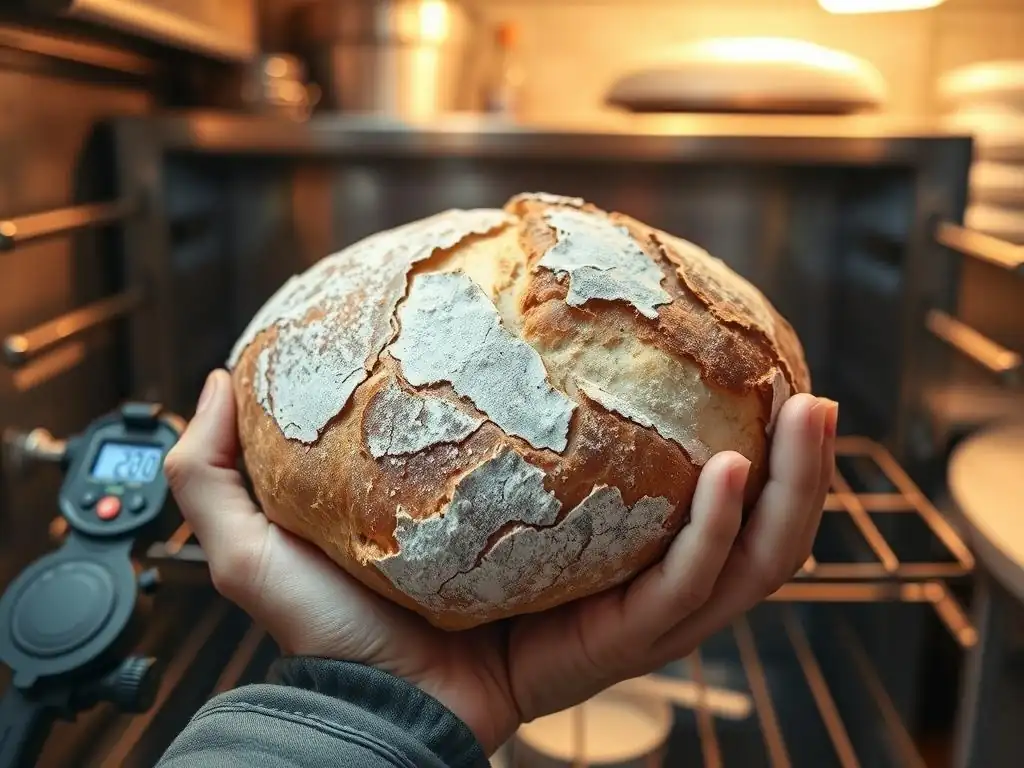
Troubleshooting: Bread Not Rising in the Oven
One of the most common issues bakers face is bread that simply doesn't rise much, if at all, once it hits the hot oven. This lack of significant expansion, or poor oven spring, can manifest in various ways, from loaves that spread outwards instead of upwards to those that remain stubbornly flat. It's frustrating, especially after spending hours mixing, kneading, and proofing. The good news is that this problem is often solvable by carefully examining your process and identifying which factor, or combination of factors, is inhibiting that crucial final lift.
Identifying the specific cause requires a bit of detective work. Is your starter or yeast active? Was the dough proofed correctly? Is your oven reaching the right temperature? Did you handle the dough gently during shaping? These are all questions to ask when troubleshooting oven spring. A loaf that spreads might indicate weak gluten or over-proofing, while a very dense loaf could point to inactive yeast or insufficient proofing. By systematically checking each stage of your bread-making process, you can pinpoint the source of the issue and apply targeted oven spring troubleshooting tips.
Identifying the Root Cause of Poor Oven Spring
Pinpointing the exact reason for lackluster oven spring often involves reviewing the entire baking timeline. Let's consider some common scenarios. If your dough didn't rise much during bulk fermentation or proofing, the issue likely lies with the yeast's activity level or temperature conditions. Perhaps your yeast was old, or the proofing environment was too cold. On the other hand, if your dough looked great before going into the oven but then sagged or didn't expand, it might be an issue with dough handling (degassing too much during shaping), over-proofing, or the oven itself (not hot enough, lack of steam).
- Checklist for Potential Causes:
- [ ] Inactive yeast/starter
- [ ] Insufficient kneading/gluten development
- [ ] Incorrect hydration level for the flour
- [ ] Under-proofing
- [ ] Over-proofing
- [ ] Rough handling during shaping
- [ ] Oven not hot enough
- [ ] Lack of steam in the oven
- [ ] Improper scoring
By evaluating these points, you can narrow down the possibilities. For example, if your sourdough starter hasn't doubled in volume after feeding, its activity might be too low for good oven spring. Similarly, if your dough springs back immediately when poked during the proofing test, it's likely under-proofed. If it deflates slightly and leaves a small indentation, it's probably just right. If it collapses completely, it's over-proofed. This systematic approach is key to effective oven spring troubleshooting tips.
Oven Spring Troubleshooting Tips: Mastering the Baking Process
Tip 1: Dough Hydration Levels and Oven Spring
The amount of water in your dough, known as hydration, significantly impacts its potential for oven spring. Higher hydration doughs (those with a higher percentage of water relative to flour, e.g., 75% hydration) generally have the capacity for greater expansion. This is because the extra water contributes to more steam production in the hot oven, which helps push the dough upwards. However, higher hydration doughs are also stickier and more challenging to handle, requiring stronger gluten development to maintain their structure.
If you're consistently getting poor oven spring with a high-hydration recipe, it's possible the dough is simply too wet for the strength of your flour or your kneading technique. The gluten network might not be robust enough to contain the expanding gases and steam, leading to a loaf that spreads rather than springs. Conversely, very low hydration doughs (e.g., 55-60%) might be easier to handle but inherently have less potential for dramatic oven spring due to less steam production. Adjusting hydration slightly can be a powerful oven spring troubleshooting tip.
Achieving the Right Dough Consistency for Optimal Rise
Finding the right hydration level is crucial for balancing workability and potential oven spring. For beginners, starting with a moderately hydrated dough, perhaps 65-70%, is often recommended. This level is typically easier to handle than very wet doughs but still offers good potential for a decent rise. The "right" consistency will feel tacky but manageable after proper kneading. It shouldn't stick excessively to your hands or the work surface if properly developed.
If your dough feels too stiff and isn't expanding well, consider increasing hydration slightly in your next bake, perhaps by 1-2% of the flour weight. If it feels too slack, sticky, and collapses easily, try reducing the hydration by a similar amount. Remember: different flours absorb water differently. Whole wheat flour, for example, typically requires more water than white bread flour. Pay attention to how the dough feels and behaves throughout mixing and kneading, rather than strictly adhering to a percentage. A dough with the right consistency will feel alive and elastic, ready to spring.
Tip 2: Gluten Development's Role in a Strong Oven Spring
Gluten, the protein network formed when water is added to flour and agitated, is the scaffolding of your bread. It provides the dough with strength and elasticity, allowing it to stretch and hold onto the gases produced by the yeast. A well-developed gluten structure is absolutely essential for capturing those gases and achieving a significant oven spring. If the gluten is weak or underdeveloped, the dough won't be able to expand much in the oven; it will likely collapse or spread outwards.
Think of gluten like tiny balloons connected by elastic bands. As yeast produces gas, these "balloons" inflate. The stronger and more elastic the "bands" (gluten), the more the balloons can expand before popping. Poor gluten development is a frequent cause of inadequate oven spring, especially with whole grain flours or recipes that skip traditional kneading in favor of very short mixing times without long fermentation periods. Improving gluten strength is a key step in oven spring troubleshooting tips.
Kneading Techniques for Enhanced Gluten Strength
Kneading, whether by hand or machine, is the primary way to develop gluten. The mechanical action aligns the gluten proteins and strengthens the network. For traditional kneading, aim for a dough that is smooth, elastic, and passes the windowpane test – you should be able to gently stretch a small piece of dough very thin without it tearing, allowing light to pass through. This indicates a strong, well-developed gluten network capable of supporting a good oven spring.
For no-knead or reduced-knead recipes, gluten is developed through time and gentle stretching or folding over several hours (autolyse and stretch-and-folds). An autolyse (mixing just flour and water and letting it rest for 20-60 minutes before adding other ingredients) helps hydrate proteins and starts gluten development passively. Regular stretch-and-folds (typically 3-5 sets performed over 2-3 hours during bulk fermentation) build strength and structure without aggressive kneading. Experimenting with longer kneading times or incorporating stretch-and-folds can significantly improve your oven spring.
Tip 3: Proper Proofing for a Successful Oven Spring
Proofing, or fermentation, is the stage where the dough rests and rises before baking. It's when the yeast is actively producing carbon dioxide, filling the dough with gas bubbles. The timing and conditions of proofing are incredibly sensitive and directly impact oven spring. Dough needs to be proofed enough to build up sufficient gas and develop flavor, but not too much that the gluten structure becomes weak and can no longer support further expansion.
The ideal proofing state is often described as "just right" – the dough has significantly increased in volume (often doubled or nearly doubled, depending on the recipe and desired outcome) and feels light and airy. It should pass the "poke test": when gently poked with a floured finger, the indentation should spring back slowly, but not completely. This indicates the dough has enough internal pressure and elasticity for a good oven spring. Incorrect proofing is a very common issue when troubleshooting oven spring problems.
Avoiding Over-Proofing and Under-Proofing
Both under-proofing and over-proofing can lead to poor oven spring, though for different reasons. Under-proofed dough hasn't built up enough internal gas pressure; while it might have a lot of potential energy left, the gas production might not be sufficient for dramatic expansion in the oven. It might also tear unevenly when scoring. Over-proofed dough, on the other hand, has exhausted most of its fermentable sugars and the gluten structure has begun to weaken and potentially collapse; the gas bubbles are too large and fragile.
- Signs of Under-Proofing: Dough feels dense and heavy, doesn't increase much in volume, poke test springs back immediately, loaf bursts unevenly in the oven (often along the sides or bottom).
- Signs of Over-Proofing: Dough feels fragile and collapses easily, has a strong alcoholic smell, poke test leaves a permanent indentation or causes the dough to deflate, loaf spreads out flat or collapses in the oven.
Adjusting proofing time or temperature (cooler temps slow proofing, warmer temps speed it up) based on these signs is a crucial oven spring troubleshooting tip. When in doubt, it's often better to slightly under-proof than severely over-proof, as under-proofed dough still retains some energy for oven spring, while over-proofed dough has little left.
Tip 4: Oven Temperature and Baking Time for Maximum Oven Spring
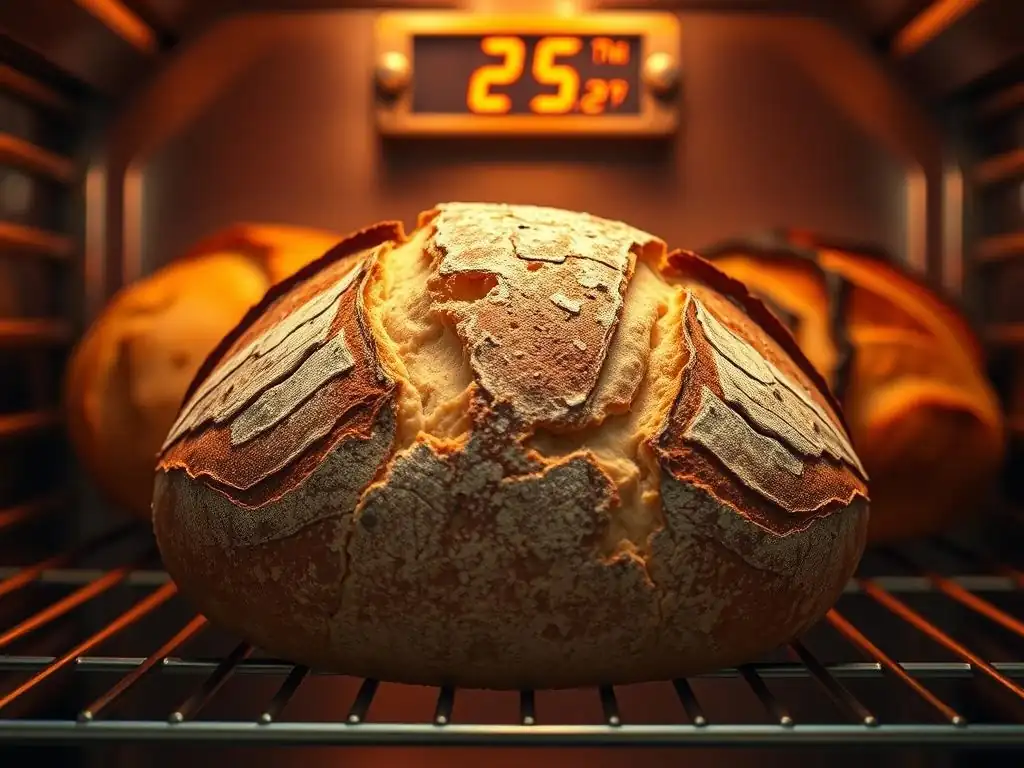
The initial heat of the oven is a major catalyst for oven spring. A very hot environment (often 450-500°F or 230-260°C for the first part of baking) causes the trapped gases and steam to expand rapidly. If the oven isn't hot enough, this rapid expansion won't occur efficiently, resulting in less oven spring. Furthermore, consistent heat throughout the baking process is important for setting the crust and baking the interior properly.
Many home ovens fluctuate in temperature, and the displayed temperature might not be accurate. Using an oven thermometer is a simple yet effective oven spring troubleshooting tip to ensure your oven is reaching and maintaining the desired temperature. Preheating your oven for a sufficient time (at least 30-60 minutes after it indicates it's reached temperature) is also vital, especially if using baking stones or Dutch ovens, as these need time to absorb heat.
Achieving the Ideal Oven Temperature for Bread Baking
Most lean bread recipes (like sourdough or baguettes) benefit from a very hot oven start, often around 450-475°F (230-245°C), sometimes even higher. This intense heat promotes maximum oven spring and helps form a beautiful crust. After the initial spring (usually 10-15 minutes), the temperature is often reduced (e.g., to 400-425°F or 200-220°C) to ensure the interior bakes through without the crust burning.
Using a Dutch oven or baking stone with steam is highly recommended for maximizing oven spring in home ovens. A preheated Dutch oven creates a steamy environment around the loaf for the first part of baking, preventing the crust from setting too quickly and allowing the dough to expand fully. Similarly, baking on a preheated stone or steel and adding steam (by placing a tray of water or ice cubes in the oven) achieves a similar effect. Ensuring your oven is accurately calibrated and sufficiently preheated are critical oven spring troubleshooting tips.
Tip 5: Scoring Techniques for Controlling Oven Spring
Scoring, or making cuts on the surface of the proofed dough just before baking, is more than just decorative. It serves a vital function: it provides controlled weak points in the dough's surface, allowing the expanding gases to escape predictably. Without scoring, the crust would set randomly and the loaf might burst in unpredictable places, leading to a less attractive shape and potentially inhibiting upward expansion.
Proper scoring directs the oven spring, encouraging the loaf to expand where you've made the cuts. The depth, angle, and pattern of the cuts all influence how the loaf will open. A deep, angled cut (like a single ear on a bâtard) can create a dramatic opening and significant oven spring along that line. Multiple shallow cuts (like on a boule) allow for more even expansion across the top. Mastering scoring is an artistic and technical skill that greatly aids in achieving consistent and beautiful oven spring.
Mastering Bread Scoring for Even Expansion
To score effectively, you need a very sharp blade, like a razor blade (often mounted on a handle called a lame). A dull blade will drag and tear the dough, causing it to deflate slightly and hindering oven spring. The dough's surface should also be taut, which comes from good shaping and proper proofing. Make confident, swift cuts. For a single deep cut on a bâtard, hold the lame at a 30-45 degree angle to the surface and make a swift, smooth cut about 1/2 inch deep along the length of the loaf.
For boules, a series of overlapping curved cuts is common, or a simple cross pattern. The key is to make cuts that are deep enough to allow expansion but not so deep they compromise the structure entirely. Practice is key! If your loaf is bursting unpredictably despite scoring, it might indicate under-proofing (the dough is still trying to expand everywhere) or that your scores weren't deep enough. Refining your scoring technique is a valuable oven spring troubleshooting tip.
Advanced Troubleshooting for Oven Spring Issues
Addressing Specific Flour Types and Their Impact on Oven Spring
Different types of flour behave very differently, and this significantly impacts oven spring. High-protein bread flours (often containing 12-14% protein) develop strong gluten networks, capable of supporting substantial oven spring. All-purpose flour (typically 10-12% protein) will yield less dramatic spring but can still produce good results with careful handling. Lower protein flours like pastry flour (around 8-10%) are not suitable for high-structure breads and will result in minimal oven spring.
Whole grain flours (like whole wheat, rye, or spelt) present unique challenges. The bran and germ particles in the flour can cut the gluten strands, weakening the network. This means doughs made with 100% whole grain flour often require higher hydration, gentle handling, and potentially longer fermentation times to build sufficient strength for decent oven spring.
Using a blend of whole wheat and bread flour (e.g., 50/50 or 75/25) can help balance flavor and nutrition with the structural support needed for better oven spring. Adjusting your technique based on the flour type is a crucial oven spring troubleshooting tip for more complex doughs.
Troubleshooting Oven Spring in Sourdough Bread
Sourdough presents its own set of variables when it comes to oven spring. While the principles of gluten development, hydration, and proofing still apply, the health and activity of your sourdough starter are paramount. A weak or inactive starter simply won't produce enough gas to leaven the dough effectively, resulting in poor or non-existent oven spring. The long fermentation times inherent in sourdough also require careful monitoring to avoid over-proofing, which is a common culprit for flat sourdough loaves.
Factors like the starter's feeding ratio, the type of flour used to feed it, the temperature at which it's kept, and the time elapsed since its last feeding all influence its leavening power. A healthy, active starter should double or triple in volume within a few hours of being fed (e.g., 4-8 hours at room temperature, depending on the temperature and feeding ratio). If your starter isn't consistently performing, addressing its health is the first step in sourdough oven spring troubleshooting tips.
Specific Considerations for Sourdough Starter and Oven Spring
To ensure your sourdough starter contributes effectively to oven spring, use it when it's at its peak activity – often when it has roughly doubled in size and is bubbly and fragrant. Using a starter that hasn't peaked, or one that has peaked and fallen significantly, will result in less leavening power. The hydration of your starter also matters; a stiffer starter ferments more slowly than a liquid one. Most recipes use a 100% hydration starter (equal weight of flour and water).
- Sourdough Starter Health Check:
- Does it consistently double (or more) in volume after feeding?
- Is it full of bubbles?
- Does it smell pleasantly tangy, not overly acidic or like nail polish remover?
- Does a small piece float in water when at its peak? (The float test isn't foolproof, but a starter that sinks is often past its peak or not active enough).
If your starter seems sluggish, try feeding it more frequently, adjusting the feeding ratio (e.g., less starter, more fresh flour and water), or keeping it in a warmer spot (75-80°F or 24-27°C is often ideal). Ensuring a vigorous starter is perhaps the most critical factor when troubleshooting oven spring in sourdough.
Dealing with Different Oven Types and Their Effects on Oven Spring
The type of oven you use can have a significant impact on oven spring. Home conventional ovens, convection ovens, and professional deck ovens all create different baking environments. Conventional ovens typically have hot spots and can dry out the surface of the dough quickly, inhibiting spring unless steam is added. Convection ovens circulate hot air, which can also cause the crust to set prematurely, potentially reducing oven spring, although they bake more evenly.
Professional deck ovens often have stone hearths and built-in steam injection systems, providing ideal conditions for maximum oven spring. Replicating these conditions in a home oven requires using strategies like baking stones, steel plates, Dutch ovens, or adding steam manually. If you're struggling with oven spring, consider how your specific oven type might be affecting the bake and adjust your approach. For instance, if using convection, you might need to lower the temperature slightly or add more steam. Understanding your oven's quirks is essential for successful oven spring troubleshooting tips.
Preventing Oven Spring Problems: Best Practices for Bread Baking

Dough Handling Techniques for Consistent Results
Gentle and mindful dough handling throughout the process is key to preserving the delicate structure built during mixing and fermentation. Avoid punching down the dough aggressively; instead, gently deflate it if needed. During shaping, work efficiently but gently to create tension on the surface without tearing the dough or forcing too much gas out. The goal is to create a taut outer skin that will support the oven spring while keeping the internal structure intact.
Overworking the dough during shaping after proofing can lead to a dense crumb and poor oven spring. Similarly, transferring the proofed dough too roughly to the oven can cause it to deflate, losing the precious gas bubbles needed for expansion. Practice makes perfect! Learning to feel the dough and handle it with care will significantly improve your results and help prevent common issues that lead to poor oven spring.
Maintaining a Consistent Baking Environment
Consistency in your baking environment, both during proofing and baking, helps ensure predictable results and good oven spring. During proofing, aim for a consistent temperature (e.g., 75-80°F / 24-27°C for a faster proof, or cooler temperatures for a slower, flavor-developing proof). Drastic temperature swings can affect the yeast activity and the dough's structure.
In the oven, ensuring the correct temperature and adding sufficient steam for the first 10-15 minutes are crucial. Using a preheated Dutch oven or adding steam manually prevents the crust from setting too early, allowing the dough to expand fully. After this initial phase, venting the steam and potentially lowering the temperature allows the crust to dry out and crisp up while the interior finishes baking. Controlling these environmental factors minimizes variables and is a fundamental practice in preventing issues when troubleshooting oven spring.
Achieving the Perfect Oven Spring: A Summary of Key Troubleshooting Steps
Achieving that coveted, sky-high oven spring is a combination of understanding the science and mastering the technique. It's about ensuring your leavening is active, your gluten is strong, your dough is proofed just right, and your oven environment is conducive to rapid expansion. Don't be discouraged by flat loaves – view them as learning opportunities! By systematically applying these oven spring troubleshooting tips, you'll improve with every bake.
Remember to evaluate each stage: Is your yeast/starter healthy? Did you develop enough gluten? Is the hydration appropriate? Was proofing spot on? Is your oven hot enough with sufficient steam? Did you score correctly? Addressing any weaknesses in these areas will dramatically improve your bread's final rise.
Quick Checklist for Troubleshooting Poor Oven Spring
Use this checklist as a quick guide when your bread isn't springing as expected:
- [ ] Yeast/Starter Activity: Is it vigorous and healthy?
- [ ] Gluten Development: Does the dough pass the windowpane test? Did you knead/fold enough?
- [ ] Hydration: Is the dough too stiff or too slack for its gluten strength?
- [ ] Proofing: Is it under-proofed (springs back too fast) or over-proofed (collapses, leaves indentation)?
- [ ] Handling: Was the dough handled gently during shaping and transfer?
- [ ] Oven Temperature: Is the oven accurately preheated and hot enough (450-500°F / 230-260°C initial temp)?
- [ ] Steam: Was sufficient steam present for the first 10-15 minutes? (Using Dutch oven, baking stone + water tray, etc.)
- [ ] Scoring: Was the dough scored deeply and cleanly just before baking?
Working through this list will help you pinpoint the most likely cause and apply the relevant oven spring troubleshooting tips.
BakeWithEase's Final Thoughts on Mastering Oven Spring
Mastering oven spring, like any baking skill, takes practice and patience. There are many variables at play, and sometimes even small changes can make a big difference. Don't be afraid to experiment, take notes on your bakes, and learn from both your successes and your failures. Every loaf, regardless of its oven spring, offers valuable insights.
We hope these oven spring troubleshooting tips from BakeWithEase help you achieve the beautiful, lofty loaves you're aiming for. Happy baking, and may your next loaf have spectacular oven spring!
Frequently Asked Questions
What is oven spring, and why is it important?
Oven spring is the rapid expansion of dough during the initial stages of baking. It's important because it contributes to the final volume and texture of the baked product.
What are some common causes of poor oven spring?
Common causes include under-proofing the dough, using old or inactive yeast, or not scoring the bread properly to control expansion.
How does oven temperature affect oven spring?
Too low of an oven temperature will prevent proper oven spring, as the yeast won't activate quickly enough. Too high, and the crust will set too fast, hindering expansion. The correct temperature is crucial.
How does scoring bread dough help with oven spring?
Scoring creates a weak point in the crust, allowing the dough to expand in a controlled manner during baking. This prevents it from bursting open in an unpredictable way.
What can I do to improve the humidity in my oven for better oven spring?
You can create steam by placing a pan of hot water in the bottom of the oven or by using a Dutch oven to trap moisture around the bread during the initial baking phase.
Final Reflection: The Joy (and Science) of a Perfect Oven Spring
The quest for the perfect oven spring isn't just about baking a beautiful loaf; it's about mastering the fundamental chemistry and technique that transforms simple ingredients into something truly magical. A successful oven spring represents a culmination of careful planning, precise execution, and a deep understanding of the interplay between yeast, gluten, and heat. This knowledge, once acquired, unlocks a world of baking possibilities, far beyond just bread.
The pursuit of that perfect rise has profoundly impacted my own baking journey, teaching me patience, precision, and the importance of understanding the "why" behind every step. It's a journey of continuous learning, where each failed loaf offers a valuable lesson. As the renowned baker, Jim Lahey, once said, Baking is a science, but it's also an art. The science gives you the framework, but the art is in the execution and the feeling.
This sentiment perfectly encapsulates the ongoing evolution of my baking skills, constantly refined by the challenges and triumphs of oven spring.
Now, it's your turn. Don't be discouraged by a collapsed loaf or a stubbornly dense crumb. Embrace the process, experiment with different techniques, and meticulously analyze each bake. Each attempt, whether successful or not, brings you closer to understanding the subtle nuances of oven spring and, ultimately, to baking bread that truly sings. The journey is as rewarding as the destination, so keep kneading, keep learning, and keep baking!
Unlock Your Baking Potential: Master the Oven Spring!
Thanks for diving into the world of perfect oven spring! We hope you now feel confident in troubleshooting those pesky baking issues. Ready to take your baking to the next level?
- Try the techniques: Pick one tip from the article – be it adjusting your oven temperature, checking your hydration, or perfecting your shaping – and try it out in your next bake. You'll be amazed by the difference!
- Share your success (or challenges!): We'd love to hear about your experiences. Post a picture of your loaf on social media and tag #BakeWithEaseOvenSpring – let's inspire each other!
- Explore our other resources: Discover more baking secrets by browsing our other articles on bread making. Who knows what other baking wonders you'll uncover?
What's your biggest oven spring challenge, and what technique are you most excited to try?