
The Secret to ProfessionalLooking Chocolate Treats at Home.

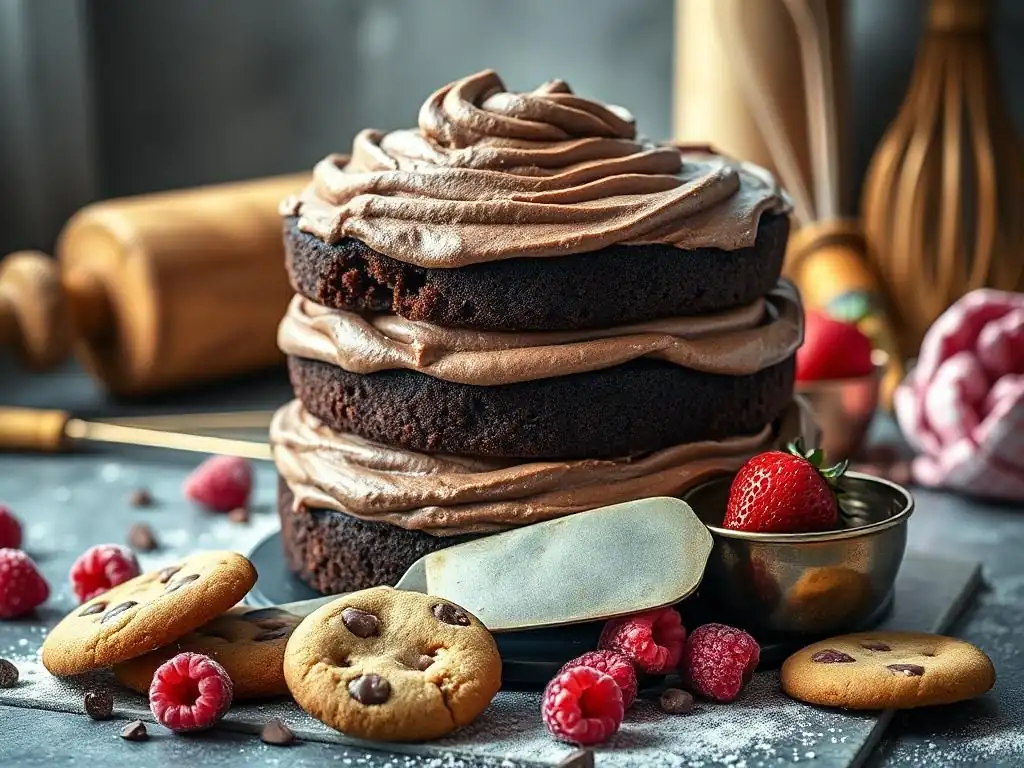
Welcome to BakeWithEase, your kitchen companion for all things baking! Ever wondered how professional bakers achieve that flawlessly smooth, decadent finish on their chocolate creations? Uncover the secret to transforming your desserts with our guide to an easy homemade chocolate frosting recipe. It's not just about taste; it's about the art of presentation. Get ready to elevate your baking game!
- BakeWithEase: Mastering Homemade Chocolate Treats
- Unlock Professional-Looking Chocolate at Home: An Introduction
- Mastering the Art of Chocolate Tempering: Your Key to Success
- The Easy Homemade Chocolate Frosting Recipe: The Foundation for Beautiful Treats
- From Frosting to Finish: Decorating Like a Pro
- Beyond the Basics: Advanced Chocolate Techniques
- Perfecting Your Presentation: Final Touches for a Professional Look
- Enjoying Your Homemade Chocolate Masterpieces
-
Frequently Asked Questions
- What makes this chocolate frosting recipe "easy"?
- Can I use different types of chocolate for this frosting?
- How do I achieve a smooth, professional-looking finish with this frosting?
- What kind of cakes or treats does this frosting pair well with?
- How long can I store leftover homemade chocolate frosting?
- Final Reflection: Mastering the Art of Effortless Elegance
- Unleash Your Inner Chocolatier!
BakeWithEase: Mastering Homemade Chocolate Treats
Welcome to BakeWithEase, your friendly guide to creating stunning baked goods right in your own kitchen. Today, we're diving into the wonderful world of chocolate and unlocking the secrets to making your homemade chocolate treats look like they came straight from a high-end patisserie. Forget grainy textures and dull finishes; we're here to help you achieve that glossy, professional sheen and perfect structure that elevates a simple dessert into a masterpiece. Whether you're crafting delicate truffles, coating cookies, or simply seeking the perfect finish for your cakes, mastering a few key techniques will make all the difference.
Achieving a professional look isn't just about fancy decorating; it starts with understanding the fundamental properties of chocolate itself. From selecting the right type of chocolate to handling it correctly, each step plays a crucial role in the final appearance and texture of your treats. We'll explore essential techniques like tempering, delve into creating a truly exceptional easy homemade chocolate frosting recipe, and cover simple yet effective decorating tips that anyone can master. Get ready to transform your kitchen into a chocolate studio and impress everyone with your newfound skills.
Unlock Professional-Looking Chocolate at Home: An Introduction
Have you ever wondered why your homemade chocolate creations, while delicious, don't quite have that polished, store-bought look? It's a common frustration for many home bakers. Often, the difference lies not just in complex techniques, but in understanding the basic science behind working with chocolate and executing fundamental steps with precision. This guide will demystify the process, breaking down the essential elements needed to elevate your chocolate treats from rustic charm to professional elegance.
We'll cover the core reasons why homemade chocolate can sometimes fall short visually – think bloom, dullness, and inconsistent textures – and provide actionable solutions. A significant focus will be placed on the critical technique of chocolate tempering, the cornerstone of achieving that coveted snap and shine. By the end of this section, you'll have a clear understanding of the foundational principles that separate amateur attempts from professional results when working with chocolate.
Why Homemade Chocolate Treats Look Amateurish (and How to Fix It)
One of the most common issues with homemade chocolate treats is chocolate bloom, which appears as a grayish or streaky surface. There are two types: fat bloom and sugar bloom. Fat bloom occurs when the cocoa butter separates from the chocolate and crystallizes on the surface, often due to improper storage or temperature fluctuations. Sugar bloom happens when moisture condenses on the chocolate surface, dissolving sugar crystals which then recrystallize into a powdery, white layer as the water evaporates. Both make chocolate look old and unappealing, even if it's still edible.
Another visual pitfall is a lack of shine and a soft, crumbly texture instead of a firm snap. This is almost always a result of not tempering the chocolate correctly, or not tempering it at all. When chocolate isn't tempered, the cocoa butter crystals don't form a stable structure. This unstable structure leads to a dull finish, a tendency to melt easily at room temperature, and that undesirable soft bite. Proper tempering ensures the cocoa butter forms stable, well-aligned crystals, giving the chocolate its characteristic gloss, snap, and resistance to melting.
The Importance of Proper Chocolate Tempering for Professional Results
Tempering is the process of carefully heating and cooling chocolate to specific temperatures to stabilize the cocoa butter crystals. Think of cocoa butter as having several different crystal forms, each melting at a different temperature. The goal of tempering is to encourage the formation of the most stable crystal form, known as Beta (or Form V) crystals, which melt around 90-94°F (32-34°C). These stable crystals are responsible for the desirable properties of high-quality chocolate: a smooth, glossy surface, a firm snap when broken, and resistance to melting at room temperature.
Without proper tempering, the less stable crystal forms dominate. These crystals melt at lower temperatures, causing the chocolate to be soft, dull, and prone to blooming. For instance, untempered chocolate might start to soften significantly around 75-80°F (24-27°C), whereas properly tempered chocolate will hold its shape much better. Whether you are dipping candies, coating cakesicles, or creating delicate chocolate decorations, tempering is absolutely essential for achieving that professional finish and a satisfying texture.
Mastering the Art of Chocolate Tempering: Your Key to Success
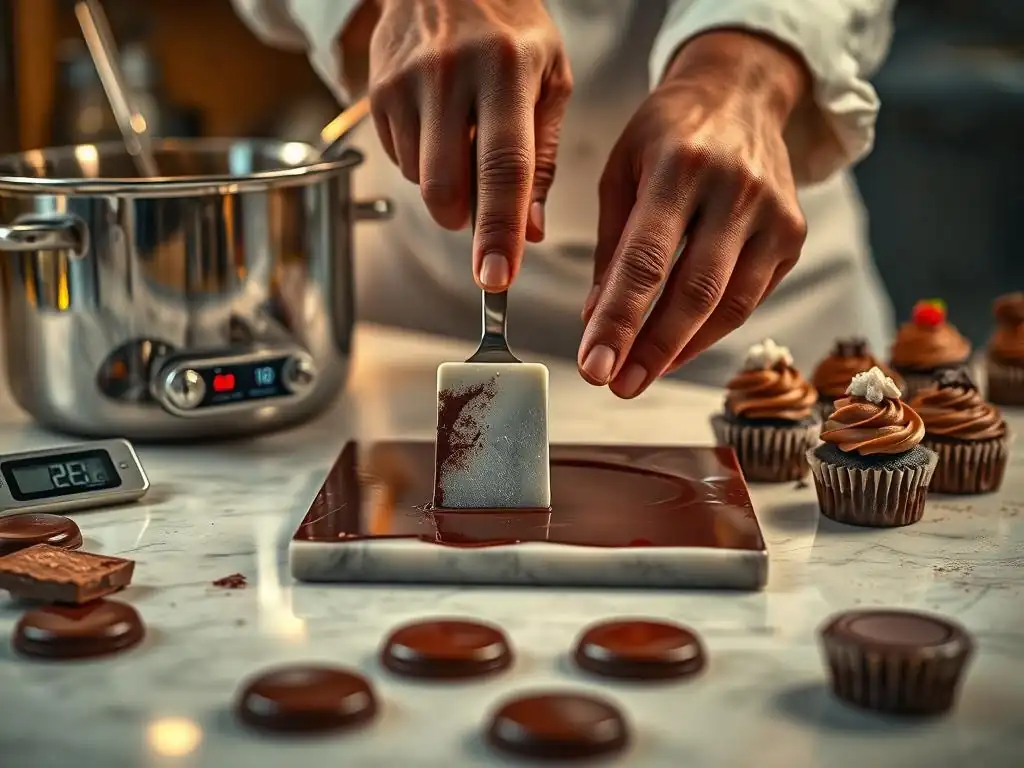
Chocolate tempering might sound intimidating, but it's a fundamental skill that, once learned, unlocks a new level of chocolate artistry. It's a delicate balance of temperature control and agitation, ensuring the cocoa butter forms those perfect, stable crystals. While precision is key, it's a technique accessible to home bakers with a little practice and the right tools, primarily a reliable thermometer. The specific temperatures vary slightly depending on the type of chocolate – dark, milk, or white – but the underlying principle remains the same: melt, cool to seed, and gently reheat to a working temperature.
Success in tempering relies on accurate temperature readings and consistent movement of the chocolate during the cooling phase. This movement helps distribute the stable crystals that form as the chocolate cools, encouraging more crystals to form evenly throughout the mass. Don't be discouraged if your first attempt isn't perfect; tempering is a skill that improves with practice. Understanding the science behind it, combined with trying different methods, will help you find the approach that works best for you and your kitchen environment.
Understanding Chocolate Tempering: Science and Art Combined
At its heart, chocolate tempering is about controlling the crystallization of cocoa butter. Cocoa butter contains polymorphic crystals, meaning they can solidify into different structures depending on how the chocolate is heated and cooled.
We're interested in Form V crystals because they are the most stable and provide the desired characteristics. The process involves melting the chocolate completely to erase the memory of previous crystal structures (typically around 113-122°F or 45-50°C for dark chocolate), then cooling it down to a specific temperature range (around 81-82°F or 27-28°C for dark chocolate) where Form V crystals begin to form, and finally warming it slightly back up to a working temperature (around 88-91°F or 31-32°C for dark chocolate) where these stable crystals are dominant and easily spreadable.
The "art" comes in the execution – managing the heat, stirring correctly, and recognizing when the chocolate is in temper. Factors like the temperature of your kitchen, the amount of chocolate you're working with, and even the humidity can affect the process. For instance, tempering in a cool kitchen (around 68°F or 20°C) is generally easier than in a warm one.
The goal is to create a seed of stable crystals during the cooling phase that will then guide the rest of the cocoa butter into the desired structure when the chocolate is gently reheated. This delicate balance is what gives tempered chocolate its unique properties.
Different Chocolate Tempering Methods: Finding What Works for You
There are several reliable methods for tempering chocolate at home, each with its own advantages. The best method for you will depend on your comfort level, the amount of chocolate you're tempering, and the tools you have available. Regardless of the method, accurate temperature monitoring using a digital thermometer is non-negotiable. Common methods include the seed method, tabliering (or marble slab) method, and using specialized tempering machines.
Choosing a method often comes down to personal preference and the specific application. For small batches or beginners, the seed method is often recommended due to its simplicity. The tabliering method is a classic professional technique that allows for rapid cooling. For those who frequently work with large quantities of chocolate, a tempering machine offers convenience and consistent results. Experimenting with a few methods will help you determine which one fits your style and provides the most reliable outcome for your needs.
Seed Tempering: A Beginner-Friendly Approach
The seed tempering method is arguably the easiest and most accessible for home bakers. It involves melting about two-thirds of your chocolate, then stirring in the remaining one-third of finely chopped, untempered chocolate (the "seed"). The cool, solid chocolate helps to rapidly cool the melted chocolate while introducing stable cocoa butter crystals. As you stir, the temperature of the mixture will drop. Continue adding small amounts of chopped chocolate and stirring until the mixture reaches the target cooling temperature for your type of chocolate (e.g., 81-82°F for dark).
Once the desired cooling temperature is reached and all the seed chocolate has melted (or you can remove any remaining solid pieces), gently warm the chocolate back up to its working temperature (e.g., 88-91°F for dark). This is often done briefly over a warm water bath or with a heat gun, stirring constantly.
The stable crystals from the seed chocolate will encourage the rest of the chocolate to crystallize correctly. A simple test involves dipping a piece of parchment paper or the tip of a knife into the chocolate; it should set within 2-3 minutes with a glossy finish and no streaks.
Tablier Tempering: The Classic Technique
Tablier tempering, also known as the marble slab method, is a traditional technique used by chocolatiers. It requires a clean, cool surface like a marble slab or even the back of a sturdy baking sheet. You start by melting all of your chocolate completely, just as in the seed method. Then, pour about two-thirds of the melted chocolate onto the cool surface. Using a metal scraper and a spatula, continuously spread and gather the chocolate, working it back and forth. This movement, combined with the cool surface, rapidly cools the chocolate and encourages crystal formation.
As you work the chocolate on the slab, monitor its temperature with a thermometer. When it reaches the target cooling temperature (e.g., 81-82°F for dark), scrape the cooled chocolate back into the bowl with the remaining one-third of warm, melted chocolate. Stir the mixture gently until everything is smooth and the temperature rises to the working temperature (e.g., 88-91°F for dark).
The warmer chocolate helps melt any unstable crystals that might have formed on the slab, leaving only the stable Form V crystals. This method allows for quick cooling but requires practice to manage the chocolate effectively on the slab.
Using a Chocolate Tempering Machine: For the Serious Baker
For those who work with chocolate frequently or in larger quantities, a dedicated chocolate tempering machine can be a valuable investment. These machines automate the heating and cooling process, providing precise temperature control and often gentle agitation to keep the chocolate in temper. They typically have a basin where chocolate is melted, cooled, and held at the correct working temperature for extended periods.
While a tempering machine represents a higher initial cost compared to manual methods, it offers significant convenience and consistency. It eliminates the need for constant monitoring with a thermometer and frees you up to focus on dipping, molding, or decorating. Machines are particularly useful for tasks like coating large batches of confections or maintaining a constant supply of perfectly tempered chocolate for production. They can significantly reduce the time and effort required for tempering, making large-scale chocolate work much more manageable.
The Easy Homemade Chocolate Frosting Recipe: The Foundation for Beautiful Treats
While tempering is key for solid chocolate work, a perfect easy homemade chocolate frosting recipe is the cornerstone for countless cakes, cupcakes, and other frosted delights. A truly great chocolate frosting should be smooth, rich, and glossy, providing a beautiful canvas or topping for your baked goods. Unlike tempered chocolate, frosting doesn't require precise temperature cycles for stability, but achieving the right texture and shine still involves careful ingredient selection and technique.
Our focus here is on an easy homemade chocolate frosting recipe that delivers professional-looking results without requiring complex steps. We'll cover the essential ingredients that contribute to a smooth, glossy finish and provide a step-by-step guide that minimizes common pitfalls. Mastering a reliable frosting recipe is a fundamental skill for any home baker looking to elevate their dessert game.
Ingredients for a Smooth and Glossy Chocolate Frosting
The secret to a smooth and glossy easy homemade chocolate frosting recipe lies in the quality and combination of ingredients. You'll typically need:
- Good quality chocolate (bittersweet or semi-sweet is common, around 60-70% cocoa solids often works well)
- Butter (unsalted is preferred for controlling saltiness)
- Confectioners' sugar (also known as powdered sugar, ensure it's lump-free)
- Liquid (milk, cream, or even brewed coffee add richness and moisture)
- Extract (vanilla is standard, but others like almond or peppermint can add flair)
- A pinch of salt (to enhance the chocolate flavor)
Using high-quality chocolate, such as a premium baking bar with around 60% cocoa, will significantly impact the flavor and richness compared to using chocolate chips, which often contain stabilizers that can affect smoothness. The butter adds richness and helps create a creamy texture. Confectioners' sugar provides sweetness and structure, while the liquid component is crucial for achieving the desired consistency and gloss. The fat content in the liquid (like heavy cream) contributes to a smoother, richer frosting.
Step-by-Step Guide to the Best Homemade Chocolate Frosting
Creating a beautiful easy homemade chocolate frosting recipe is straightforward when you follow a few key steps. This method focuses on ensuring a smooth texture from the start.
- Melt the chocolate and butter: Gently melt the chopped chocolate and softened butter together. A double boiler or melting in a heatproof bowl set over a pan of simmering water works well. Alternatively, you can microwave in short bursts (30 seconds), stirring between each, until smooth. Be careful not to overheat.
- Combine wet ingredients: In a separate bowl, whisk together your liquid (milk, cream, etc.) and vanilla extract.
- Sift the confectioners' sugar: Sifting your confectioners' sugar is a crucial step to prevent lumps and ensure a smooth frosting.
- Combine melted chocolate mixture and sugar: Pour the slightly cooled melted chocolate and butter mixture into a large mixing bowl. Gradually add the sifted confectioners' sugar, alternating with the liquid mixture.
- Mix until smooth: Start mixing on low speed to incorporate the sugar without creating a cloud. Once combined, increase the speed to medium and beat for 3-5 minutes until the frosting is light, fluffy, and glossy. Add the pinch of salt and mix briefly.
Allowing the melted chocolate-butter mixture to cool slightly before combining with the sugar prevents the frosting from becoming greasy or overly soft. The beating step is essential; it incorporates air, making the frosting lighter and easier to spread or pipe, while also developing its smooth texture and glossy sheen. Don't rush this step; beating for the full time makes a noticeable difference in the final consistency.
Melting the Chocolate: Avoiding Common Pitfalls
Properly melting chocolate is the first critical step for many chocolate recipes, including an easy homemade chocolate frosting recipe. The most common pitfall is overheating the chocolate, which can cause it to seize – becoming a thick, grainy, unusable mass. This happens when even a tiny amount of moisture comes into contact with overheated chocolate or if it's heated too quickly or intensely.
To avoid seizing, use a gentle heat source like a double boiler or microwave on low power in short intervals. If using a double boiler, ensure the bottom of the bowl does not touch the simmering water, and use a bowl that covers the pan opening to prevent steam from getting into the chocolate. When microwaving, stir thoroughly after each 20-30 second burst, even if the chocolate doesn't look fully melted; the residual heat will continue to melt the pieces as you stir. Stop heating when only a few small lumps remain and stir until smooth.
Achieving the Perfect Consistency: Tips and Tricks
The perfect consistency for your easy homemade chocolate frosting recipe will depend on its intended use – a smooth glaze for a cake needs to be thinner than a frosting for piping swirls on cupcakes. The amount of liquid added is the primary factor controlling consistency. Start with the amount specified in the recipe, but be prepared to adjust slightly.
If your frosting is too thick, add liquid (milk, cream, coffee) one tablespoon at a time, beating well after each addition until the desired consistency is reached. If it's too thin, you can try adding a little more sifted confectioners' sugar, one or two tablespoons at a time, or chilling the frosting in the refrigerator for 15-30 minutes. Chilling can firm up frostings that are too soft due to warm ingredients or kitchen temperature. Always mix thoroughly after adding ingredients or chilling to ensure a uniform texture.
Troubleshooting Common Chocolate Frosting Issues
Even with a great easy homemade chocolate frosting recipe, sometimes things don't go exactly as planned. Knowing how to troubleshoot common issues can save your batch and prevent frustration.
| Issue | Potential Causes | Solutions |
|---|---|---|
| Grainy Frosting | Unmelted sugar crystals; Overheated chocolate | If due to sugar, try warming gently over a water bath while stirring vigorously to dissolve crystals. If seized chocolate, it's hard to fix, but sometimes adding a tablespoon of hot milk or cream can help. |
| Frosting Too Thick | Not enough liquid; Too much sugar; Over-beating | Add liquid (milk, cream, coffee) 1 tbsp at a time, beating well. |
| Frosting Too Thin | Too much liquid; Not enough sugar; Warm ingredients | Add sifted confectioners' sugar 1-2 tbsp at a time. Chill in the refrigerator for 15-30 minutes. |
| Greasy Frosting | Butter or chocolate too warm; Over-beating butter | Chill the frosting for 30-60 minutes, then re-beat briefly. |
Addressing these issues quickly can often salvage your frosting. For instance, a slightly grainy frosting due to sugar can sometimes be fixed by gently warming it over a double boiler for a few minutes while whisking constantly – the heat helps dissolve the sugar crystals. However, if chocolate has truly seized from overheating or moisture, it's often best to start over for the best texture and appearance.
Grainy Frosting: Causes and Solutions
Grainy frosting is typically caused by undissolved sugar crystals or, less commonly in butter-based frostings, issues with the fat structure. When confectioners' sugar isn't properly sifted or mixed in thoroughly, small lumps can remain. If the liquid content is too low or the mixing time is too short, the sugar crystals may not fully dissolve into the fat and liquid components, resulting in a gritty texture. Overheating the melted chocolate used in the frosting can also contribute to a grainy texture if it begins to seize.
To fix grainy frosting due to sugar, gently warm the frosting over a double boiler or in the microwave on low power, stirring constantly. The gentle heat helps to dissolve any remaining sugar crystals. Avoid overheating, as this can melt the butter and make the frosting greasy. Stir or whisk vigorously as it warms. If the graininess is due to seized chocolate, it's much harder to correct, but sometimes whisking in a tablespoon of very hot milk or cream one at a time can help emulsify it, though it may not fully restore the smooth texture.
Frosting Too Thick or Too Thin: Adjusting Your Recipe
Achieving the right consistency is key for an easy homemade chocolate frosting recipe, whether you're spreading it smoothly or piping intricate designs. If your frosting is too thick, it will be difficult to spread and may tear your cake layers. This is usually caused by adding too much confectioners' sugar or not enough liquid. To correct it, gradually add more liquid (milk, cream, or coffee works well) one tablespoon at a time, beating thoroughly after each addition until the frosting reaches your desired consistency. Be patient and add slowly to avoid overshooting.
Conversely, if your frosting is too thin, it will slide off the cake and won't hold its shape for piping. This happens when too much liquid is added or not enough confectioners' sugar, or if your ingredients were too warm. To thicken, add more sifted confectioners' sugar, one or two tablespoons at a time, beating until incorporated. Another effective method is to chill the frosting in the refrigerator for 15-30 minutes. As the butter and chocolate cool, the frosting will firm up. After chilling, give it a quick beat to restore smoothness.
From Frosting to Finish: Decorating Like a Pro
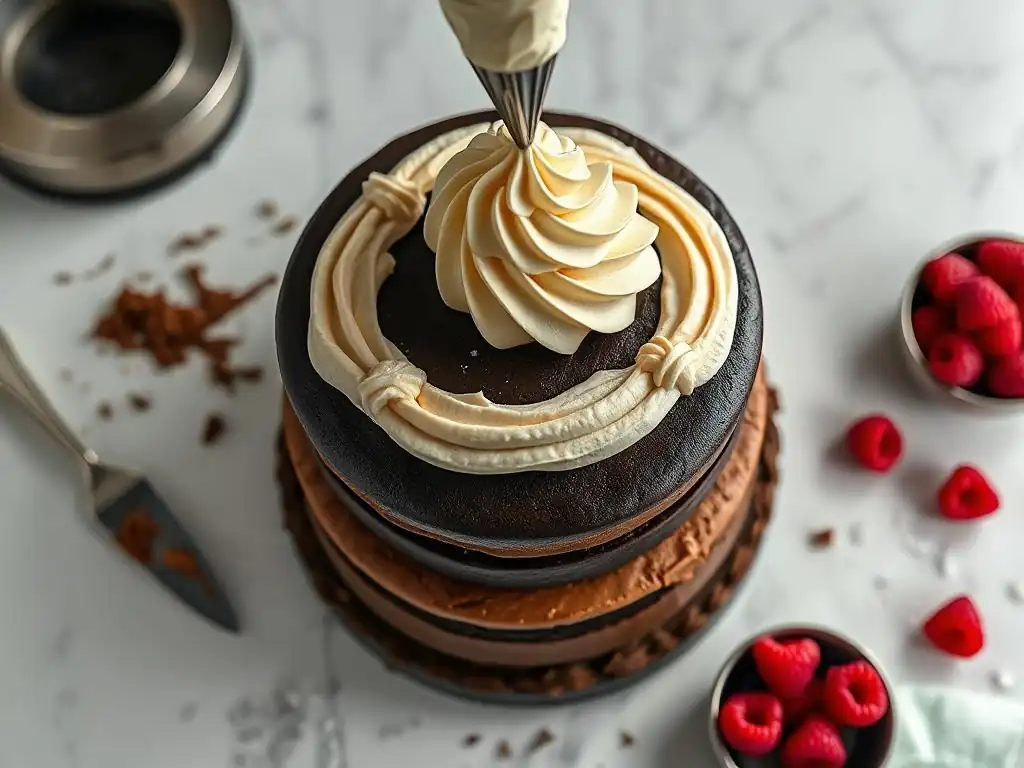
Once you've mastered tempering and perfected your easy homemade chocolate frosting recipe, you're ready to move on to the fun part: decorating! Professional-looking decoration isn't solely about complex techniques; it's also about using the right tools effectively and employing simple methods that create visual appeal. Even basic techniques, executed cleanly, can transform a simple chocolate treat into something special.
This section will introduce you to essential tools that make decorating easier and more precise, from creating smooth surfaces to piping intricate details. We'll then explore simple yet stunning decorating techniques using both tempered chocolate and frosting, providing you with the skills to add elegant finishes to your cakes, cupcakes, cookies, and confections. With a little practice, you'll be able to apply these techniques to create a wide variety of beautiful chocolate treats.
Essential Tools for Chocolate Decorating
Having the right tools at your disposal can make a significant difference in the ease and outcome of your chocolate decorating efforts. You don't need a professional kitchen's worth of equipment, but a few key items are invaluable.
Here are some essential tools:
- Piping Bags and Tips: For piping frosting, ganache, or melted chocolate. A set with various tips allows for different designs.
- Spatulas and Scrapers: Offset spatulas are essential for spreading frosting smoothly on cakes. Bench scrapers help create sharp edges.
- Chocolate Molds: Available in countless shapes and sizes for creating solid chocolate pieces, bonbons, or decorations.
- Parchment Paper or Silicone Mats: Ideal for creating chocolate decorations, drizzles, or letting dipped items set.
- Fine-Mesh Sieve: Crucial for sifting confectioners' sugar for smooth frostings.
- Digital Thermometer: Absolutely necessary for accurate tempering.
- Double Boiler or Microwave-Safe Bowls: For melting chocolate gently.
Investing in quality versions of these basic tools will enhance your decorating capabilities and make the process much more enjoyable. For instance, a good set of piping tips made from stainless steel will provide clean, consistent patterns compared to cheaper alternatives.
Piping Bags and Tips: Creating Intricate Designs
Piping bags and tips are fundamental tools for applying an easy homemade chocolate frosting recipe, ganache, or tempered chocolate in controlled and decorative ways. Piping bags come in reusable silicone or plastic, or disposable plastic. Disposable bags are convenient for quick cleanup, while reusable ones are more eco-friendly and durable. Tips come in various shapes and sizes, designated by numbers (like Wilton or Ateco systems).
Common tips include:
- Round tips: For dots, lines, and filling in areas (e.g., #1, #3, #12).
- Star tips: For star shapes, rosettes, and borders (open stars like #1M, closed stars like #32).
- Petal tips: For creating realistic buttercream flowers and ruffles (e.g., #104, #125).
- Leaf tips: For piping leaves (e.g., #67, #352).
To use, fit the tip into the bag, fill the bag about two-thirds full with your frosting or chocolate, twist the top to seal, and apply even pressure while guiding the tip. Practice on a piece of parchment paper before decorating your actual treat to get a feel for the consistency and pressure needed for different designs.
Spatulas and Scrapers: Achieving a Smooth Finish
For coating cakes or cupcakes with your easy homemade chocolate frosting recipe, spatulas and scrapers are indispensable for achieving a smooth, professional finish. An offset spatula, with its angled blade, keeps your hand clear of the frosting surface, allowing for easier spreading and smoothing. They come in various sizes; a small one (around 4-6 inches) is good for cupcakes and small details, while a larger one (around 8-10 inches) is better for frosting the sides and top of cakes.
Bench scrapers (or cake scrapers) are flat tools, often plastic or metal, used to smooth the sides of a frosted cake and create sharp edges. After applying a generous layer of frosting to the sides of a cake, hold the scraper vertically against the side, keeping it perpendicular to the cake board, and rotate the cake stand while holding the scraper steady. This shaves off excess frosting, leaving a smooth, even surface. For extra sharp edges, chill the cake slightly after smoothing the sides, then gently smooth the top edge with an offset spatula, pulling inwards.
Chocolate Molds: Making Perfect Shapes
Chocolate molds are fantastic for creating consistent, perfectly shaped chocolate decorations, bonbons, or solid chocolate pieces. They come in a vast array of designs, from simple squares and hearts to intricate flowers, animals, and seasonal shapes. Molds are typically made from polycarbonate plastic (professional grade, durable, produces high shine), silicone (flexible, easy to release, less shine), or rigid plastic.
When using molds with tempered chocolate, ensure the molds are perfectly clean and dry. Pour or pipe the tempered chocolate into the cavities, tap the mold gently on the counter to remove air bubbles, and scrape off any excess chocolate from the surface. Chill the filled molds in the refrigerator (around 35-40°F or 2-4°C) until the chocolate is fully set and has contracted slightly, usually 15-30 minutes depending on the size. Properly tempered chocolate will release easily from a clean mold with a beautiful, glossy finish.
Simple Chocolate Decorating Techniques for Stunning Results
You don't need to be a master decorator to make your chocolate treats look impressive. Several simple techniques using tempered chocolate or your easy homemade chocolate frosting recipe can add significant visual appeal. These methods are easy to learn and can be applied to a variety of desserts.
Consider these techniques:
- Chocolate Shavings and Curls: Easy to make and adds texture and elegance.
- Chocolate Drizzles: Quick way to add visual interest and a touch of extra chocolate flavor.
- Chocolate Flowers and Leaves: Slightly more intricate but achievable with practice using tempered chocolate or modeling chocolate.
Practicing these techniques on parchment paper first can help you get comfortable before applying them to your final product. Consistency in execution is key to achieving a professional look, so take your time and focus on clean lines and shapes.
Chocolate Shavings and Curls: An Elegant Touch
Chocolate shavings and curls are a classic and elegant way to garnish cakes, cupcakes, pastries, and plated desserts. They add texture, visual appeal, and extra chocolate flavor. Making them is relatively simple. For shavings, use a vegetable peeler or a sharp knife to shave pieces off a block of chocolate (tempered or untempered, though untempered is often easier for softer shavings). Hold the chocolate block firmly and draw the peeler or knife along the edge to create fine curls or shavings.
To make larger, more defined curls, use a slightly softened block of chocolate (leave it at room temperature for 15-30 minutes). Draw a wider, flat scraper or large knife across the surface of the chocolate at an angle, allowing the chocolate to curl up as it's scraped away. The temperature of the chocolate is key here; if it's too cold, you'll get flakes; if too warm, a smear. Experiment with the chocolate temperature and the angle of your tool to find the perfect technique for beautiful curls. Handle the finished curls gently as they are delicate.
Chocolate Drizzles: Adding Visual Appeal
A simple chocolate drizzle can dramatically enhance the look of a dessert, adding movement and a touch of sophistication. Drizzles work well on cakes, cupcakes, cookies, and even plated desserts. You can use melted chocolate (tempered for a firm set and shine, or untempered for a softer set) or a pourable ganache.
To create a drizzle, place your melted chocolate or ganache in a piping bag with a small round tip, a zip-top bag with a corner snipped off, or even just use a spoon or fork. For a controlled drizzle, use a piping bag or snipped corner bag. Hold the bag over your dessert and apply gentle, even pressure while moving your hand back and forth in a random or patterned motion.
For a more rustic look, dip a fork or spoon into the chocolate and wave it over the dessert, letting the chocolate fall in thin streams. Practice your technique on parchment paper first to control the flow and pattern before drizzling onto your final creation.
Chocolate Flowers and Leaves: Elevating Your Creations
For a truly elevated look, consider creating delicate chocolate flowers or leaves. These can be made using tempered chocolate, modeling chocolate (a pliable chocolate paste), or even a stiff easy homemade chocolate frosting recipe that crusts well. Using tempered chocolate results in decorations with a crisp snap and shine.
To make chocolate leaves, melt and temper chocolate. Choose clean, non-toxic leaves (like rose or mint leaves with prominent veins). Brush the underside of the leaf with a thin layer of tempered chocolate, ensuring the chocolate gets into the veins. Let it set slightly, then apply a second, slightly thicker layer.
Chill until fully set. Carefully peel the real leaf away from the chocolate. For flowers, you can pipe petals onto parchment paper using tempered chocolate or modeling chocolate, let them set, and then assemble them. Modeling chocolate is particularly versatile for sculpting detailed shapes like roses or figurines, offering more flexibility than tempered chocolate alone.
Beyond the Basics: Advanced Chocolate Techniques
While mastering tempering and a great easy homemade chocolate frosting recipe provides a solid foundation, there are other advanced techniques that can further expand your chocolate repertoire. These methods introduce different textures, flavors, and forms of chocolate, allowing for even more creative and professional-looking desserts.
Exploring techniques like creating chocolate ganache, working with modeling chocolate, and understanding the nuances of different types of chocolate will open up new possibilities for fillings, coatings, and decorations. These are skills that build upon the basics and allow you to tackle more complex and visually stunning chocolate projects.
Creating Chocolate Ganache: Versatile and Delicious
Chocolate ganache is a simple yet incredibly versatile mixture of chocolate and cream. The ratio of chocolate to cream dictates its consistency, making it suitable for various applications, from a pourable glaze to a rich truffle filling or a sturdy frosting base. A basic ratio of 1:1 (equal parts chocolate and cream by weight) typically yields a pourable ganache, while a 2:1 or 3:1 ratio results in a thicker ganache suitable for truffles or whipping into a frosting.
To make ganache, heat the heavy cream in a saucepan until it just begins to simmer. Pour the hot cream over finely chopped chocolate in a heatproof bowl. Let it sit for a minute or two to allow the heat from the cream to begin melting the chocolate, then gently whisk from the center outwards until smooth and emulsified. Avoid vigorous whisking, which can incorporate too much air.
For a glossy finish, ensure all the chocolate is melted and the mixture is smooth. Let it cool to the desired consistency before using – chilling will thicken it significantly. Adding a tablespoon of butter at the end can also enhance glossiness.
Making Chocolate Decorations: Mastering Fondant and Modeling Chocolate
While tempered chocolate is excellent for molded shapes and delicate structures, modeling chocolate and chocolate fondant offer different properties ideal for sculpting and detailed decorations. Modeling chocolate is made by melting chocolate and combining it with a liquid sweetener like corn syrup or golden syrup. This creates a pliable paste that can be kneaded, rolled, and shaped much like fondant, but with a rich chocolate flavor. It's perfect for creating figurines, intricate cutouts, or edible flowers that are too delicate for tempered chocolate.
Chocolate fondant is essentially traditional sugar-based fondant with melted chocolate incorporated. It's smoother and more elastic than modeling chocolate, making it ideal for covering cakes with a flawless, smooth chocolate finish. Both modeling chocolate and chocolate fondant can be colored with gel food coloring. Working with them requires kneading until pliable, rolling thinly on a surface dusted with cornstarch or cocoa powder, and using modeling tools to create shapes. They offer excellent control for detailed work that isn't possible with liquid chocolate or soft frosting.
Exploring Different Types of Chocolate: Choosing the Right One for Your Project
The type of chocolate you choose significantly impacts the flavor, working properties, and final appearance of your treats. Understanding the differences between dark, milk, and white chocolate, as well as couverture versus compound chocolate, is crucial for professional results.
- Dark Chocolate: Contains cocoa solids, cocoa butter, and sugar. Higher cocoa percentages mean less sugar and a more intense flavor. Ideal for tempering due to higher cocoa butter content.
- Milk Chocolate: Contains cocoa solids, cocoa butter, sugar, and milk solids. Sweeter and creamier than dark chocolate, lower cocoa butter content means different tempering temperatures.
- White Chocolate: Contains cocoa butter, sugar, milk solids, but no cocoa solids. Technically not "chocolate" by some definitions but works similarly in baking. Very sensitive to heat and tricky to temper due to its composition.
Couverture chocolate is high-quality chocolate containing a high percentage of cocoa butter (typically 32-39%), which makes it ideal for tempering and results in a superior shine and snap. Compound chocolate (also called confectionery coating or summer coating) contains vegetable oil (like palm kernel oil) instead of cocoa butter. It melts easily and doesn't require tempering, making it convenient for simple coatings, but it lacks the flavor, texture, and shine of real chocolate.
For truly professional results, especially when tempering, always opt for high-quality couverture chocolate. For an easy homemade chocolate frosting recipe, good quality baking chocolate (which may or may not be couverture) is usually sufficient.
Perfecting Your Presentation: Final Touches for a Professional Look
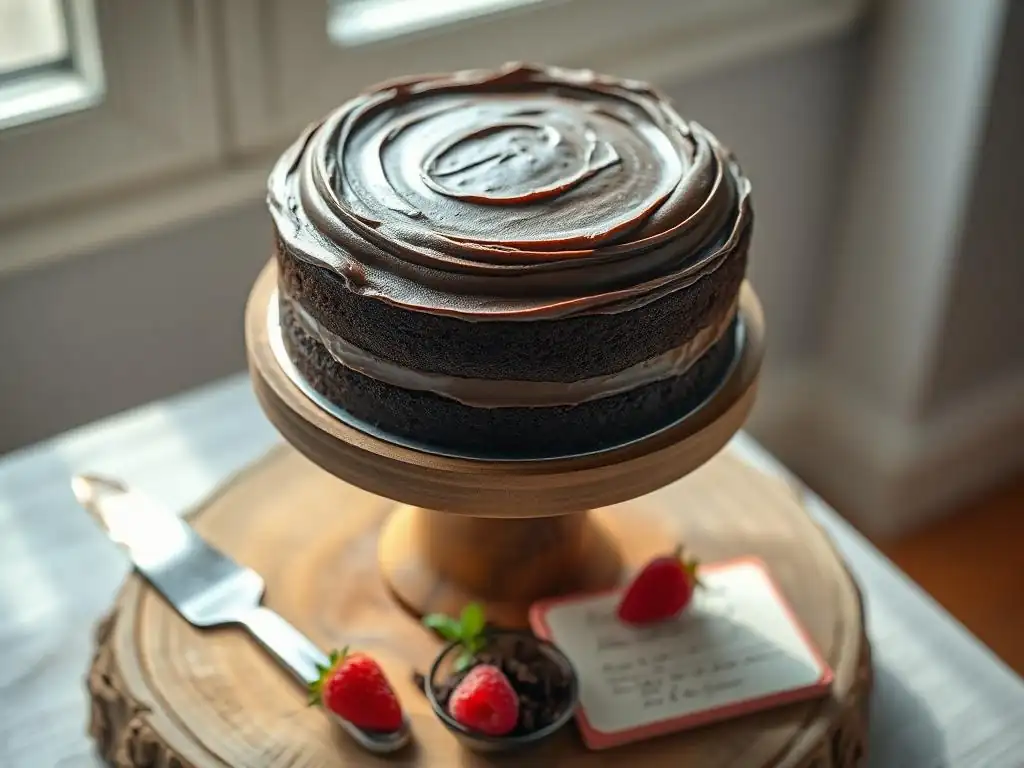
Beyond the baking and decorating, the way you present your chocolate treats plays a significant role in their perceived professionalism. Even the most delicious and beautifully decorated dessert can lose impact if it's not presented thoughtfully. This section focuses on the final steps that elevate your creations, from how they are arranged to how they are stored to maintain their quality and appearance.
Attention to detail in plating and storage demonstrates care and skill. A clean plate, a simple garnish, or a well-chosen cake stand can make a big difference. Similarly, knowing how to store your chocolate treats correctly ensures that the textures and finishes you worked hard to achieve remain intact until they are enjoyed.
Plating Your Chocolate Treats: Creating an Appealing Display
Plating is the art of arranging food on a plate to make it visually appealing. For individual chocolate treats like tarts, mousses, or even a slice of cake frosted with your easy homemade chocolate frosting recipe, a clean plate is paramount. Wipe away any drips or smudges before serving. Consider adding a simple garnish that complements the chocolate – a dusting of cocoa powder, a few fresh berries, a sprig of mint, or a sprinkle of chocolate shavings can add color and freshness.
For platters of smaller items like truffles, cookies, or molded chocolates, arrangement is key. Arrange items neatly, perhaps grouping similar items together or creating patterns. Using contrasting colors (like placing dark chocolate items next to white chocolate ones) can make the display pop. Adding non-edible decorative elements like doilies or small signs can also enhance the presentation for a party or gift. Think about height and texture – stack cookies, place truffles in mini paper cups, or arrange items at different levels if using a tiered stand.
Storing Your Chocolate Creations: Maintaining Quality and Freshness
Proper storage is essential to maintain the quality, texture, and appearance of your homemade chocolate treats, especially those made with tempered chocolate or a delicate easy homemade chocolate frosting recipe. Temperature and humidity are the biggest enemies of chocolate.
- Tempered Chocolate: Store finished items like bonbons or solid chocolate decorations in a cool, dry place, ideally between 60-68°F (15-20°C), away from direct sunlight and strong odors. An airtight container helps protect against humidity and odors. Avoid refrigeration if possible, as condensation can cause sugar bloom, unless your kitchen is very warm. If you must refrigerate, place items in an airtight container to minimize condensation when moving them in and out.
- Frosted Goods (with easy homemade chocolate frosting recipe): Cakes and cupcakes frosted with butter-based frostings can usually be stored at cool room temperature for 2-3 days in an airtight container or under a cake dome. If the frosting contains fresh cream or perishable fillings, refrigeration is necessary. When refrigerating, cover loosely with plastic wrap or store in an airtight container. Allow refrigerated items to come to room temperature for about 20-30 minutes before serving for the best flavor and texture.
Always store chocolate away from strong smells, as it can absorb odors easily. Proper storage ensures that the beautiful appearance and delicious taste you worked hard to achieve last as long as possible.
Enjoying Your Homemade Chocolate Masterpieces
You've put in the effort, mastered new techniques like tempering, perfected your easy homemade chocolate frosting recipe, and decorated your treats with flair. Now it's time for the most rewarding part: enjoying the fruits of your labor! There's immense satisfaction in creating something beautiful and delicious from scratch, and even more so when it looks professionally made.
Take a moment to appreciate your work before diving in. Notice the glossy shine on your tempered chocolate, the smooth swirls of your frosting, or the intricate details of your decorations. This journey from raw ingredients to finished masterpiece is what baking is all about.
One of the greatest joys of baking is sharing your creations with others. Presenting friends and family with homemade chocolate treats that look and taste professional is incredibly rewarding. Watch their faces light up as they admire the appearance and savor the rich chocolate flavor.
Whether it's a birthday cake frosted with your signature easy homemade chocolate frosting recipe, a box of handcrafted truffles, or a platter of decorated cookies, your efforts will be appreciated. Don't be shy about sharing your process or the techniques you learned – inspiring others to bake is part of the fun. Your beautifully presented treats are sure to be the highlight of any gathering.
Continuing Your Chocolate Journey: Resources and Inspiration
Mastering professional-looking chocolate treats is an ongoing journey. There's always more to learn and new techniques to explore. Continue practicing the skills you've acquired, especially tempering and working with different frosting consistencies from your easy homemade chocolate frosting recipe.
Look for inspiration in cookbooks, baking blogs, and online tutorials. Experiment with different types of chocolate, explore advanced decorating methods like airbrushing or velvet spray, or try making complex confections like filled chocolates. BakeWithEase.com offers many resources to help you continue honing your skills. Each new project is an opportunity to learn and grow as a baker. Keep experimenting, keep creating, and most importantly, keep enjoying the delicious process of working with chocolate!
Frequently Asked Questions
What makes this chocolate frosting recipe "easy"?
This recipe focuses on simple ingredients and a straightforward method. It avoids complicated techniques, making it beginner-friendly and quick to whip up.
Can I use different types of chocolate for this frosting?
Yes, you can! The recipe is adaptable, but different chocolates will affect the flavor and sweetness. Experiment with dark, milk, or even white chocolate.
How do I achieve a smooth, professional-looking finish with this frosting?
The secret is to whip the frosting for a sufficient amount of time. This incorporates air and creates a light, fluffy texture that spreads beautifully.
What kind of cakes or treats does this frosting pair well with?
This versatile frosting works well with a variety of baked goods. It's fantastic on chocolate cakes, vanilla cupcakes, brownies, and even cookies.
How long can I store leftover homemade chocolate frosting?
Properly stored in an airtight container in the refrigerator, this frosting can last for up to 5-7 days. Allow it to come to room temperature before using.
Final Reflection: Mastering the Art of Effortless Elegance
The pursuit of professional-looking chocolate treats at home is no longer a distant dream; it's a delicious reality achievable with the right techniques and a touch of patience. This article has explored the simple yet transformative power of mastering a few key elements, from achieving the perfect chocolate melt to creating a flawlessly smooth and decadent frosting. The ease with which these techniques can be implemented makes the creation of stunning desserts accessible to everyone, regardless of baking experience.
The impact of homemade treats extends far beyond the simple act of baking. It's about creating cherished memories, sharing joy with loved ones, and experiencing the profound satisfaction of crafting something beautiful with your own hands. The best things in life are homemade.
This sentiment resonates deeply, highlighting the personal connection we forge with food, especially when we invest our time and effort into its creation. The ability to easily replicate professional-quality chocolate frosting empowers us to elevate everyday moments and share a piece of our heart with others through delicious, handcrafted desserts.
Now, it's your turn. Don't be intimidated by the seemingly complex world of professional-looking desserts. Take the knowledge gained from this article, experiment with different flavors and techniques, and unleash your inner pastry chef. Imagine the smiles you'll bring to faces, the compliments you'll receive, and the lasting memories you'll create. The secret to professional-looking chocolate treats isn't some hidden ingredient; it's the confidence to try, the joy of creating, and the love you pour into each delicious bite. Go forth and bake!
Here's a Call to Action (CTA) designed for the end of an article on BakeWithEase.com titled "The Secret to Professional-Looking Chocolate Treats at Home":
Unleash Your Inner Chocolatier!
Thanks for taking the time to explore the secrets to creating stunning chocolate treats at home! We hope you've gained some valuable tips and inspiration. Now it's time to put your newfound skills to the test!
- Master a new chocolate technique: Choose one recipe or technique from the article and try it out this week. Challenge yourself to perfect the details!
- Share your delicious creations: Post a picture of your masterpiece on social media and tag us – we'd love to see your success! Use #BakeWithEaseChoc
- Dive deeper into chocolate: Explore our other chocolate recipes and techniques on BakeWithEase.com for even more inspiration.
Ready to transform your kitchen into a professional chocolate haven? What's the first chocolate treat you're going to conquer?