
Demystifying Chocolate Tempering: Advanced Results Made Accessible.

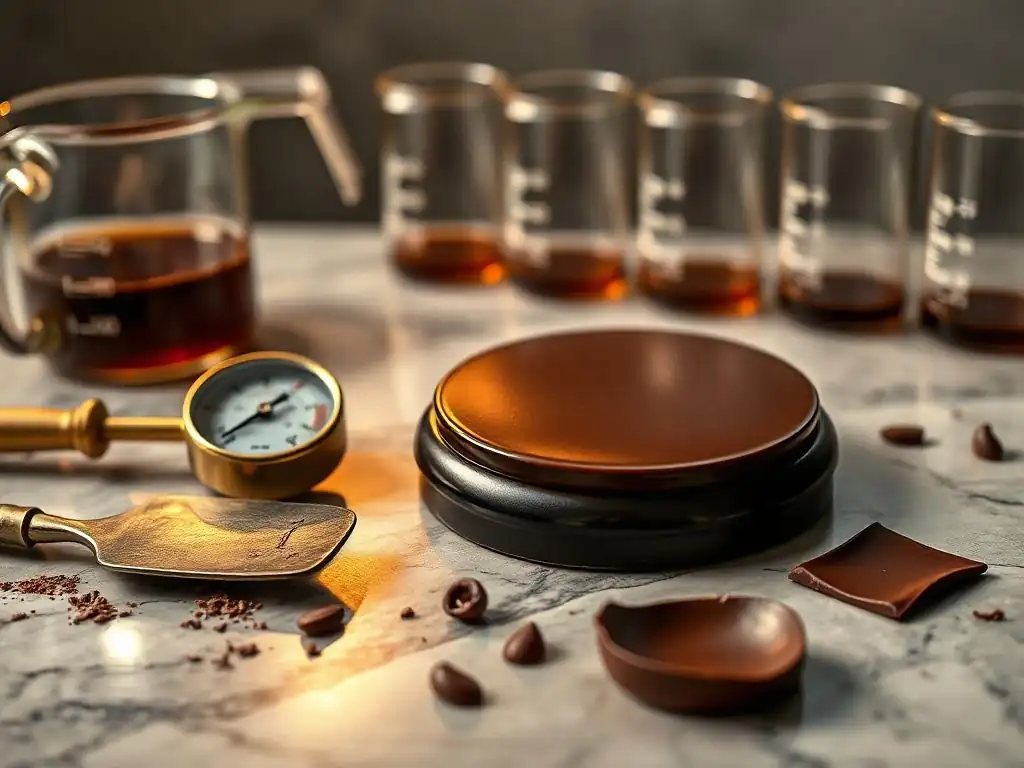
Welcome to BakeWithEase, your ultimate destination for mastering the art of baking with simplicity and flair! Here, we believe that anyone can create delicious masterpieces, and our latest article on "Chocolate Tempering for Beginners" reveals the secrets to achieving that glossy, professional finish on your chocolates. Whether you’re a novice or an experienced baker looking to refine your skills, our step-by-step guide will empower you to conquer this advanced technique with ease. Dive in and discover how to elevate your baking game—your sweet creations await!
- Introduction to Chocolate Tempering for Beginners
- The Essential Tools and Ingredients for Chocolate Tempering
- Mastering the Seed Method for Chocolate Tempering
- Alternative Chocolate Tempering Techniques for Home Bakers
- Troubleshooting Common Chocolate Tempering Problems
- Advanced Tips and Tricks for Perfect Chocolate Tempering
- Recipes to Showcase Your Perfectly Tempered Chocolate
- Conclusion: Achieving Chocolate Tempering Success
-
Frequently Asked Questions
- What exactly is chocolate tempering, and why is it important?
- Is chocolate tempering really necessary for all chocolate recipes?
- What are the different methods for tempering chocolate, and which is easiest for beginners?
- What happens if I don't temper chocolate properly?
- What tools do I absolutely need to temper chocolate at home?
- Final Reflection: The Sweet Science of Accessible Chocolate
- Unlock Your Inner Chocolatier: Master the Art of Tempering
Introduction to Chocolate Tempering for Beginners
Learning the art of chocolate tempering for beginners might seem daunting at first, but it's a fundamental skill that elevates homemade confections from good to truly professional. Tempering chocolate isn't just about melting and cooling; it's a controlled process that manipulates the cocoa butter crystals within the chocolate. When done correctly, this process ensures your chocolate sets properly, resulting in a beautiful finish and satisfying texture. Think of it as aligning the tiny building blocks of the chocolate for optimal performance.
This guide aims to break down the science and techniques of chocolate tempering into easy-to-understand steps, perfect for anyone starting their journey. We'll explore the "why" behind tempering, the essential tools you'll need, and walk through the most accessible method – the seed method. By understanding the basic principles and practicing the techniques, you'll be well on your way to creating stunning chocolate treats that look and taste incredible. Mastering chocolate tempering opens up a world of possibilities in your baking and candy-making endeavors.
Why Temper Chocolate? Understanding Beta Crystals
At its core, tempering chocolate is all about controlling the crystallization of cocoa butter. Cocoa butter can crystallize in several different forms, or polymorphs, depending on the temperature it solidifies at. These forms are often labeled I through VI. Forms I through IV are unstable and undesirable; they melt easily, result in a dull finish, and have a crumbly texture. Form VI is the most stable but forms slowly over time in solid chocolate. The goal of tempering is to encourage the formation of Form V crystals, often called Beta V crystals.
Beta V crystals are the stable ones we want. They melt sharply just below body temperature (around 88-91°F or 31-33°C for dark chocolate), which gives chocolate its characteristic smooth mouthfeel. They are also responsible for chocolate's desirable properties: a glossy surface, a firm snap when broken, and resistance to melting at room temperature. By carefully melting and cooling chocolate through specific temperature ranges, we destroy the unstable crystals and promote the growth and alignment of these crucial Beta V crystals, setting the stage for perfect results.
Benefits of Properly Tempered Chocolate in Confectionery
The advantages of using properly tempered chocolate are immediately visible and palpable in your finished products. Firstly, it provides a beautiful, high-gloss finish that is visually appealing, whether you're dipping strawberries, coating truffles, or making chocolate bars. This shine is a direct result of the uniform structure of the Beta V crystals reflecting light consistently. A dull or streaky surface is a tell-tale sign of improperly tempered chocolate.
Beyond aesthetics, tempered chocolate offers superior performance. It sets quickly and firmly at room temperature (ideally around 68-70°F or 20-21°C), allowing for efficient production. When broken, it produces a clean, sharp snap, indicating a solid, stable structure. Furthermore, properly tempered chocolate is much less prone to fat bloom – those unsightly greyish streaks or patches that can appear on the surface of chocolate over time, caused by unstable fat crystals migrating and recrystallizing. This means your tempered creations will look good and maintain quality for longer at typical room temperatures.
The Essential Tools and Ingredients for Chocolate Tempering
Successfully tempering chocolate requires a few key pieces of equipment that allow you to accurately control temperature, which is paramount to the process. While some methods can be adapted with minimal tools, having the right gear makes the process much more reliable, especially when you are first learning chocolate tempering for beginners. Precise temperature control is not optional; it is the foundation upon which successful tempering is built.
In addition to tools, the quality and type of chocolate you choose play a significant role. Not all chocolate is created equal when it comes to tempering. Understanding the characteristics of different chocolates and selecting one suitable for tempering (specifically, one containing real cocoa butter) is just as important as following the temperature guidelines. Using the correct ingredients with the right equipment sets you up for success.
Must-Have Equipment: Thermometers, Bowls, and Scrapers
A reliable thermometer is arguably the most critical tool for chocolate tempering. You need to monitor the chocolate's temperature at several stages. A digital probe thermometer offers quick, accurate readings and is easy to use in a bowl of chocolate. Infrared thermometers can also be useful for surface temperature checks, but a probe is essential for stirring and ensuring the temperature is consistent throughout the chocolate. Aim for one that reads temperatures quickly and accurately within the specific ranges needed for chocolate (roughly 80°F to 130°F).
You'll also need heatproof bowls for melting the chocolate. Glass or stainless steel bowls work well, especially when using a double boiler method (a bowl set over a pot of simmering water). Avoid plastic, as it can retain moisture and odors, and is harder to heat gently.
Spatulas or bowl scrapers are necessary for stirring the chocolate constantly during melting and cooling to ensure even temperature distribution and crystal formation. Silicone spatulas are ideal as they are flexible and easy to clean. For methods like the tablier method, metal scrapers or palette knives are essential for working the chocolate on a cool surface.
Choosing Chocolate: Cocoa Content and Quality Considerations
The most important factor when selecting chocolate for tempering is ensuring it is real chocolate made with cocoa butter, not a compound coating made with vegetable fats. Compound coatings do not contain cocoa butter and therefore do not require or respond to tempering in the same way. Look for chocolate labeled "couverture," which typically has a higher percentage of cocoa butter (around 32-39%) and is formulated specifically for melting, tempering, and coating. High-quality chocolate chips or bars made with real cocoa butter can also work, but check the ingredients list.
The cocoa content (percentage) affects the melting and tempering temperatures. Dark chocolate, with higher cocoa solid and cocoa butter content, requires the highest temperatures (melt around 115-120°F, temper around 88-91°F). Milk chocolate, containing milk solids and less cocoa, requires slightly lower temperatures (melt around 105-110°F, temper around 86-88°F). White chocolate, made from cocoa butter, sugar, and milk solids (no cocoa solids), requires the lowest temperatures (melt around 105-110°F, temper around 84-86°F). Using finely chopped chocolate or callets (small drops designed for melting) will help it melt more evenly and quickly.
Mastering the Seed Method for Chocolate Tempering
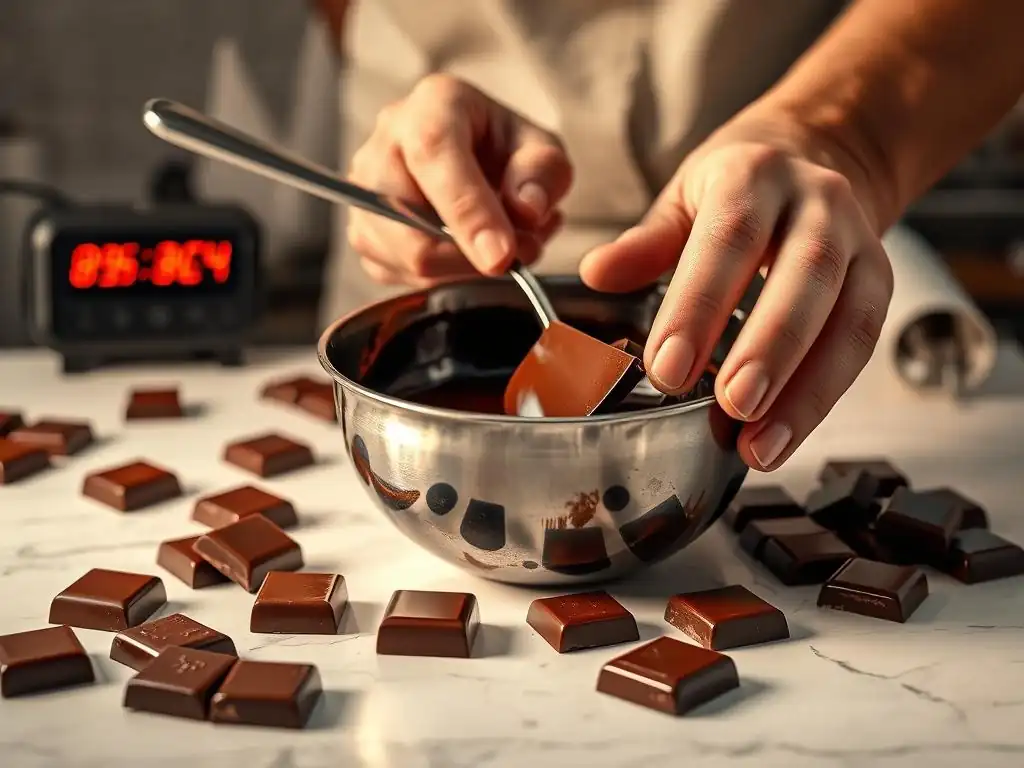
For those learning chocolate tempering for beginners, the seed method is often recommended as the most accessible and reliable technique. It doesn't require specialized surfaces like marble slabs and is relatively easy to control with just a bowl, a thermometer, and some untempered and pre-tempered chocolate. This method works by introducing stable Beta V crystals from the "seed" chocolate into the melted, untempered chocolate, encouraging the entire batch to crystallize correctly as it cools.
The process involves carefully melting most of your chocolate, then cooling it down by stirring in finely chopped pieces of already-tempered chocolate (your "seed"). As the seed chocolate melts into the warm, melted chocolate, it distributes its stable crystal structure throughout the mixture. Continuous stirring helps the chocolate cool evenly and promotes the growth of new Beta V crystals around the introduced seeds, leading to a perfectly tempered batch ready for use.
What is the Seed Method and Why is it Effective for Beta Crystal Formation?
The seed method leverages the principle of nucleation. When you melt chocolate completely and then simply let it cool, the cocoa butter crystals form randomly, resulting in a mixture of unstable and stable forms. The seed method bypasses this by adding a significant number of pre-formed, stable Beta V crystals (contained within the seed chocolate). These stable crystals act as templates. As the melted chocolate cools and its temperature drops into the ideal range for Beta V formation (around 80-90°F depending on the type), the cocoa butter molecules preferentially align themselves with the structure of the seed crystals.
This controlled cooling and agitation, guided by the stable seed crystals, ensures that the vast majority of the cocoa butter solidifies into the desired Beta V form. The process is effective because you are not waiting for stable crystals to spontaneously form from scratch during cooling (which is slow and unreliable) but are actively introducing them to guide the crystallization process. This leads to a more uniform and stable crystal structure throughout the entire batch of chocolate, giving you that desired snap and shine.
Step-by-Step Guide to Seeding Chocolate
Melting the Chocolate: Achieving Initial Melt Temperature
Begin by finely chopping about 70-80% of the chocolate you plan to temper. Place it in a dry, heatproof bowl. Gently melt the chocolate. The safest way is using a double boiler: place the bowl over a pot of barely simmering water, ensuring the bottom of the bowl does not touch the water. Stir the chocolate constantly as it melts. Alternatively, you can use a microwave on low power (30-50%), heating in short bursts (30-60 seconds) and stirring thoroughly after each burst until the chocolate is mostly melted with just a few small lumps remaining.
Continue heating and stirring until the chocolate reaches its initial melting temperature, which is high enough to melt all crystal forms, including any unstable ones. For dark chocolate, aim for about 115-120°F (46-49°C). For milk or white chocolate, aim for a lower temperature, around 105-110°F (40-43°C). Remove the bowl from the heat (or microwave) as soon as it reaches this temperature. Ensure there are no unmelted lumps remaining by stirring until completely smooth.
Adding the Seed Chocolate: Percentage and Stirring Technique
Once the chocolate has reached its initial melt temperature and is smooth, add the remaining 20-30% of the finely chopped, untempered chocolate. This is your "seed" chocolate. Stir continuously and vigorously. The heat from the melted chocolate will begin to melt the seed chocolate. As the seed chocolate melts, it releases its stable Beta V crystals into the mixture. The stirring helps distribute these crystals evenly and, crucially, helps cool the overall mixture down.
Continue stirring until all the seed chocolate has melted and the temperature of the entire batch has dropped into the working temperature range for tempered chocolate: roughly 88-91°F (31-33°C) for dark chocolate, 86-88°F (30-31°C) for milk chocolate, and 84-86°F (29-30°C) for white chocolate. If the chocolate is still too warm after all the seed has melted, you can add a tiny bit more seed chocolate and continue stirring, or simply continue stirring over an ice bath (being careful not to get water in the chocolate) until the target temperature is reached.
The chocolate should thicken slightly as it cools and the Beta V crystals begin to form.
Testing for Proper Temper: Snap, Shine, and Set Time
Before using your chocolate for coating or molding, it's essential to test if it's properly tempered. A simple and reliable test is the "spatula test" or "parchment test." Dip the tip of a clean knife or spatula into the chocolate, or spread a thin smear of chocolate onto a small piece of parchment paper. Set this sample aside at cool room temperature (ideally around 68-70°F or 20-21°C).
If the chocolate is properly tempered, this small sample should set and become firm relatively quickly, typically within 3 to 5 minutes. Once set, it should have a smooth, glossy surface without any streaks or dull spots. When you break the sample, it should snap cleanly with an audible sound, especially dark chocolate.
If the chocolate is still soft, dull, or takes a long time to set, it is not in temper and will need to be re-melted and tempered again. If it sets too quickly and is very thick, it might be over-crystallized, requiring slight re-warming to the correct working temperature.
Alternative Chocolate Tempering Techniques for Home Bakers
While the seed method is excellent for chocolate tempering for beginners, there are other techniques home bakers can explore as they gain confidence. These methods offer different approaches to controlling the temperature and encouraging Beta V crystal formation. Each has its own advantages and may be preferred depending on the equipment available, the quantity of chocolate being tempered, and personal preference.
Exploring alternative methods can deepen your understanding of the tempering process and provide flexibility. The tablier method, for instance, offers a very hands-on approach, while sous vide provides exceptional temperature stability. The microwave method, when done correctly with added cocoa butter, can be incredibly fast for small amounts. Familiarity with these techniques expands your toolkit for handling chocolate.
The Tablier Method (Working on Marble): Cooling and Agitation
The tablier method, also known as the marbleing or tableing method, is a classic technique often used by professional chocolatiers. It requires a cool, smooth surface, traditionally a marble or granite slab, and metal scrapers or palette knives. You start by melting the chocolate to the same initial melt temperature as in the seed method (e.g., 115-120°F for dark chocolate). Then, pour about two-thirds of the melted chocolate onto the cool surface.
Using the scrapers, continuously work the chocolate by spreading it thinly and scraping it back together. This process rapidly cools the chocolate while the constant movement encourages the formation of Beta V crystals. Monitor the temperature with a thermometer; you're aiming to cool the chocolate significantly, down to around 80-82°F (27-28°C) for dark chocolate, or slightly lower for milk/white.
Once the chocolate starts to thicken and shows signs of crystallization (it might look slightly matte or streaky), quickly scrape it back into the bowl with the remaining one-third of warm, melted chocolate. Stir vigorously until the entire batch reaches the correct working temperature (e.g., 88-91°F for dark). The warm chocolate helps melt any over-crystallized portions from the marble, bringing the batch into temper.
Using a Sous Vide for Precise Chocolate Tempering: Temperature Stability
The sous vide method offers unparalleled temperature control, making it one of the most foolproof ways to temper chocolate once the initial setup is done. You'll need a sous vide immersion circulator and a container for a water bath. Set the sous vide device to the target working temperature for your type of chocolate (e.g., 88-91°F / 31-33°C for dark, 86-88°F / 30-31°C for milk, 84-86°F / 29-30°C for white). Place the chocolate (finely chopped or callets) in a vacuum-sealable bag or a heatproof bowl that fits inside the water bath.
Submerge the bag or bowl in the preheated water bath, ensuring no water gets into the chocolate. Allow the chocolate to melt completely, stirring occasionally if using a bowl. The chocolate will slowly heat and then be held precisely at the ideal working temperature for Beta V crystal formation. Leave it in the water bath for 30-60 minutes (or longer) to ensure all crystals have formed and stabilized at that temperature. The chocolate will be perfectly tempered and ready to use directly from the bath. This method is excellent for maintaining temper over extended periods.
Microwave Tempering: A Quick and Easy Option for Small Batches with Cocoa Butter Addition
A fast and convenient method for tempering small amounts of chocolate involves using the microwave in conjunction with powdered cocoa butter, often sold under the brand name Mycryo. This method relies on the fact that Mycryo is 100% pure cocoa butter already in a stable Beta V crystalline form. You melt your chocolate to its initial melting temperature (e.g., 115-120°F for dark) using short bursts of microwave power, stirring well between each burst until smooth.
Once melted, allow the chocolate to cool slightly, stirring occasionally, until it reaches a specific temperature where the Mycryo is effective – typically around 93°F (34°C) for dark chocolate. At this temperature, stir in a specific percentage of Mycryo powder, usually about 1% of the weight of the chocolate (e.g., 5 grams of Mycryo for 500 grams of chocolate). Stir thoroughly for a few minutes to distribute the Mycryo crystals and encourage the melted chocolate to crystalize into the desired Beta V form.
The chocolate should then cool slightly to its working temperature (88-91°F for dark) and be ready to use. This method is rapid because you're introducing pre-formed stable crystals directly.
Troubleshooting Common Chocolate Tempering Problems
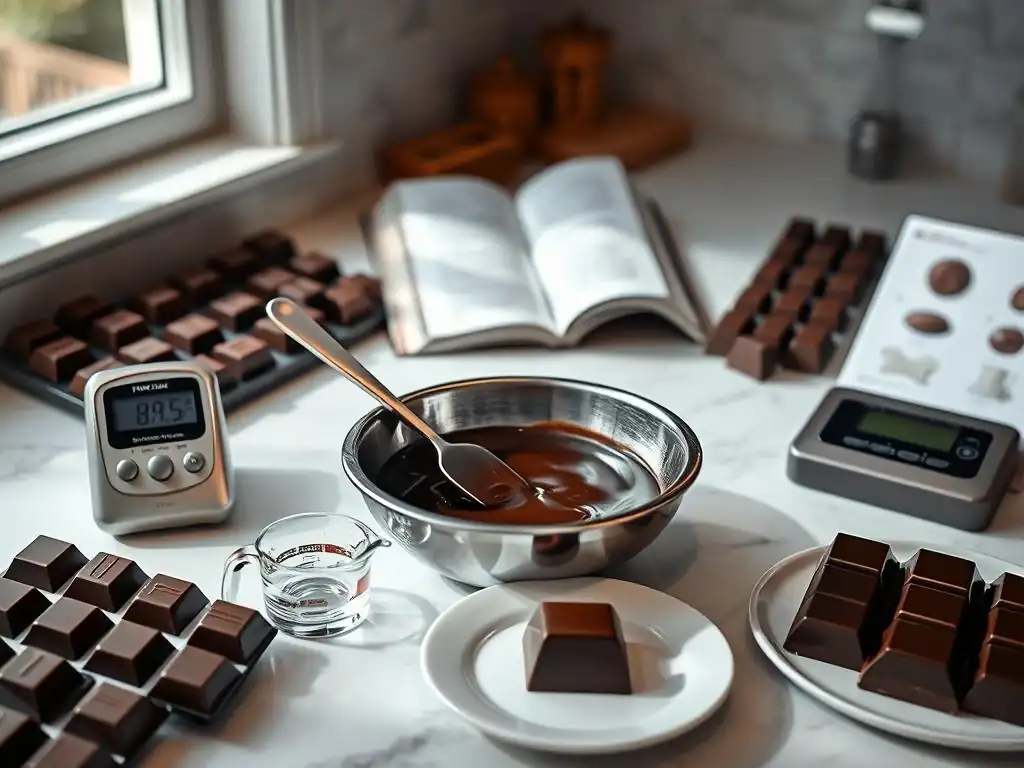
Even with careful attention to detail, you might encounter issues when learning chocolate tempering for beginners. Understanding common problems and how to address them is part of the learning process. Problems like chocolate bloom, overheating, or incorrect viscosity can derail your efforts, but they are often fixable or preventable with a little knowledge.
Don't be discouraged if your first attempts aren't perfect. Tempering is a skill that improves with practice. Identifying what went wrong is the first step to correcting it. Most tempering issues relate back to temperature control or the presence of moisture. By learning to diagnose and fix these problems, you'll build confidence and achieve better results consistently.
Dealing with Chocolate Bloom: Fat and Sugar Bloom Solutions
Chocolate bloom is a common issue that results in a dull, sometimes streaky, or mottled appearance on the surface of chocolate. There are two types: fat bloom and sugar bloom. Fat bloom appears as grayish streaks or patches and a waxy texture. It's caused by unstable fat crystals melting and recrystallizing on the surface, often due to improper tempering or storage temperature fluctuations. Sugar bloom appears as a gritty, white or gray film and feels rough to the touch. It's caused by moisture on the surface dissolving sugar, which then recrystallizes as larger, visible crystals when the water evaporates.
Bloomed chocolate is still safe to eat and can be used in baking where appearance doesn't matter (like brownies or cookies). Fat bloom can often be corrected by simply re-melting the chocolate and tempering it properly again. The re-tempering process will melt the unstable fat crystals and, if done correctly, form stable ones. Unfortunately, sugar bloom cannot be fixed by re-tempering; the sugar crystals will remain. To prevent bloom, ensure chocolate is properly tempered and stored in a cool, dry place with stable temperatures (ideally 60-68°F / 15-20°C and below 50% humidity).
Overheating Chocolate: Rescue Techniques Involving Added Fat
Overheating chocolate is a common mistake, especially when melting it too quickly or at too high a temperature. Heating chocolate significantly above its initial melting temperature (e.g., dark chocolate above 130°F / 54°C) can burn it, causing it to become grainy or seize. More commonly, overheating destroys all the cocoa butter crystal structures, including the stable Beta V forms, making it impossible to temper until new stable crystals are introduced.
If you've overheated your chocolate but it hasn't seized or burned (it's just too hot for tempering, perhaps 125°F+), you can attempt to rescue it. One technique is to quickly cool it down while stirring vigorously, perhaps over an ice bath (again, avoiding any water contact), until it reaches the working temperature range (e.g., 88-91°F for dark).
If it still won't temper, you may need to add finely chopped, untempered chocolate (acting as seed) and stir until it cools into the working range and thickens slightly. In severe cases of overheating or if the chocolate has seized (become a thick, unworkable paste, usually due to moisture), it might be best to start over with fresh chocolate, using the overheated batch for baking purposes.
Achieving the Right Viscosity: Adjusting with Cocoa Butter or Vegetable Oil
Sometimes, even properly tempered chocolate might be too thick or too thin for your intended use. The viscosity of melted chocolate is influenced by its cocoa butter content, the fineness of the cocoa solids and sugar particles, and the temperature. If your tempered chocolate is too thick for dipping or coating delicate items, you can adjust its viscosity. The best way to thin tempered chocolate while maintaining its properties is by adding a small amount of melted cocoa butter.
Melt a small quantity of extra cocoa butter separately and stir a few drops or a teaspoon at a time into your tempered chocolate, stirring gently until the desired consistency is reached. Be careful not to add too much, as this can slightly alter the tempering balance. As a last resort, a tiny amount of a neutral vegetable oil like refined coconut oil or grapeseed oil can be used to thin chocolate.
However, adding vegetable oil will slightly change the texture and how the chocolate melts in the mouth compared to adding pure cocoa butter. Always add fats after the chocolate is tempered and at its working temperature, and add them sparingly.
Advanced Tips and Tricks for Perfect Chocolate Tempering
Once you've mastered the basics of chocolate tempering for beginners, you might want to explore ways to enhance your results and expand your repertoire. Advanced techniques involve coloring chocolate, understanding the nuances of different chocolate types, and learning how to maintain tempered chocolate for extended use. These tips can help you achieve even more professional-looking and consistent results in your confectionery creations.
Adding color, working with various chocolate types, and holding chocolate in temper are skills that build upon the foundational knowledge of crystal formation and temperature control. Experimenting with these tips will not only improve your finished products but also deepen your understanding of this fascinating ingredient. Precision and patience remain key, even as you tackle more complex applications.
Coloring Tempered Chocolate: Using Oil-Based Food Coloring
Adding color to tempered chocolate requires specific types of food coloring. Standard water-based gel or liquid food colors will cause chocolate to seize instantly, turning it into a thick, unworkable paste. This is because water interferes with the fat structure of the chocolate. To color tempered chocolate successfully, you must use oil-based food colorings or specialized powder colors designed for chocolate or candy melts.
Oil-based colors disperse smoothly into the fat base of the chocolate without causing it to seize. You can add these colors to the melted chocolate before you begin the tempering process, or stir a small amount into your already-tempered chocolate while keeping it at its working temperature. Start with a small amount and add more gradually until you achieve the desired shade, stirring gently to incorporate. Powdered colors can be mixed with a little melted cocoa butter first to create a smooth paste before stirring into the chocolate, which often yields vibrant results.
Working with Different Types of Chocolate (Dark, Milk, White): Temperature Variations
As mentioned earlier, different types of chocolate require slightly different temperature ranges for successful tempering due to their varying compositions. Dark chocolate, with its higher cocoa butter content and absence of milk solids, requires the highest temperatures. Its initial melt is typically 115-120°F (46-49°C), it's cooled down during seeding (or on marble) to around 80-82°F (27-28°C), and then brought back up to a working temperature of 88-91°F (31-33°C).
Milk chocolate contains milk solids and less cocoa butter than dark. This means it melts and tempers at lower temperatures. Typical ranges are: melt to 105-110°F (40-43°C), cool to 78-80°F (26-27°C), and work at 86-88°F (30-31°C). White chocolate, made only from cocoa butter, sugar, and milk solids, requires the lowest temperatures: melt to 105-110°F (40-43°C), cool to 78-80°F (26-27°C), and work at 84-86°F (29-30°C). Always use a thermometer and follow the correct ranges for the specific type of chocolate you are working with.
Storing Tempered Chocolate: Maintaining Temper with Temperature Control
When working with tempered chocolate, especially for dipping or molding, you often need to keep it in temper for an extended period. If the chocolate cools too much, it will become too thick to work with properly. If it gets too warm, it will lose its temper as the stable Beta V crystals melt. The goal is to maintain the chocolate within its specific working temperature range (e.g., 88-91°F for dark).
Several methods can help maintain the temper. For small batches, you can periodically place the bowl back over your warm (but not simmering) double boiler for just a few seconds, stirring constantly, and then remove it immediately, checking the temperature. Alternatively, a warming pad set on a very low setting can be placed under the bowl. Specialized chocolate warming units are also available. Regularly stirring the chocolate helps distribute the heat evenly and prevents localized cooling or overheating. Always use your thermometer to ensure the chocolate stays within the correct working temperature range while you are using it.
Recipes to Showcase Your Perfectly Tempered Chocolate
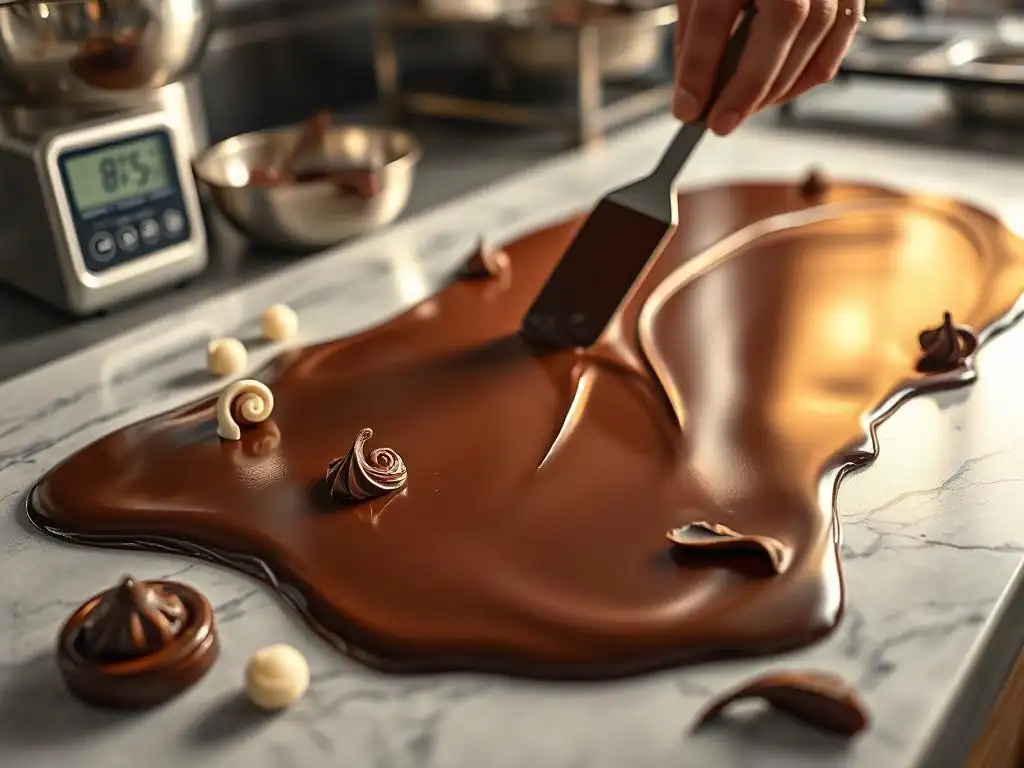
Putting your newly acquired chocolate tempering skills to use is the most rewarding part! Tempered chocolate is essential for a variety of confections that require a hard shell, a glossy finish, or a clean snap. These recipes are excellent ways to practice your tempering technique and create impressive treats that highlight the beautiful properties of properly tempered chocolate.
From simple barks to elegant decorations, working with tempered chocolate allows you to achieve professional-quality results at home. These recipes are designed to be accessible while demonstrating the benefits of correct tempering – shine, snap, and a smooth texture. Choose one that appeals to you and get ready to showcase your skills in chocolate tempering for beginners.
Chocolate Truffles with a Cocoa Powder Coating
Tempered chocolate is often used to create a crisp shell around a soft ganache center for truffles. While the ganache itself is not tempered, the outer layer is where your tempering skills shine. To make simple truffles, prepare a ganache by heating heavy cream and pouring it over chopped chocolate (not tempered), stirring until smooth. Let the ganache chill until firm enough to roll into balls (about 1-2 hours).
Once the ganache balls are formed and chilled, temper your chosen chocolate (dark, milk, or white). Dip each ganache ball into the tempered chocolate, ensuring it's fully coated. Lift it out, letting excess chocolate drip off, and immediately roll it in cocoa powder or desired toppings before the chocolate sets. The tempered chocolate shell will set quickly, providing a delightful contrast in texture to the creamy interior and preventing the ganache from becoming sticky.
Homemade Chocolate Bark with Sea Salt and Almonds
Chocolate bark is one of the easiest and most satisfying ways to use tempered chocolate. It requires minimal ingredients and highlights the snap and shine of well-tempered chocolate. Start by tempering a generous amount of your favorite chocolate (dark, milk, or white) using the seed method or another preferred technique.
Once tempered and at the correct working temperature, pour the chocolate onto a piece of parchment paper spread on a flat surface (like a baking sheet). Use an offset spatula to spread the chocolate into a thin, even layer, about 1/4 inch thick. Immediately sprinkle your desired toppings over the wet chocolate. Classic choices include toasted nuts (like almonds or pistachios), dried fruit, candies, or flaky sea salt.
Allow the chocolate bark to set completely at cool room temperature or in the refrigerator for about 20-30 minutes. Once set, break it into irregular pieces. The tempered chocolate will break with a clean snap.
Elegant Chocolate Decorations for Cakes and Pastries: Curls and Shavings
Properly tempered chocolate is essential for creating delicate and stable chocolate decorations that hold their shape and add a touch of elegance to cakes, cupcakes, and pastries. Decorations like chocolate curls, shavings, or piped shapes rely on the chocolate setting firmly with a good snap. Untempered chocolate would be too soft or would bloom, resulting in messy or unattractive decorations.
To make simple chocolate curls, temper a block of chocolate. Once tempered and set, hold the block firmly and use a vegetable peeler or a sharp knife held at an angle to shave thin layers off the side. The tempered chocolate will curl up as you shave it. For piped decorations, fill a piping bag with tempered chocolate and pipe shapes onto parchment paper. Let them set completely. Because the chocolate is tempered, these decorations will be firm, glossy, and easy to handle and place on your baked goods without melting quickly at room temperature.
Conclusion: Achieving Chocolate Tempering Success
Embarking on the journey of chocolate tempering for beginners is a rewarding step in expanding your baking and confectionery skills. While it involves precise temperature control and attention to detail, the results are well worth the effort. By understanding the crucial role of Beta V crystals and practicing the techniques, you can transform simple melted chocolate into a glossy, snappy, and stable ingredient perfect for a wide array of delicious creations.
Recap of Key Tempering Techniques and Beta Crystal Formation
We've explored why tempering is necessary – to align cocoa butter into stable Beta V crystals for optimal structure, shine, and snap. We discussed essential tools like accurate thermometers and quality chocolate containing real cocoa butter. We delved into the accessible seed method, breaking down the steps from melting to seeding and testing for temper.
We also touched upon alternative techniques like the tablier method, the precise sous vide method, and the quick microwave method using cocoa butter powder (Mycryo), each offering a different path to Beta V formation. Troubleshooting common issues like bloom and overheating equips you to handle challenges along the way.
Encouragement for Continued Practice and Experimentation
Remember that mastering chocolate tempering, like any baking skill, takes practice. Don't be discouraged by initial imperfections. Each attempt is a learning opportunity to better understand how chocolate behaves. Experiment with different types of chocolate, try the various tempering methods, and apply your skills to the suggested recipes or your own creations. The ability to properly temper chocolate opens up a world of possibilities for creating beautiful, professional-quality confections in your own kitchen. Keep practicing, keep experimenting, and enjoy the delicious results!
Frequently Asked Questions
What exactly is chocolate tempering, and why is it important?
Chocolate tempering is the process of stabilizing the cocoa butter crystals within chocolate. This results in a smooth, glossy finish and a satisfying snap when broken. Without tempering, chocolate can be dull, streaky, and melt easily.
Is chocolate tempering really necessary for all chocolate recipes?
No, tempering is primarily important when you want chocolate to have a professional appearance and a stable structure, like for dipping, molding, or creating decorations. For baking in cakes or cookies, it's generally not required.
What are the different methods for tempering chocolate, and which is easiest for beginners?
There are several methods, including seeding, tabliering (marble slab method), and using a water bath (sous vide). The seeding method is often considered the easiest for beginners, as it involves adding tempered chocolate to untempered chocolate.
What happens if I don't temper chocolate properly?
If chocolate isn't properly tempered, it will likely exhibit fat bloom (white streaks), a soft texture, and won't have that desirable snap. It might also be difficult to remove from molds.
What tools do I absolutely need to temper chocolate at home?
While specialized equipment exists, beginners can temper chocolate with a double boiler or microwave, a reliable thermometer (ideally a digital one), and a spatula. Accurate temperature control is key!
Final Reflection: The Sweet Science of Accessible Chocolate
Mastering chocolate tempering isn't just about achieving a glossy sheen; it's about unlocking the potential for truly exceptional chocolate experiences. This article has explored the seemingly complex world of chocolate tempering, breaking down the science behind crystal formation and offering practical, beginner-friendly techniques to achieve professional-quality results at home. The accessibility of these methods empowers anyone with a passion for chocolate to elevate their creations.
The impact of understanding chocolate tempering extends far beyond the kitchen. It's about appreciating the artistry and precision involved in transforming simple cocoa beans into a luxurious treat. This knowledge fosters a deeper connection to the ingredients and the process, enriching the entire experience of making and enjoying chocolate. As renowned pastry chef, Jacques Torres, once said, Chocolate is a magical ingredient. It's a canvas for creativity, and tempering is the key to unlocking its full potential.
This sentiment resonates deeply, highlighting the transformative power of mastering this seemingly simple technique.
Now, it's your turn. Don't be intimidated by the perceived complexity of chocolate tempering. Experiment with the techniques outlined in this article, embrace the learning process, and discover the joy of creating flawlessly tempered chocolate. The satisfaction of achieving that perfect snap, that irresistible shine, and that melt-in-your-mouth texture is a reward in itself. So, grab your chocolate, follow your passion, and unlock the sweet science within!
Unlock Your Inner Chocolatier: Master the Art of Tempering
Thanks for taking the time to delve into the world of chocolate tempering! We hope you now feel more confident in tackling this often-intimidating technique. Ready to put your newfound knowledge into practice?
- Craft your dream chocolate creations: Start with a simple recipe—truffles, perhaps?—and experiment with different types of chocolate. Let us know how it goes!
- Share your tempered triumphs (or delightful failures!): We love seeing what you bake. Post your creations on social media using #BakeWithEaseTempering and tag us!
- Dive deeper into our chocolate resources: Explore our other articles on chocolate work for even more tips and tricks to enhance your baking skills.
What incredible chocolate masterpiece will you create first?