
Unlock Versatility: Baking Cakes, Pastries, and More in Your Dutch Oven.

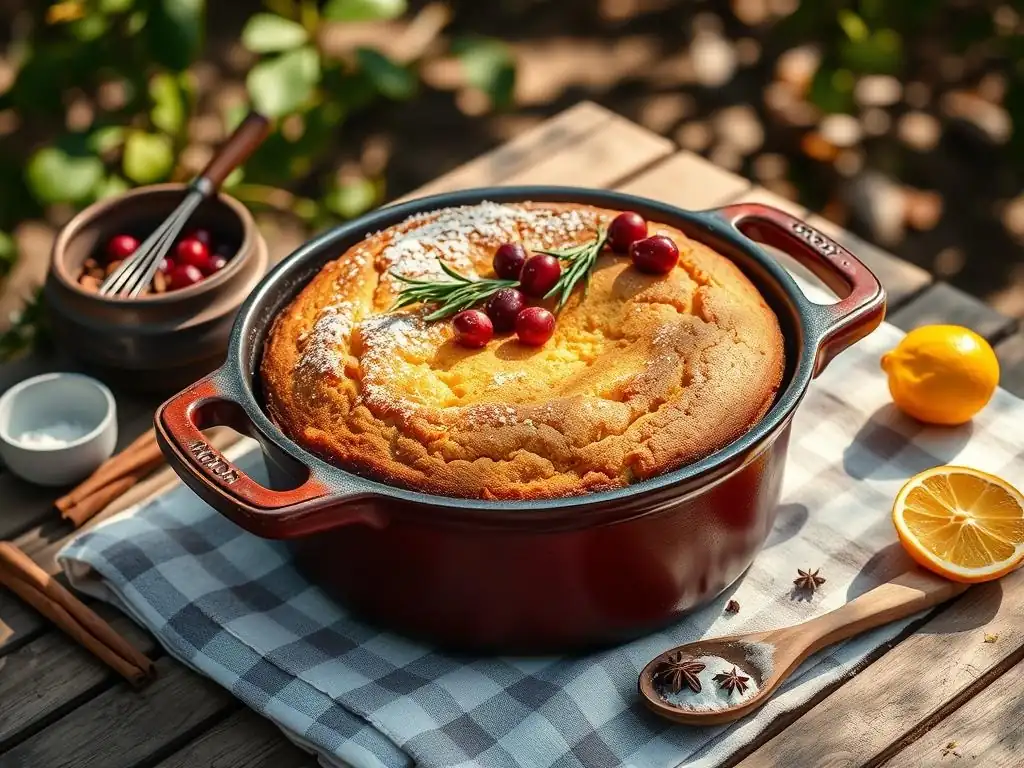
Welcome to BakeWithEase, your trusted guide to the delightful world of baking! Ever imagined creating flawlessly moist cakes, rustic pastries, and even crusty breads using just one versatile tool? Prepare to unlock the hidden potential of your Dutch oven. In this guide, we're diving deep into Dutch oven cake recipes easy enough for any skill level, revealing how this kitchen staple can transform your baking game. Get ready to be amazed!
- Baking Cakes and Beyond: The Unexpected Versatility of Your Dutch Oven
- Dutch Oven Cake Recipes Easy: A Beginner's Guide
- From Cakes to Pastries: Exploring Dutch Oven Baking Possibilities
- Why Bake Cakes in a Dutch Oven? Advantages and Benefits
- Dutch Oven Baking Techniques for Cakes and Pastries
- Dutch Oven vs. Baking Stone: Which is Right for Your Baking Needs?
- Essential Dutch Oven Baking Equipment and Accessories
- Troubleshooting Common Dutch Oven Cake Baking Problems
- Dutch Oven Cake Recipe Ideas: Inspiration for Your Next Bake
- Mastering Dutch Oven Baking: Tips and Tricks for Success
- Frequently Asked Questions
- Final Reflection: The Unexpected Versatility of the Humble Dutch Oven
- Unleash Your Dutch Oven's Baking Power!
Baking Cakes and Beyond: The Unexpected Versatility of Your Dutch Oven
Many home bakers associate Dutch ovens primarily with hearty stews, braised meats, or perhaps rustic no-knead bread. While these are certainly excellent uses, the humble Dutch oven holds incredible potential far beyond savory dishes. Its heavy construction and tight-fitting lid create a unique microclimate perfect for various baking applications, transforming it into a versatile piece of equipment that can handle everything from delicate cakes to flaky pastries.
Exploring the full range of what you can bake in a Dutch oven opens up a world of possibilities, whether you're working in a conventional oven or even over an open flame outdoors. This guide will delve into the techniques, benefits, and delicious outcomes of using your Dutch oven for baking, proving it's an indispensable tool for any baking enthusiast looking to expand their repertoire.
Discover the Dutch Oven's Baking Prowess
The secret to the Dutch oven's baking success lies in its material and design. Typically made from cast iron, often enameled, these pots heat up evenly and retain that heat exceptionally well. This consistent temperature provides a stable environment crucial for successful baking, helping batters rise uniformly and crusts develop beautifully. The heavy lid traps steam released during the baking process, which is particularly beneficial for creating moist interiors, a desirable trait for many baked goods like cakes and quick breads.
Furthermore, the enclosed environment mimics a small oven, which can be advantageous in various situations. For instance, when baking certain items that require a high initial burst of heat, preheating the Dutch oven allows for a strong oven spring, similar to what a professional deck oven provides. This capability makes it surprisingly effective for items like biscuits, scones, and even some styles of artisan bread, demonstrating its adaptability across different baking categories.
Dutch Oven Baking: More Than Just Bread
While artisan bread is perhaps the most celebrated baked good made in a Dutch oven, its utility extends significantly further. Think about the range of baked items that benefit from consistent, radiant heat and controlled moisture: tender cakes, flaky biscuits, moist muffins, rustic cobblers, and even fudgy brownies. Each of these can be successfully baked, and often improved, by using a Dutch oven.
Consider baking a simple cake. Placing the batter in a lined Dutch oven ensures the edges bake evenly without becoming dry, while the trapped steam keeps the crumb wonderfully moist. For pastries like scones or biscuits, the preheated Dutch oven provides an intense heat from all sides, promoting a rapid rise and a crispy exterior while keeping the interior tender. This versatility means your Dutch oven can become a go-to piece of equipment for sweet treats as well as savory loaves.
Dutch Oven Cake Recipes Easy: A Beginner's Guide
Getting started with baking cakes in a Dutch oven doesn't have to be complicated. Many classic cake recipes can be adapted for this method, and there are numerous simple Dutch oven cake recipes easy enough for anyone to try, even if you've never baked in a Dutch oven before. The key is understanding a few basic principles, like proper preparation of the pot and temperature management.
The benefit of starting with simple recipes is that they allow you to get a feel for how your Dutch oven performs. You'll learn how quickly it heats up, how long it retains heat, and how the trapped steam affects the final product. Once you've mastered a few easy Dutch oven cake recipes, you'll feel confident tackling more complex bakes.
Simple Dutch Oven Cake Recipes for Home Bakers
Many types of simple cakes translate beautifully to Dutch oven baking. Think about single-layer cakes, loaf cakes, or even upside-down cakes. A basic vanilla or chocolate cake batter, a simple fruit cake, or even a quick bread recipe like banana bread can be excellent starting points.
For example, a straightforward lemon pound cake recipe designed for a standard loaf pan can often be scaled slightly or adjusted for baking in a 5 or 6-quart Dutch oven. Using parchment paper to line the pot makes removal effortless. Baking times might be similar to conventional oven methods, perhaps slightly longer or shorter depending on the specific recipe and your oven's calibration, often falling in the range of 45 to 70 minutes at around 325°F to 350°F (160°C to 175°C). These types of simple Dutch oven cake recipes easy the transition into this baking method.
Another easy option is a simple apple cake or cobbler-style cake. Layering sliced apples with a simple cake batter or crumble topping directly in the Dutch oven creates a rustic dessert that bakes up moist and flavorful. These often require minimal fuss and are forgiving for beginners. The direct contact with the heated pot bottom can even create a slightly caramelized layer, adding extra depth of flavor.
Achieving Moist and Delicious Cakes in a Dutch Oven
One of the standout advantages of using a Dutch oven for cakes is its ability to lock in moisture. The heavy lid prevents steam from escaping, creating a humid environment inside the pot as the cake bakes. This trapped steam helps the cake rise evenly and keeps the crumb incredibly tender and moist, preventing the dry edges or tops that can sometimes occur with conventional baking methods, especially in drier climates or ovens.
This moisture retention is particularly beneficial for cakes that are prone to drying out, such as those with less fat or those baked for longer periods. For instance, a spice cake or a simple butter cake can achieve a wonderfully soft and moist texture when baked in a Dutch oven. The radiant heat from the cast iron also ensures the cake bakes through evenly from all sides, contributing to a consistent texture throughout the loaf or round.
From Cakes to Pastries: Exploring Dutch Oven Baking Possibilities
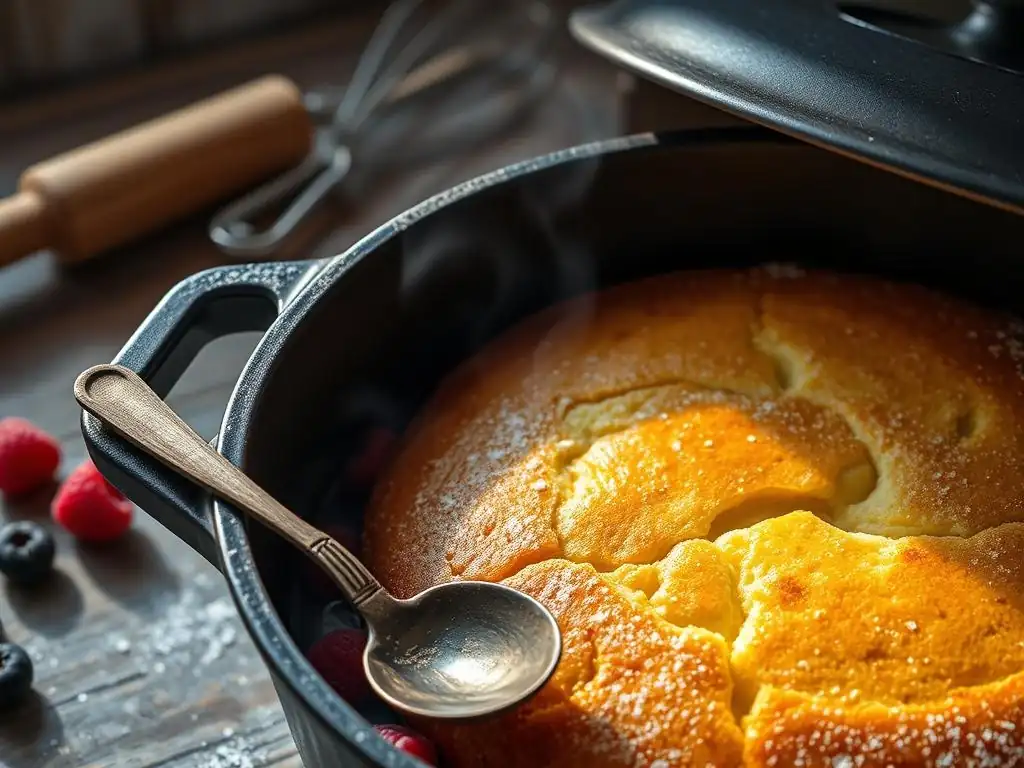
The versatility of the Dutch oven extends well beyond simple cakes. Its unique baking environment makes it suitable for a surprising array of pastries and other baked goods, each benefiting in different ways from the consistent heat and controlled moisture.
Whether you're aiming for flaky layers, tender interiors, or gooey centers, the Dutch oven can help you achieve impressive results with various sweet treats. This section explores how this single piece of equipment can handle everything from breakfast pastries to decadent desserts.
Baking Scones and Biscuits in a Dutch Oven: Crispy Perfection
Scones and biscuits rely on a quick, high heat to achieve a good rise and a flaky or tender interior with a crispy exterior. The Dutch oven is perfectly suited for this. By preheating the Dutch oven (often with the lid on) at a relatively high temperature, such as 400°F to 450°F (200°C to 230°C), you create an intense heat source.
When you carefully place the scones or biscuits inside (usually on parchment paper) and replace the lid, the immediate heat from the pot bottom and sides encourages rapid expansion, leading to a great "oven spring." The trapped steam also helps keep the interiors tender initially before the exteriors crisp up. Baking times are often short, perhaps 12-20 minutes depending on size and temperature, resulting in beautifully golden-brown pastries with a delightful texture contrast.
Dutch Oven Cobblers and Crisps: Rustic and Flavorful
Cobblers, crisps, and crumbles are ideal candidates for Dutch oven baking, especially in outdoor settings but also in a conventional oven. These desserts typically involve a layer of fruit topped with a batter, biscuit dough, or crumb topping. Baking them in a Dutch oven creates a wonderful rustic presentation and ensures even cooking of the fruit layer while the topping bakes to a golden crisp.
For a fruit cobbler, you might simmer the fruit filling briefly in the Dutch oven first, then top it with dollops of biscuit or cake batter before baking. The direct heat helps thicken the fruit juices, while the enclosed space bakes the topping beautifully. A typical fruit cobbler in a 6-quart Dutch oven might bake for 30-40 minutes at 375°F (190°C). The result is a bubbling, flavorful dessert with perfectly cooked fruit and a delicious topping.
Dutch Oven Brownies and Bars: Fudgy Delight
Achieving fudgy, moist brownies or bars can sometimes be tricky in standard baking pans, where edges can overbake before the center is done. A Dutch oven, particularly when lined with parchment paper, can help create a more even baking environment for these dense treats.
Baking brownies in a Dutch oven at a moderate temperature, like 325°F or 350°F (160°C or 175°C), allows them to cook through gently. The retained moisture from the lid can contribute to a wonderfully fudgy texture throughout the batch. Baking time will vary based on the thickness and richness of the batter, but might range from 25-40 minutes. The even heat distribution helps prevent the edges from becoming too hard or dry, ensuring a consistent, delightful chewiness.
Why Bake Cakes in a Dutch Oven? Advantages and Benefits
Beyond simply being possible, baking cakes in a Dutch oven offers several distinct advantages that can lead to superior results compared to traditional baking pans. These benefits stem primarily from the unique properties of cast iron and the enclosed baking environment it creates.
Understanding these advantages helps explain why many bakers, once they try it, become enthusiasts of Dutch oven cake baking. It's not just a novelty; it's a method that can genuinely improve the quality of your baked goods, especially easy Dutch oven cake recipes where consistent results are key.
Consistent Heat Distribution: The Key to Even Baking
Cast iron is renowned for its ability to absorb and distribute heat evenly. When a Dutch oven is preheated, the entire pot, including the bottom, sides, and lid, reaches a uniform temperature. This radiant heat surrounds the cake batter, ensuring that it bakes evenly from all directions.
Unlike thin metal pans that can develop hot spots or cool down quickly, the heavy cast iron maintains a stable temperature throughout the baking process. This consistent heat minimizes the risk of uneven baking, where the edges are done while the center is still raw, or vice versa. The result is a cake with a more uniform crumb structure and consistent doneness from edge to center.
Retaining Moisture: Achieving a Tender Cake Texture
As mentioned earlier, the tight-fitting lid of a Dutch oven is a game-changer for moisture retention. As the cake bakes, water evaporates from the batter and is trapped within the pot by the lid. This creates a steamy environment that keeps the surface of the cake moist, allowing it to rise more freely and preventing a tough crust from forming prematurely.
This trapped moisture is reabsorbed by the cake as it cools slightly within the pot after baking, contributing significantly to a tender and moist crumb. This effect is particularly noticeable in cakes that might otherwise be prone to dryness. Easy Dutch oven cake recipes often highlight this benefit, resulting in cakes that stay moist and delicious for longer.
Outdoor Baking: Dutch Oven Cake Recipes for Camping
One of the most practical advantages of a Dutch oven is its suitability for baking outdoors, particularly when camping or cooking over a campfire. Unlike standard baking pans, a cast iron Dutch oven can withstand direct heat from coals or flames.
Many easy Dutch oven cake recipes are specifically designed for outdoor cooking. You can place coals underneath the Dutch oven for bottom heat and on top of the lid for top heat, effectively turning it into a portable oven. This method allows you to bake everything from simple dump cakes to more traditional layer cakes while enjoying the great outdoors. The robust nature of the Dutch oven makes it the only practical option for baking cakes in many outdoor scenarios.
Dutch Oven Baking Techniques for Cakes and Pastries
Mastering Dutch oven baking involves understanding a few core techniques specific to this type of cookware. While the principles of baking remain the same, the application within a heavy, lidded pot requires some adjustments compared to using standard baking pans.
From preparing the pot itself to managing temperatures and understanding baking times, these techniques are crucial for successful and consistent results, especially when tackling easy Dutch oven cake recipes or more complex pastries.
Preparing Your Dutch Oven for Baking: Seasoning and Lining
Proper preparation of your Dutch oven is essential to prevent sticking and ensure easy release of your baked goods. For bare cast iron Dutch ovens, ensuring they are well-seasoned is the first step. A good seasoning creates a natural non-stick surface. For enameled Dutch ovens, sticking is less of an issue, but lining is still highly recommended for cakes and pastries.
The most common and effective method for cakes, brownies, and many pastries is to line the Dutch oven with parchment paper. Cut a circle or square for the bottom and strips for the sides, or use a single large piece pressed into the shape of the pot, leaving excess hanging over the sides to serve as handles for lifting the finished bake out. Greasing and flouring can also be used, especially for simple cakes, but parchment paper offers the most reliable non-stick solution and simplifies cleanup considerably.
Temperature Control: Mastering Dutch Oven Baking Temperatures
Temperature control is key in Dutch oven baking. When using a conventional oven, you typically preheat the oven to the desired temperature. For many Dutch oven recipes, particularly bread, you also preheat the empty Dutch oven inside the oven. However, for cakes and some pastries, you might place the batter into a cold or warm Dutch oven and then place it into a preheated oven.
This approach allows the cake to warm up gradually with the pot, potentially leading to a more even rise. Baking temperatures for cakes in a Dutch oven are often similar to or slightly lower than standard cake recipes, commonly in the 325°F to 350°F (160°C to 175°C) range. For pastries like biscuits or scones, a higher temperature, like 400°F to 450°F (200°C to 230°C), is often used, and the Dutch oven is usually preheated empty to provide intense initial heat. Monitoring with an oven thermometer can help ensure accuracy.
Dutch Oven Cake Baking Times: A Comprehensive Guide
Determining the exact baking time for a cake in a Dutch oven requires some understanding of the recipe and your specific equipment. While many easy Dutch oven cake recipes will provide an estimated range, factors like the size and depth of your Dutch oven, the density of the batter, and the accuracy of your oven's temperature will influence the actual time needed.
As a general guideline, a standard 6-quart Dutch oven baking a single-layer cake at 350°F (175°C) might take anywhere from 45 to 60 minutes. Loaf cakes or denser batters might take longer, perhaps 60-75 minutes. It's crucial to start checking for doneness using a wooden skewer or toothpick inserted into the center of the cake towards the lower end of the estimated baking time.
The skewer should come out clean or with only a few moist crumbs attached. Avoid opening the lid too frequently in the first 2/3 of the baking time to maintain the internal temperature and trapped steam.
Dutch Oven vs. Baking Stone: Which is Right for Your Baking Needs?
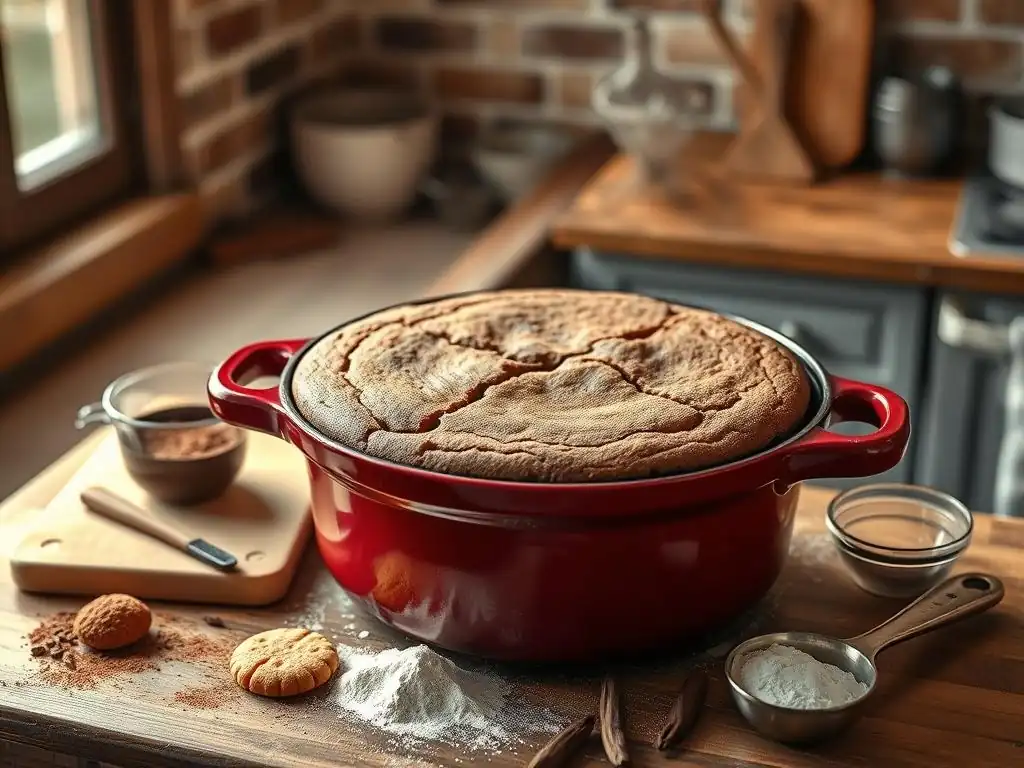
When discussing baking equipment that provides intense, even heat, two items often come up: the Dutch oven and the baking stone (or steel). Both are excellent tools, but they serve slightly different purposes and excel at different types of baking.
Understanding the key differences between a Dutch oven and a baking stone can help you decide which piece of equipment is best suited for a particular baking project, whether it's baking bread, pizzas, or easy Dutch oven cake recipes.
Comparing Heat Retention: Dutch Oven vs. Baking Stone
Both Dutch ovens and baking stones/steels are excellent at absorbing and retaining heat, which is beneficial for creating a good crust and achieving even baking. A baking stone or steel is typically preheated in the oven for a significant amount of time (often 45-60 minutes or more) to reach a very high temperature. When dough is placed directly on the hot surface, it receives a powerful burst of heat from below, promoting rapid oven spring and crust development.
A Dutch oven, especially a cast iron one, also retains heat exceptionally well. When preheated, the entire pot becomes a heat reservoir. However, the key difference is the enclosed environment. The Dutch oven traps steam, while a baking stone bakes in the open environment of the oven. This makes the Dutch oven superior for items that benefit from trapped moisture, like cakes and certain breads, whereas the stone is ideal for items needing intense bottom heat and a dry environment for crisping, like pizza crusts or lean bread loaves baked without steam injection.
Versatility Showdown: Cakes, Breads, and More
In terms of sheer versatility across different types of baked goods, the Dutch oven arguably has an edge, particularly when considering easy Dutch oven cake recipes and other moist bakes.
- Dutch Oven: Excels at bread that requires steam (like sourdough), cakes, quick breads, cobblers, stews, braises, frying. Can be used indoors and outdoors.
- Baking Stone/Steel: Excels at pizza, lean artisan bread (often used in conjunction with a separate steam source), flatbreads, and providing a consistent heat base for sheet pan baking. Primarily used in conventional ovens.
While you can bake some items like biscuits or scones in both, the Dutch oven's ability to trap moisture makes it unique for cakes and ensures a moist crumb, a feature a baking stone cannot replicate on its own. Conversely, achieving a crispy pizza crust directly on a baking stone is often easier than in a Dutch oven.
Choosing the Right Baking Equipment for Your Project
The choice between a Dutch oven and a baking stone depends on what you plan to bake most often.
- Choose a Dutch Oven if you prioritize:
- Baking bread that benefits from steam (like sourdough).
- Baking moist cakes, quick breads, cobblers, or brownies.
- Outdoor baking (camping, etc. ).
- A multi-purpose pot for savory dishes as well as baking.
- Choose a Baking Stone/Steel if you prioritize:
- Making authentic pizza with crispy crusts.
- Baking lean artisan bread loaves without a lid (though often with added oven steam).
- Improving the crust on items baked on sheet pans.
For those who enjoy a wide range of baking, owning both a Dutch oven and a baking stone provides the greatest flexibility. However, for baking easy Dutch oven cake recipes and achieving moist results across various bakes, the Dutch oven is an excellent starting point.
Essential Dutch Oven Baking Equipment and Accessories
While you can bake many things with just a Dutch oven and an oven mitt, a few accessories can significantly improve your experience, enhance safety, and lead to better results, especially when baking cakes and pastries.
Investing in these simple tools can make Dutch oven baking smoother, from preparing the pot to safely handling the hot vessel and checking the doneness of your delicious easy Dutch oven cake recipes.
Dutch Oven Liners: Preventing Sticking and Burning
Dutch oven liners, primarily parchment paper, are incredibly valuable for baking. They create a non-stick barrier between your batter or dough and the hot cast iron surface.
- Benefits of Liners:
- Prevents cakes, breads, and pastries from sticking to the bottom and sides.
- Makes lifting finished baked goods out of the deep pot much easier, especially for cakes.
- Simplifies cleanup by catching drips and residue.
- Helps prevent the very bottom of the bake from scorching, which can sometimes happen with direct contact on intensely hot cast iron.
While bare cast iron can be seasoned to be non-stick, using parchment paper offers an extra layer of security, particularly for delicate cakes or sticky batters. For easy Dutch oven cake recipes, using a liner is highly recommended for stress-free removal.
Dutch Oven Thermometers: Ensuring Accurate Baking Temperatures
Accurate temperature is critical for successful baking. While your oven has a thermostat, its internal temperature can fluctuate significantly (sometimes by 25-50°F or more) from the set temperature. This inconsistency can lead to cakes that bake too quickly, too slowly, or unevenly.
- Types of Thermometers:
- Oven Thermometer: Placed inside the oven (and ideally inside the Dutch oven if preheating it empty) to verify the actual ambient temperature.
- Infrared Thermometer: Can measure the surface temperature of the preheated Dutch oven itself.
- Instant-Read Thermometer: Used to check the internal temperature of the baked good (though a skewer test is more common for cakes).
Using an oven thermometer is perhaps the most important tool for ensuring your oven is truly at the temperature required for your Dutch oven cake recipes easy or complex. Knowing the actual temperature allows you to adjust baking times or oven settings accordingly for consistent results.
Dutch Oven Lifting Tools: Safe and Easy Handling
Dutch ovens, especially when full of hot food or cake, are incredibly heavy and retain heat for a long time. Safely moving them in and out of a hot oven requires robust tools.
- Essential Lifting Tools:
- Heavy-Duty Oven Mitts: Standard cloth mitts may not provide enough protection from the intense heat of cast iron. Silicone or aramid fiber (like Kevlar) mitts designed for high temperatures are recommended. You often need two mitts to lift a heavy Dutch oven.
- Parchment Paper Slings: As mentioned earlier, leaving excess parchment paper hanging over the sides of the pot creates handles that allow you to lift the baked cake or bread straight up and out of the hot Dutch oven after baking. This is particularly useful for easy Dutch oven cake recipes where you want to avoid inverting the pot.
- Lid Lifter (for outdoor cooking): A specialized tool used to safely remove the hot lid of a Dutch oven when cooking over coals, preventing ashes from falling into the food.
Always prioritize safety when handling a hot Dutch oven. Use appropriate protection and ensure you have a stable surface ready to place the hot pot on.
Troubleshooting Common Dutch Oven Cake Baking Problems
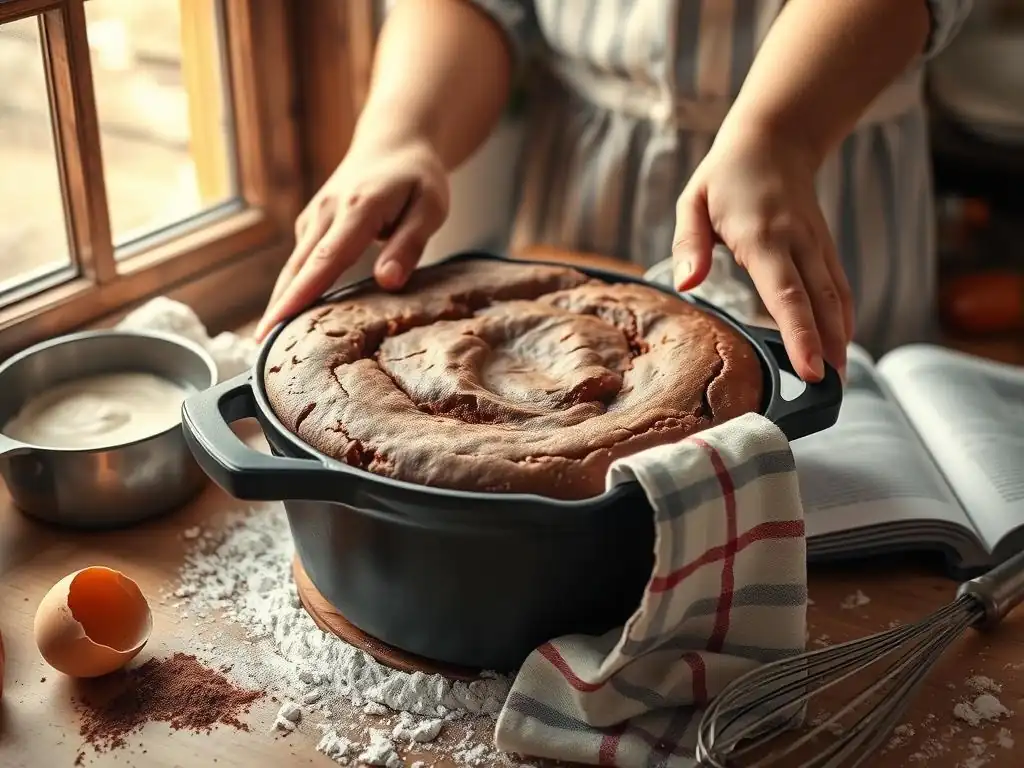
Even with the best techniques and easy Dutch oven cake recipes, occasional issues can arise. Knowing how to identify and address common problems can save your bake and help you learn for next time.
Here are some typical challenges faced when baking cakes in a Dutch oven and practical solutions to get you back on track to delicious results.
Cake Sticking to the Dutch Oven: Prevention and Solutions
One of the most frustrating problems is a cake sticking firmly to the inside of the Dutch oven. This usually happens because the pot wasn't properly prepared.
- Prevention:
- Always use parchment paper to line the Dutch oven when baking cakes. Ensure the bottom and sides are covered.
- For simple batters in well-seasoned bare cast iron, a thorough greasing and flouring might suffice, but parchment is more reliable.
- Ensure the Dutch oven was clean and dry before preparing it.
- Solutions if Sticking Occurs:
- Let the cake cool slightly in the pot (10-15 minutes) before attempting removal. Sometimes, as it cools and contracts, it will release from the sides.
- Gently run a thin, flexible spatula or knife around the edges if you didn't use parchment on the sides.
- If using a parchment sling, carefully lift the cake out using the sling handles.
- If it's truly stuck, sometimes warming the bottom of the pot very gently on a low heat source for a minute or two can help release the bottom, but be cautious not to overcook the bottom of the cake.
Uneven Baking: Addressing Hot Spots in Your Dutch Oven
While Dutch ovens are known for even heat distribution, external factors or improper technique can still lead to uneven baking, where one side or the bottom cooks faster than the rest.
- Causes:
- Uneven oven temperature (oven has hot spots).
- Direct contact with a heat source that is too intense (e.g., too many coals directly under the pot outdoors).
- Placing the Dutch oven too close to an oven heating element.
- Solutions:
- Use an oven thermometer to check your oven's temperature and identify potential hot spots. Rotate the Dutch oven halfway through the baking time if you suspect your oven is uneven.
- Ensure the Dutch oven is centered on the oven rack, away from the walls and heating elements.
- When baking outdoors, distribute coals evenly under and on top of the Dutch oven, and rotate the pot and lid periodically.
- Using a heat diffuser or trivet underneath the Dutch oven in a conventional oven can help if the bottom is consistently overcooking.
Cake Not Rising Properly: Troubleshooting Tips
A cake that doesn't rise as expected can be disappointing. Several factors, including recipe issues and baking environment, can contribute to this.
- Potential Causes:
- Expired leavening agents (baking powder or soda).
- Overmixing the batter (develops too much gluten, resulting in a dense cake).
- Undermixing the batter (leavening not evenly distributed).
- Oven temperature too low (leavening isn't activated properly).
- Opening the Dutch oven lid too early during baking (causes a draft and temperature drop).
- Solutions:
- Check the freshness of your baking powder/soda.
- Follow mixing instructions carefully – mix until just combined, don't overwork the batter.
- Ensure your oven is preheated properly using an oven thermometer.
- Avoid opening the Dutch oven lid during the first 2/3 of the baking time. The trapped steam actually helps with the initial rise.
- Ensure the cake batter is appropriate for the Dutch oven size – too much batter can overflow, too little won't fill the pot adequately.
Dutch Oven Cake Recipe Ideas: Inspiration for Your Next Bake
Ready to try baking a cake in your Dutch oven? Here are a few ideas, ranging from classic flavors to seasonal favorites, that adapt well to this method and serve as excellent easy Dutch oven cake recipes to get you started.
These concepts highlight the versatility of the Dutch oven for different cake styles and flavors.
Classic Chocolate Dutch Oven Cake Recipe
A simple, moist chocolate cake is a perfect candidate for Dutch oven baking. The enclosed environment ensures the chocolate flavor stays rich and the crumb remains tender.
- Concept: A one-layer or small loaf-style chocolate cake baked from scratch or even a high-quality mix.
- Method: Prepare batter, pour into a parchment-lined Dutch oven. Bake at around 350°F (175°C) until a skewer comes out clean, likely 45-65 minutes depending on size.
- Why it works: The moisture retention prevents the chocolate cake from drying out, which can sometimes happen with intense chocolate batters. The even heat ensures the center bakes through without the edges becoming tough. This is a prime example of an easy Dutch oven cake recipe yielding delicious results.
Dutch Oven Apple Cake: A Fall Favorite
Apple cakes, especially those with a rustic charm, are wonderfully suited for Dutch oven baking, particularly for outdoor cooking.
- Concept: Sliced apples layered with a simple spice cake batter or topped with a crumble.
- Method: You might sauté apples briefly in the Dutch oven first (if using bare cast iron), then add batter/topping. Bake at 350°F-375°F (175°C-190°C), often 50-70 minutes, until fruit is tender and topping is golden.
- Why it works: The Dutch oven handles the moisture from the fruit well, preventing a soggy bottom while the topping bakes to perfection. The even heat ensures the apples cook through completely.
Dutch Oven Lemon Cake: A Zesty Delight
A bright and zesty lemon cake can be baked to perfection in a Dutch oven, resulting in a moist and flavorful dessert.
- Concept: A simple lemon-flavored cake, perhaps a loaf cake or a single round layer.
- Method: Prepare a lemon cake batter (using lemon zest and juice), pour into a lined Dutch oven. Bake at approximately 325°F-350°F (160°C-175°C) for 45-60 minutes.
- Why it works: The Dutch oven's ability to retain moisture is fantastic for citrus cakes, which can sometimes dry out. It keeps the crumb tender and the lemon flavor bright and moist. This makes it another excellent option among easy Dutch oven cake recipes.
Mastering Dutch Oven Baking: Tips and Tricks for Success
Beyond the basic techniques, a few extra tips can help you achieve consistently excellent results when baking cakes and pastries in your Dutch oven. These small details can make a big difference in the final texture, appearance, and ease of removal of your baked goods.
Incorporating these simple tricks into your routine will help you feel more confident and successful with every Dutch oven bake, from the simplest easy Dutch oven cake recipes to more ambitious projects.
Preheating Your Dutch Oven Properly
While some cake recipes call for placing the batter in a cold or warm Dutch oven, many other bakes, like bread, biscuits, and some pastries, benefit from a fully preheated Dutch oven.
- Why Preheat? Placing dough or batter into a very hot Dutch oven provides an immediate burst of heat from all sides. For bread and pastries, this helps create a rapid rise (oven spring) and develop a crispy crust. For some cakes, preheating the oven but not the Dutch oven allows for a gentler rise.
- How to Preheat: Place the empty Dutch oven with its lid in the cold oven, then turn the oven on to the desired temperature. Allow it to heat for at least 30-60 minutes after the oven indicates it's reached temperature. This ensures the heavy cast iron is uniformly hot. Use heavy-duty mitts when handling a preheated Dutch oven.
Using Parchment Paper for Easy Cake Removal
We've mentioned parchment paper as a liner, but its role in easy removal cannot be overstated, especially for easy Dutch oven cake recipes.
- Method: Cut a piece of parchment paper large enough to cover the bottom and extend up the sides of the Dutch oven, with substantial overhang. Press it into the pot, pour in the batter, and bake.
- Benefit: Once the cake is baked and has cooled slightly, you can simply grab the edges of the parchment paper overhang and lift the entire cake straight out of the Dutch oven. This avoids the need to invert the heavy, hot pot and minimizes the risk of the cake breaking or sticking. It makes cleanup much easier as well.
Cooling Your Dutch Oven Cake for Optimal Texture
Proper cooling is a critical step in baking that affects the final texture and structure of the cake, regardless of whether it was baked in a standard pan or a Dutch oven.
- Initial Cooling: Allow the cake to cool in the Dutch oven for a period specified by the recipe, often 10-20 minutes. This allows the cake to set slightly and makes it less fragile for removal. The trapped heat continues to cook the center gently during this time, and moisture is reabsorbed.
- Cooling on a Rack: After the initial cooling in the pot, use the parchment sling (or carefully invert if preferred) to transfer the cake to a wire cooling rack.
- Why Use a Rack? A wire rack allows air to circulate around the entire cake, preventing condensation from making the bottom soggy. It ensures the cake cools evenly, which is important for its final structure and texture. Do not slice the cake until it has cooled completely on the rack, unless the recipe specifically instructs otherwise (like for some cobblers).
Frequently Asked Questions
What makes a Dutch oven ideal for baking cakes?
A Dutch oven's thick walls provide even heat distribution, preventing hotspots and resulting in a more uniformly baked cake. Its tight-fitting lid also traps moisture, creating a steam-oven effect that keeps cakes tender.
Are Dutch oven cake recipes easy for beginners?
Yes, many Dutch oven cake recipes are designed to be easy and straightforward, often requiring minimal ingredients and simple instructions. The closed environment of the Dutch oven makes it more forgiving than a conventional oven.
Can I bake pastries other than cakes in a Dutch oven?
Absolutely! Dutch ovens are incredibly versatile and can be used to bake a wide range of pastries, including breads, cobblers, and even some types of cookies.
What kind of Dutch oven is best for baking cakes?
A cast iron Dutch oven, whether enameled or seasoned, is generally recommended. Ensure it has a tight-fitting lid to trap steam and create the ideal baking environment. Size will depend on the recipe.
Do I need to adjust baking times or temperatures when using a Dutch oven?
Generally, you'll follow the recipe's instructions. However, keep a close eye on your cake, as Dutch ovens retain heat very well, and baking times may be slightly shorter. An oven thermometer can be helpful to ensure accuracy.
Final Reflection: The Unexpected Versatility of the Humble Dutch Oven
The Dutch oven, once relegated to stews and braises, has emerged as a surprisingly versatile baking powerhouse. Its ability to distribute heat evenly and create a wonderfully crisp crust makes it a game-changer for anyone looking to elevate their baking game, especially when tackling easy recipes like cakes and pastries. This isn't just a trend; it's a testament to the enduring power of simple, adaptable tools in the kitchen.
The journey from simple Dutch oven cooking to mastering delicate cakes and flaky pastries within the same vessel has been a fascinating one for me. It highlights how a single piece of equipment can unlock a world of culinary possibilities, challenging preconceived notions about what's possible in the kitchen. The best things in life are simple,
a phrase often heard, rings especially true when considering the ease and delicious results achievable with Dutch oven baking. The simplicity of the method allows for creativity and experimentation, making it accessible to both novice and experienced bakers alike.
Now, it's your turn. Consider the untapped potential in your own kitchen. Don't be afraid to experiment with different recipes, to push the boundaries of what you think your equipment can achieve. Grab that Dutch oven, preheat your oven, and embark on a baking adventure. Discover the joy of creating delicious cakes, pastries, and more, all from the comfort of your own kitchen, using a tool you might have already overlooked. The possibilities are as limitless as your imagination.
Unleash Your Dutch Oven's Baking Power!
Thanks for diving into the world of Dutch oven baking! We hope you've discovered the versatility and deliciousness this amazing cookware offers. Ready to take your baking to the next level?
- Bake your dream dessert: Choose your favorite recipe (or try one of our many others!) and get baking in your Dutch oven today. Embrace the even heat distribution and achieve perfect results every time.
- Share your baking triumphs: Post a picture of your masterpiece on social media and tag us! Let's inspire each other with delicious Dutch oven creations.
- Explore our other Dutch oven recipes: Head over to BakeWithEase.com to discover even more exciting recipes and baking tips to expand your culinary horizons.
What incredible creation will you bake in your Dutch oven next?