
Unlock the Flavors: Cold Fermentation for Superior Pizza Dough

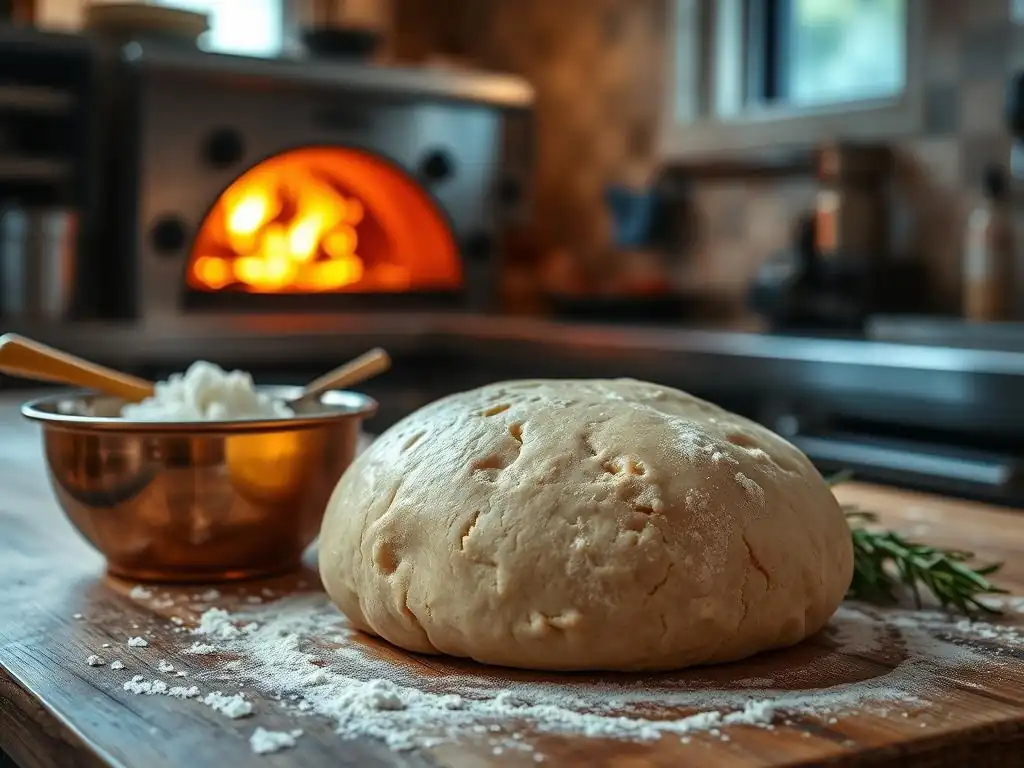
Welcome to BakeWithEase, your kitchen companion for unlocking baking brilliance! Ever wondered how to elevate your pizza game from good to extraordinary? Our guide to cold fermentation pizza dough reveals the secrets to achieving incredible flavor and texture, even if you're new to the technique. Discover how this simple process transforms ordinary ingredients into a culinary masterpiece. Ready to bake a pizza that will wow? Let's get started!
- Introduction to Cold Fermentation Pizza Dough
- Understanding the Science Behind Cold Fermentation
- Cold Fermentation vs. Room Temperature Fermentation: A Comparison
-
Step-by-Step Guide to Making Cold Fermented Pizza Dough
- Ingredients for Cold Fermentation Pizza Dough
- Equipment Needed for Successful Cold Fermentation
- Mixing the Dough: The Initial Steps
- Bulk Fermentation in the Refrigerator: The Cold Fermentation Process
- Shaping and Proofing: Preparing Your Dough for Baking
- Baking Your Cold Fermented Pizza: Achieving the Perfect Crust
- Troubleshooting Common Cold Fermentation Issues
- Tips and Tricks for Mastering Cold Fermentation
- Delicious Recipes Using Cold Fermented Pizza Dough
- Storing and Using Leftover Cold Fermented Pizza Dough
- Conclusion: Embrace the Art of Cold Fermentation for Exceptional Pizza
- Frequently Asked Questions
- Final Reflection: The Slow Rise to Pizza Perfection
- Unleash Your Inner Pizzaiolo: Craft the Perfect Dough!
Introduction to Cold Fermentation Pizza Dough
Why Cold Fermentation Elevates Your Pizza Baking
Cold fermentation pizza dough is a technique that transforms simple ingredients into something truly special. By slowing down the yeast activity through refrigeration, bakers can achieve a depth of flavor and complexity that is simply not possible with rapid, room-temperature fermentation. This method allows enzymes in the dough to break down complex carbohydrates into simpler sugars, which are then consumed by the yeast over a longer period, producing a wider array of flavorful compounds. The result is a crust with nuanced taste, often described as nutty or slightly tangy, far beyond the standard yeasty flavor.
Furthermore, cold fermentation significantly improves the texture of the finished pizza crust. The extended rest period allows for better hydration of the flour and more thorough gluten development. This leads to a dough that is stronger, more extensible, and easier to handle when shaping. When baked, this superior structure translates into a crust that is light and airy with a satisfying chew, often achieving those desirable large air pockets (cornicione) characteristic of artisan pizzas. The handling benefits alone make mastering cold fermentation pizza dough a worthwhile endeavor for any home baker aiming for pizzeria-quality results.
Mastering Cold Fermentation: A Comprehensive Guide
Mastering cold fermentation pizza dough involves understanding the interplay between time, temperature, and ingredients. Unlike quick doughs that might be ready in an hour or two, cold fermented dough requires patience, typically resting in the refrigerator for at least 24 hours, and often up to 72 hours or even longer for maximum flavor development. The process is surprisingly hands-off during the cold rest period, making it convenient for busy schedules once the initial mixing is done.
This guide will walk you through the fundamental principles and practical steps needed to successfully make cold fermentation pizza dough at home. We will delve into the science behind why it works, compare it to traditional methods, provide a detailed step-by-step process, offer troubleshooting tips, and share techniques to enhance your results. By the end, you'll be equipped to consistently produce delicious, flavorful pizza crusts that will impress your friends and family.
Understanding the Science Behind Cold Fermentation
The Role of Yeast: Slow and Steady Wins the Race
Yeast, the magical microorganism responsible for leavening dough, behaves differently at cold temperatures. At typical room temperatures (around 20-24°C), yeast is highly active, quickly consuming sugars and producing carbon dioxide gas, which makes the dough rise, along with ethanol and other volatile compounds. However, at refrigerator temperatures (typically 4-5°C), yeast activity is drastically slowed down. While gas production is minimal, the yeast continues to slowly consume sugars and, crucially, interacts with enzymes present in the flour.
This slow, deliberate activity at low temperatures encourages different metabolic pathways in the yeast. Instead of rapidly producing large amounts of CO2 and simple flavors, the yeast slowly generates a wider range of complex aromatic compounds. These compounds, like organic acids and esters, contribute significantly to the depth and richness of the final baked crust's flavor profile. Think of it like slow cooking versus fast cooking – the longer, slower process allows flavors to meld and develop more fully.
Gluten Development: Enhanced Strength and Structure
Gluten, the protein network formed when water interacts with proteins in flour (gliadin and glutenin), is essential for the structure of bread and pizza dough. Kneading dough helps align and strengthen this network, giving the dough elasticity and extensibility. However, cold fermentation provides a unique benefit to gluten development that goes beyond manual kneading.
During the long, cold rest, enzymes called proteases, naturally present in flour, slowly break down some of the protein bonds in the gluten network. While this might sound counterintuitive, this controlled breakdown, combined with the dough's natural hydration over time, allows the gluten network to relax and realign more effectively than with just kneading.
This leads to a more relaxed yet stronger and more extensible dough that is easier to stretch thinly without tearing. The enhanced structure also supports better gas retention during the final proofing and baking, contributing to a lighter, airier crust with a more open crumb structure.
Flavor Development: The Magic of Complex Flavors
The primary reason many bakers swear by cold fermentation for pizza dough is the unparalleled flavor development. As mentioned, the slow yeast activity at cold temperatures leads to the production of complex flavor compounds. Beyond the yeast, natural enzymes in the flour also play a significant role. Amylase enzymes break down starches into simpler sugars, which then become food for the yeast. This slow breakdown process ensures a steady supply of sugars over a long period, preventing the yeast from exhausting its food source too quickly and allowing for sustained flavor development.
Furthermore, lactic acid bacteria, which are often naturally present in flour and can thrive in a cold environment, contribute to flavor by producing organic acids, primarily lactic and acetic acid. These acids contribute a subtle tanginess and complexity to the dough, similar to the flavors found in sourdough, even when commercial yeast is used. The combination of slow yeast metabolism, enzymatic activity, and potential bacterial contribution creates a flavor profile that is far more nuanced and interesting than dough fermented quickly at room temperature.
Cold Fermentation vs. Room Temperature Fermentation: A Comparison
Taste and Texture: A Noticeable Difference
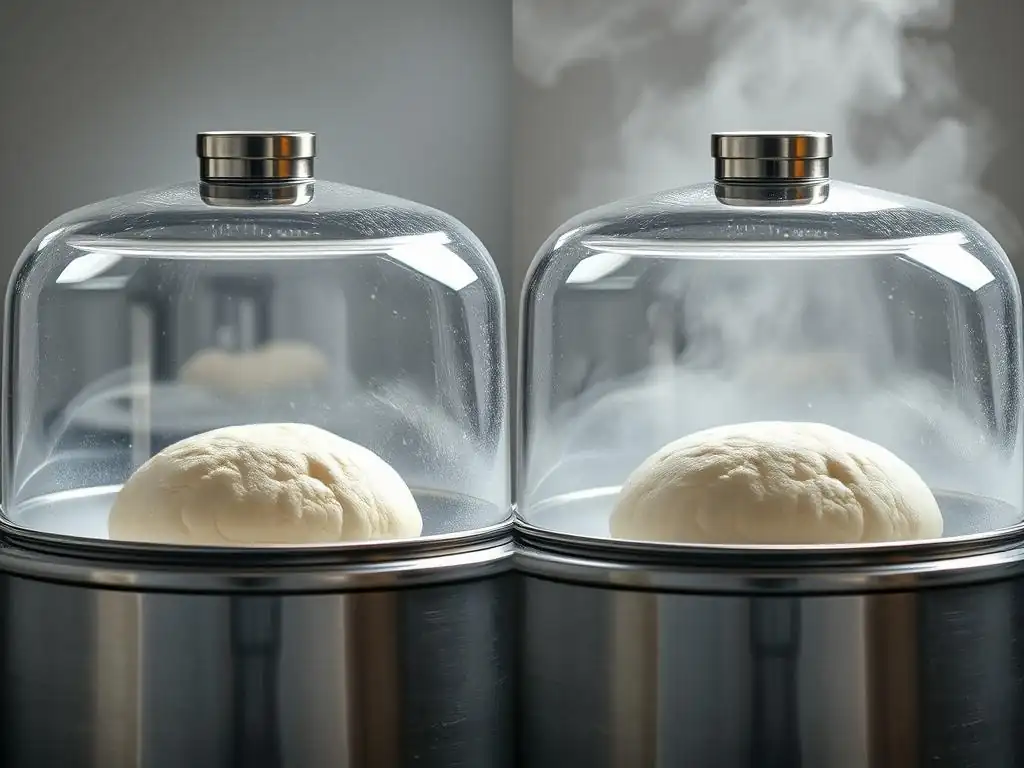
The most significant difference between cold fermented pizza dough and dough fermented at room temperature lies in the final taste and texture. Room temperature fermentation, while fast, tends to produce a crust with a more straightforward, often predominantly yeasty flavor. The rapid activity doesn't allow sufficient time for the complex flavor compounds to develop. The texture can also be less refined, sometimes resulting in a denser crust or a less open crumb structure if not handled perfectly.
Cold fermentation, conversely, yields a crust with a deeper, more complex flavor profile. You'll often detect subtle notes that are absent in quick doughs, ranging from slightly sweet and nutty to subtly tangy, depending on the fermentation time and flour used. The texture is typically lighter and airier, with a more satisfying chew and better development of the characteristic irregular air pockets in the crust (cornicione). This noticeable difference in sensory experience is why many dedicated pizza enthusiasts prefer the cold fermentation method.
Time Management: Planning and Flexibility
From a time management perspective, room temperature fermentation is ideal for spontaneous baking. You can mix the dough and often be ready to bake within 2-4 hours, sometimes faster depending on the recipe and ambient temperature. This is convenient for last-minute pizza cravings but offers little flexibility once the process begins, as the dough can quickly over-proof if not watched carefully.
Cold fermentation requires planning ahead, as the dough needs a minimum of 24 hours in the refrigerator, and often benefits from longer periods like 48 or 72 hours. However, this upfront planning grants immense flexibility. Once in the fridge, the dough's fermentation is dramatically slowed, giving you a window of several days during which the dough is perfectly aged and ready to use. This means you can mix a batch on a Monday and bake pizza anytime from Tuesday evening through Friday, fitting pizza night into your schedule rather than being dictated by the dough's rapid rise time.
Ease of Handling: Stability and Control
Handling dough fermented at room temperature can sometimes be tricky, especially for beginners. The rapid gas production can make the dough feel very airy and potentially fragile, and it can become sticky quickly if slightly over-proofed. Stretching can require more care to avoid degassing or tearing the delicate structure.
Cold fermented pizza dough, due to its slower rise and enhanced gluten development, is generally much more stable and easier to handle. The long, slow fermentation relaxes the gluten, making the dough incredibly extensible and easy to stretch evenly without resistance or snapping back excessively. It tends to be less sticky and holds its structure better during shaping. This ease of handling provides greater control, allowing both novice and experienced bakers to achieve beautifully shaped pizza bases with less frustration.
Step-by-Step Guide to Making Cold Fermented Pizza Dough
Ingredients for Cold Fermentation Pizza Dough
Making cold fermentation pizza dough starts with just a few basic ingredients, but their quality and ratios are key. You'll need high-quality flour, which is the foundation. Many bakers prefer Italian '00' flour for its fine texture and specific protein content suitable for high-temperature baking, but bread flour (around 12-14% protein) also works very well, providing good structure. Water is essential for hydration and activating gluten; aim for a hydration level typically between 60% and 70% (water weight relative to flour weight).
Yeast is the leavening agent. For a long cold ferment, very small amounts of active dry yeast, instant dry yeast, or fresh yeast are used – often as little as 0.1% to 0.5% of the flour weight. Salt is crucial for flavor and also helps control yeast activity and strengthen gluten; typically, 2-2.5% of the flour weight is used. Some recipes might include a small amount of olive oil (1-3%) for tenderness and flavor, or a pinch of sugar (0.5-1%) to give the yeast a quick start, though neither is strictly necessary for a successful cold ferment.
Equipment Needed for Successful Cold Fermentation
While you don't need fancy equipment, a few tools make the process of making cold fermentation pizza dough much smoother. A reliable kitchen scale is highly recommended for accurately measuring ingredients, especially flour and water, using baker's percentages. This precision is crucial for consistent results. A large mixing bowl is needed for combining the ingredients and the initial bulk fermentation.
For the cold fermentation period, you'll need airtight containers. These can be large plastic food containers with lids, or even large zip-top bags, ensuring there's enough space for the dough to expand slightly (it will still rise a little in the fridge). A dough scraper or spatula is useful for handling the sticky dough during mixing and transferring. Finally, a clean surface for shaping the dough and a pizza peel and pizza stone or steel are essential for achieving a great crust when baking at high temperatures.
Mixing the Dough: The Initial Steps
Begin by accurately weighing your flour into your mixing bowl. If using active dry yeast, hydrate it first in a small amount of the total water (lukewarm, around 30-35°C) with a pinch of sugar, letting it bloom for 5-10 minutes until frothy. If using instant yeast, you can typically mix it directly with the flour. Weigh your water (cold or room temperature, depending on the recipe – cold water is often preferred to keep the dough temperature down initially) and add the salt, stirring to dissolve.
Combine the wet ingredients with the dry ingredients in the bowl. Mix using a wooden spoon, spatula, or your hands until a shaggy dough forms and there are no dry pockets of flour. At this stage, the dough will likely be sticky and uneven. Cover the bowl and let it rest for 20-30 minutes (autolyse). This rest period allows the flour to absorb the water fully and gluten development to begin naturally, making subsequent kneading easier.
Bulk Fermentation in the Refrigerator: The Cold Fermentation Process
After the initial rest (autolyse), perform a few rounds of kneading or stretch-and-folds. If kneading by hand or machine, knead until the dough is smooth and elastic, passing the windowpane test (stretching a small piece thin enough to see light through without tearing). If using stretch-and-folds, perform 3-4 sets at 20-30 minute intervals in the bowl. After the final fold or knead, the dough should be significantly smoother and more cohesive.
Lightly oil a clean, airtight container large enough for the dough to expand. Transfer the dough to the container, turning it to coat all sides lightly with oil. Seal the container and immediately place it in the refrigerator (at approximately 4-5°C). This is where the cold fermentation pizza dough magic happens. The dough will undergo a slow fermentation, developing flavor and structure over the next 24 to 72+ hours. Check on it periodically, but resist the urge to work with it until it's properly aged according to your desired fermentation time.
Shaping and Proofing: Preparing Your Dough for Baking
When you are ready to bake, remove the cold fermented pizza dough from the refrigerator. The dough will likely have increased in volume, perhaps doubling depending on the yeast amount and time. Gently turn the dough out onto a lightly floured surface. Divide the dough into individual portions if making multiple pizzas (e.g., 250-300g for a 12-inch pizza).
Shape each portion into a taut ball by gently tucking the edges underneath. Place the dough balls on a lightly floured tray or proofing box, ensuring they have space between them. Cover loosely with plastic wrap or a damp cloth to prevent drying. Let the dough balls rest at room temperature for 1-2 hours, or until they are puffy and relaxed. This final resting period, often called 'tempering' or 'final proofing', allows the dough to warm up slightly and become relaxed and easy to stretch, while also allowing for a final bit of gas production before baking.
Baking Your Cold Fermented Pizza: Achieving the Perfect Crust
Preheat your oven to the highest possible temperature, ideally 250°C (480°F) or higher. If using a pizza stone or steel, place it on the middle or upper rack during preheating, allowing it to heat up for at least 30-60 minutes. A hot baking surface is crucial for achieving a crispy crust and proper oven spring.
Once the dough has proofed and is relaxed, gently shape it into your desired pizza base. Start by gently pressing from the center outwards, leaving the edges untouched to form the rim (cornicione). Avoid using a rolling pin, as this can deflate the dough and compromise the airy texture.
Stretch the dough using your hands, rotating and gently pulling until you reach the desired size, about 10-14 inches depending on the dough weight. Quickly top your pizza, transfer it to a pizza peel dusted with semolina or flour, and slide it onto the hot stone or steel in the oven. Bake for 6-12 minutes, rotating once if necessary, until the crust is golden brown and the toppings are cooked.
Troubleshooting Common Cold Fermentation Issues
Dough Not Rising: Identifying and Solving the Problem
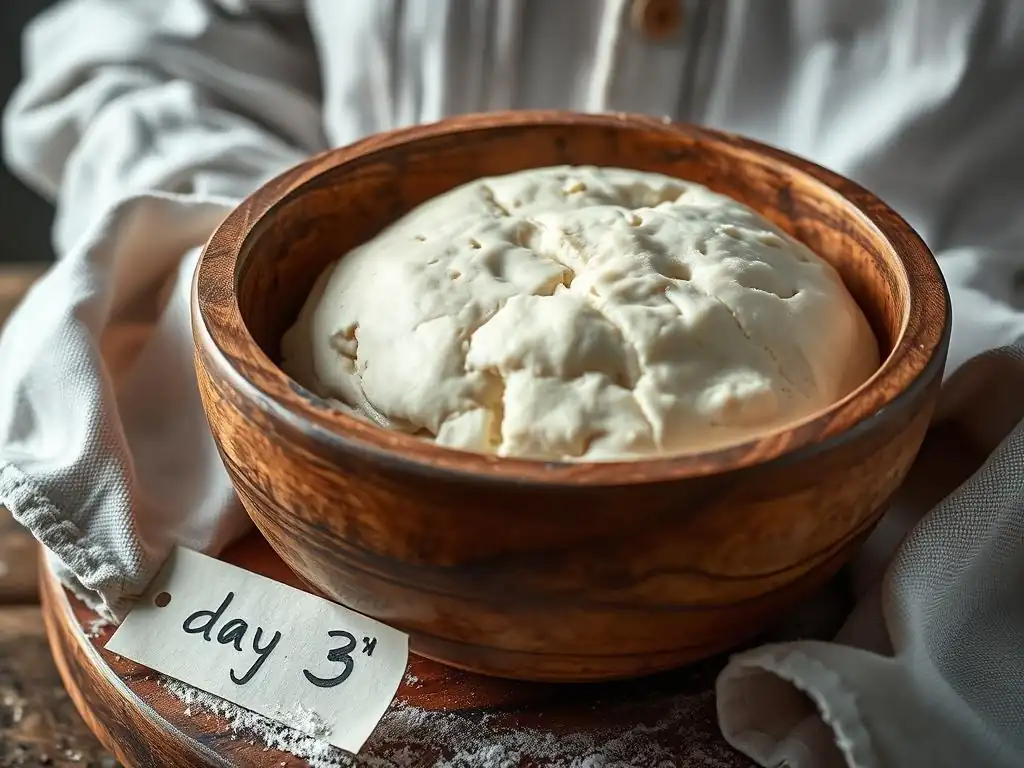
A common issue when making cold fermentation pizza dough is insufficient rise during the cold ferment or final proof. If your dough shows little to no activity in the fridge after 24-48 hours, the most likely culprits are inactive yeast, too little yeast for the temperature/time, or the refrigerator temperature is too low, completely halting yeast activity.
Ensure your yeast is fresh; test active dry yeast in warm water before use. While cold fermentation uses minimal yeast, ensure you've measured accurately – using too little (e.g., less than 0.1% of flour weight for a long ferment) might result in extremely slow activity.
Verify your refrigerator temperature is within the typical range of 4-5°C (39-41°F); temperatures close to freezing can render yeast dormant. If the dough didn't rise much in the fridge but feels alive, it might just need a longer final proof at room temperature (2-4 hours) to become active again. If the dough feels dense and lifeless even after warming up, the yeast might have been inactive from the start, requiring a new batch with fresh yeast.
Over-Proofing: Recognizing and Preventing Over-Fermentation
While less common with cold fermentation pizza dough than with room temperature dough, over-proofing can still occur, especially if the dough is left in the fridge for too long (e.g., beyond 5-7 days for some recipes) or if the refrigerator temperature is warmer than ideal (above 5-6°C). Signs of over-proofing include a dough that smells strongly alcoholic, collapses easily when handled, is very sticky or even soupy, and lacks elasticity. It might also have a very pronounced sour flavor.
To prevent over-proofing, monitor your dough, especially when experimenting with longer fermentation times or warmer refrigerators. Use the minimum amount of yeast recommended for long ferments (often 0.1-0.2% of flour weight). If your fridge runs warm, you may need to reduce fermentation time or yeast quantity slightly. If you suspect your dough is nearing over-proofing but you're not ready to bake, you can sometimes 'punch down' the dough gently to redistribute gases and slightly slow activity, but this is often only a temporary fix. The best prevention is proper planning and yeast measurement.
Dough Too Sticky: Adjusting Hydration Levels
Cold fermented pizza dough can sometimes feel stickier than expected, making it difficult to handle and shape. This is often related to the hydration level (the ratio of water to flour). Higher hydration doughs (above 65-70%) are inherently stickier but can yield a more open, airy crumb. If your recipe calls for a high hydration and you're struggling, ensure you're using enough flour on your work surface and hands when shaping, but avoid incorporating too much extra flour into the dough itself.
If the dough is excessively sticky and difficult to manage even with proper technique, the hydration might be too high for your specific flour type or environment. Different flours absorb water differently; high-protein bread flour can typically handle higher hydration than lower-protein all-purpose flour. For your next batch of cold fermentation pizza dough, consider slightly reducing the hydration by 2-3% (e.g., from 65% to 62% water relative to flour) until you find a level that is manageable while still yielding a desirable texture.
Dough Too Dense: Adjusting Fermentation Time and Starter
If your finished pizza crust is dense and lacks airiness, several factors might be at play with your cold fermentation pizza dough. Insufficient fermentation time, either in the fridge or during the final proof at room temperature, can result in inadequate gas production. Ensure your dough has had ample time (at least 24 hours cold, plus 1-2 hours warm-up) to develop and become active.
Another cause could be insufficient yeast or inactive yeast, as discussed earlier. Punching down the dough too aggressively during handling or using a rolling pin instead of gentle stretching can also degas the dough excessively, leading to a dense crust. If you consistently get dense results despite adequate time and yeast, consider experimenting with slightly increasing the yeast quantity (e.g., from 0.1% to 0.2%) or extending the cold fermentation time further (e.g., from 24 to 48 hours) to encourage more gas production and gluten relaxation.
Tips and Tricks for Mastering Cold Fermentation
Choosing the Right Flour for Cold Fermentation
The type of flour you choose significantly impacts your cold fermentation pizza dough. High-protein flours (like bread flour, 12-14% protein) are excellent because the strong gluten network they form can withstand the long fermentation period without degrading excessively. They provide structure and chewiness. Italian '00' flour, particularly specific pizza flours like Caputo Pizzeria (around 12.5% protein), is highly regarded for its finely milled texture and balanced protein quality, which yields a soft, extensible dough perfect for achieving a light, airy cornicione at high temperatures.
While all-purpose flour (10-12% protein) can be used, it may result in a less structured dough that might be harder to handle after a long cold ferment and yield a less chewy crust. For best results with cold fermentation pizza dough, opt for bread flour or '00' pizza flour. Experiment with different brands and protein levels to find the flour that gives you the desired balance of handling ease, texture, and flavor.
Adjusting Fermentation Time Based on Temperature
The actual temperature of your refrigerator is critical when making cold fermentation pizza dough and will dictate the optimal fermentation time. A standard refrigerator temperature is around 4°C (39°F). At this temperature, fermentation proceeds very slowly, and dough can often ferment successfully for 48-72 hours or even longer.
If your refrigerator runs colder (closer to 2-3°C or 35-37°F), fermentation will be even slower, and the dough might require 72 hours or more to develop fully. Conversely, if your fridge is warmer (5-6°C or 41-43°F), fermentation will be faster, and the dough might be ready in 24-48 hours but could over-proof sooner. It's helpful to know your fridge's actual temperature using a thermometer. Adjust your fermentation time based on this; colder fridges require longer times, warmer fridges require shorter times or less yeast.
Adding Flavor Enhancers to Your Dough
While cold fermentation naturally develops complex flavors in pizza dough, you can further enhance the taste with simple additions. High-quality extra virgin olive oil, added at 1-3% of the flour weight during mixing, can add richness and tenderness to the crust. A small pinch of sugar (0.5-1%) can give the yeast a quick boost initially, though it's not strictly necessary for a long cold ferment.
Other enhancers include using a portion of whole wheat or rye flour (e.g., 10-20%) in the total flour weight for a nuttier, more rustic flavor profile. Adding ingredients like dried herbs (oregano, basil) or garlic powder directly to the dough is also possible, though this is less traditional for classic pizza dough and can sometimes affect gluten development. For a truly advanced flavor boost, consider incorporating a pre-ferment like a poolish or biga into your cold fermentation pizza dough recipe.
Using a Poolish or Biga for Enhanced Flavor
Incorporating a pre-ferment like a poolish or biga is an advanced technique that can significantly enhance the flavor and structure of your cold fermentation pizza dough. A poolish is a wet, prefermented mixture (equal parts flour and water by weight, plus a tiny amount of yeast), typically fermented at room temperature for several hours until bubbly before being added to the main dough. A biga is a drier, stiffer preferment (lower hydration), also fermented for hours before being incorporated.
Using a pre-ferment introduces more complex flavors developed during its initial fermentation and provides a boost of active yeast to the final dough. When used in conjunction with cold fermentation, the pre-ferment contributes foundational flavor and structure, while the subsequent cold rest further develops complexity and improves dough handling. This combination yields a truly exceptional cold fermentation pizza dough with layers of nuanced flavor and a superb texture. Start by replacing 20-30% of the total flour and water in your recipe with the pre-ferment.
Delicious Recipes Using Cold Fermented Pizza Dough
Classic Margherita Pizza with Cold Fermented Dough
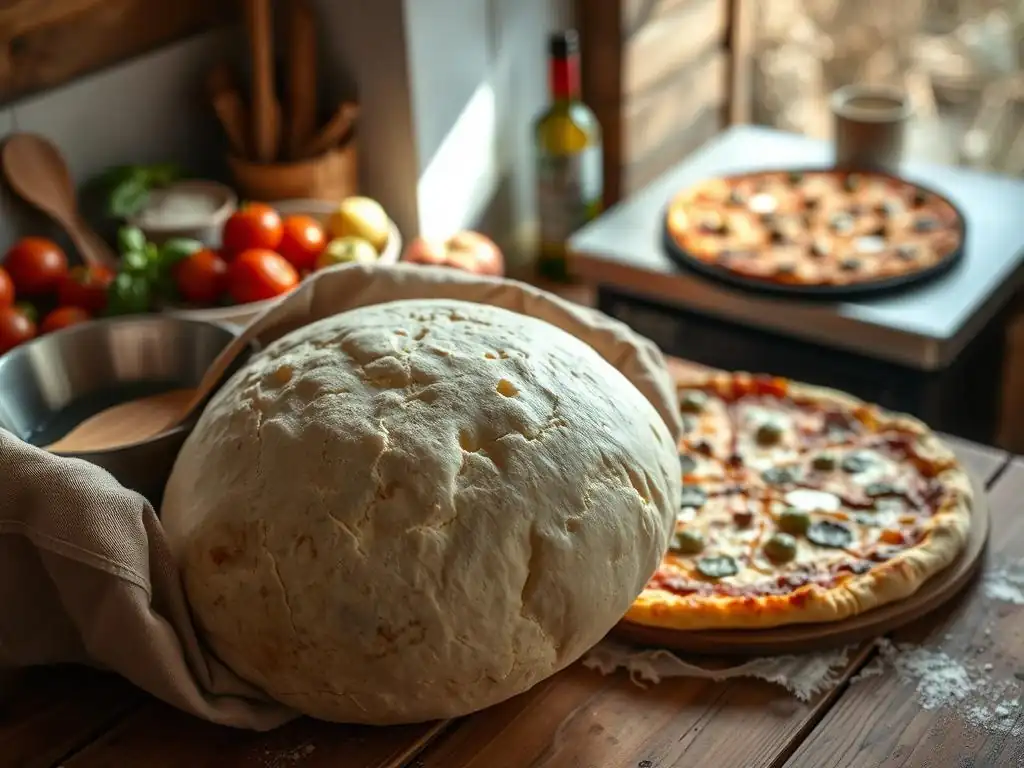
A classic Margherita is the perfect way to showcase the superior flavor and texture of cold fermented pizza dough. The simple toppings allow the quality of the crust to shine. Start with your perfectly aged cold fermented dough ball, tempered at room temperature for 1-2 hours. Gently stretch it into a 10-12 inch circle.
Top with San Marzano tomatoes (crushed by hand or lightly blended), fresh mozzarella cheese (torn or sliced), fresh basil leaves, a drizzle of extra virgin olive oil, and a pinch of salt. Bake at your oven's highest temperature on a preheated pizza stone or steel for 6-10 minutes until the crust is puffed and charred in spots, and the cheese is melted and bubbly. The complex flavors developed during the cold fermentation pizza dough process beautifully complement the fresh, simple ingredients.
Pepperoni Pizza: A Cold Fermented Dough Delight
Pepperoni pizza is a perennial favorite, and using cold fermented pizza dough takes it to the next level. The robust flavor of pepperoni stands up well to the nuanced taste of the long-fermented crust. Prepare your cold fermented dough as usual, tempering and stretching it.
Spread a layer of your favorite pizza sauce over the base, leaving the rim clear. Distribute shredded mozzarella cheese evenly, then layer sliced pepperoni over the cheese. For extra flavor, consider using a mix of cheeses like mozzarella and provolone. Bake at high heat until the crust is golden and the pepperoni is crispy around the edges, typically 8-12 minutes depending on your oven. The structure of the cold fermentation pizza dough ensures a sturdy base that can handle the weight and grease of the pepperoni, while the flavor adds depth.
Gourmet Pizza Creations Using Cold Fermented Dough
Cold fermented pizza dough is a fantastic base for more gourmet and adventurous topping combinations. Its strength and flavor profile can support a wide variety of ingredients without becoming soggy or bland. Consider toppings like roasted vegetables (bell peppers, onions, zucchini), caramelized onions, various cheeses (goat cheese, gorgonzola, fontina), cured meats (prosciutto, salami), or even seafood.
Try a pizza with fig jam, prosciutto, goat cheese, and arugula added after baking. Or a white pizza with a garlic and olive oil base, topped with mushrooms, fontina, and fresh thyme. The possibilities are vast. The reliable structure and enhanced flavor of the cold fermentation pizza dough will elevate even simple gourmet toppings into a restaurant-quality meal.
Neapolitan Pizza with Cold Fermented Dough
Achieving a true Neapolitan-style pizza at home is challenging without a professional oven, but cold fermentation pizza dough is the closest you can get with a standard home oven. Authentic Neapolitan pizza dough is characterized by a very high hydration (often 60-65%), minimal yeast, minimal kneading, and a long fermentation (often including cold fermentation), resulting in a very light, airy crust with a prominent, blistered edge (cornicione).
Use a recipe specifically designed for Neapolitan-style cold fermentation pizza dough, often using only '00' flour, water, salt, and a tiny amount of yeast. Follow the cold fermentation process for at least 24-48 hours. When shaping, be extremely gentle to preserve the air bubbles. Bake on a preheated pizza steel or stone at your oven's absolute highest temperature (ideally 260°C/500°F or higher) for a very short time, often just 5-8 minutes. The cold fermentation is key to developing the strength needed to handle the high hydration and achieve the signature airy, chewy crust.
Storing and Using Leftover Cold Fermented Pizza Dough
Proper Storage Techniques for Optimal Freshness
Properly storing cold fermented pizza dough is essential if you're not using the entire batch at once. After the initial bulk cold fermentation, you can divide the dough into individual portions and shape them into balls. Lightly oil each dough ball and place them in individual airtight containers or large zip-top bags. Ensure there's enough space for slight expansion.
Store these sealed containers in the refrigerator (at 4-5°C). Dough stored this way can often last for 3-5 days, sometimes longer depending on the recipe and yeast amount. The flavor will continue to develop during this time. For longer storage, cold fermented pizza dough freezes exceptionally well. After shaping the balls, place them on a lightly floured tray and freeze until solid (about 2-3 hours). Then transfer the frozen dough balls to a freezer-safe bag or container, removing as much air as possible. Frozen dough can last for 1-2 months.
Reviving Cold Fermented Dough After Refrigeration
When you're ready to use cold fermented pizza dough stored in the refrigerator, it's crucial to let it warm up and relax before shaping. Remove the dough ball from the fridge and its container. Place it on a lightly floured surface or in a lightly oiled proofing container.
Cover the dough loosely and let it sit at room temperature for 1-2 hours. The exact time needed depends on the dough's temperature straight from the fridge and your room temperature. The dough should feel relaxed, pliable, and slightly puffy. It should stretch easily without snapping back excessively. If it still feels cold and tight, give it more time. For frozen cold fermented pizza dough, transfer it to the refrigerator 24 hours before you plan to bake to let it thaw slowly, then follow the room temperature tempering step for 1-2 hours before shaping.
Using Leftover Dough for Breadsticks or Focaccia
Don't let leftover cold fermented pizza dough go to waste! Its excellent flavor and texture make it perfect for other baked goods. A simple way to use it is to make delicious breadsticks. After tempering the dough, gently stretch or roll it into a rectangle. Cut the rectangle into strips, brush with olive oil, sprinkle with salt, herbs, or cheese, and bake at around 200°C (400°F) for 15-20 minutes until golden brown.
Another great option is focaccia. Take your tempered cold fermented pizza dough, gently stretch it into a rectangle or circle, and place it in a well-oiled baking pan. Dimple the dough with your fingers, drizzle generously with olive oil, and add toppings like rosemary, sea salt, cherry tomatoes, or olives. Let it proof for another 30-60 minutes at room temperature before baking at 220°C (425°F) for 20-30 minutes until golden. The cold fermentation contributes wonderful flavor to both these simple uses.
Conclusion: Embrace the Art of Cold Fermentation for Exceptional Pizza
The Benefits of Cold Fermentation: A Recap
Embracing cold fermentation for your pizza dough unlocks a world of superior flavor, texture, and handling characteristics. We've explored how the slow, cold process allows yeast to develop complex aromatic compounds, how enzymes enhance gluten structure for a stronger, more extensible dough, and how these factors combine to create a pizza crust with nuanced taste and a wonderfully light, airy chew.
Compared to rapid room temperature methods, cold fermentation offers unparalleled flavor depth and makes the dough significantly easier to work with after its long rest. While it requires planning ahead, the flexibility of having perfectly aged dough ready in the fridge for several days makes it incredibly convenient. From classic Margheritas to gourmet creations, cold fermented pizza dough elevates any pizza recipe.
Further Exploration: Mastering Advanced Dough Techniques
Once you've successfully mastered the basics of cold fermentation pizza dough, you can delve into more advanced techniques to further refine your results. Experiment with different hydration levels; pushing hydration higher (e.g., to 70% or more) can result in an even lighter, more open crumb, though it requires more careful handling. Explore using different types of flour, such as combining '00' flour with a small percentage of whole wheat or durum flour for added flavor and texture.
Incorporating a pre-ferment like a poolish or biga, as discussed earlier, is another significant step that adds complexity and structure. You can also experiment with varying the cold fermentation time, tasting the dough baked at 24 hours versus 48 or 72 hours to see which flavor profile you prefer. Don't be afraid to tweak yeast quantities slightly based on your refrigerator's temperature and desired fermentation duration.
Your Journey to Pizza Perfection
Making exceptional homemade pizza is a journey, and mastering cold fermentation pizza dough is a crucial milestone along the way. It requires a little patience and planning, but the rewards in terms of flavor and texture are immense. By understanding the science, following the steps, and practicing the techniques outlined in this guide, you are well on your way to consistently producing pizza crusts that rival those from your favorite pizzerias.
So, measure out your ingredients, start your cold fermentation, and get ready to unlock the incredible flavors hidden within a simple ball of dough. Your friends and family will thank you, and you'll find immense satisfaction in creating such delicious results with your own hands. Happy baking, and enjoy your perfectly crafted, cold fermented pizza!
Frequently Asked Questions
How does cold fermentation improve pizza dough?
Cold fermentation slows down the yeast activity, allowing for a longer fermentation period, which develops more complex flavors and a better dough structure. This results in a more flavorful and easier-to-handle pizza dough.
How long should I cold ferment my pizza dough?
For optimal flavor development, a cold fermentation of at least 24 hours is recommended. However, you can ferment for up to 72 hours for even more complex flavors.
What temperature is ideal for cold fermentation?
The ideal temperature for cold fermentation is between 35-40°F (2-4°C). This is typically the temperature range of a standard refrigerator.
Can I use any pizza dough recipe for cold fermentation?
While most pizza dough recipes can be adapted, it's best to use one specifically designed for cold fermentation. These recipes often have a lower yeast content to compensate for the longer fermentation time, preventing over-proofing.
What are the benefits of using cold fermentation compared to room temperature fermentation?
Cold fermentation leads to a more complex flavor profile, a better dough structure that is easier to work with, and improved digestibility of the pizza dough due to the longer fermentation process.
Final Reflection: The Slow Rise to Pizza Perfection
The art of cold fermentation isn't just a culinary technique; it's a revolution in pizza dough. By slowing down the fermentation process, we unlock a depth of flavor and texture previously unimaginable. This isn't just about making a better pizza; it's about elevating the entire experience, from the initial knead to the final, satisfying bite.
The impact of cold fermentation extends beyond the individual pizza. It represents a return to traditional methods, a conscious slowing down in a fast-paced world. It's a reminder that patience and precision yield unparalleled results. This resonates deeply with the current culinary movement emphasizing fresh, local ingredients and mindful preparation. The best things in life are worth waiting for,
and this couldn't be truer when it comes to cold-fermented pizza dough. The subtle nuances of flavor, the airy texture, the overall improved digestibility – these are all testaments to the power of slow fermentation.
Now, it's your turn. Consider the possibilities. Will you embrace the slow rise, the subtle complexities, the enhanced flavor profile that cold fermentation offers? Experiment with different flours, times, and temperatures. Discover the unique character your dough can achieve. The journey to pizza perfection begins with a single, carefully planned, cold fermentation. Embrace the process, and savor the results.
Unleash Your Inner Pizzaiolo: Craft the Perfect Dough!
Thanks for taking the time to explore the world of cold fermentation! You've now unlocked the secret to creating pizza dough with incredible flavor and texture. Ready to put your newfound knowledge into practice?
- Bake your masterpiece: Try making the cold-fermented pizza dough recipe from the article – you’ll be amazed by the difference! Share your results on social media using #BakeWithEaseColdFerment!
- Experiment with flavors: Explore different flours, herbs, or even add sourdough starter to your dough for an even deeper flavor profile. What unique combinations will you create?
- Join our community: Head over to the BakeWithEase forum to connect with fellow pizza enthusiasts and share your cold fermentation journey! Discover new techniques and inspire others.
What unexpected flavor combinations will you try in your next cold-fermented pizza? Let's discuss!