
Rich & Tender Brioche Rolls You Can Bake Today


Welcome to BakeWithEase, your trusted companion in the delightful world of baking! Ever dreamt of creating bakery-worthy treats right in your own kitchen? You're in the right place. Get ready to uncover the secrets to achieving pillowy perfection, starting with our easy brioche rolls recipe. But don't stop there! Discover a world of simple techniques and expert tips, and let's embark on a baking journey together. What makes these brioche rolls so special? Keep reading to find out!
- BakeWithEase: Mastering the Art of Brioche Baking
- Why You'll Love This Easy Brioche Rolls Recipe
- The Secret to Rich & Tender Brioche Rolls: Ingredients & Equipment
- Step-by-Step: Baking Your Own Easy Brioche Rolls
- Tips & Tricks for Perfect Brioche Rolls
- Serving Suggestions: Enjoying Your Homemade Brioche Rolls
- Storing Your Brioche Rolls: Keeping Them Fresh
- Conclusion: Embrace the Joy of Baking Easy Brioche Rolls at Home
- Frequently Asked Questions
- Final Reflection: The Enduring Joy of Homemade Brioche
- Unleash Your Inner Baker: Make These Brioche Rolls Today!
BakeWithEase: Mastering the Art of Brioche Baking
Welcome to BakeWithEase.com - Your Guide to Perfect Brioche Rolls
Welcome to BakeWithEase.com! We're thrilled you're here to explore the wonderful world of baking with us. Today, we're diving into a classic that might seem intimidating at first glance, but we promise, with our guidance, you'll be baking beautiful, rich, and tender brioche rolls in no time. Our mission is to demystify baking, making it accessible and enjoyable for everyone, regardless of your current skill level.
Brioche is a French bread known for its high butter and egg content, which gives it a distinctive soft, fluffy texture and a slightly sweet flavor. While traditional brioche recipes can be complex, we've crafted an easy brioche rolls recipe that simplifies the process without sacrificing that luxurious taste and texture you expect. Get ready to impress yourself and your loved ones with these delightful homemade rolls!
Why You'll Love This Easy Brioche Rolls Recipe
Simple Ingredients, Extraordinary Flavor
One of the best things about this easy brioche rolls recipe is that it relies on simple, readily available ingredients. You likely have most of them in your pantry and refrigerator right now: flour, yeast, butter, eggs, sugar, and salt. The magic happens when these basic components come together in the right proportions and with the correct technique, transforming into something truly extraordinary.
Despite the simplicity of the ingredients, the flavor is anything but basic. The high butter and egg content contribute to a rich, almost cake-like crumb that's far superior to standard bread rolls. This recipe highlights the natural sweetness of the dough, making these rolls perfect on their own or as a base for countless sweet and savory applications.
Perfect for Beginners: An Easy Brioche Dough Recipe
If you've never tackled enriched doughs before, this easy brioche dough recipe is the perfect starting point. We've broken down each step clearly, focusing on techniques that are manageable for home bakers. Unlike some complex brioche methods that require intricate folding or long, multi-day processes, our approach is streamlined to fit into a standard baking day.
We'll guide you through everything from activating the yeast to achieving the signature silky texture of brioche dough. You don't need professional equipment or years of experience; just a willingness to follow along and a little patience. Our aim is to build your confidence in working with enriched dough, setting you up for success with future baking projects.
Versatile Brioche: Enjoy Them Sweet or Savory
The beauty of these easy brioche rolls lies in their incredible versatility. Their slightly sweet, rich profile makes them a fantastic accompaniment to both sweet and savory dishes. Imagine them warm from the oven, split and slathered with butter and jam for breakfast, or used as the ultimate bun for a gourmet burger.
Whether you're planning a weekend brunch, a family dinner, or just want a delicious treat, these homemade brioche rolls fit the bill. Their soft texture soaks up flavors beautifully, making them ideal for French toast or bread pudding, yet they are sturdy enough to hold up in a sandwich. This easy brioche rolls recipe truly offers endless possibilities.
The Secret to Rich & Tender Brioche Rolls: Ingredients & Equipment

Essential Ingredients
- Flour: King Arthur All-Purpose Flour
- Yeast: Instant Dry Yeast
- Butter: Unsalted European-Style Butter
- Eggs: Large, Free-Range Eggs
- Sugar: Granulated Sugar
- Salt: Fine Sea Salt
Essential Equipment
- Stand Mixer
- Mixing Bowls
- Measuring Cups and Spoons
- Baking Sheet
- Parchment Paper
Step-by-Step: Baking Your Own Easy Brioche Rolls
Step 1: Activating the Yeast
Begin by ensuring your yeast is active. While instant dry yeast doesn't strictly require activation in warm liquid before adding to dry ingredients, proofing it first confirms its viability and gives your dough a reliable start. In a small bowl, combine warm water (around 105-115°F or 40-46°C) with a pinch of sugar and your instant dry yeast.
Let the mixture stand for about 5-10 minutes. You should see a foamy layer develop on the surface, indicating the yeast is alive and ready to work its magic. If no foam appears, your yeast may be expired, or the water temperature was incorrect; you'll need to start with fresh yeast. This simple step is crucial for a well-risen brioche dough.
Step 2: Combining Dry Ingredients
In the bowl of your stand mixer, whisk together the flour, remaining granulated sugar, and fine sea salt. Using a stand mixer is highly recommended for brioche dough due to its high butter and egg content, which makes hand kneading quite challenging and messy. Ensure these dry ingredients are evenly distributed before adding the wet components.
The specific ratio of ingredients is key to this easy brioche rolls recipe. For example, a typical brioche dough might use around 500 grams of flour, 50-100 grams of sugar, and about 10 grams of salt. Whisking them together now ensures the salt and sugar are dispersed throughout the flour, preventing concentrated pockets that could affect yeast activity or flavor distribution.
Step 3: Incorporating Wet Ingredients
Add the activated yeast mixture and the large eggs to the dry ingredients in the stand mixer bowl. If your recipe calls for milk, add it now as well. Attach the dough hook to your stand mixer and begin mixing on a low speed (like setting 2 on a KitchenAid) until the ingredients just come together into a shaggy dough.
It's important not to overmix at this stage; the goal is simply to hydrate the flour and start the gluten development process. The dough will look quite wet and sticky, which is normal for an enriched dough like brioche before the butter is added. Scrape down the sides of the bowl as needed to ensure everything is incorporated.
Step 4: The Butter Incorporation Technique
This is perhaps the most crucial step in achieving that signature brioche richness and tenderness. With the mixer running on low speed, add the softened, unsalted European-style butter one cube at a time. Wait until each piece is almost fully incorporated into the dough before adding the next. This process is slow and requires patience, often taking 10-15 minutes or even longer depending on your mixer and the dough consistency.
Adding butter gradually allows it to emulsify with the dough, creating a smooth, elastic, and incredibly rich texture. A typical brioche uses a high proportion of butter, often 40-60% of the flour weight. For 500g of flour, this could be 200-300g of butter. Continue mixing after all the butter is added on medium speed (like setting 4) for another 10-15 minutes, or until the dough is smooth, shiny, and passes the "windowpane test" – a small piece of dough can be stretched thinly without tearing.
Step 5: First Rise
Once the dough is beautifully smooth and elastic, transfer it to a lightly greased large mixing bowl. Cover the bowl tightly with plastic wrap or a damp clean kitchen towel. The first rise, also known as bulk fermentation, allows the yeast to produce carbon dioxide, causing the dough to expand and develop flavor.
Place the covered bowl in a warm, draft-free spot. The ideal temperature for rising is often between 75-80°F (24-27°C). Let the dough rise until it has doubled in size, which typically takes about 1.5 to 2.5 hours, depending on the temperature and the activity of your yeast. You can also perform a slow, cold rise in the refrigerator overnight (8-12 hours) which develops even deeper flavor.
Step 6: Shaping the Brioche Rolls
After the first rise, gently punch down the dough to release the air. Turn the dough out onto a lightly floured surface. Divide the dough into equal portions, aiming for rolls of a consistent size for even baking. A standard roll size might be around 60-80 grams each, which for a batch using 500g of flour might yield 10-12 rolls.
Shape each portion into a smooth ball. You can do this by gently cupping your hand over the dough piece and rolling it against the counter in a circular motion, applying slight downward pressure. Alternatively, you can flatten the dough piece slightly, fold the edges towards the center, and then pinch the seams closed before rolling it into a ball. Place the shaped rolls onto a baking sheet lined with parchment paper, leaving some space between them as they will expand during the second rise and baking.
Step 7: Second Rise
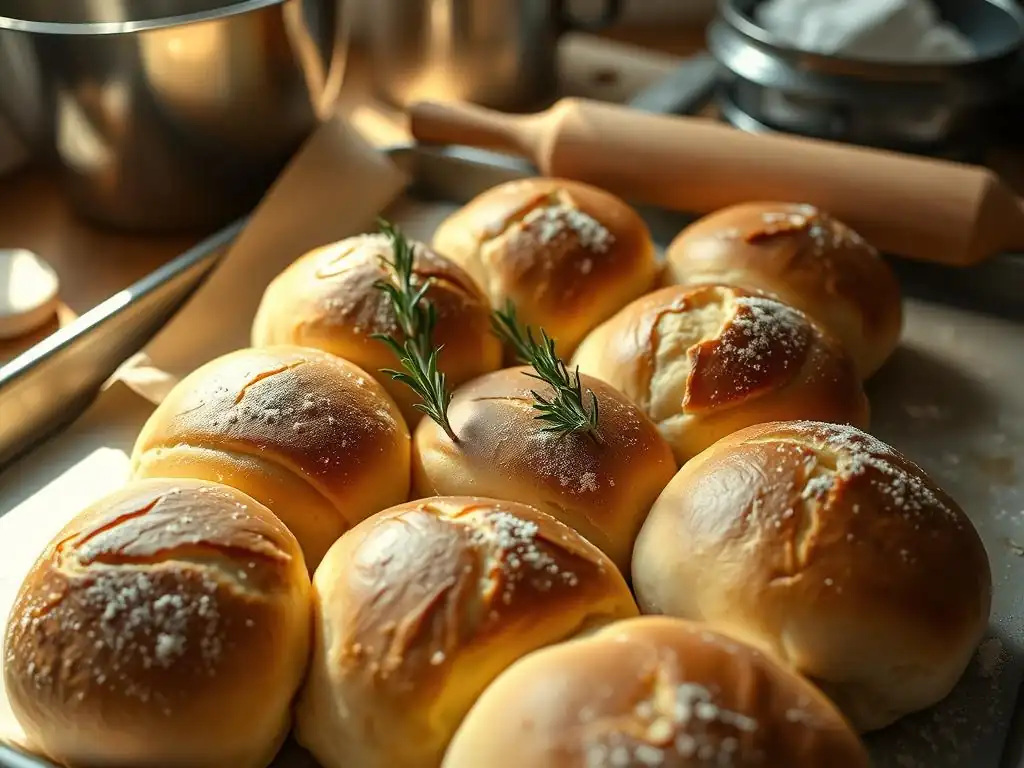
Cover the baking sheet loosely with plastic wrap or a clean towel. This second rise, or proofing, is crucial for achieving light and airy rolls. The dough balls need to relax and increase in volume again.
Allow the rolls to proof in a warm spot for about 45-75 minutes, or until they are noticeably puffy and have nearly doubled in size. They should look soft and pillowy. While the rolls are proofing, preheat your oven to the recommended temperature, usually around 375°F (190°C). You may also prepare an egg wash (one egg beaten with a tablespoon of water or milk) to brush on the rolls before baking for a golden crust.
Step 8: Baking the Brioche Rolls
Once the oven is preheated and the rolls are perfectly proofed, gently brush the tops of the rolls with the egg wash, if using. This gives them a beautiful, glossy, golden-brown finish. Avoid letting the egg wash pool between the rolls, as this can cause them to stick together.
Bake the rolls in the preheated oven for approximately 15-20 minutes. The exact time will depend on your oven and the size of your rolls. They are done when they are deeply golden brown on top and the internal temperature reaches about 190-200°F (88-93°C). You can check this with an instant-read thermometer inserted into the center of a roll.
Step 9: Cooling and Enjoying
Carefully remove the baked brioche rolls from the oven. For the best texture and flavor, transfer them from the baking sheet to a wire rack immediately to cool. Allowing them to cool on the rack prevents the bottoms from becoming soggy due to residual heat.
While it's tempting to tear into one right away, letting them cool for at least 15-20 minutes allows the internal structure to set properly. Enjoy your warm, homemade brioche rolls as is, or prepare them for your desired sweet or savory application. This easy brioche rolls recipe yields results that are truly rewarding.
Tips & Tricks for Perfect Brioche Rolls
Achieving the Perfect Brioche Dough Consistency
The ideal brioche dough is soft, smooth, elastic, and slightly sticky, but it should pull away from the sides of the mixer bowl cleanly after sufficient kneading. If your dough seems too wet even after extended mixing (20+ minutes), you can add a tablespoon of flour at a time, allowing it to incorporate fully before deciding if more is needed. Avoid adding too much flour, as this will result in a dry, dense roll.
Conversely, if the dough seems too stiff initially, ensure your butter was soft enough when added (room temperature, but not melted) and that you allowed enough time for the butter to incorporate fully. Sometimes, dough that appears too stiff just needs more kneading time to develop gluten and become pliable. Trust the process and the windowpane test as indicators of readiness.
Troubleshooting Common Brioche Baking Problems
Baking can sometimes present challenges, but don't worry, most issues with this easy brioche rolls recipe are fixable.
- Dough Not Rising: Ensure your yeast was active (proofed correctly in Step 1). Check the temperature of your rising environment; it might be too cold. Try moving the dough to a warmer spot.
- Rolls Too Dense: This is often due to insufficient kneading (dough didn't pass the windowpane test), adding too much flour, or not allowing enough time for the first and second rises. Ensure the dough doubles in size during the rises.
- Uneven Baking: Your oven might have hot spots. Try rotating the baking sheet halfway through the baking time. Ensure rolls are spaced evenly on the sheet.
Variations: Explore Different Flavors and Fillings
Once you've mastered the basic easy brioche rolls recipe, feel free to experiment! Before the second rise, you can incorporate additions into the dough or fillings into the rolls.
- Add zest: Incorporate lemon or orange zest into the dry ingredients for a bright, citrusy note.
- Chocolate chips: Fold in a cup of chocolate chips after the butter is incorporated during kneading.
- Savory herbs: Mix in dried herbs like rosemary or thyme with the dry ingredients for savory rolls.
- Fillings: Flatten the dough portion before shaping, add a spoonful of jam, cream cheese, or a savory filling (like caramelized onions and cheese), then wrap the dough around the filling and shape into a ball, ensuring the seams are sealed tightly.
Serving Suggestions: Enjoying Your Homemade Brioche Rolls

Sweet Brioche Roll Ideas: Breakfast and Dessert
The slightly sweet profile of these easy brioche rolls makes them ideal for indulgent breakfast or dessert applications.
- Brioche French Toast: Slice slightly stale brioche rolls about 1 inch thick. Dip them in a rich custard made from eggs, milk, sugar, vanilla, and cinnamon. Cook on a buttered griddle until golden brown and cooked through. Serve with syrup and fresh berries.
- Brioche Bread Pudding: Cube leftover brioche rolls and arrange in a baking dish. Pour a rich custard (similar to French toast batter) over the bread and let it soak. Bake until set and golden brown. Add fruits like apples or berries, or spices like nutmeg and cloves.
- Brioche with Jam and Cream: Simply split a warm roll and spread generously with butter, your favorite jam, or clotted cream. A classic, simple pleasure.
Savory Brioche Roll Ideas: Lunch and Dinner
Don't let the sweetness fool you; brioche makes a fantastic base for savory dishes.
- Brioche Burger Buns: Use slightly larger portions of dough (around 90-100g) when shaping. These rolls make incredibly soft, rich buns that elevate any burger experience.
- Brioche Sandwiches: Split a roll horizontally and fill with your favorite sandwich fillings – ham and cheese, turkey and avocado, chicken salad, etc. The soft texture is a lovely contrast to crisp fillings.
- Brioche with Cheese and Charcuterie: Serve warm rolls alongside a cheese board and selection of cured meats. The richness of the bread pairs beautifully with savory flavors.
Storing Your Brioche Rolls: Keeping Them Fresh
Best Practices for Storing Leftover Brioche
Homemade brioche rolls are best enjoyed fresh, ideally within 1-2 days of baking. To store them at room temperature, allow them to cool completely on a wire rack first. Once cool, place them in an airtight container or a resealable plastic bag.
Avoid storing them in the refrigerator, as this can actually cause bread to stale faster than at room temperature due to a process called starch retrogradation. If storing for more than 2 days, freezing is the best option.
Freezing Brioche Rolls: Extending Their Shelf Life
Brioche freezes exceptionally well, allowing you to enjoy your easy brioche rolls for weeks to come. Once the rolls are completely cool, wrap each roll individually in plastic wrap, then place the wrapped rolls inside a freezer-safe bag or container. This double wrapping helps prevent freezer burn.
Frozen brioche rolls can be stored for up to 2-3 months. To thaw, simply remove the desired number of rolls from the freezer and let them sit at room temperature for a few hours. For a "just baked" experience, you can reheat thawed rolls in a preheated oven at 300°F (150°C) for about 5-10 minutes until warmed through.
Conclusion: Embrace the Joy of Baking Easy Brioche Rolls at Home
BakeWithEase: Your Partner in Baking Success
You've done it! You've successfully baked rich and tender brioche rolls using our easy brioche rolls recipe. We hope this experience has shown you that baking beautiful, enriched bread is well within your reach. At BakeWithEase, we are committed to providing you with clear instructions, helpful tips, and reliable recipes to make your baking journey enjoyable and successful.
This easy brioche dough recipe is just one example of how we aim to simplify complex techniques, empowering you to create delicious baked goods in your own kitchen. Keep practicing, keep exploring, and don't be afraid to try variations.
We love seeing what you bake! Share photos of your beautiful homemade brioche rolls with us. Let us know how you served them – did you make French toast, burger buns, or something entirely new? Your success is our inspiration. Happy baking!
Frequently Asked Questions
What makes brioche rolls different from other bread rolls?
Brioche rolls are distinguished by their high butter and egg content, which gives them a rich, tender crumb and a slightly sweet flavor, unlike leaner bread rolls.
Are brioche rolls difficult to make at home?
While brioche dough requires some patience due to the butter incorporation process and rise times, our Easy Brioche Rolls Recipe simplifies the process with clear instructions and readily available ingredients.
Can I substitute ingredients in the Easy Brioche Rolls Recipe?
While we recommend following the recipe for best results, you can often substitute dairy-free butter alternatives or plant-based milk. However, this may affect the final texture and flavor.
How should I store leftover brioche rolls?
To maintain their freshness, store leftover brioche rolls in an airtight container at room temperature for up to two days, or freeze them for longer storage. Reheating is recommended for optimal taste.
What are some serving suggestions for brioche rolls?
Brioche rolls are incredibly versatile! Enjoy them plain, use them for delicious sandwiches, or serve them alongside soups and stews. Their slightly sweet flavor also pairs well with savory dishes.
Final Reflection: The Enduring Joy of Homemade Brioche
The simple act of baking, especially something as rewarding as brioche, connects us to a timeless tradition of culinary comfort and creativity. In a world increasingly dominated by convenience, taking the time to craft these rich, tender rolls offers a powerful antidote – a tangible reminder of the satisfaction found in creating something beautiful and delicious with your own hands.
The aroma of baking brioche, that intoxicating blend of butter, yeast, and sugar, evokes a powerful sense of nostalgia and home for many. It's a scent that transcends generations, a link to family kitchens and cherished memories. The best things in life are homemade.
This simple adage rings particularly true when considering the effort and love poured into each golden-brown roll. The process itself, from kneading the dough to the satisfying rise, is a meditative experience, a welcome break from the frenetic pace of modern life.
Now, I invite you to roll up your sleeves, gather your ingredients, and embark on your own brioche baking adventure. Don't be intimidated by the seemingly complex process; the rewards are well worth the effort. Remember the joy of sharing these warm, buttery rolls with loved ones, the smiles they bring to faces, and the lasting memories you create around the table. Let the simple act of baking become a source of comfort, connection, and enduring happiness in your life.
Unleash Your Inner Baker: Make These Brioche Rolls Today!
Thanks for joining us on this delicious journey into the world of brioche! We hope you've gained the confidence and knowledge to create wonderfully rich and tender rolls. Ready to bring that buttery goodness to life?
- Bake your own brioche today! Gather your ingredients and follow the recipe—you'll be amazed at how rewarding the process is.
- Share your baking triumph! Snap a picture of your golden-brown creations and share them with us on social media – we'd love to see them! Use #BakeWithEaseBrioche.
- Explore more delicious recipes on our site! Discover a world of easy-to-follow baking adventures.
What’s your favorite part of the baking process – the kneading, the rising, or the glorious moment of biting into a perfectly baked roll? Let us know in the comments below!