
Offset Spatula Deep Dive: Smooth Layers, Sharp Edges, Total Control

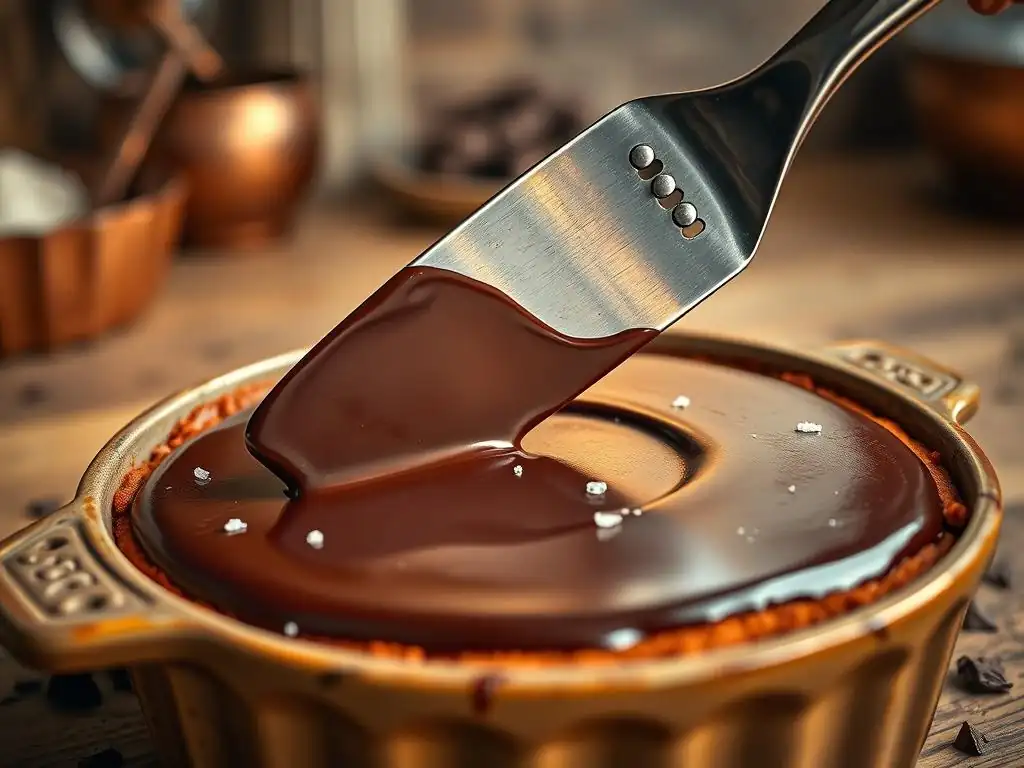
Welcome to BakeWithEase, where baking bliss is just a recipe away! Ever wonder how professional bakers achieve those flawlessly smooth cake layers and razor-sharp edges? This week, we're diving deep into the secrets of the offset spatula, revealing baking techniques that will revolutionize your frosting game. Discover how this humble tool can unlock a world of precision and artistry in your baking adventures. Intrigued? Let's get started and transform your cakes from good to gorgeous!
- Mastering Offset Spatula Techniques for Baking Perfection
- Understanding Offset Spatulas in Baking
- Essential Offset Spatula Techniques for Cake Decorating
- Selecting and Maintaining Your Offset Spatula
- Troubleshooting Common Issues
- Advanced Techniques for Professional Results
- Conclusion: Elevating Your Baking with the Offset Spatula
-
Frequently Asked Questions
- What is an offset spatula and why is it useful in baking?
- What are some common offset spatula baking techniques?
- How do I choose the right size offset spatula for my baking needs?
- What's the best way to clean and maintain an offset spatula?
- Can I use an offset spatula for tasks other than frosting and leveling?
- Final Reflection: Mastering the Art of Baking with Offset Spatulas
- Unleash Your Inner Pastry Chef: Master the Offset Spatula!
Mastering Offset Spatula Techniques for Baking Perfection
Understanding Offset Spatulas in Baking
Why Offset Spatulas Are Essential Tools
An offset spatula is a deceptively simple tool, yet it's absolutely indispensable for achieving polished results in baking, especially when it comes to cake decorating and frosting. Unlike a straight spatula, the blade of an offset spatula is angled away from the handle. This design is crucial because it allows you to apply frosting or spread batter without your knuckles dragging through the mixture or scraping against the surface you're working on. This clearance is vital for maintaining a smooth, even finish and precise control.
Furthermore, the offset design provides leverage and precision that straight spatulas simply can't match for certain tasks. Whether you're smoothing a large surface of a cake, carefully nudging delicate cookies onto a cooling rack, or spreading thick batter into a pan, the angle helps distribute pressure evenly and allows for finer adjustments. Mastering offset spatula baking techniques significantly elevates the appearance and consistency of your baked goods, turning homemade treats into professional-looking creations.
Exploring Offset Spatula Variations: Blade, Handle, and Material
Offset spatulas come in a variety of sizes and materials, each suited for different baking tasks. The most noticeable variations are in the blade length and width. Small offset spatulas, often with blades 4-6 inches long, are perfect for intricate detail work, smoothing cupcakes, or working on smaller cakes.
Medium spatulas (8-10 inches) are versatile workhorses for frosting standard layer cakes (like an 8-inch round), while large spatulas (10-14 inches or more) are ideal for covering large sheet cakes or spreading batter quickly over a wide area. The width of the blade can also vary, with wider blades being better for smoothing large surfaces and narrower blades offering more precision for tight spots.
The handle material and design also play a significant role in comfort and control. Common handle materials include wood, plastic, and silicone. Wooden handles offer a classic feel but require careful washing to prevent splitting. Plastic and silicone handles are often more ergonomic, providing a non-slip grip even when your hands are greasy or covered in flour.
The blade material is typically stainless steel, which is durable, rust-resistant, and easy to clean. Some spatulas have a bit more flex in the blade, which is useful for smoothing frosting, while others are more rigid, offering better control for lifting or spreading thicker substances. Understanding these variations helps you choose the right tool for specific offset spatula baking techniques.
Essential Offset Spatula Techniques for Cake Decorating
Achieving a Smooth Cake Finish with an Offset Spatula
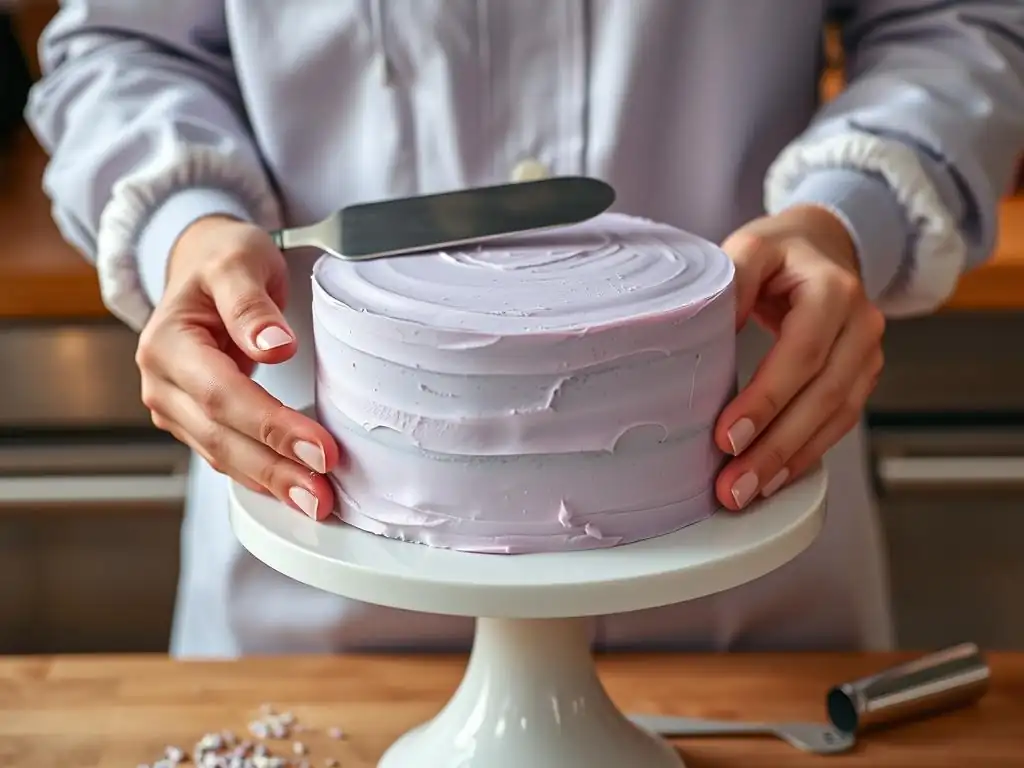
Creating a beautifully smooth cake surface is a hallmark of professional-looking baking, and the offset spatula is your primary tool for this. The process involves two main stages: the crumb coat and the final frosting layer. Using proper offset spatula baking techniques ensures you lock in crumbs and create a perfect canvas.
The goal is to apply frosting evenly, covering the cake completely without lifting the spatula too often, which can create ridges or pull up crumbs. Holding the spatula at a slight angle (around 45 degrees) against the cake and using steady, consistent strokes is key. For the top, start from the center and work outwards, smoothing as you go.
For the sides, hold the spatula vertically and rotate the cake stand (if using one) while holding the spatula still, allowing the rotation to do the work of smoothing. Practice is essential, but focusing on applying even pressure and minimizing contact points helps achieve that flawless finish.
The Crumb Coat: Setting the Stage for Success
The crumb coat is a thin layer of frosting applied to the cake before the final frosting layer. Its primary purpose is to trap any loose crumbs from the cake layers, preventing them from showing up in your final, smooth coating. Think of it as a primer for your cake.
Applying a crumb coat using an offset spatula involves spreading a very thin layer of frosting over the entire cake, top and sides. You don't need to make it perfectly smooth at this stage; the goal is simply coverage. Use your offset spatula to gently spread the frosting, filling any gaps between layers and sealing the surface.
Once covered, chill the cake in the refrigerator for at least 15-30 minutes. This allows the crumb coat to firm up, effectively locking in all those pesky crumbs and providing a stable base for your final layer of frosting. This is one of the foundational offset spatula baking techniques for any layered cake.
Final Frosting: Achieving a Professional Look
Once the crumb coat is firm, you're ready for the final, thicker layer of frosting. This is where your offset spatula truly shines in creating that smooth, bakery-worthy finish. Apply a generous amount of frosting to the top and sides of the cake – using more frosting than you need initially makes smoothing easier, as you can scrape away the excess.
Using your offset spatula, start by smoothing the top of the cake, working from the center outwards. Then, tackle the sides. Hold the spatula perpendicular to the cake and parallel to the side. If using a turntable, rotate the cake slowly while holding the spatula steady against the side, allowing the spatula to scrape away excess frosting and create a smooth surface.
For stationary cakes, use overlapping vertical strokes, smoothing each section carefully. Don't be afraid to scrape excess frosting back into your bowl and reapply as needed. The flexibility and angle of the offset spatula make these smoothing offset spatula baking techniques much more manageable.
Achieving Sharp Edges: A Step-by-Step Guide
Sharp edges give a cake a clean, modern, and professional appearance. Achieving them with an offset spatula requires patience and precision after the final frosting layer is applied and smoothed.
Here's how to do it:
- Step 1: Overshoot the Top Edge: When smoothing the sides of the cake, allow the frosting to stand slightly proud or "overshoot" the top edge of the cake. Don't try to make the side perfectly flush with the top yet.
- Step 2: Chill Briefly: Once the sides are smoothed and the frosting slightly overshoots the top edge, chill the cake for about 10-15 minutes. This firms up the frosting slightly, making it easier to work with.
- Step 3: Trim the Top Edge: Take your offset spatula and hold it flat against the top surface of the cake, with the blade parallel to the surface. Starting from the outside edge, gently pull the excess frosting from the top edge towards the center of the cake. Wipe the excess frosting off your spatula after each pull.
- Step 4: Repeat and Refine: Continue working around the entire circumference of the cake, pulling the excess frosting towards the center and wiping your spatula clean. This process effectively trims the frosting on the edge, creating a defined, sharp angle where the side meets the top. Repeat as needed until the edge is as sharp as desired. Mastering these offset spatula baking techniques takes practice, but the result is worth it.
Beyond Cake Decorating: Diverse Applications
While cake decorating is a primary use, the offset spatula's utility extends far beyond frosting. Its unique design makes it invaluable for various other tasks in the kitchen, demonstrating the versatility of these offset spatula baking techniques.
Consider tasks like spreading thick batters or doughs evenly into baking pans. For instance, spreading a stiff brownie batter or a dense cookie dough can be challenging with a spoon or straight spatula. The offset spatula provides leverage and a flat surface to push and spread the mixture into corners and achieve an even thickness, which is crucial for uniform baking. Its angled blade also makes it excellent for lifting delicate items.
Working with Brownies and Bars: Achieving Even Spreads
Achieving an even layer of batter is essential for baking brownies, bar cookies, and other similar treats evenly. If the batter is thicker in one spot than another, you'll end up with some parts overcooked and dry while others are undercooked and gooey (unless that's the intentional texture! ).
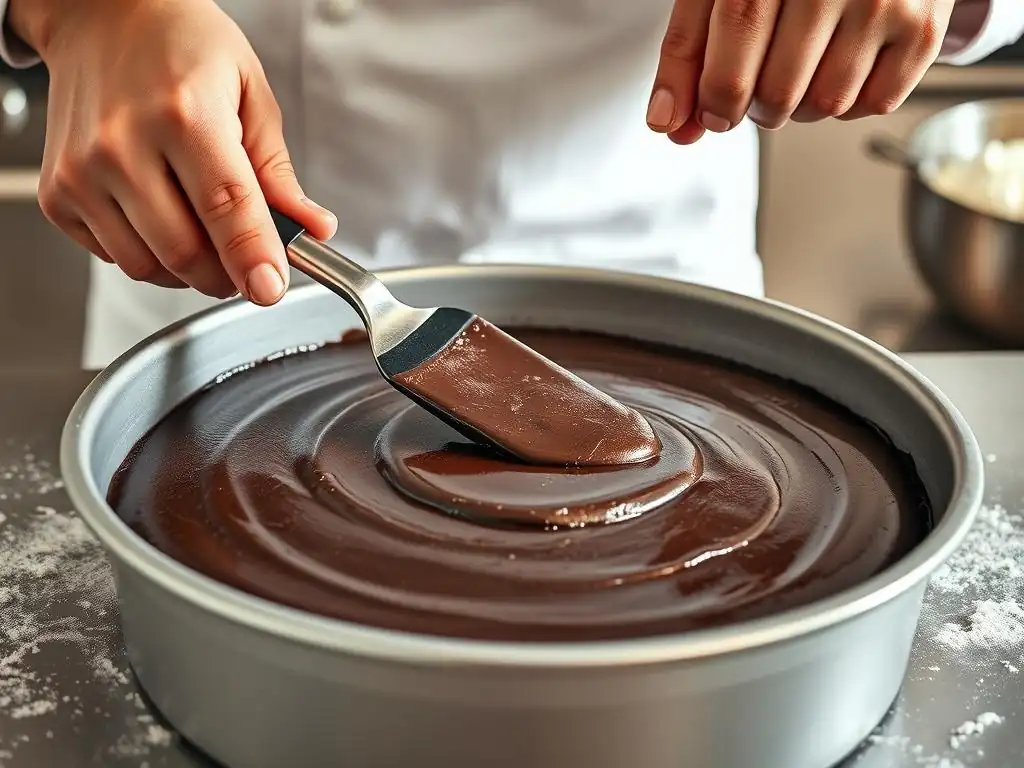
An offset spatula is the perfect tool for this. Once you've poured or scooped your batter into the prepared baking pan, use the flat side of your offset spatula to gently push and spread the batter all the way to the edges and into the corners. The offset handle keeps your hand clear of the pan sides, allowing you to apply even pressure across the surface.
For very thick batters, you can lightly dampen the spatula blade with water to reduce sticking. This simple application of offset spatula baking techniques ensures consistent thickness and promotes uniform baking throughout the pan.
Transferring Cookies and Delicate Items: Avoiding Breakage
Freshly baked cookies, especially those that are soft or delicate, can easily break when being moved from a baking sheet to a cooling rack. The same goes for fragile pastries or even slices of cake. An offset spatula, particularly one with a wide, thin blade, is ideal for this task.
Slide the thin edge of the offset spatula carefully underneath the item you wish to move. The wide surface provides ample support, distributing the weight and preventing the item from bending or breaking. The offset handle allows you to get the blade flat against the baking surface and lift smoothly without your hand obstructing the movement.
Gently lift the item and transfer it to its destination. For example, moving a batch of warm chocolate chip cookies from a hot baking sheet to a wire rack is much safer and easier using this offset spatula baking technique than trying to nudge them with a standard spatula or fork.
Tempering Chocolate: Spreading and Manipulating with Precision
Tempering chocolate is a precise process that involves melting, cooling, and reheating chocolate to specific temperatures to stabilize the cocoa butter crystals. This results in chocolate that sets with a glossy finish, a firm snap, and resistance to melting at room temperature. An offset spatula is a key tool in the traditional tempering method using a marble slab.
Hot, melted chocolate (around 115°F or 46°C for dark chocolate) is poured onto a cool marble or granite surface. An offset spatula is then used to spread the chocolate thinly and work it back and forth, cooling it down to a specific temperature range (typically 80-82°F or 27-28°C for dark chocolate). The flat, wide blade allows for efficient cooling by maximizing the surface area in contact with the cold stone.
The offset handle provides the necessary angle and control to scrape, gather, and spread the chocolate repeatedly until it reaches the desired working temperature. This specific application of offset spatula baking techniques is fundamental for achieving perfectly tempered chocolate for dipping or molding.
Selecting and Maintaining Your Offset Spatula
Choosing the Ideal Offset Spatula
Selecting the right offset spatula can make a significant difference in the ease and success of your baking projects. Consider the types of tasks you'll perform most often. If you primarily decorate standard 8 or 9-inch round cakes, a medium-sized spatula (8-10 inch blade) is a great starting point. For cupcakes or smaller details, a smaller spatula is invaluable. If you bake large sheet cakes or work with dense batters frequently, a large, sturdy spatula will be most helpful.
Beyond size, pay attention to the material and construction. A stainless steel blade is standard and recommended for durability and hygiene. Look for a blade that is securely attached to the handle and feels sturdy. The handle material and shape should feel comfortable in your hand, offering a good grip, especially since you'll often be using it for extended periods. Consider purchasing a set with varying sizes if you plan to tackle a range of baking projects, allowing you to apply different offset spatula baking techniques with the most appropriate tool.
Blade Flexibility and Angle: Matching the Task
The flexibility of the offset spatula blade is an important characteristic that affects its performance for different offset spatula baking techniques. A more flexible blade is excellent for smoothing frosting on cakes, allowing you to gently glide over the surface and achieve a very smooth finish without pulling up the cake or creating drag marks. It conforms slightly to the surface, making it easier to get that perfect level.
Conversely, a more rigid blade offers better control when spreading thick batters, lifting delicate items, or working with substances like tempered chocolate on a cold surface. It provides the necessary strength and stability for pushing and scraping. The angle of the offset itself can also vary slightly; some spatulas have a more pronounced bend than others. Choose an angle that feels comfortable and provides enough clearance for your hand based on the typical height of the cakes or items you work with.
Handle Ergonomics: Comfort and Control
The handle of your offset spatula is where you interact with the tool, so its design and material significantly impact comfort and control during use. An ergonomically designed handle fits comfortably in your hand, reducing fatigue during long decorating sessions. Materials like textured plastic or silicone offer a non-slip grip, which is crucial when working with potentially greasy or wet hands.
Consider the weight and balance of the spatula. A well-balanced spatula feels like an extension of your hand, allowing for precise movements. Test how it feels when you hold it; does the handle feel too heavy or too light relative to the blade? Is the grip secure? Investing in a spatula with a comfortable, ergonomic handle will make applying offset spatula baking techniques much more enjoyable and effective, especially for tasks requiring extended effort like smoothing a multi-tiered cake.
Proper Cleaning and Storage
Maintaining your offset spatulas properly ensures they remain hygienic and in good working condition for years of baking. After each use, clean your spatula thoroughly. For most spatulas, hand washing with warm, soapy water is recommended, especially for those with wooden handles, which can warp or crack in a dishwasher. Pay attention to where the blade meets the handle, as frosting and batter can accumulate there.
Dry the spatula immediately after washing, particularly if it has a wooden handle, to prevent water damage and rust spots on the stainless steel blade. Store your spatulas in a way that protects the blades from getting bent or damaged. A utensil drawer organizer, a knife block with slots for spatulas, or a crock on your countertop are good options. Proper cleaning and storage are simple steps but are vital for preserving your tools and ensuring they are ready for your next application of offset spatula baking techniques.
Troubleshooting Common Issues
Even with the right tools and techniques, bakers sometimes encounter challenges. Understanding how to troubleshoot common issues like air pockets, crumbs, and uneven frosting is part of mastering offset spatula baking techniques.
One frequent problem is incorporating air bubbles into your frosting while mixing or applying it, leading to unsightly pockets on your smooth surface. Another is dealing with crumbs that escape the crumb coat and mar the final layer. Lastly, achieving a perfectly even layer of frosting on all sides and the top can be tricky. Addressing these issues requires patience and knowing a few tricks.
Preventing Air Pockets in Frosting
Air pockets in frosting occur when air gets trapped during the mixing process or when spreading the frosting onto the cake. To minimize air pockets, ensure your frosting is mixed properly. After whipping, you can gently stir the frosting with a spatula (not a whisk) by hand for a minute or two to help release trapped air bubbles. Push the frosting against the sides of the bowl to compress it.
When applying frosting with your offset spatula, try to use smooth, consistent strokes rather than choppy ones. Applying a generous amount of frosting initially and then smoothing it down helps prevent dragging air into the layer. If you spot a large air pocket while smoothing, gently prick it with the tip of your spatula or a toothpick and then smooth over the area. Taking these steps improves the outcome of your offset spatula baking techniques for smooth finishes.
Minimizing Crumbs in Your Final Layer
Crumbs showing up in the final frosting layer typically indicates that the crumb coat was either too thin, not applied thoroughly, or the cake wasn't chilled sufficiently afterwards. The crumb coat's job is specifically to seal the surface and trap those loose bits.
Ensure you apply a complete, albeit thin, layer of frosting for the crumb coat, covering the entire surface of the cake, including the bottom edges. Don't skip the chilling step – allowing the crumb coat to firm up for at least 15-30 minutes is crucial for locking in crumbs. When applying the final layer, try not to scrape down to the crumb coat layer, as this can disturb it and release trapped crumbs.
Use a generous amount of frosting and let your offset spatula glide over the surface, removing only the excess. If you do pick up crumbs on your spatula during the final layer, wipe the spatula clean before continuing.
Addressing Uneven Frosting
Uneven frosting can result from inconsistent pressure, an unlevel cake, or not using enough frosting initially. To achieve an even layer using your offset spatula, focus on applying consistent pressure as you smooth. When frosting the sides, use a consistent angle and pressure against the cake. If using a turntable, practice keeping your spatula stationary relative to yourself while the cake rotates; this is key to uniform sides.
Ensure your cake layers are level before frosting. You can trim domed tops with a serrated knife if needed. Applying a generous amount of frosting first, then using your offset spatula to remove the excess, is often easier than trying to spread a limited amount thinly. The excess frosting helps fill in dips and allows you to smooth more easily. If you notice an uneven spot, apply a little more frosting to that area and resmooth gently. Patience and practice with these offset spatula baking techniques will improve your ability to achieve perfectly even layers.
Advanced Techniques for Professional Results
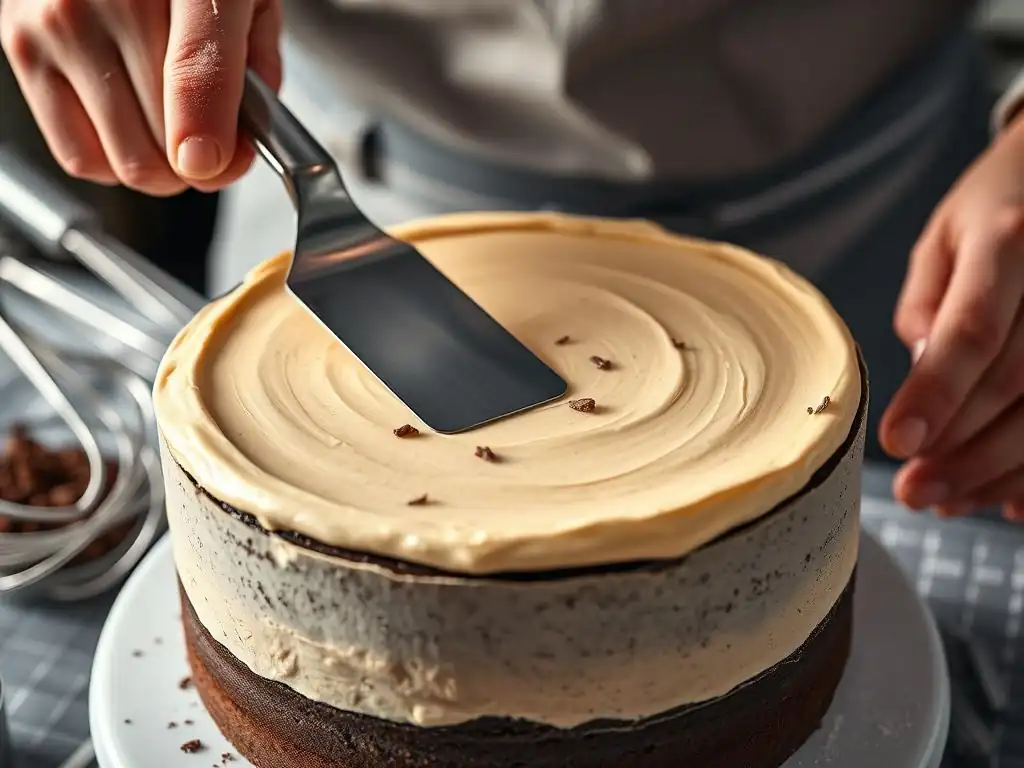
Once you've mastered the basic offset spatula baking techniques for smoothing cakes, you can explore more advanced applications to add flair and complexity to your baked goods. These techniques often involve using the spatula to create specific textures or manipulate other mediums like ganache.
These methods build upon the fundamental skills of control and precision. They allow you to move beyond a simple smooth finish and add decorative elements or prepare your cake for further decoration, such as covering it in fondant. Experimenting with different pressures and angles of your offset spatula can yield surprising and beautiful results.
Creating Textured Finishes: Swirls, Ridges, and More
The offset spatula isn't just for smoothing; it can also be used to create beautiful textures in frosting. A simple and popular technique is creating swirls on the top of a cake or cupcakes. After applying the final layer of frosting, hold a small or medium offset spatula flat against the surface and gently swirl it from the center outwards or in a circular motion. Varying the pressure and direction creates different patterns.
For ridges, apply a generous amount of frosting to the sides of the cake. Then, hold your offset spatula vertically against the side, applying firm, even pressure, and drag it upwards from the bottom edge to the top edge. Repeat this around the cake, slightly overlapping each stroke, to create vertical ridges. You can also create horizontal ridges by holding the spatula horizontally and dragging it around the cake while rotating it. These simple offset spatula baking techniques add visual interest without needing piping bags or tips.
Utilizing the Offset Spatula for Ganache Drip Cakes
Ganache drip cakes are visually stunning, and an offset spatula can be a useful tool in achieving a clean ganache drip. After chilling your frosted cake, you can apply ganache (melted chocolate mixed with cream) to the top. While pouring is common, using a small offset spatula gives you more control over where the ganache goes and how far it drips.
Spoon a small amount of ganache onto the top edge of the cake near where you want a drip to start. Use the tip or edge of a small offset spatula to gently nudge the ganache over the edge, encouraging it to drip down the side.
For the top surface, pour or spoon the remaining ganache onto the center and use the flat side of a slightly warmed offset spatula to gently push and spread the ganache towards the edges, creating a smooth pool on top before it sets. This controlled application is a key offset spatula baking technique for perfect drips.
Achieving a Smooth Buttercream Base for Fondant
When covering a cake with fondant, it's crucial to have a perfectly smooth and sharp buttercream base. Any bumps, crumbs, or unevenness in the buttercream will show through the fondant. An offset spatula is essential for creating this flawless base.
After applying the final layer of buttercream (which should be firmer than frosting used for simple decoration), use your offset spatula and potentially a cake scraper to achieve the smoothest possible finish and sharp edges, following the steps outlined earlier. Pay extra attention to getting the sides perfectly straight and the top perfectly level. Chill the cake thoroughly until the buttercream is very firm.
This hard, smooth surface is essential for the fondant to lay flat and smooth without showing imperfections from the cake or buttercream layers beneath. Mastering these foundational offset spatula baking techniques is paramount before attempting to cover a cake with fondant.
Conclusion: Elevating Your Baking with the Offset Spatula
The offset spatula is far more than just a frosting tool; it's a versatile and essential piece of equipment that can dramatically improve the appearance and consistency of your baked goods. From mastering the art of smooth cake finishes and sharp edges to evenly spreading batters and delicately handling fragile items, the applications of this simple tool are numerous and valuable.
By understanding the different types of offset spatulas available and practicing the fundamental and advanced offset spatula baking techniques discussed, you can elevate your baking from homemade to truly professional. Investing in a quality offset spatula and learning to use it effectively is one of the best ways to enhance your baking skills and achieve beautiful, delicious results every time you step into the kitchen. Embrace the offset spatula, and watch your baking perfection soar!
Frequently Asked Questions
What is an offset spatula and why is it useful in baking?
An offset spatula is a baking tool with a thin, flexible blade set at an angle from the handle. This design allows for smoothly spreading frosting and leveling batters without your hand getting in the way.
What are some common offset spatula baking techniques?
Common techniques include frosting cakes, leveling batter in pans, and releasing baked goods from pans. Its flexibility allows for even distribution and precise control.
How do I choose the right size offset spatula for my baking needs?
The best size depends on the task. Smaller spatulas (4-6 inches) are great for detailed work, while larger ones (8+ inches) are better for covering large surfaces like cakes. Consider the size of your most frequent baking projects.
What's the best way to clean and maintain an offset spatula?
Wash your offset spatula with warm soapy water after each use. Avoid harsh abrasives that could scratch the blade. Proper cleaning ensures longevity and hygiene.
Can I use an offset spatula for tasks other than frosting and leveling?
Yes! Offset spatulas are also useful for lifting cookies from baking sheets, scraping bowls, and even decorating desserts with swirls and patterns. They are quite versatile in the kitchen.
Final Reflection: Mastering the Art of Baking with Offset Spatulas
In the world of baking, the offset spatula stands out as an essential tool that elevates both technique and presentation. As we’ve explored throughout this article, mastering the use of an offset spatula not only enhances the aesthetics of our baked goods but also empowers bakers to achieve precision in their craft. In today’s baking landscape, where visual appeal is just as important as flavor, understanding how to wield this versatile tool can make all the difference in creating stunning desserts that leave a lasting impression.
The influence of the offset spatula extends beyond mere functionality; it embodies a deeper connection to the art of baking itself. Every smooth layer and sharp edge created with this tool reflects the dedication and passion that bakers pour into their creations. As we continue to share and learn from one another in the baking community, we recognize that tools like the offset spatula are not just instruments but extensions of our creativity. > “Baking is both an art and a science, and the right tools can help us express ourselves in ways we never thought possible.”
As you reflect on the techniques discussed in this article, I invite you to embrace the offset spatula in your own baking journey. Consider how mastering this tool can transform not just your desserts but also your confidence in the kitchen. Whether you’re a seasoned baker or just starting, take the time to practice and experiment with your offset spatula. Let it guide you to new heights of creativity and precision, and remember that each layer you smooth and edge you sharpen is a step toward mastering the beautiful art of baking.
Unleash Your Inner Pastry Chef: Master the Offset Spatula!
Thanks for taking the time to explore the world of offset spatulas with us! We hope you've gained valuable insights into how this versatile tool can elevate your baking game. Ready to put your newfound knowledge into practice?
- Master the perfect frosting swirl: Practice your techniques with a simple cake or cupcakes, focusing on smooth, even layers and crisp edges. This is your chance to really hone those skills!
- Share your creations: Show us your stunningly frosted masterpieces! Post photos of your baking using #BakeWithEaseOffsetSpatula on your favorite social media platform – we'd love to see them.
- Explore advanced techniques: Dive deeper into the world of cake decorating by researching advanced offset spatula techniques (like creating textured finishes or intricate designs) – the possibilities are endless!
What amazing cake creations will you craft with your newly mastered offset spatula skills?