
Yeast Explained: Getting Your Croissant Dough to Rise Beautifully

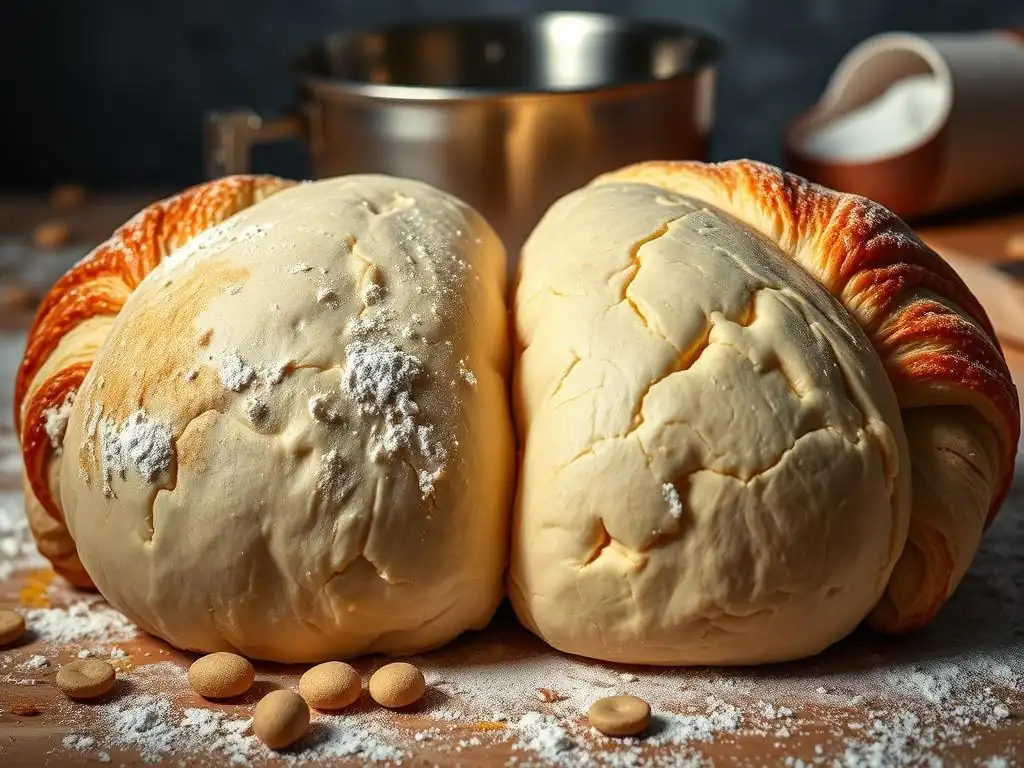
Welcome to BakeWithEase, your companion in the delightful world of baking! Ever wrestled with stubborn yeast dough that just refuses to rise? You're not alone! We're diving deep into understanding yeast dough rising problems and how to conquer them. Unlocking the secrets to a perfectly proofed dough is easier than you think. Ready to transform your baking from frustrating to fantastic? Let's get started!
- Understanding Yeast for Perfect Croissants
- Introduction to Yeast and Croissant Dough
- Yeast Types and Their Impact on Croissant Dough
- Troubleshooting Croissant Dough Rising Issues
- Temperature Control for Yeast Activity
- Step-by-Step Guide to Croissant Dough Proofing
- Advanced Techniques for Croissant Dough Development
- Common Proofing Mistakes to Avoid
- Addressing Specific Proofing Challenges
- Alternative Proofing Techniques
- Tips for Consistent Croissant Proofing Success
- Conclusion: Mastering Croissant Proofing for Exceptional Results
-
Frequently Asked Questions
- What are the most common reasons for yeast dough rising problems when making croissants?
- How do I know if my yeast is active and ready to use in my croissant dough?
- What is the ideal temperature range for proofing croissant dough to ensure proper rising?
- My croissant dough rose initially, but then collapsed. What caused this, and how can I prevent it?
- Can the type of flour I use affect how well my croissant dough rises?
- Final Reflection: The Humble Yeast, the Bountiful Rise
- Unleash Your Inner Baker: Rise to the Croissant Challenge!
Understanding Yeast for Perfect Croissants
Introduction to Yeast and Croissant Dough
Baking perfect croissants at home is a rewarding challenge, and at the heart of their signature airy, flaky texture is yeast. Understanding how yeast works is fundamental to avoiding common yeast dough rising problems and achieving that desirable rise and structure. Yeast, a single-celled microorganism, acts as the leavening agent, producing carbon dioxide gas that inflates the dough, creating pockets that expand during baking. Without proper yeast activity, your croissant dough would remain flat and dense, lacking the light, ethereal layers we all crave.
The process of making croissants involves specific steps, including lamination (folding butter into dough) and multiple proofing stages. Each stage relies heavily on the yeast performing optimally. From the initial bulk fermentation where flavor develops to the final proofing that gives the shaped croissants their volume, yeast is constantly working. Mastering the conditions under which yeast thrives is key to navigating the complexities of croissant making and ensuring your dough rises beautifully, setting the stage for those exquisite, buttery layers.
The Role of Yeast in Croissant Lamination and Texture
Yeast plays a critical role long before the croissants hit the oven. During fermentation, the yeast consumes sugars in the dough and produces carbon dioxide gas and ethanol. This gas gets trapped within the gluten network, causing the dough to expand. In laminated doughs like croissants, this expansion is crucial. As the dough rises, it helps to separate the thin layers of dough and butter created during lamination. During baking, the trapped gas expands further, and the water in the butter turns to steam, also forcing the layers apart.
A healthy, active yeast culture ensures sufficient gas production to lift the numerous, thin layers of dough. If yeast activity is too low, the dough won't rise enough, and the layers will stick together, resulting in a dense, heavy croissant instead of a light, airy one. Conversely, excessive yeast activity or too rapid fermentation can lead to over-proofing, where the gluten structure weakens, and the dough collapses, again hindering proper layer separation and contributing to yeast dough rising problems. The delicate balance of yeast activity directly impacts the final texture – from the crisp exterior to the honeycomb interior.
Achieving Optimal Rise for Flaky Layers
Achieving the optimal rise for croissant dough is a careful balance of time, temperature, and yeast health. The goal is sufficient leavening to create volume and separate layers without over-stressing the delicate gluten and butter structure. Typically, bulk fermentation for croissant dough might take 1.5 to 2 hours at room temperature (around 75°F or 24°C), followed by an extended cold fermentation period (retarding) in the refrigerator for 8 to 12 hours or even longer. This cold period significantly slows yeast activity, allowing flavors to develop while firming the butter for lamination.
The final proof after shaping is where the croissants gain their characteristic puffy shape. This stage is often done at a warmer temperature, perhaps 78-82°F (26-28°C), but carefully controlled to prevent the butter from melting. This final rise can take 1.5 to 2.5 hours, depending on the temperature and yeast activity. Properly proofed croissants will be visibly expanded, jiggly when gently shaken, and have a delicate surface. Under-proofing leads to dense, tight crumb, while over-proofing results in collapsed layers and a poor structure, both classic yeast dough rising problems.
Yeast Types and Their Impact on Croissant Dough
Choosing the right type of yeast is a foundational step in avoiding yeast dough rising problems and achieving consistent results with your croissant baking. Different yeast types behave differently, affecting the speed of fermentation, the flavor development, and how they interact with doughs of varying sugar levels. Understanding these differences helps you select the best yeast for your recipe and control the rising process effectively.
The three most common types of commercial yeast available to home bakers are instant dry yeast, active dry yeast, and fresh yeast. While active dry yeast requires rehydration before use, instant dry yeast and fresh yeast can often be incorporated directly into the dough mixture, though dissolving in a little liquid first can help ensure even distribution and kickstart activity. Each type has characteristics that make it suitable for different baking scenarios, and your choice can influence the entire fermentation timeline and final outcome of your croissants.
Instant Dry Yeast: Convenience and Performance
Instant dry yeast is a popular choice for many home bakers, including those tackling croissants, primarily due to its convenience and reliable performance. It comes in fine granules and is typically added directly to the dry ingredients, though dissolving it in warm liquid first is still a good practice to ensure it's active and evenly distributed.
Instant yeast is processed to be more potent and faster-acting than active dry yeast, often requiring about 25% less by weight compared to active dry yeast in a recipe. For example, if a recipe calls for 10g of active dry yeast, you might use 7.5g of instant dry yeast.
One of the key advantages of instant dry yeast is its long shelf life when stored properly (usually several years in an airtight container in the freezer). Its consistent activity makes it a reliable option for recipes requiring specific proofing times.
While some purists argue that it offers less complex flavor development compared to fresh yeast, its ease of use and predictability make it excellent for beginners and experienced bakers alike looking to minimize yeast dough rising problems related to inconsistent yeast activity. Its rapid fermentation can sometimes be a challenge in long, cold fermentation processes like retarding croissant dough, but recipes are often formulated to account for this.
Fresh Yeast: Flavor Depth and Considerations
Fresh yeast, also known as cake yeast or compressed yeast, is often favored by professional bakers and those seeking the most nuanced flavor development in their baked goods, including croissants. It has a moist, crumbly texture and a distinctive, pleasant aroma. Unlike dry yeasts, fresh yeast is highly perishable and must be stored in the refrigerator, typically lasting only 1-2 weeks.
It is usually dissolved in a small amount of lukewarm liquid before being added to the dough to ensure even distribution. The general conversion is that 1 part active dry yeast or 0.75 parts instant dry yeast is roughly equivalent to 3 parts fresh yeast by weight. So, a recipe calling for 7.5g instant yeast might use 22.5g of fresh yeast.
While fresh yeast can contribute a subtle depth of flavor due to different fermentation byproducts, it requires careful handling and storage to maintain its viability. Using stale or improperly stored fresh yeast is a common cause of yeast dough rising problems. Its activity can be slightly less predictable than instant dry yeast, potentially requiring closer monitoring of proofing times. However, for bakers prioritizing traditional methods and flavor complexity, fresh yeast is often the preferred choice for enriching the taste of their homemade croissants.
Osmotolerant Yeast: For High-Sugar Doughs
Osmotolerant yeast is a specialized type of instant dry yeast specifically engineered to perform well in doughs with high sugar content (typically above 5-10% of the flour weight). High sugar concentrations can stress regular yeast by drawing water out of the yeast cells through osmosis, inhibiting their activity. Croissant dough, while not always extremely high in sugar, often contains enough sugar to benefit from osmotolerant yeast, especially richer variations.
Using osmotolerant yeast can be particularly helpful in preventing yeast dough rising problems in sweet or enriched doughs. It ensures consistent and vigorous fermentation even when significant amounts of sugar are present, leading to a more reliable rise and better volume.
While regular instant yeast will often work in standard croissant recipes, switching to osmotolerant yeast can provide an extra layer of insurance, especially if you're using a recipe with a higher sugar percentage or experiencing difficulties with rise in sweeter doughs. It is used in the same way as regular instant dry yeast, typically added directly to the dry ingredients.
Troubleshooting Croissant Dough Rising Issues
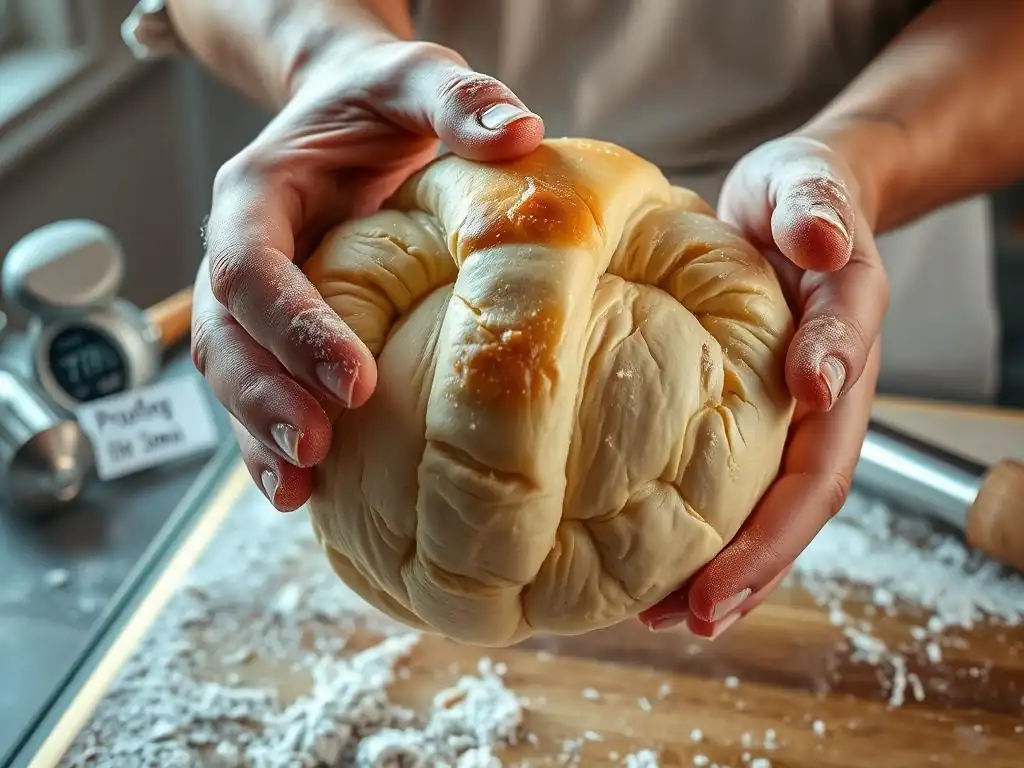
Encountering yeast dough rising problems is a common hurdle for many bakers, especially when working with delicate doughs like croissants. Issues can range from dough that barely rises to dough that rises too quickly and then collapses. Identifying the root cause is the first step in troubleshooting and improving your results. Factors such as yeast viability, dough temperature, ingredient ratios, and proofing environment all play a significant role in successful fermentation.
A systematic approach to troubleshooting involves reviewing each stage of the process, from ingredient mixing to the final proof. Did you use the correct type and amount of yeast? Was the water temperature appropriate? Was the dough kneaded sufficiently? Was the dough stored at the correct temperature during bulk fermentation and retarding? By methodically checking each potential variable, you can pinpoint where things might have gone wrong and make adjustments for future batches.
Identifying Reasons for Insufficient Rise
Insufficient rise in croissant dough can be attributed to several factors. The most common culprit is inactive or dead yeast. Yeast is a living organism, and if it's old, improperly stored, or exposed to extreme temperatures (too hot or too cold), it may lose its leavening power. Using water that is too hot (above 130°F or 54°C) will kill the yeast instantly, while water that is too cold (below 70°F or 21°C) will significantly slow down or inhibit its activity.
Other reasons for poor rise include insufficient kneading, which prevents proper gluten development necessary to trap the gas produced by the yeast. The dough might also be too cold during fermentation stages, drastically slowing yeast activity. Additionally, too much salt or sugar can inhibit yeast, especially if not properly balanced. For example, salt should typically be around 1.8-2% of the flour weight, and while necessary for flavor and dough structure, too much can stress the yeast. Ensuring all ingredients are measured accurately and are at the correct temperature is vital to preventing yeast dough rising problems.
Verifying Yeast Viability
Before you even start mixing your croissant dough, it's a good practice to verify that your yeast is alive and active, especially if you are using active dry yeast or fresh yeast that has been stored for a while. This simple test can save you the frustration of a failed rise later on. For active dry or fresh yeast, combine the amount specified in your recipe (or a small portion, like 1 teaspoon) with about 1/4 cup of lukewarm water (around 105-115°F or 40-46°C) and a pinch of sugar. Stir gently and let it sit for 5-10 minutes.
If the yeast is viable, it will dissolve and the mixture will become foamy and bubbly on the surface, indicating that the yeast is consuming the sugar and producing carbon dioxide. This "bloom" confirms your yeast is ready to work. If there is little to no activity, your yeast is likely dead or inactive, and you should discard it and use a fresh batch. Instant dry yeast is generally reliable enough not to require blooming, but if you suspect it's the cause of yeast dough rising problems, you can test it similarly, though the foam might be less pronounced.
Temperature Control for Yeast Activity
Temperature is arguably the most critical factor influencing yeast activity and, consequently, the success of your croissant dough rise. Yeast thrives within a specific temperature range, and veering outside of this can lead to sluggish fermentation, over-proofing, or even killing the yeast. Precise temperature control throughout the bulk fermentation, retarding, and final proofing stages is essential for developing both the structure and flavor of your croissants while avoiding common yeast dough rising problems.
Maintaining consistent temperatures can be challenging in a home kitchen, but understanding the optimal ranges and how to manage them is key. Whether you're relying on ambient room temperature, the chill of your refrigerator, or a controlled proofing environment, being mindful of the temperature surrounding your dough will significantly impact the rate at which your yeast ferments and produces gas.
Optimal Temperature Range for Croissant Dough Proofing
Yeast activity is highly dependent on temperature. For most standard doughs, yeast is most active between 75°F and 95°F (24°C and 35°C). However, for croissant dough, which involves long fermentation periods and cold retarding, the optimal temperatures for proofing stages are slightly different and more nuanced. Bulk fermentation, where the dough doubles in size, is often done at room temperature, ideally between 72-78°F (22-26°C) for 1.5-2 hours. This allows for good initial activity and gluten development.
The cold fermentation (retarding) in the refrigerator is typically done at temperatures between 35°F and 40°F (2°C and 4°C). This significantly slows yeast activity, sometimes reducing gas production by 90% or more, allowing enzymes to break down starches into sugars and proteins into amino acids, which contributes significantly to flavor complexity.
The final proofing of shaped croissants is often done at a slightly warmer but still moderate temperature, around 78-82°F (26-28°C), to encourage rise while preventing the butter layers from melting. This stage requires careful monitoring; temperatures much higher can melt the butter, ruining the lamination, a major cause of yeast dough rising problems in croissants.
Adjusting Proofing Time Based on Ambient Temperature
Since most home kitchens don't have perfectly controlled environments, you'll need to adjust proofing times based on the ambient temperature. Yeast ferments faster in warmer conditions and slower in cooler conditions. If your kitchen is warmer than the ideal range (say, above 80°F or 27°C), your dough will rise more quickly, and you'll need to shorten the proofing time to prevent over-proofing. Conversely, in a cooler kitchen (below 70°F or 21°C), fermentation will be slower, and the dough will require a longer time to rise sufficiently.
It's crucial to learn to judge the dough's readiness by its appearance and feel rather than strictly adhering to recipe times. During bulk fermentation, the dough should roughly double in size. For the final proof, shaped croissants should look visibly puffy and feel light, but not so fragile that they collapse at the slightest touch. Using a probe thermometer to check the internal temperature of your dough can also give you a more accurate sense of how yeast is behaving and help you anticipate the required proofing time, minimizing yeast dough rising problems related to temperature fluctuations.
Retarding Croissant Dough: Cold Fermentation Benefits
Retarding, or cold fermenting, croissant dough in the refrigerator is a crucial step that offers multiple benefits beyond just firming the butter for lamination. This long, slow fermentation at cold temperatures (35-40°F or 2-4°C) allows for the development of complex flavors through enzymatic activity that occurs slowly while yeast activity is suppressed. This process breaks down complex carbohydrates and proteins, resulting in a more flavorful and aromatic final product.
Furthermore, cold fermentation strengthens the gluten structure in the dough. The long, slow rise allows the gluten network to relax and align, which contributes to better structure and extensibility, making the dough easier to handle during lamination and shaping. This improved gluten strength also helps the dough hold onto the gas produced during the final proof, leading to a better rise and a more open crumb structure.
Retarding for 8-12 hours is standard, but some recipes call for up to 24 hours for even deeper flavor development. This controlled slow rise is key to avoiding rapid yeast dough rising problems and achieving superior croissants.
Step-by-Step Guide to Croissant Dough Proofing
Successfully navigating the proofing stages is paramount to achieving the coveted light and airy texture of croissants. From activating the yeast to the final rise before baking, each step requires attention to detail and an understanding of how yeast interacts with the dough. This step-by-step guide outlines the key stages of proofing croissant dough, focusing on best practices to ensure optimal yeast activity and prevent common yeast dough rising problems.
Following a methodical approach allows you to control the process and anticipate how the dough should behave at each stage. While recipes may vary slightly in timing and specific temperatures, the fundamental principles of yeast activation, incorporation, bulk fermentation, and final proof remain consistent. Mastering these steps will significantly improve your chances of baking perfect, flaky croissants.
Preparing the Yeast Mixture
The first step is often preparing the yeast, especially if using active dry or fresh yeast. Measure the required amount of yeast precisely using a digital scale, as accuracy is important. For active dry or fresh yeast, gently warm a portion of the liquid specified in your recipe (typically milk or water) to the appropriate temperature range – around 105-115°F (40-46°C) for active dry or fresh yeast, and slightly cooler, 95-105°F (35-40°C), for instant yeast if dissolving it separately. Add a pinch of sugar from your recipe's total amount to feed the yeast.
Sprinkle the yeast over the warm liquid and let it sit for 5-10 minutes (for active dry or fresh yeast) until foamy. For instant yeast, you can stir it into the warm liquid immediately. This process ensures the yeast is active and hydrated before being added to the bulk of the ingredients. Seeing a good bloom of foam is a positive sign that your yeast is viable and ready to leaven your dough, helping to avoid potential yeast dough rising problems from the outset.
Incorporating Yeast into the Dough
Once your yeast is prepared (either bloomed in liquid or added directly to dry ingredients if using instant yeast), it's time to incorporate it into the main dough mixture. If you bloomed the yeast, add the yeast-liquid mixture to the bowl with your flour, sugar, salt, and any other wet ingredients like eggs or the remaining milk/water. If using instant yeast directly, mix it thoroughly with the flour and other dry ingredients before adding the wet components.
Ensure the yeast is evenly distributed throughout the dough during the initial mixing phase. This allows the yeast cells to access the sugars and moisture needed for fermentation across the entire dough mass. Proper mixing is crucial for developing the gluten network and distributing the yeast evenly, both of which are essential for a uniform rise and preventing localized yeast dough rising problems during subsequent stages. Continue mixing or kneading until a cohesive dough forms.
Bulk Fermentation: Developing Flavor and Structure
Bulk fermentation, also known as the first rise, is the period after the initial mixing and kneading where the entire mass of dough is allowed to ferment. This stage is critical for developing both the dough's structure and flavor. Place the dough in a lightly oiled bowl, cover it tightly with plastic wrap or a damp towel to prevent drying, and let it rise in a warm, draft-free place. As mentioned earlier, a temperature of 72-78°F (22-26°C) is often ideal for this stage.
During bulk fermentation, the yeast consumes sugars, producing carbon dioxide gas that expands the dough and ethanol, which contributes to flavor. Enzymes also begin to break down starches and proteins. The dough should typically double in size during this phase, which might take 1.5 to 2.5 hours depending on the temperature and yeast activity. You can perform one or two "stretch and folds" during this time, which helps strengthen the gluten and equalize the dough temperature, contributing to a more even rise and minimizing yeast dough rising problems.
Final Proof: Achieving Optimal Volume
After shaping your croissants (which involves lamination, folding, and cutting), they undergo a final proof before baking. This stage is where the shaped pastries gain their final volume and airy structure. Arrange the shaped croissants on a baking sheet lined with parchment paper, leaving ample space between them as they will expand significantly. Cover them loosely with plastic wrap or place them in a controlled environment like a proofing box.
The final proof is often done at a slightly warmer temperature than bulk fermentation, around 78-82°F (26-28°C), but must be carefully monitored to prevent the butter from melting. The duration can range from 1.5 to 2.5 hours. Croissants are ready to bake when they look visibly puffy, have increased in size by about 50-75%, and appear delicate and jiggly when gently shaken. They should not look fully doubled like bread dough typically does. This careful balance in the final proof is essential for achieving flaky layers and avoiding yeast dough rising problems that lead to flat or dense croissants.
Advanced Techniques for Croissant Dough Development
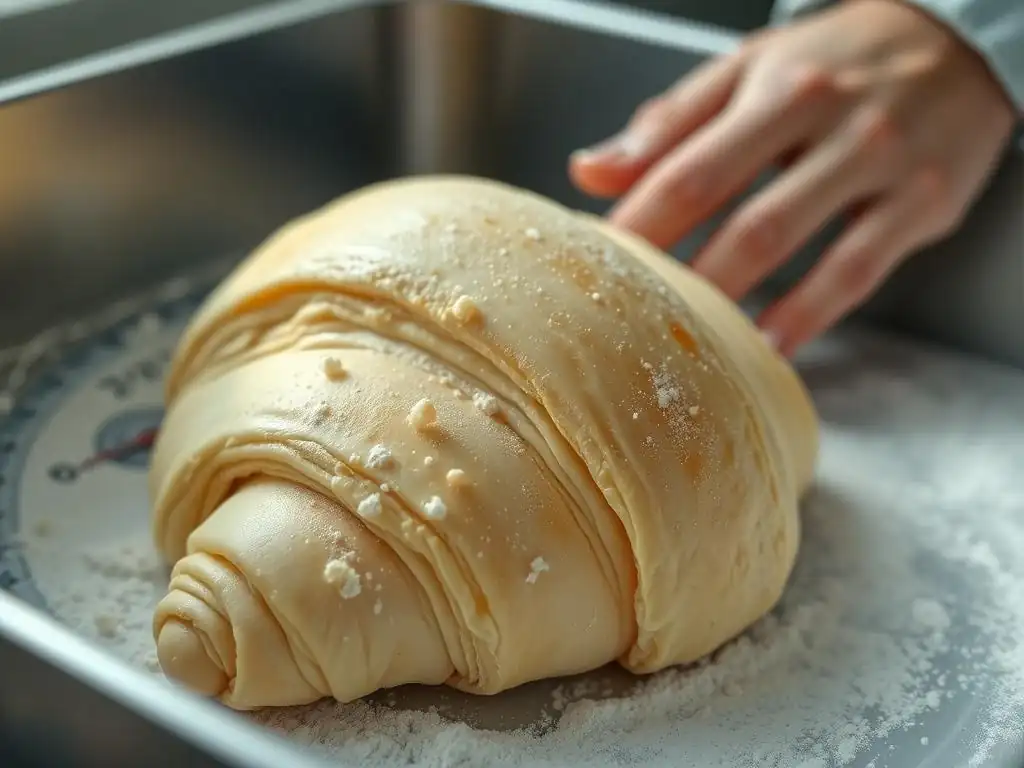
Moving beyond the basics, several advanced techniques can further enhance your croissant dough, leading to improved texture, flavor, and a more reliable rise. These methods often require a deeper understanding of dough rheology and fermentation but can significantly elevate the quality of your homemade croissants. Incorporating techniques like using a proofing box, autolyse, and focusing on gluten development can help you achieve professional-level results and consistently avoid yeast dough rising problems.
These techniques are not strictly necessary for baking good croissants, but they offer ways to optimize the process and troubleshoot specific issues. They demonstrate how interconnected different aspects of dough handling are, from ingredient mixing to final proofing, all impacting the yeast's ability to perform optimally and contribute to the desired outcome.
Utilizing a Proofing Box for Consistent Results
One of the biggest challenges in home baking, especially with sensitive doughs like croissants, is maintaining a consistent temperature and humidity for proofing. Fluctuating conditions can lead to uneven rise, skinning of the dough, and unpredictable fermentation rates, contributing to yeast dough rising problems. A proofing box, or even a makeshift one, provides a controlled environment, ensuring your dough rises consistently every time.
Commercial proofing boxes offer precise temperature and humidity settings. At home, you can create a simple proofing environment by placing your dough in a turned-off oven with the light on (which usually provides a gentle warmth around 80-85°F or 27-29°C) and a pan of hot water on the rack below to create humidity. Another method is to use a large plastic storage container with a bowl of hot water inside. Consistent temperature and humidity prevent the dough surface from drying out and ensure the yeast ferments at a steady rate, leading to a more predictable and successful rise.
Autolyse: Enhancing Dough Hydration and Gluten Strength
Autolyse is a technique where the flour and water from a recipe are mixed together and allowed to rest for 20-60 minutes before adding the yeast and salt. This resting period allows the flour to fully hydrate and enzymes present in the flour to begin breaking down proteins, which facilitates gluten development. While not always included in standard croissant recipes, performing an autolyse can lead to dough that is easier to handle, more extensible, and has a stronger gluten network capable of trapping more gas.
By allowing the flour to hydrate fully during the autolyse, you can sometimes incorporate slightly more water into the dough, leading to a lighter, more open crumb. The initial enzymatic action also means less mechanical kneading might be required to achieve sufficient gluten development. This stronger, more developed gluten structure is better equipped to support the layers during lamination and hold the gas produced by the yeast during proofing, contributing to a better rise and reducing potential yeast dough rising problems related to weak structure.
Gluten Development and its Relation to Rise
Gluten development is intrinsically linked to the dough's ability to rise effectively. Gluten is a protein network formed when two proteins in flour, glutenin and gliadin, combine with water and are worked (through mixing or kneading). This network provides the dough with elasticity and extensibility, allowing it to stretch and expand without tearing as the yeast produces carbon dioxide gas.
Sufficient gluten development creates a strong, flexible framework that can trap the gas bubbles produced by yeast. If the gluten is underdeveloped, the network is weak and cannot hold the gas, resulting in a dense dough with poor volume – a classic yeast dough rising problem. Conversely, over-developed gluten can become tight and difficult to work with. Achieving the right balance through proper mixing and kneading is crucial for ensuring the dough has the strength and elasticity needed to rise beautifully and support the delicate laminated structure of croissants.
Common Proofing Mistakes to Avoid
Even with the best recipe and ingredients, simple mistakes during the proofing process can lead to disappointing results and significant yeast dough rising problems. Being aware of these common pitfalls and taking steps to avoid them is essential for consistent success with your croissant baking. From misjudging the dough's readiness to exposing it to unfavorable conditions, each mistake can compromise the yeast's performance and the final outcome.
Paying close attention to the dough's appearance, feel, and environment during both bulk fermentation and final proof is key. Trusting your senses and understanding the signs of properly proofed dough will help you avoid these common errors and ensure your croissants develop that perfect rise and texture.
Recognizing Over-Proofed vs. Under-Proofed Dough
One of the most common yeast dough rising problems is misjudging when the dough is ready for the next step or baking.
- Under-proofed dough hasn't had enough time for the yeast to produce sufficient gas. It will feel dense and firm, spring back quickly when poked, and won't have significantly increased in volume. When baked, under-proofed croissants will be smaller, denser, and have a tighter crumb.
- Over-proofed dough has fermented for too long. The gluten structure becomes weakened, and the dough can't hold the gas anymore. It will look overly puffy, potentially have large, uneven bubbles on the surface, and may even start to collapse. When gently poked, it will leave a dent that doesn't spring back. Baking over-proofed croissants often results in a poor shape, collapsed layers, and sometimes a slightly alcoholic smell from excessive fermentation.
Learning to gently poke the dough (the "poke test") and observe the indentation's spring-back is a key skill in judging proofing readiness.
Protecting Dough from Drafts and Temperature Swings
Yeast activity is sensitive to environmental conditions, and exposing your dough to drafts or significant temperature swings can lead to uneven or stalled fermentation, exacerbating yeast dough rising problems. A cold draft can quickly cool the surface of the dough, slowing or stopping yeast activity in that area and potentially causing a tough skin to form.
Conversely, placing dough in an area that gets too hot, like next to a sunny window or directly on a warm appliance, can cause it to over-proof rapidly or even melt the butter layers in laminated dough like croissants. Always proof your dough in a consistent, draft-free environment. As mentioned earlier, a turned-off oven with the light on or a proofing box are excellent ways to provide a stable temperature and humidity. Covering the dough tightly with plastic wrap also helps prevent drying and protects it from drafts.
Balancing Salt and Sugar for Yeast Health
Salt and sugar are essential ingredients in croissant dough, contributing to flavor, crust color, and dough structure. However, both can impact yeast activity. Salt, while necessary for controlling fermentation speed and strengthening gluten, can inhibit yeast if too much is used or if it comes into direct contact with yeast for an extended period before mixing. Recipes typically call for salt at around 1.8-2% of the flour weight; significantly exceeding this can cause yeast dough rising problems.
Sugar provides food for the yeast, accelerating fermentation. However, in high concentrations (above 5-10% of flour weight), sugar can draw water out of yeast cells through osmosis, slowing down or inhibiting fermentation. This is where osmotolerant yeast can be beneficial. It's important to use the correct amounts of both salt and sugar as specified in a tested recipe and ensure they are distributed evenly during mixing to maintain yeast health and optimal activity throughout the proofing process.
Addressing Specific Proofing Challenges
Even when following a recipe carefully, you might encounter specific yeast dough rising problems. The dough might be fermenting too quickly or too slowly, or the final baked croissants might be denser than desired. Understanding how to diagnose and address these specific challenges can help you fine-tune your process and improve your results over time.
Troubleshooting often involves adjusting temperature, time, or occasionally, the yeast quantity in subsequent batches. Keeping detailed notes in a baking log (as discussed later) can be invaluable for identifying patterns and understanding what adjustments are most effective for your specific kitchen environment and ingredients.
Reducing Rapid Fermentation
If your croissant dough is fermenting too quickly, leading to over-proofing or difficulty managing the dough, the primary culprit is usually temperature. The dough is likely too warm during bulk fermentation or final proof. To slow down rapid fermentation and prevent yeast dough rising problems:
- Reduce the ambient temperature where the dough is proofing. Move it to a cooler spot in your kitchen, or use a cooler section of your refrigerator for bulk fermentation if the recipe allows.
- Consider using slightly cooler water when activating or mixing the yeast (within the acceptable range, e.g., 70-80°F or 21-27°C).
- If using instant yeast and fermentation is consistently too fast, you might slightly reduce the amount of yeast in your next batch, perhaps by 10-15%.
- Ensure your cold fermentation (retarding) in the refrigerator is at the correct temperature (35-40°F or 2-4°C); a warmer fridge will lead to faster fermentation during this crucial period.
Accelerating Slow Fermentation
If your croissant dough is rising too slowly, taking much longer than the recipe suggests, or barely rising at all (assuming you've verified yeast viability), the issue is most likely temperature. The dough is too cold. To accelerate slow fermentation and overcome yeast dough rising problems:
- Increase the ambient temperature where the dough is proofing. Find a warmer spot, use a proofing box, or utilize the oven-with-light-on method. Aim for temperatures in the optimal range (72-78°F or 22-26°C for bulk, 78-82°F or 26-28°C for final proof).
- Ensure the water or milk used in the dough is within the correct temperature range for activating yeast.
- If your kitchen is consistently cool, you might slightly increase the amount of yeast in your next batch, perhaps by 10-15%.
- Allow sufficient time for the dough to warm up slightly after cold fermentation before starting the final proofing stage, especially if your kitchen is cool.
Improving Dense Croissant Texture
A dense texture in baked croissants, despite appearing to rise during proofing, can stem from several yeast dough rising problems and structural issues. Insufficient rise due to inactive yeast or improper temperature control is a major factor, as discussed. However, even if the dough rises, a dense crumb can result from:
- Under-proofing: The dough didn't develop enough gas or structure before baking.
- Over-proofing: The gluten structure collapsed, causing the dough to deflate slightly or fail to expand properly in the oven.
- Poor lamination: The butter layers were not distinct or melted into the dough, preventing proper separation and steam lift during baking.
- Insufficient gluten development: The dough lacked the structure to support the rise and hold an open crumb.
- Incorrect baking temperature: The oven wasn't hot enough to create sufficient oven spring (the final rapid rise in the oven) or properly crisp the layers. Croissants are typically baked at relatively high temperatures, often starting around 400-425°F (200-220°C).
Address the specific issue based on how the dough behaved during proofing and lamination, focusing on temperature control, yeast viability, and proper dough handling techniques to improve density.
Alternative Proofing Techniques
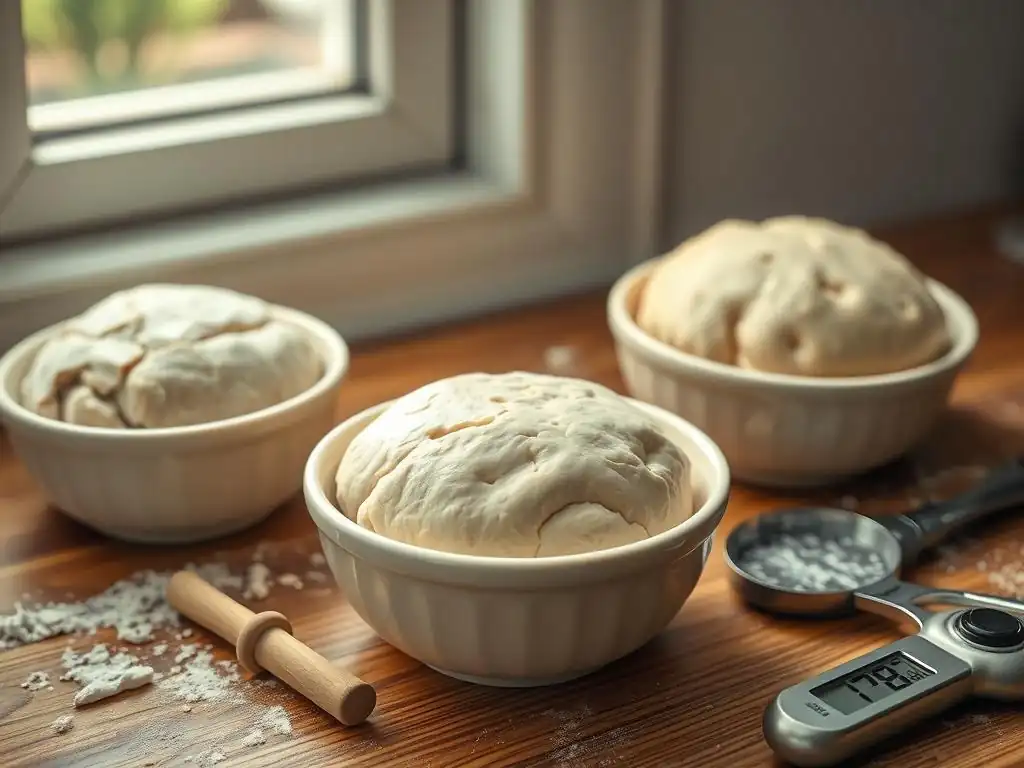
While traditional methods involving bulk fermentation and cold retarding are standard for classic croissants, exploring alternative proofing techniques can offer different flavor profiles and potentially simplify the process for home bakers. Sourdough croissants, for instance, utilize a different leavening agent entirely, while overnight proofing offers a convenient schedule and enhanced flavor development.
Understanding these alternatives can broaden your baking repertoire and provide solutions if you face persistent yeast dough rising problems with conventional methods or simply wish to experiment with different tastes and textures.
Sourdough Croissants: A Different Flavor Profile
Sourdough croissants replace or supplement commercial yeast with a sourdough starter, a symbiotic culture of wild yeasts and bacteria. This results in a slower fermentation process and a distinct tangy flavor profile characteristic of sourdough. The wild yeasts in the starter leaven the dough, while the lactic acid bacteria produce organic acids that contribute to the sour taste and improve the dough's keeping quality.
Making sourdough croissants typically involves feeding your starter, incorporating it into the dough, and then following a longer bulk fermentation (often several hours at room temperature) and a lengthy cold fermentation period (up to 24-48 hours) to allow the sourdough cultures to develop flavor and leaven the dough slowly. While they require patience and an active starter, sourdough croissants offer a unique taste and texture that many find appealing, providing an alternative approach to achieving a good rise without relying solely on commercial yeast.
Overnight Proofing: Enhancing Flavor Complexity
Overnight proofing, often referring to the final proof of shaped croissants, is a technique where the shaped pastries are placed in the refrigerator (at 35-40°F or 2-4°C) overnight, typically for 8-12 hours, instead of proofing at a warmer temperature for a shorter time. This extends the final rise, allowing for continued slow fermentation even after the main cold retard.
This extended, cold final proof allows for further development of complex flavors through the slow enzymatic activity, similar to the benefits of cold retarding the bulk dough. It also offers practical convenience, allowing you to shape the croissants one day and bake them fresh the next morning.
While not suitable for all recipes or yeast types (instant yeast can sometimes over-ferment too quickly even in the fridge), when done successfully, overnight proofing can lead to croissants with a deeper, more nuanced flavor and a potentially more open crumb structure due to the extended slow rise. Carefully monitoring the dough and adjusting the temperature is key to preventing yeast dough rising problems during this long proof.
Tips for Consistent Croissant Proofing Success
Achieving consistently perfect croissant proofing requires attention to detail throughout the entire process, not just during the rise itself. From the initial measurement of ingredients to understanding the subtle cues your dough provides, developing good habits and keen observation skills will significantly reduce yeast dough rising problems and improve your baking outcomes batch after batch.
These tips focus on precision, observation, and reflection, guiding you towards mastering the art of proofing delicate laminated doughs. By implementing these practices, you'll gain confidence and control over the fermentation process, leading to more reliable and delicious croissants.
Precise Ingredient Measurement for Consistent Results
Accurate measurement is fundamental in baking, and it's especially critical when working with yeast dough and delicate pastries like croissants. Small variations in the amount of flour, liquid, yeast, salt, or sugar can significantly impact the dough's hydration, structure, and the rate of yeast activity, leading to unpredictable yeast dough rising problems.
Using a digital kitchen scale to weigh all your ingredients, especially flour (as volume measurements can vary wildly), is the best way to ensure consistency. Weighing yeast, salt, and sugar ensures you're using the exact amounts specified in the recipe, preventing issues like inhibited yeast from too much salt or sugar, or insufficient rise from too little yeast. Precise measurements provide a reliable starting point for every batch, making it easier to troubleshoot if issues arise.
Developing Dough Feel: Recognizing Proper Development
Beyond following recipe instructions, developing a tactile understanding of properly developed dough is invaluable. As you mix and knead your croissant dough, pay attention to how it feels. Initially, it will be shaggy and sticky. As gluten develops, it will become smoother, more elastic, and less sticky. A well-developed dough should be extensible but also have enough tension to hold its shape.
During proofing, observe the dough's texture and elasticity. Under-proofed dough feels dense and tight. Properly proofed dough feels light, slightly airy, and elastic but delicate. Over-proofed dough feels overly soft, potentially sticky, and lacks resistance. Learning to recognize the signs of proper dough development and proofing readiness by feel and appearance is a skill that comes with practice and is crucial for preventing yeast dough rising problems. The "poke test" is a key part of this – gently pressing the dough surface and observing how quickly the indentation springs back.
Maintaining a Baking Log for Improvement
To truly master croissant proofing and consistently avoid yeast dough rising problems, consider keeping a baking log. Document details for each batch, including:
- Date and recipe used.
- Ingredient weights and types (e.g., specific brand of flour, type of yeast).
- Water/milk temperature used for yeast activation/mixing.
- Kitchen ambient temperature during mixing, bulk fermentation, and final proof.
- Start and end times for bulk fermentation, retarding, and final proof.
- Observations about dough behavior at each stage (e.g., how quickly it rose, dough feel).
- Notes on lamination process (e.g., butter temperature, how easy dough was to work).
- Baking temperature and time.
- Results (e.g., crumb structure, flavor, rise, flakiness, any yeast dough rising problems encountered).
Reviewing this log helps you identify patterns, understand what worked well or where problems occurred, and make informed adjustments for future batches. Did the dough over-proof when your kitchen was warmer? Did using a specific brand of yeast yield faster results? This data-driven approach is powerful for continuous improvement.
Conclusion: Mastering Croissant Proofing for Exceptional Results
Mastering the art of baking croissants, particularly the critical proofing stages, is a journey that requires patience, practice, and a deep understanding of how yeast behaves. By paying careful attention to yeast viability, temperature control, proper dough handling, and recognizing the signs of correctly proofed dough, you can significantly reduce common yeast dough rising problems. From the initial activation of yeast to the delicate final rise of shaped pastries, each step contributes to the ultimate success of your croissants.
Embracing techniques like cold fermentation for flavor development, utilizing tools like proofing boxes for consistency, and learning to troubleshoot specific challenges will elevate your baking skills. Remember that baking is both a science and an art; while precision is key, developing intuition about your dough is equally important. With persistence and attention to the details outlined here, you'll be well on your way to baking beautiful, flaky croissants with consistent and reliable rise, bringing the joy of this classic pastry into your home kitchen.
Frequently Asked Questions
What are the most common reasons for yeast dough rising problems when making croissants?
The most common issues involve incorrect yeast temperature, poor gluten development, or unsuitable room temperature for proofing. Addressing these will significantly improve your results.
How do I know if my yeast is active and ready to use in my croissant dough?
You can proof your yeast by mixing it with warm water and a bit of sugar. If it foams within 5-10 minutes, it's active and viable; otherwise, it's best to use fresh yeast.
What is the ideal temperature range for proofing croissant dough to ensure proper rising?
The ideal proofing temperature is typically between 75-80°F (24-27°C). Too cold and the dough will rise very slowly; too warm and the butter might melt.
My croissant dough rose initially, but then collapsed. What caused this, and how can I prevent it?
This collapse is often due to over-proofing. Reduce the proofing time or lower the proofing temperature slightly to prevent this from happening.
Can the type of flour I use affect how well my croissant dough rises?
Yes, absolutely. Using high-protein flour (like bread flour) is crucial for developing the necessary gluten structure to support the layers and rise in croissant dough.
Final Reflection: The Humble Yeast, the Bountiful Rise
Understanding the nuances of yeast is not merely a baking skill; it's a gateway to understanding the delicate balance of nature within our kitchens. A perfectly risen croissant, a fluffy loaf of bread – these are testaments to the power of microscopic life and the precision required to harness it. The seemingly simple act of baking becomes a profound exploration of biology and patience, a lesson in respecting the natural processes that bring our food to life.
The journey of yeast, from dormant powder to vibrant activity, mirrors our own personal growth. It requires the right conditions – warmth, nourishment, and time – to flourish. This resonates deeply with me, as I've found that many of life's most rewarding endeavors follow a similar pattern. Patience is a virtue,
the old adage goes, and nowhere is this truer than in the art of baking with yeast. The wait, the anticipation, and the eventual reward of a perfectly risen dough are a beautiful metaphor for the patience required in achieving our goals.
Now, consider your own "dough." What projects, dreams, or relationships require the same nurturing care and attention that yeast demands? What conditions are you providing to allow them to rise to their full potential? I encourage you to reflect on this, to identify the "warmth" and "nourishment" needed for your own personal growth, and to embrace the process with the same patience and understanding you would bring to a batch of croissant dough. The rewards, I promise, will be equally delicious.
Unleash Your Inner Baker: Rise to the Croissant Challenge!
Thanks for taking the time to explore the wonderful world of yeast and croissants! We hope you now feel confident in tackling even the flakiest pastries. Ready to put your new knowledge to the test?
- Bake a batch of croissants: Use this newfound yeast wisdom to create your own perfect croissants. Don't be afraid to experiment!
- Share your baking journey: Post a picture of your croissant creations on social media and tag us – we'd love to see them!
- Explore other BakeWithEase recipes: Discover more delicious baking adventures that will help you master the art of the perfect bake.
What unique twist will you add to your next croissant creation? Let's hear your ideas in the comments below!