
Making Croissant Dough in Your Stand Mixer: Easy Start


Welcome to BakeWithEase, where the joy of baking is always within reach! Ever dreamt of flaky, buttery croissants but felt intimidated by the process? Prepare to be amazed! Discover our guide to crafting an easy stand mixer croissant dough, demystifying this classic pastry and bringing the taste of a Parisian bakery right to your kitchen. Intrigued? Let's get started and unlock the secrets to perfect croissants, made simpler than you ever imagined!
- Making Croissant Dough in Your Stand Mixer: An Easy Start with BakeWithEase
- BakeWithEase Presents: Effortless Croissant Dough with a Stand Mixer
- Why Choose a Stand Mixer for Your Croissant Dough?
- Easy Stand Mixer Croissant Dough Recipe: Ingredients and Equipment
-
Step-by-Step Guide: Making Croissant Dough in Your Stand Mixer
- Step 1: Combining the Dry Ingredients in Your Stand Mixer
- Step 2: Adding Wet Ingredients and Initial Mixing
- Step 3: Developing the Dough: Kneading with Your Stand Mixer
- Step 4: The First Rise: Bulk Fermentation for Flavor
- Step 5: Preparing the Butter Block: Achieving the Right Consistency
- Step 6: Lamination: Incorporating the Butter into the Dough
- Step 7: Folding Techniques for Flaky Croissants
- Step 8: Chilling and Resting the Dough
- Step 9: Shaping and Proofing Your Croissants
- Step 10: Baking Your Stand Mixer Croissant Dough
- Troubleshooting Common Stand Mixer Croissant Dough Issues
- Tips and Tricks for the Best Stand Mixer Croissant Dough
- Enjoy Your Homemade Croissants!
- Beyond the Basics: Advanced Croissant Techniques
-
Frequently Asked Questions
- How much easier is making croissant dough with a stand mixer compared to by hand?
- What specific stand mixer attachment is best for making croissant dough?
- Can I use all-purpose flour for this "Easy stand mixer croissant dough" recipe, or is bread flour necessary?
- What's the most important thing to avoid when making croissant dough in a stand mixer?
- How long does it generally take to make croissant dough from start to finish using a stand mixer?
- Final Reflection: The Joy of Accessible Pastry
- Unleash Your Inner Baker: Craft Perfect Croissants!
Making Croissant Dough in Your Stand Mixer: An Easy Start with BakeWithEase
BakeWithEase Presents: Effortless Croissant Dough with a Stand Mixer
Welcome to Intermediate Baking: Mastering Croissants at Home
Welcome, fellow baking enthusiasts! If you've mastered the basics like simple cookies and quick breads, you might feel ready to tackle a slightly more challenging, yet incredibly rewarding, pastry: the croissant. This journey into intermediate baking often feels daunting, but with the right tools and guidance, creating beautiful, flaky croissants at home is absolutely achievable. At BakeWithEase, we believe that complex pastries can be made accessible, and starting with an easy stand mixer croissant dough recipe is a fantastic way to build your skills and confidence.
Stepping up to croissants introduces you to fundamental techniques like lamination, which involves creating alternating layers of dough and butter. This process is what gives croissants their signature airy, flaky texture.
While traditional methods involve extensive hand kneading and rolling, leveraging modern kitchen equipment like a stand mixer can significantly simplify the initial dough preparation, making the overall process less physically demanding and more consistent, paving the way for a truly easy stand mixer croissant dough experience. We'll guide you through each step, ensuring you understand the 'why' behind the techniques, making this seemingly complex pastry well within your reach.
Why Choose a Stand Mixer for Your Croissant Dough?
The Benefits of Using a Stand Mixer for Croissant Dough
Using a stand mixer for your croissant dough offers several key advantages, particularly when aiming for an easy stand mixer croissant dough. Firstly, it significantly reduces the physical effort required for kneading. Developing the necessary gluten structure for croissant dough by hand can take 10-15 minutes of vigorous work, which can be tiring. A stand mixer, equipped with a dough hook, can often achieve the same level of gluten development in a shorter time, typically 6-10 minutes, depending on the mixer's power and speed settings. This saved energy can be better spent on the crucial lamination steps later on.
Secondly, a stand mixer provides unparalleled consistency in kneading. Its continuous, uniform motion ensures that the dough is worked evenly throughout. This consistency is vital for developing a smooth, elastic dough that can withstand the stretching and folding required during lamination without tearing. Hand kneading, while effective, can vary in pressure and speed, potentially leading to uneven gluten development. For an easy stand mixer croissant dough, this consistent start lays a strong foundation for successful layering and a beautifully flaky finished product.
Achieving Consistent Results with Your Stand Mixer
Consistency is paramount when making croissant dough, and a stand mixer excels in this area. The machine maintains a steady speed and rhythm, ensuring that the dough is kneaded uniformly. This means you're less likely to end up with areas of underdeveloped gluten, which can lead to tough or uneven layers in the final croissant.
Furthermore, a stand mixer allows you to monitor the dough's development more easily. You can observe the dough's texture and elasticity as it kneads, stopping precisely when the desired windowpane effect (where a small piece of dough can be stretched thinly without tearing) is achieved.
Moreover, using a stand mixer helps maintain a lower dough temperature during the initial mixing phase. Friction from kneading generates heat, and keeping the dough cool is crucial before incorporating the butter block. While hand kneading can warm the dough quickly, a stand mixer often generates less heat over the necessary kneading time, especially if you use chilled liquids. This control over temperature contributes significantly to creating an easy stand mixer croissant dough that is ready for the next cold stages of lamination, where maintaining firm butter layers is key to flakiness.
Easy Stand Mixer Croissant Dough Recipe: Ingredients and Equipment
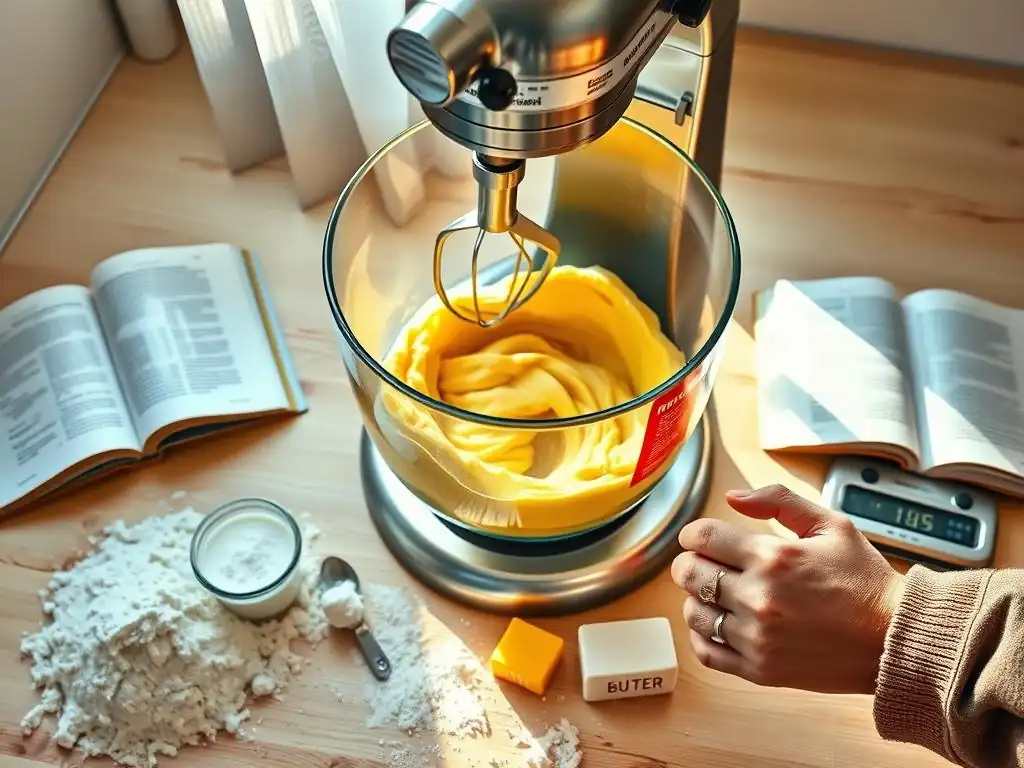
Essential Ingredients for Perfect Croissant Dough
To make delicious, flaky easy stand mixer croissant dough, you'll need a few high-quality ingredients. The foundation is typically bread flour, which has a higher protein content (around 12-14%) compared to all-purpose flour (around 10-12%). This higher protein is crucial for developing the strong gluten network needed to create those delicate layers. You'll need about 500 grams of bread flour for a standard batch, though specific recipes may vary slightly.
Beyond flour, other key ingredients include granulated sugar, salt, active dry or instant yeast, cold water or milk, and most importantly, high-quality unsalted butter. For lamination, butter with a high butterfat content (ideally 82% or more) is highly recommended. This type of butter is firmer and more pliable when cold, reducing the risk of melting or leaking during the rolling and folding process.
You'll need a significant amount of butter for the butter block, often around 250-300 grams, depending on the recipe's hydration and desired butter-to-dough ratio. Using cold liquids for the initial dough mix also helps control temperature, contributing to an easy stand mixer croissant dough process.
Must-Have Equipment for Stand Mixer Croissant Dough Preparation
Having the right tools makes the process of creating easy stand mixer croissant dough significantly smoother. The most essential piece of equipment, as the title suggests, is a stand mixer with a dough hook attachment. A mixer with a powerful motor (at least 300 watts) is beneficial for handling the relatively stiff dough. A standard kitchen scale is absolutely crucial for accurately measuring ingredients by weight, which is far more precise than volume measurements in baking, especially for dough hydration.
Other necessary tools include a large mixing bowl (for the first rise), a rolling pin (preferably a heavy, non-stick one), a bench scraper (invaluable for handling and dividing dough), plastic wrap (for chilling and resting), and baking sheets lined with parchment paper. A sharp knife or a pastry wheel is needed for cutting the dough into shapes.
While not strictly essential, a large ruler or measuring tape can help ensure consistent sizing when cutting the dough triangles, leading to uniformly sized croissants. Having these tools ready before you begin ensures a streamlined and more enjoyable baking experience with your easy stand mixer croissant dough.
Step-by-Step Guide: Making Croissant Dough in Your Stand Mixer
Step 1: Combining the Dry Ingredients in Your Stand Mixer
Begin your easy stand mixer croissant dough journey by adding the dry ingredients to the bowl of your stand mixer. Measure your bread flour, sugar, salt, and yeast accurately using a digital scale. For example, a typical recipe might call for 500g bread flour, 60g sugar, 10g salt, and 7g instant yeast. Place the mixing bowl onto your stand mixer base.
Ensure the dough hook attachment is securely fitted onto your stand mixer. Add all the measured dry ingredients directly into the mixing bowl. Use a whisk attachment or briefly pulse the mixer on the lowest speed for just a few seconds to combine these dry components thoroughly. This initial mixing ensures that the salt and yeast are evenly distributed throughout the flour, which is important for proper gluten development and fermentation in your easy stand mixer croissant dough.
Step 2: Adding Wet Ingredients and Initial Mixing
Once the dry ingredients are combined, it's time to introduce the cold wet ingredients. Measure the specified amount of cold water or milk. Using cold liquid is important to keep the dough temperature low during mixing, which is crucial for an easy stand mixer croissant dough that will be laminated later. A standard recipe might use around 280-300ml of cold liquid.
Pour the cold liquid into the mixing bowl with the dry ingredients. Attach the dough hook if you used a whisk in the previous step. Start the mixer on the lowest speed (Speed 1 or 2 on most mixers) to bring the ingredients together. Mix until a shaggy dough forms and there are no pockets of dry flour left. This initial mix should only take 1-2 minutes. The dough will look rough and sticky at this stage, which is perfectly normal for an easy stand mixer croissant dough recipe starting point.
Step 3: Developing the Dough: Kneading with Your Stand Mixer
After the ingredients have just come together, increase the mixer speed slightly to a low-medium setting (Speed 2 or 3). Allow the mixer to knead the dough. The dough will initially stick to the sides of the bowl, but as gluten develops, it should start to pull away, cleaning the sides. Knead for the time specified in your recipe, typically between 6 and 10 minutes for a stand mixer.
During kneading, monitor the dough's consistency. It should become smoother and more elastic. You can perform the "windowpane test" to check for sufficient gluten development: carefully pinch off a small piece of dough, and gently stretch it between your fingers. If it stretches into a thin, translucent membrane without tearing, the gluten is well-developed. If it tears easily, continue kneading for another minute or two and test again. Proper gluten development at this stage is key for the successful lamination of your easy stand mixer croissant dough.
Step 4: The First Rise: Bulk Fermentation for Flavor
Once the dough has been kneaded to the desired consistency, it's time for the first rise, also known as bulk fermentation. This stage allows the yeast to begin producing carbon dioxide, which creates air pockets, and helps develop flavor in the dough. Remove the dough from the stand mixer bowl and shape it into a rough ball.
Place the dough ball into a lightly oiled bowl (you can use the cleaned stand mixer bowl). Cover the bowl tightly with plastic wrap or a damp towel. Let the dough rise in a cool place, ideally around 18-21°C (65-70°F), for about 1 to 1.5 hours, or until it has nearly doubled in size. Alternatively, for a more flavorful dough, you can place it in the refrigerator overnight (8-12 hours) for a slow, cold fermentation. This cold rest also makes the dough easier to handle for the next steps of your easy stand mixer croissant dough process.
Step 5: Preparing the Butter Block: Achieving the Right Consistency
While the dough is undergoing its first rise, prepare the butter block. This is a crucial component of the lamination process for your easy stand mixer croissant dough. Take your cold, high-quality butter (e.g., 250g) and place it between two sheets of parchment paper or inside a large plastic bag.
Using a rolling pin, gently but firmly beat the butter to soften it slightly without melting. This makes it more pliable. Then, roll the butter into a flat, rectangular block, typically around 18cm x 25cm (7 inches x 10 inches) or a size specified by your recipe, ensuring even thickness (around 5-7mm or 1/4 inch). The goal is to have a butter block that is cold but pliable – it should bend without breaking. If it's too hard, it will break through the dough during rolling; if too soft, it will melt into the dough.
Step 6: Lamination: Incorporating the Butter into the Dough
Lamination is the process of creating layers of dough and butter. This is arguably the most critical step for achieving flaky croissants from your easy stand mixer croissant dough. After the first rise (and chilling, if using a cold fermentation), gently punch down the dough and roll it out on a lightly floured surface into a rectangle that is roughly twice the size of your butter block. For example, if your butter block is 18x25cm, roll the dough to approximately 36x25cm.
Place the prepared butter block onto one half of the rolled-out dough rectangle, leaving a small border around the edges. Fold the other half of the dough over the butter block, carefully sealing the edges to fully enclose the butter. Ensure the butter is completely encased in dough. This creates the first "layer" of butter within the dough, setting the stage for the subsequent folds that will multiply these layers.
Understanding the Importance of Lamination
Lamination is the heart of a flaky pastry like a croissant. It involves repeatedly folding and rolling the dough and butter together to create hundreds of alternating thin layers. During baking, the water in the butter turns to steam, which forces the layers of dough apart, creating that signature airy, crisp texture. Without proper lamination, your easy stand mixer croissant dough would bake into a bread-like texture rather than a light, flaky pastry.
The success of lamination depends on maintaining both the dough and the butter at the correct temperature and consistency. The dough needs to be elastic enough to roll without tearing, while the butter needs to be cold and firm enough to remain as distinct layers rather than melting into the dough. Each fold multiplies the number of layers; for example, after enclosing the butter, a single fold creates 3 layers (dough/butter/dough), and subsequent double or single folds increase this exponentially, ultimately resulting in hundreds of potential layers in the final pastry.
Step 7: Folding Techniques for Flaky Croissants
After enclosing the butter, you begin the folding process. There are two primary folding techniques used in making easy stand mixer croissant dough: the single fold and the double fold (also called a book fold). These folds are repeated, with chilling periods in between, to build the layers.
Typically, a standard croissant dough requires a total of three turns (folds). This might be three single folds, or a combination like one double fold followed by one or two single folds. The number and type of folds determine the total number of layers created.
For example, three single folds result in 3^3 = 27 layers, while one double fold (4 layers) followed by two single folds (x3, x3) results in 4 * 3 * 3 = 36 layers. More layers generally lead to a flakier texture, but too many can make the layers too thin and prone to tearing.
The Single Fold Explained
The single fold is straightforward. After rolling the dough and butter block into a long rectangle (typically about 3 times as long as it is wide), imagine dividing the rectangle into three equal sections horizontally. Fold one end section over the middle section. Then, fold the remaining end section over the top of the folded sections, like folding a letter.
This process creates three layers of dough separated by two layers of butter. After completing a single fold on your easy stand mixer croissant dough, wrap the dough tightly in plastic wrap and refrigerate it for at least 30-60 minutes to allow the butter to firm up and the gluten to relax before the next roll and fold. Mark the dough (e.g., by pressing a finger into it) to indicate how many folds you've completed.
The Double Fold Explained
The double fold, or book fold, creates more layers in a single step but requires a longer rectangle. After rolling the dough and butter block into a rectangle that is about 4 times as long as it is wide, imagine dividing the rectangle into four equal sections horizontally. Fold both ends inwards so their edges meet precisely in the center of the rectangle.
Then, fold the entire rectangle in half along the center line where the two edges meet, like closing a book. This technique creates four layers of dough separated by three layers of butter. A double fold is more efficient for building layers quickly but can be slightly more challenging to execute cleanly than a single fold. After performing a double fold on your easy stand mixer croissant dough, wrap it well and chill it for at least 60 minutes before the next step.
Step 8: Chilling and Resting the Dough
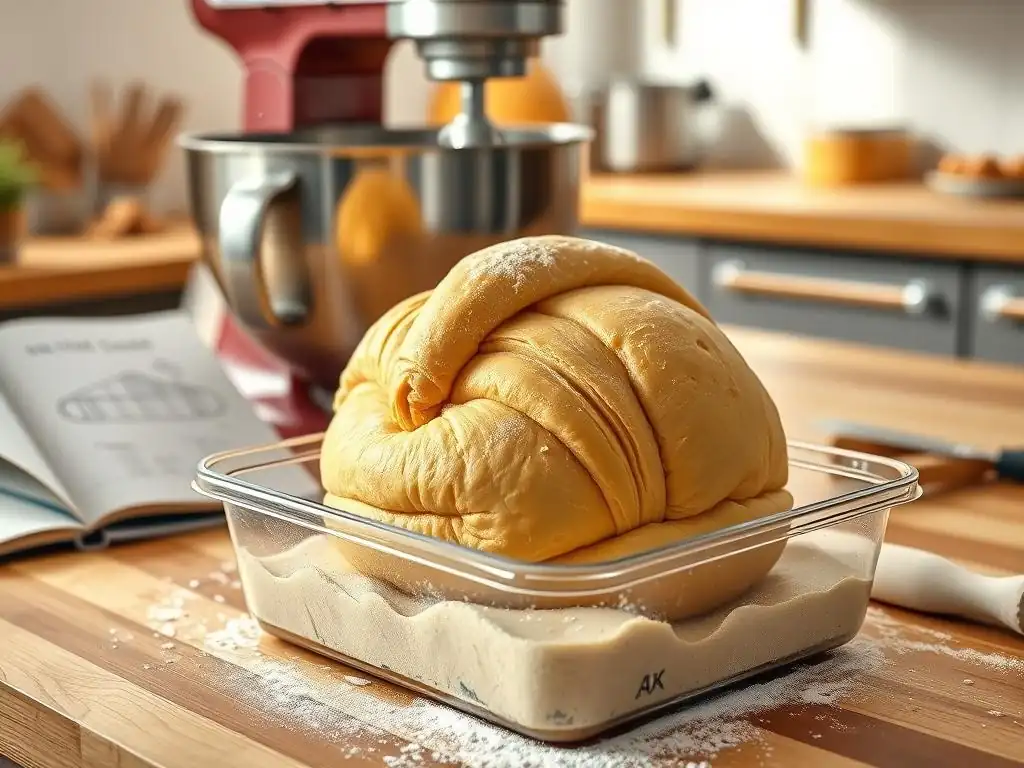
Chilling is a non-negotiable step in making successful easy stand mixer croissant dough. After each fold (whether single or double), the dough must be chilled in the refrigerator. This serves two critical purposes: firming up the butter and allowing the gluten in the dough to relax.
If the butter is too warm, it will melt into the dough during rolling, destroying the distinct layers needed for flakiness. If the dough's gluten network hasn't had time to relax after being stretched during rolling, it will resist being rolled out smoothly in the next step, leading to uneven layers or tearing.
A minimum chilling time of 30-60 minutes between folds is usually required, but longer chilling (up to several hours or even overnight) can be beneficial, especially if your kitchen is warm or you're new to the process. Proper chilling ensures your easy stand mixer croissant dough handles beautifully during the final rolling and shaping.
Step 9: Shaping and Proofing Your Croissants
Once all the required folds and final chilling period are complete, your easy stand mixer croissant dough is ready for shaping and proofing. Remove the dough from the refrigerator and roll it out to its final thickness and dimensions, typically a large rectangle about 3-4mm (1/8 to 1/6 inch) thick. Be gentle and roll evenly to maintain the layers.
Trim the edges of the rectangle to expose the layers (these scraps can be baked off as 'croissant bites'). Cut the dough into triangles. The base width of the triangle determines the size of your croissant; a common base is 8-10 cm (3-4 inches), with a length of 20-25 cm (8-10 inches). Make a small notch or slit (about 1-2 cm) in the center of the base of each triangle.
Shaping Techniques for Classic Croissant Forms
Shaping the classic crescent roll involves starting at the notched base of the triangle. Gently pull the base slightly apart to create a wider starting point. Then, starting from the base, tightly roll the triangle up towards the point.
As you roll, gently stretch the point of the triangle slightly. Once rolled, curve the ends inwards to create the traditional crescent shape. Place the shaped croissants on baking sheets lined with parchment paper, leaving ample space between them as they will expand significantly during proofing and baking. For an easy stand mixer croissant dough, getting the shaping right sets the stage for beautiful final pastries.
Step 10: Baking Your Stand Mixer Croissant Dough
After shaping, the croissants need to proof (rise) before baking. This final rise is crucial for achieving a light, airy interior. Place the baking sheets with the shaped croissants in a warm, humid environment, ideally around 24-27°C (75-80°F) with about 70-80% humidity.
A common method is to place them in a slightly warm oven (turned off) with a pan of hot water on the rack below. Proofing can take 1.5 to 3 hours, depending on the temperature and humidity. The croissants are ready when they look visibly puffed up and jiggly, but not doubled in size, and the layers are visible but still distinct.
Before baking, gently brush the tops of the proofed croissants with an egg wash (one egg whisked with a tablespoon of milk or water). This gives them a beautiful golden-brown color and shine. Preheat your oven to a hot temperature, typically between 190-220°C (375-425°F), depending on your oven and recipe.
Achieving a Golden-Brown Crust
Bake the croissants in the preheated oven. The baking time will vary depending on their size and your oven, but it's typically between 15 and 25 minutes. The high initial temperature helps create steam from the butter, which lifts the layers, and sets the structure. Some recipes recommend reducing the temperature slightly after the first 10-15 minutes to ensure the interior cooks through without the exterior burning.
Your easy stand mixer croissant dough pastries are done when they are deeply golden brown all over, including the sides. A pale croissant is likely underbaked and will lack the desired flaky texture. The internal temperature should reach around 93-96°C (200-205°F). Carefully remove the croissants from the oven and let them cool slightly on the baking sheet before transferring them to a wire rack. Patience during baking yields that perfect crisp exterior and tender, airy interior.
Troubleshooting Common Stand Mixer Croissant Dough Issues
Even with an easy stand mixer croissant dough recipe, you might encounter challenges. Understanding common issues and their fixes can save your batch.
Dough Too Sticky?
If your dough remains excessively sticky after kneading in the stand mixer, even after the recommended time, it could be due to several factors. The most common cause is too much liquid relative to the flour, or inaccurate measuring. Humidity can also play a role, causing the flour to absorb more moisture from the air.
To fix this, you can try adding a very small amount of flour (a tablespoon at a time) while the mixer is on low speed, allowing it to incorporate fully before adding more. Be cautious not to add too much, as it can make the dough tough. Ensure you are weighing your ingredients precisely using a scale, as volume measurements for flour can be highly inaccurate, leading to inconsistent dough hydration. Proper ingredient ratios are key to an easy stand mixer croissant dough.
Dough Not Rising?
If your easy stand mixer croissant dough isn't rising sufficiently during bulk fermentation or proofing, several factors could be at play. The most likely culprit is inactive or dead yeast. Check the expiration date of your yeast and ensure it hasn't been stored improperly (e.g., in a warm, humid place). You can test active dry yeast by dissolving it in warm water (around 40-45°C / 105-115°F) with a pinch of sugar; it should become foamy within 5-10 minutes if active.
Another reason could be the temperature of your proofing environment. Yeast is most active within a specific temperature range. If it's too cold (below 20°C / 68°F), fermentation will be very slow. If it's too hot (above 50°C / 122°F), the yeast can be killed. Ensure your proofing area is warm but not hot, ideally around 24-27°C (75-80°F). Also, ensure you haven't used liquids that were too hot during mixing, as this can also kill the yeast.
Butter Leaking During Lamination?
Butter leaking out of your dough during rolling and folding is a common and frustrating issue when making easy stand mixer croissant dough. This primarily happens when the butter is too soft or the dough is too warm. The butter melts and seeps out instead of staying in distinct layers.
The key to preventing leaks is temperature control. Ensure both the dough and the butter block are adequately chilled before and between each fold. The butter block should be firm but still pliable, not rock hard or greasy. If you notice the butter starting to break through or the dough becoming difficult to roll, stop immediately, wrap the dough well, and return it to the refrigerator for at least 30-60 minutes to firm up before attempting to roll again. Working quickly and efficiently during the rolling process also helps keep everything cool.
Tips and Tricks for the Best Stand Mixer Croissant Dough
Beyond the basic steps, a few extra tips can elevate your easy stand mixer croissant dough from good to great.
Temperature Control: Key to Success
We've mentioned it before, but it bears repeating: temperature control is absolutely paramount when working with easy stand mixer croissant dough. From the initial mixing of the dough to the final proofing, maintaining the correct temperature is crucial for success. Use cold liquids (water or milk) in the dough mix to keep the initial dough temperature low, ideally below 24°C (75°F).
Throughout the lamination process, frequent chilling is essential. The dough and butter should be cold (around 4-6°C / 39-43°F) but pliable enough to roll without tearing. If your kitchen is warm (above 21°C / 70°F), you may need to chill the dough for longer periods between folds, perhaps 60-90 minutes instead of 30. Using a marble or granite pastry board, if available, can also help keep the dough cool during rolling due to its naturally low temperature.
Choosing the Right Flour for Croissants
While many recipes specify bread flour for easy stand mixer croissant dough, the exact type of flour can influence the final texture. Bread flour with a protein content around 12-14% provides a strong gluten structure capable of supporting the many layers and achieving a good rise. However, some bakers prefer a blend of bread flour and all-purpose flour (e.g., 75% bread flour, 25% all-purpose) to achieve a slightly more tender crumb while retaining sufficient strength for lamination.
Experimenting with different brands of flour is also worthwhile, as protein content can vary. Ensure your flour is fresh and stored properly. Using a scale to measure flour is critical, as scooping flour directly from the bag can pack it down, resulting in significantly more flour by weight than intended and leading to a dry, tough dough that is difficult to laminate successfully. Accurate measurement is the first step to a truly easy stand mixer croissant dough.
Mastering the Proofing Process
Proofing is the final rise before baking and is essential for a light, airy interior crumb. Underproofed croissants will be dense and heavy, while overproofed ones may collapse in the oven or lose their shape, with layers blurring together. The ideal proofing environment is warm and humid. Aim for a temperature of 24-27°C (75-80°F) and a relative humidity of 70-80%.
Proofing time varies greatly depending on the temperature; it could take anywhere from 1.5 to 3 hours. A good visual indicator is that the croissants should look significantly puffed, about 1.5 times their original size, and feel light and airy. The layers should still be visible and distinct.
If you gently shake the baking sheet, the croissants should jiggle slightly. Avoid proofing at too high a temperature, as this can melt the butter before baking, leading to butter leakage and loss of layers. Patience during this final stage is key to unlocking the full potential of your easy stand mixer croissant dough.
Enjoy Your Homemade Croissants!
After the effort of making your easy stand mixer croissant dough and seeing those beautiful pastries emerge golden and flaky from the oven, the best part is finally here: enjoying them!
Serving Suggestions and Creative Variations
Classic croissants are best enjoyed warm, perhaps simply sliced open and spread with butter and jam. They pair wonderfully with coffee or tea for a delightful breakfast or brunch. However, the possibilities extend far beyond the classic.
Consider turning your easy stand mixer croissant dough into pain au chocolat by enclosing dark chocolate batons before shaping. Or, make almond croissants by filling them with frangipane (almond cream) after baking and topping with sliced almonds and powdered sugar. Savory options include filling them with ham and cheese before rolling or topping with herbs and flaky salt. Don't be afraid to experiment with fillings like pastry cream, fruit preserves, or even savory combinations like spinach and feta to make your easy stand mixer croissant dough creations uniquely yours.
Storing Your Freshly Baked Croissants
Freshly baked croissants are undoubtedly at their peak texture and flavor within a few hours of coming out of the oven. However, if you have leftovers (a rare occurrence! ), they can be stored.
Cool completely before storing. Place them in an airtight container at room temperature for up to 1-2 days. To refresh them, warm them in a preheated oven at 180°C (350°F) for 5-10 minutes until crisp again.
For longer storage, cooled croissants can be frozen in an airtight container or freezer bag for up to 1-2 months. Thaw at room temperature and then warm in the oven to restore some of their flakiness. While freezing is possible, the texture may not be quite as light as when fresh, highlighting the joy of baking small batches of easy stand mixer croissant dough as needed.
Beyond the Basics: Advanced Croissant Techniques
Once you've mastered the easy stand mixer croissant dough recipe and feel comfortable with the lamination process, you might be ready to explore more advanced techniques to further refine your croissant-making skills.
Exploring Different Flours for Unique Flavors
While bread flour is standard for its gluten strength, experimenting with other flours can impart unique flavors and textures to your croissants. Using a small percentage of whole wheat flour (perhaps 10-15% of the total flour weight) can add nutty undertones and increased nutritional value, though it may result in a slightly less open crumb due to the bran interfering with gluten development.
Some bakers also explore regional or specialty flours, like French T55 flour, which is traditionally used for viennoiseries. T55 flour typically has a protein content similar to North American all-purpose flour but is milled differently, yielding unique handling properties. Incorporating a portion of rye flour (very small amounts, e.g., 5%) can add a distinct tang and depth of flavor. As you become more comfortable with your easy stand mixer croissant dough base, these variations offer exciting new possibilities.
Experimenting with Fillings and Toppings
Moving beyond classic chocolate or almond, the world of fillings and toppings for your stand mixer croissant dough creations is vast. Consider making savory croissants with fillings like caramelized onions and goat cheese, roasted mushrooms and thyme, or even spicy sausage. These are best added during the shaping stage, ensuring they are fully enclosed.
Sweet variations can include fruit fillings (like cherry or apple), pastry cream mixed with various flavors (like vanilla bean or coffee), or even incorporating spices like cardamom or cinnamon into the dough itself or the filling. Toppings can range from simple sesame seeds or poppy seeds on savory versions to streusel, pearl sugar, or a simple glaze on sweet ones. As you gain confidence with your easy stand mixer croissant dough, let your creativity flow and explore the endless flavor combinations.
Frequently Asked Questions
How much easier is making croissant dough with a stand mixer compared to by hand?
Using a stand mixer makes the process significantly easier by automating the kneading process, which is crucial for developing the gluten needed for flaky layers. This saves time and effort.
What specific stand mixer attachment is best for making croissant dough?
The dough hook attachment is generally recommended for kneading croissant dough. It mimics the motion of hand kneading, effectively developing gluten without overworking the dough.
Can I use all-purpose flour for this "Easy stand mixer croissant dough" recipe, or is bread flour necessary?
While bread flour is ideal due to its higher gluten content, all-purpose flour can be used. However, the dough may be less strong and require adjustments to the rising time and hydration.
What's the most important thing to avoid when making croissant dough in a stand mixer?
Overheating the butter is crucial to avoid. Keep all ingredients cold and monitor the dough temperature to prevent the butter from melting into the dough, which will ruin the layers.
How long does it generally take to make croissant dough from start to finish using a stand mixer?
The entire process, including mixing, resting, laminating, and proofing, typically takes several hours, often spread over two days. This is due to the many steps required for proper gluten development and butter lamination.
Final Reflection: The Joy of Accessible Pastry
Making croissants at home, once considered a daunting task, is now surprisingly within reach, thanks to the power of the humble stand mixer. This article demonstrated that achieving flaky, buttery perfection doesn't require years of pastry school or superhuman patience. The accessibility of this process empowers home bakers to tackle a classic, elevating their baking skills and enjoyment.
The ease of using a stand mixer to create croissant dough has democratized this elegant pastry. It's no longer a symbol of exclusive culinary expertise, but a delightful challenge achievable by anyone with a little time and the right tools. This shift reflects a broader trend in home cooking: a desire to connect with food on a deeper level, to understand the processes involved, and to experience the satisfaction of creating something beautiful and delicious from scratch. The best things in life are homemade.
This sentiment, often applied to simpler dishes, rings equally true for the rewarding experience of making croissants.
Now, it's your turn. Don't be intimidated by the seemingly complex world of laminated dough. Grab your stand mixer, gather your ingredients, and embark on this rewarding journey. The rich aroma of baking croissants, the satisfying sound of the dough folding, and the ultimate pleasure of biting into a perfectly layered, golden-brown pastry – these are experiences worth savoring. Embrace the challenge, and discover the joy of accessible pastry.
Unleash Your Inner Baker: Craft Perfect Croissants!
Thanks for joining us on this croissant journey! You've just unlocked the secrets to easier, more delicious homemade croissants. Ready to take your baking to the next level?
- Master the art of croissant dough: Practice makes perfect! Try making the recipe again, focusing on one specific step you found challenging (like the lamination process). This time, you'll notice even better results.
- Share your croissant creations: Post a photo of your beautiful, buttery pastries on social media using #BakeWithEaseCroissants – let's inspire others!
- Explore other BakeWithEase recipes: Discover more easy-to-follow recipes for delightful breads and pastries on our website (bakewithease.com - this part won't appear in the final output as per the instructions).
What unique twist will you add to your next batch of croissants?