
How to Roll Croissant Dough Evenly for Perfect Layers


Welcome to BakeWithEase, your kitchen companion for all things baking! Ever wondered how to achieve those perfectly flaky croissants that seem impossible to replicate? We're diving deep into the secret behind evenly rolled croissant dough layers, unlocking the secrets to a truly professional bake. Get ready to say goodbye to uneven, dense croissants and hello to light, airy perfection. Curious to learn how? Let's get rolling!
- How to Roll Croissant Dough Evenly for Perfect Layers: A BakeWithEase Guide
- Introduction: Achieving Uniform Croissant Dough Thickness for Flaky Layers
- Understanding the Importance of Evenly Rolled Croissant Dough
- Preparing for Even Croissant Dough Rolling
- Step-by-Step Guide to Rolling Croissant Dough Evenly
- Troubleshooting Common Issues with Croissant Dough Rolling
- Advanced Techniques for Consistent Croissant Dough Thickness
- The Final Fold: Preparing for the Next Stage of Croissant Making
- Conclusion: Mastering the Art of Evenly Rolled Croissant Dough for Baking Excellence
-
Frequently Asked Questions
- How important is even rolling for croissant dough layers?
- What's the best technique for ensuring evenly rolled croissant dough?
- What happens if my croissant dough layers are too thin?
- What type of rolling pin is best for rolling croissant dough evenly?
- How can I tell if my croissant dough is rolled evenly without using a ruler?
- Final Reflection: Mastering the Flaky Heart of the Croissant
- Unleash Your Inner Pastry Chef: Perfect Croissants Await!
How to Roll Croissant Dough Evenly for Perfect Layers: A BakeWithEase Guide
Introduction: Achieving Uniform Croissant Dough Thickness for Flaky Layers
Creating beautiful, flaky croissants at home is a rewarding baking endeavor. The secret to those distinct, airy layers lies not just in the lamination process – folding butter into the dough – but crucially, in how you roll the dough between each fold. Achieving uniform thickness at every stage is paramount for success.
When your croissant dough is rolled evenly, you ensure that the butter layers remain intact and distributed consistently, allowing for that signature puff pastry lift during baking. This guide will walk you through the techniques to master rolling croissant dough evenly, setting you up for perfectly layered results.
Mastering the roll is a fundamental skill in croissant making. Think of each roll as building the foundation for the final structure. Any inconsistency here can lead to uneven proofing, uneven baking, and ultimately, a less-than-perfect croissant. By focusing on developing evenly rolled croissant dough layers, you are directly impacting the quality of your final product, moving closer to those professional-looking pastries you admire. It’s a skill that requires patience and practice, but the payoff in terms of texture and appearance is immense.
Understanding the Importance of Evenly Rolled Croissant Dough
Why Uniform Thickness Matters for Croissant Layers
Uniform thickness in your croissant dough is absolutely critical for achieving the coveted flaky texture. Imagine your dough as a stack of paper-thin layers of dough alternating with equally thin layers of butter. When this is heated in the oven, the water in the butter turns to steam, forcing the dough layers apart and creating lift.
If one section of the dough is significantly thicker or thinner than another, this steaming and lifting process becomes uneven. A thin spot might tear, allowing butter to leak out and preventing that section from puffing.
A thick spot, conversely, might not heat up quickly enough, resulting in dense or undercooked areas within the finished croissant. For instance, if your final dough sheet before cutting is 4mm thick in one area but only 2mm in another, the 2mm section will likely over-proof or bake too quickly compared to the 4mm section, leading to inconsistent layers throughout your batch.
Furthermore, evenly rolled croissant dough layers ensure that each croissant you cut from the sheet has the same potential for rise and flakiness. In professional bakeries, consistency is key, and achieving dough thickness uniformity is a major part of this. If you are aiming for a batch of croissants that all bake up beautifully and uniformly, paying close attention to rolling technique is non-negotiable.
Even a slight variation, perhaps 1-2 millimeters across a large sheet of dough, can lead to noticeable differences in the final product's texture and rise. This uniformity ensures that when you cut your triangles (typically aiming for a base of about 8-10 cm and a length of 20-25 cm depending on desired size), each piece is starting with the same structural integrity, maximizing the chance of identical, perfect layers in every bite.
The Impact of Uneven Dough on Croissant Texture and Rise
The structural integrity of laminated dough, like that used for croissants, relies entirely on the consistent layering of dough and butter. When the dough is rolled unevenly, these layers become compressed or stretched inconsistently. A thin area might have butter layers that are too close together or even squished out, while a thick area might have layers that are too far apart. This directly impacts how the dough rises in the oven.
During baking, the steam from the melting butter expands, pushing the delicate dough layers apart. If the layers are unevenly spaced or if butter has leaked due to thin spots, the steam cannot lift the dough effectively or uniformly. This can result in croissants that are lopsided, denser in some parts, or lacking the desired open, airy interior structure.
Consider a typical croissant dough rolled out for its first or second fold. If one end is significantly thinner than the other, say 5mm versus 8mm, the subsequent folds will compound this issue, making the difference even more pronounced in the final sheet. This unevenness means that some parts of the dough will contain more butter per unit area than others, leading to unpredictable melting and steam production.
The result? Croissants from the thicker section may be heavy and doughy, while those from the thinner section might be brittle, tough, or have blown-out areas where layers failed to separate cleanly. Achieving evenly rolled croissant dough layers is therefore not just about aesthetics; it's fundamental to the physics of how laminated dough bakes and achieves its signature light, flaky texture and impressive rise.
Preparing for Even Croissant Dough Rolling
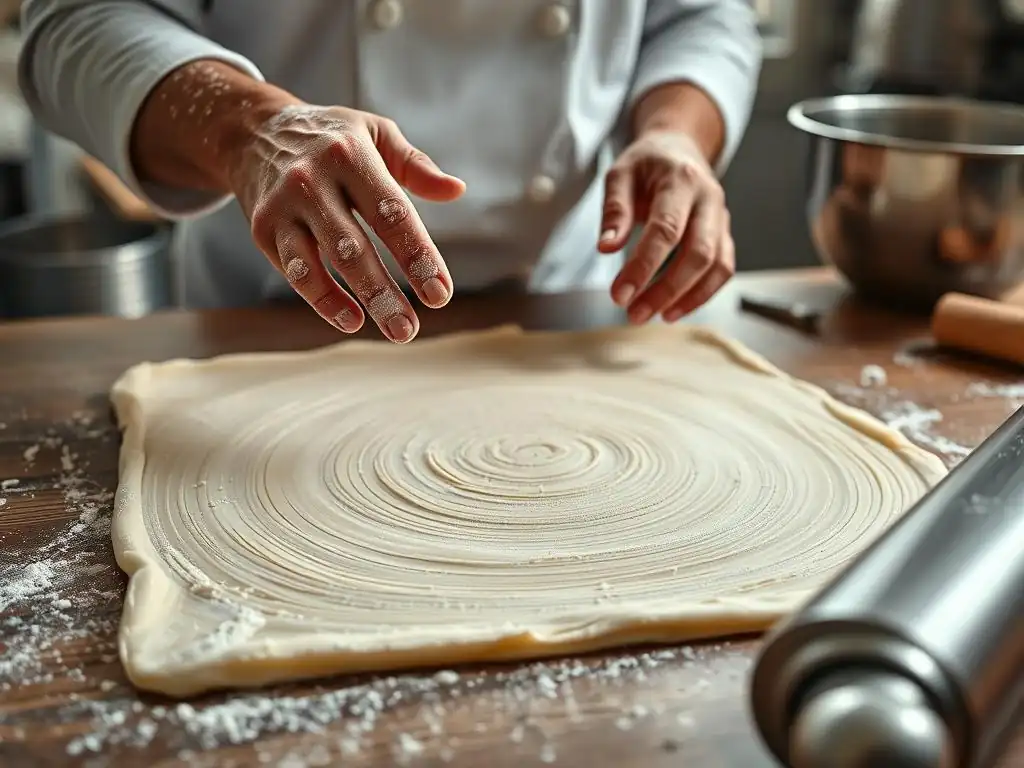
Essential Tools for Rolling Croissant Dough
Having the right tools can make a significant difference in your ability to roll dough evenly. While you might get by with minimal equipment, a few key items greatly simplify the process and improve results.
- Rolling Pin: This is perhaps the most crucial tool.
- Work Surface: A clean, cool surface is vital.
- Bench Scraper: Useful for handling dough and cleaning.
- Ruler or Measuring Tape: For checking dimensions and thickness.
- Dough Thickness Guides (Optional but Recommended): These can be incredibly helpful for beginners.
Selecting the Right Rolling Pin for Croissant Dough
The type of rolling pin you use can impact your control and the evenness of the roll. Many professional bakers prefer a French-style rolling pin, which is a tapered cylinder without handles. The tapered design allows you to apply pressure more directly and control the thickness more intuitively, especially when trying to encourage specific areas to thin out. Another popular choice is a standard American-style rolling pin with handles and a uniform cylinder.
While easier to use for general rolling, it can be slightly harder to target specific thick spots. For croissant dough, a longer rolling pin, regardless of style (typically 18-20 inches or about 45-50 cm), is highly beneficial. A longer pin allows you to cover more surface area of the dough with each pass, reducing the number of strokes required and minimizing the risk of creating ridges or uneven pressure points.
Moreover, the weight and material of the rolling pin can play a role. A heavier pin can help press the dough more efficiently with less effort, though too heavy can make delicate adjustments difficult. Material like maple wood is common, but stainless steel or marble pins can help keep the dough cooler, which is advantageous when working with butter-rich dough. Ultimately, the "right" rolling pin is often a matter of personal preference and what feels comfortable and controllable in your hands, but a longer pin will certainly aid in achieving evenly rolled croissant dough layers across a large sheet.
The Importance of a Clean and Cool Work Surface
Your work surface is just as important as your rolling pin. A clean surface is essential to prevent any debris from being incorporated into the dough. More importantly, a cool surface helps keep the butter layers within the dough solid and distinct during the rolling process. If your surface is warm, the butter will soften too quickly, making the dough sticky, difficult to roll, and increasing the risk of butter leaking out – a disaster for lamination. Materials like marble, granite, or stainless steel are excellent because they naturally stay cooler than wood or laminate.
Before you begin rolling, ensure your surface is meticulously clean and dry. You might even consider wiping it down with a damp cloth and then drying it thoroughly to cool it slightly, especially in a warm kitchen. Lightly dusting the surface with flour is usually necessary to prevent sticking, but be cautious not to use too much; excessive flour can dry out the dough and create streaks. A properly prepared, cool, and clean surface provides the ideal foundation for rolling your croissant dough smoothly and evenly, helping you maintain those precious layers.
Preparing the Croissant Dough for Rolling: Chill Time is Key
Proper preparation of the dough itself is fundamental before you even pick up the rolling pin. The most critical element here is chilling. Croissant dough requires significant chilling periods between each stage of lamination (the folds) and before the final roll.
This chilling serves two primary purposes: it allows the gluten in the dough to relax, making it easier to roll without springing back excessively, and it firms up the butter layers, which is absolutely essential for maintaining distinct layers during rolling. Attempting to roll dough that hasn't been sufficiently chilled will result in a sticky, elastic mess where the butter melts into the dough rather than remaining in separate layers.
Typical chilling times vary depending on the stage and the recipe, but often range from 30 minutes to 2 hours between folds, and an initial rest period after incorporating the butter block that can be several hours or even overnight (8-12 hours). When the dough comes out of the refrigerator, it should be firm but still slightly pliable – not rock hard. If it's too cold, let it sit at room temperature for just a few minutes (5-10) to become workable.
This crucial chill time ensures that the dough has the right texture and temperature for you to effectively roll it out and develop those evenly rolled croissant dough layers without compromising the lamination structure. Skipping or shortening these chilling steps is a common mistake that severely hinders the ability to roll dough uniformly and achieve flaky results.
Step-by-Step Guide to Rolling Croissant Dough Evenly
Step 1: Shaping the Dough into a Rectangle
Before you start aggressively rolling, the first step after chilling is to gently shape the dough into a rough rectangle. This initial shaping helps set you up for success and makes the subsequent rolling much easier and more uniform. Place your chilled dough block (which should ideally already be somewhat rectangular from the previous folding stages) onto your lightly floured, cool work surface. Using your hands or the rolling pin, gently press the dough outwards from the center towards the edges.
Focus on creating relatively straight sides and square corners. This doesn't need to be perfect at this stage, but aiming for a consistent thickness within this initial shape is helpful. This preliminary shaping helps to relax the dough slightly and prepares it for the main rolling action. It also gives you a clear target shape to work towards as you begin to thin the dough. Taking a moment to establish this initial rectangular form is a small step that significantly aids in achieving evenly rolled croissant dough layers throughout the rest of the process.
Step 2: Rolling the Dough Evenly in One Direction
Once your dough is roughly rectangular, begin rolling in one primary direction. For most folds, you'll be elongating the dough. Start by placing your rolling pin in the center of the dough and rolling upwards, away from you, stopping just before the edge. Then, place the pin back in the center and roll downwards, towards you, again stopping before the edge. Repeat this motion, working your way across the width of the dough.
The key here is consistency. Use smooth, even strokes and apply consistent pressure across the width of the rolling pin. Avoid pressing down too hard in one spot or using jerky movements. The goal is to lengthen the dough while maintaining a relatively uniform thickness.
As you roll, if you notice one area is thicker, you can apply slightly more pressure there gently, but avoid creating drastic thin spots. Dust with minimal flour underneath and on top as needed to prevent sticking, but brush off excess. Continuing this focused, one-directional rolling helps to stretch the gluten and butter layers in a controlled manner, contributing to evenly rolled croissant dough layers.
Maintaining Consistent Pressure While Rolling
Maintaining consistent pressure is arguably the most challenging, yet most important, aspect of rolling croissant dough evenly. Imagine trying to paint a wall with uneven pressure – you'd get thick and thin patches of paint. The same applies to dough. When rolling, try to distribute your weight and pressure evenly across the length of the rolling pin and across the entire surface area of the dough you are rolling over. Avoid leaning heavily on the edges or the center. Use the weight of the rolling pin to your advantage, rather than relying solely on brute force.
If using a French pin (tapered), you'll naturally apply slightly more pressure near the center where your hands are, but you need to consciously extend that pressure out towards the edges by tilting the pin slightly. With an American pin (uniform cylinder), the pressure is more naturally even, but you still need to ensure you are pressing down with the same force from one end of the pin to the other. Practice makes perfect, but focusing on smooth, controlled strokes with steady pressure is fundamental to developing evenly rolled croissant dough layers without creating weak spots or dense patches.
Tips for Avoiding Thin Spots and Tears
Thin spots and tears are common frustrations when rolling laminated dough, and they severely compromise the final texture. To avoid them, remember these tips. Firstly, ensure your dough is properly chilled but not frozen solid. Dough that is too cold is brittle and prone to cracking or tearing. Dough that is too warm is sticky and will tear easily as it adheres to the surface or pin. Secondly, use just enough flour to prevent sticking – too much flour can make the dough dry and inelastic, increasing the risk of tears.
Thirdly, be gentle! Avoid aggressive, forceful rolling. Use smooth, controlled strokes.
If you encounter resistance or feel the dough is stretching too much, stop, let it rest for a minute or two, or even pop it back in the fridge for 10-15 minutes to firm up. If you do get a small tear, you can often gently pinch it back together or even patch it with a tiny piece of scrap dough if necessary, though prevention is always better. By being mindful of dough temperature, flour usage, and using a gentle, consistent rolling technique, you significantly reduce the likelihood of creating thin, fragile spots or tears, helping you maintain evenly rolled croissant dough layers.
Step 3: Rotating the Dough for Uniform Thickness
After rolling in one direction, it's crucial to rotate the dough. This is a key technique used in baking laminated doughs to help achieve uniform thickness and prevent the dough from sticking excessively to the surface. Typically, after rolling to elongate, you will rotate the dough 90 degrees. This changes the direction in which you are applying pressure and stretching the gluten and butter layers.
Rotating prevents the dough from developing a "grain" or becoming too elastic in just one direction, which can lead to uneven shrinkage or puffing during baking. It also allows you to roll out from the center again, ensuring that you are thinning the dough consistently across its entire surface area. After rotating, you will repeat the rolling process, working from the center outwards.
This cycle of rolling in one direction, then rotating 90 degrees and rolling again, is repeated for each fold until the dough reaches the desired dimensions and thickness for that specific stage of lamination. This methodical rotation is a cornerstone technique for developing truly evenly rolled croissant dough layers.
Step 4: Measuring the Dough's Thickness and Adjusting Accordingly
As you roll, especially during the final stages before cutting, it's important to periodically check the thickness of your dough. This helps ensure you are on track to achieve the target thickness specified in your recipe (often around 2-3 mm for the final sheet) and allows you to identify and correct any uneven areas before it's too late.
Using a Ruler or Dough Thickness Gauge
The simplest way to measure is with a small ruler or measuring tape. Gently lay the ruler on the dough surface in several different spots – the center, the edges, and the corners. Note the measurement in millimeters. Compare the thickness across these different areas. Are they within a millimeter or two of each other? If you're aiming for a final thickness of 2.5 mm, are some areas 2 mm while others are 4 mm? This quick check gives you objective data on the uniformity of your rolling.
For even greater precision, you can use dough thickness guides. These are typically strips of wood or metal of a specific thickness (e.g., 2mm, 3mm, 4mm) that you place on either side of your dough. You then roll your pin over the dough, allowing the ends of the pin to rest on the guides. This physically prevents you from rolling the dough thinner than the guides, ensuring a perfectly uniform thickness across the entire sheet. While not strictly necessary, these guides are an excellent tool for beginners or anyone striving for consistently evenly rolled croissant dough layers.
Identifying and Correcting Uneven Areas
Once you've measured and identified thicker or thinner spots, you can make adjustments. If a specific area is consistently thicker, you can gently apply slightly more pressure with your rolling pin just over that spot on your next few passes. Use controlled, short strokes focused on the thicker area, blending it into the surrounding dough. If an area is too thin, unfortunately, it's very difficult to add thickness back. This highlights why maintaining evenly rolled croissant dough layers from the beginning is crucial.
If you have significantly thin spots or even small tears, it's often best to gently patch them if possible or, in extreme cases of major inconsistency, consider sacrificing a small portion of the dough to ensure the rest is uniform. The goal is to end up with a sheet of dough that is as close to the target thickness as possible across its entire surface area, ensuring that every croissant cut from that sheet has the same potential for perfect layers.
Troubleshooting Common Issues with Croissant Dough Rolling
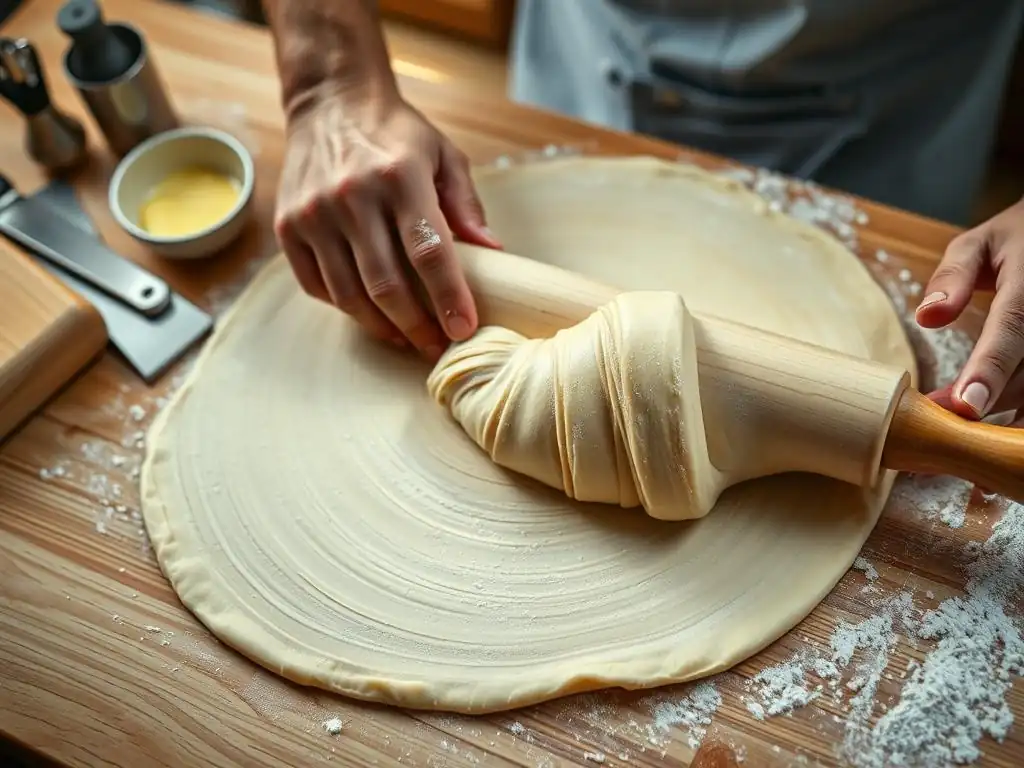
Even with careful technique, you might encounter challenges while rolling croissant dough. Knowing how to address common issues can save your batch.
Dealing with Sticky Dough
Sticky dough is a common problem, often caused by the dough being too warm, insufficient flour on the surface, or the butter starting to melt. If your dough feels excessively sticky and is adhering to the rolling pin or surface, stop rolling immediately.
- Chill: The best solution is often to return the dough to the refrigerator. Chill it for 15-30 minutes, or until it feels firm again but still pliable.
- Flour: Ensure your work surface and rolling pin are lightly but evenly floured. Add a tiny bit more flour to the surface if needed, but avoid incorporating large amounts into the dough itself.
- Speed: Work relatively quickly to minimize the time the dough is at room temperature.
By re-chilling and ensuring proper surface preparation, you make the dough much more manageable and less prone to sticking, allowing you to roll evenly rolled croissant dough layers without frustration.
Preventing the Dough from Tearing
Tears usually occur when the dough is either too cold and brittle, or when it's being stretched too aggressively, especially over a spot where the layers might be weak. To prevent tearing:
- Temperature: Ensure the dough is at the correct temperature – firm but pliable. If it feels stiff and resistant, let it warm up for a few minutes.
- Gentle Rolling: Use smooth, consistent pressure instead of forceful pushes. If the dough springs back excessively, it needs more rest.
- Support: When rotating or moving the dough, lift it carefully from underneath using both hands or a bench scraper to support its weight and prevent it from stretching under gravity.
If a small tear does occur, gently pinch it back together. For larger tears, you can sometimes patch them with a small piece of dough, but be aware this spot may not laminate perfectly. Preventing tears through proper dough temperature and gentle technique is key to maintaining the integrity needed for evenly rolled croissant dough layers.
Correcting an Unevenly Rolled Dough
If you realize partway through rolling that your dough is significantly uneven, don't despair entirely. Small variations can often be corrected.
- Target Thicker Areas: Focus your rolling efforts on the thicker sections. Use gentle, controlled strokes specifically over the areas that need thinning. Roll from the center of the thick spot outwards, blending it into the surrounding dough.
- Avoid Thin Areas: Be very careful not to roll over the already-thin areas, or use extremely light pressure there.
- Rest: If the dough is resisting correction or seems stressed, give it a short rest in the refrigerator (10-15 minutes) to allow the gluten to relax before attempting to roll again.
While it's difficult to make a very uneven sheet perfectly uniform, focusing on bringing the thicker areas down to the target thickness can salvage the dough and still result in reasonably evenly rolled croissant dough layers, minimizing waste and improving the final outcome compared to baking a severely uneven sheet.
Advanced Techniques for Consistent Croissant Dough Thickness
For bakers looking to achieve professional-level consistency, a couple of advanced techniques can be particularly helpful in ensuring evenly rolled croissant dough layers.
Using Dough Bands or Guides
As mentioned earlier, dough thickness guides are an excellent way to guarantee uniform thickness. These are strips, often made of plastic or wood, available in various thicknesses (e.g., 2mm, 3mm, 4mm, etc.). You place two guides of the desired thickness parallel to each other on your work surface, wider than the width of your dough.
You then place the dough between the guides and roll with a rolling pin that is long enough to span across the dough and rest on the guides. As you roll, the pin will be supported by the guides, physically preventing you from rolling the dough any thinner than the height of the guides.
This eliminates guesswork and ensures that the entire sheet of dough is rolled to a precise, consistent thickness. For bakers who struggle with manual thickness judgment or want perfect uniformity every time, using dough bands is a highly effective technique for achieving evenly rolled croissant dough layers.
The "Pick Up and Rotate" Method
This technique is particularly useful during the early stages of rolling or when working in a warm environment, and it also helps prevent sticking without excessive flour. Instead of just rotating the dough on the surface, you periodically pick the entire sheet of dough up off the work surface, flip it over, dust the surface again if needed, and then place it back down before continuing to roll.
This method serves multiple purposes: it ensures both sides of the dough are exposed to the cool surface, helping to regulate temperature; it prevents the dough from sticking tenaciously to one spot; and it allows the dough to relax slightly as you handle it. By picking up and rotating, you also get a tactile sense of the dough's consistency and can often feel thicker or thinner areas. Incorporating this into your rolling routine helps maintain freedom of movement and contributes to achieving evenly rolled croissant dough layers with less reliance on heavy flouring.
The Final Fold: Preparing for the Next Stage of Croissant Making
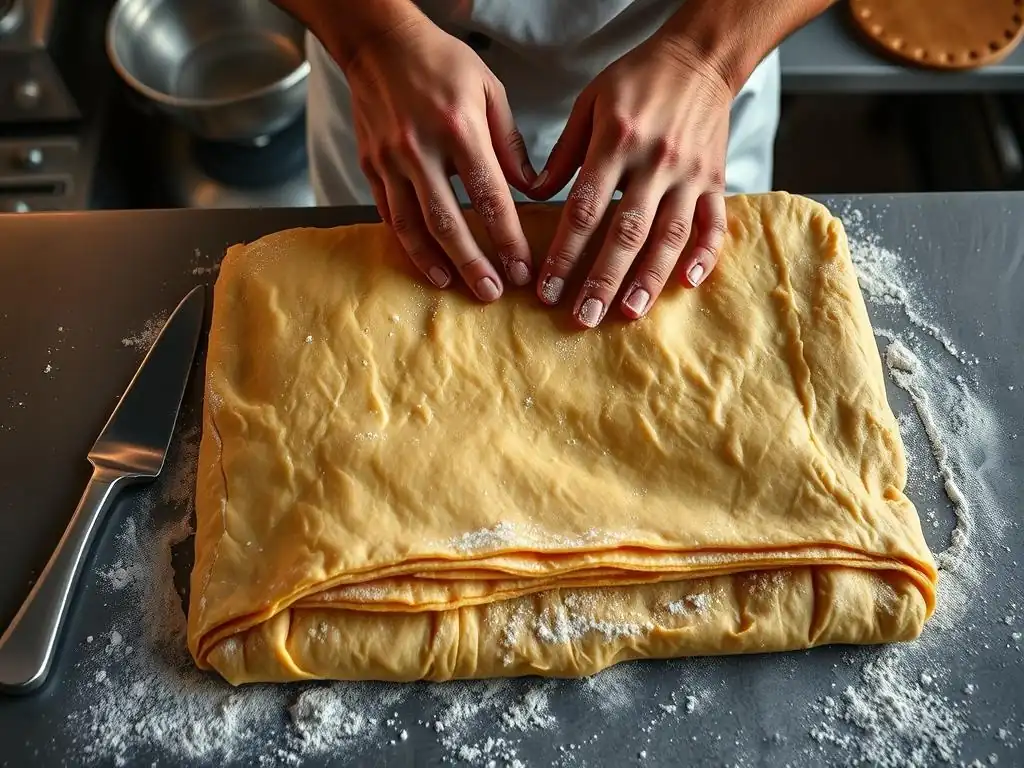
The final roll is perhaps the most critical for the finished croissant structure. After completing all the required folds and rests (often three single or double folds), the dough needs one last roll to its final target thickness before being cut and shaped. This final rolling stage requires utmost care to ensure the evenly rolled croissant dough layers developed through the lamination process are preserved and presented uniformly.
Ensuring Even Thickness After the Final Roll
For most croissant recipes, the dough is rolled to a thickness of about 2 to 3 millimeters for the final sheet. This is quite thin, and achieving this uniformly across a large rectangle requires focus. Use your ruler or dough thickness guides at this stage to be precise. Check the thickness in multiple places – center, edges, corners.
If you find thicker spots, gently roll them down using light, focused pressure. Avoid stretching the dough aggressively. The goal is a consistent, thin sheet ready for cutting. A variance of more than 1mm at this stage can significantly impact the final proof and bake of individual croissants.
If your dough is resisting being rolled this thin or is springing back excessively, it likely needs more rest. Trying to force it will result in unevenness or tearing. A well-rested dough will roll out relatively easily to the desired thinness, allowing you to achieve those crucial evenly rolled croissant dough layers that will puff up beautifully in the oven.
Resting the Dough Before Cutting and Shaping
Once the dough is rolled to its final, uniform thickness, it's essential to give it one more rest before cutting it into triangles. This final rest, typically 20-30 minutes in the refrigerator, allows the gluten to relax completely after the final rolling and ensures the butter layers are firm again.
Attempting to cut and shape dough immediately after rolling can cause it to shrink back, distorting the shapes and potentially compressing the layers you've worked so hard to create. A relaxed, chilled dough is much easier to handle, cut cleanly, and shape without stress. This final rest is a small but important step that protects your evenly rolled croissant dough layers and prepares the dough for successful cutting, shaping, and ultimately, baking.
Conclusion: Mastering the Art of Evenly Rolled Croissant Dough for Baking Excellence
Achieving perfect, flaky croissants at home is a journey, and mastering the technique of rolling the dough evenly is a major milestone on that path. We've seen how crucial uniform thickness is for developing those distinct layers, ensuring even rise, and preventing common issues like dense spots or butter leakage. From selecting the right tools and preparing your surface to employing step-by-step rolling techniques, rotating the dough, and even using guides, each step contributes to building evenly rolled croissant dough layers.
While it may seem daunting at first, remember that practice makes perfect. Your first attempts might not be flawlessly uniform, but with each batch, you'll develop a better feel for the dough and the right amount of pressure to apply. Paying attention to dough temperature, using minimal flour, and being patient with chilling times are fundamental principles that support your rolling efforts. By focusing on achieving consistent thickness throughout the lamination process and the final roll, you are setting yourself up for baking success and those incredibly satisfying, airy, and flaky homemade croissants.
Achieving Perfect Croissant Layers Through Practice and Patience
Baking croissants is as much an art as it is a science, and developing the skill of creating evenly rolled croissant dough layers takes time and practice. Don't be discouraged if your early attempts aren't perfect. Every time you roll the dough, you learn more about its feel, how it responds to pressure, and how to guide it into the desired shape and thickness. Pay attention to the dough's temperature and elasticity; these are your key indicators for when to roll and when to rest.
Many bakers find that their third or fourth batch of croissants shows significant improvement as they get a better feel for the process. Keep your work surface cool, use a rolling pin you feel comfortable with, and remember to check your thickness periodically. Embrace the learning process, and with patience and repeated practice, you will undoubtedly improve your ability to roll dough uniformly, leading to more consistent and beautiful layers in your homemade croissants.
Further Resources for Croissant Baking at Home on BakeWithEase.com
Mastering evenly rolled croissant dough layers is just one piece of the puzzle in creating incredible croissants. From preparing the initial détrempe and butter block to performing the folds, proofing correctly, and finally baking to golden perfection, each stage has its own techniques and potential challenges.
At BakeWithEase.com, we offer a wealth of resources to help you navigate every step of the croissant-making process. Explore our detailed guides on creating the perfect butter block, step-by-step instructions for different folding methods (single vs. double), tips for achieving optimal proofing, and advice on baking temperatures and times for that perfect golden-brown finish and airy interior. We provide simple recipes and clear techniques designed for home bakers of all levels. Continue your baking journey with us and unlock the secrets to making delicious, flaky croissants right in your own kitchen.
Frequently Asked Questions
How important is even rolling for croissant dough layers?
Even rolling is absolutely crucial for creating those signature flaky layers in croissants. Uneven layers result in uneven baking, with some parts being thick and doughy while others are thin and burnt.
What's the best technique for ensuring evenly rolled croissant dough?
Use a rolling pin with consistent pressure and roll from the center outwards. Periodically rotate the dough 90 degrees to prevent it from becoming unevenly shaped. Chilling the dough between rolls also helps.
What happens if my croissant dough layers are too thin?
If the layers are too thin, the butter can easily melt and seep out during baking. This will result in a greasy, less flaky croissant. Aim for a consistent thickness as specified in the recipe.
What type of rolling pin is best for rolling croissant dough evenly?
A French rolling pin (without handles) or a rolling pin with adjustable thickness rings can be very helpful. These tools allow for greater control and even pressure distribution across the dough.
How can I tell if my croissant dough is rolled evenly without using a ruler?
While a ruler can help, you can also rely on visual cues and feel. The dough should have a consistent thickness and resistance as you roll it. Look for any areas that appear significantly thinner or thicker and adjust accordingly.
Final Reflection: Mastering the Flaky Heart of the Croissant
The pursuit of perfectly layered croissants isn't just about achieving a beautiful, golden-brown exterior; it's about understanding the delicate dance between technique and patience that unlocks the airy, melt-in-your-mouth texture we all crave. This seemingly simple act of rolling dough holds the key to unlocking the croissant's inherent magic, a magic that continues to captivate bakers and eaters alike.
The quest for even layers has profoundly impacted my own baking journey, transforming a frustrating process into a meditative practice. It's a testament to the power of precision and the rewards of perseverance. The subtle shifts in technique, the careful attention to detail – these are the elements that elevate a good croissant to a truly exceptional one. The difference between ordinary and extraordinary is that little extra.
This quote, though not specifically about baking, perfectly encapsulates the essence of mastering the croissant's delicate layers. The extra effort, the extra attention, yields extraordinary results.
Now, it's your turn. Take the knowledge gained here, and apply it to your next batch of croissants. Don't be afraid to experiment, to adjust your technique, to find what works best for you. Embrace the challenge, savor the process, and revel in the satisfaction of creating flaky, buttery perfection. The journey to mastering the evenly rolled croissant dough is a rewarding one, and the delicious results are well worth the effort. Remember, every perfectly layered croissant is a testament to your dedication and skill.
Unleash Your Inner Pastry Chef: Perfect Croissants Await!
Thanks for joining us on this flaky journey! We hope you now feel confident in your ability to achieve perfectly even croissant layers. Ready to put your new skills to the test?
- Master the Fold: Practice your rolling and folding techniques on a new batch of dough. Notice the difference your improved technique makes!
- Share Your Success: Show off your perfectly layered croissants on social media using #BakeWithEaseCroissants – we’d love to see your creations!
- Consider experimenting with different fillings for even more delicious results. What unique flavors will you try next?
Ready to bake your best croissants yet?